A small bathroom works best when the fittings, storage and walking space are planned together. A slightly narrower vanity or a better shower-door position can matter more than a decorative accessory. Start with what feels difficult in your current room, from nowhere to put toiletries to a door that catches the cabinet.
These photographs show whole compact rooms and useful details within them. Compare the arrangements with your own measurements before choosing fixtures. Check opening clearances, ventilation, product suitability and the waterproofing plan with the appropriate installer; a room photograph cannot establish those hidden details.
PART 01
Choose a Vanity That Uses Its Space Well
IDEA 01 / 20
Leave Visible Floor below a Floating Vanity
 SaveSupport Non AI Creator
Source: www.houzz.com
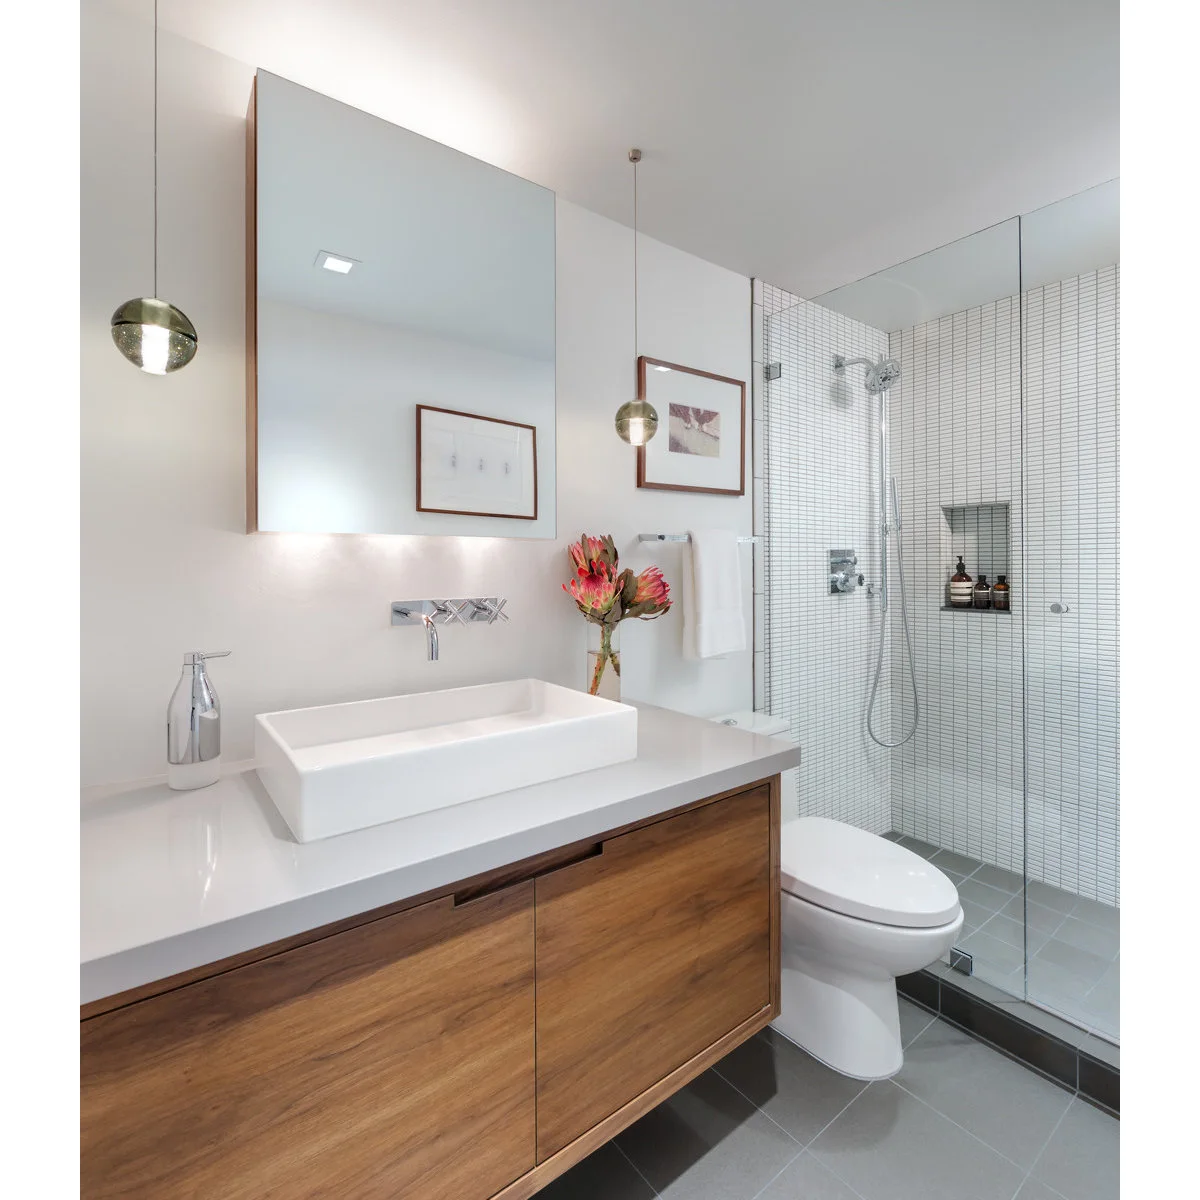
The wood vanity and toilet both sit clear of the floor in this compact bathroom. A clear shower enclosure leaves the small white wall tiles visible, while the broad mirror connects the basin area to the room behind it. The arrangement reduces bulky outlines near floor level.
Choose the vanity around the storage you actually need rather than appearance alone. Wall-hung fittings require suitable support and access to concealed parts, so plan those with the installer. Check that you can clean the gap below the cabinet comfortably and that the shower door clears nearby fittings when open. If replacing the main fittings is beyond the current plan, these budget bathroom remodel ideas explore smaller changes and retaining what still works. For a basin that sits above the counter like this one, compare vessel sink ideas before choosing the tap position and the final rim height. If the shower door’s swing is the main constraint, these doorless shower ideas offer alternatives to compare with your installer, including the space needed to contain splashes.
IDEA 02 / 20
Fit the Vanity into an Existing Alcove
 SaveSupport Non AI Creator
Image credit: Project: Ben Herzog (via Houzz)
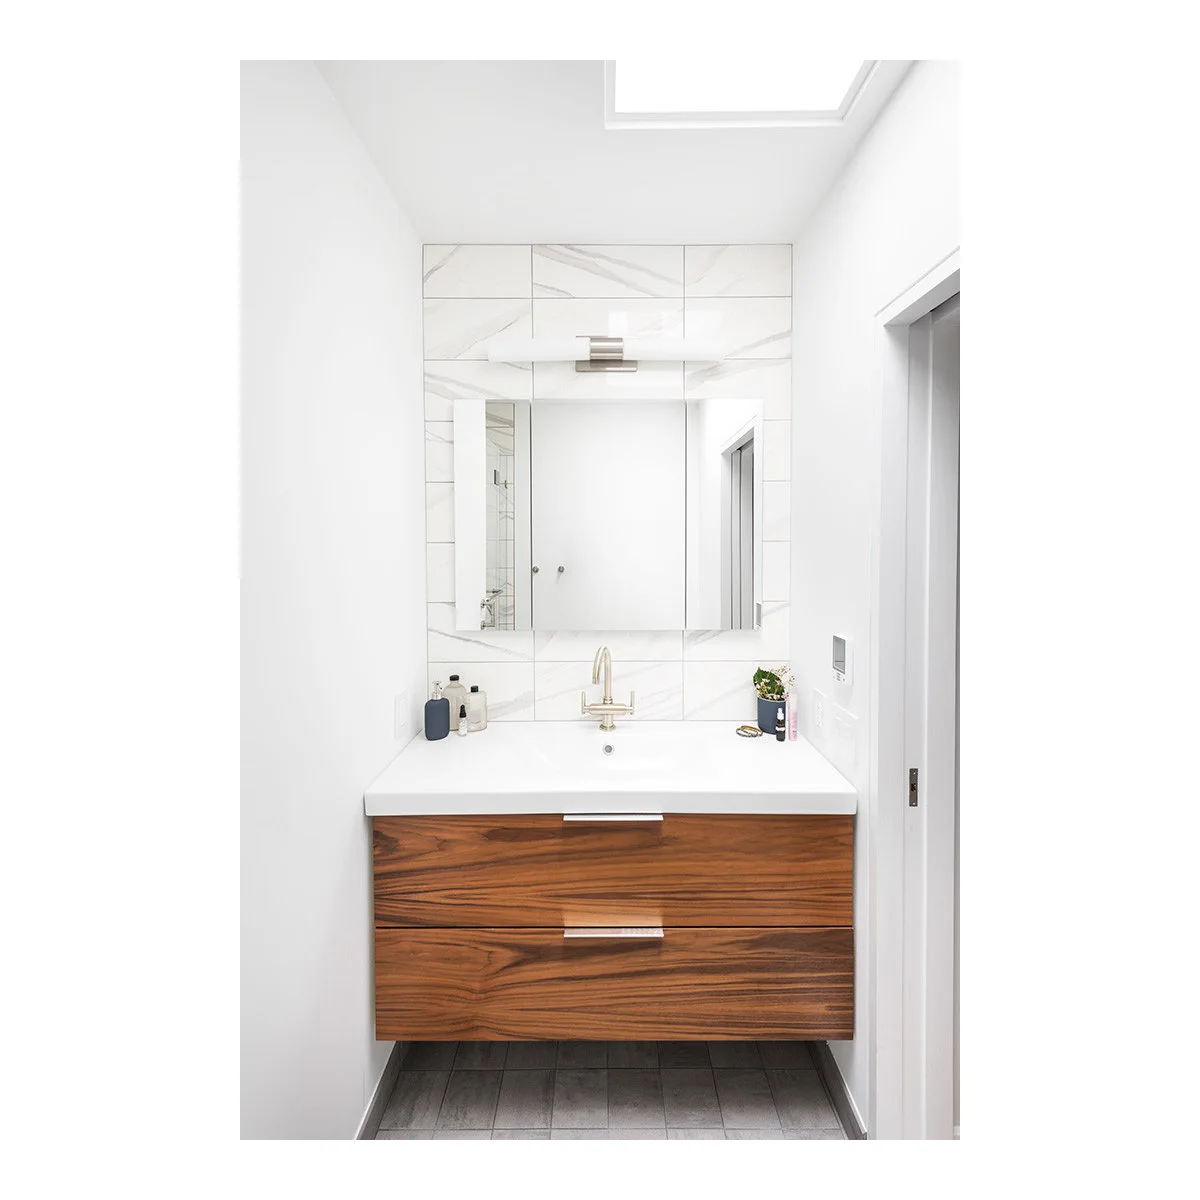
This floating vanity fills a narrow alcove with two broad wood-fronted drawers. The pale counter reaches both side walls, and the mirrored cabinet sits above a veined tile backsplash. Using the full recess avoids small, difficult-to-clean gaps at either end of a freestanding cabinet.
Measure the alcove at several heights before ordering fitted furniture, since walls may not be perfectly square. Check drawer clearance against the doorway and allow access to plumbing. Use organizers around the basin’s actual shape so the broad drawer front does not lead you to overestimate the uninterrupted storage inside.
IDEA 03 / 20
Use a Round Mirror above a Rectangular Cabinet
 SaveSupport Non AI Creator
Image credit: Project: C. Kramer Interiors (via Houzz)
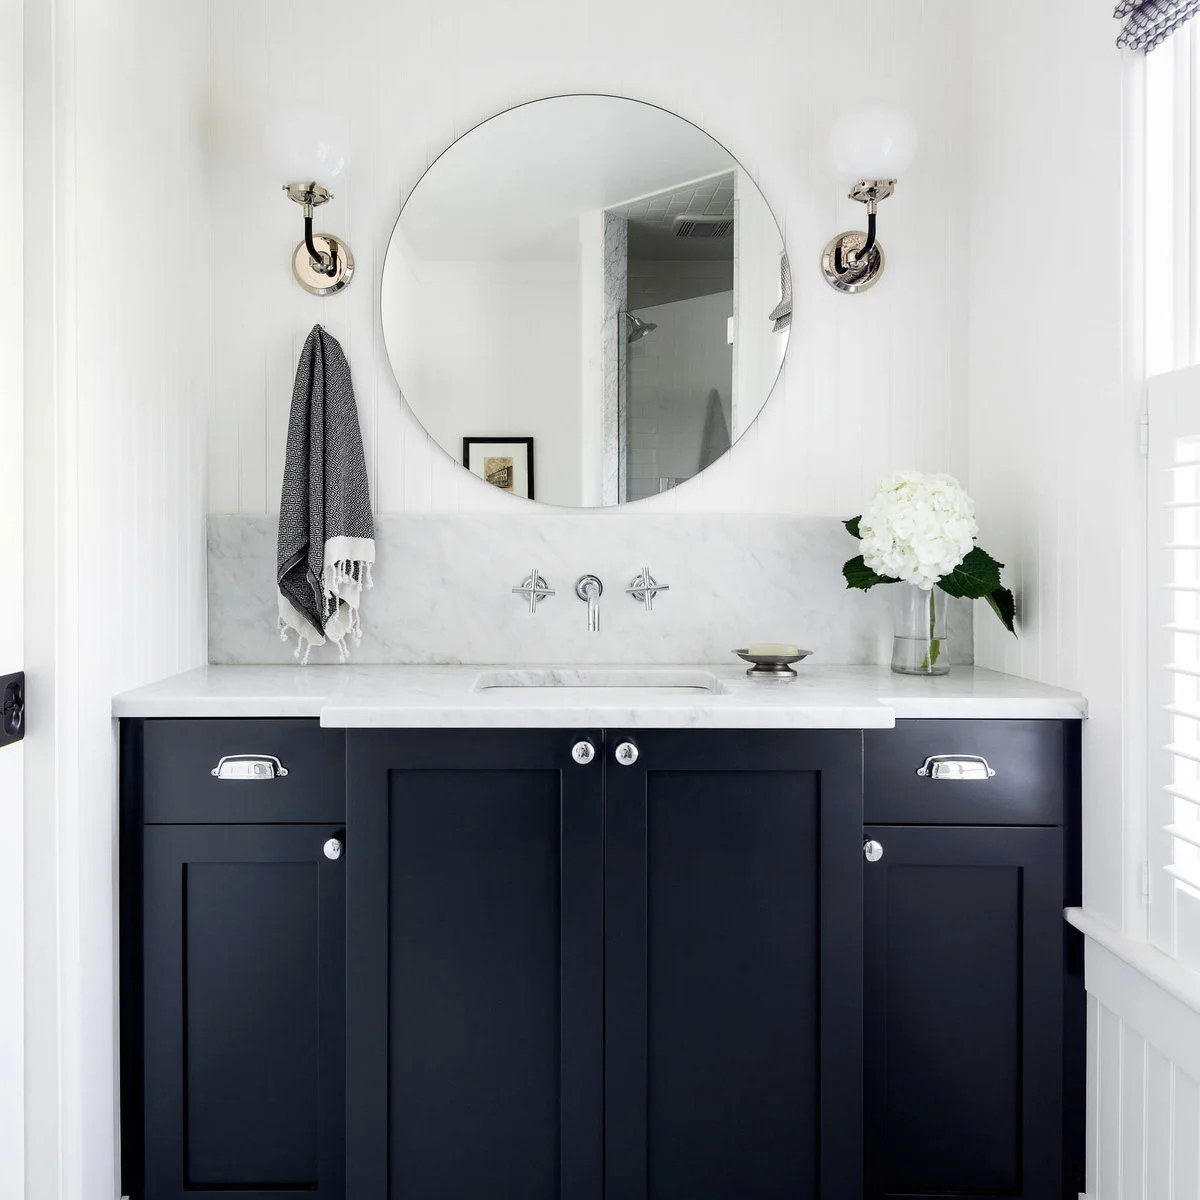
A large round mirror softens the rectangular dark cabinet in this narrow vanity space. Two wall lights flank it, while a pale counter and backsplash keep the working surface easy to read. The cabinet supplies closed storage without additional shelving around the mirror.
Test mirror height and light positions for the people who will use the basin. A wide mirror should not force fittings into awkward corners or block a window. Leave the countertop useful by reducing the flower arrangement or other display pieces when everyday bottles and personal items need to share the surface.
IDEA 04 / 20
Keep an Open Shelf for One Useful Basket
 SaveSupport Non AI Creator
Source: www.houzz.com
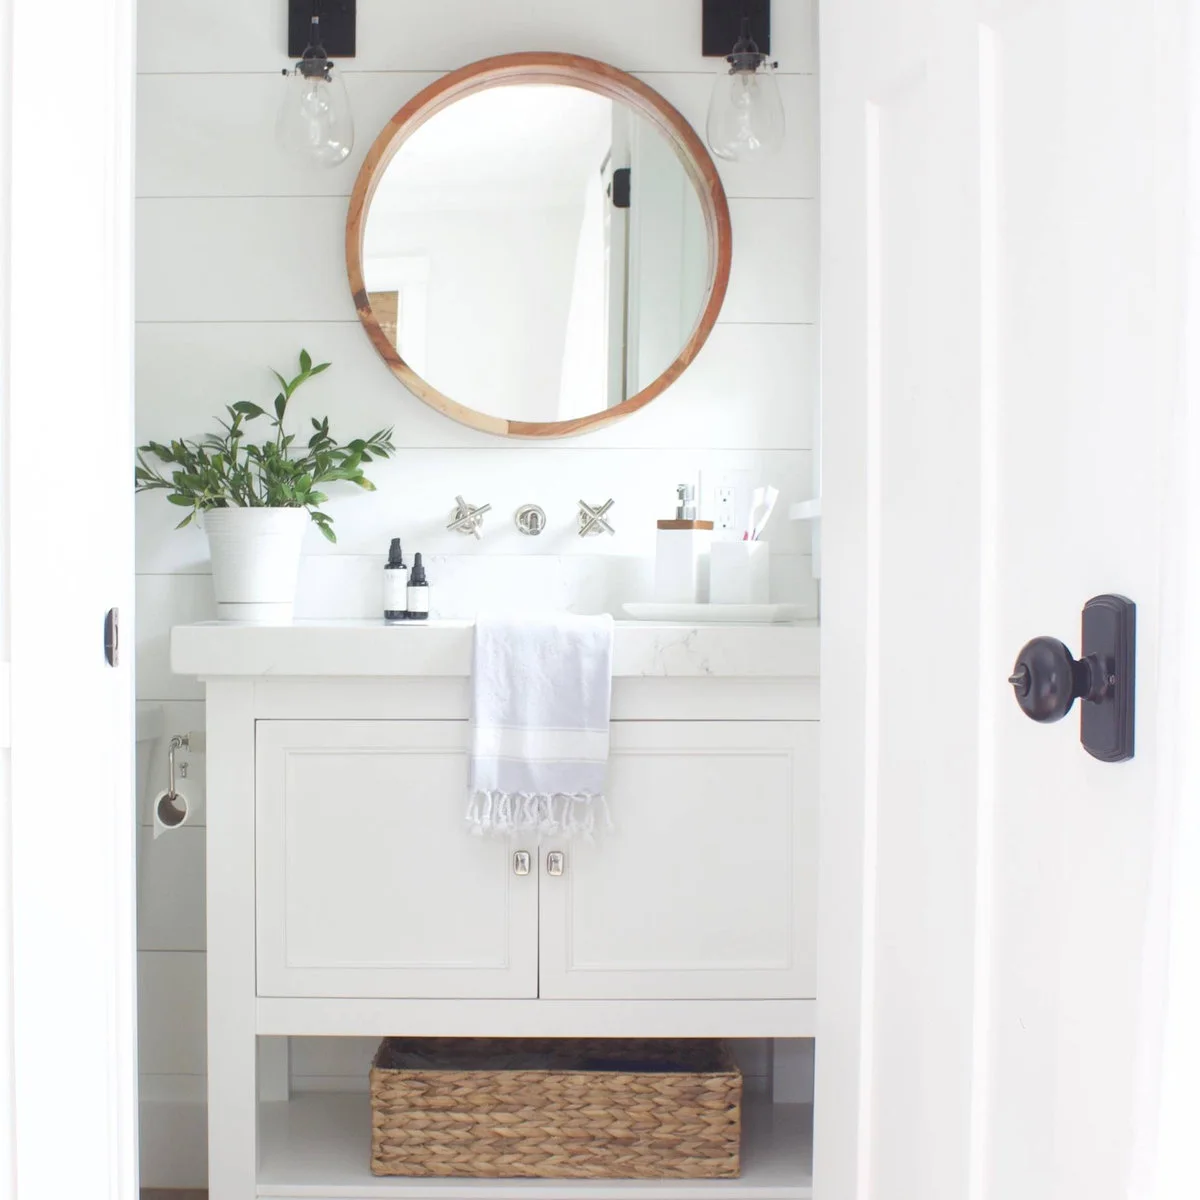
A woven basket sits on the lower shelf of this small white vanity, leaving the counter and cabinet doors separate from the extra storage below. The wood-framed mirror adds warmth against the white wall. One contained basket looks less scattered than several loose items across the open shelf.
Choose a basket that slides out easily without catching pipes or the cabinet frame. Keep items that need to stay dry behind doors if the shelf receives splashes. Check that the open base remains accessible for cleaning, and avoid filling the basket so heavily that removing it becomes a two-handed task.
IDEA 05 / 20
Use a Short Partition beside the Vanity
 SaveSupport Non AI Creator
Source: www.houzz.com
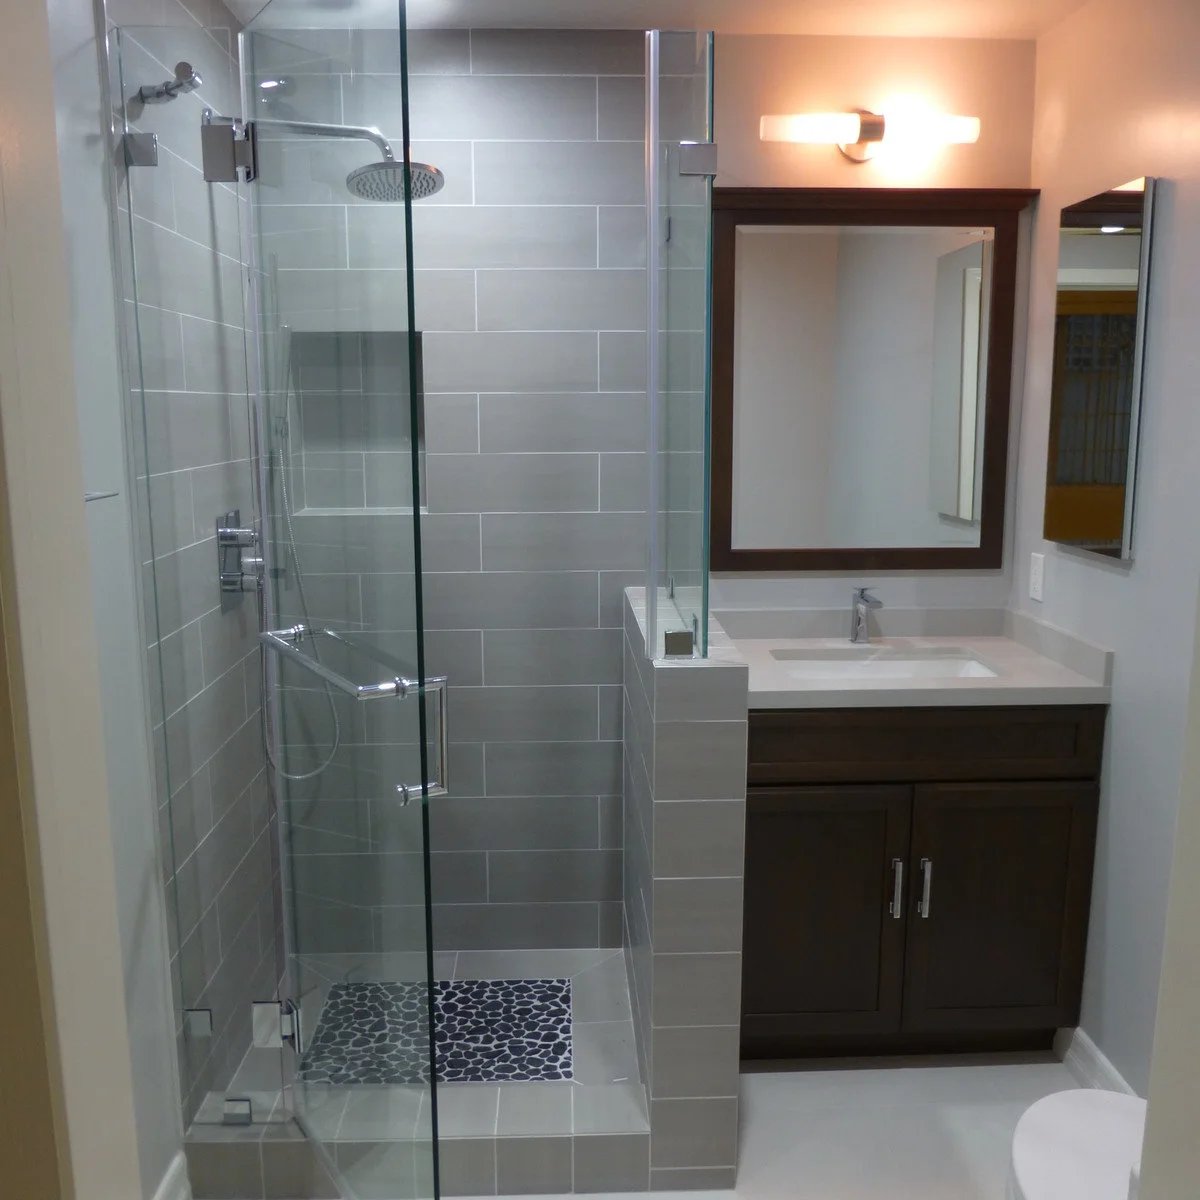
A short tiled partition separates this shower from the neighboring vanity, with glass continuing above. The basin and framed mirror occupy the remaining wall space, while the shower niche stores bottles within the enclosure. The division gives each fitting a clear place in the compact layout.
Plan the partition thickness before choosing the vanity so it does not consume the last usable standing space. Check the shower door’s swing against the cabinet and toilet. Resolve the partition cap, glass fixings and waterproofing together, rather than treating the low wall as a decorative detail added after the fittings are ordered.
PART 02
Plan the Shower and Bath Together
IDEA 06 / 20
Choose Sliding Glass when a Swinging Door Is Awkward
 SaveSupport Non AI Creator
Image credit: Project: Luxe Remodel (via Houzz)
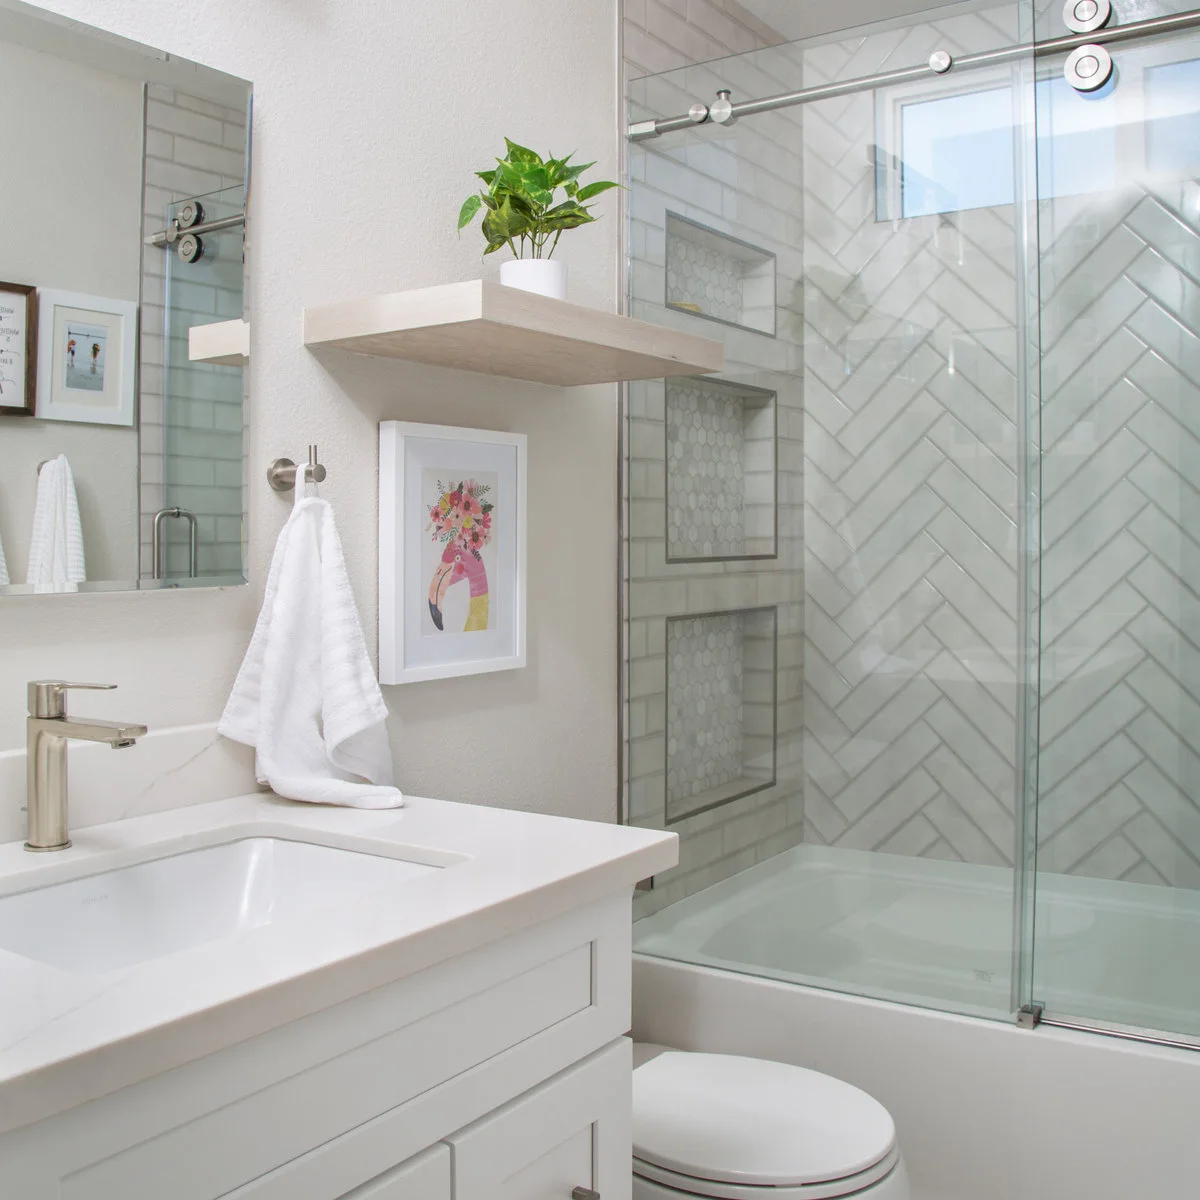
Sliding glass encloses the tub in this compact bathroom, avoiding a large outward-swinging shower door beside the vanity. Herringbone tiles make the back wall distinctive, and three niches use the side wall for storage. The clear enclosure keeps those details visible from the basin area.
Compare the usable opening width as well as the closed appearance of a sliding system. Tracks and overlapping panels need accessible cleaning, and a tub still has a step-over edge. Plan how towels and handles work with the screen instead of choosing them separately and discovering that they interfere.
IDEA 07 / 20
Use a Curtain where a Rigid Screen Would Crowd Access
 SaveSupport Non AI Creator
Image credit: Project: Rock Paper Hammer (via Houzz)
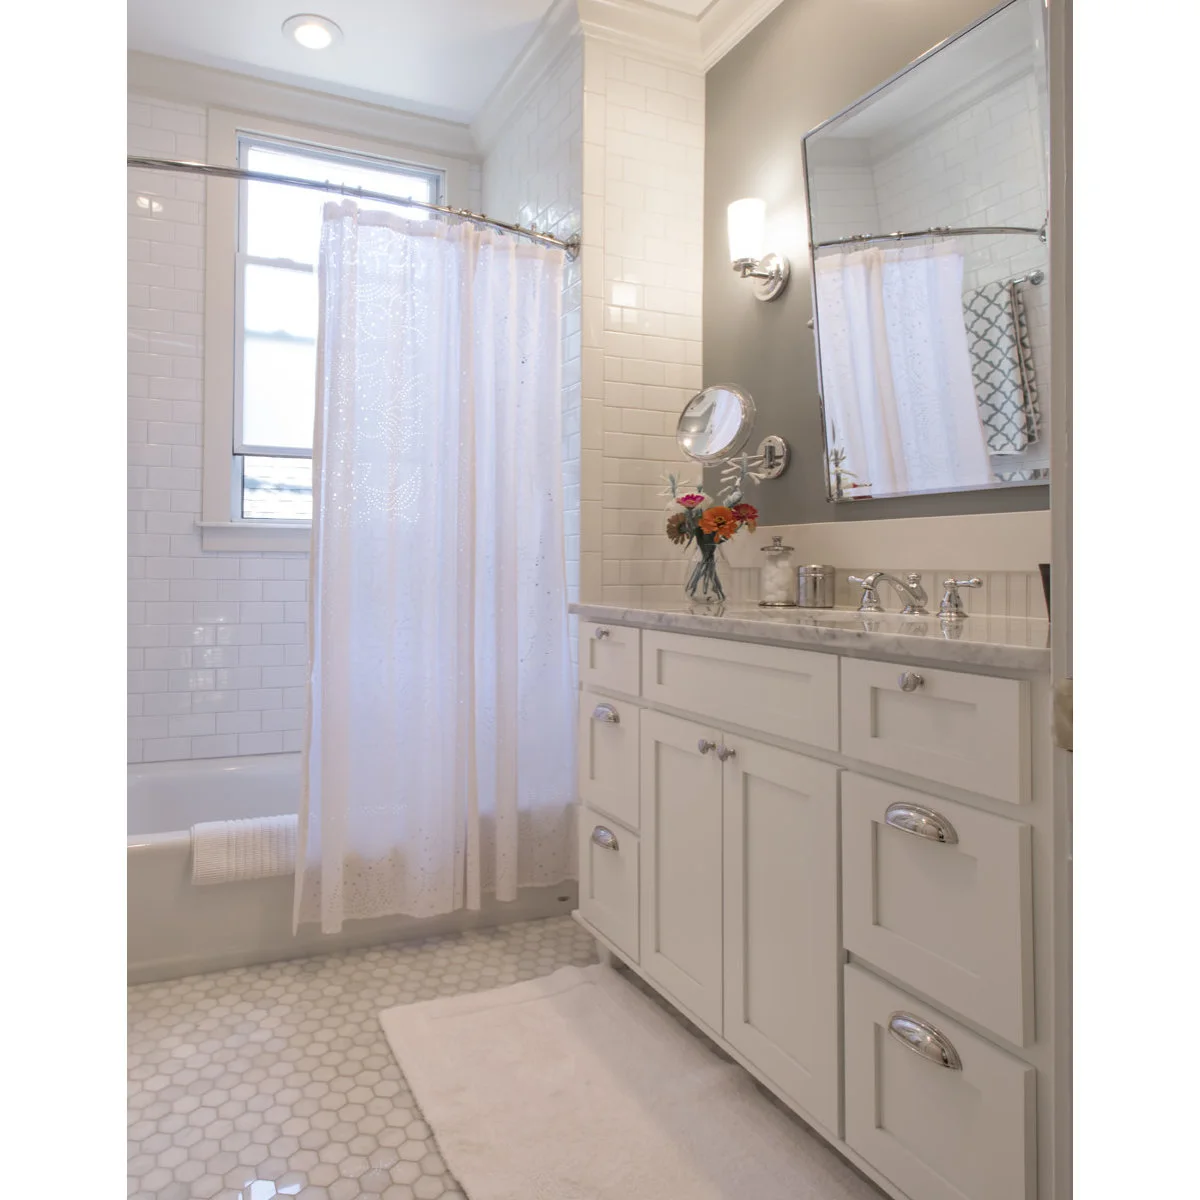
A shower curtain hangs from a curved rod around the tub in this compact bathroom. White cabinetry and small pale floor tiles keep the rest of the room quiet. The flexible enclosure allows access without adding a glass door that must swing into the space beside the vanity.
Check how the rod projects into the room before choosing a curved version. The curtain and liner should contain water without obstructing the doorway or window controls. Choose fabrics you can wash or replace easily, and give the liner room to dry rather than leaving it folded tightly against the wall.
IDEA 08 / 20
Keep a Narrow Shower Enclosure Visually Simple
 SaveSupport Non AI Creator
Source: houzz.com
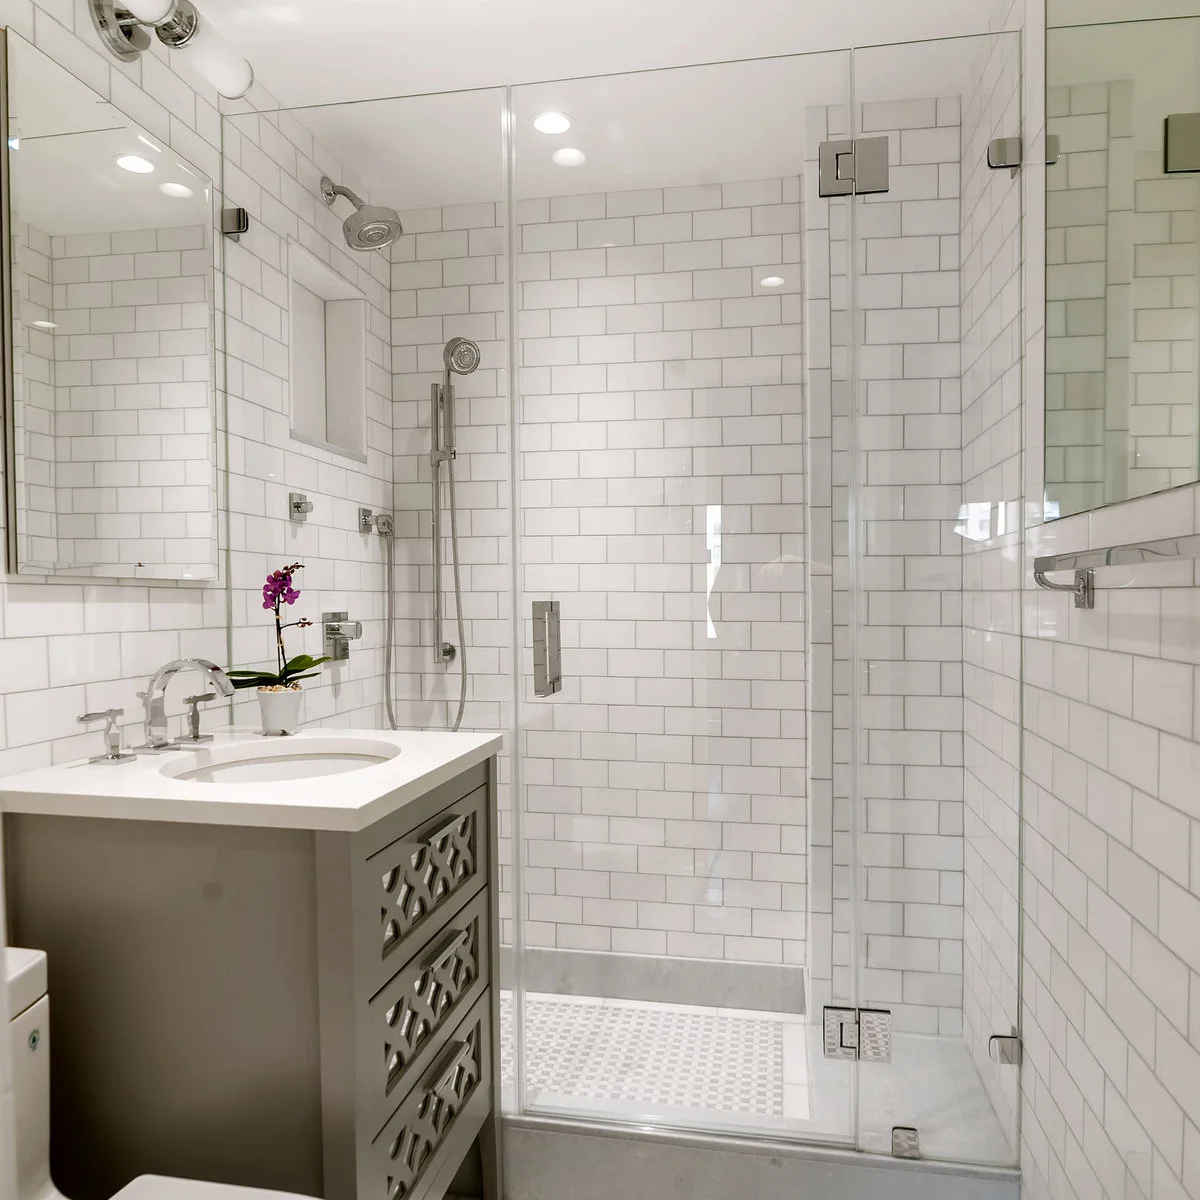
White rectangular tiles continue around this narrow shower and neighboring wall, with clear glass keeping the enclosure’s outline light. A compact grey vanity adds storage without extending across the full wall. The small shower floor uses a different format while staying within the same pale palette.
Measure the shower opening and door travel with the vanity in place, rather than judging them as separate products. Keep handles and towel fittings clear of the route. A repeated wall tile can simplify the appearance, but the waterproofing, threshold and drainage still need a proper plan for the room.
IDEA 09 / 20
Plan a Shower Seat without Losing the Standing Area
 SaveSupport Non AI Creator
Image credit: Project: Walls too Windows, Interior Design (via Houzz)
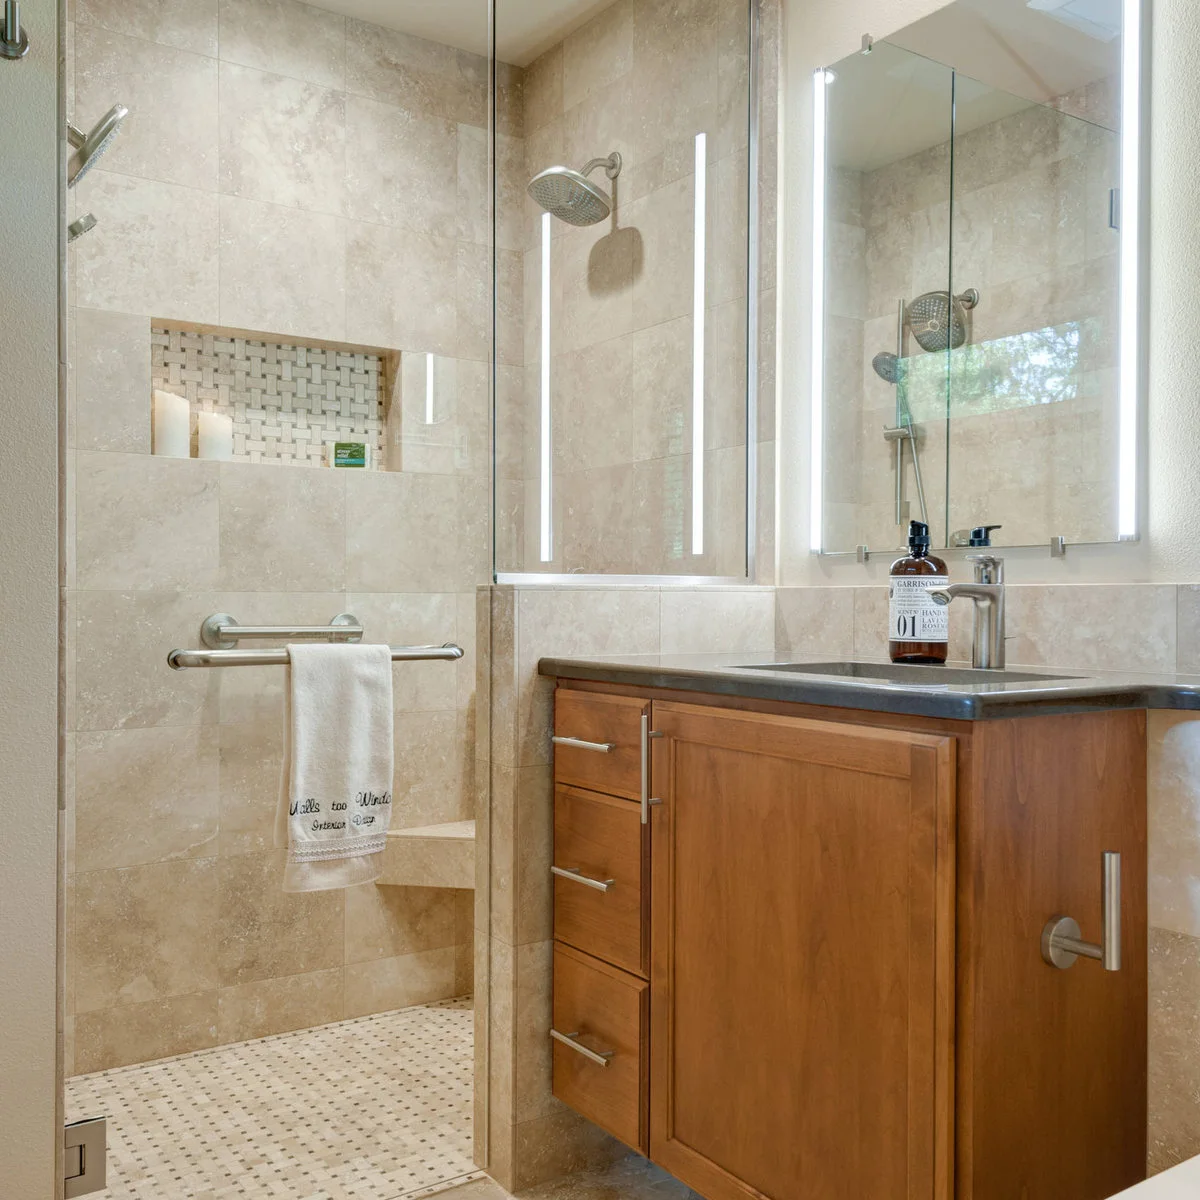
A small built-in seat occupies the corner of this glass shower, with a niche above and warm pale tiles around it. The adjacent wood vanity has an illuminated mirror, keeping the basin wall relatively uncluttered. The seat is contained within the shower rather than added as loose furniture.
Check the remaining standing space and comfortable access before including a fixed seat. Its surface, waterproofing and drainage need appropriate detailing. If future support is important, discuss suitable fittings and wall reinforcement with a qualified installer; a decorative towel bar should not be assumed to serve as a grab bar.
IDEA 10 / 20
Keep Loose Furniture out of the Shower Route
 SaveSupport Non AI Creator
Image credit: Project: Juxtaposed Interiors (via Houzz)
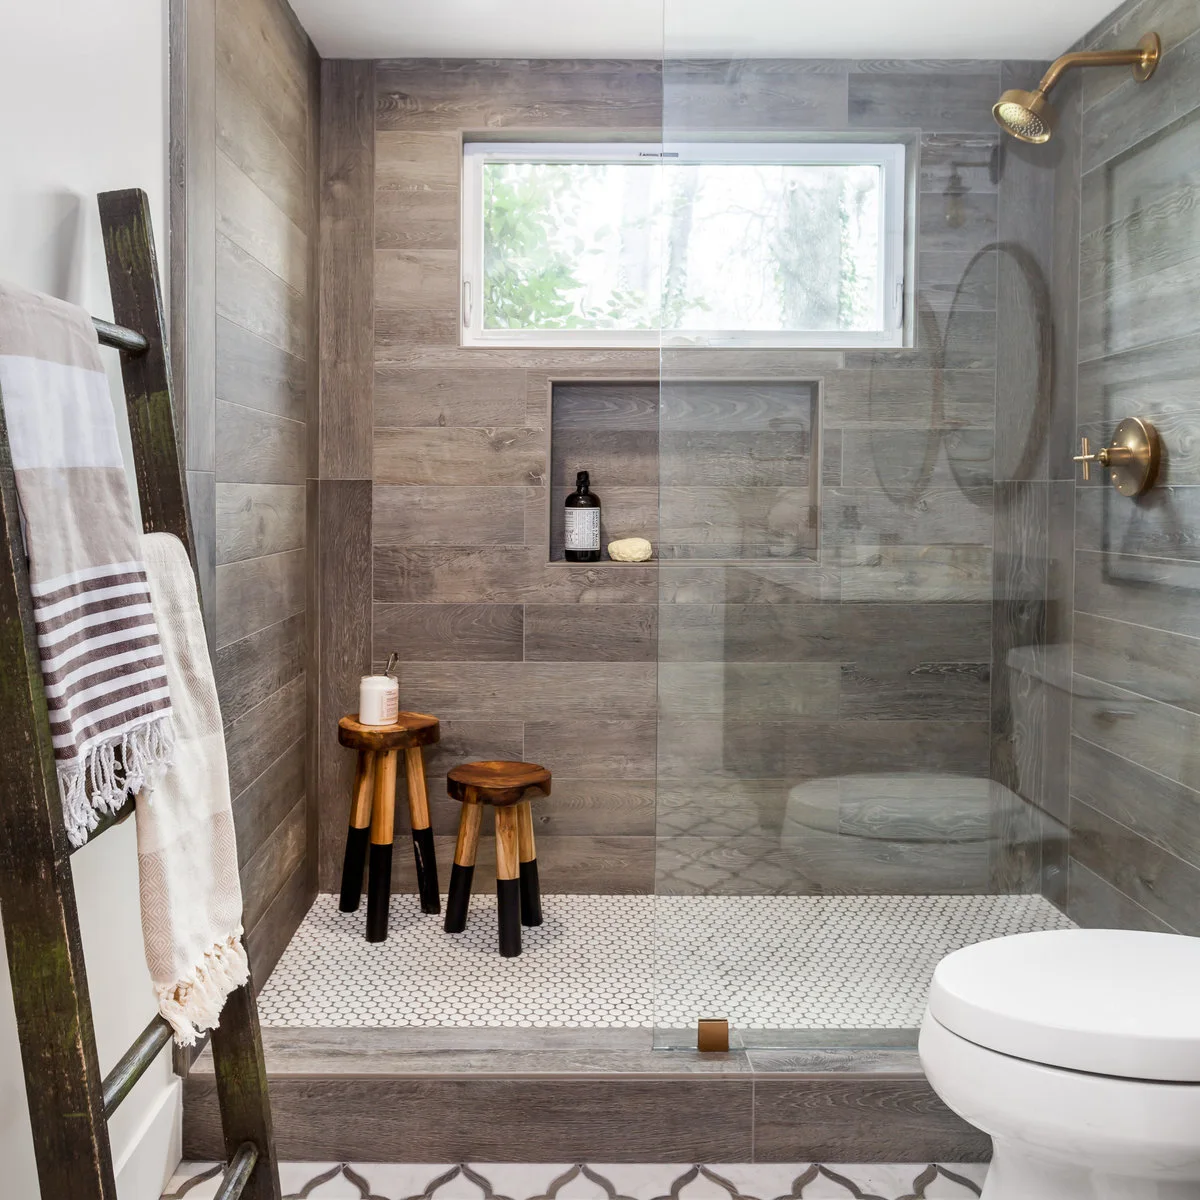
Grey wood-grain tiles surround this shower, with a large niche below the window and pale small-format tiles underfoot. Two small stools hold decorative toiletries near the side. The niche is the more useful idea for a tight room because it stores bottles without occupying standing space.
Borrow the recessed storage and reduce loose pieces if they make the shower harder to enter or clean. Do not assume a decorative stool is suitable for wet use or sitting. Plan the niche around the wall structure and bottle sizes, with its waterproofing and sloped surfaces properly resolved.
PART 03
Keep Storage Close and Surfaces Useful
IDEA 11 / 20
Add Storage above the Toilet without a Deep Cabinet
 SaveSupport Non AI Creator
Image credit: Project: i.d. | interior design (via Houzz)
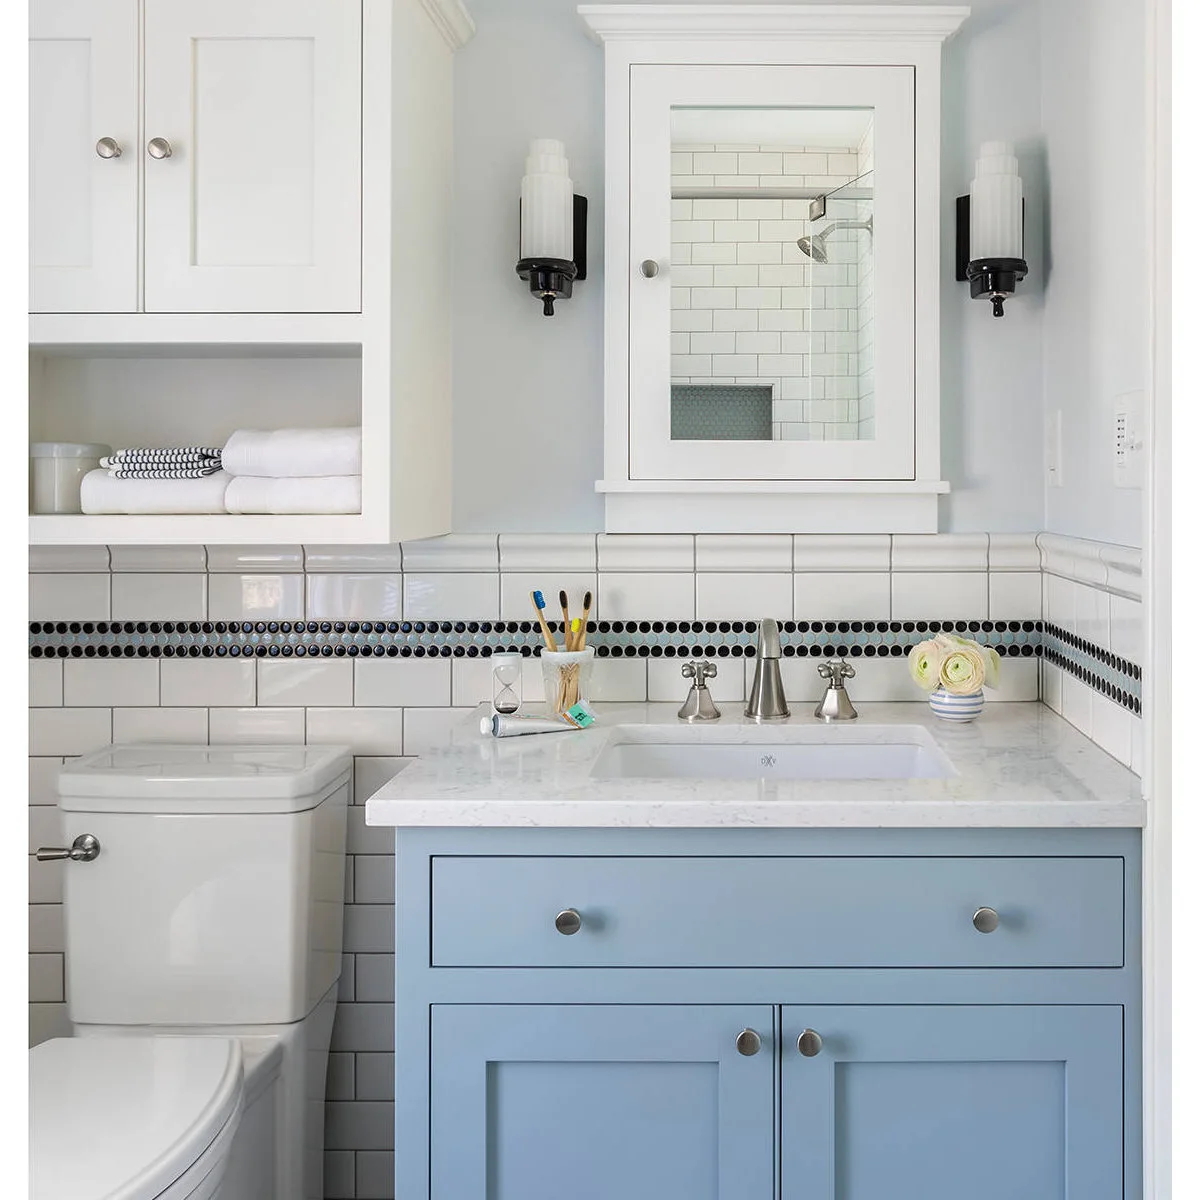
A white cupboard and open towel shelf use the wall above the toilet in this small bathroom. The pale blue vanity handles storage below the basin, while a mirrored cabinet adds another level above. The separate pieces distribute supplies without needing one deep floor-standing linen unit.
Choose the upper cabinet depth so it does not interfere with using or servicing the toilet. Secure the unit appropriately and keep heavier items lower where possible. Reserve the open shelf for a small number of towels, leaving bottles and spare supplies behind doors so the wall does not become visually crowded.
IDEA 12 / 20
Put Spare Towels on a Small Wall Shelf
 SaveSupport Non AI Creator
Image credit: Project: Maryland Home Pros (via Houzz)
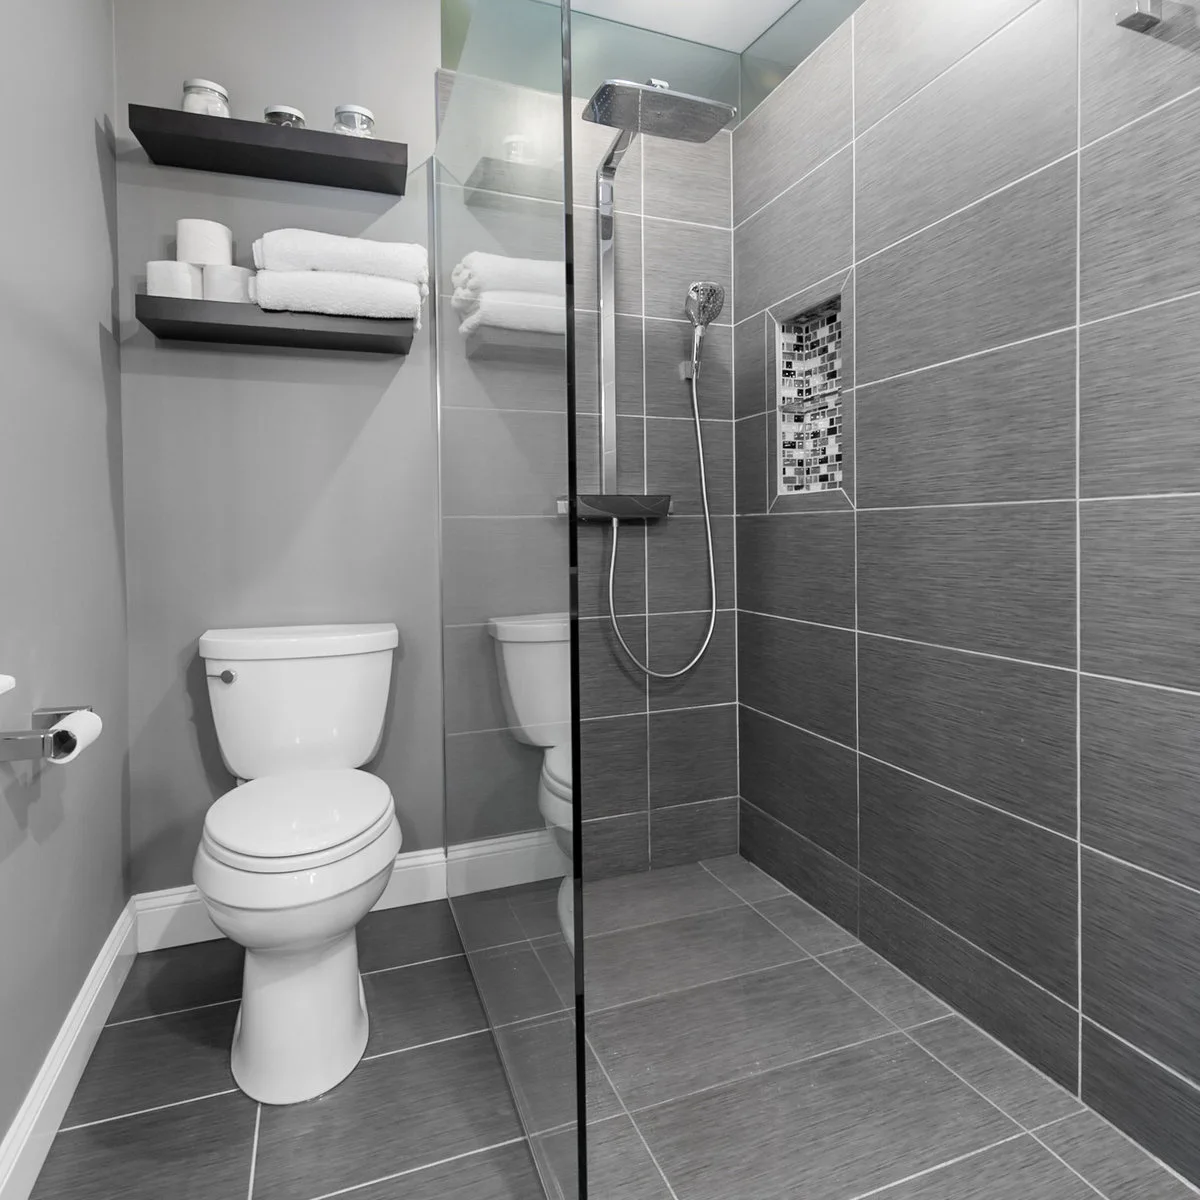
Two dark shelves hold spare towels and small containers above the toilet in this grey bathroom. The shower uses a recessed niche for its own supplies, keeping dry storage separate from the spray area. The shelves add useful capacity without a cabinet extending down to the floor.
Keep the shelves shallow enough for comfortable use of the toilet below, and fix them for their intended load. Avoid balancing heavy glass containers near an edge. Store only the supplies you need in this room, with bulk packs elsewhere, so the shelves remain easy to reach and clean.
IDEA 13 / 20
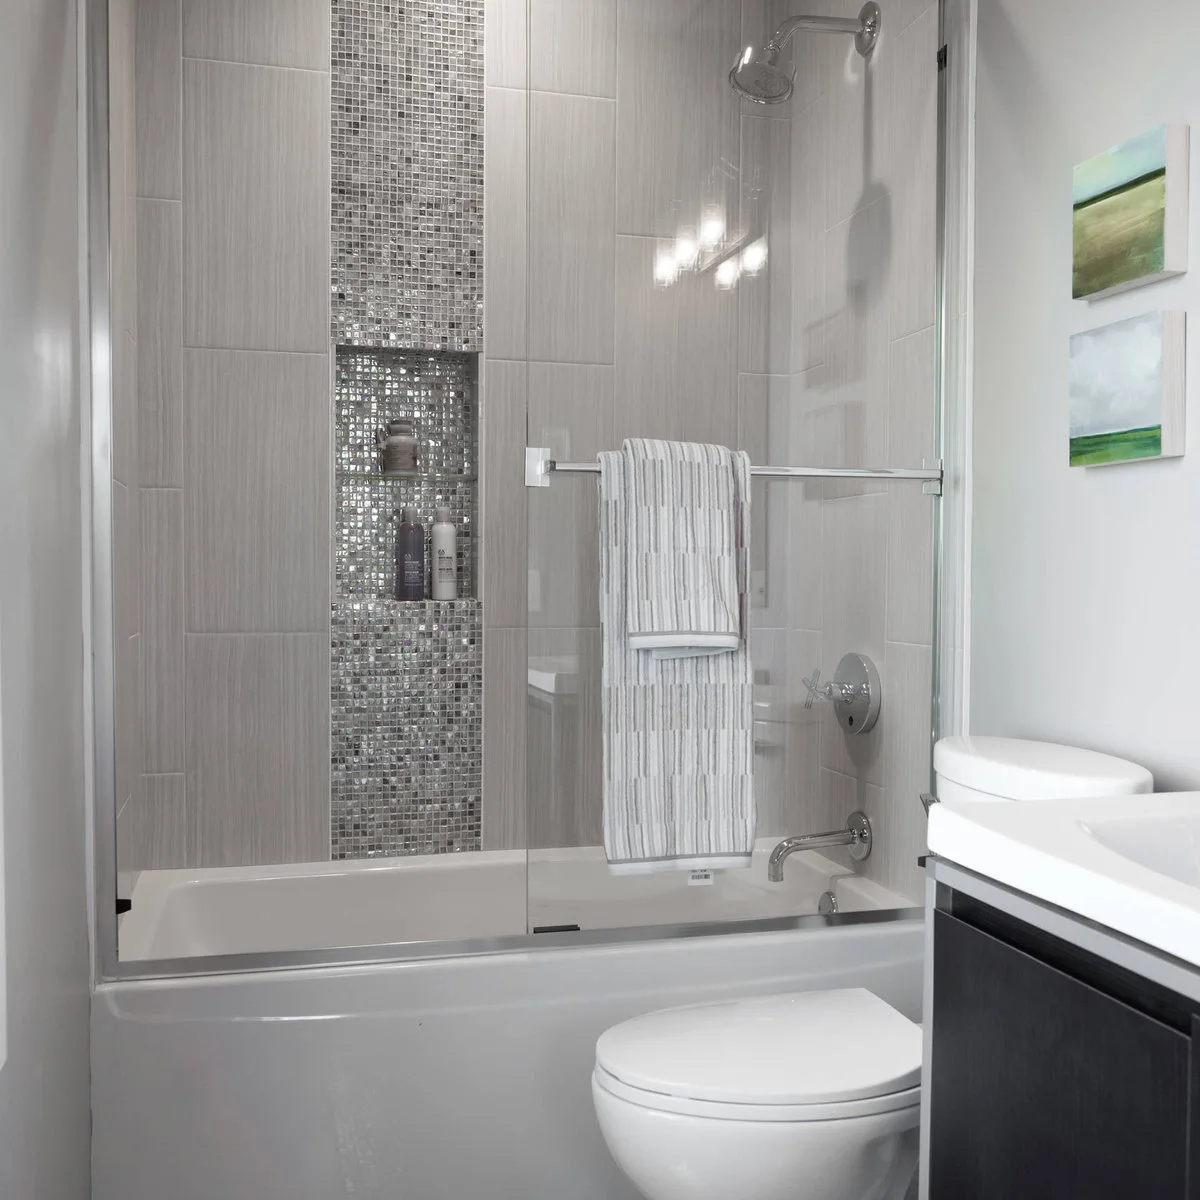
Use a Vertical Niche to Hold Bottles at Several Heights
 SaveSupport Non AI Creator
Source: www.houzz.com
A narrow mosaic strip rises behind this tub, with two recessed shelves using part of its height for toiletries. Larger pale tiles keep the surrounding wall simpler. The storage is incorporated into a decorative feature instead of being added as a projecting rack over the bath.
Measure tall bottles and soap containers before dividing the niche. More shelves are not useful if none is high enough for the products you use. Coordinate the recess with the wall structure and waterproofing, then choose a mosaic that you are prepared to clean around its many small joints.
IDEA 14 / 20
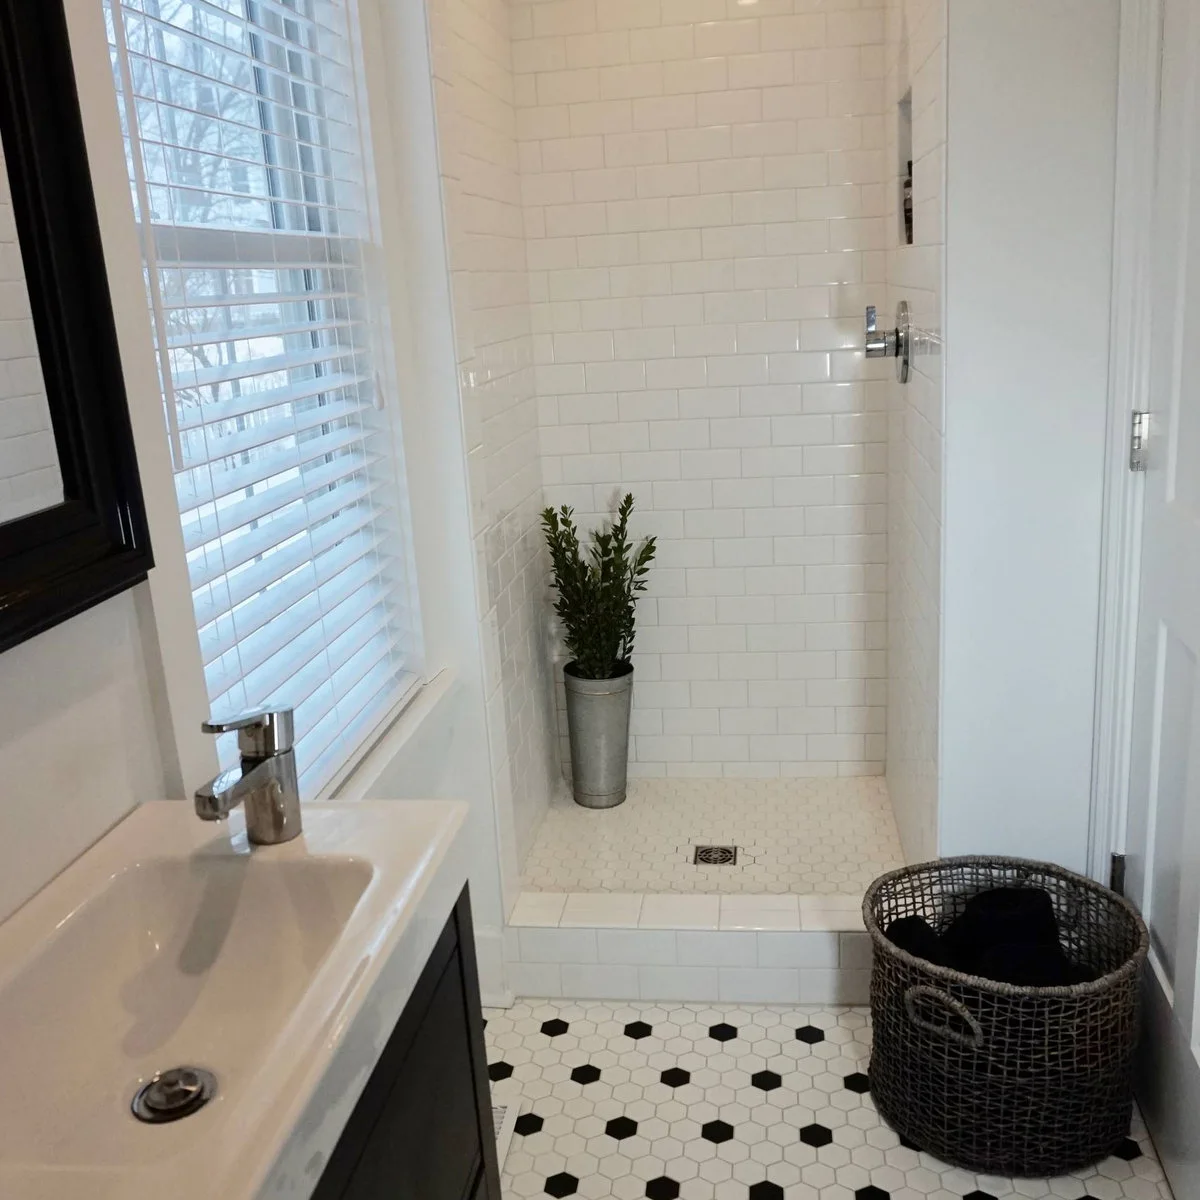
Keep a Long, Narrow Room Free of Extra Pieces
 SaveSupport Non AI Creator
Image credit: Project: Christina Richardson (via Houzz)
A small basin sits along one side of this long, narrow bathroom, leaving a direct route to the shower at the end. White wall tiles keep the far corner simple, while black accents in the hexagonal floor give the room pattern. Most storage must fit within the existing fittings.
Keep baskets and decorative plants out of the approach when space is this limited. The open shower arrangement also needs careful water-containment planning; do not assume that a tiled floor alone makes the whole room suitable to get wet. Check clearances and drainage before copying a minimal enclosure.
IDEA 15 / 20
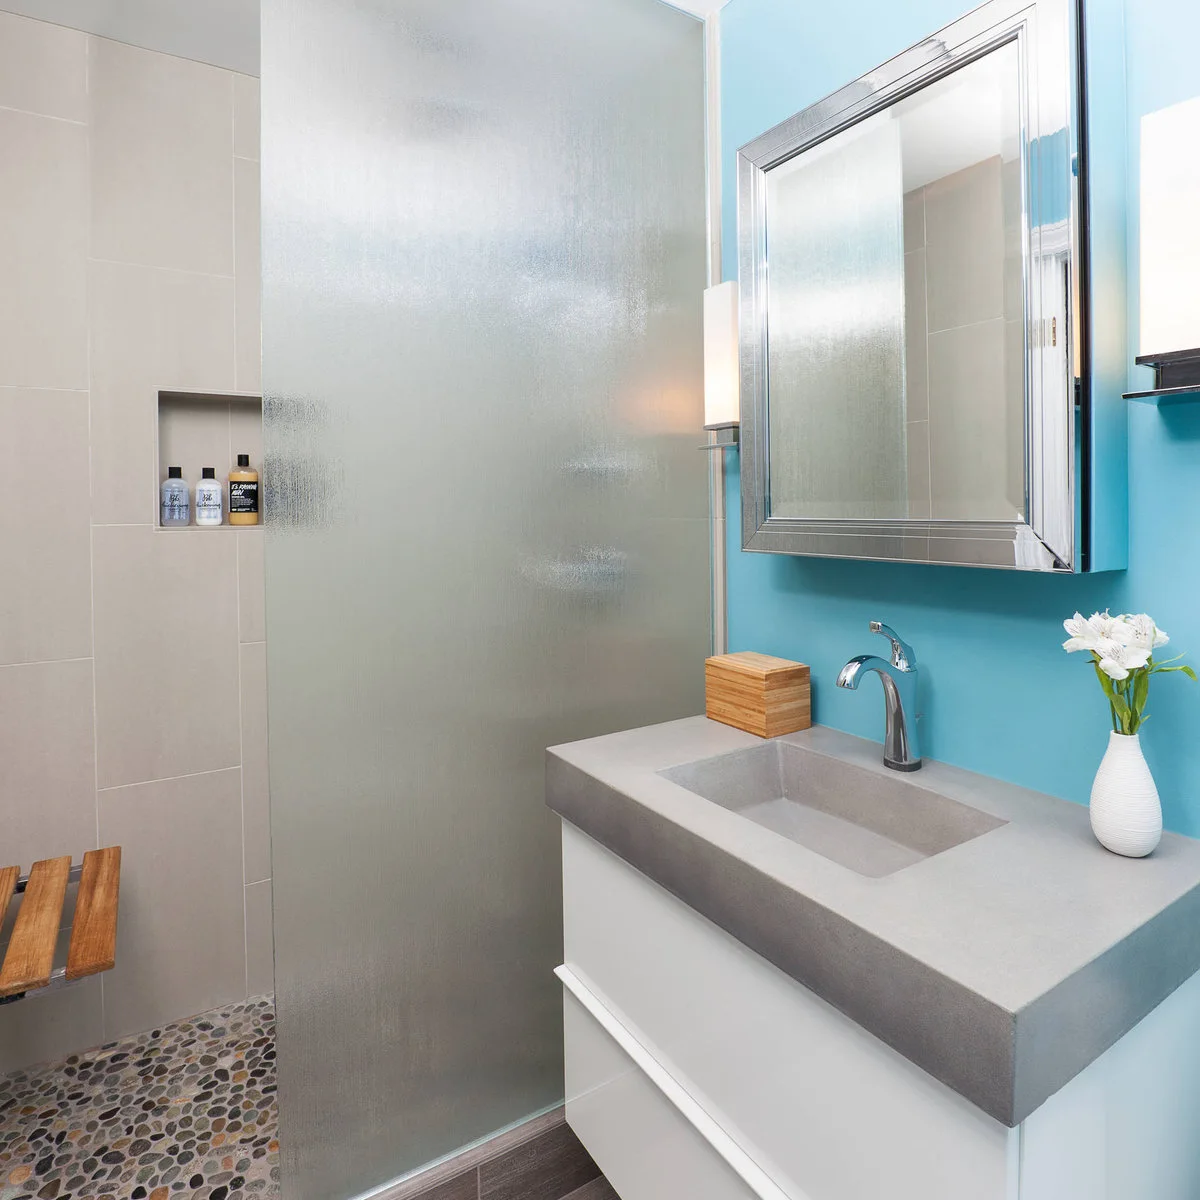
Use Frosted Glass when Privacy Matters
 SaveSupport Non AI Creator
Image credit: Project: MILIEU (via Houzz)
A frosted screen separates the shower from this small vanity area. Turquoise paint gives the basin wall a distinct color, while pale tiles and white drawers keep the remaining surfaces quiet. The screen provides more visual separation than clear glass without requiring a full solid partition.
Compare samples of frosted glass in the room’s light, including how clearly silhouettes remain visible. Think about which side is easiest to clean and how the screen meets the floor. Keep the counter practical by limiting display pieces, especially where the basin already uses most of its depth.
PART 04
Make Color, Light and Pattern Work Harder
IDEA 16 / 20
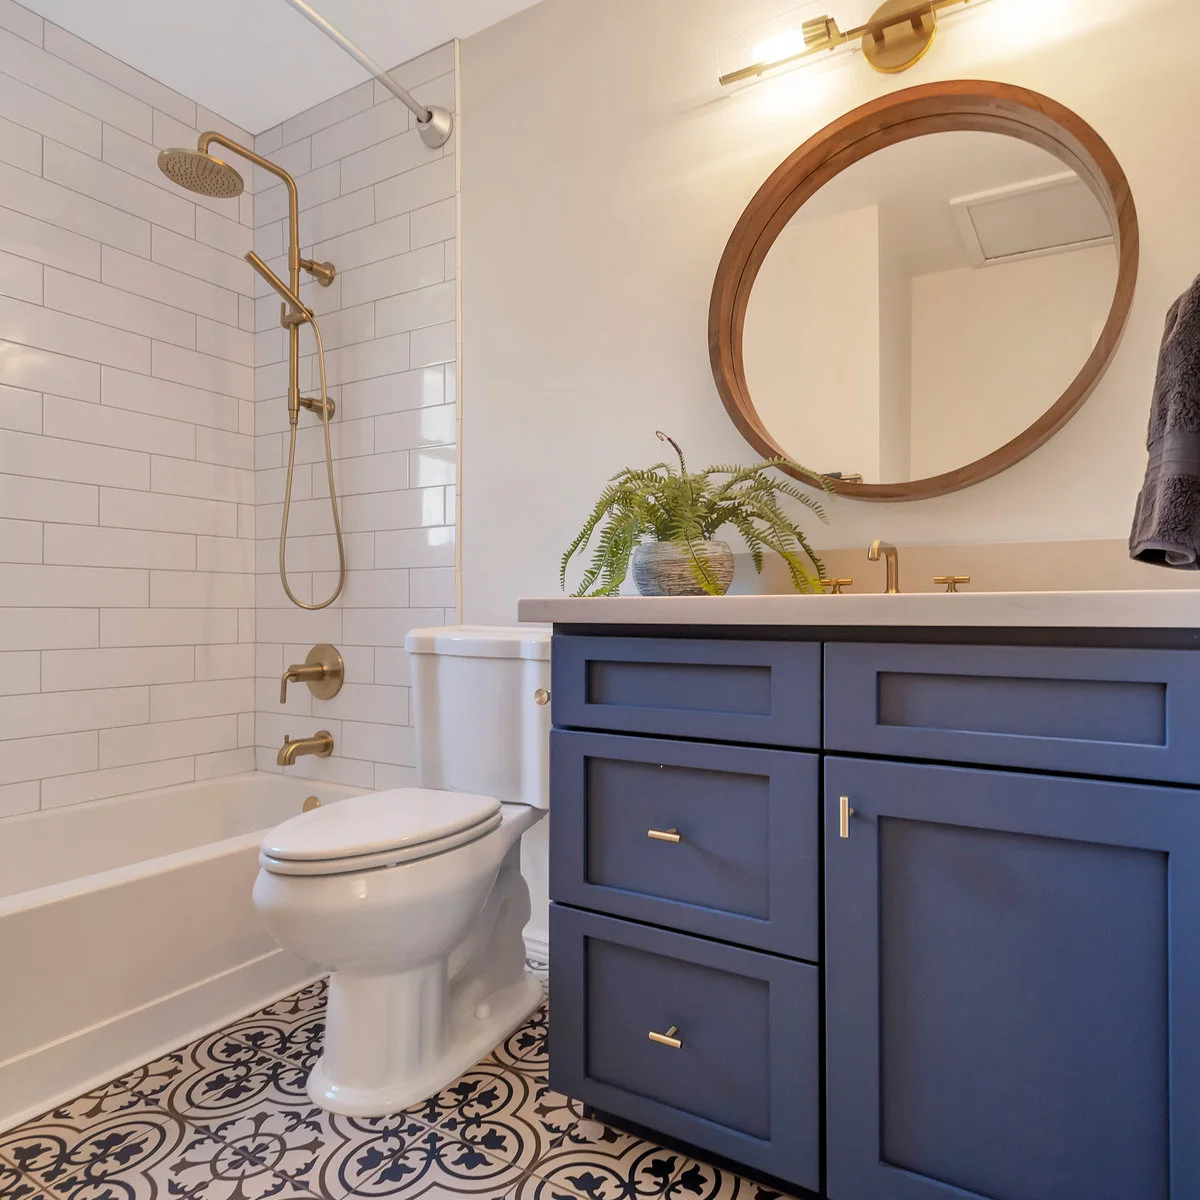
Put a Strong Color on the Vanity
 SaveSupport Non AI Creator
Image credit: Project: Mariano & Co., LLC (via Houzz)
A navy vanity gives this bathroom a strong color anchor, with a patterned floor adding another layer below. White wall tiles and a white tub keep the room from becoming dark throughout. Gold-colored fittings and the wood mirror frame add warmth without introducing another large furniture piece.
Compare the cabinet color with the floor pattern before adding new accessories. If both are strong, keep towels and the shower curtain simpler. Check the cabinet’s usable drawer space and opening clearances first; color can make a small room feel personal, but it cannot compensate for storage that is difficult to reach.
IDEA 17 / 20
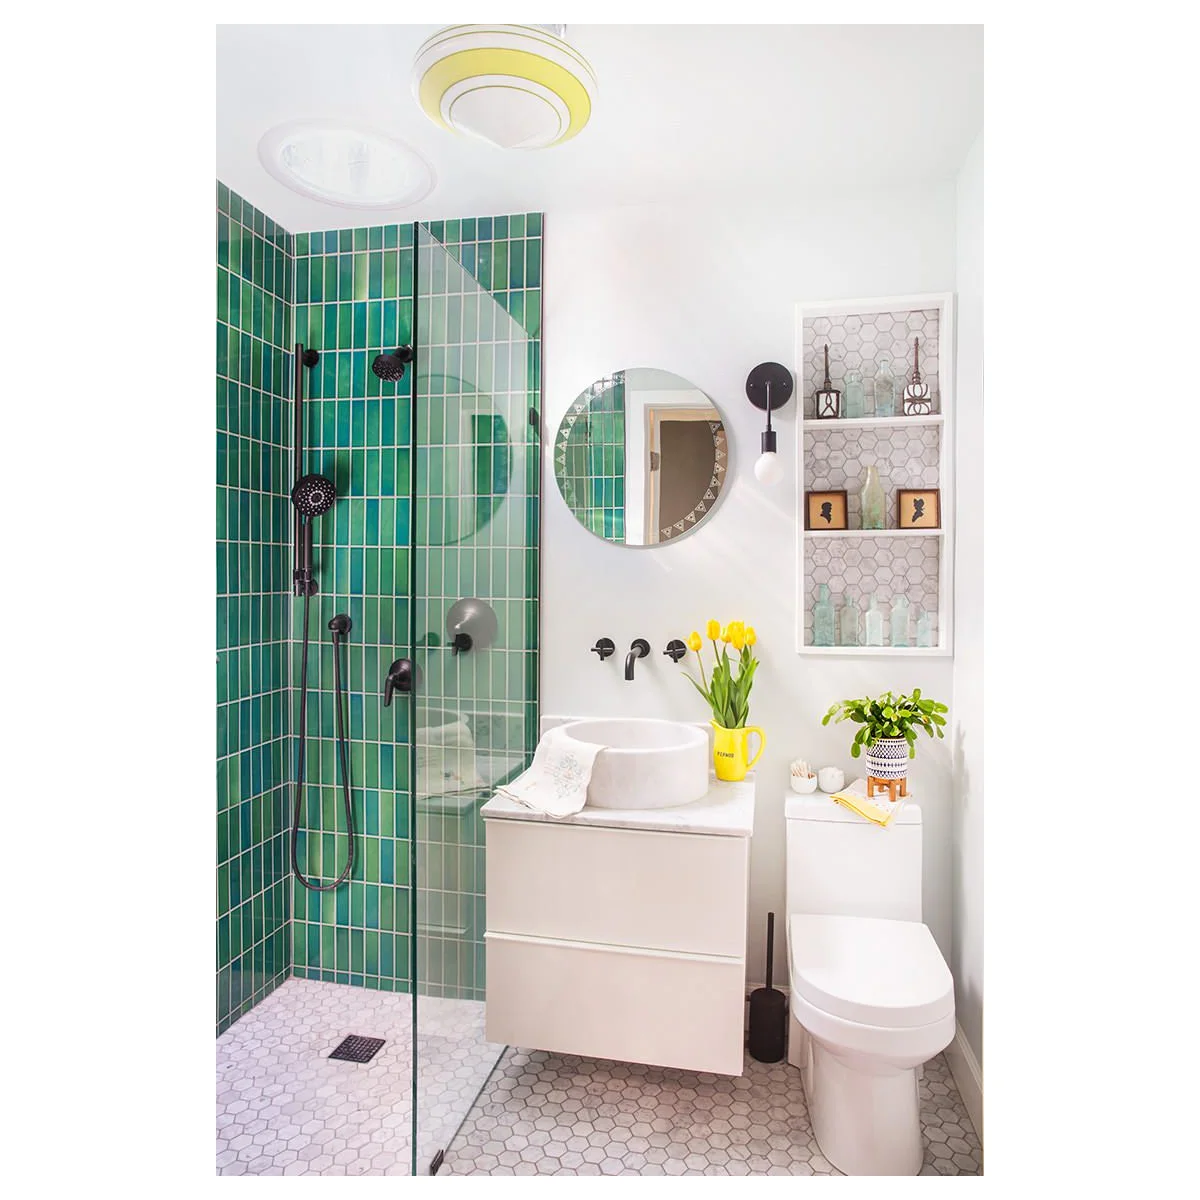
Concentrate Green Tile in the Shower
 SaveSupport Non AI Creator
Image credit: Project: Julia Chasman Design (via Houzz)
Vertical green tiles make the shower the most colorful part of this compact bathroom. The white vanity, toilet and upper walls keep the surrounding fittings lighter, while a recessed shelf supplies additional wall storage. A small yellow accent adds contrast without another large colored surface.
Choose a green sample beside the actual white fixtures before ordering. Keep the recess useful by reserving some space for daily supplies instead of filling every level with ornaments. Check the shower screen and entry opening together so the compact vanity does not make getting in and out awkward.
IDEA 18 / 20
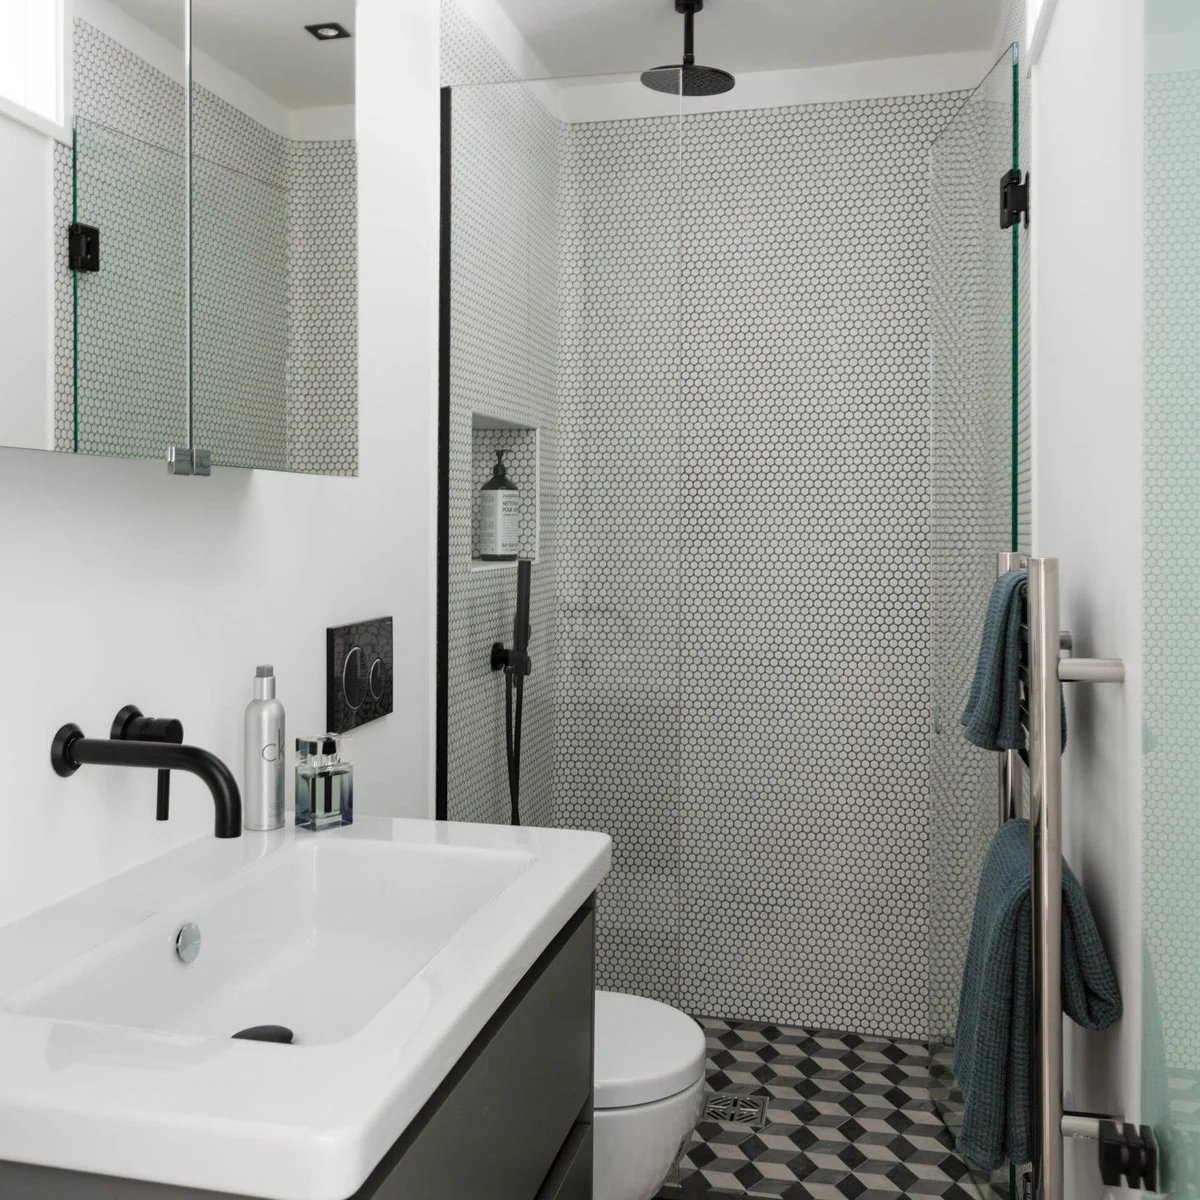
Let Small Wall Tiles Work with a Bold Floor
 SaveSupport Non AI Creator
Image credit: Project: Maurizio Pellizzoni Ltd (via Houzz)
Small round tiles cover the shower walls in this compact monochrome bathroom, while a larger geometric pattern defines the floor. Black fittings link the two surfaces. The basin area stays comparatively plain, allowing different tile scales to provide character without adding several competing colors.
View a group of wall tiles beside a larger floor sample to judge how the patterns interact. Small tiles bring many grout joints, so factor cleaning into the choice. Keep bottles in the niche rather than adding another rack, and choose finishes for their intended wet-area use rather than appearance alone.
IDEA 19 / 20
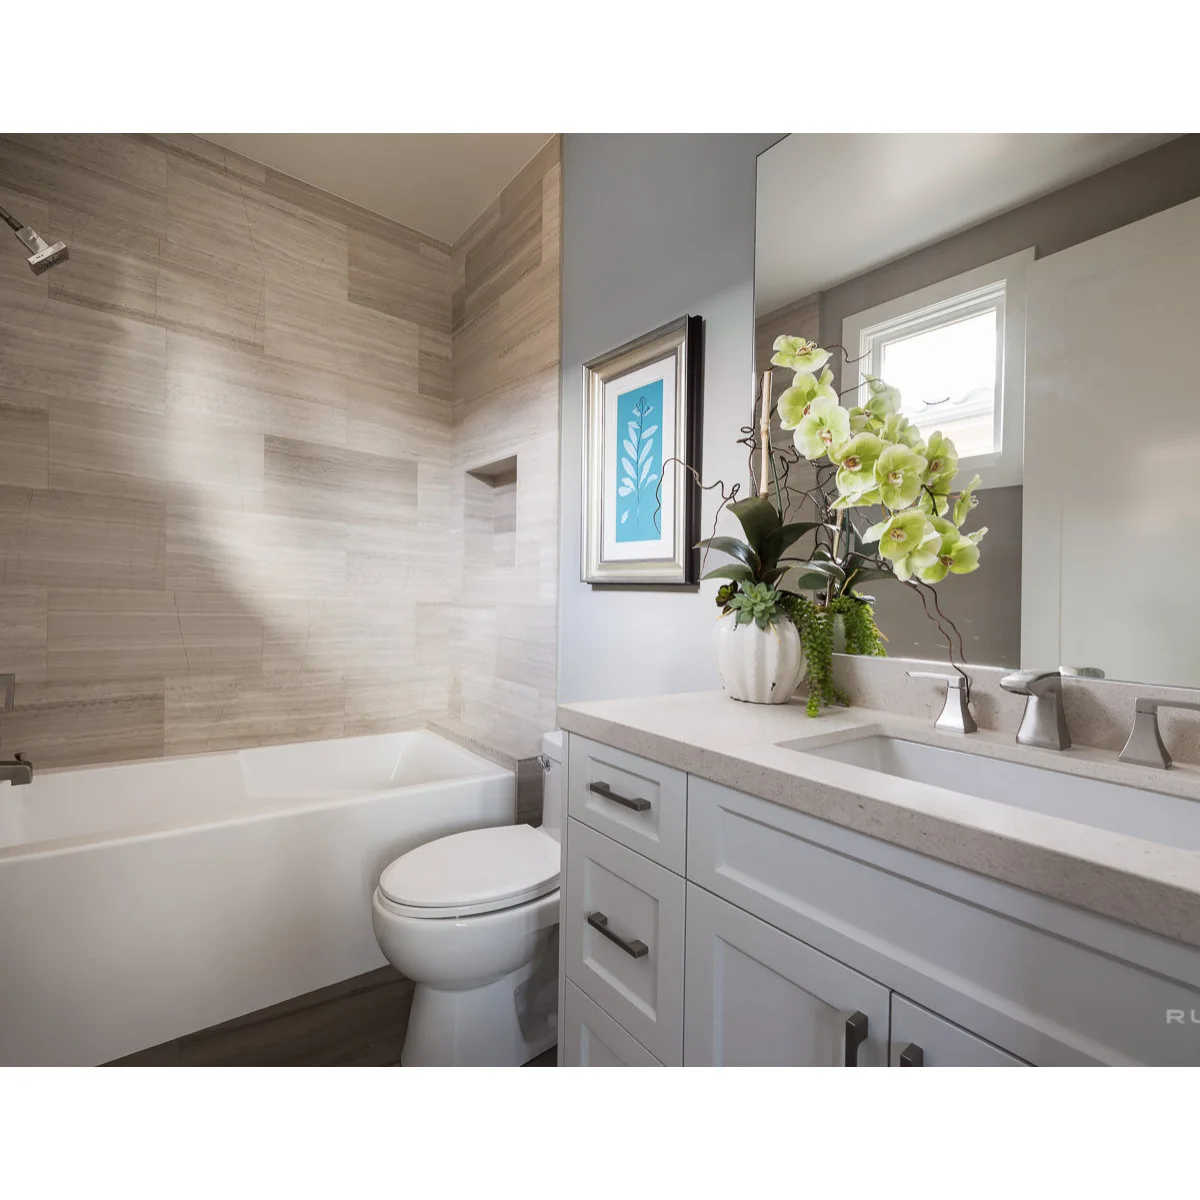
Use a Broad Mirror across a Compact Vanity Wall
 SaveSupport Non AI Creator
Image credit: Project: Teale Architecture (via Houzz)
A broad mirror spans the wall above this grey vanity, reflecting the window and pale tub surround. The cabinet offers drawers as well as a cupboard, allowing different supplies to be separated. The restrained colors help the room’s practical fittings remain the main features.
Check mirror height and lighting from your usual standing position, including reflections from the window at different times of day. Reduce oversized flowers or decorative pieces if they take away the only useful counter space. Plan a place for everyday toiletries before choosing a cabinet purely for its outer width.
IDEA 20 / 20
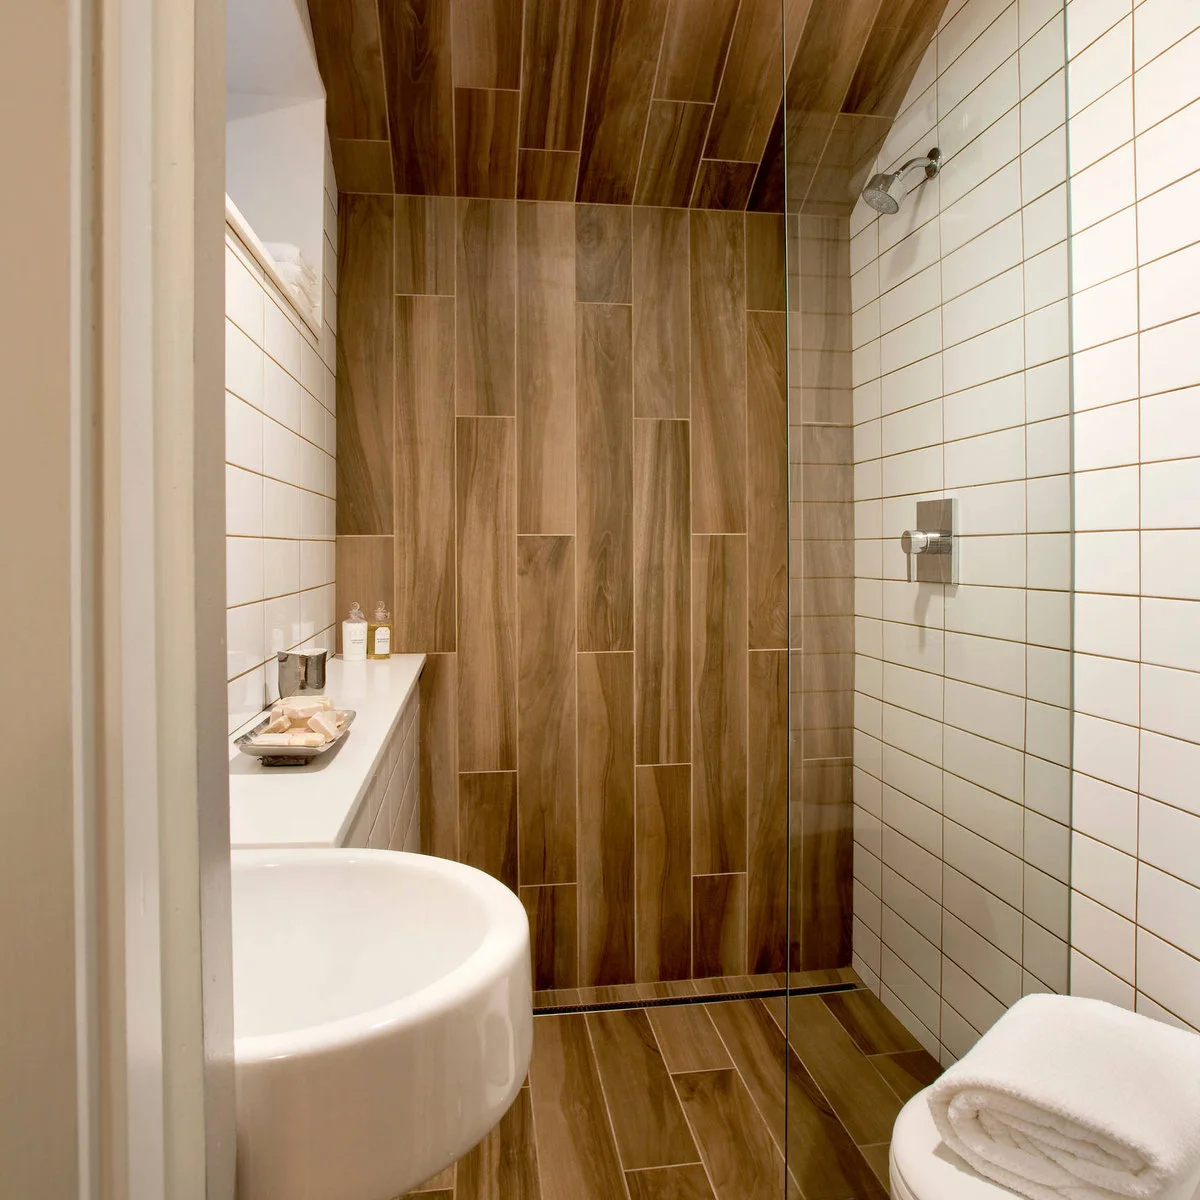
Give a Tiny Shower One Continuous Wood-Grain Feature
 SaveSupport Non AI Creator
Image credit: Project: Blanchard Design Studio (via Houzz)
A wood-grain finish continues from the back wall onto the sloped shower ceiling in this tiny bathroom. White side tiles and a small basin keep the remaining surfaces simpler. A narrow ledge uses the side wall for toiletries without a broad shelf projecting across the shower.
Confirm the actual finish and its suitability for each wet surface rather than assuming the visible grain means ordinary wood. Check standing headroom beneath the slope and keep the ledge shallow enough for comfortable movement. Plan ventilation and access for cleaning high corners before choosing a dramatic continuous finish.
BRING IT ALL TOGETHER
Make Room for the Routine You Actually Have
Mark the fittings and their opening positions before choosing finishes. Include a person standing at the basin, a drawer pulled out and the shower door open. The most useful small-bathroom change is often a better arrangement of those ordinary movements, followed by storage that gives daily supplies a clear place.
Choose one or two surfaces to carry color or pattern, then keep the remaining details calmer. Wall storage, recessed shelves and carefully sized vanities can help, but each adds its own cleaning or installation considerations. Leave enough clear surface and floor to use the room comfortably after the styling is removed.