A budget bathroom remodel starts with deciding what can stay. A sound vanity, working plumbing layout and serviceable fittings can leave more room in the budget for changes you notice every day. Fix leaks, damage and ventilation problems before spending on decorative finishes.
The photographs below illustrate individual choices, from painted cabinetry to smaller tiled areas. They are not promises that every pictured room was inexpensive. Get a price for the work in your own room, including preparation and professional installation where needed, before committing to materials.
PART 01
Keep what still works
IDEA 01 / 20
Paint a Sound Vanity Instead of Replacing It
 SaveSupport Non AI Creator
Source: www.midwestlifeandstyle.com
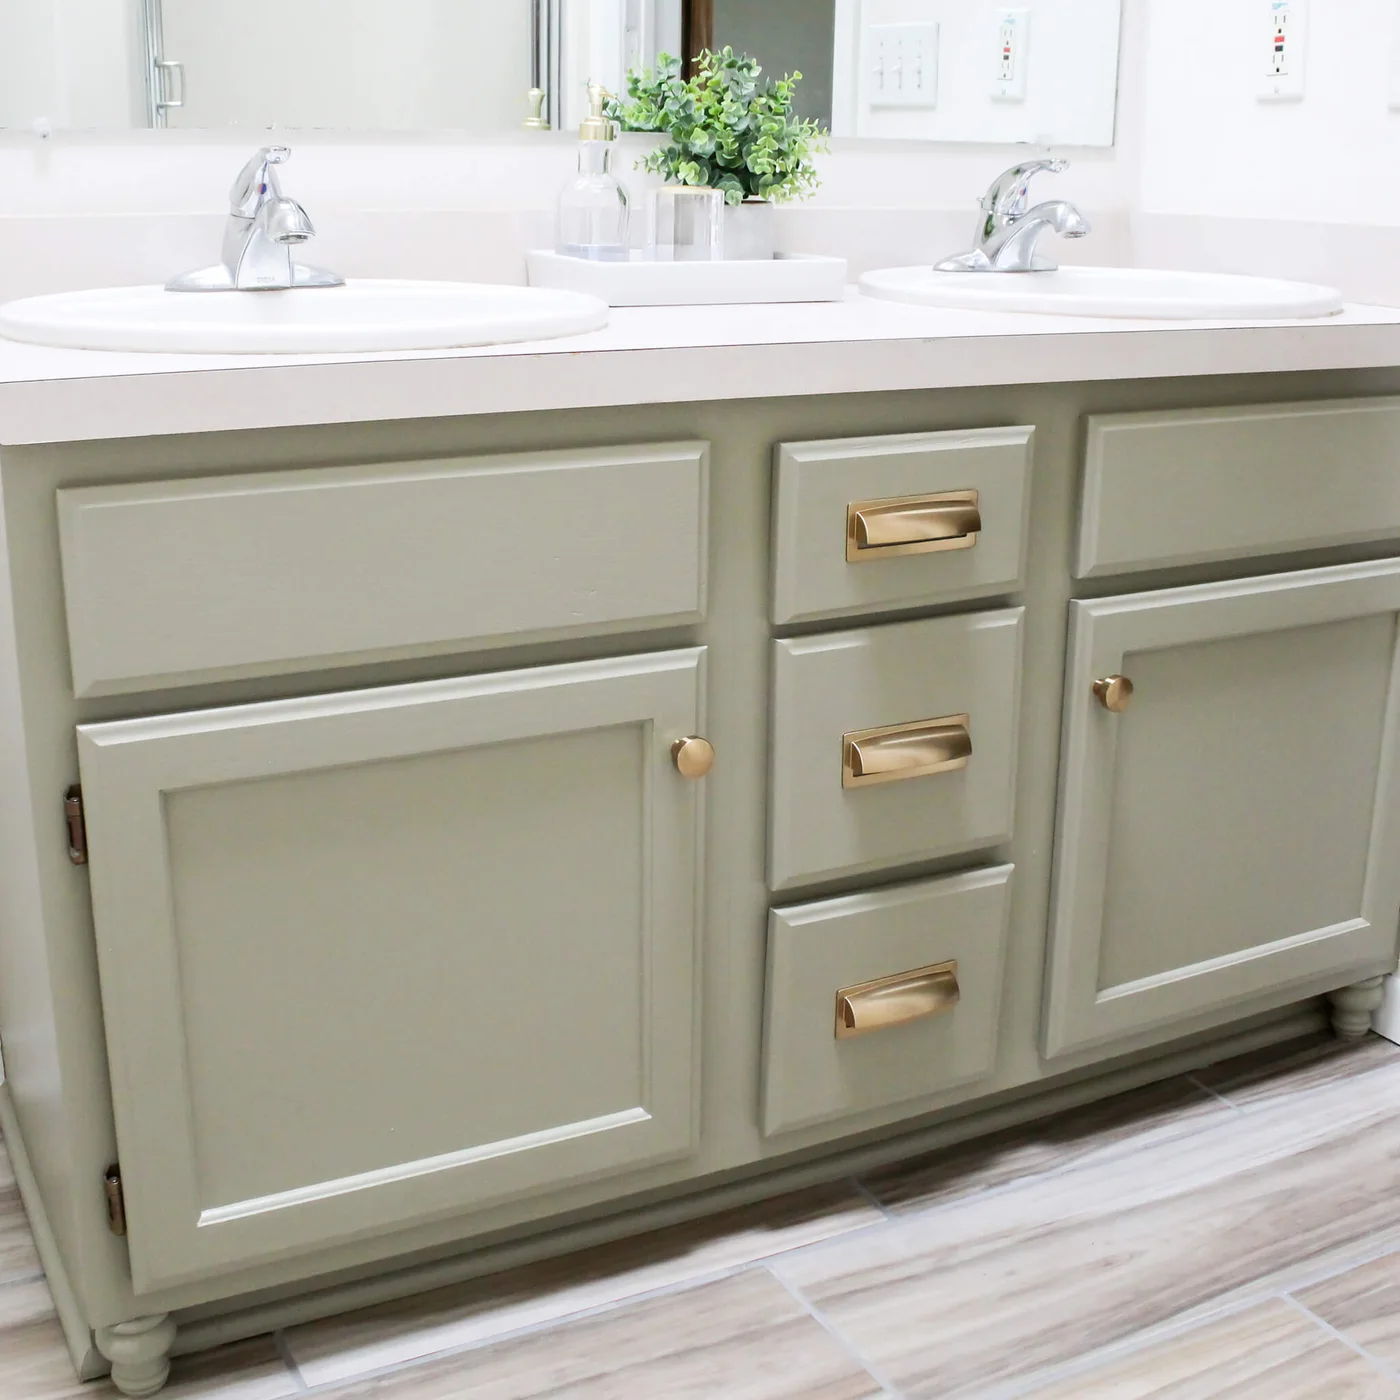
Pale green paint changes the vanity’s appearance while the white counter and two basins remain visually straightforward. Cup pulls on the drawers and round knobs on the doors add definition. The cabinet’s original panel shapes still provide most of its detail.
Check the cabinet for swelling, loose joints and leaks before planning a paint project. Match preparation and coatings to the existing surface, and allow the specified curing time before everyday use. Keeping a sound cabinet can reduce replacement work, but paint will not repair damaged board or failing plumbing.
IDEA 02 / 20
Change the Wall Color Above Existing Tile
 SaveSupport Non AI Creator
Image credit: Project: Lowe's Home Improvement (via Houzz)
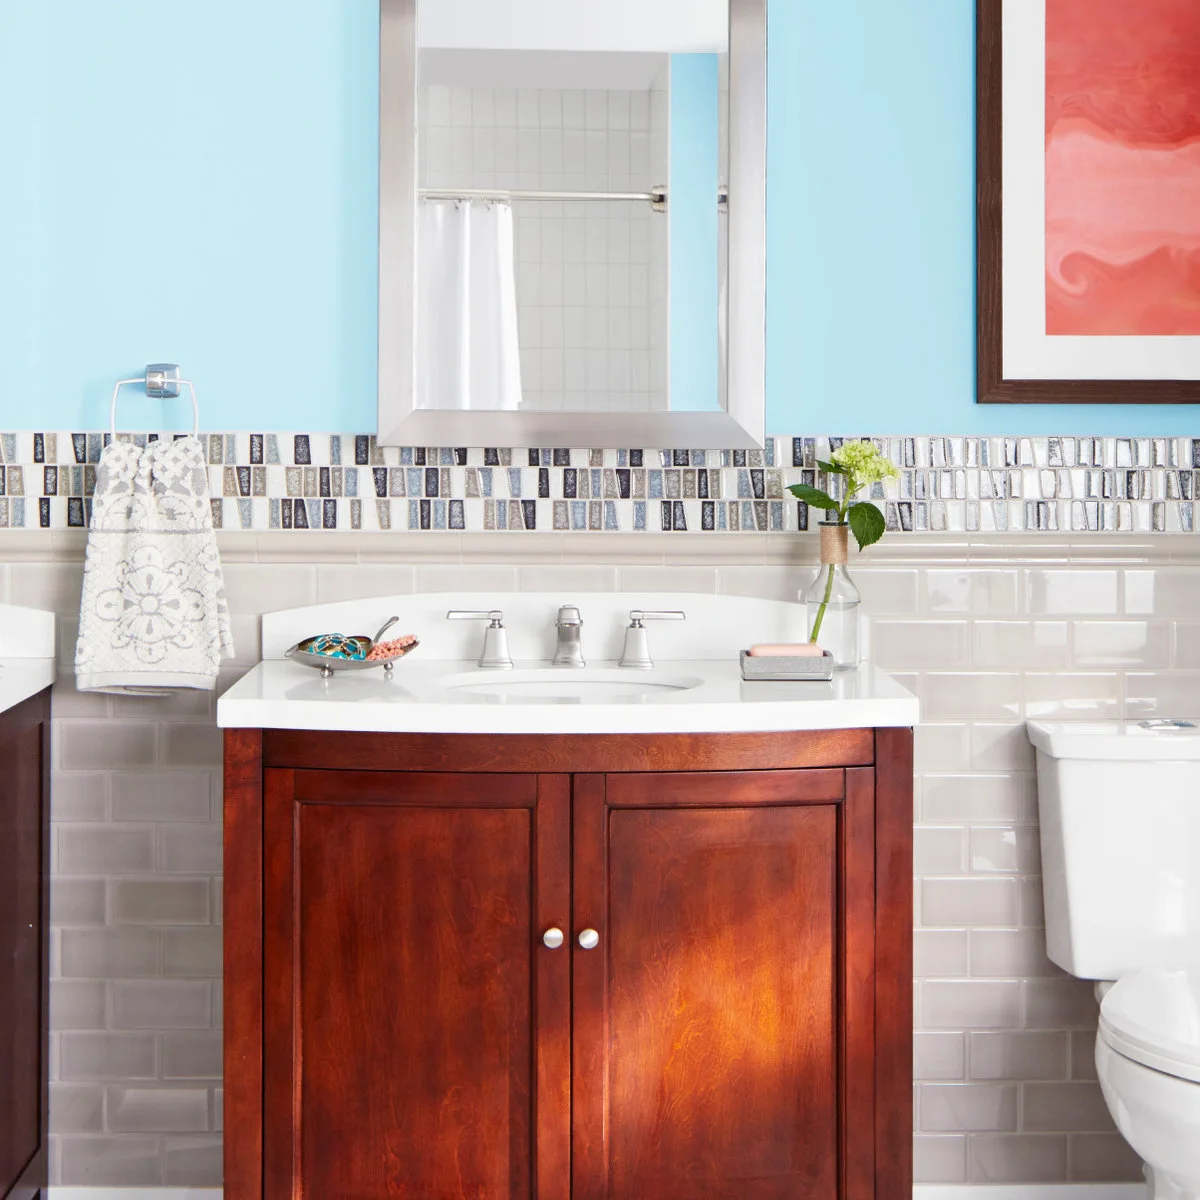
Blue paint supplies most of the new color above the tiled wall, leaving the wood vanity and pale counter as warmer, quieter elements. The small mosaic band already gives the room detail. A simple framed mirror prevents the basin wall from becoming visually crowded.
If the tile is sound and you still like it, test paint samples beside it before pricing a replacement. Clean and prepare the wall properly and use a finish suitable for that location. Keep paint work outside areas that require a waterproof system rather than treating paint as a substitute for one.
IDEA 03 / 20
Frame the Mirror to Connect It with the Vanity
 SaveSupport Non AI Creator
Source: athomewiththebarkers.com
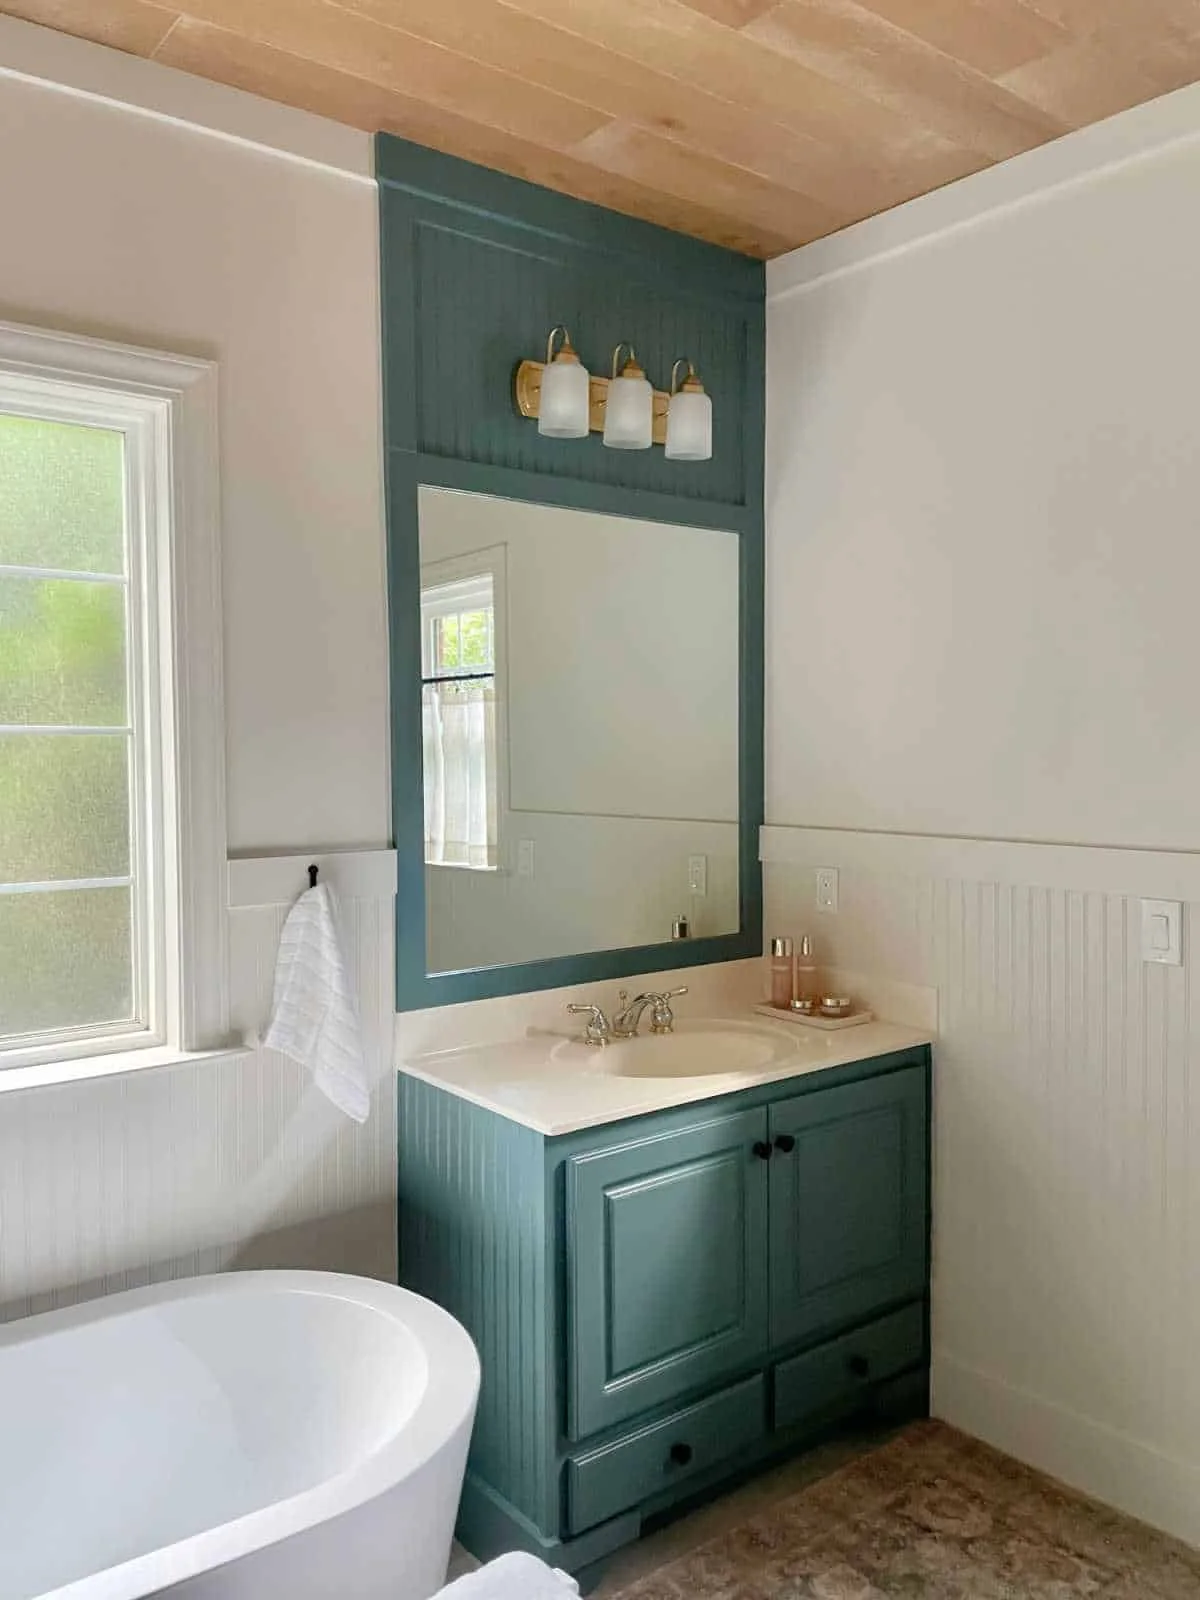
A blue-green frame connects the large mirror to the vanity below, while vertical panel detail extends the color toward the ceiling. The pale counter and white lower wall keep the stronger color contained. The existing mirror area still provides a broad useful reflection.
Inspect the mirror’s edges and mounting before adding trim. Plan around clips, outlets and any cabinet doors, and use materials and attachment methods suited to the setting. Ask for help if the glass must be moved; a decorative frame should never be expected to hold an inadequately mounted mirror in place.
IDEA 04 / 20
Give a Suitable Bath Exterior a New Color
 SaveSupport Non AI Creator
Image credit: Future PLC / ONE REPRESENTS
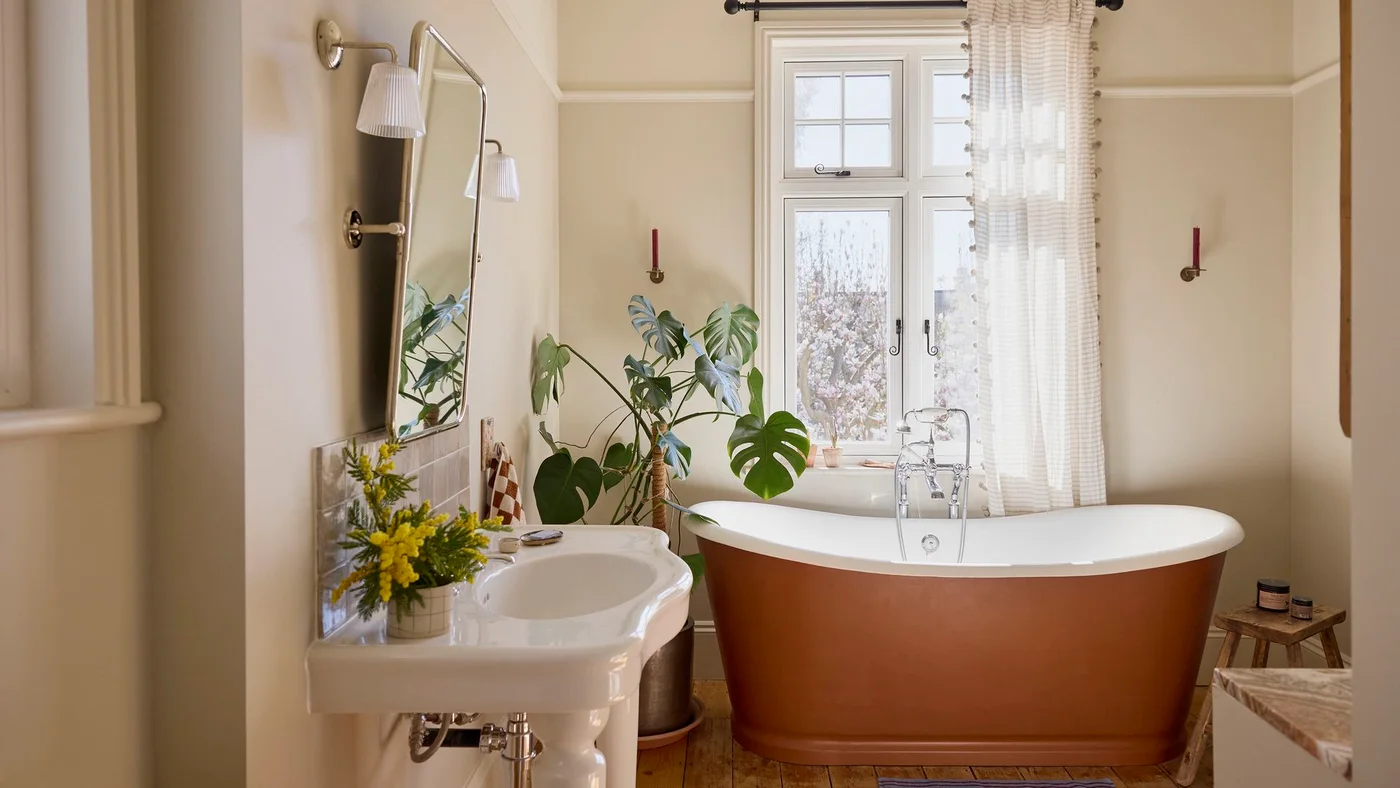
The warm bath exterior becomes the room’s main color accent, while the white rim and basin stay visually fresh. Pale walls and a simple curtain leave the tub’s outline clear. A small stool supplies a practical surface without adding a large storage unit.
Check the bath material and manufacturer’s coating guidance before buying paint. An exterior refresh is different from refinishing the bathing surface, which may require a specialist. Price preparation and curing time as part of the project, and leave plumbing accessible rather than boxing it in just for appearance.
IDEA 05 / 20
Refresh the Curtain Before Changing the Enclosure
 SaveSupport Non AI Creator
Image credit: Project: Lowe's Home Improvement (via Houzz)
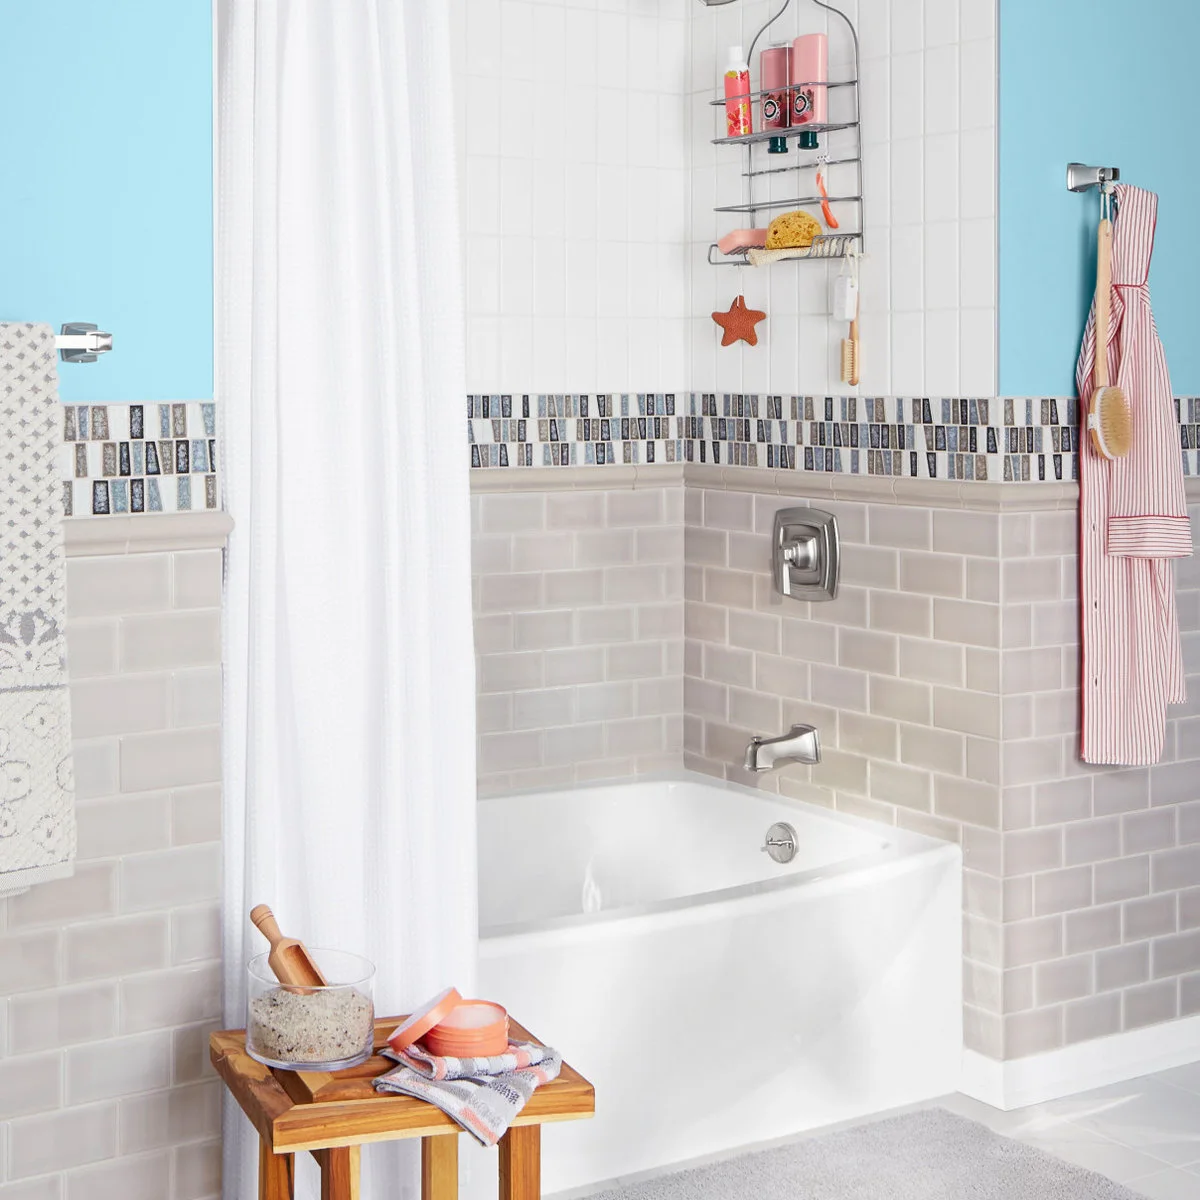
A plain white curtain keeps this tub and shower area light, with a hanging caddy holding bottles in one place. The tiled wall provides the stronger pattern through its mosaic band. Smaller textiles add color without changing the bath or shower fittings.
A fresh curtain and suitable liner can be an achievable first change when the existing tub area works properly. Check rod security and let fabric dry between uses. Keep the caddy within its rated load and avoid hanging storage in a way that strains the shower pipe.
PART 02
Choose surfaces deliberately
IDEA 06 / 20
Limit a Feature Tile to the Basin Splash Area
 SaveSupport Non AI Creator
Image credit: Project: Allison Lind Interiors (via Houzz)
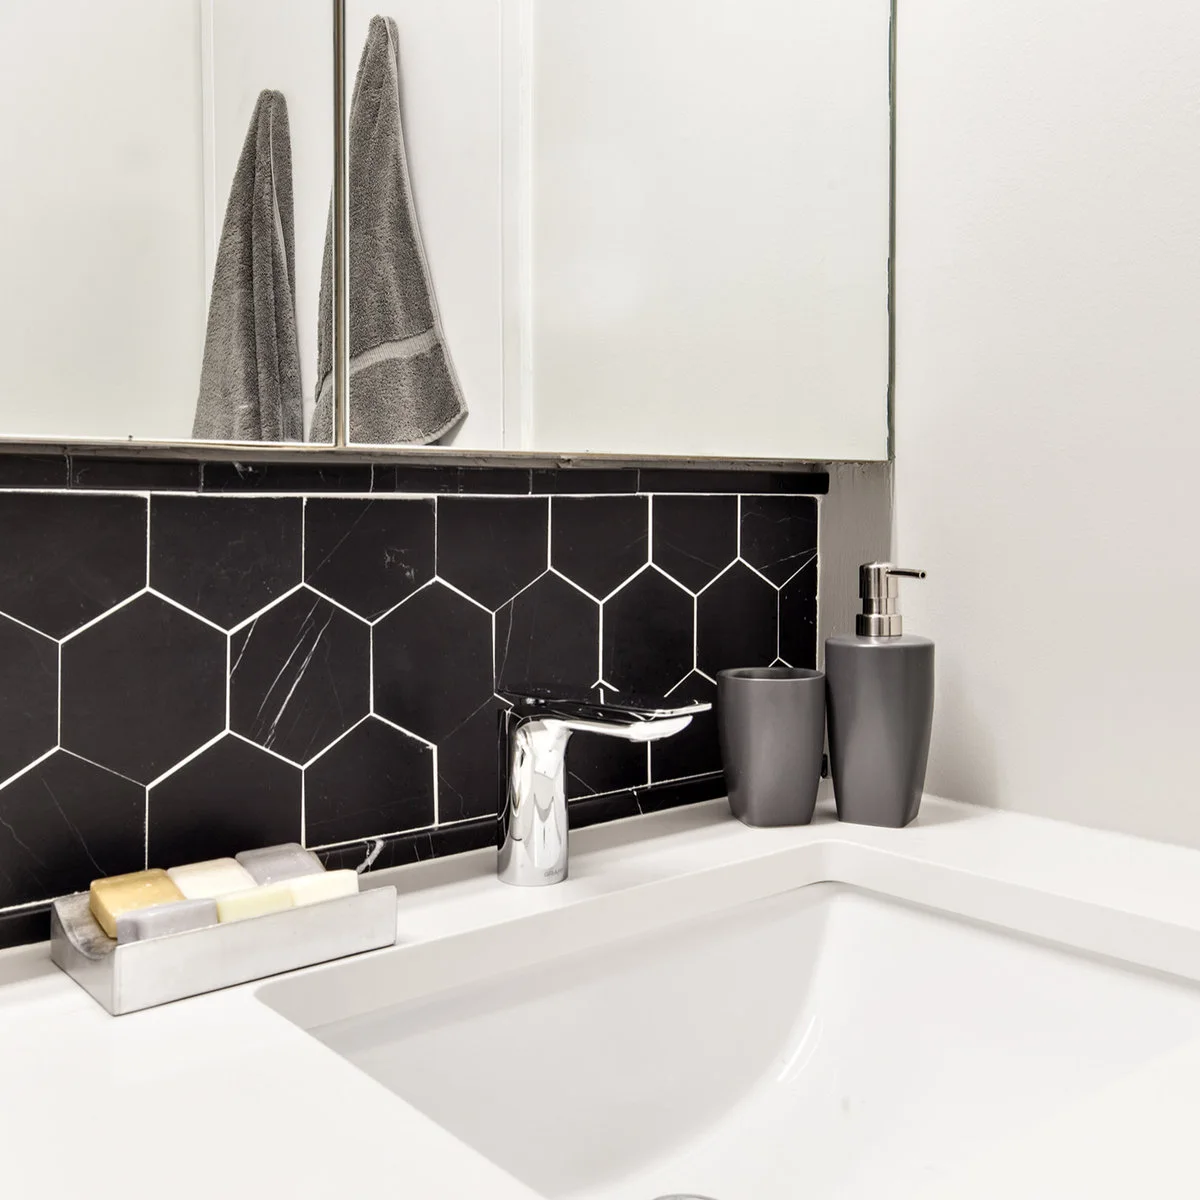
Dark hexagonal tiles create a clear feature in a relatively short splash area. The white basin and mirrored cabinet keep the rest of the wall simple. Pale grout outlines the pattern, allowing the tile shape to carry the decoration without covering every wall.
Measure the whole area including cuts, trim and waste before comparing tile prices. A small surface can still involve significant labor around corners and fittings. Check that the backing and finish suit the splash exposure, and choose grout you are willing to clean regularly.
IDEA 07 / 20
Use a Small Patterned Backsplash as the Accent
 SaveSupport Non AI Creator
Image credit: Future PLC / Matt Clayton Photography
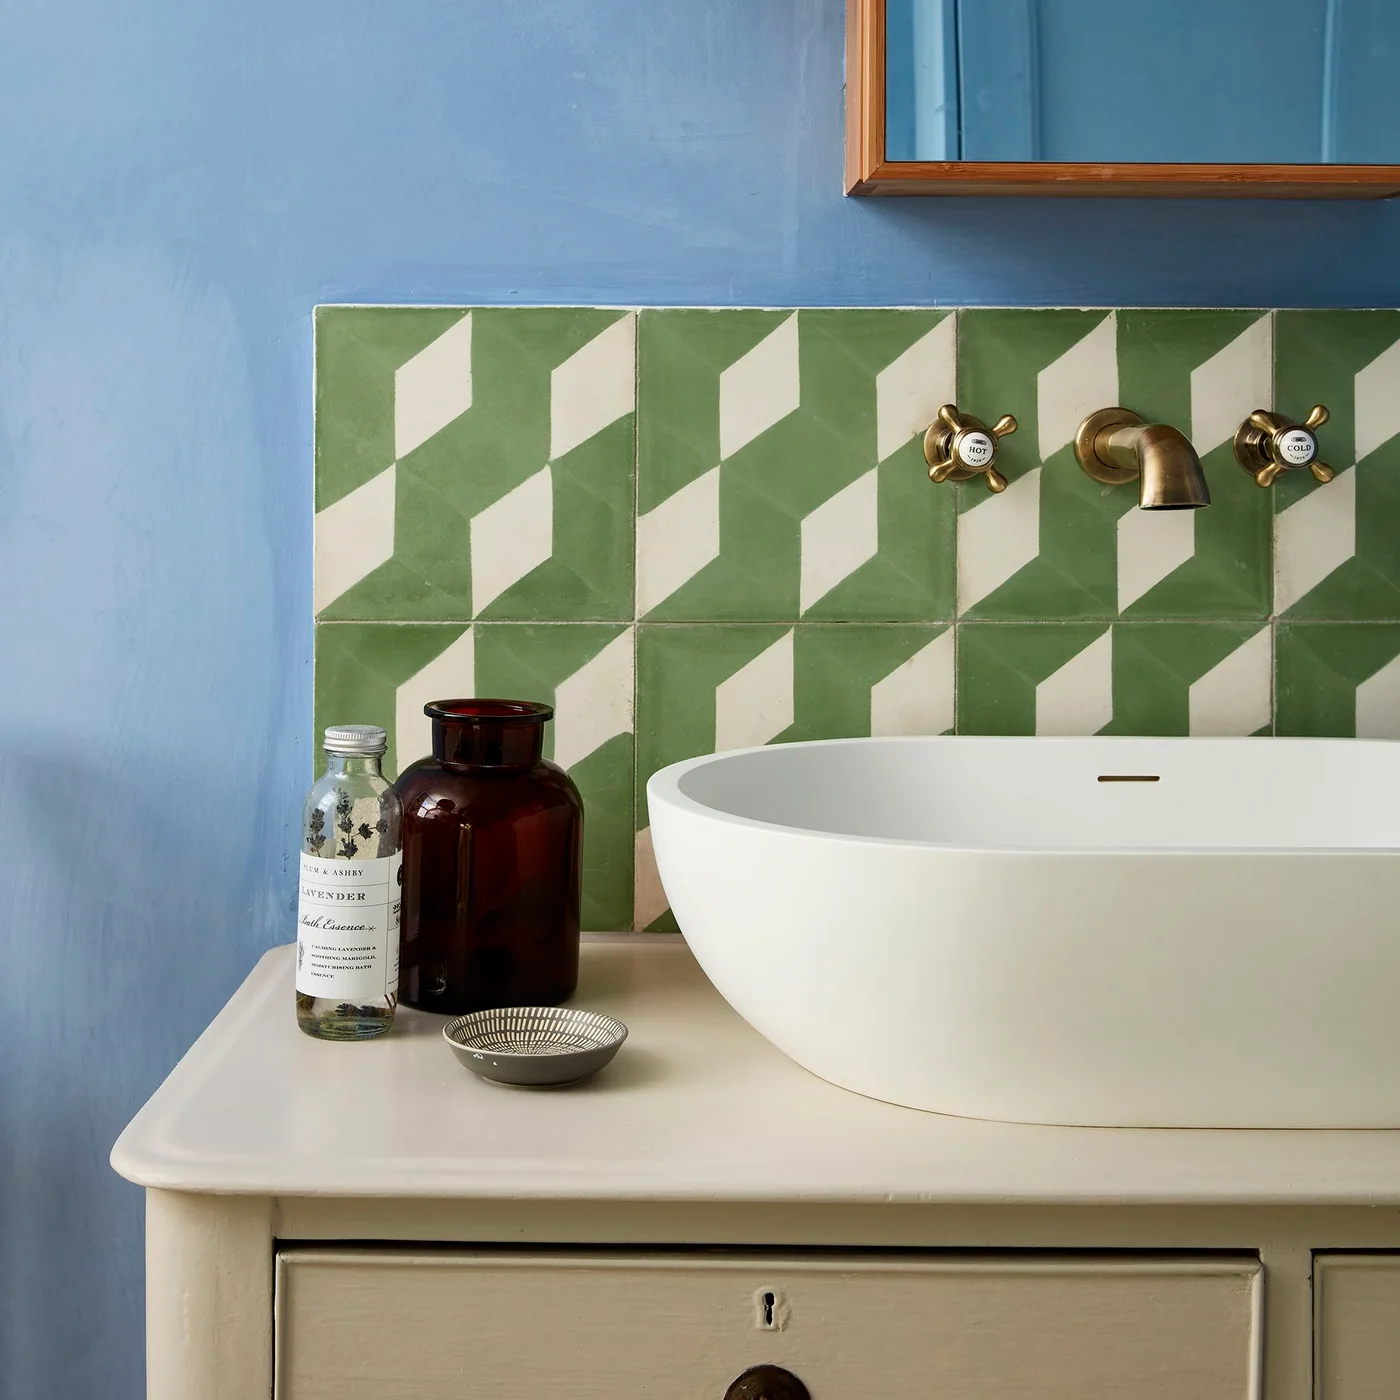
A small geometric tile field brings pattern to the basin wall, with blue paint supplying the broader background color. The white vessel basin stays distinct from both. Keeping the patterned area contained lets the room have character without using the same tile across every surface.
Work out the pattern placement before installation so cut pieces do not look accidental at the ends. Compare the total installed cost with simpler tile, including edging and preparation. For another approach to the wet area, these modern bathroom tile ideas can help you separate a small accent from the room’s main surfaces.
IDEA 08 / 20
Add Detail to a Dry Wall with Battens
 SaveSupport Non AI Creator
Image credit: Project: Judy Dinkle - JD Designs (via Houzz)
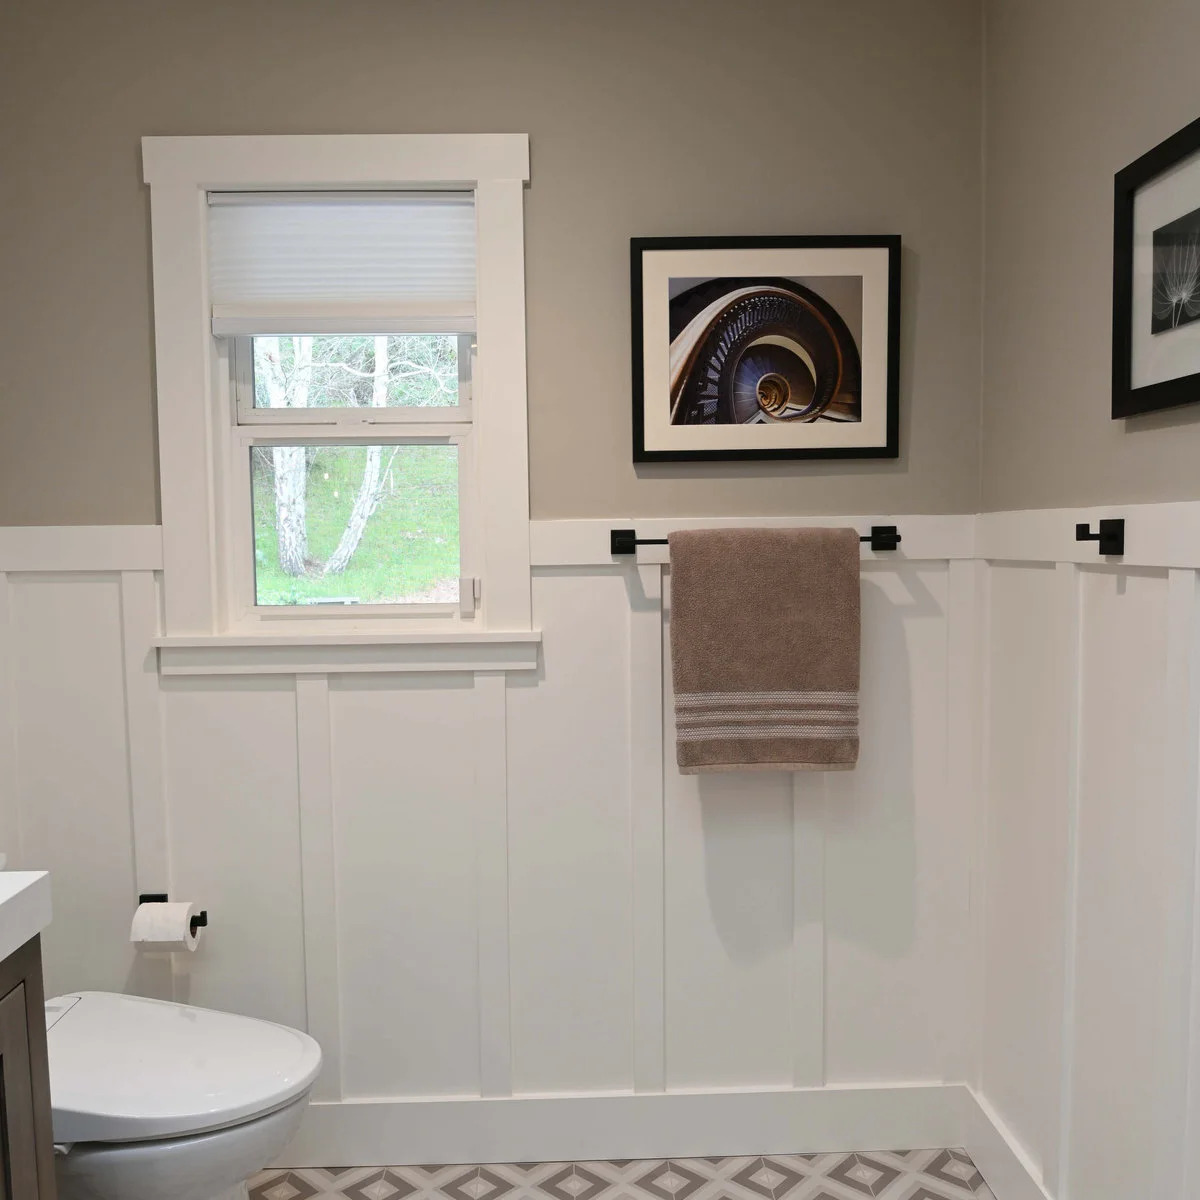
White battens break up the lower wall without introducing another tile pattern. Dark hooks and a towel rail stand out clearly against them, while taupe paint keeps the upper wall quieter. The window trim gives the treatment a useful horizontal reference.
Use materials and finishes appropriate for the room’s moisture and place decorative paneling outside direct shower spray. Check for pipes and wiring before fixing anything to the wall. Align rails with existing trim where practical, and include the cost of filling and finishing rather than comparing timber prices alone.
IDEA 09 / 20
Bring Color onto the Ceiling
 SaveSupport Non AI Creator
Image credit: Future
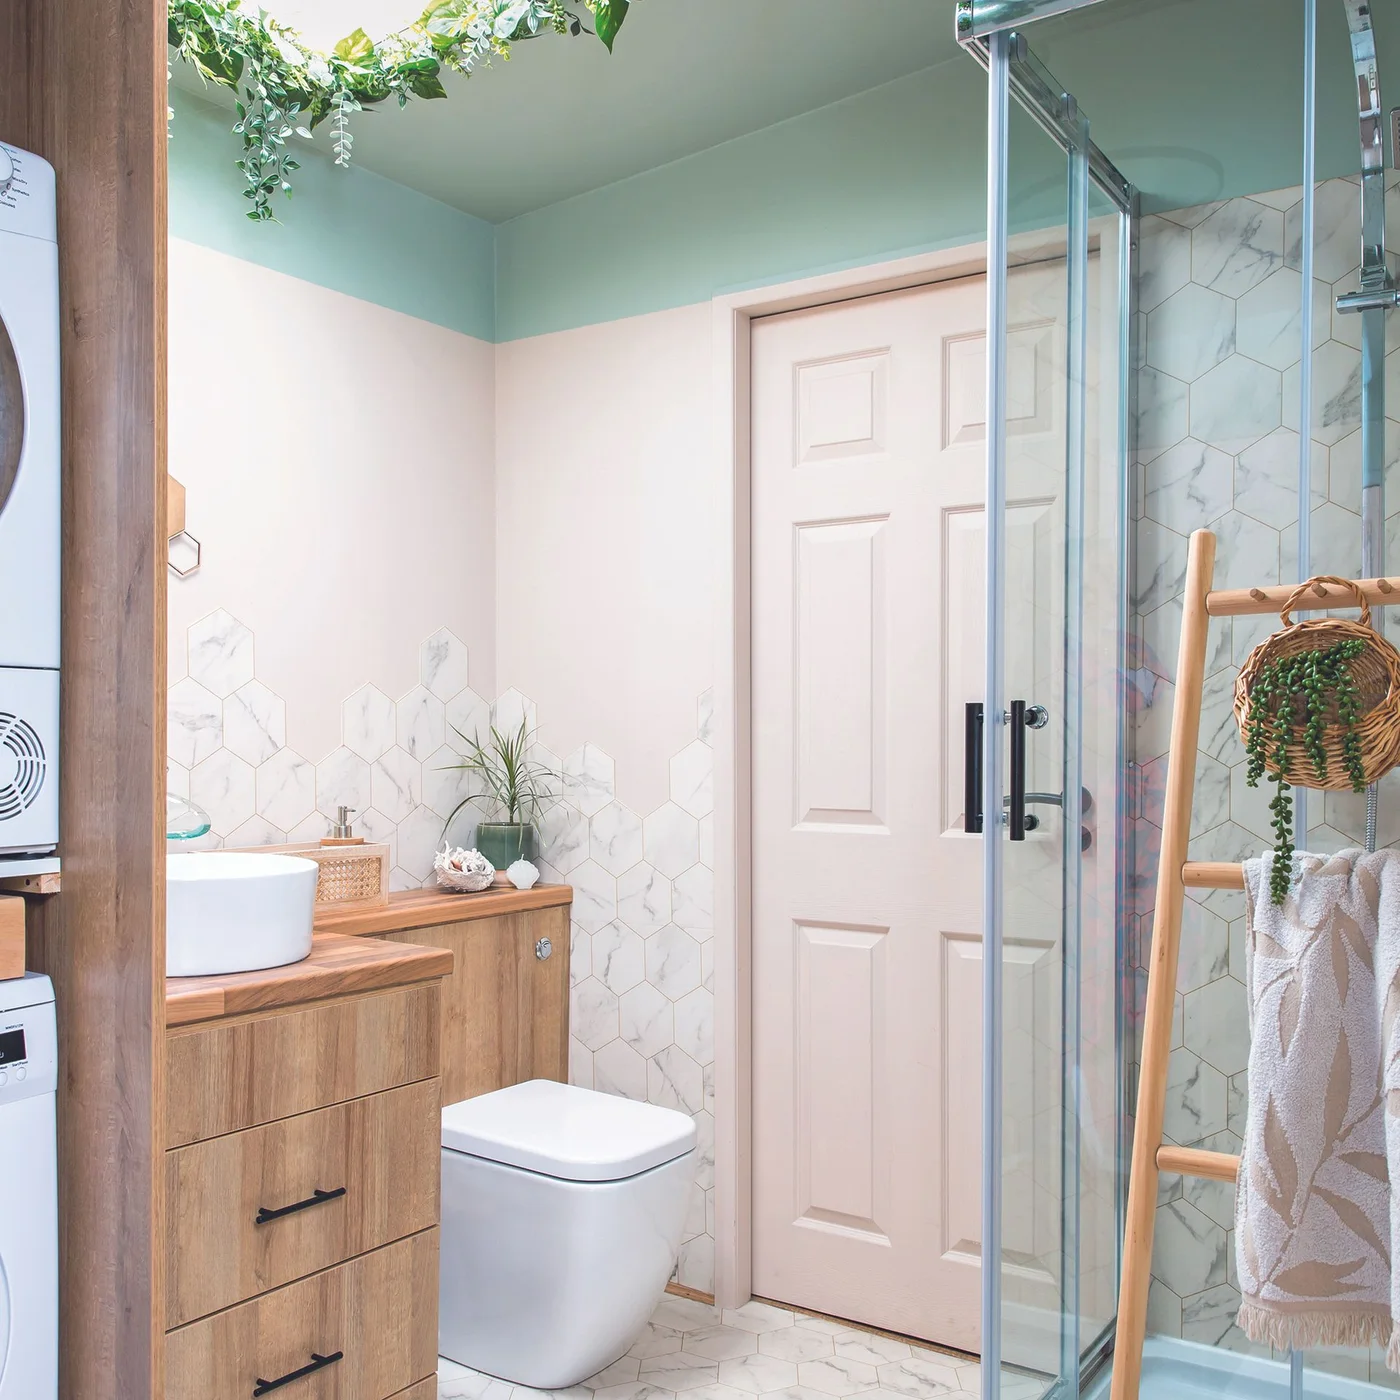
Mint color continues from the ceiling onto a short upper wall band, giving the room a different emphasis from a conventional accent wall. The lower surfaces remain pale. Wood cabinetry adds warmth, while the shower enclosure stays a separate transparent shape beside the door.
Test overhead color with the room’s actual lighting because it can change the cast on nearby white surfaces. Prepare the ceiling and address moisture damage before painting. Use a suitable coating and preserve ventilation; covering marks without finding their cause can turn a cosmetic project into repeated repair work.
IDEA 10 / 20
Use Simple Tile Around a Bath Panel
 SaveSupport Non AI Creator
Image credit: Future PLC/Colin Poole
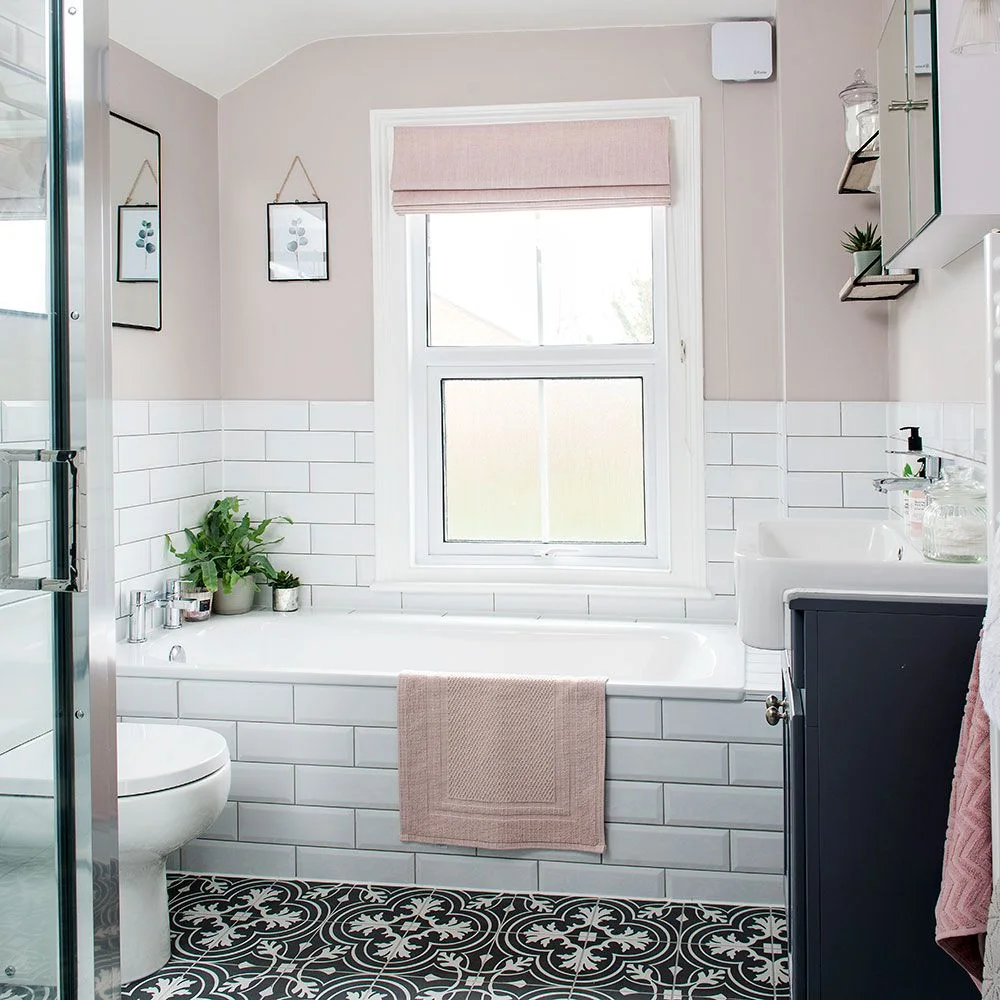
Plain white tile runs around the bath and across the surrounding wall, creating a consistent lower band. Pale pink paint and towels soften the room, while the patterned floor supplies the stronger print. The bath panel feels part of the same surface rather than a separate decorative feature.
Compare a simple tile format with more elaborate options using the full installation price. Keep any required access panel usable and ask the installer about the bath’s support and waterproofing details. A neat finish depends on preparation and junctions as much as on the price of the tile itself.
PART 03
Make focused changes around the basin
IDEA 11 / 20
Choose Simple Separate Mirrors for Two Basins
 SaveSupport Non AI Creator
Image credit: Project: Judy Dinkle - JD Designs (via Houzz)
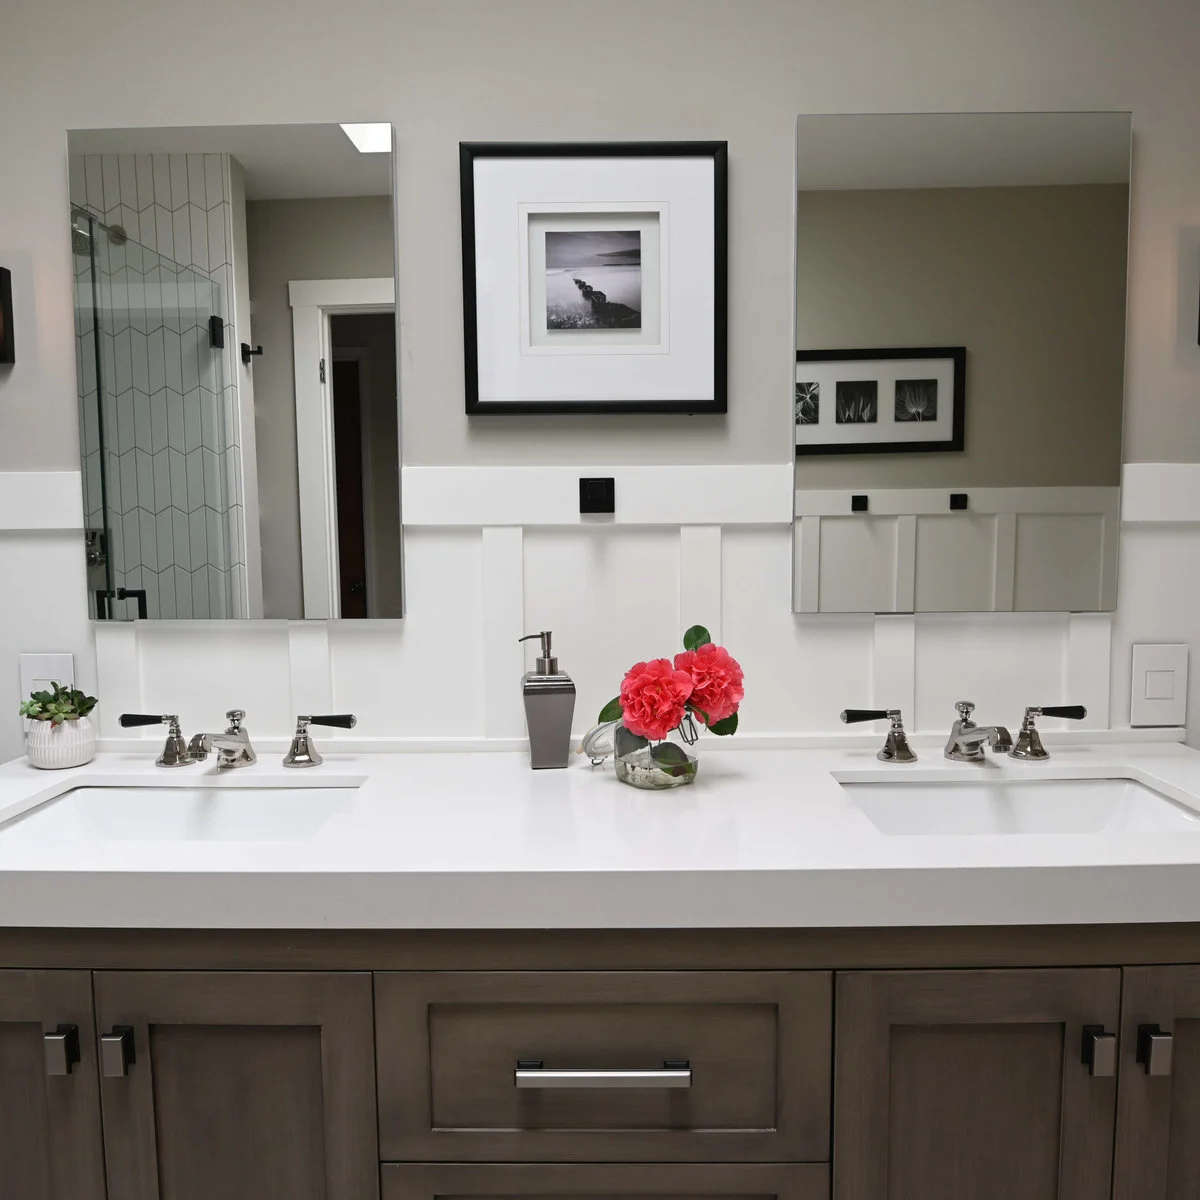
Two simple rectangular mirrors give each basin its own useful reflection. A small framed photograph occupies the gap between them, while the white counter remains mostly clear. The restrained mirror edges let the cabinet and wall treatment provide the room’s stronger outlines.
Check whether two standard mirror sizes suit the basin spacing before ordering custom glass. Measure around lights and outlets, and use mounting hardware appropriate to the mirror weight. Keep the mirrors useful for the people who share the room rather than positioning them only to achieve a symmetrical photograph.
IDEA 12 / 20
Make One Round Mirror the Main New Piece
 SaveSupport Non AI Creator
Image credit: Project: Alys Design (via Houzz)
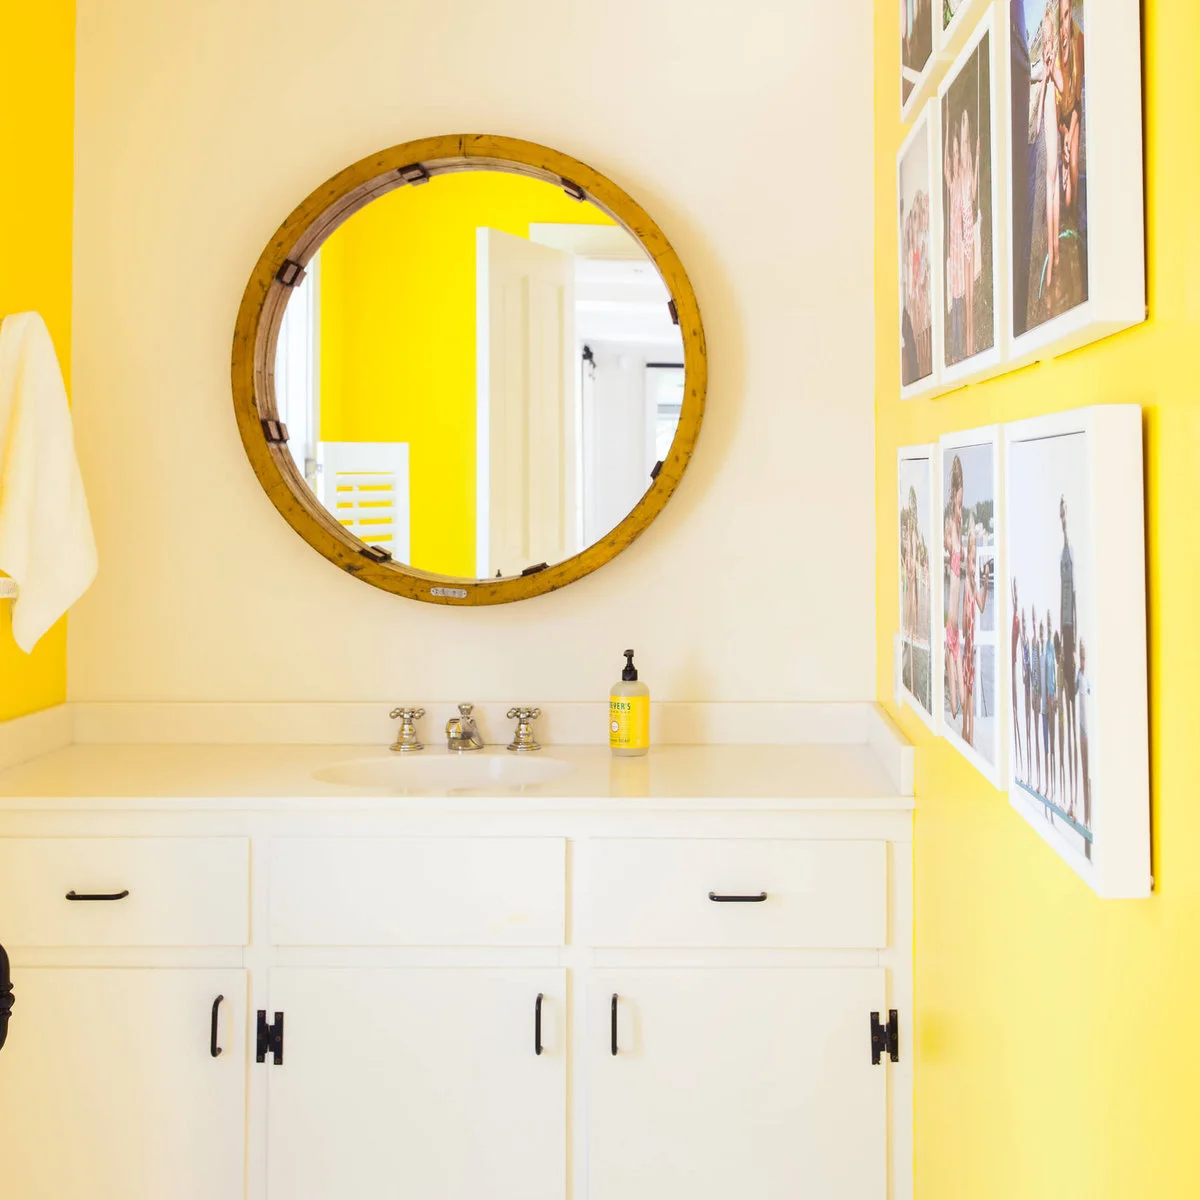
The round wood-framed mirror gives the basin wall a clear focal point without requiring a patterned backsplash. Yellow walls add most of the room’s brightness. The white vanity and small dark handles remain comparatively simple, allowing the frame’s shape to stand out.
Choose the mirror after measuring the usable wall and checking the lighting position. Reusing a sound vanity can make room for one more noticeable accessory, but include proper mounting in the cost. If keeping a bright wall color, test the frame finish beside it before buying.
IDEA 13 / 20
Use a Compact Ready-Made Basin Unit
 SaveSupport Non AI Creator
Image credit: Project: Style My Abode NZ (via Houzz)
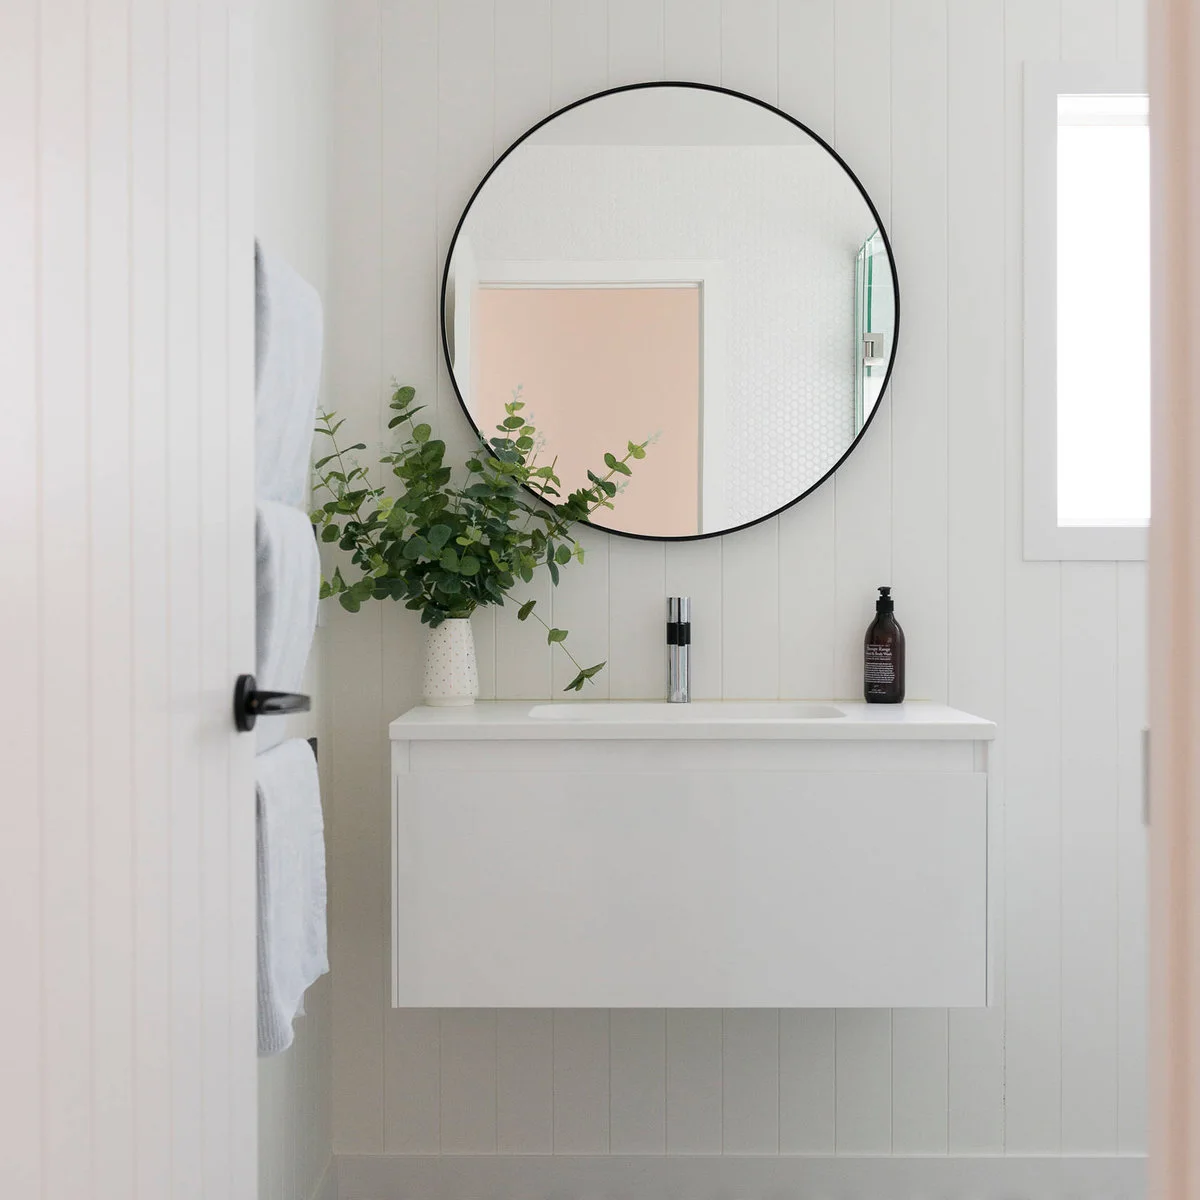
The compact white unit keeps the small basin area visually light, with a round dark-framed mirror giving it a clear center. A simple faucet and soap bottle leave the top usable. The open space below reduces the amount of furniture meeting the floor.
A standard unit may simplify shopping, but check pipe positions, wall support and installation costs before ordering. Floating furniture needs suitable fixing into a capable wall. Compare usable drawer space as well as the outside dimensions, and leave enough room for the door and your feet in front of the basin.
IDEA 14 / 20
Consider a Suitable Table as a Vanity Base
 SaveSupport Non AI Creator
Image credit: Future PLC/David Giles
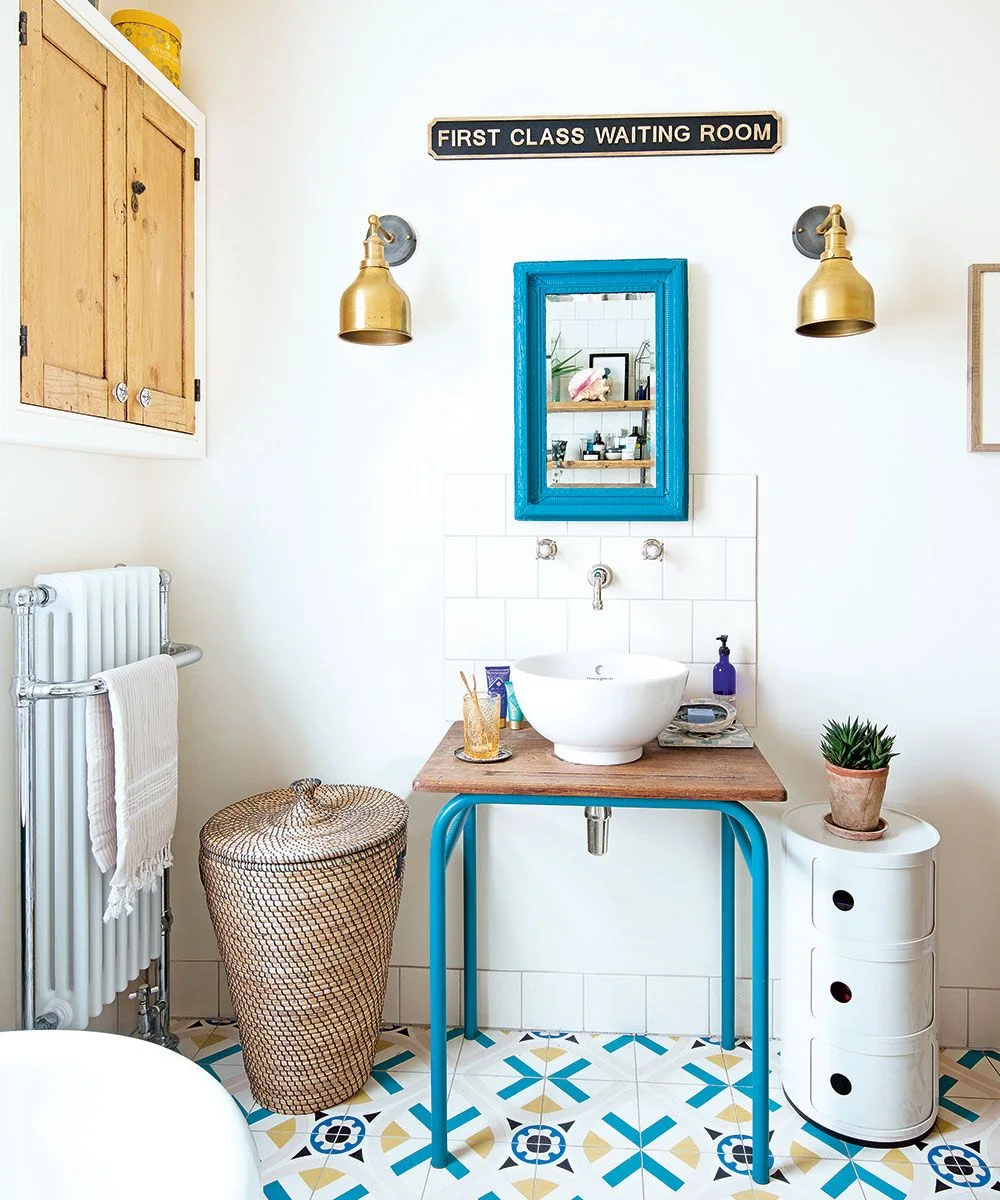
A small table supports the basin, leaving its blue legs and exposed underside visible. The matching mirror connects the two pieces, while a separate narrow storage unit holds supplies. The arrangement keeps the basin area distinct from the larger wall cupboard beside it.
Converting furniture needs more planning than setting a bowl on a table. Ask a professional to assess support, plumbing, splash protection and the finished basin height. Include those changes in the budget before assuming reused furniture will cost less than a purpose-made unit.
IDEA 15 / 20
Keep a Warm Counter with a Small Basin
 SaveSupport Non AI Creator
Image credit: Project: Julie Alves Designs (via Houzz)
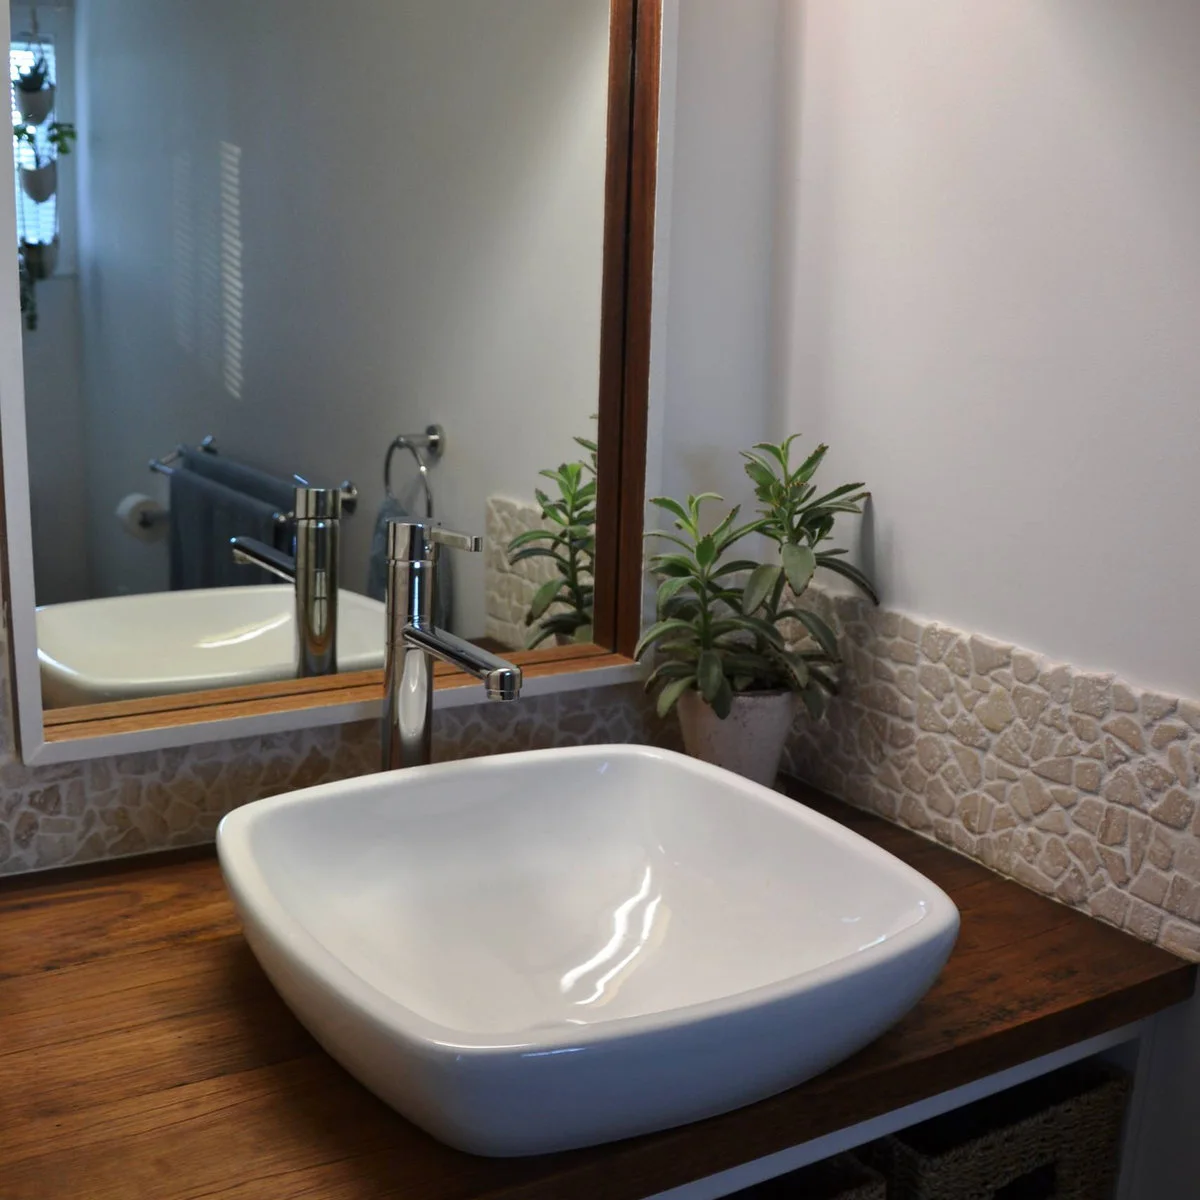
The white basin stands out against the warm wood counter, while the low pebble-pattern backsplash adds a narrow strip of texture. A framed mirror repeats the counter’s warmer tone. The limited number of accessories leaves space beside the basin for daily use.
Inspect an existing wood counter carefully for water damage before keeping it. Use a suitable protective finish and maintain seals around the basin and fittings. Changing a basin or faucet can affect clearances and plumbing, so check compatibility and the installed price before buying either item separately.
PART 04
Improve storage and finishing details
IDEA 16 / 20
Hide Open Storage with a Washable Sink Skirt
 SaveSupport Non AI Creator
Image credit: Future
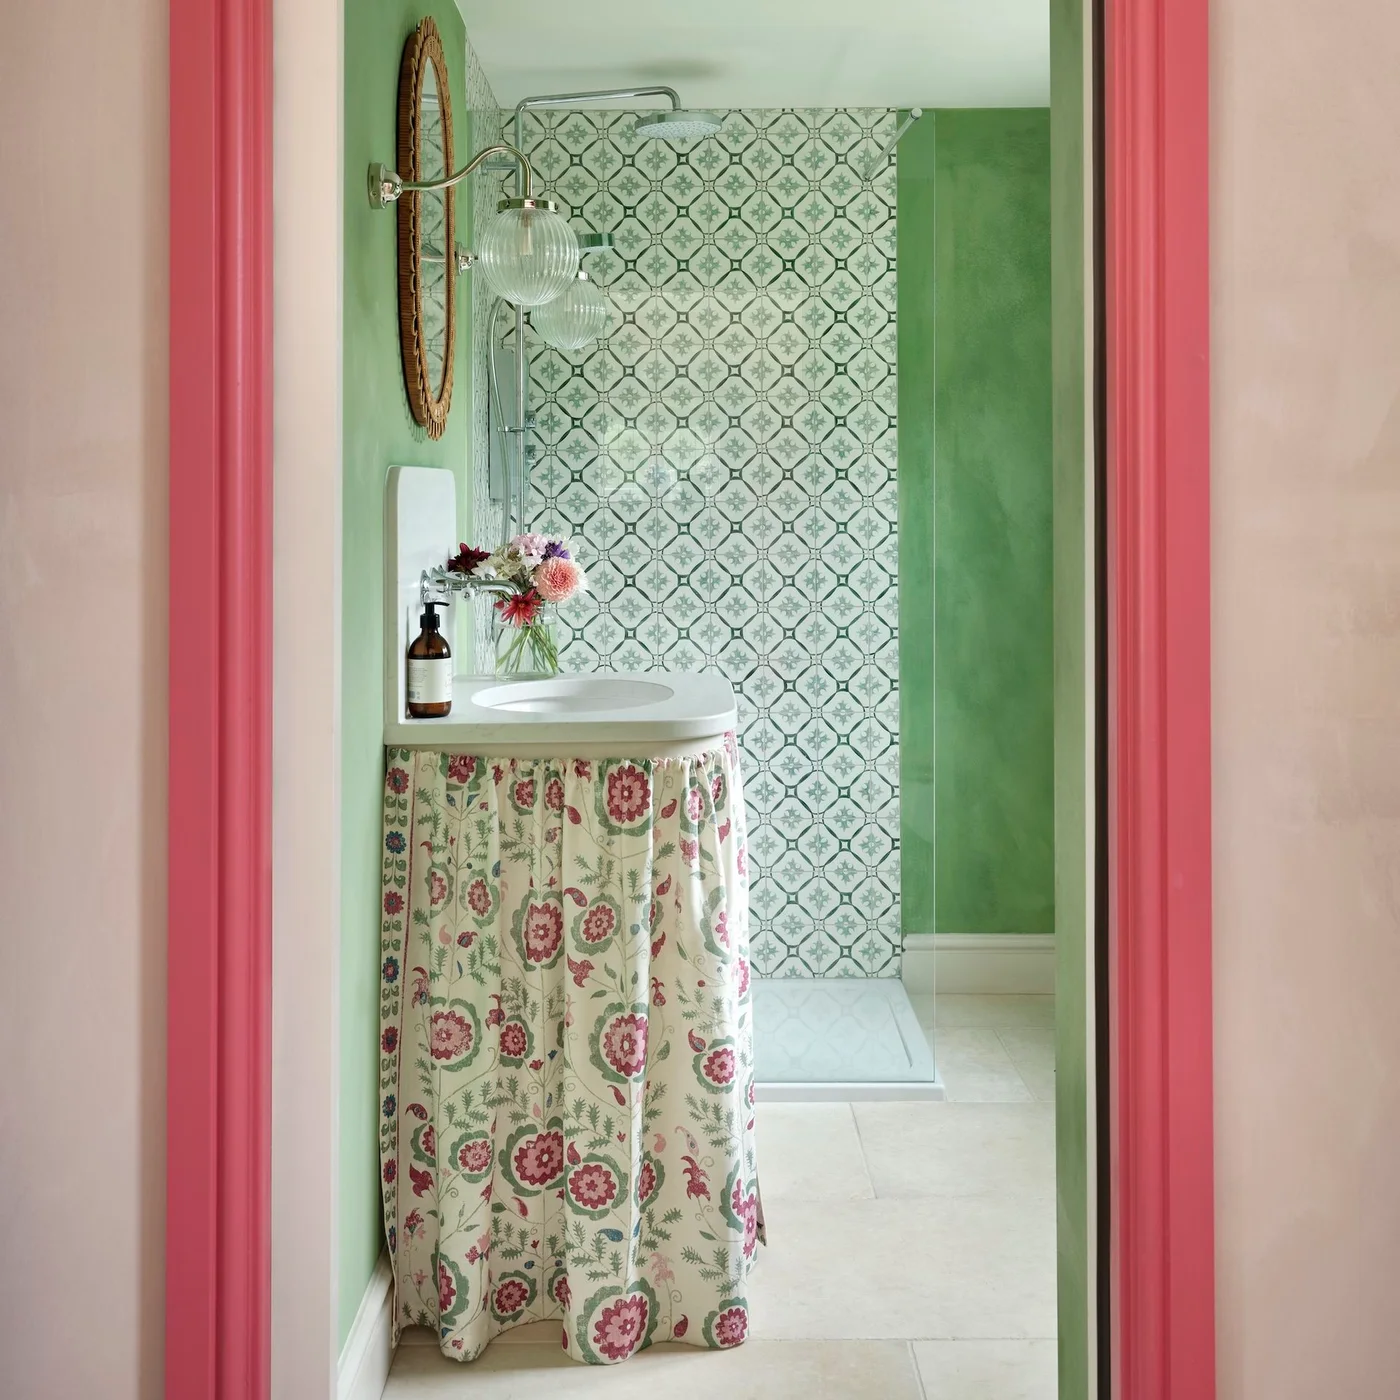
A floral skirt softens the open space below the basin and introduces pattern at a small scale. Green walls connect it with the tiled shower, while pink door trim adds a contrasting edge. The basin itself remains plain, keeping the fabric easy to notice.
Choose fabric that can be removed and washed, and keep its hem clear of a wet floor. Leave access to plumbing and avoid storing items that need ventilation behind a tightly gathered cover. A skirt changes appearance, but it should not hide leaks or make routine checks difficult.
IDEA 17 / 20
Add Texture to Plain Cabinet Fronts
 SaveSupport Non AI Creator
Image credit: Caroline Mardon
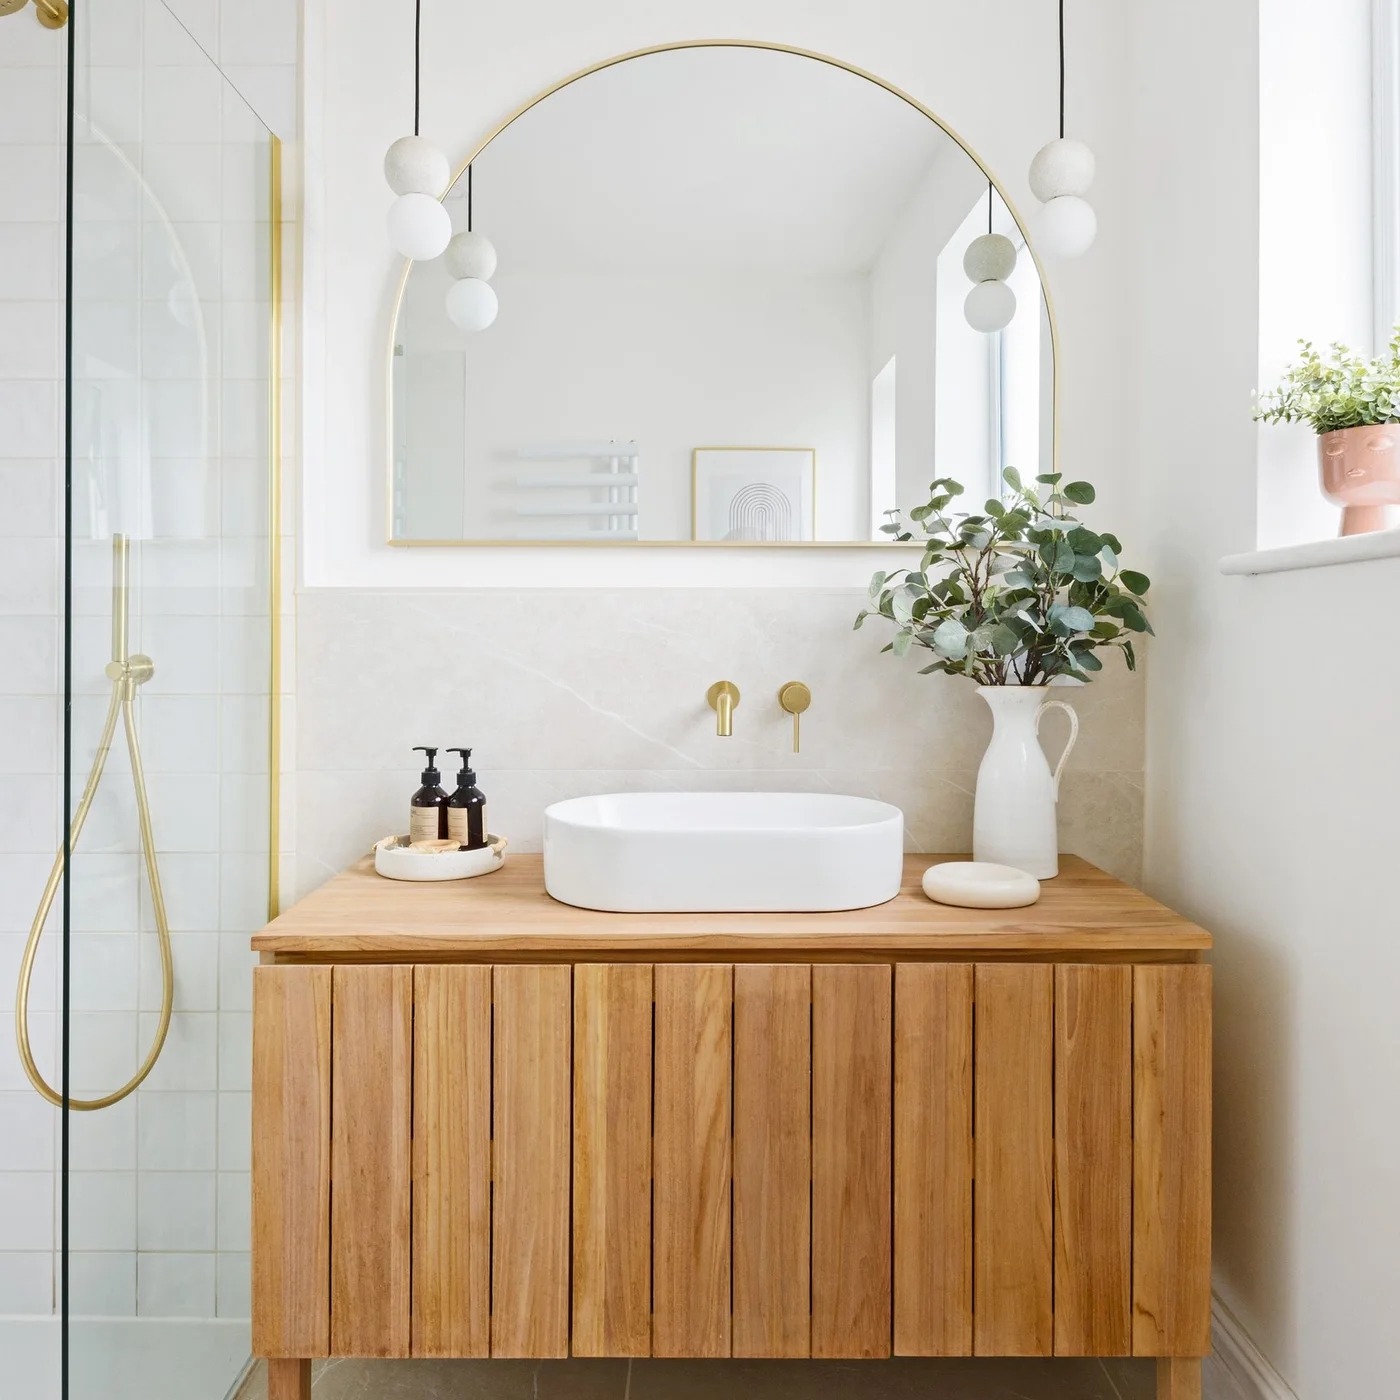
Vertical fronts give the vanity texture without relying on a strong paint color. The white basin and pale wall keep the surface changes easy to see. The broad mirror above supplies a contrasting curved outline, while the counter remains largely free of objects.
Before adding trim to existing doors, check hinge capacity, door swing and clearance at the sides. Price adhesive, preparation and finishing as well as the wood strips. Use a method suitable for humidity and leave drawer and door edges working freely after the added thickness.
IDEA 18 / 20
Make a Storage Door Blend into a Dark Wall
 SaveSupport Non AI Creator
Image credit: Future PLC / Colin Poole
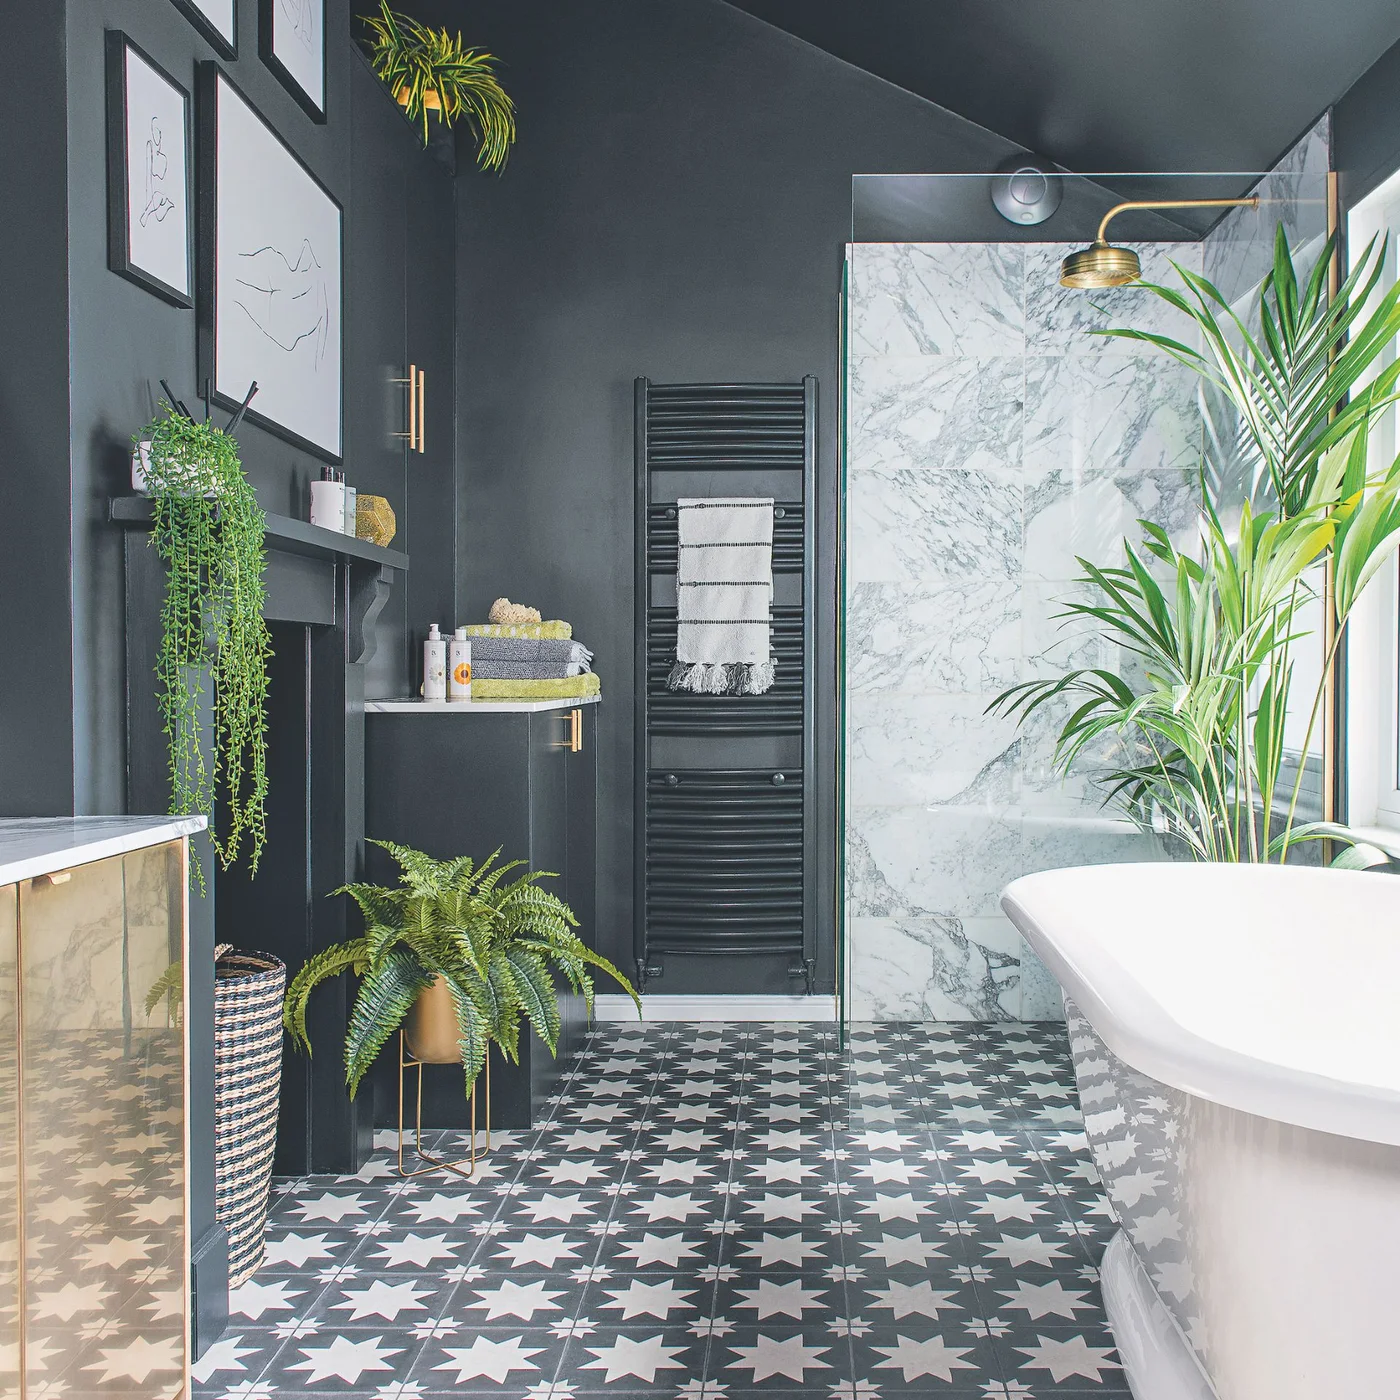
The storage door blends into the dark wall, reducing the number of separate visual blocks in the room. A towel rail repeats that dark finish. Pale shower surfaces and green foliage provide contrast, while framed line drawings create a small decorative area away from the wettest zone.
If a sound cupboard looks awkward, matching its finish to the wall can be worth testing before replacing it. Use coatings suited to each different surface. Keep handles easy to find, preserve ventilation gaps and check how the dark color affects the room under your normal evening lighting.
IDEA 19 / 20
Coordinate Towel Hardware and Small Handles
 SaveSupport Non AI Creator
Image credit: Project: Lucy Call (via Houzz)
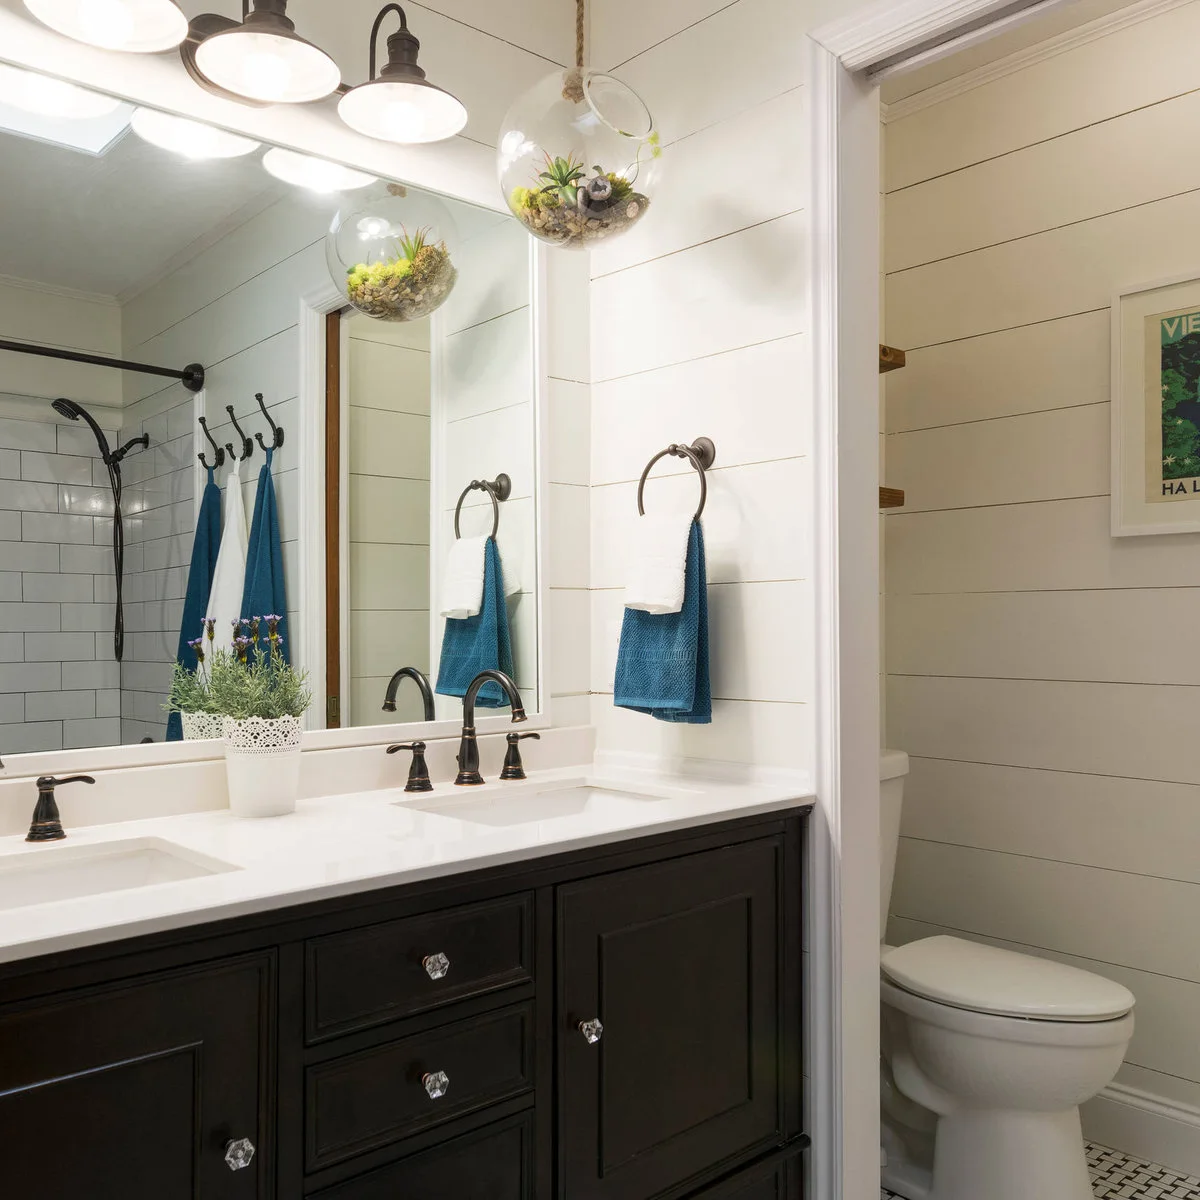
Small faceted knobs brighten the dark cabinet fronts, while dark faucets and towel rings repeat a consistent outline around the basin. Blue and white towels supply the color. The plain white wall treatment leaves these modest fittings visible without needing a separate accent tile.
List the fittings you already have before replacing them all. Changing a few handles or towel accessories may give enough consistency for the room. Measure existing screw spacing, check wall fixings and keep usable towel space near the basin rather than placing hardware solely where it looks balanced.
IDEA 20 / 20
Give a Small Room Character with Painted Stripes
 SaveSupport Non AI Creator
Source: www.thisoldhouse.com
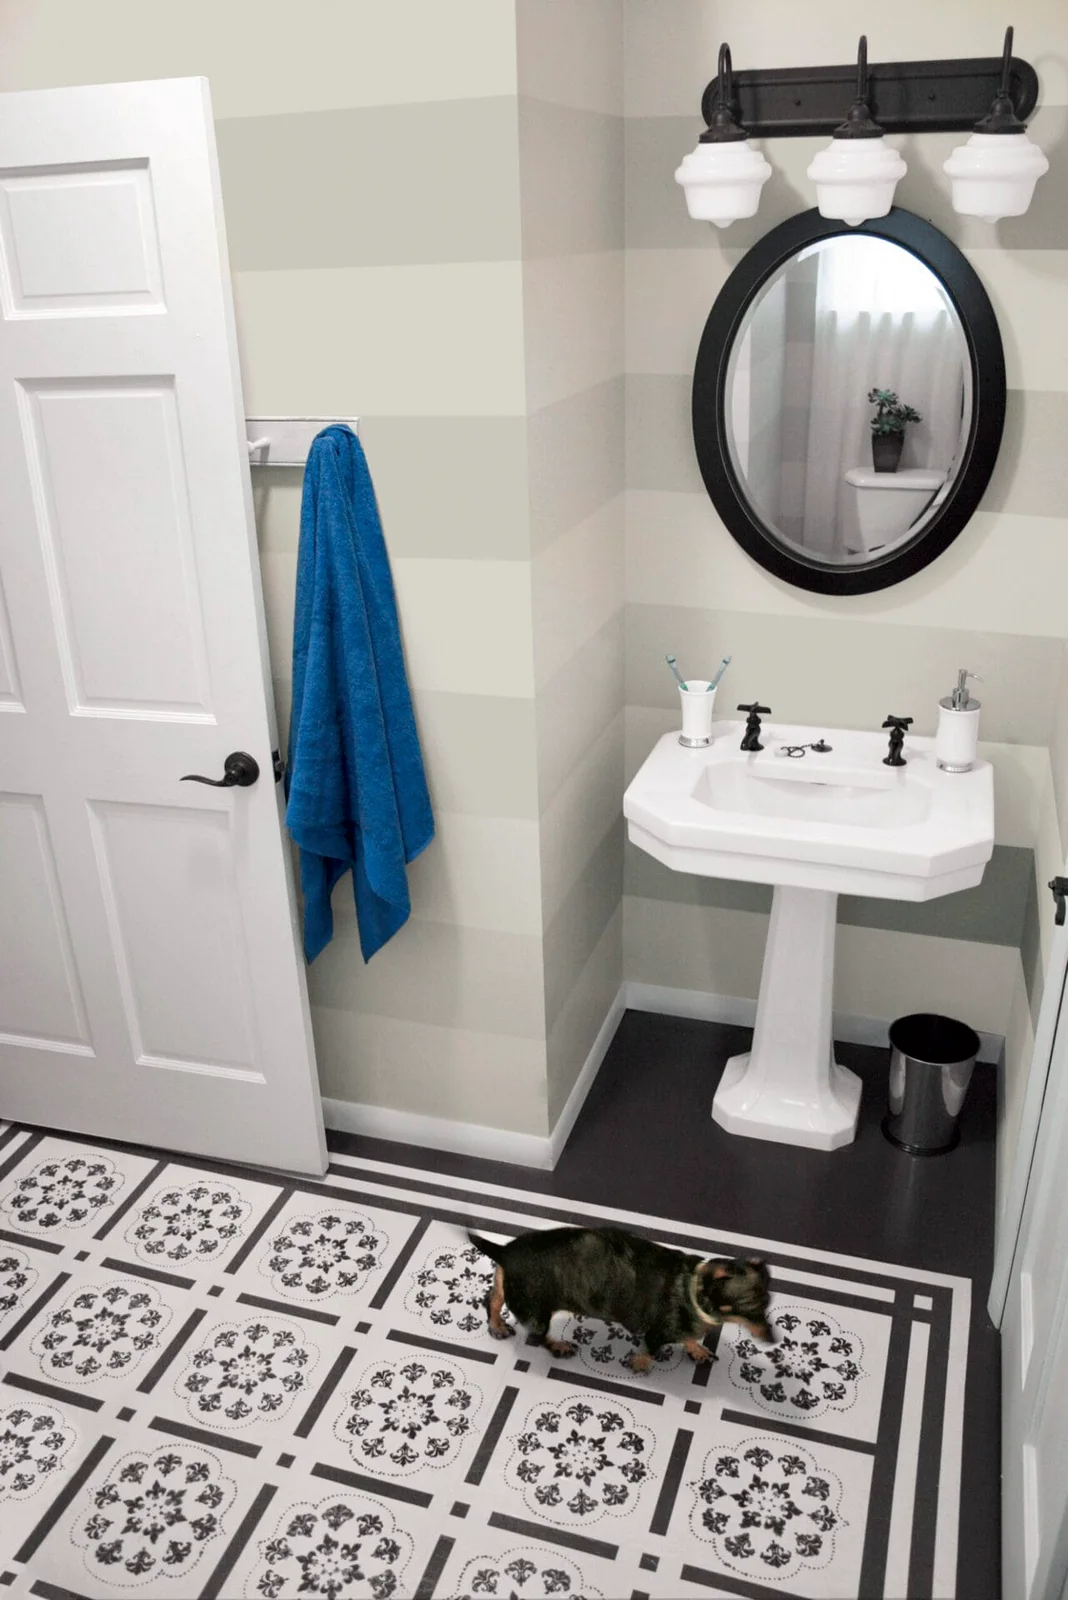
Broad pale stripes bring pattern to the wall around the pedestal basin. The black oval mirror and dark light fitting supply stronger outlines, while the white basin keeps the floor area open. A blue towel gives the otherwise restrained room a small color accent.
Plan stripe positions around corners and trim before starting, then test the paint finish under the room’s light. Keep the existing basin if it works and is in sound condition. For more compact arrangements, these small bathroom ideas can help you choose changes that preserve the usable space.
BRING IT ALL TOGETHER
Price a short list before changing the whole room
Separate repairs from cosmetic work, then choose the few changes that improve everyday use. Keep sound fittings where they suit the room and compare full installed costs. Preparation, compatible materials and access for maintenance deserve a place in the budget.
A smaller finished project is more useful than several half-completed upgrades. Choose one area, check the practical details and leave enough allowance to finish it properly before moving to the next.