A useful walk-in shower starts with an entry you can use comfortably and a layout that keeps water where it belongs. Glass, benches, storage and tile should support that everyday routine rather than make the room harder to maintain.
These examples include open entries, doors, low thresholds and raised curbs. A photograph cannot establish accessibility, drainage performance or waterproofing. Use the visible arrangements to plan questions for your installer, then check the details against your room and household.
PART 01
Plan the Entry and Enclosure
IDEA 01 / 20
Keep the Entry Visually Clear
 SaveSupport Non AI Creator
Image credit: Project: Devine Bath & Kitchen (via Houzz)
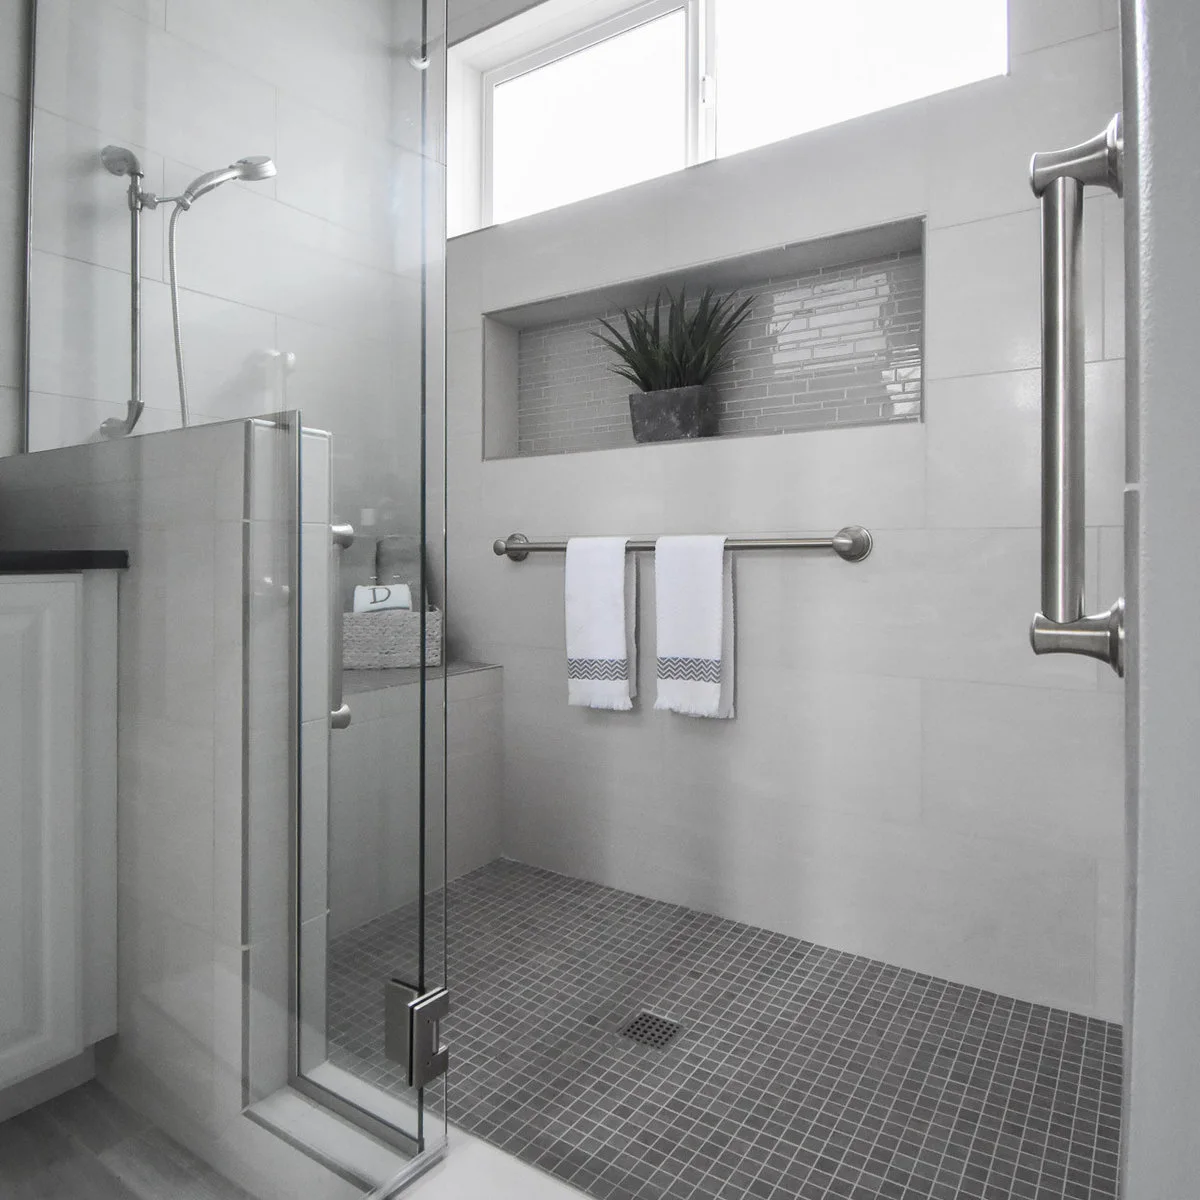
Clear glass leaves the shower entry visible beside a tiled half wall. Small gray floor tiles define the wet area, while a long niche sits beneath the high window. The handheld shower and horizontal rail are easy to distinguish against the pale wall.
Check the entry width, door swing and threshold with the people who will use the room. Clear glass alone does not make an enclosure accessible. Plan any support rails with suitable backing and professional installation rather than treating a towel bar or door handle as a handhold.
IDEA 02 / 20
Run a Shower Across the Back Wall
 SaveSupport Non AI Creator
Source: www.houzz.com
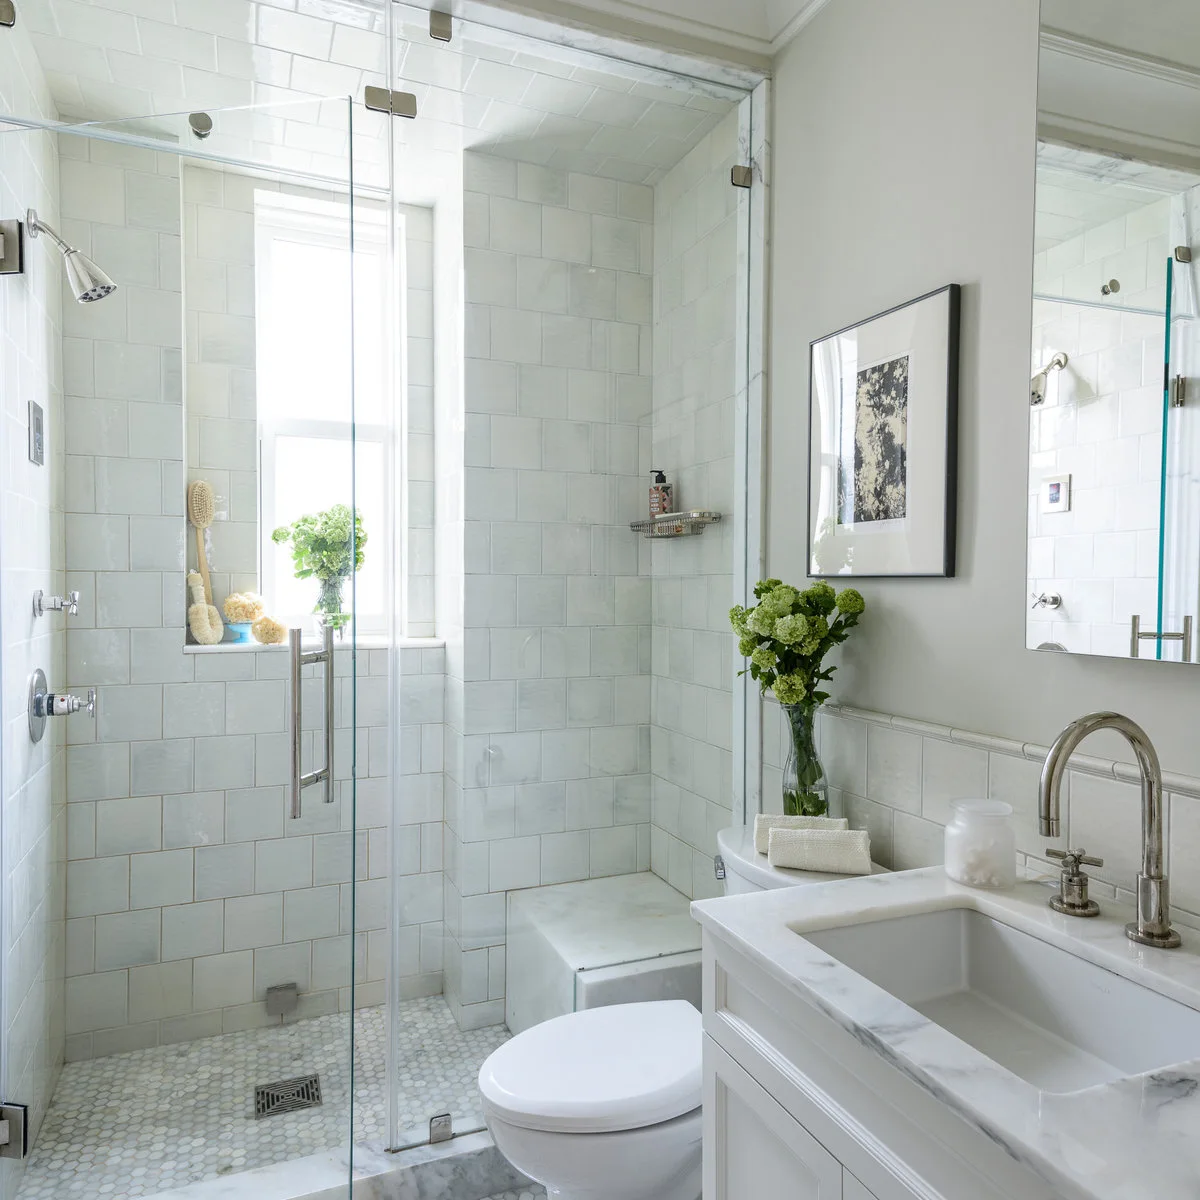
This white shower occupies the back of a compact bathroom, leaving the basin and toilet in front. Clear glass allows the window and tiled walls to remain visible from the doorway. A small bench at one side keeps the middle of the enclosure relatively open.
Draw the glass door swing together with the toilet and vanity clearances before ordering. A back-wall shower can use the room efficiently, but the door still needs somewhere to open. Check access to the window and leave the drain easy to reach during routine cleaning.
IDEA 03 / 20
Use a Half Wall Beside the Toilet
 SaveSupport Non AI Creator
Image credit: Project: Artistic Renovations of Ohio LLC (via Houzz)
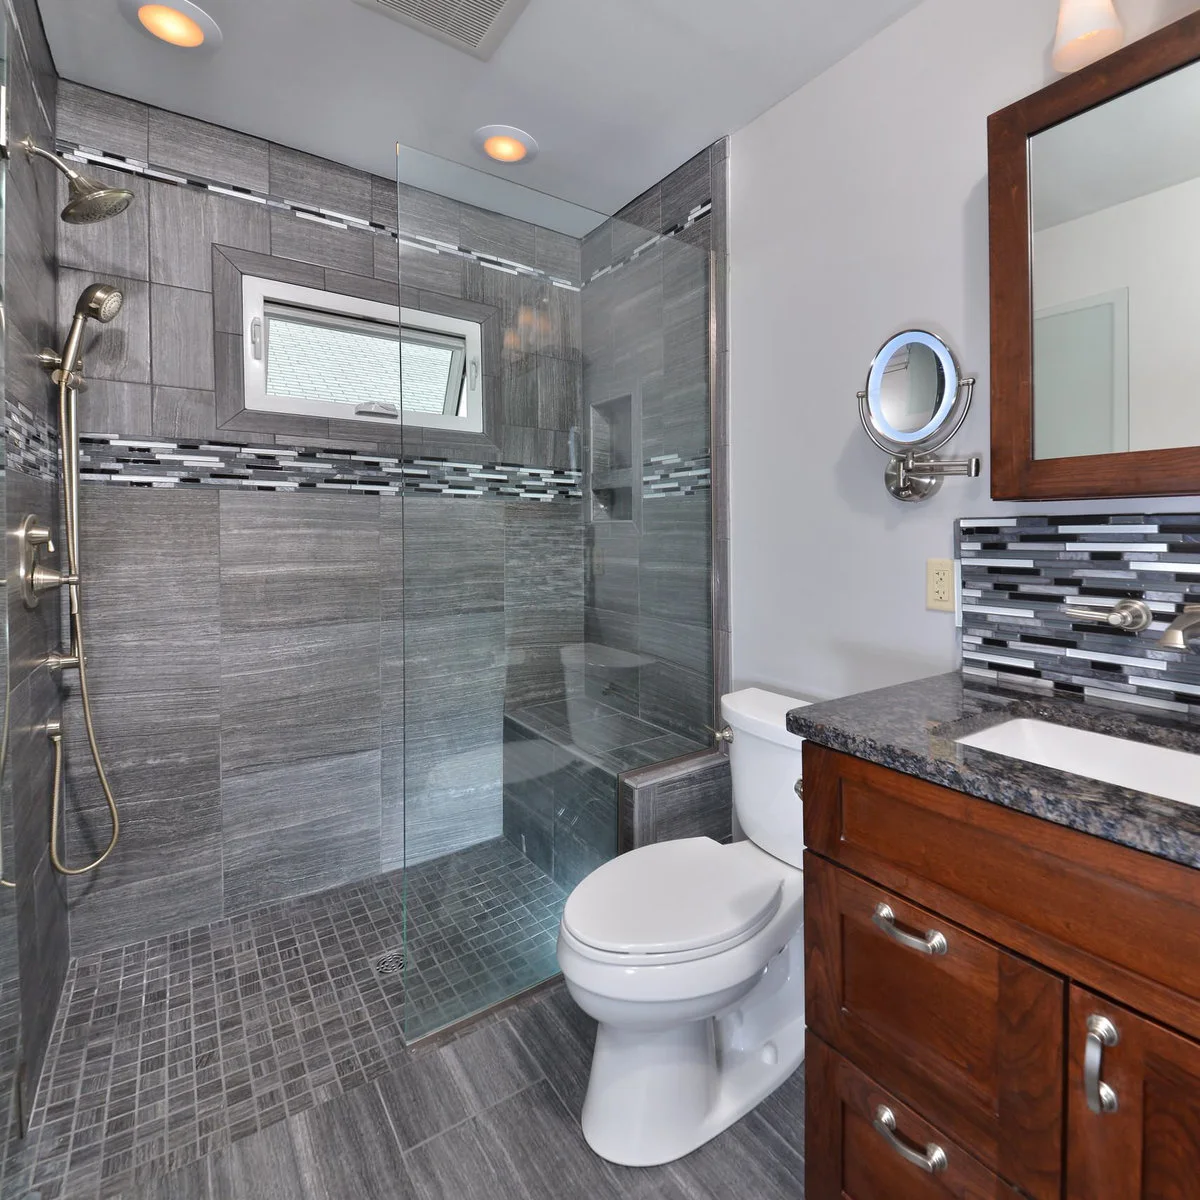
A short tiled wall separates the shower from the toilet, with clear glass extending above it. Gray wall and floor tiles keep the enclosure visually connected, while narrow mosaic bands add detail. A high window brings light to the back of the shower.
A half wall can screen lower fittings without blocking all the light. Its top and glass junction still need careful waterproofing and a drainage-friendly detail. Check that the remaining entry works when the door is open, and leave room to clean the side facing the toilet.
IDEA 04 / 20
Share a Wet Area with a Freestanding Tub
 SaveSupport Non AI Creator
Image credit: Project: Spivey Architects, Inc. (via Houzz)
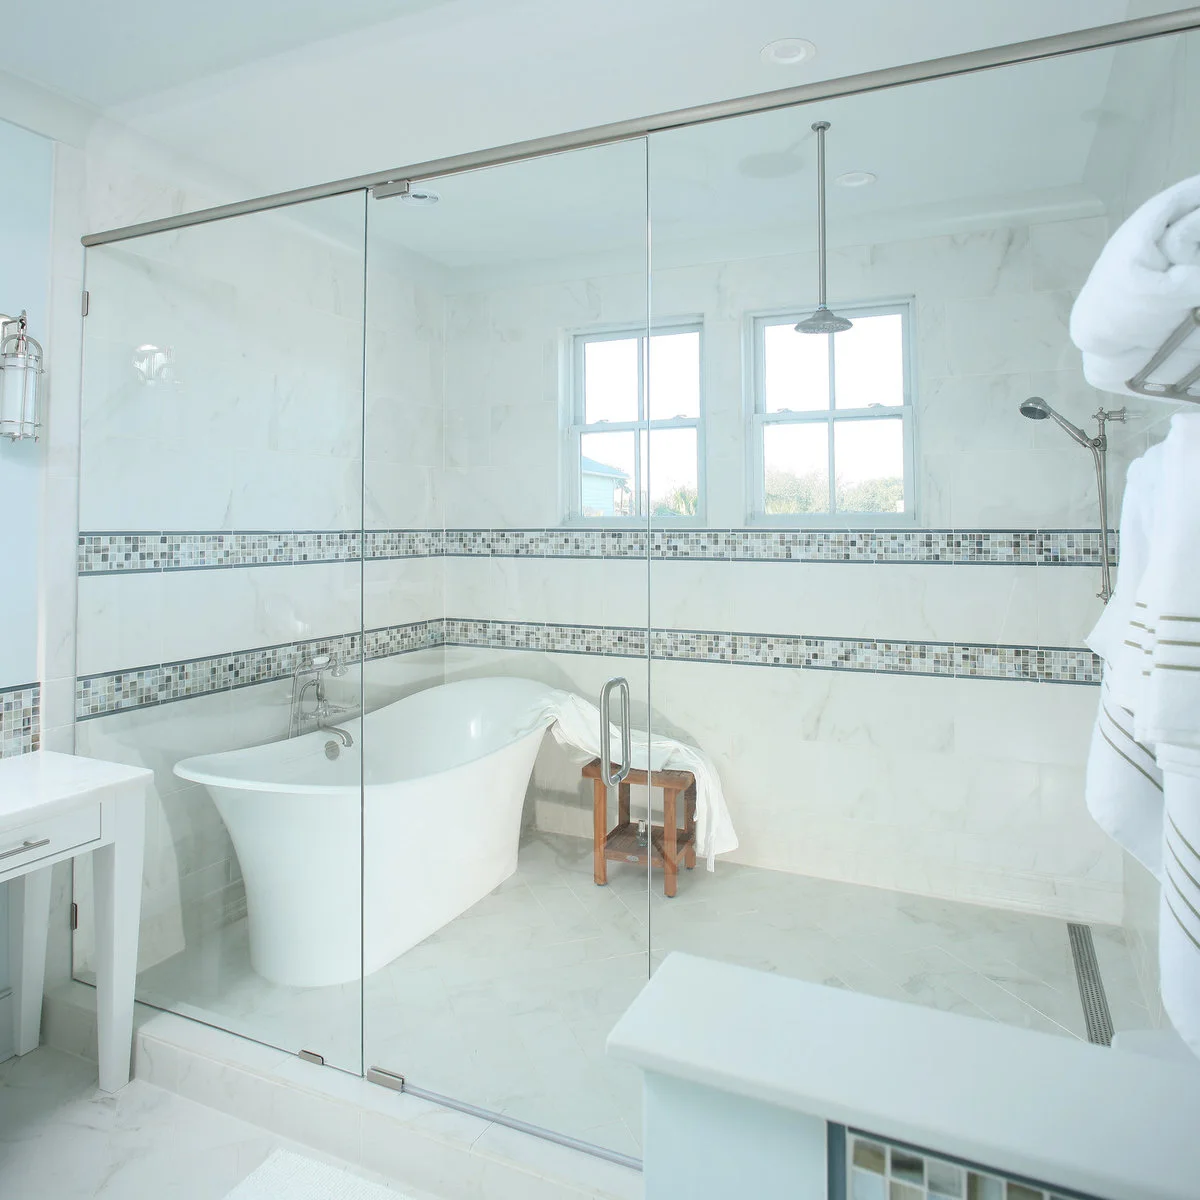
A freestanding tub shares this glass-enclosed wet area with a ceiling shower and handheld fitting. A long drain runs along the shower side, while mosaic bands connect the pale walls. The tub remains a distinct shape rather than being built into a shower surround.
Only consider this arrangement when there is enough room to walk and clean around the bath. Everything inside the enclosure must be detailed for the exposure it receives. Ask how water will drain, how the glass door opens and how you will reach the floor behind the tub.
IDEA 05 / 20
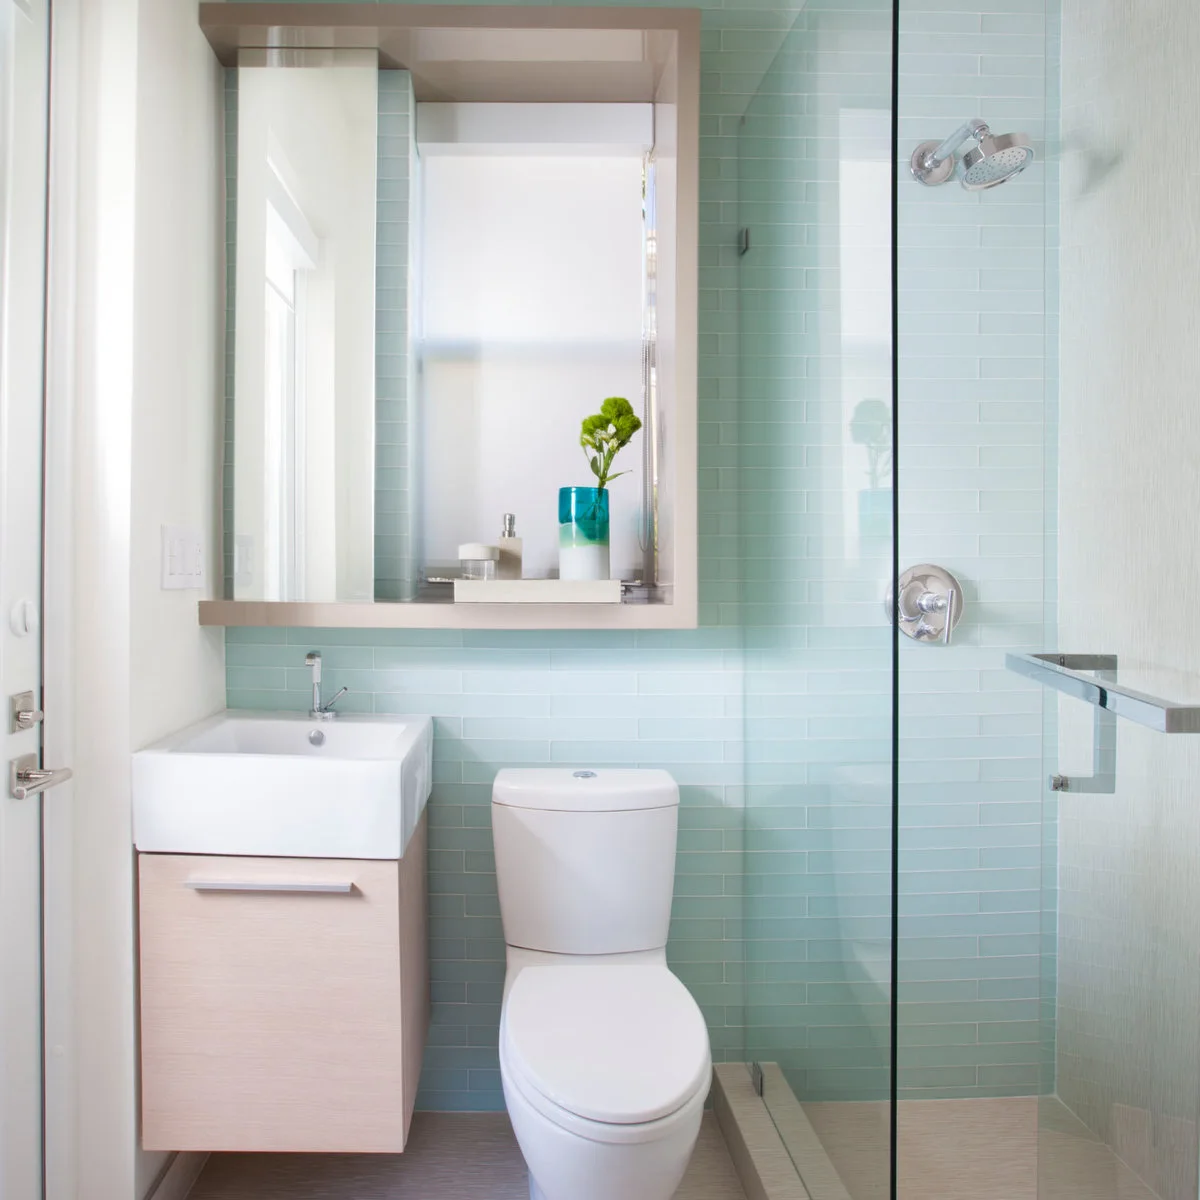
Carry One Wall Color Through a Small Room
 SaveSupport Non AI Creator
Image credit: Project: DKOR Interiors Inc.- Interior Designers Miami, FL (via Houzz)
Pale aqua tiles continue behind the basin and toilet into this small glass shower. Using one wall color makes the fittings read as parts of a connected room. The clear enclosure preserves that continuity without a visually heavy frame between the sink and shower.
Keep the practical boundaries clear even when the finishes match. The shower needs suitable waterproofing and floor falls, while the door must clear nearby fittings. Choose a grout color you can maintain, and test the tile under your bathroom lighting before committing to a large area.
PART 02
Give Storage a Useful Position
IDEA 06 / 20
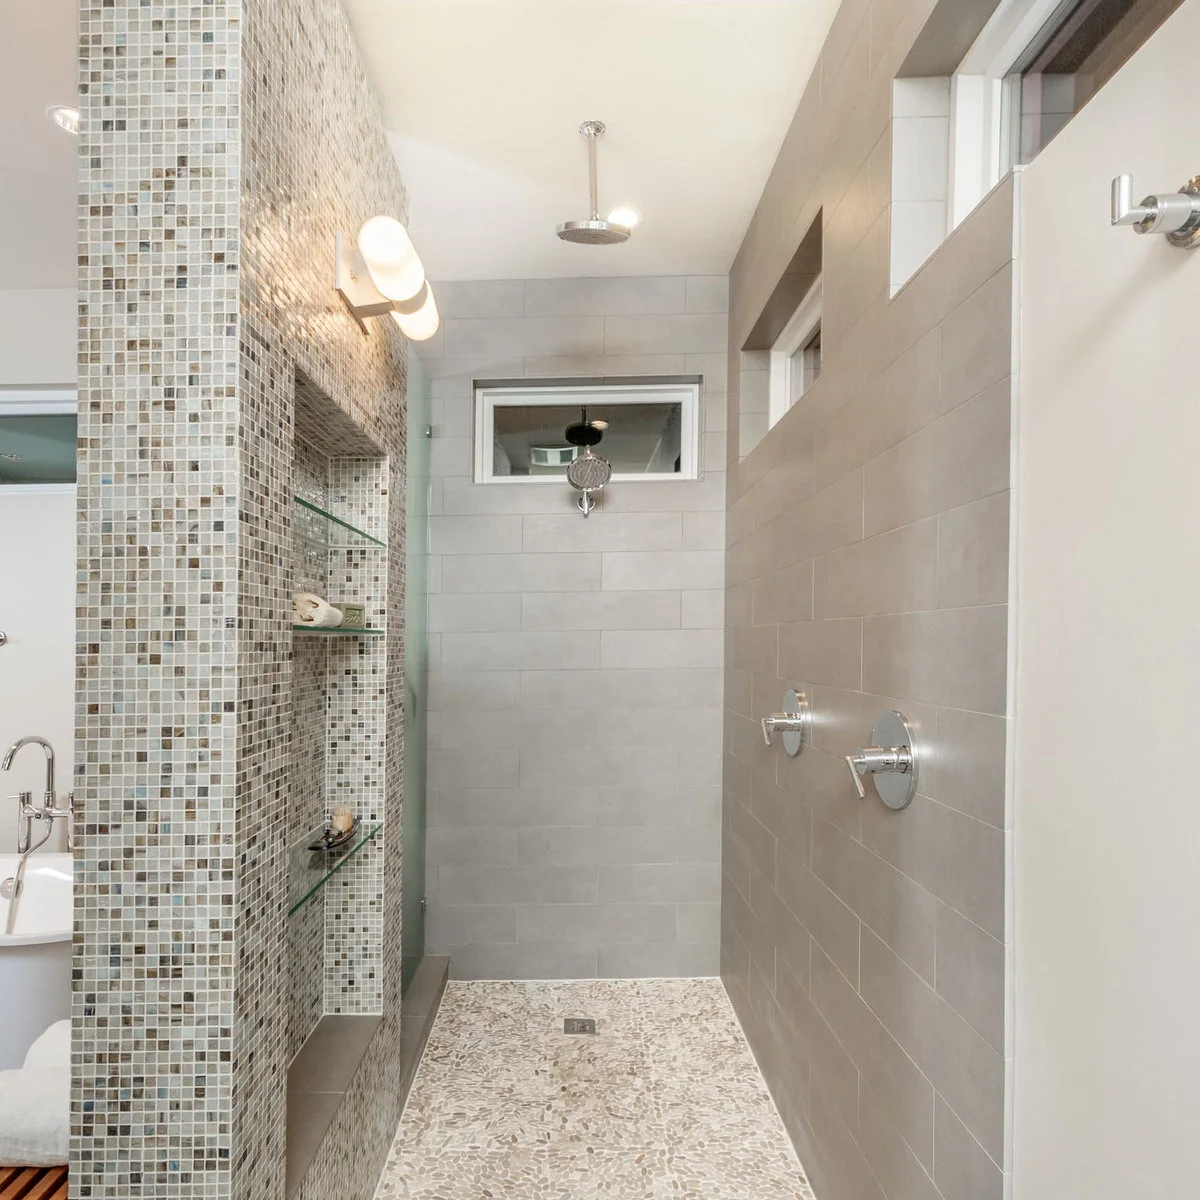
Build Storage into a Divider Wall
 SaveSupport Non AI Creator
Image credit: Project: Associate Interiors (via Houzz)
A mosaic-clad divider contains recessed shelves along this narrow shower. The opposite wall uses larger pale tiles, and small rounded floor pieces introduce a third scale. High windows bring in light without using the main storage wall for a low opening.
Recessed shelves can keep bottles out of the standing area, but their dimensions should suit the products you use. Plan them before waterproofing rather than cutting into a finished wall. Keep shelf edges easy to wipe and avoid filling every recess with decorative objects that complicate cleaning.
IDEA 07 / 20
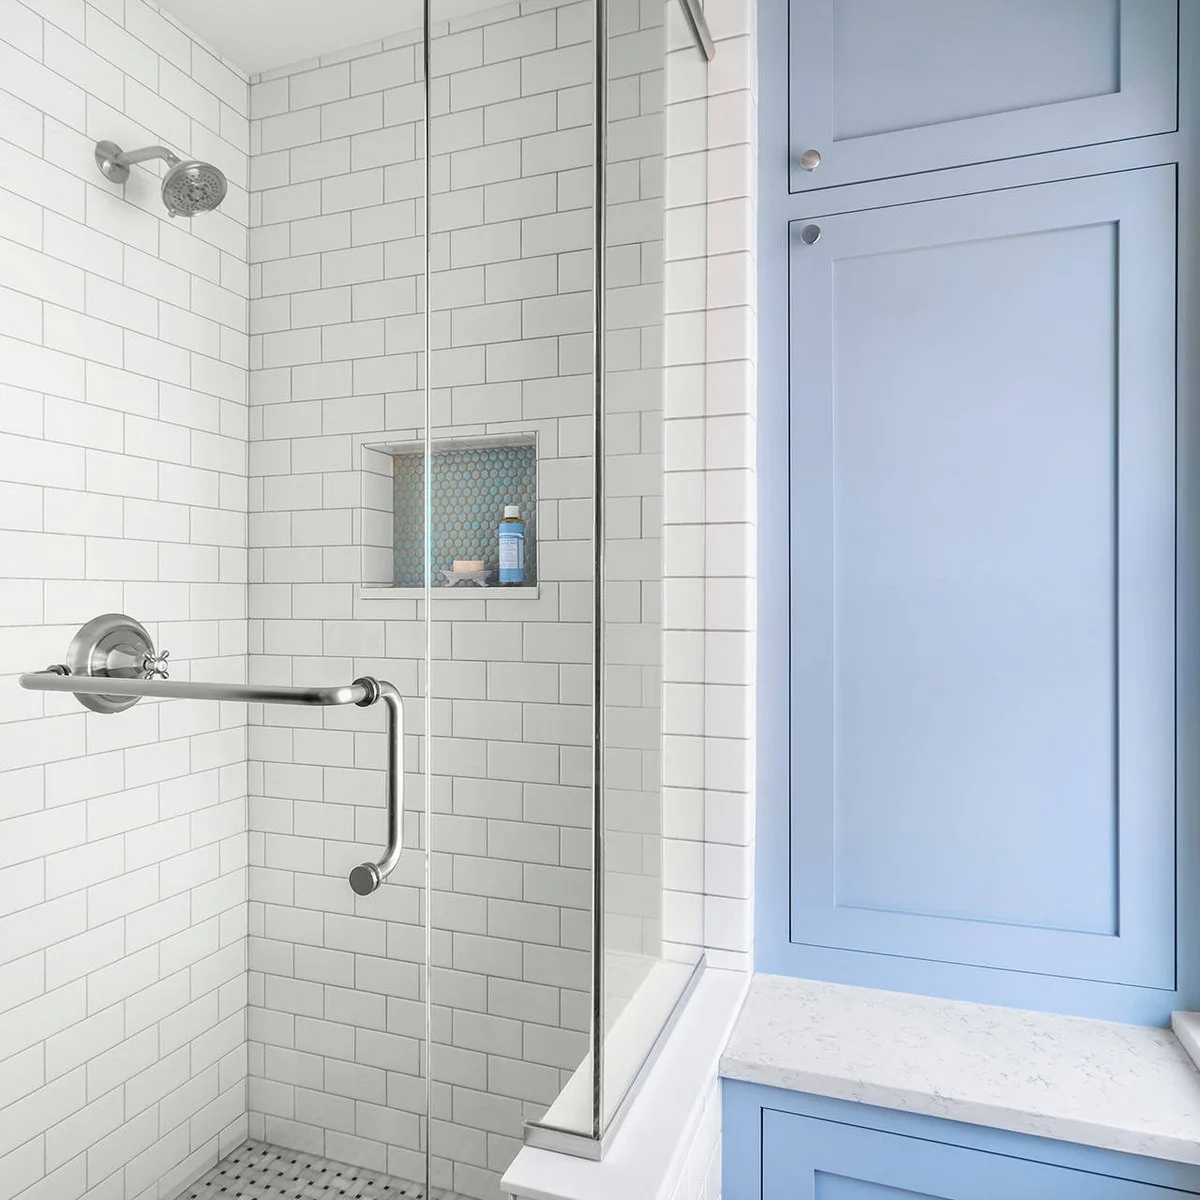
Give One Small Niche a Colored Back
 SaveSupport Non AI Creator
Image credit: Project: i.d. | interior design (via Houzz)
A small blue mosaic niche adds color inside this white subway-tiled shower. The nearby blue cabinetry repeats the tone without extending the mosaic across every wall. A clear glass panel keeps the niche visible while the plain surrounding tile makes its outline easy to read.
Size the recess for actual bottles and leave enough headroom to remove pump tops. A small-bathroom storage plan works better when everyday items fit without stacking. Check shelf slope and waterproofing with the installer; an attractive tile border cannot compensate for water collecting in the recess.
IDEA 08 / 20
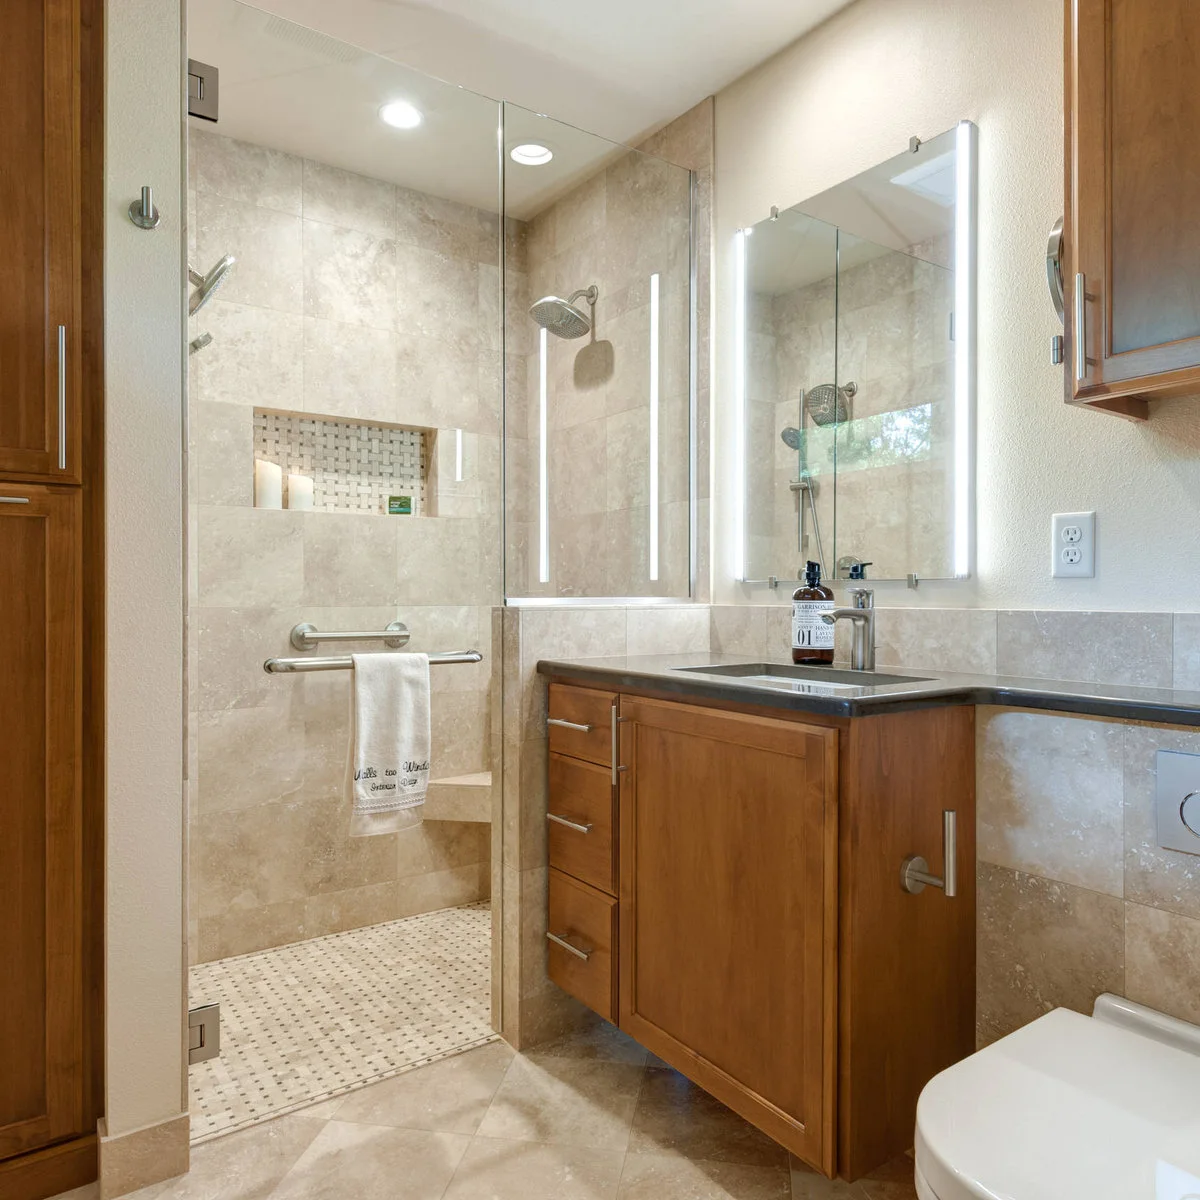
Place a Wide Niche Above the Rail
 SaveSupport Non AI Creator
Image credit: Project: Walls too Windows, Interior Design (via Houzz)
A wide recessed niche sits above the horizontal rail in this pale tiled shower. Its basketweave-patterned backing adds a focused detail without covering the whole enclosure. Glass above the vanity-side divider allows light through while keeping the wet area separate from the counter.
Check that the niche is reachable without stretching across another fitting. Decide where bottles and soap will sit before the wall is closed. Keep the recess shallow enough to see and clean easily, and have the installer coordinate its framing with any planned rail backing.
IDEA 09 / 20
Keep a Corner Seat Separate from Bottles
 SaveSupport Non AI Creator
Image credit: Project: Bathroom and Kitchen Services, LLC (via Houzz)
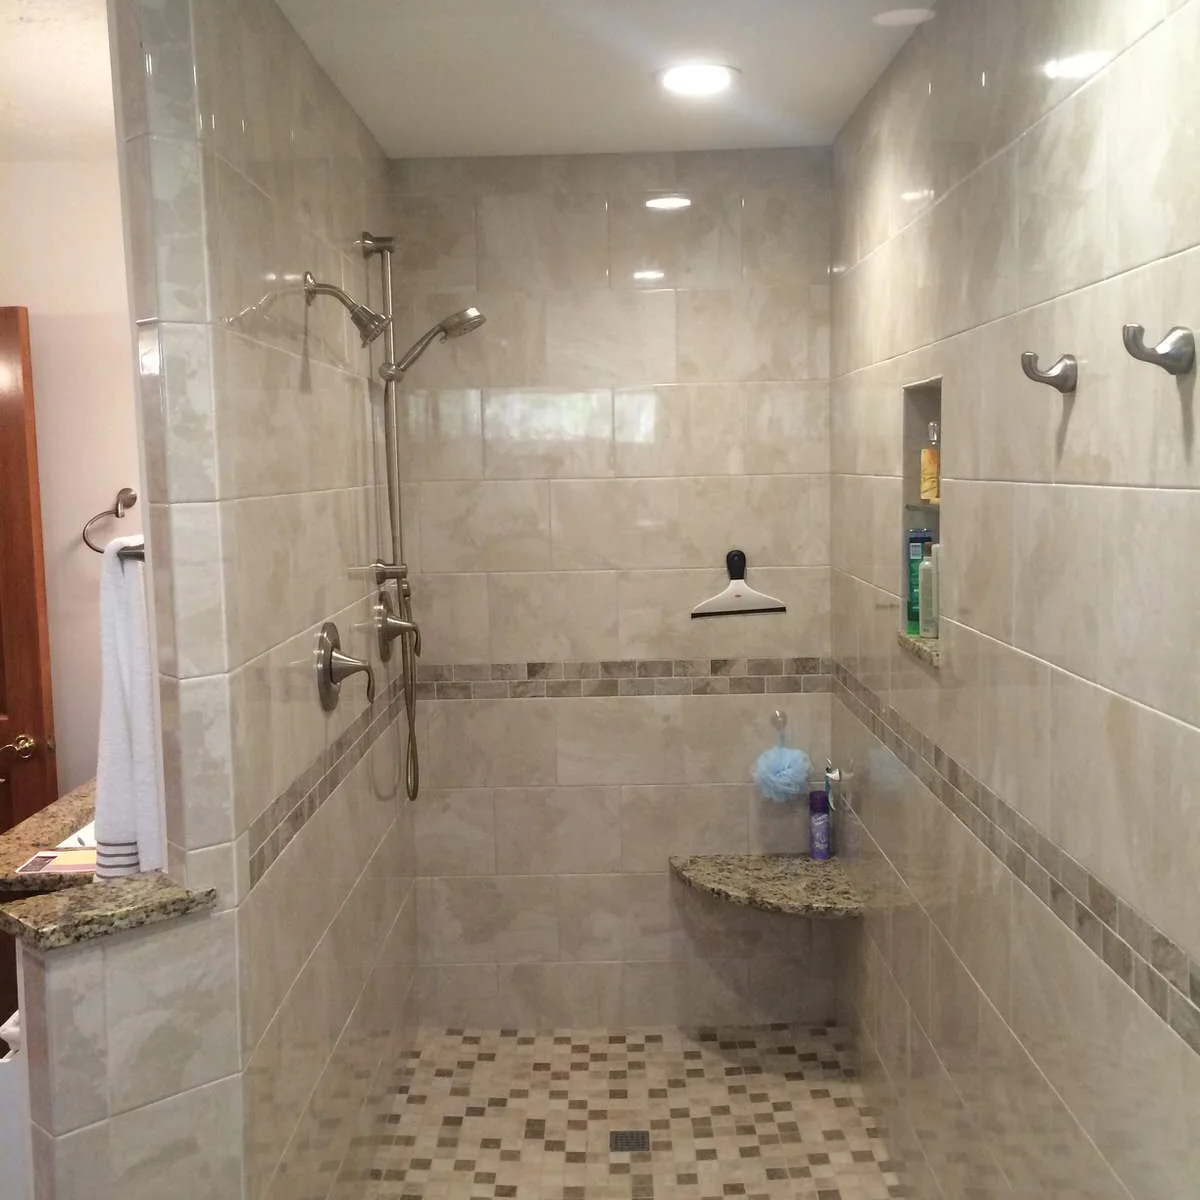
A triangular corner seat uses one corner of this beige tiled shower, while a taller recess holds bottles above it. The central floor stays relatively open. A visible squeegee on the rear wall also shows that cleaning equipment needs a convenient home, not just toiletries.
A compact seat is useful only if its size and height suit the person using it. Check support and waterproofing details before installation. Avoid using the seat as permanent bottle storage; keeping it clear makes the surface easier to wipe and preserves the purpose of the corner.
IDEA 10 / 20
Use a Curtain Where Door Swing Is Awkward
 SaveSupport Non AI Creator
Image credit: Project: Adeline Ray Design Studio (via Houzz)
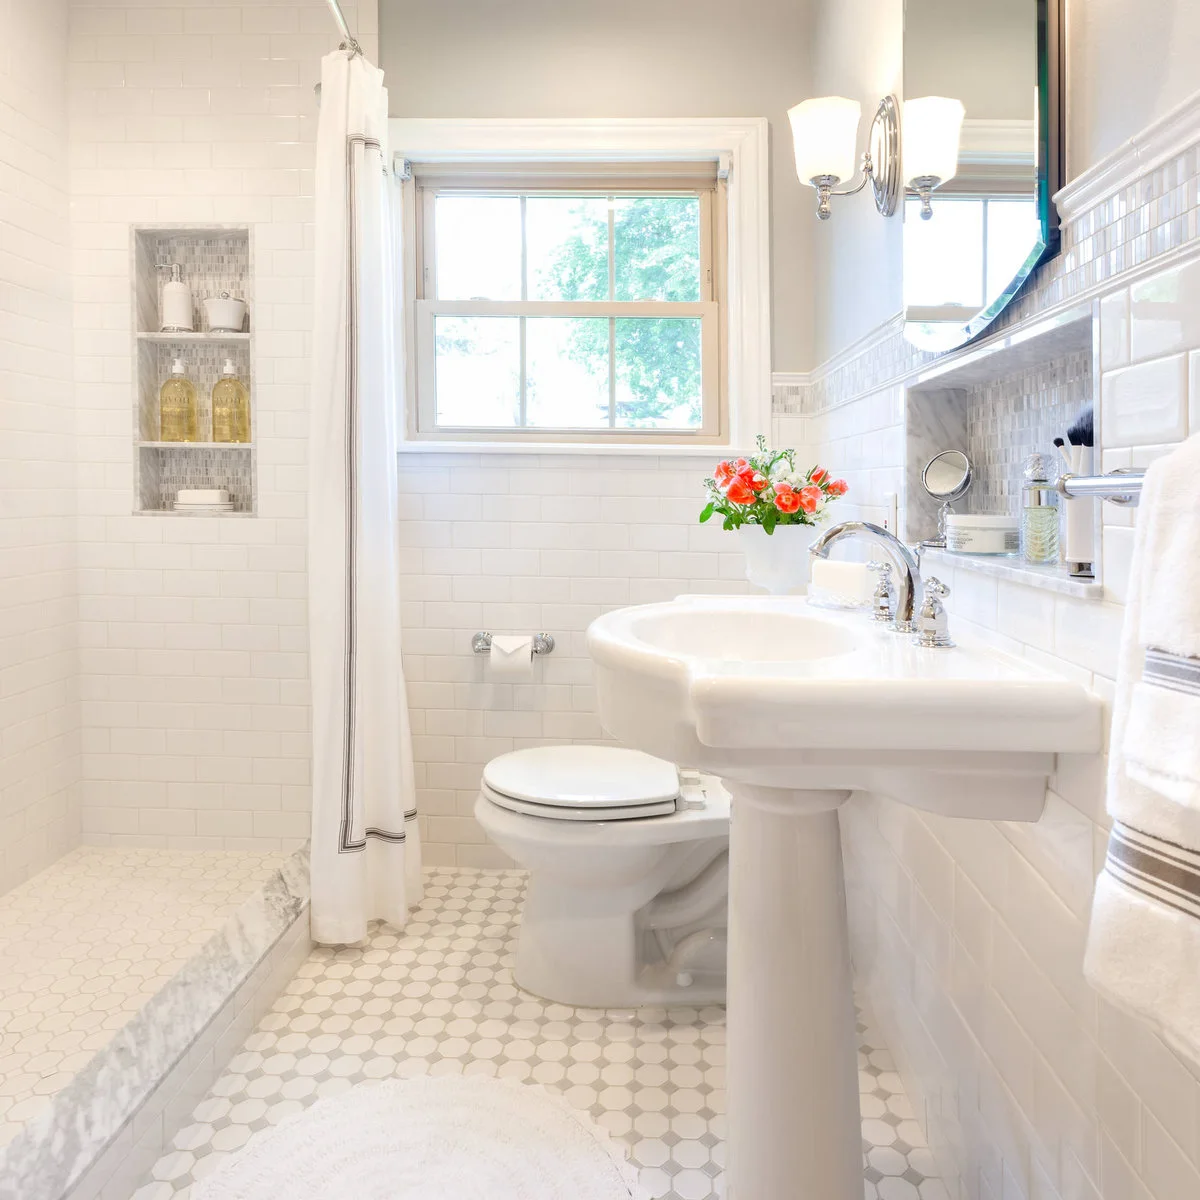
A white curtain closes this raised-entry shower beside a pedestal sink. The curtain can move out of the way without a glass door swinging into the small bathroom. A divided niche holds bottles and soap, leaving the tiled floor free of loose storage.
Choose a liner that stays inside the shower boundary and dries between uses. Check its length against the curb rather than letting it drag. This arrangement still has a step to cross; a flexible curtain does not remove the need to plan safe entry and splash control.
PART 03
Make Daily Use More Comfortable
IDEA 11 / 20
Compare a Loose Stool with a Built-In Bench
 SaveSupport Non AI Creator
Image credit: Project: Steinberg Custom Designs (via Houzz)
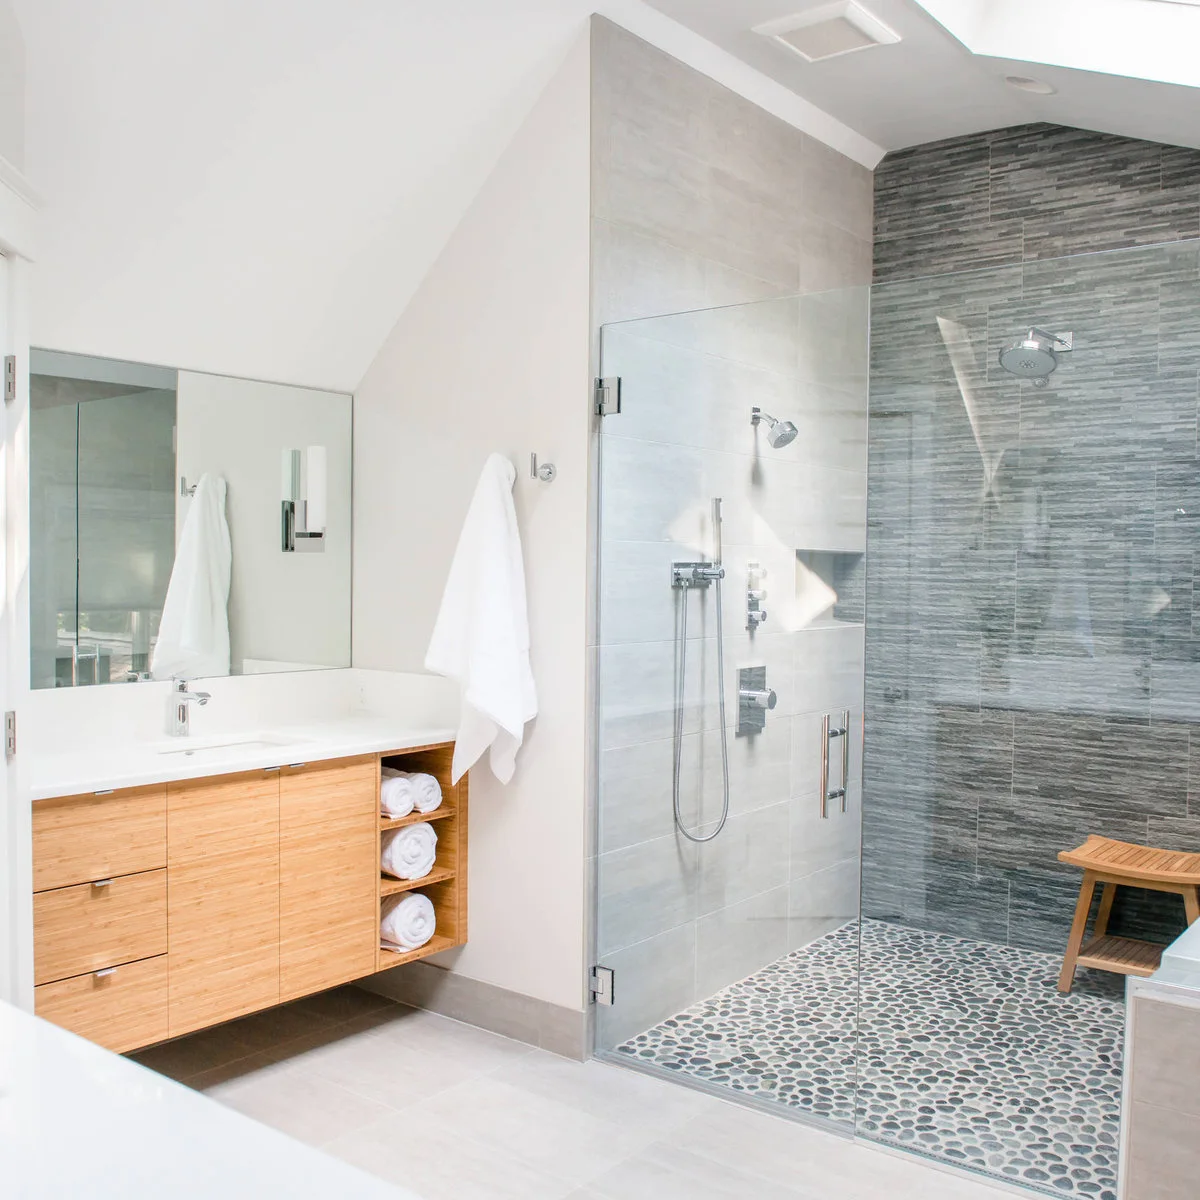
A small slatted stool sits inside this tall glass shower against a dark textured wall. Its movable form leaves more layout flexibility than a full-width built-in bench. The pale side wall and handheld fitting balance the darker back surface without adding more decorative patterns.
If seating is needed, choose a shower-rated product with an appropriate load rating and stable feet. A decorative stool is not a substitute for properly specified support. Keep the seat clear of the door path, and check cleaning and drying guidance for both the stool and floor beneath it.
IDEA 12 / 20
Leave the Middle Open Beside a Folding Seat
 SaveSupport Non AI Creator
Image credit: Project: U.S. Frameless Glass Shower Door (via Houzz)
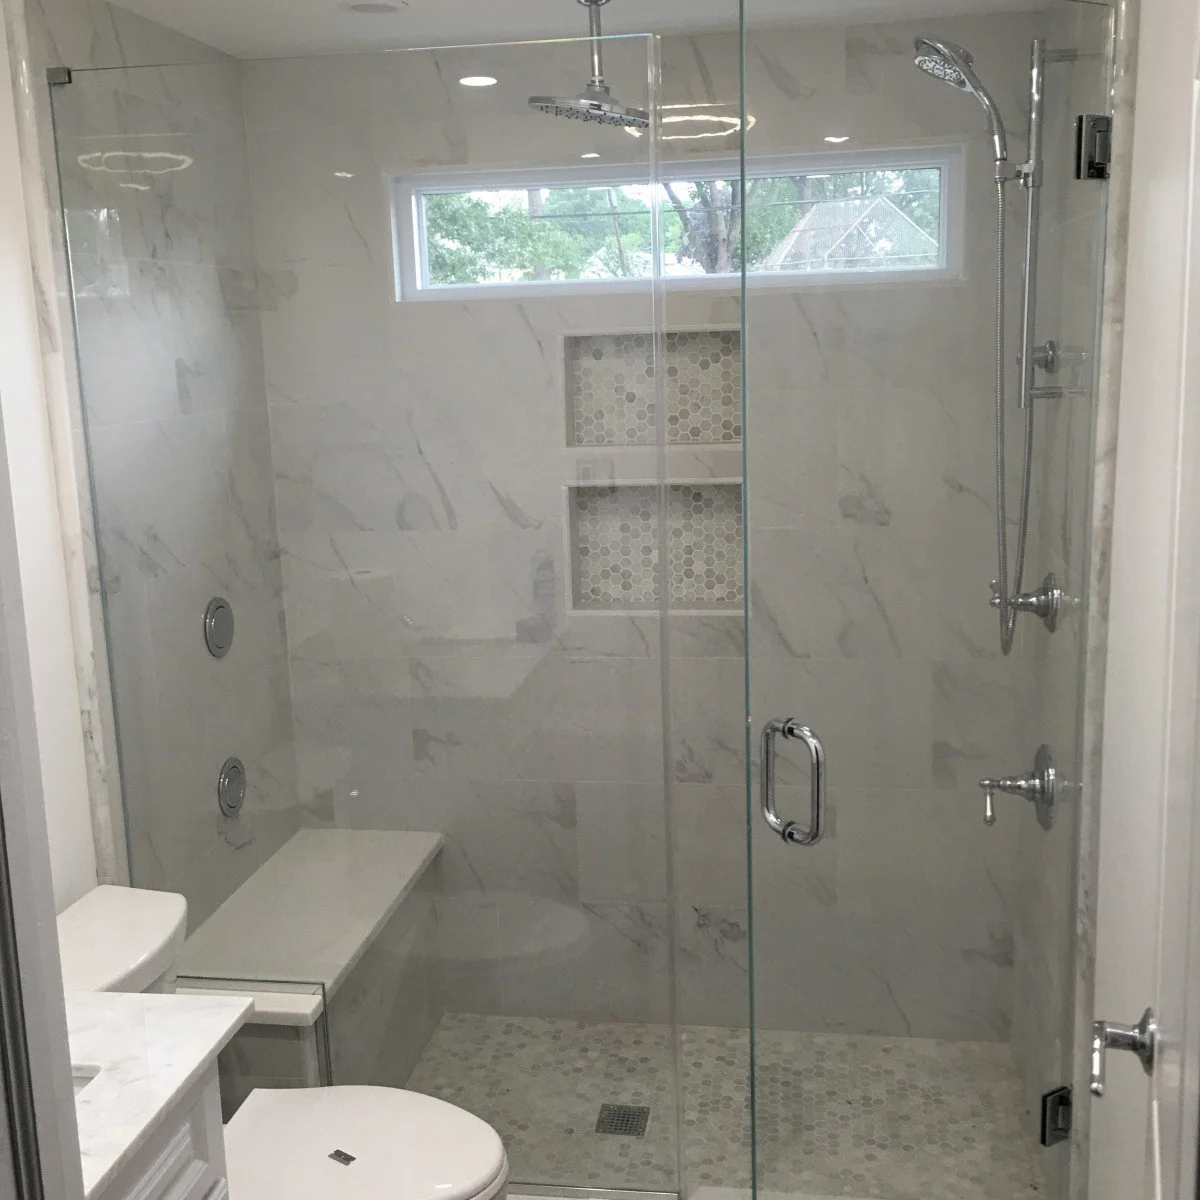
A wall-mounted folding seat occupies the side of this compact glass shower. The handheld fitting sits opposite, with two recessed shelves on the rear wall. A high horizontal window supplies daylight while leaving the central shower walls available for the seat, controls and storage.
Plan seat position and structural backing with the installer before closing the wall. Check whether controls and the handheld can be reached from the seated position. Keep the folding mechanism accessible for cleaning, and verify the product’s ratings rather than inferring suitability from the photograph.
IDEA 13 / 20
Let a Full-Width Bench Define the Back
 SaveSupport Non AI Creator
Image credit: Project: SEED Homes (via Houzz)
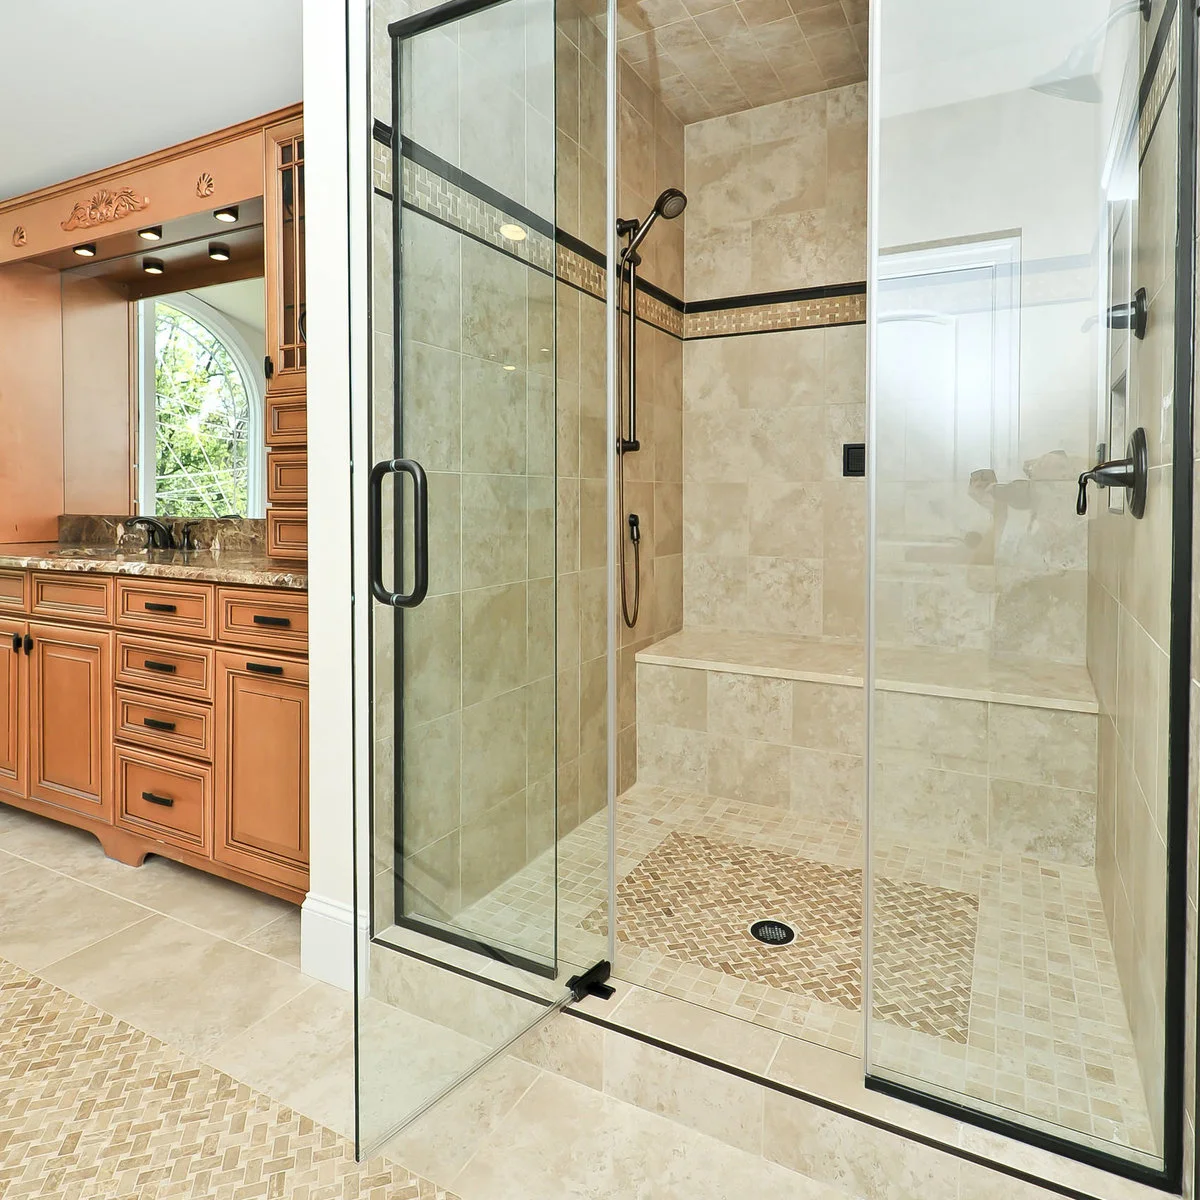
A full-width bench defines the back of this shower behind clear glass and dark hardware. The small floor pattern is echoed outside the enclosure, connecting the shower with the bathroom. A handheld shower sits above the bench area rather than relying only on an overhead spray.
A long bench offers a generous resting surface but reduces standing space. Compare its depth with the finished enclosure dimensions before construction. Plan waterproofing, drainage of the seat surface and access to the handheld together, and avoid leaving towels on the bench where they will remain wet.
IDEA 14 / 20
Plan Two Shower Positions Deliberately
 SaveSupport Non AI Creator
Image credit: Project: Steven Paul Whitsitt Photography (via Houzz)
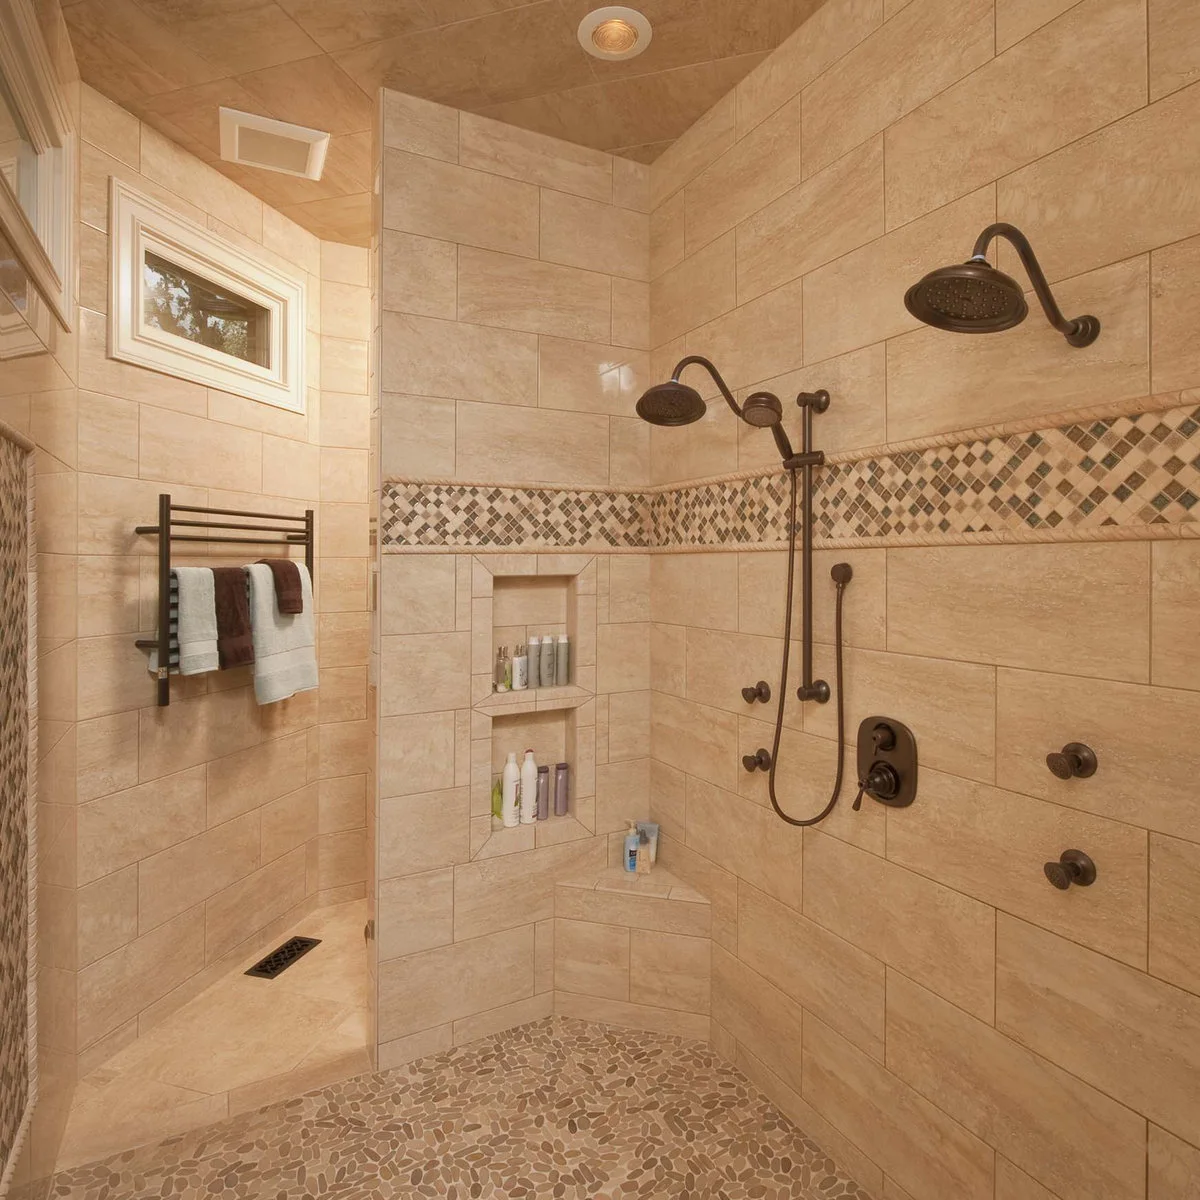
Two wall-mounted showerheads flank a central handheld fitting in this warm beige enclosure. A corner storage recess and small rounded floor pieces keep the lower area relatively uncluttered. The repeated dark fittings stand out against a continuous field of pale tile.
Two positions require more planning than adding another visible fitting. Ask the plumber about supply capacity, controls and drainage for the intended use. Keep each standing area clear, and check where spray lands so the person entering is not immediately in the path of running water.
IDEA 15 / 20
Use High Daylight Without Losing a Solid Wall
 SaveSupport Non AI Creator
Image credit: Project: Workshop11 (via Houzz)
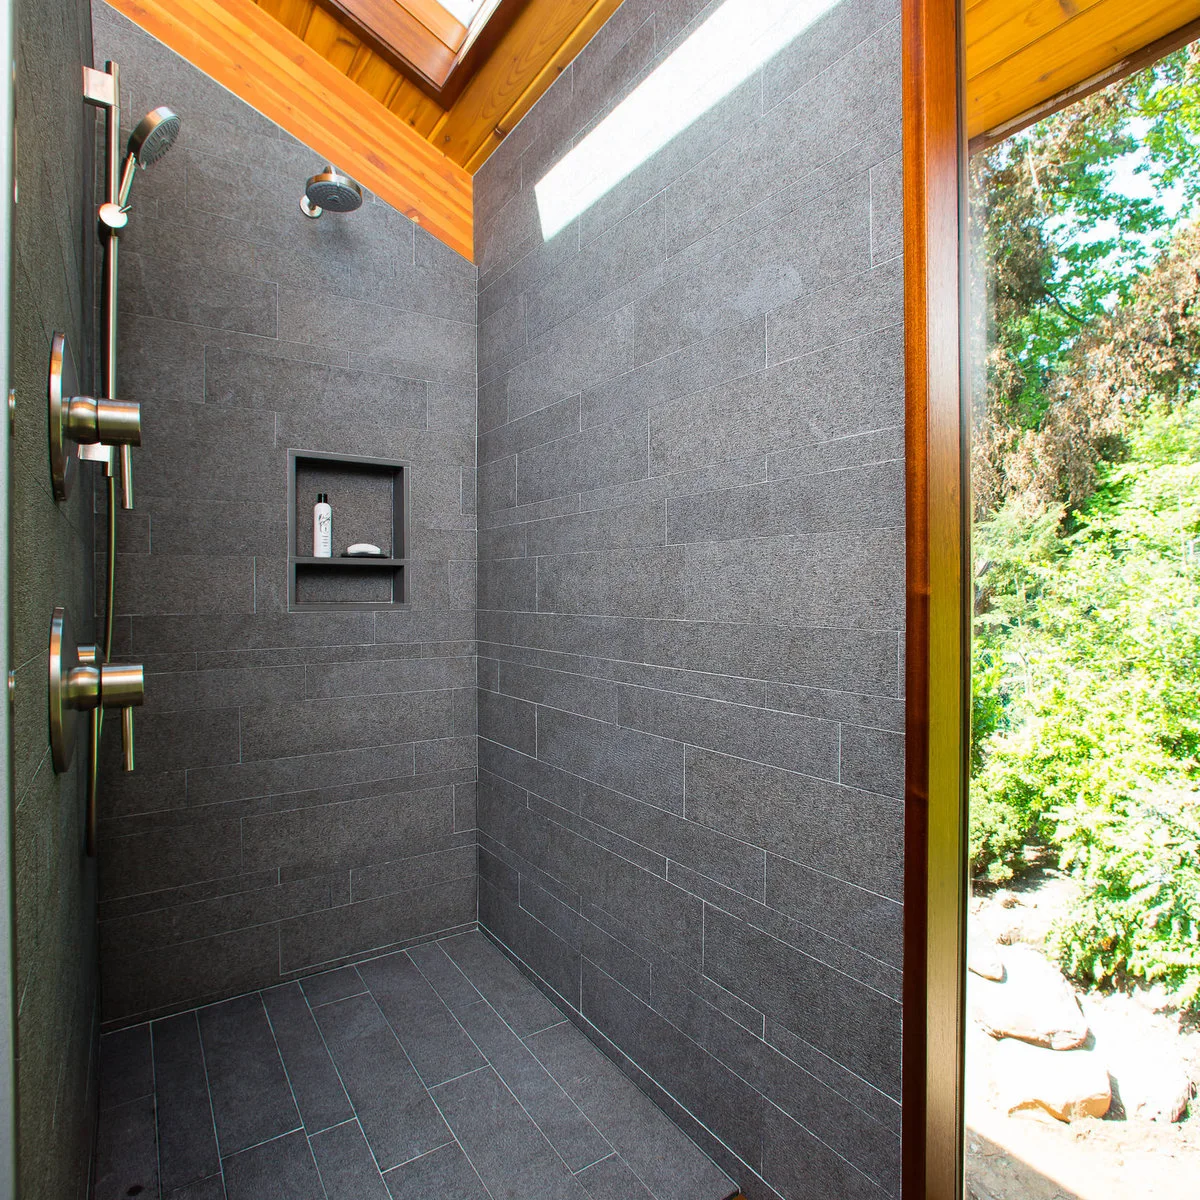
A high narrow window brings light onto the dark gray shower wall beneath a wood ceiling. A recessed niche and handheld fitting remain easy to see against the simple tile layout. A large glazed opening at the side connects the enclosure visually with greenery outside.
Think about privacy, cleaning access and water exposure before copying the glazing. High daylight can free lower wall space, but a window within a shower needs an appropriate waterproof detail. Verify the suitability of every exposed finish, including timber near the wet area, with the responsible installer.
PART 04
Choose Details You Can Maintain
IDEA 16 / 20
Balance Dark Walls with a Small Floor Pattern
 SaveSupport Non AI Creator
Image credit: Project: Hollingsworth Design, LLC (via Houzz)
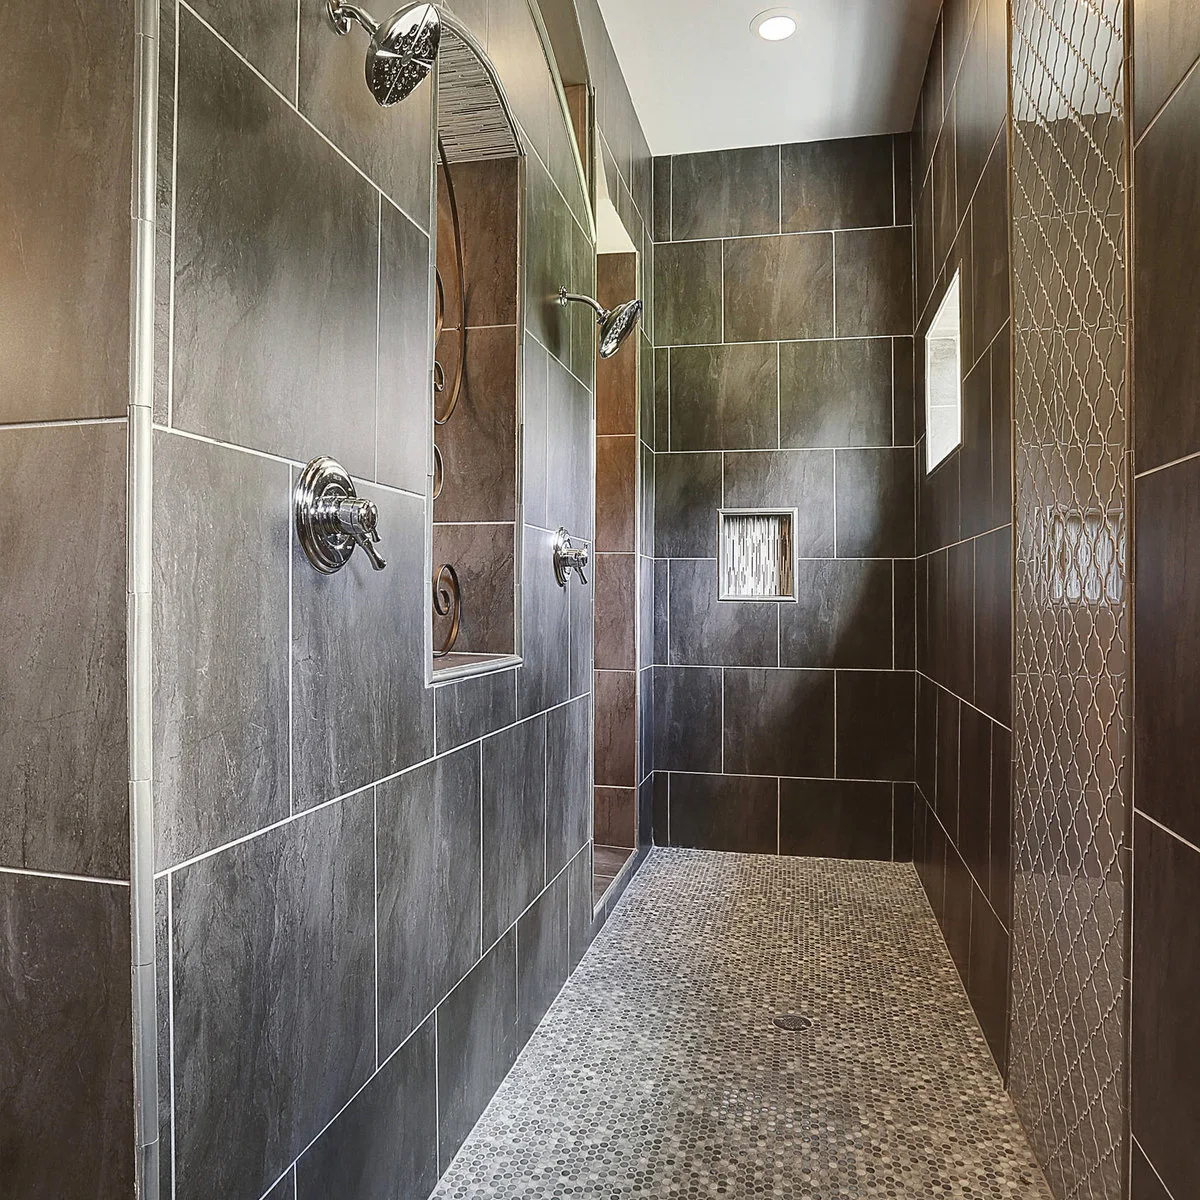
Large dark tiles line this long shower, while much smaller pieces cover the floor. A narrow decorative strip and recessed details interrupt the walls without filling them with pattern. The bright ceiling and light grout outlines help the enclosure remain readable despite its darker finish.
Ask for wet-area floor suitability and cleaning instructions for the actual product rather than choosing by appearance alone. More small pieces generally create more grout joints to maintain. Test a sample with your water and cleaning routine, especially where a dark surface may make pale mineral deposits noticeable.
IDEA 17 / 20
Repeat a Pale Tile Across Walls and Bench
 SaveSupport Non AI Creator
Image credit: Project: USI Design & Remodeling (via Houzz)
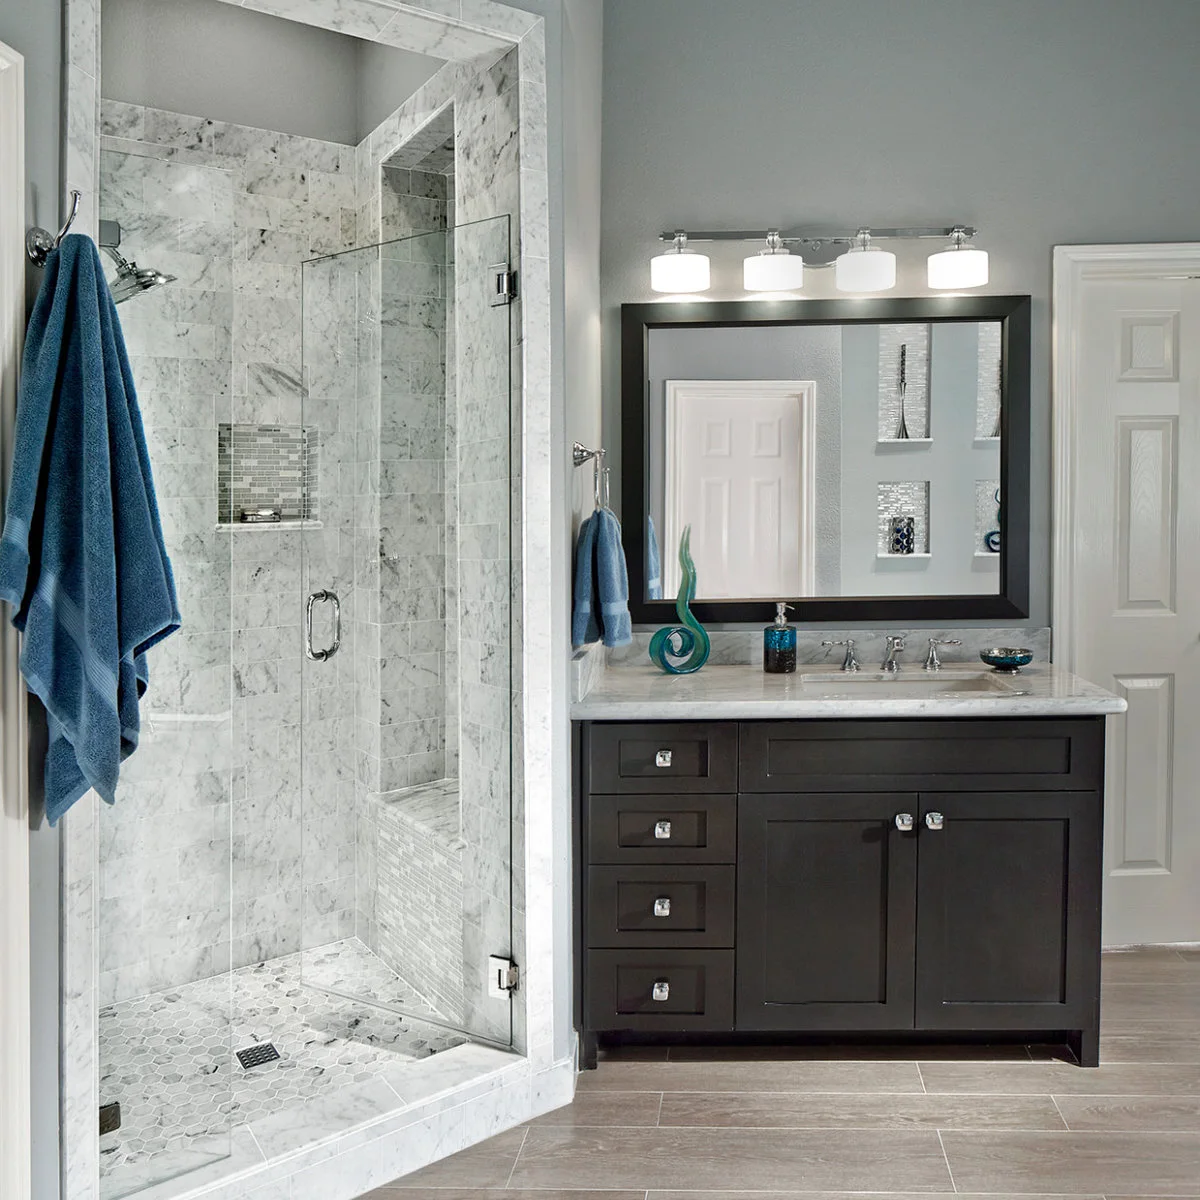
Pale veined tiles cover the walls and bench of this glass shower beside a dark vanity. A smaller floor pattern distinguishes the standing surface without introducing a new strong color. The continuous pale finish makes the bench read as part of the enclosure.
Confirm the actual tile material and its care requirements before choosing cleaners or sealers. A veined appearance alone does not identify stone. Keep the bench edge, glass fixings and floor drain accessible, and compare grout colors in person so the smaller floor pattern stays manageable visually.
IDEA 18 / 20
Use Mosaic Color in a Compact Enclosure
 SaveSupport Non AI Creator
Image credit: Project: Town & Country Kitchen and Bath (via Houzz)
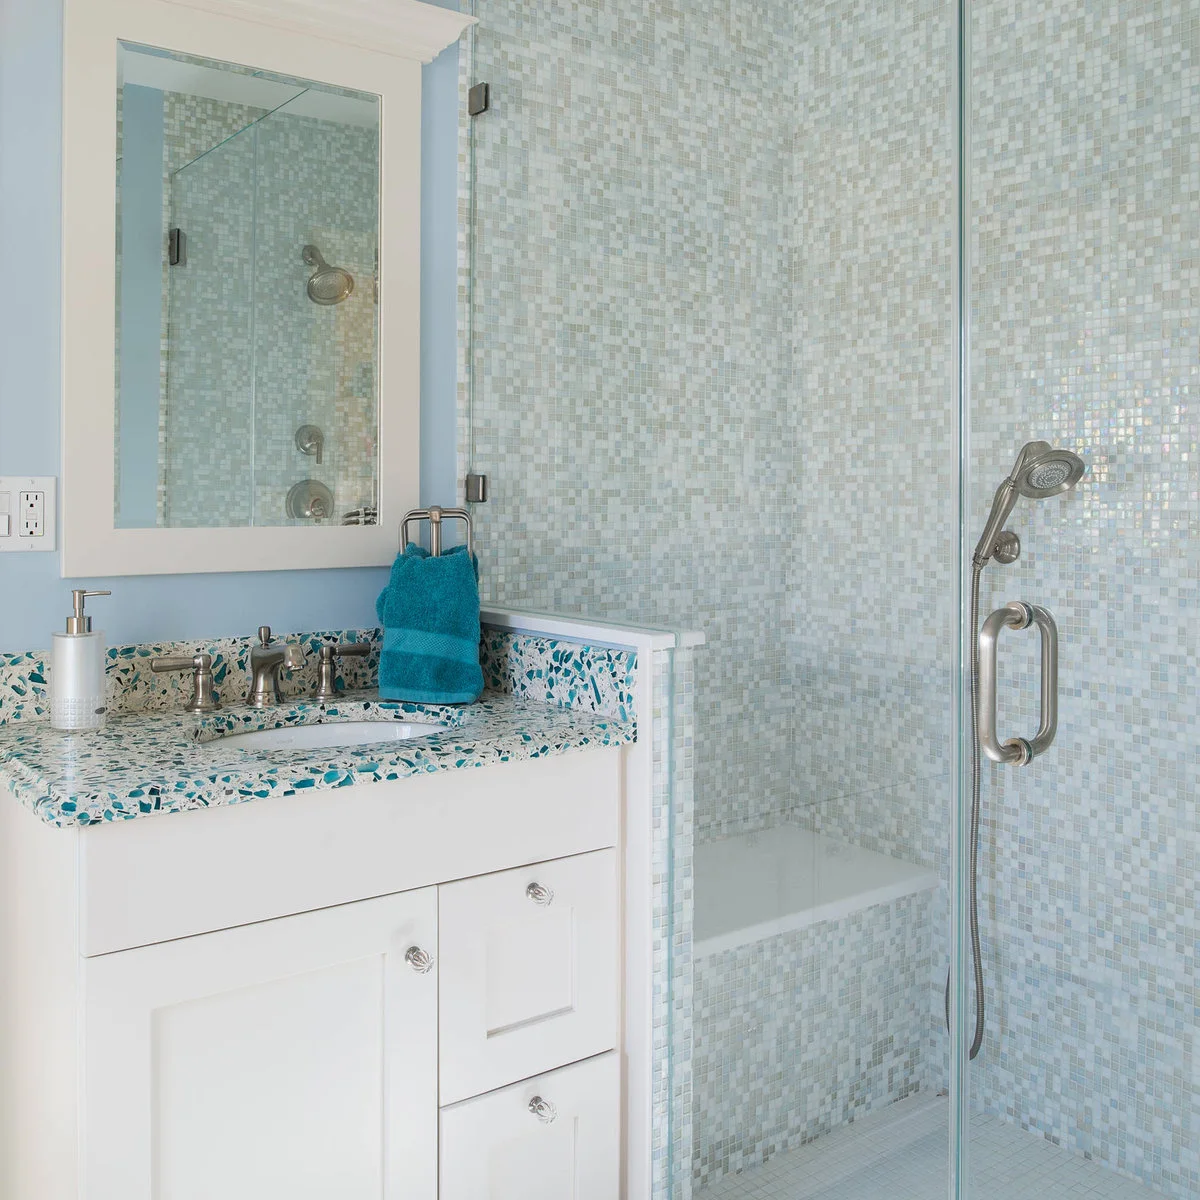
Small pale blue tiles cover this compact glass shower and its built-in bench. Turquoise pieces in the neighboring counter repeat the color more strongly, while the white vanity keeps the room light. The handheld fitting remains visible against the softly varied shower wall.
Mosaic can handle corners and changes of plane neatly, but the extra grout needs regular attention. Keep the palette restrained if a neighboring counter is already patterned. Plan the bench and bottle positions together so the small enclosure remains useful rather than becoming a collection of competing surfaces.
IDEA 19 / 20
Put a Handheld Fitting Within Easy Reach
 SaveSupport Non AI Creator
Image credit: Project: Lochwood-Lozier Custom Homes (via Houzz)
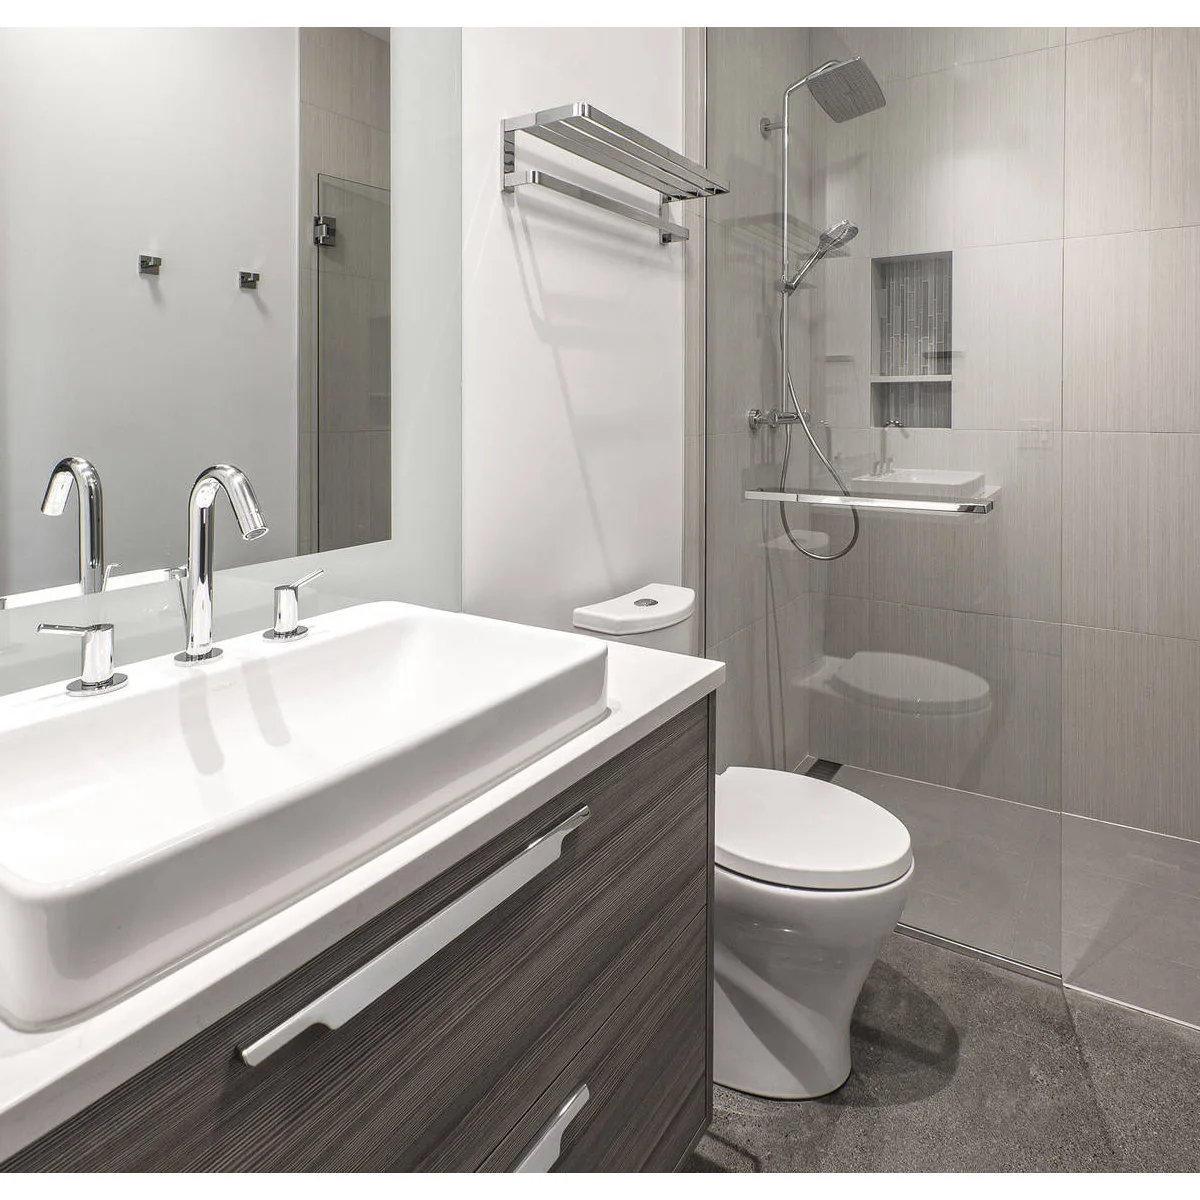
A handheld shower hangs on a vertical rail beside a divided niche in this slim enclosure. Pale gray wall tiles keep the fittings easy to distinguish, while the glass door allows the light room to remain visible. A horizontal handle marks the enclosure boundary clearly.
Check the reach to the handheld and controls from the positions you actually use. Plan hose movement so it does not catch on the seat, shelf or door. Specify any support rails separately; a shower-head adjustment rail or glass handle should not be assumed suitable for bearing body weight.
IDEA 20 / 20
Keep Adjacent Decorative Timber Outside the Spray
 SaveSupport Non AI Creator
Image credit: Project: S2 Architects (via Houzz)
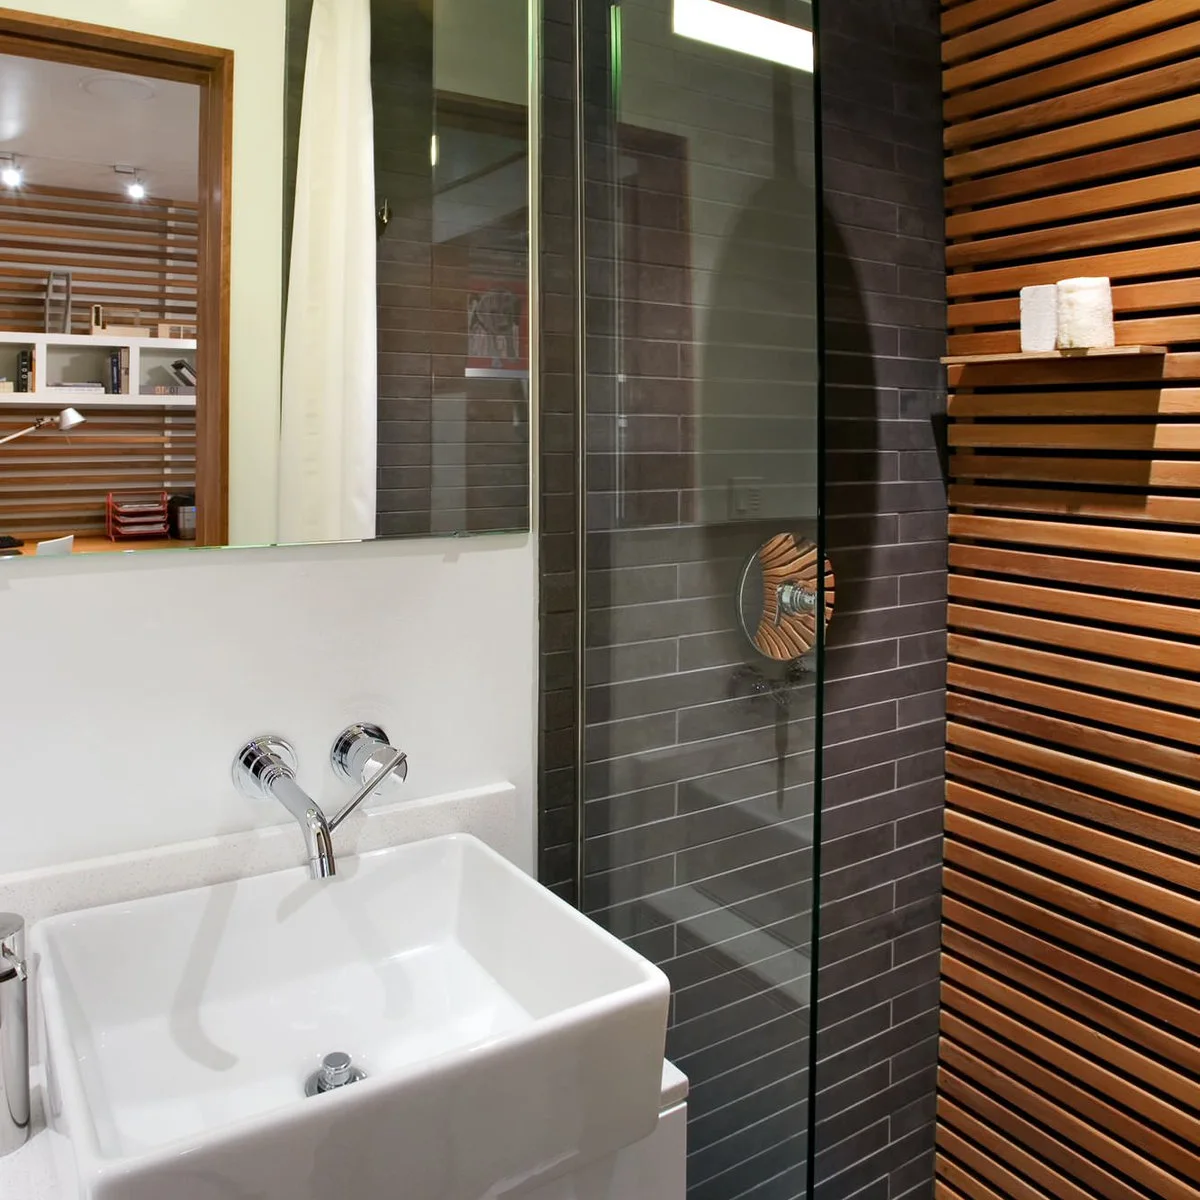
Dark horizontal shower tiles sit behind clear glass beside a warm timber screen. The white basin and reflective fittings keep the small room from becoming uniformly dark. Concentrating the timber outside the main shower wall gives the room warmth without replacing the tiled wet-area surface.
Use the glass boundary to plan where splash is likely to land, and check the suitability of nearby timber finishes. Leave enough access to wipe the glass edge and screen. A beautiful contrast is easier to live with when the junctions are reachable and the ventilation works effectively.
BRING IT ALL TOGETHER
Start with the Entry, Then Choose the Finish
Mark out the finished enclosure, door movement, seat and storage before comparing tile colors. Leave the standing area useful, keep the drain reachable and decide where wet hands can comfortably reach controls and toiletries.
Have waterproofing, floor falls, ventilation and any accessibility requirements resolved for your actual room. The most useful details are often quiet ones: a shelf that fits the bottles, glass you can wipe and a threshold the household can manage confidently.