Kitchen wall decor needs a little more planning than a picture over a sofa. Steam, splashes, cupboard doors and food preparation all affect where things can go. Start with a wall outside the busiest cooking area, then choose pieces you will enjoy seeing every day.
These kitchens and connected eating areas use art, collections and useful storage in different proportions. Borrow the arrangement that fits your available wall, and leave the surfaces needed for cooking and cleaning easy to reach.
PART 01
Find a place for pictures
IDEA 01 / 20
Frame Family Artwork Beside the Table
 SaveSupport Non AI Creator
Image credit: Project: Von Fitz Design (via Houzz)
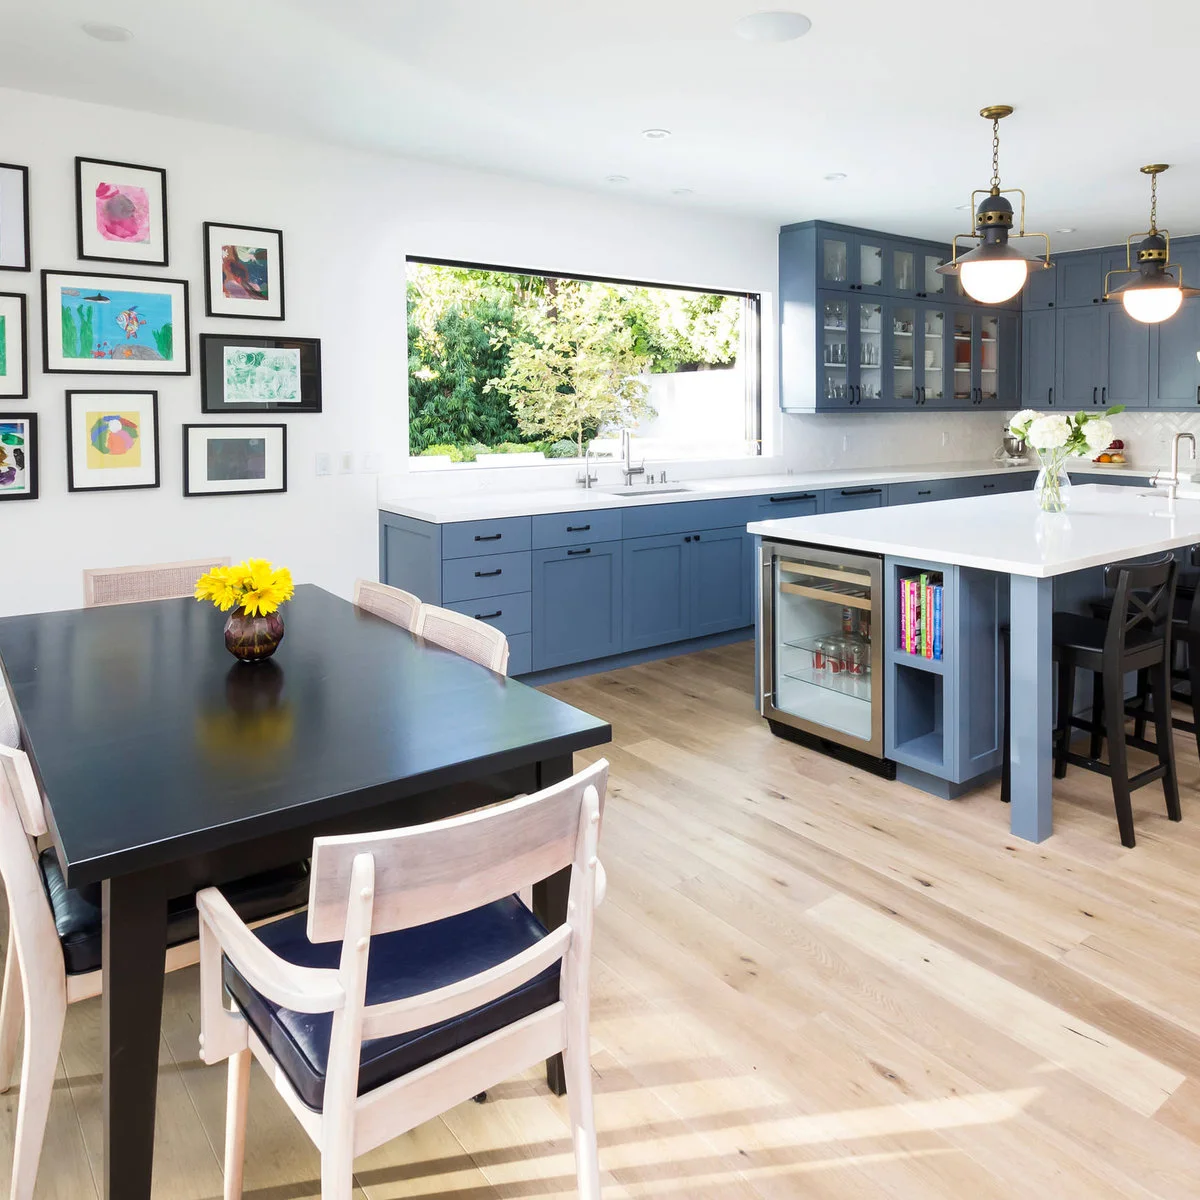
Colorful drawings fill a group of black frames beside the kitchen table, bringing a personal element to the blue-and-white room. The collection occupies an eating-area wall rather than the backsplash. White mounts connect the varied pictures and leave a clear border around each one.
Lay the frames out on the floor before fixing them, keeping a few consistent gaps even when their sizes differ. Glazed frames help separate paper from everyday dust, though they still need cleaning. For furniture placement around this wall, compare these kitchen dining room combo ideas. If your own room has a gap above its upper cabinets, compare these above kitchen cabinet decor ideas before adding another display to the walls.
IDEA 02 / 20
Put a Landscape at the End of a Galley
 SaveSupport Non AI Creator
Image credit: Project: Angela Free Design (via Houzz)
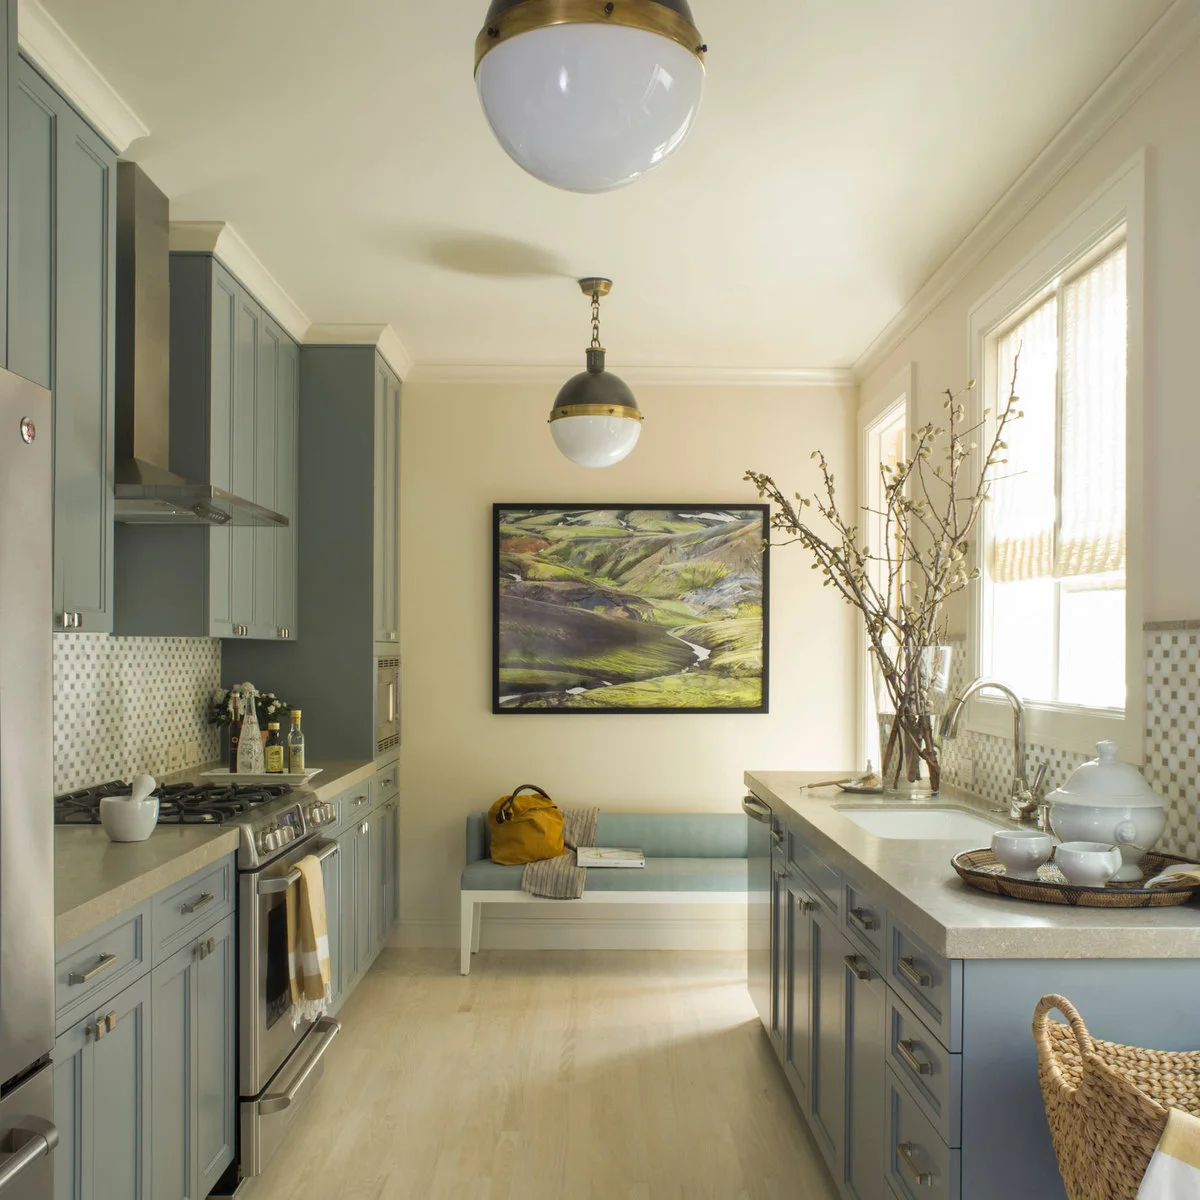
A landscape photograph fills the end wall of this galley, drawing the eye past the gray cabinets toward the bench. Its greens bring color into a largely pale room. The picture is separated from both the cooking surface and the sink, making its position practical as well as decorative.
Stand at the kitchen entrance to judge the picture’s scale before hanging it. Leave a comfortable gap above any bench so a seated person will not knock the frame. If you are rearranging the room, these galley kitchen ideas show other ways to use a narrow end wall.
IDEA 03 / 20
Give a Kitchenette One Small Picture
 SaveSupport Non AI Creator
Image credit: Project: Mesh Architectures (via Houzz)
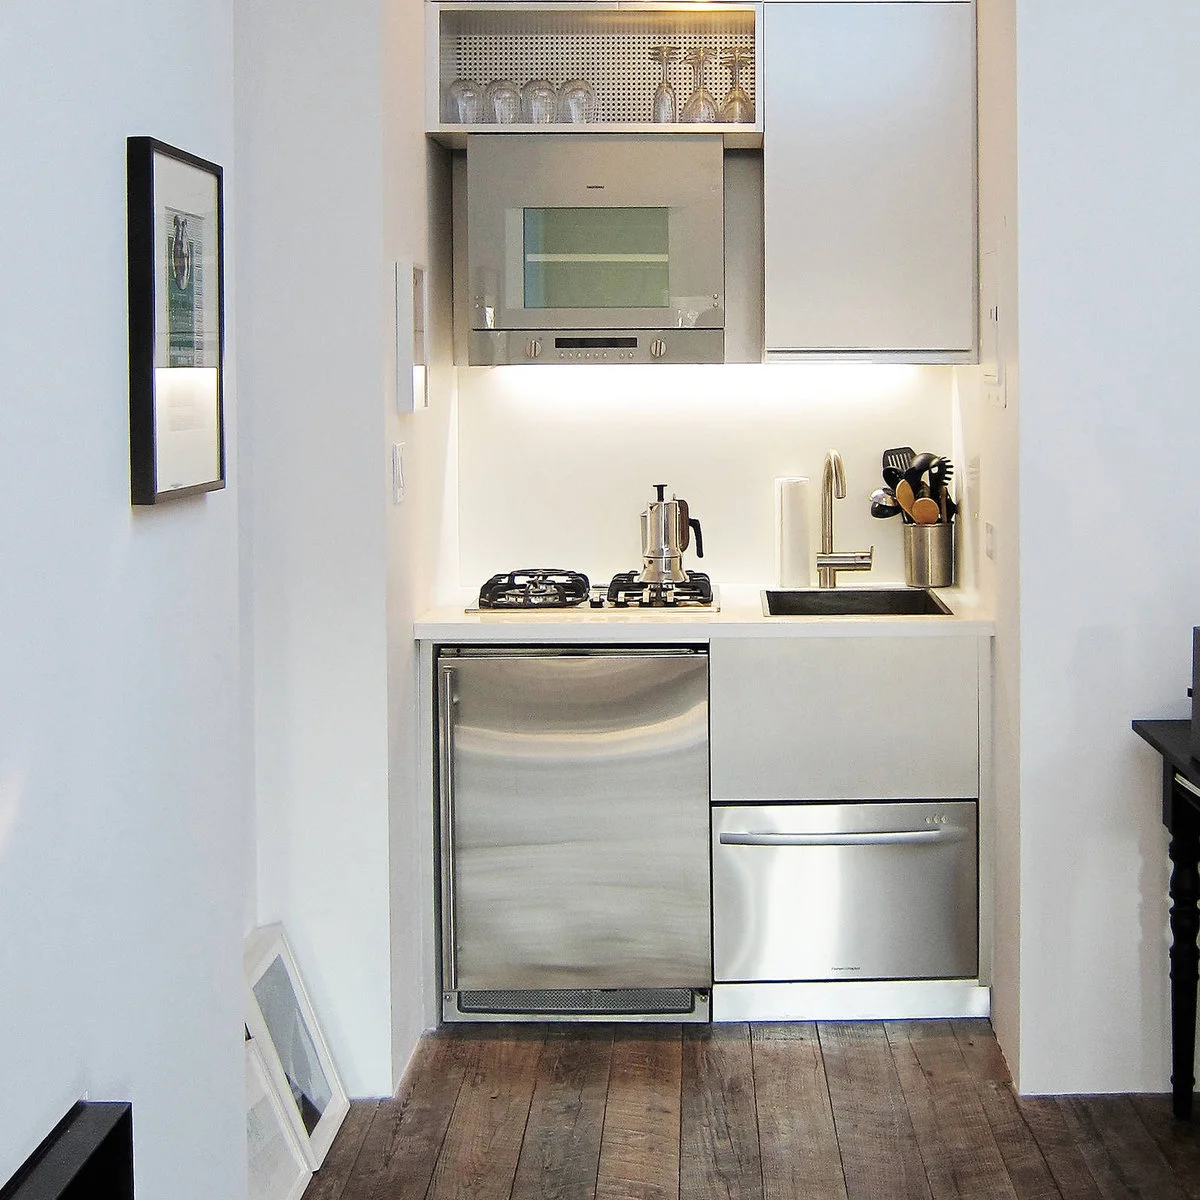
One slim black frame occupies the side wall beside the kitchenette, where a large gallery would overwhelm the narrow space. White cabinetry and stainless appliances keep the cooking recess visually compact. The picture adds character without taking up the limited counter needed for preparation.
Check the wall from the doorway and from the counter before selecting a size. Keep the frame outside the cabinet-door swing and away from steam. A small kitchen benefits more from one well-placed piece than several objects that interfere with the little working space available.
IDEA 04 / 20
Use One Broad Painting over Low Cabinets
 SaveSupport Non AI Creator
Image credit: Project: Fifi and Coco Interiors (via Houzz)
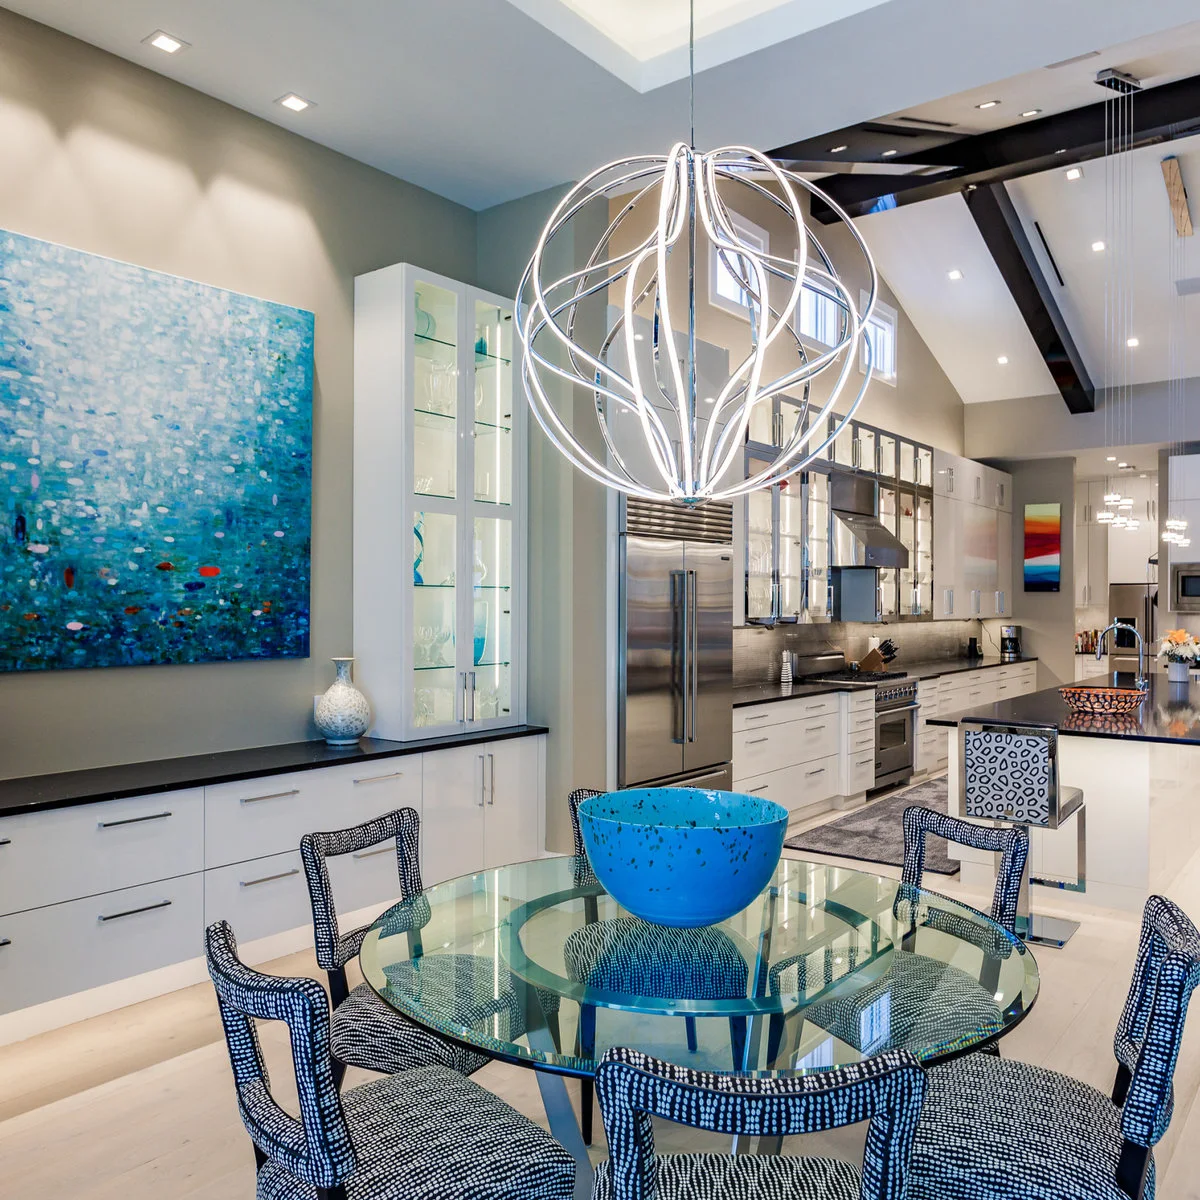
A broad blue painting fills the wall above the low cabinets, with its color repeated in the bowl on the nearby glass table. The tall glass-front cabinet gives the artwork a clear boundary. The cooking run remains visible beyond, linking the eating area with the kitchen.
Measure the usable wall between tall units rather than centering the picture on the entire room. Keep decorative objects below it low enough to leave the painting visible. A large piece is easiest to enjoy when smaller countertop accessories do not compete directly underneath it.
IDEA 05 / 20
Hang a Pair of Tall Prints in a Narrow Gap
 SaveSupport Non AI Creator
Image credit: Future PLC/Malcolm Menzies
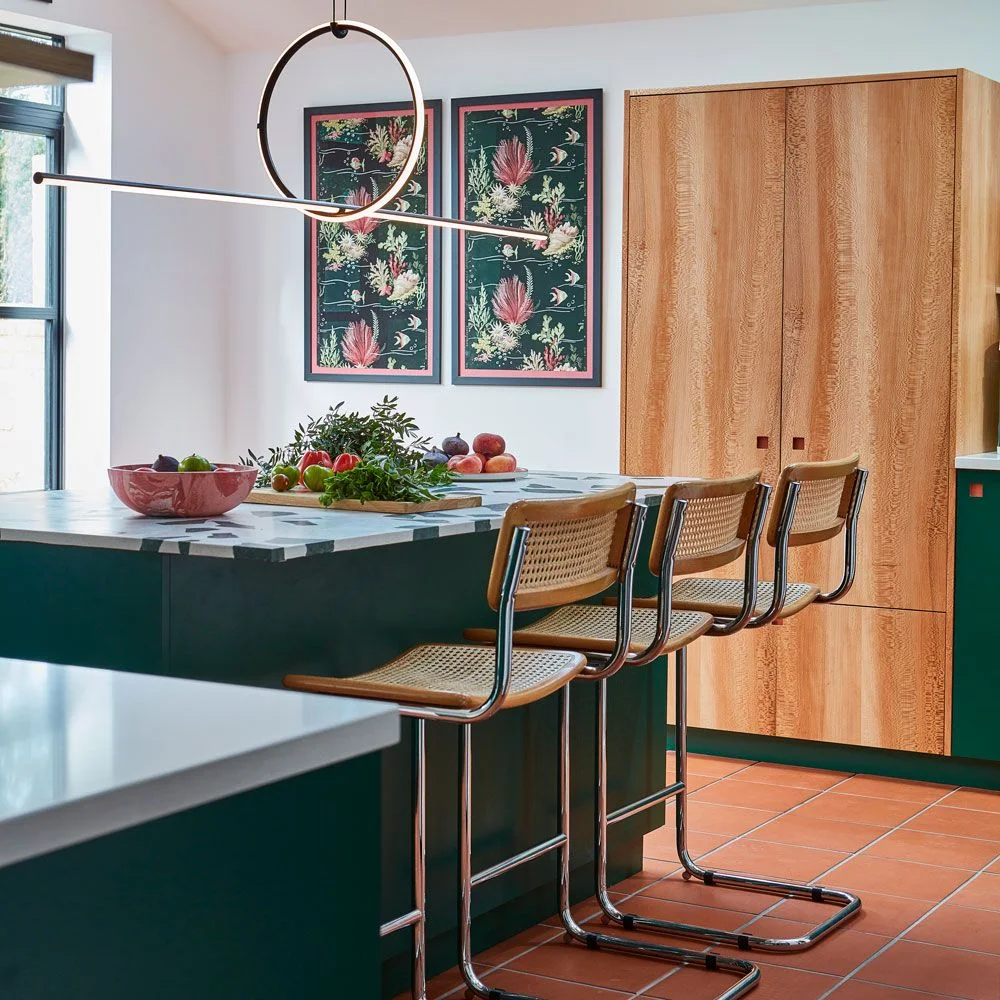
Two tall prints make use of the narrow wall between a window and a wood-front cupboard. Their dark backgrounds relate to the green island, while pink borders add a softer accent. The matching frames give the small display enough presence beside the large cabinet doors.
Measure both the cabinet-door swing and the frame projection before hanging a pair near tall storage. Align the prints as one group, then check how a pendant light crosses the view. A consistent frame style can make different patterns feel connected without requiring identical artwork.
PART 02
Display a collection with purpose
IDEA 06 / 20
Arrange Plates in a Clear Grid
 SaveSupport Non AI Creator
Image credit: Project: Henry Woide (via Houzz)
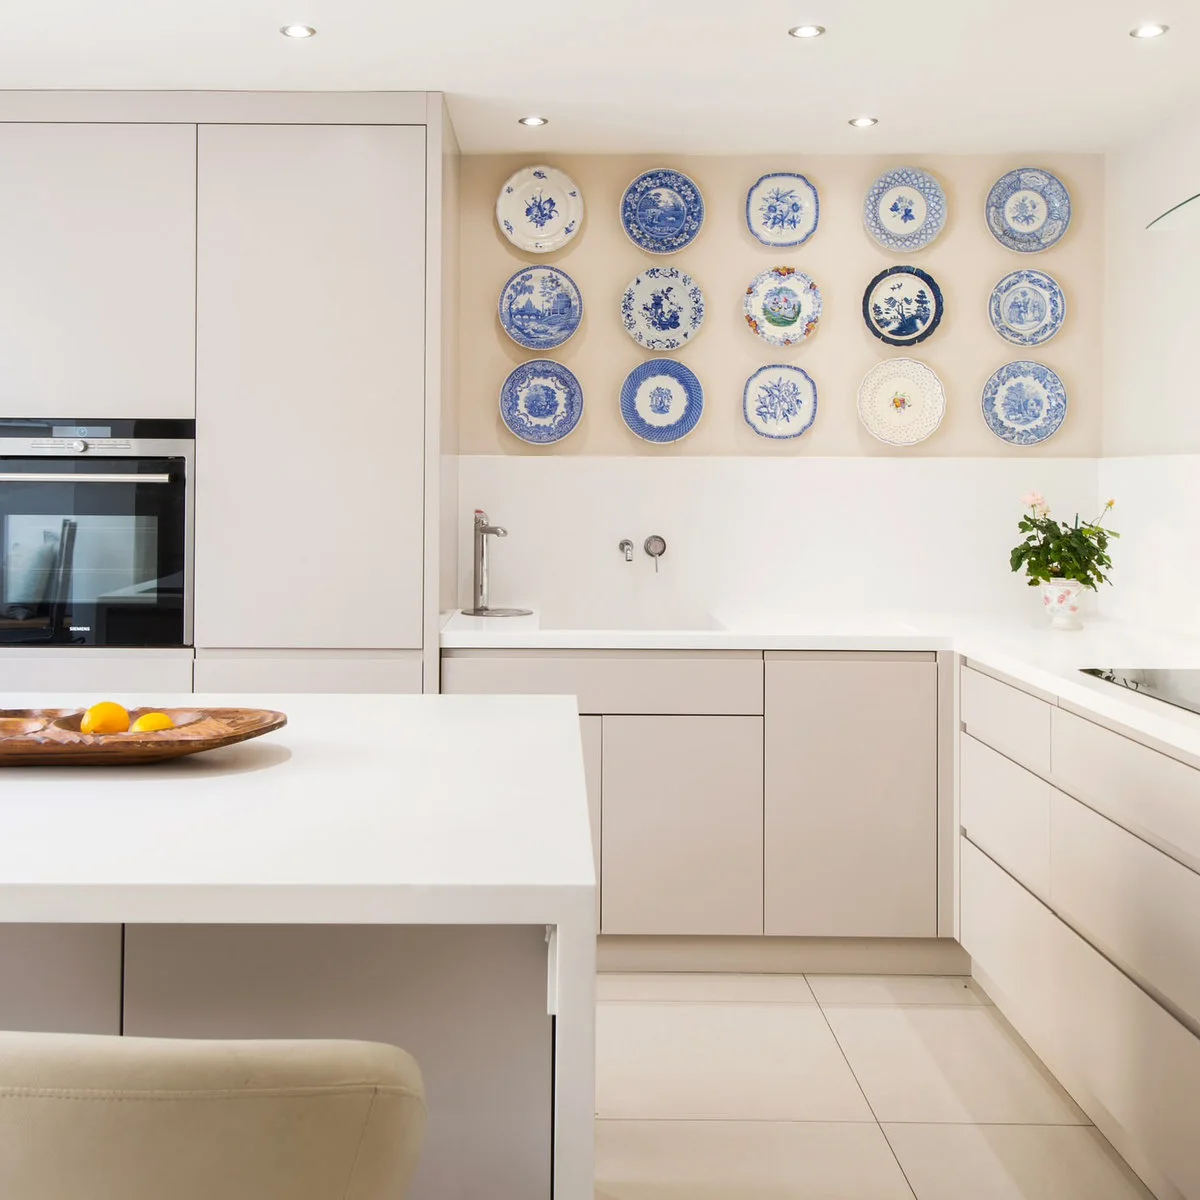
A grid of blue-and-white plates covers the open wall above the sink, with a plain backsplash separating them from the wettest area. Their varied patterns provide detail while the rows keep the display orderly. Pale flat-front cabinets leave the collection as the main decorative feature.
Use plate hangers suited to each plate’s weight and shape, with fixings appropriate for the wall. Plan a template before drilling so the gaps stay consistent. Plates in a kitchen still collect residue; choose pieces you can safely remove and clean according to their finish.
IDEA 07 / 20
Frame Coffee Sacks as a Pair
 SaveSupport Non AI Creator
Image credit: Project: John Johnstone (via Houzz)
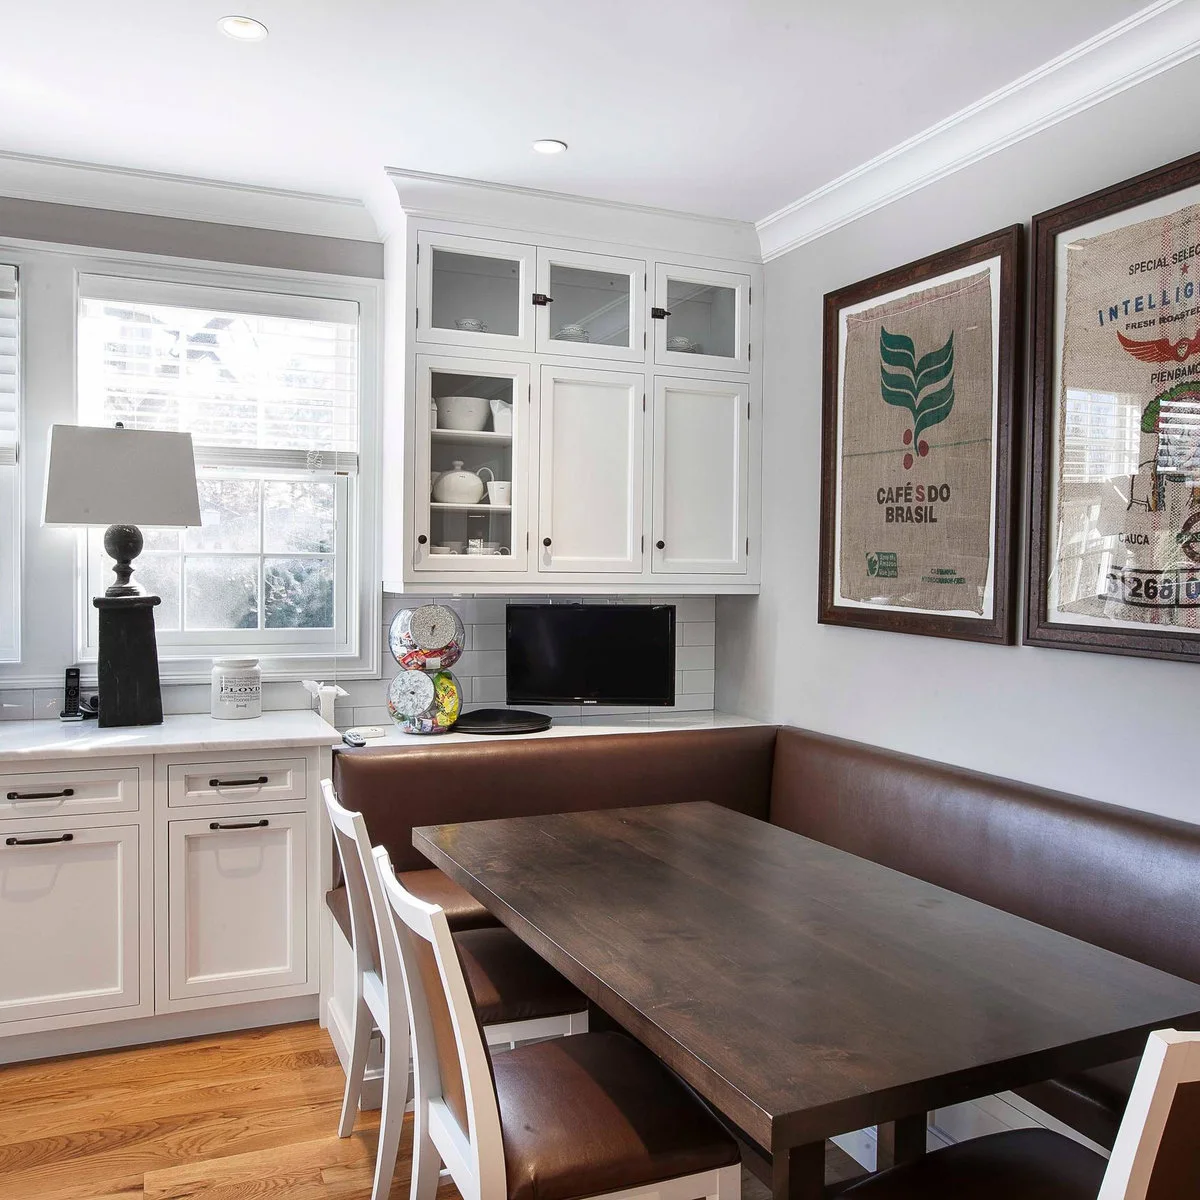
Printed coffee sacks become large pictures above the brown banquette, adding texture to the white kitchen. Dark frames give the fabric clear edges, while the pair relates to the broad table below. The collection sits in the eating corner rather than directly behind the cooker.
Choose fabric with meaning to you rather than buying pieces solely to fill space. Have the mounting method suit the textile, especially if it is fragile. Check reflections on the glazing from the window and nearby lamps so the printed details remain visible when people are seated.
IDEA 08 / 20
Line Up Collected Plates on an Existing Beam
 SaveSupport Non AI Creator
Image credit: Future
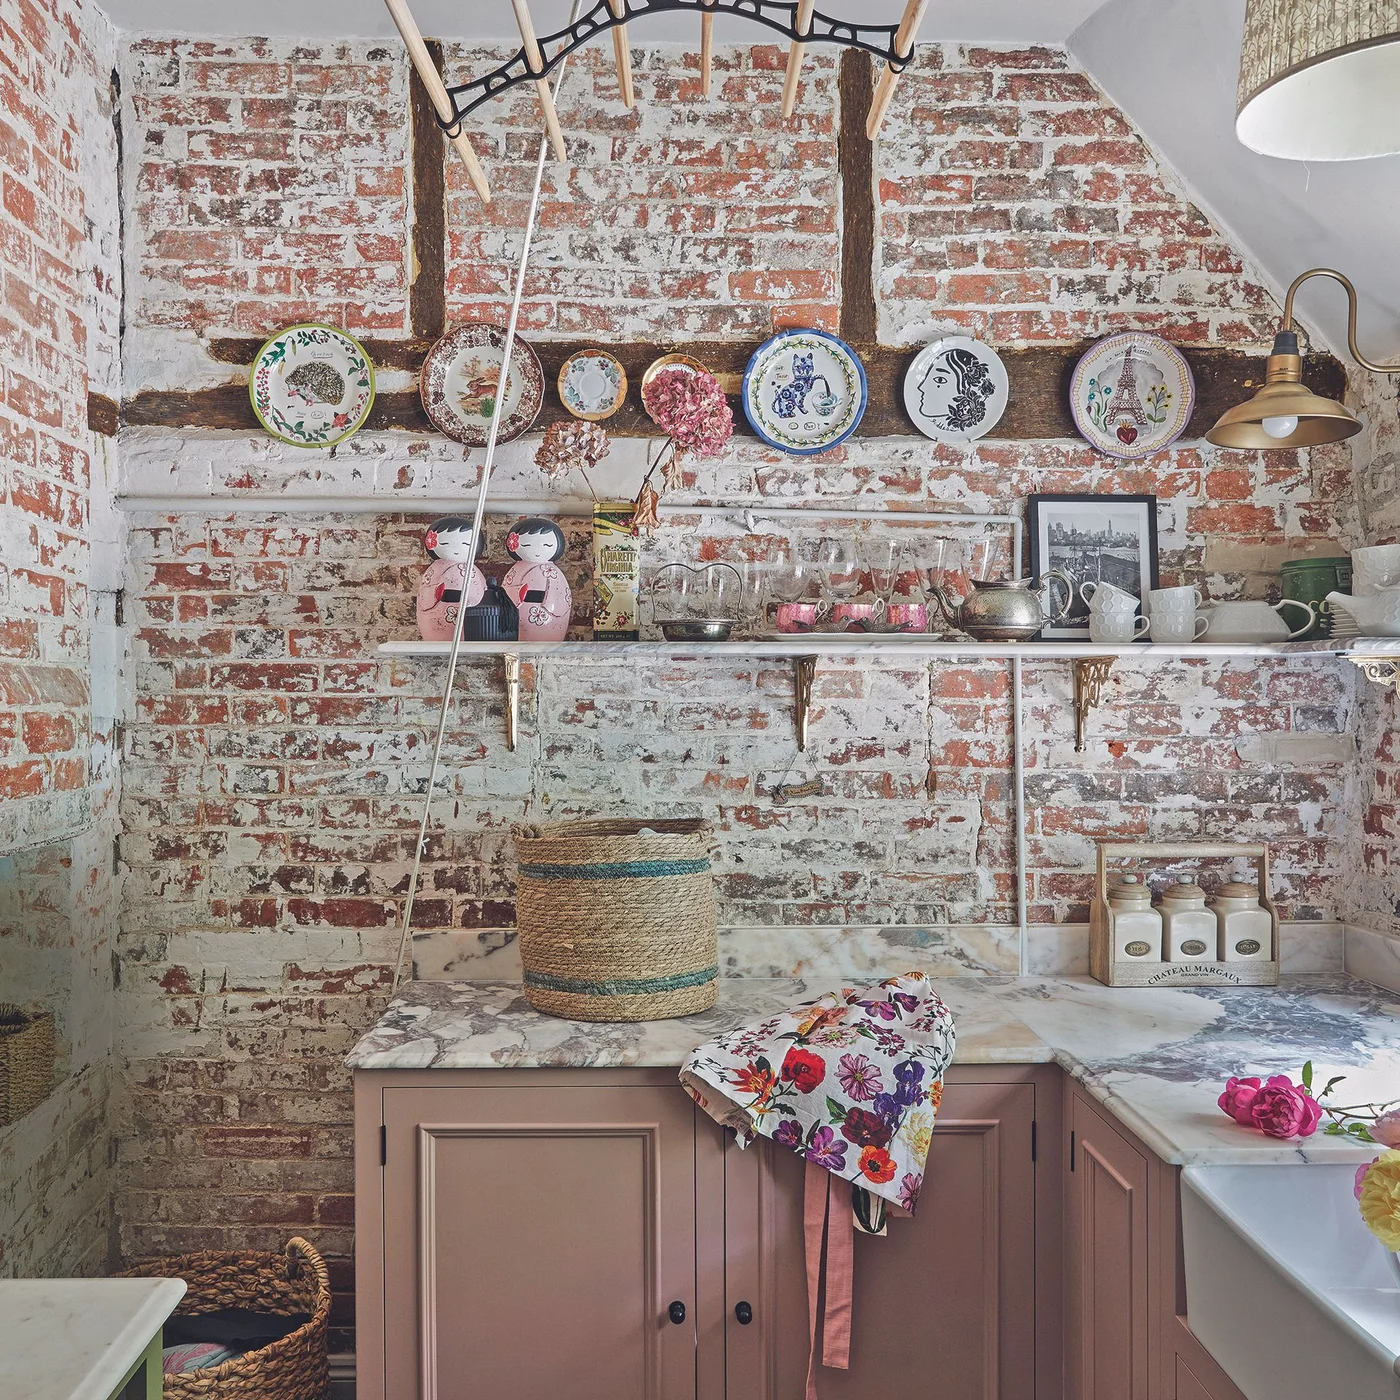
A line of plates follows the existing dark beam across the brick wall, giving differently sized pieces a shared direction. The shelf below carries cups, glasses and a framed picture. Pink cabinets and a floral cloth continue the collected, informal character at counter level.
Start with the wall’s existing lines when planning an irregular collection. Keep each plate securely mounted rather than relying on a shallow ledge. Leave enough access to remove pieces for cleaning, and avoid filling every gap simply because the wall has room for another object.
IDEA 09 / 20
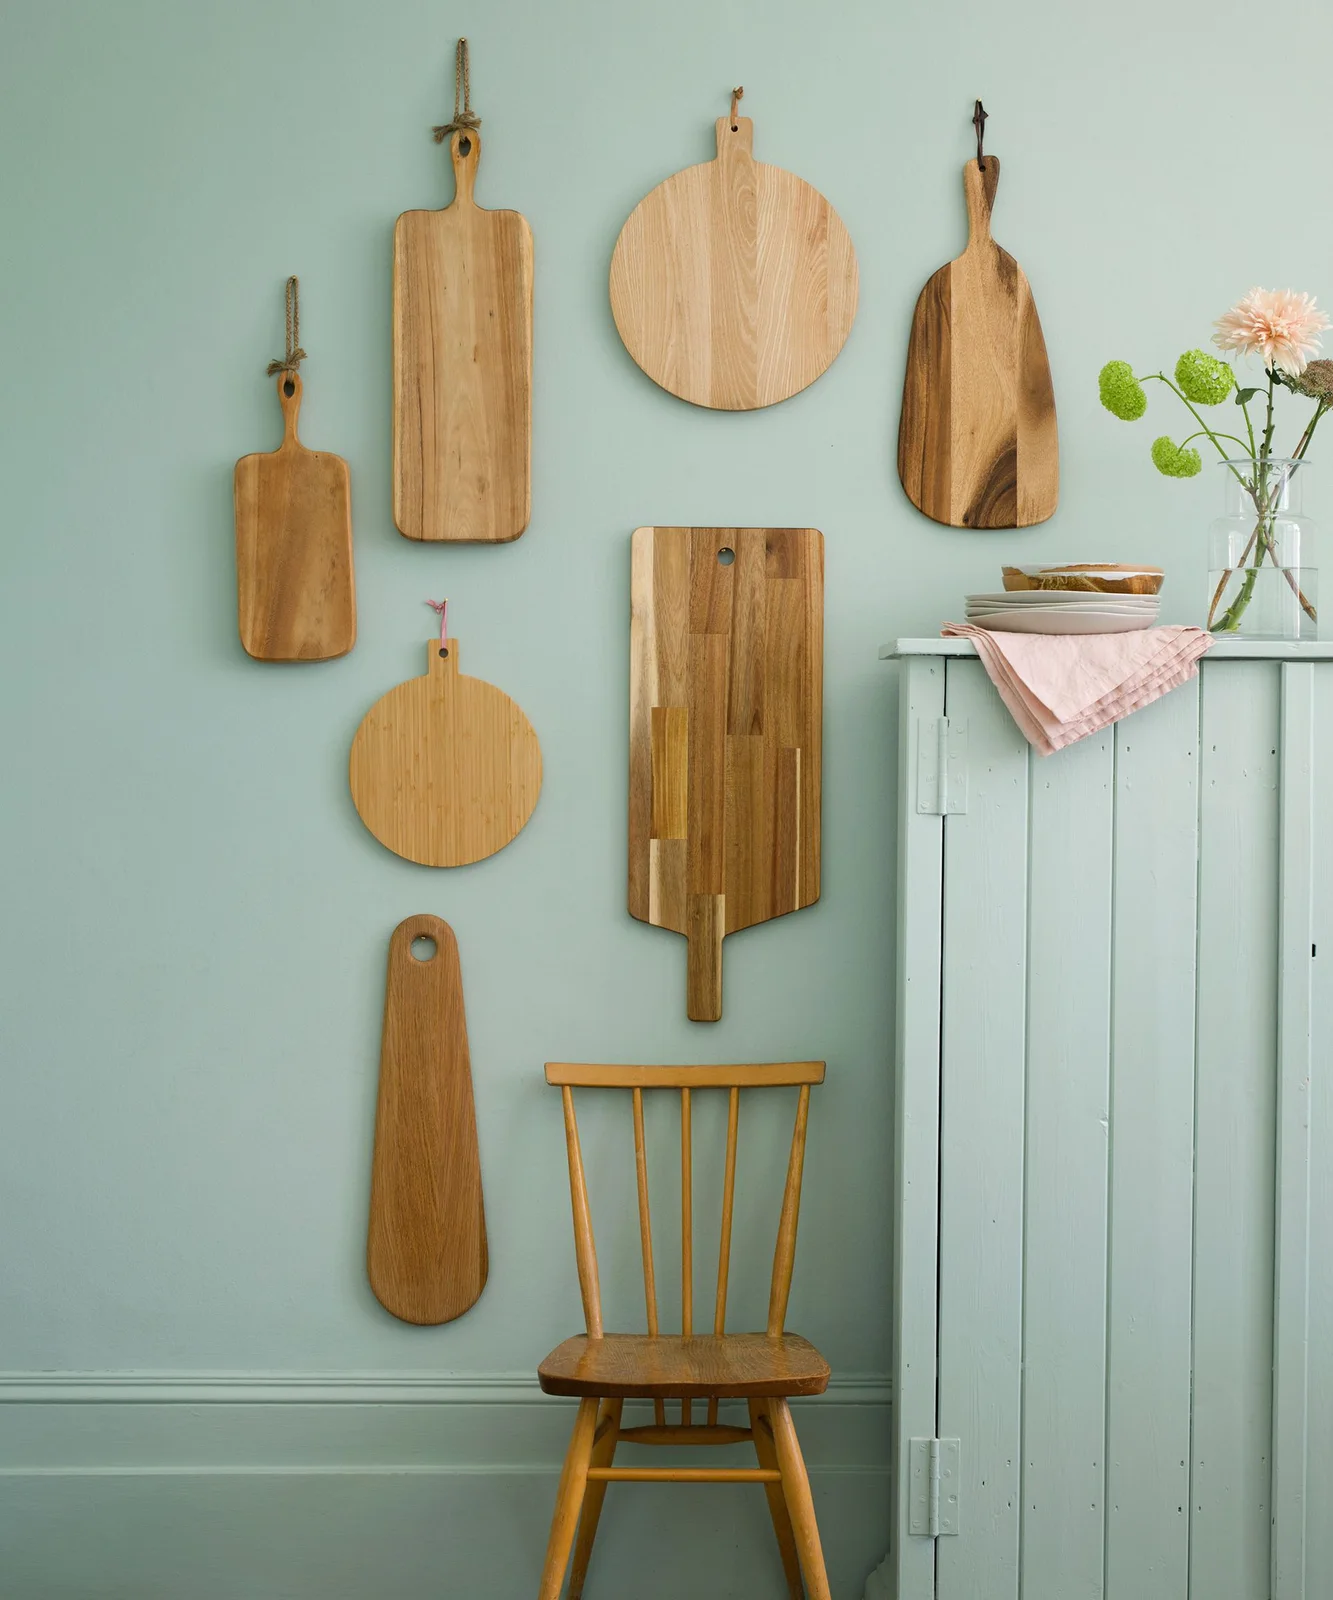
Turn Serving Boards into Wall Shapes
 SaveSupport Non AI Creator
Image credit: Future PLC/Simon Whitmore
Round and rectangular boards form an informal arrangement on the pale green wall, with their different wood tones supplying most of the contrast. Several hang from loops through their handles. The nearby cabinet repeats the wall color, allowing the board shapes to remain distinct.
Hang boards where they will not be knocked by chairs or doors, using fixings that carry their weight. If you use them for food, take them down and clean them properly before use. Keep the display dry; a decorative wall position is not a substitute for suitable board care.
IDEA 10 / 20
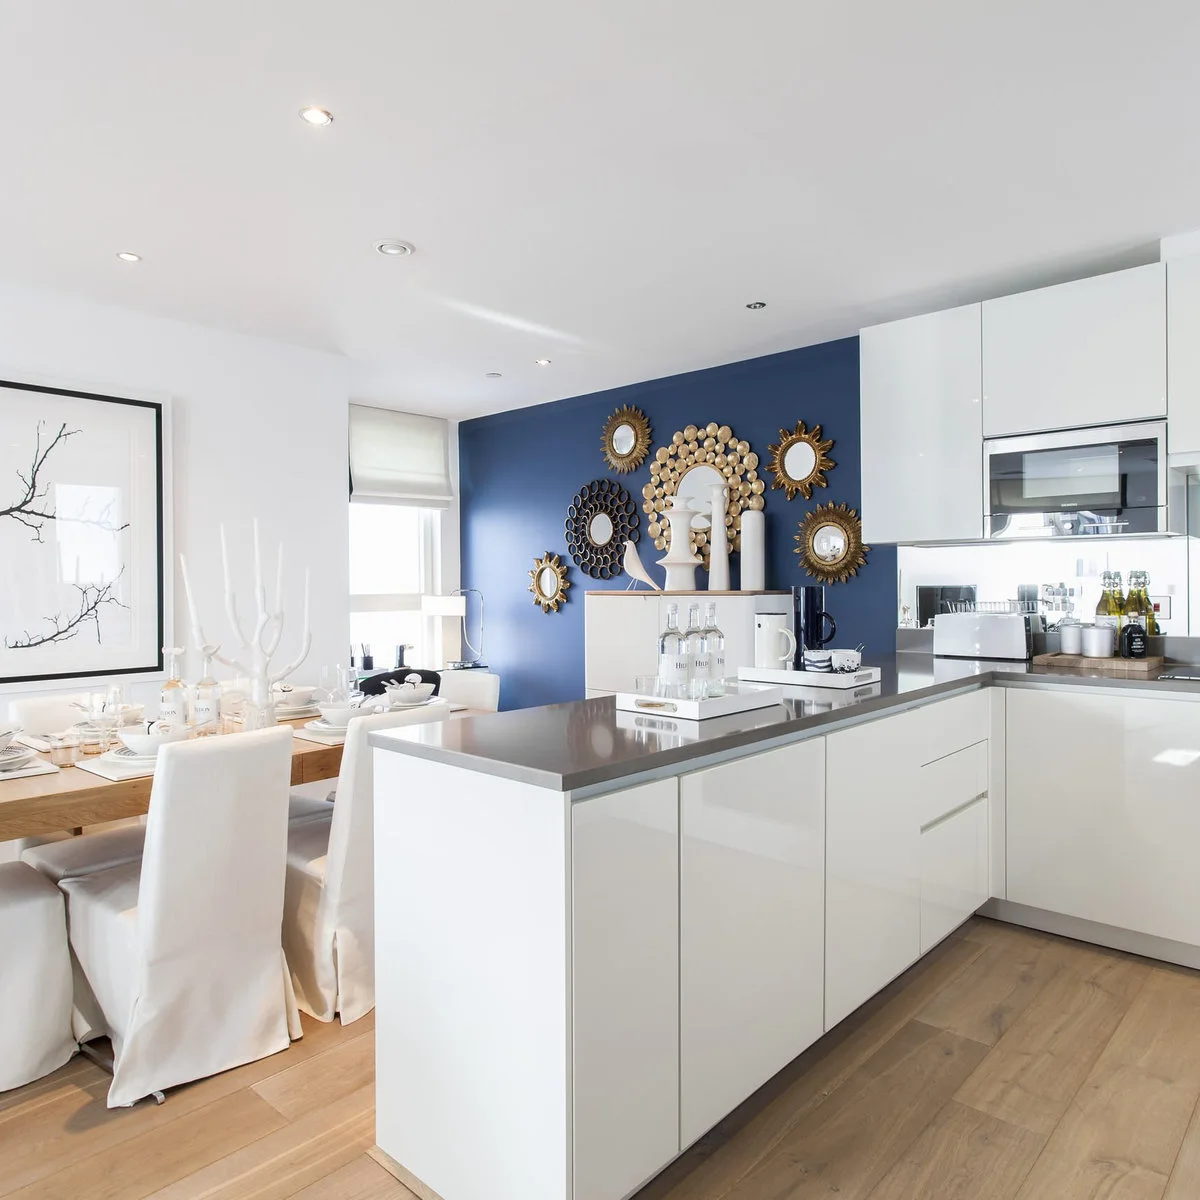
Group Small Mirrors on a Colored Wall
 SaveSupport Non AI Creator
Image credit: Project: Chris Snook (via Houzz)
A group of small mirrors covers the blue wall beside the kitchen, with different circular frames making the arrangement feel collected. White cabinets and a pale counter keep the surrounding area simple. The mirrors add detail without introducing another large printed image into the open room.
Check each reflection from the table and the cooking area before making holes. You may want to reflect daylight or a pleasant view rather than a crowded countertop. Arrange the frames on paper first, and use secure individual fixings rather than treating the group as one lightweight decoration.
PART 03
Make a shelf part of the decoration
IDEA 11 / 20
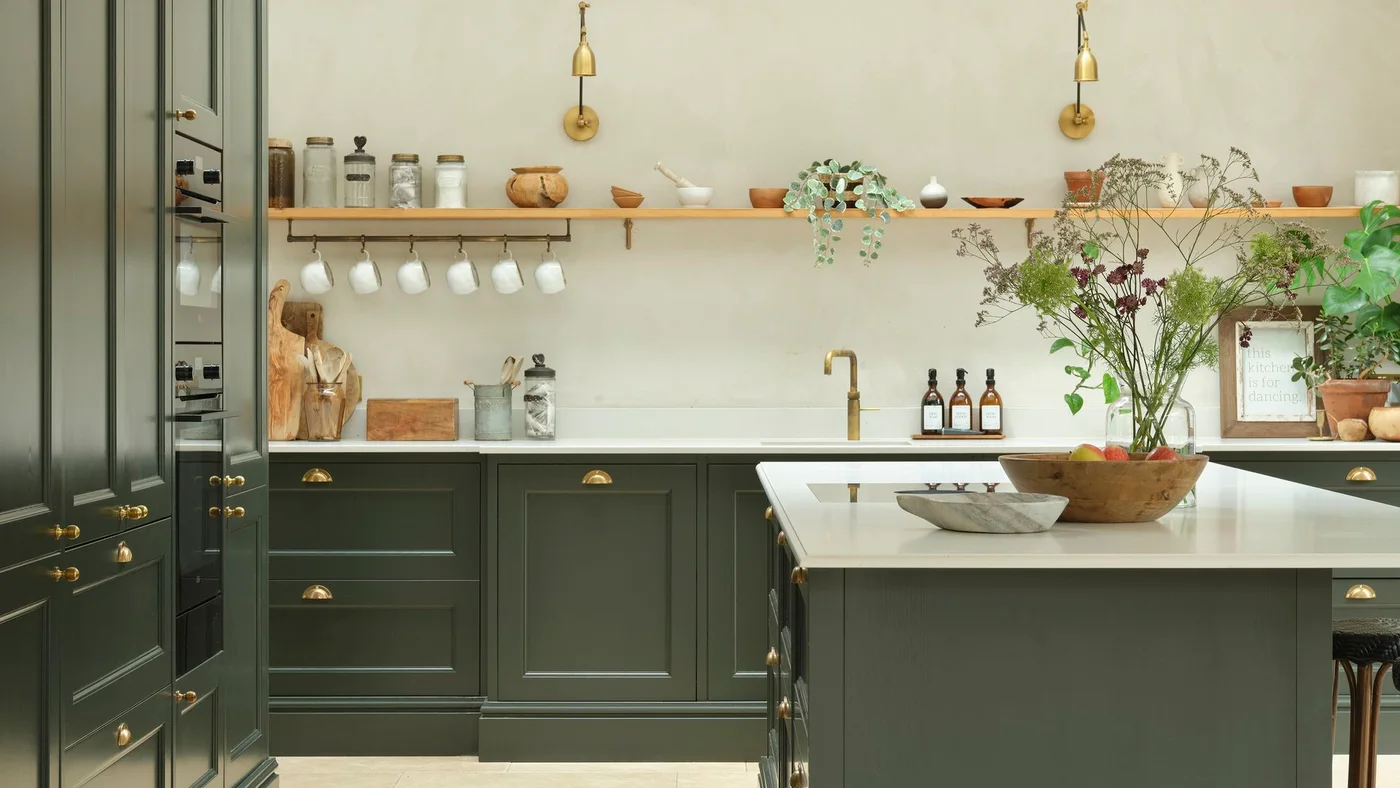
Combine a Display Shelf with a Mug Rail
 SaveSupport Non AI Creator
Image credit: Future PLC/Maxwell Attenborough
A slim wooden shelf stretches across the pale wall, carrying jars, bowls and a little greenery. A rail beneath one section holds matching white mugs, making part of the display useful. Two wall lights mark the long surface without requiring a row of upper cupboards.
Keep frequently used mugs within comfortable reach and check the rail’s load rating before filling it. Leave breaks between shelf groups so each object is easy to remove. For a display that also helps everyday routines, consider these kitchen cabinet organization ideas before moving too much storage into the open.
IDEA 12 / 20
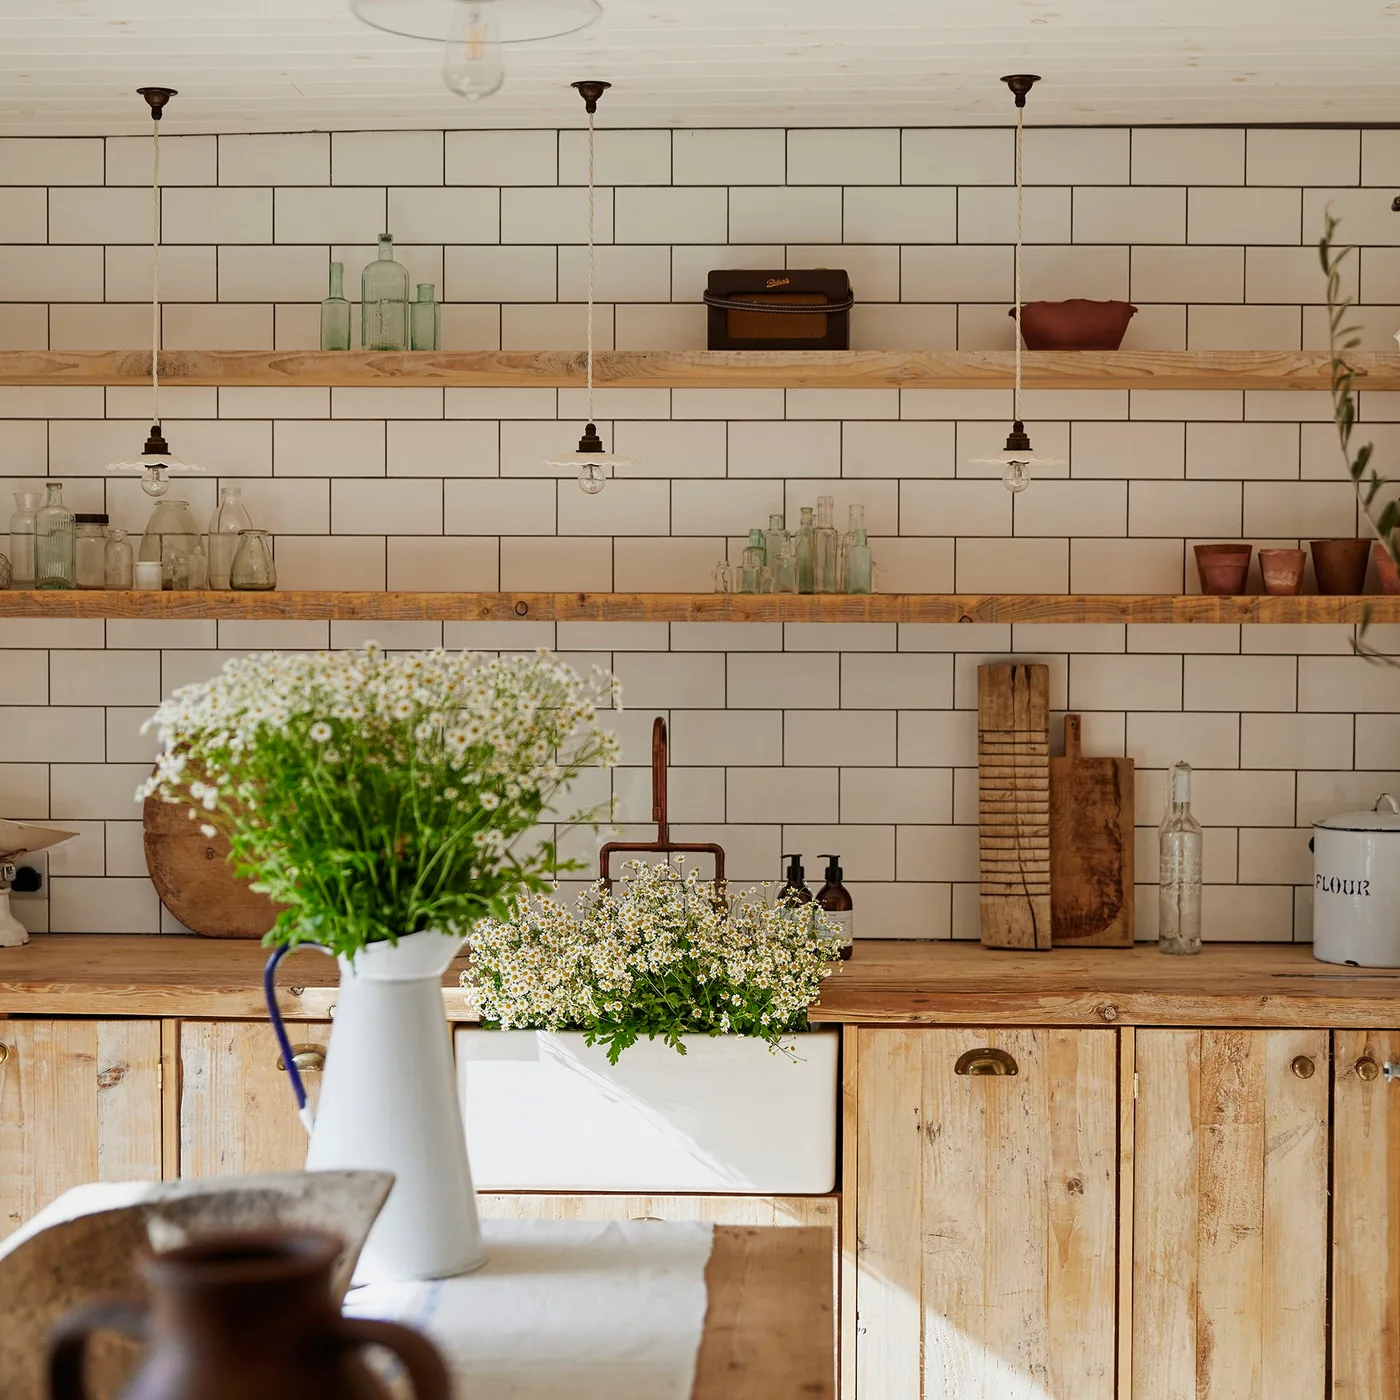
Give Glass Bottles Space on Open Shelves
 SaveSupport Non AI Creator
Image credit: Future/Brent Darby
Pale glass bottles appear in small clusters on two long wooden shelves, with a radio and a bowl providing different silhouettes. White tiles with dark joints create a regular background. The shelves repeat the warmth of the lower wooden cabinets without filling the wall with closed storage.
Keep glass collections small enough that cleaning remains manageable. Test how far the shelf projects over the counter and whether you can safely reach its contents. Open shelves work best for objects that are either used often or worth the extra effort of periodic washing.
IDEA 13 / 20
Set a Landscape on a Picture Shelf
 SaveSupport Non AI Creator
Image credit: Future PLC / Simon Whitmore
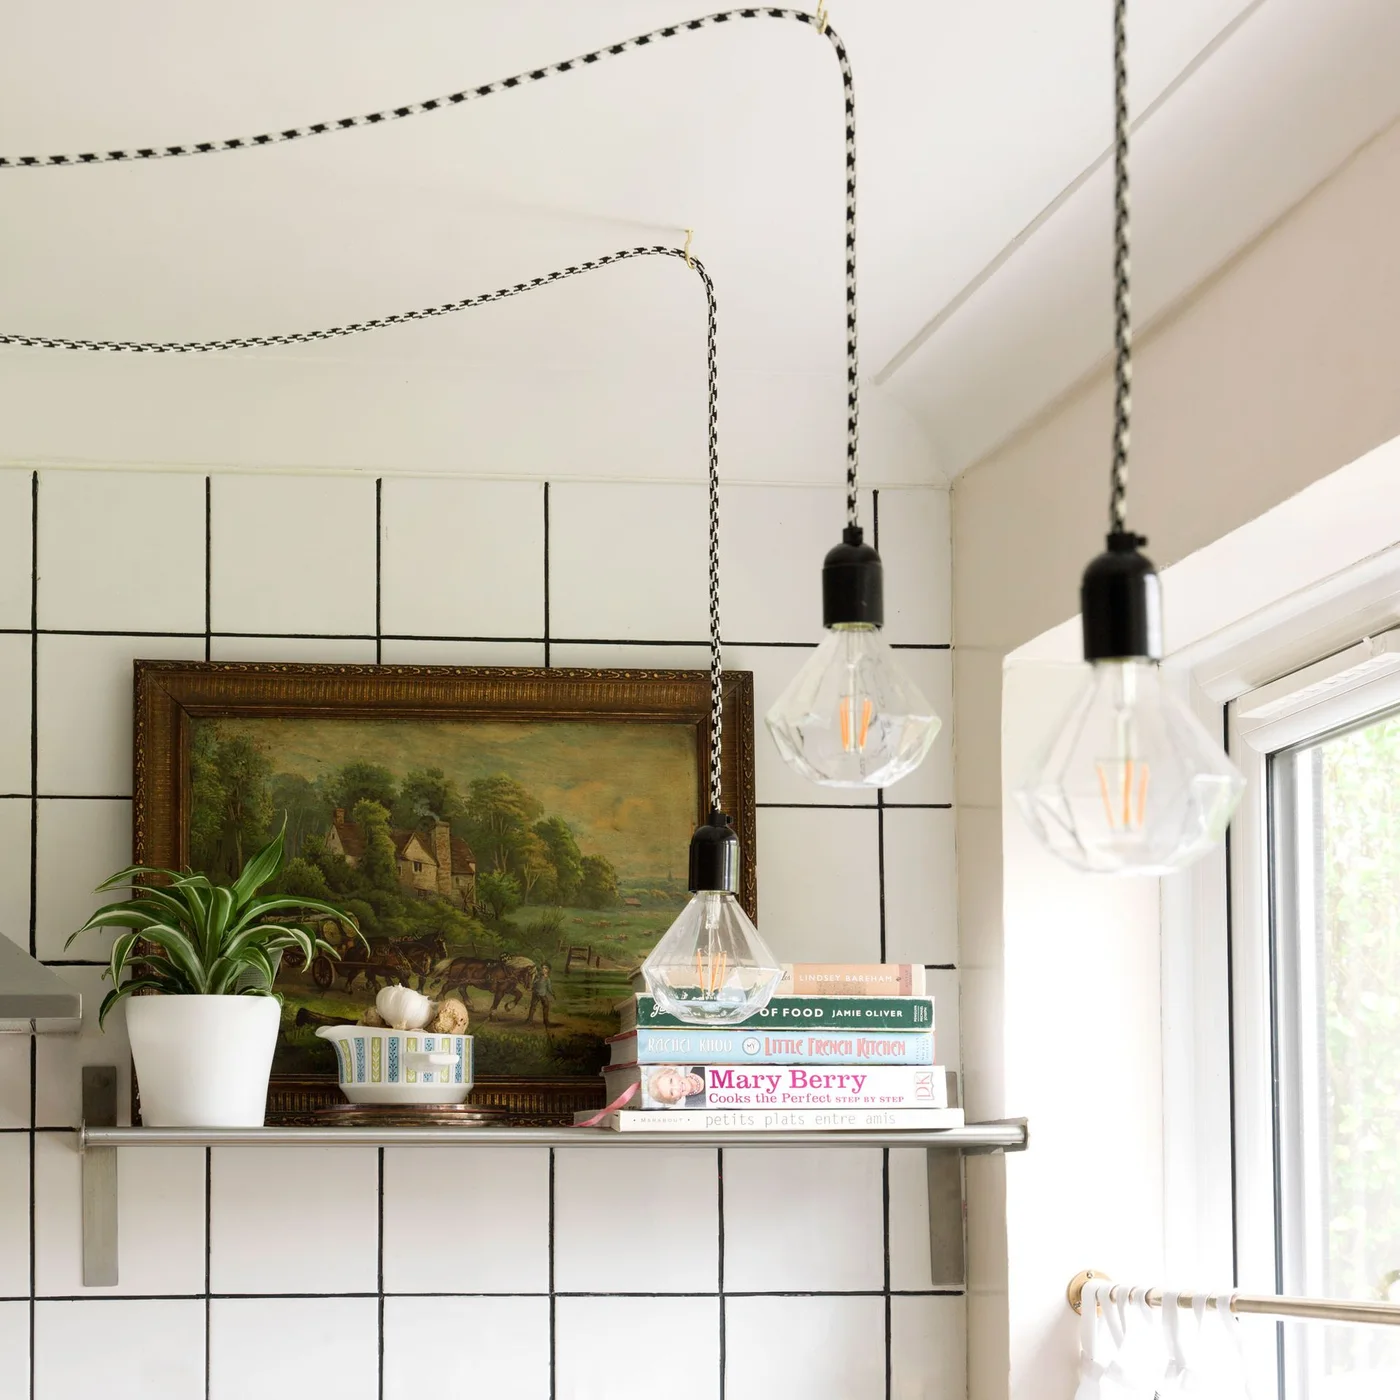
A framed landscape leans on a narrow shelf behind a small plant and a short stack of cookbooks. The white tiled wall gives the dark frame a clear outline. Keeping these objects together makes one decorative corner instead of scattering pictures and books across the working counter.
Use a shelf with an appropriate retaining edge or another secure method to keep the frame from slipping. Position paper and books away from steam, heat and splashes. Leave enough space to take a cookbook down without moving the painting and every other object first.
IDEA 14 / 20
Use Picture Ledges Away from the Cooking Run
 SaveSupport Non AI Creator
Image credit: Future PLC/Davide Lovatti
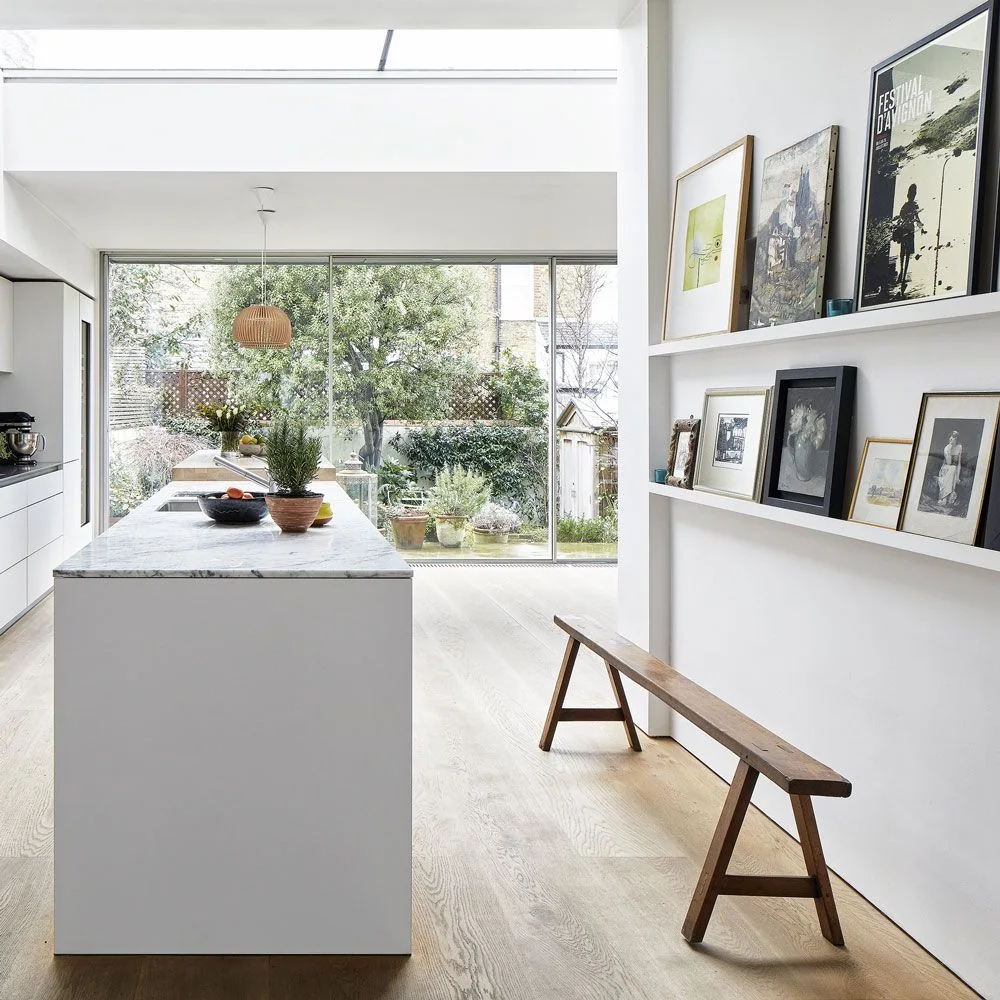
Two picture ledges turn the wall beside the kitchen island into a flexible display. Large frames occupy the upper row while smaller pictures overlap below. A narrow wooden bench sits underneath, keeping the arrangement separate from the countertop where food is being prepared.
Check the ledges’ depth and load limits, particularly when frames overlap. Secure pieces that could topple above a seat, and leave enough headroom for someone sitting on the bench. A restrained group is easier to change and dust than a shelf packed edge to edge.
IDEA 15 / 20
Make Everyday Cups Supply the Color
 SaveSupport Non AI Creator
Image credit: Project: Camilla Molders Design (via Houzz)
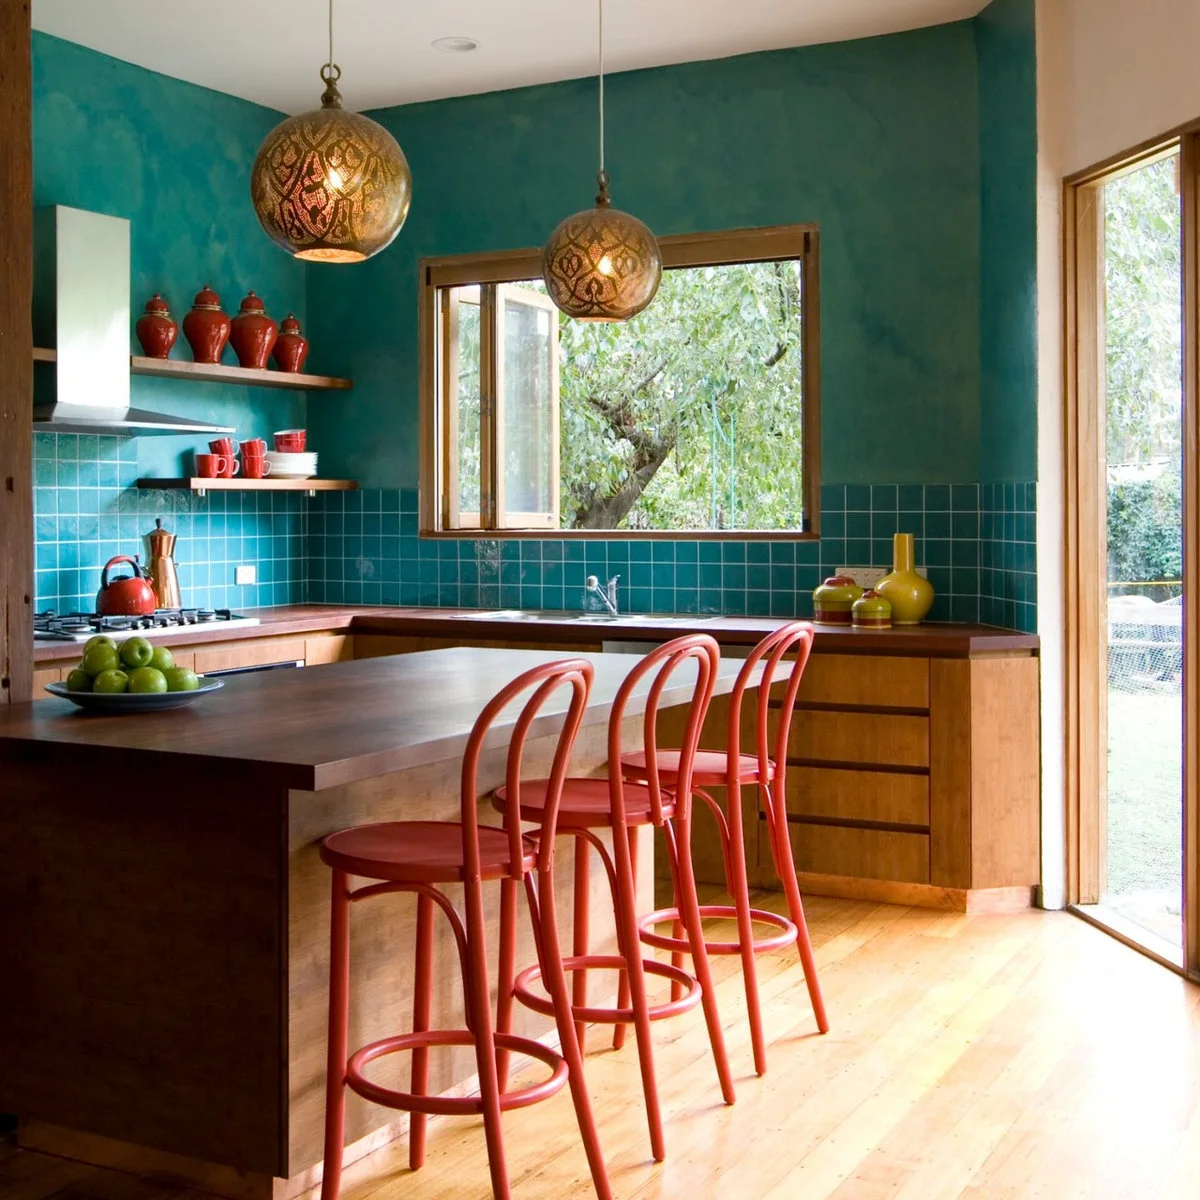
Red cups and lidded vessels stand out on two wooden shelves against the blue-green wall. Their color repeats the red stools and kettle, bringing the upper and lower parts of the room together. The open shelves occupy a small section beside the hood rather than the entire wall.
Choose objects you can reach and clean easily, and keep them clear of the appliance’s required ventilation and heat clearances. A repeated color can unite assorted shapes without requiring a matching set. Leave enough shelf space around handles so taking down one cup does not disturb its neighbors.
PART 04
Finish the corners people use
IDEA 16 / 20
Put the Weekly Menu on a Paper Roll
 SaveSupport Non AI Creator
Image credit: Future PLC/Joanna Henderson
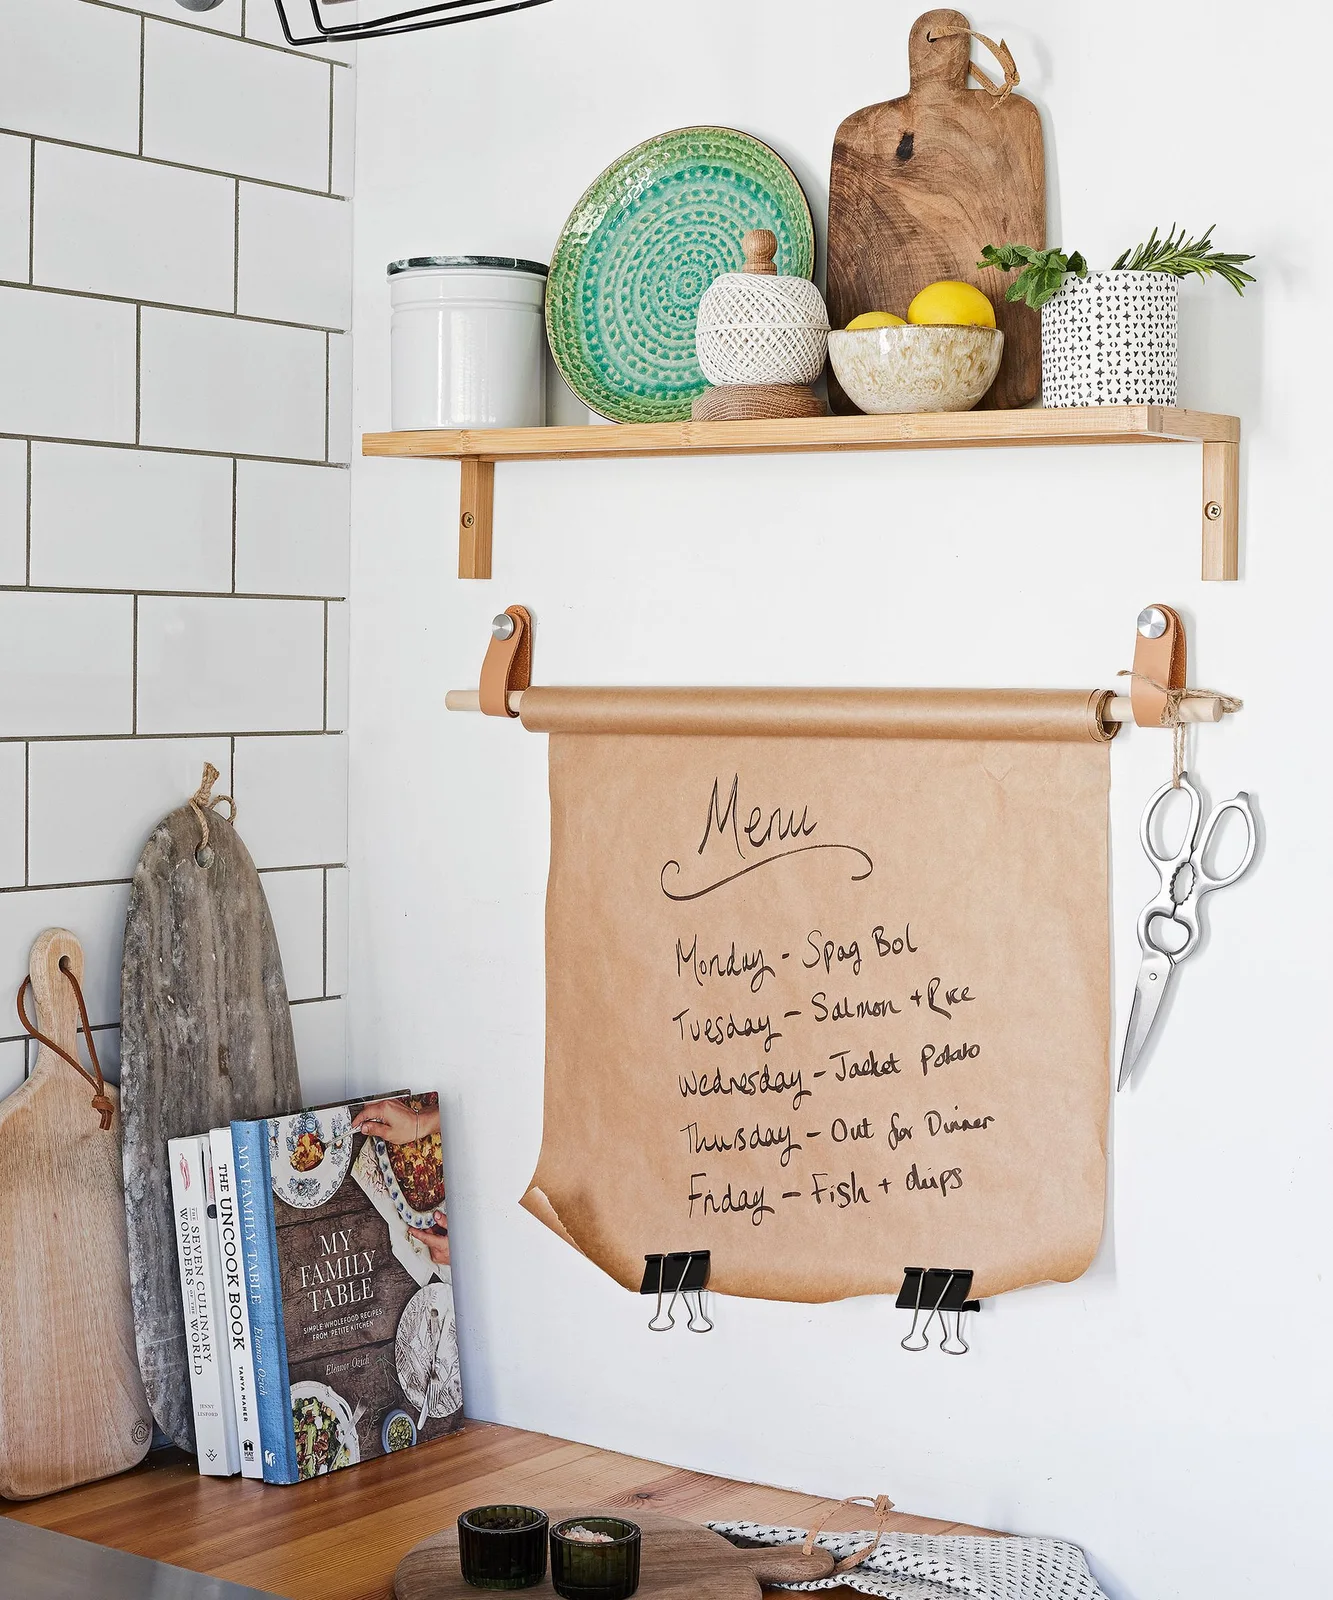
A roll of brown paper provides a changing menu below a small shelf of useful and decorative objects. Clips weigh down its lower edge, while the handwritten list gives the wall a daily purpose. The shelf’s green plate and wooden board keep the practical corner from feeling stark.
Mount the roll where you can write comfortably without leaning over hot appliances or a wet sink. Keep pens nearby and use a simple replacement routine so old lists do not accumulate. A narrow shelf above can hold a few pieces, but avoid placing fragile items where writing will knock them.
IDEA 17 / 20
Make a Kitchen Sitting Corner Feel Intentional
 SaveSupport Non AI Creator
Image credit: Future
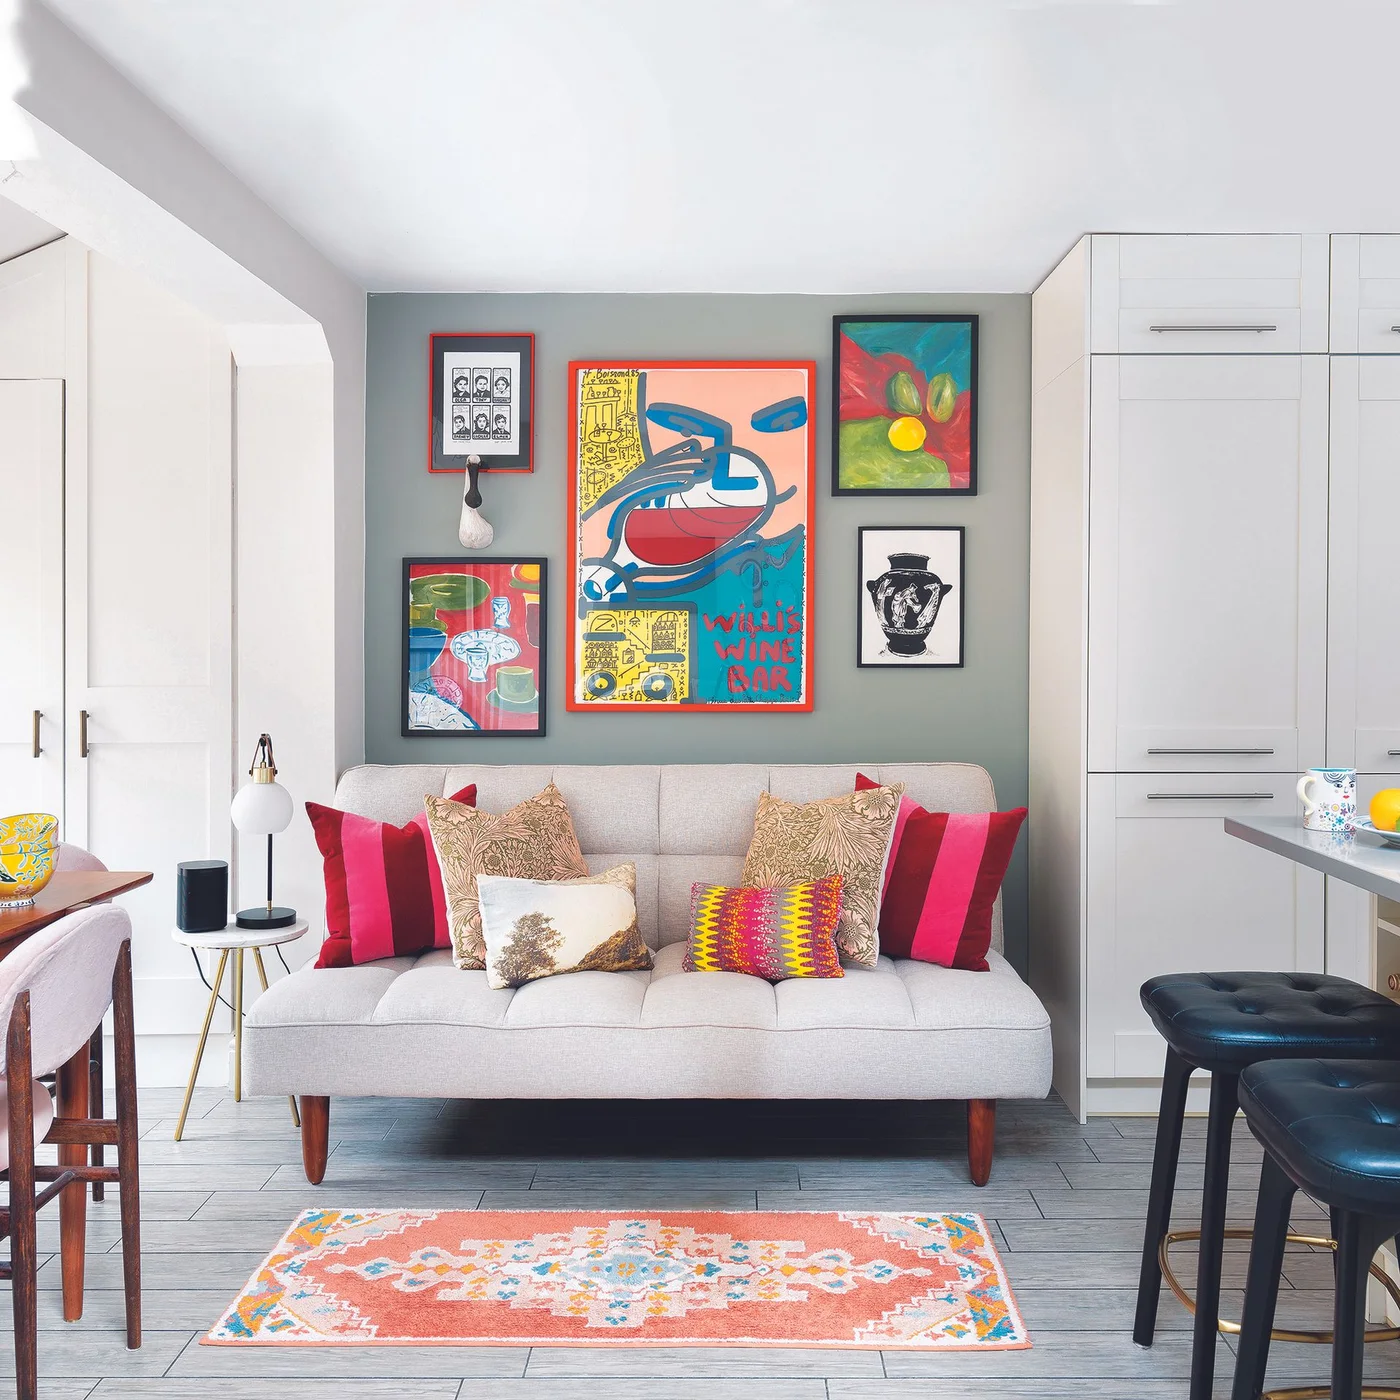
A colorful group of pictures sits above a compact sofa within the kitchen’s open layout. One larger poster anchors the arrangement, with smaller frames around it. Red cushions repeat colors in the artwork, connecting the sitting corner with the more practical white storage and island beside it.
Treat the group as one composition centered on the sofa rather than on the entire wall. Leave enough clearance for the adjacent cupboards to open. A kitchen sitting area needs a clear route past it, so keep frames and furniture from projecting into the path between storage and the island.
IDEA 18 / 20
Hang One Round Mirror Above a Breakfast Seat
 SaveSupport Non AI Creator
Image credit: Future PLC
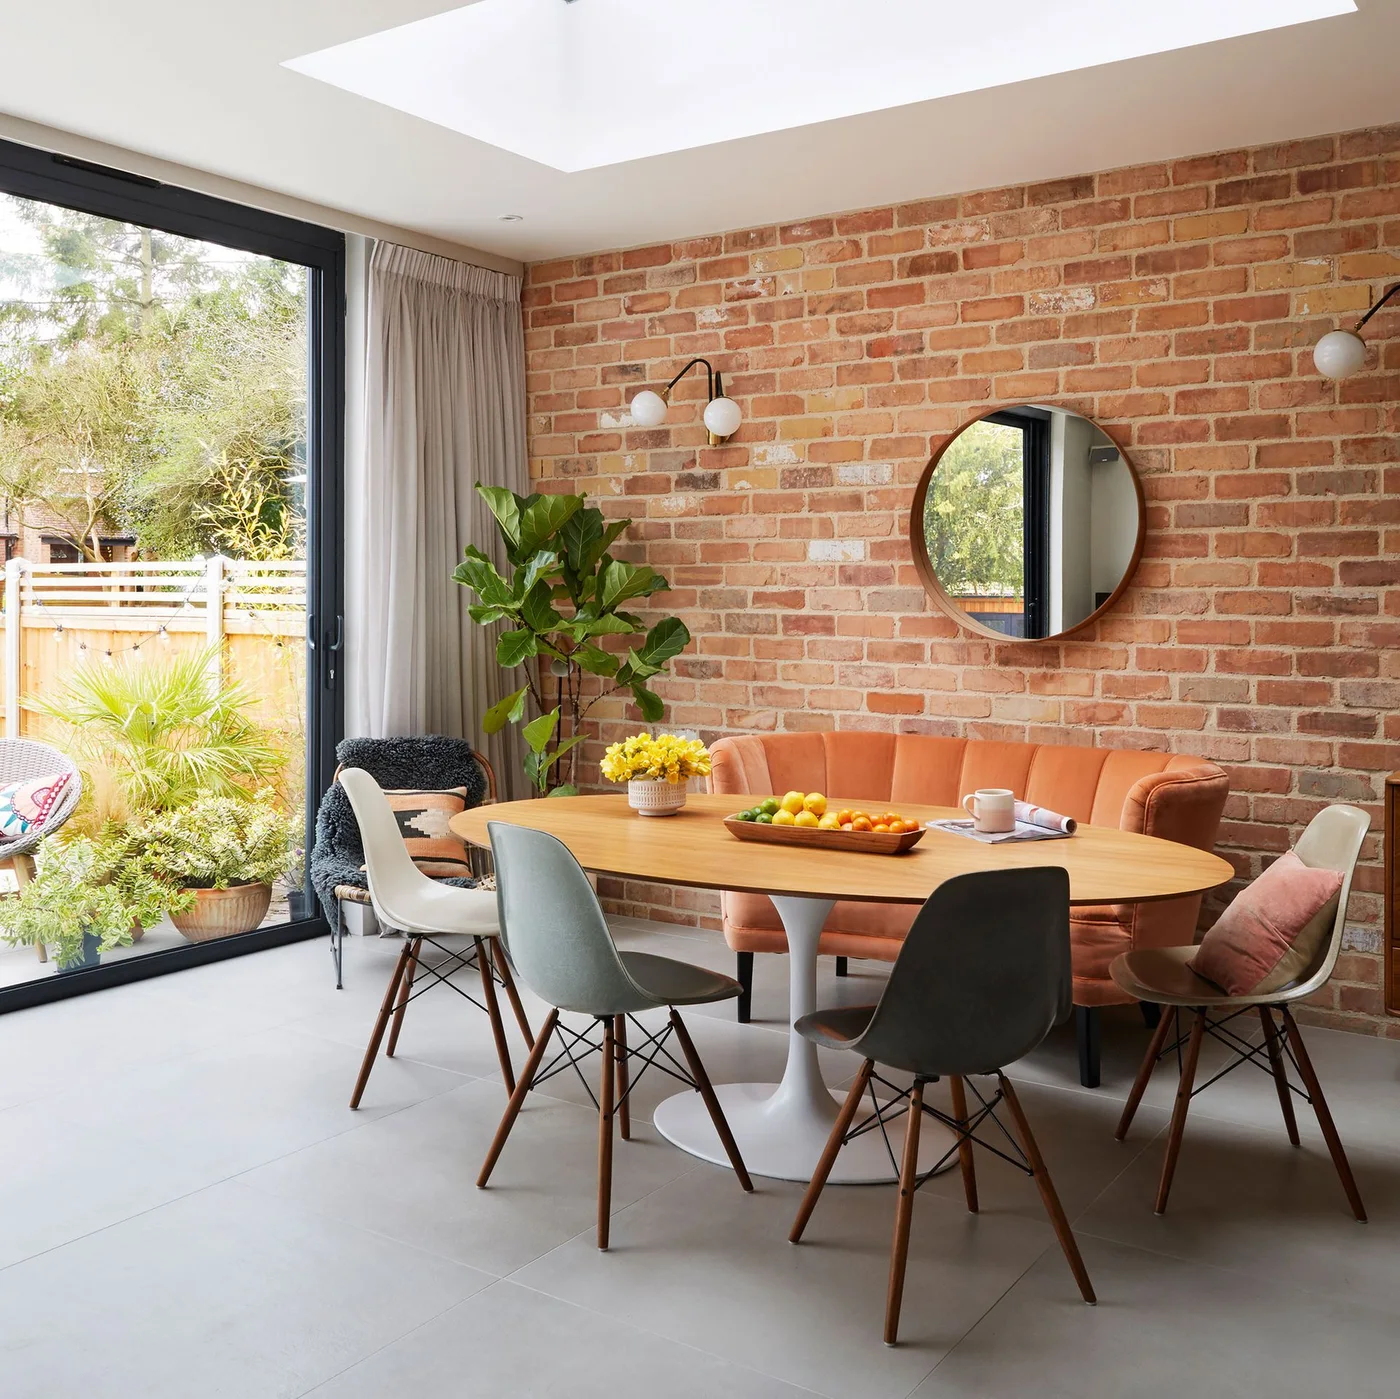
A round mirror breaks up the straight brick courses above the orange breakfast seat. Its warm frame relates to the upholstery and wooden table, while globe wall lights provide smaller circles nearby. The display remains simple, leaving the brick itself visible around the furniture.
Check the mirror’s position while seated as well as standing, and keep its lower edge clear of moving heads. Use fixings appropriate for the wall construction and the mirror’s weight. A single large shape can be easier to maintain here than a dense gallery of small frames.
IDEA 19 / 20
Fit a Small Picture Between Windows
 SaveSupport Non AI Creator
Image credit: Project: Stephen Graver (via Houzz)
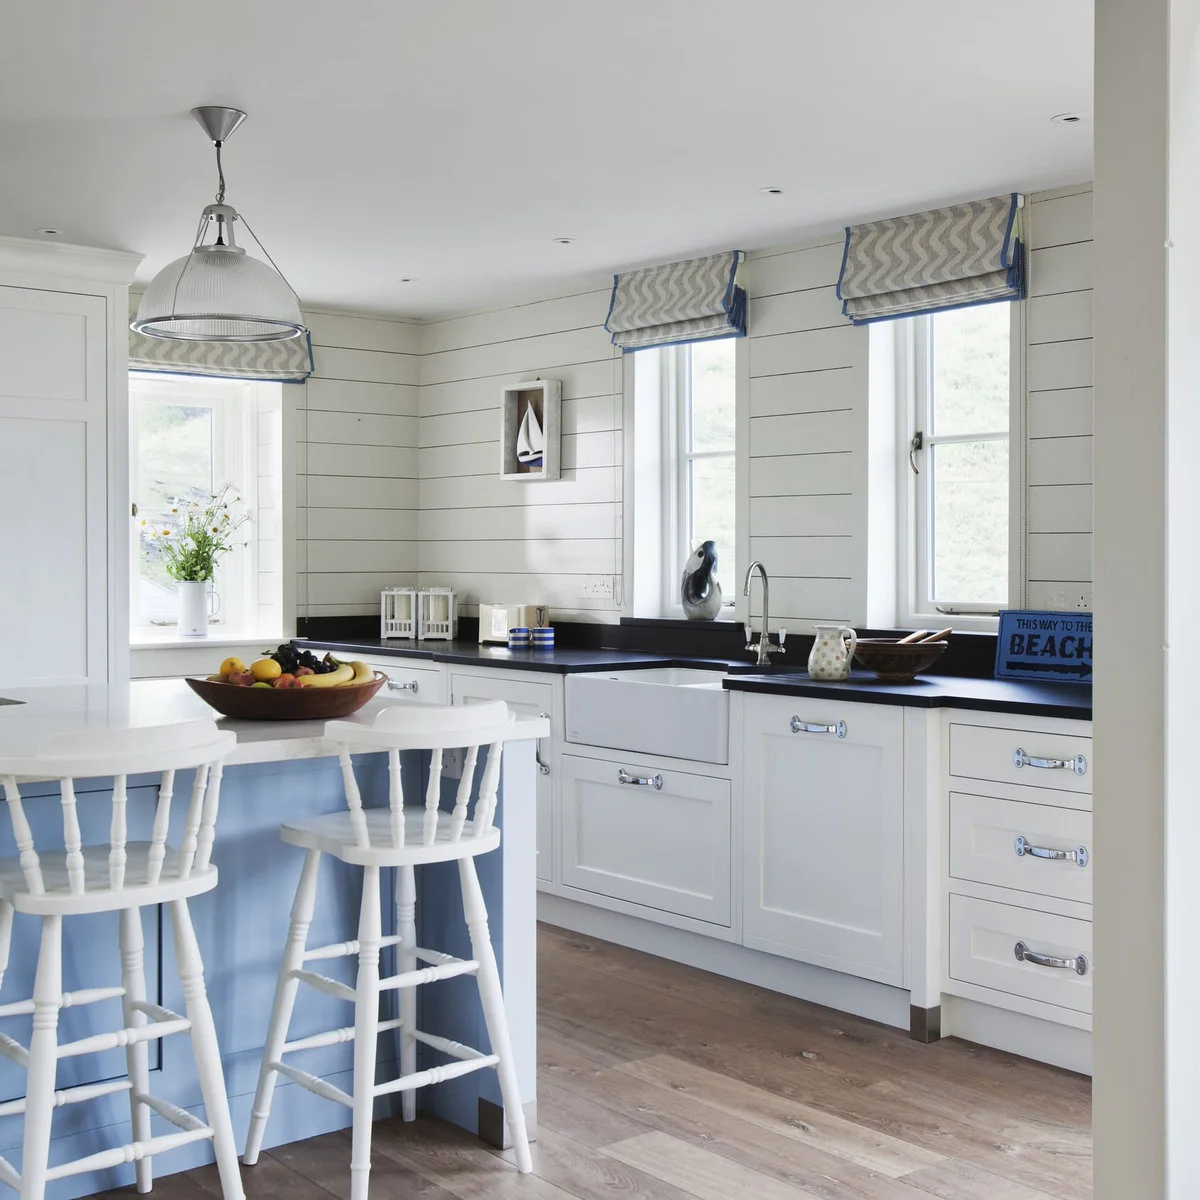
A small sailboat picture fills a section of boarded wall between the windows. The frame stays compact enough to leave the horizontal boards visible. Blue-edged blinds and white cabinetry support the coastal theme, while the countertop objects remain mostly below the window line.
Match the picture to the available gap rather than buying a larger frame that crowds the trim. Check where blinds, curtain fittings and window handles move. A small piece works best when it has a clear outline and enough surrounding wall to be read from across the kitchen.
IDEA 20 / 20
Make a Chalkboard Wall Part of an Eating Nook
 SaveSupport Non AI Creator
Image credit: Project: Crown Point Cabinetry (via Houzz)
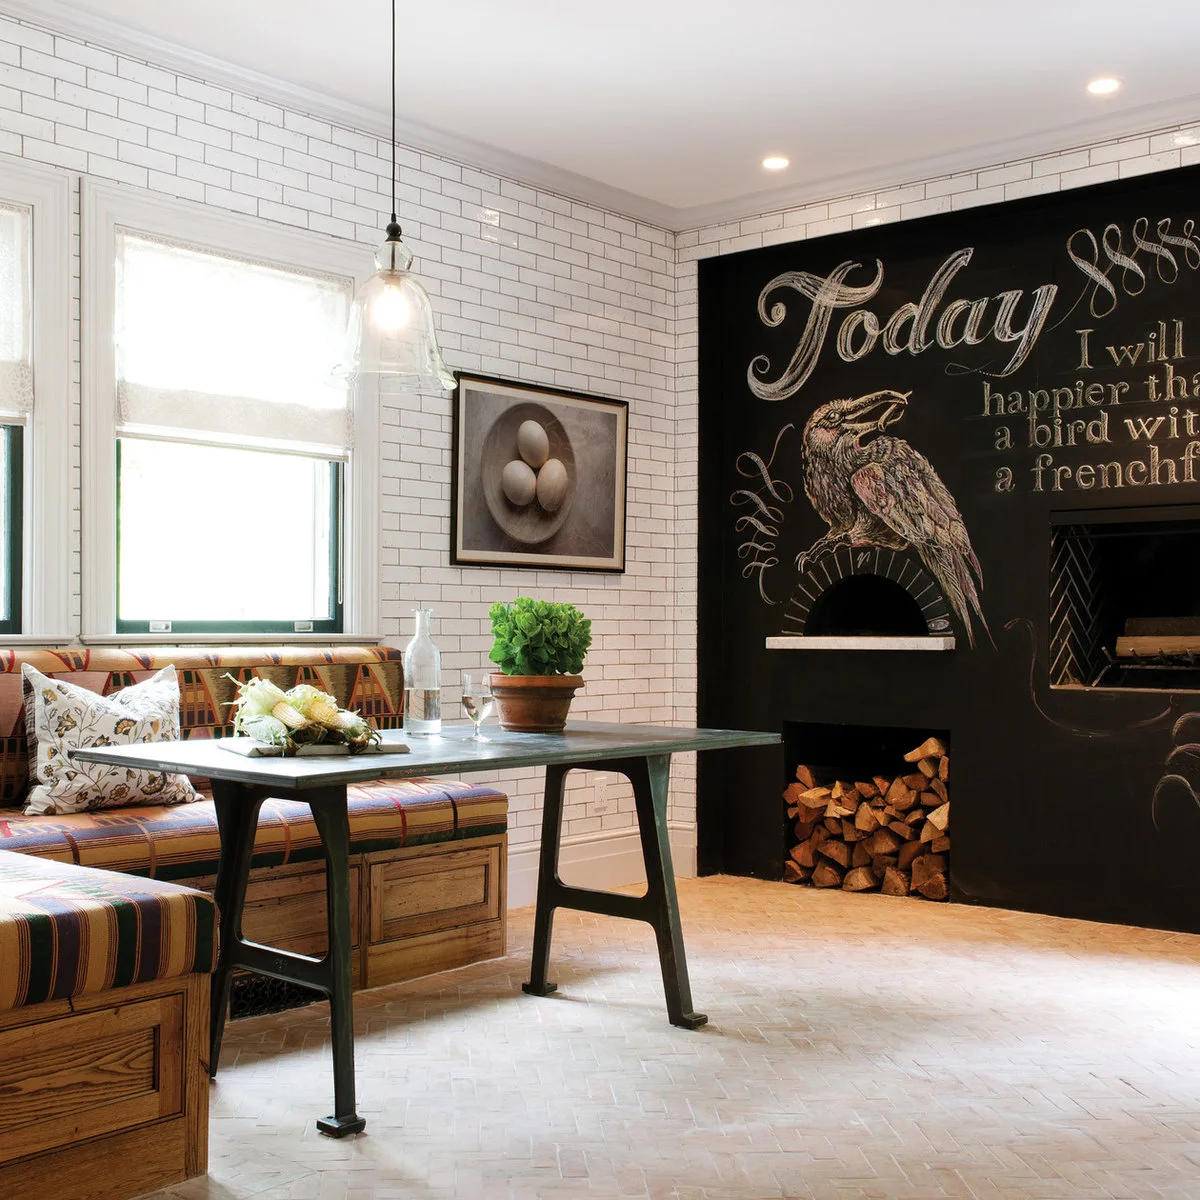
A large chalkboard surface carries lettering and a bird drawing beside the banquette, giving the eating nook a changeable focal point. White tiles keep the adjacent wall brighter. A single framed picture above the seat adds a quieter image at a smaller scale.
Keep chalk and an eraser near the eating area, away from open food preparation. Choose a surface and cleaning method suited to regular use, and expect fine residue when rewriting. Around any oven opening, follow the appliance and finish requirements rather than copying decorative details from a photograph.
BRING IT ALL TOGETHER
Choose a wall you can enjoy and maintain
A useful kitchen display fits around cooking, cupboard doors and cleaning. Keep your most fragile pieces in the eating area, and let practical shelves or a small picture bring character to the working part of the room.
Start with one arrangement and live with it before adding more. If you need to move several objects every time you cook or wipe the counter, simplify the display until the room works comfortably again.