A useful coffee bar keeps the making, serving and clearing-up close together. Your machine needs room to refill, cups need a reachable place and the counter needs an empty spot for the drink you are preparing.
These photographed setups range from a small chest to fitted cupboards. Choose a scale that fits your routine and use the decorative details sparingly enough that cleaning up coffee grounds stays simple.
PART 01
Start with a Small Coffee Spot
IDEA 01 / 20
Start with a Sideboard and a Grinder
 SaveSupport Non AI Creator
Image credit: Project: Sarah Greenman (via Houzz)
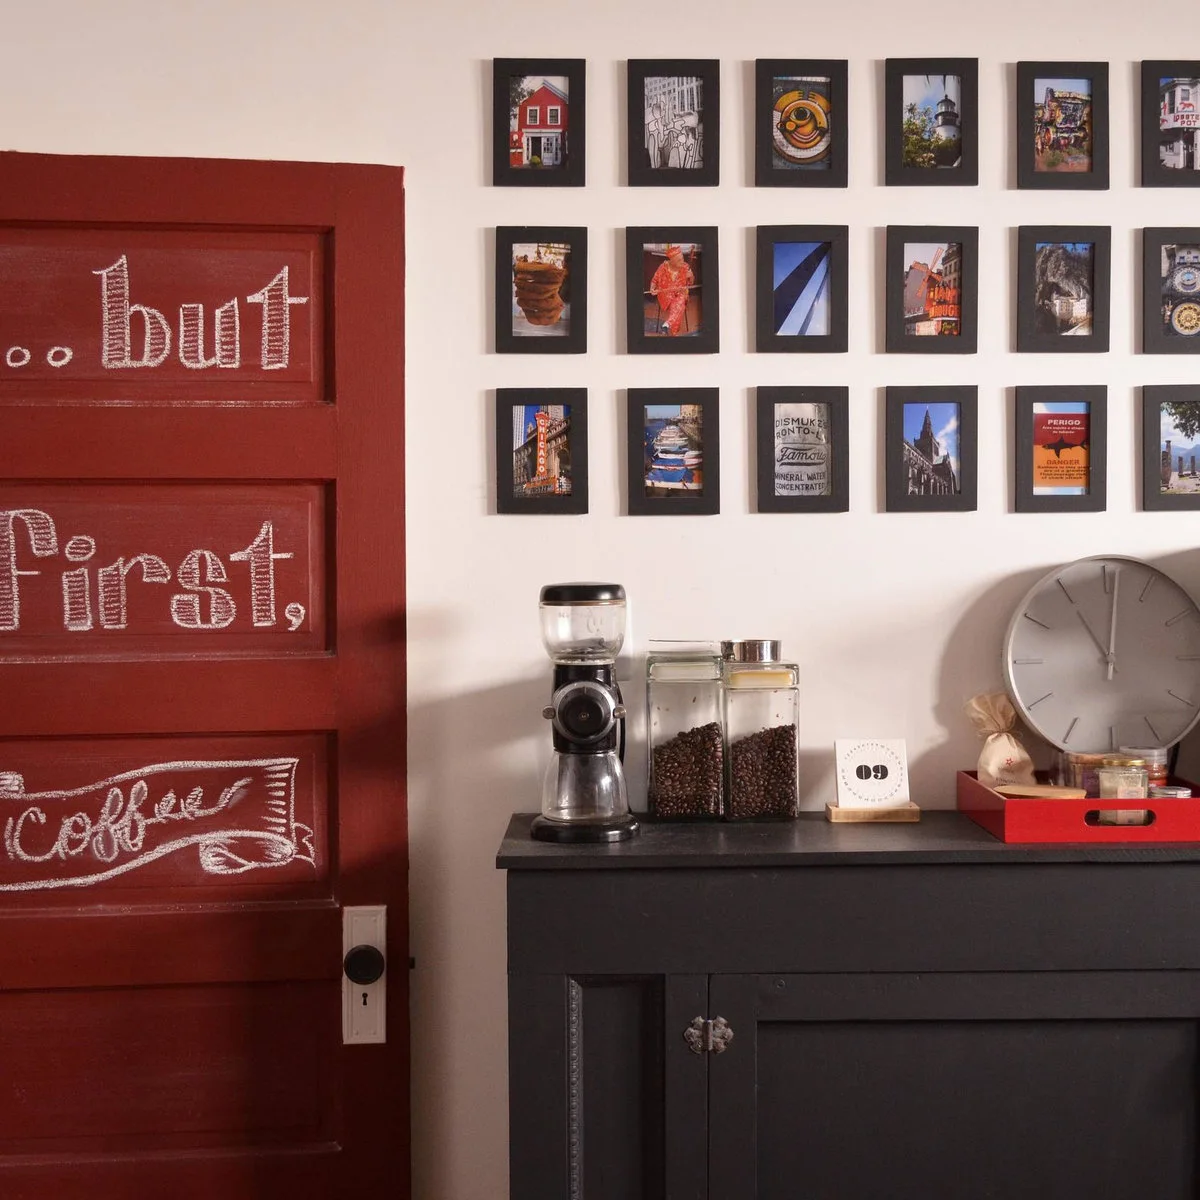
A grinder and clear bean jars turn the top of this dark sideboard into a coffee preparation spot. A red tray groups smaller items at one end, leaving a stretch of surface between them. The grid of small framed pictures gives the corner personality without occupying the working area.
Make sure furniture used for coffee can tolerate spills and vibration. Put a protective mat beneath equipment if the finish needs it, leaving cords clear of drawer fronts. Keep only a modest amount of beans out for daily use and follow their storage instructions rather than leaving a large supply in bright light. If refreshments are moving downstairs, these basement bar ideas compare compact cabinet runs with larger serving counters and cleanup areas.
IDEA 02 / 20
Use a Small Chest for a Coffee Corner
 SaveSupport Non AI Creator
Image credit: Project: Advance Design Studio, Ltd. (via Houzz)
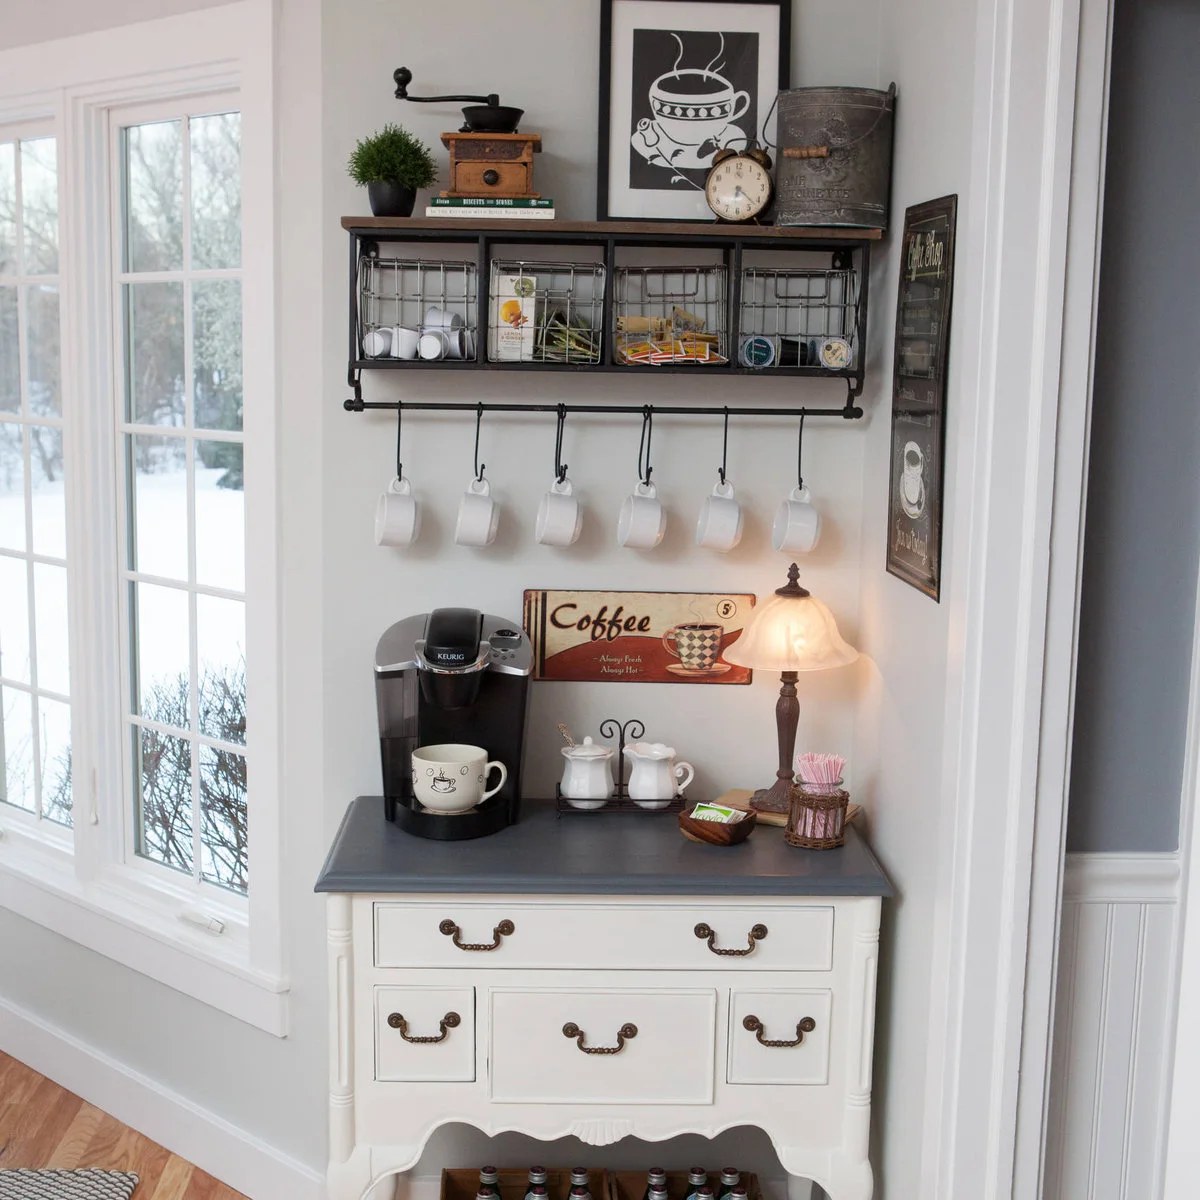
A small white chest carries a coffee maker and serving supplies beneath a wall rack. Wire baskets gather packets above, while mugs hang from the rail below them. The compact arrangement creates a distinct coffee corner without needing a long run of fitted kitchen cabinetry.
Check that the chest is stable, secured where needed and comfortable to work at. Keep a clear place for a cup beside the machine before adding signs or decorative pieces. Mount loaded mug rails properly and leave enough clearance that hanging cups cannot be knocked while refilling the reservoir.
IDEA 03 / 20
Use a Narrow Gap for Morning Drinks
 SaveSupport Non AI Creator
Image credit: Project: All Wood Kitchens & Closets (via Houzz)
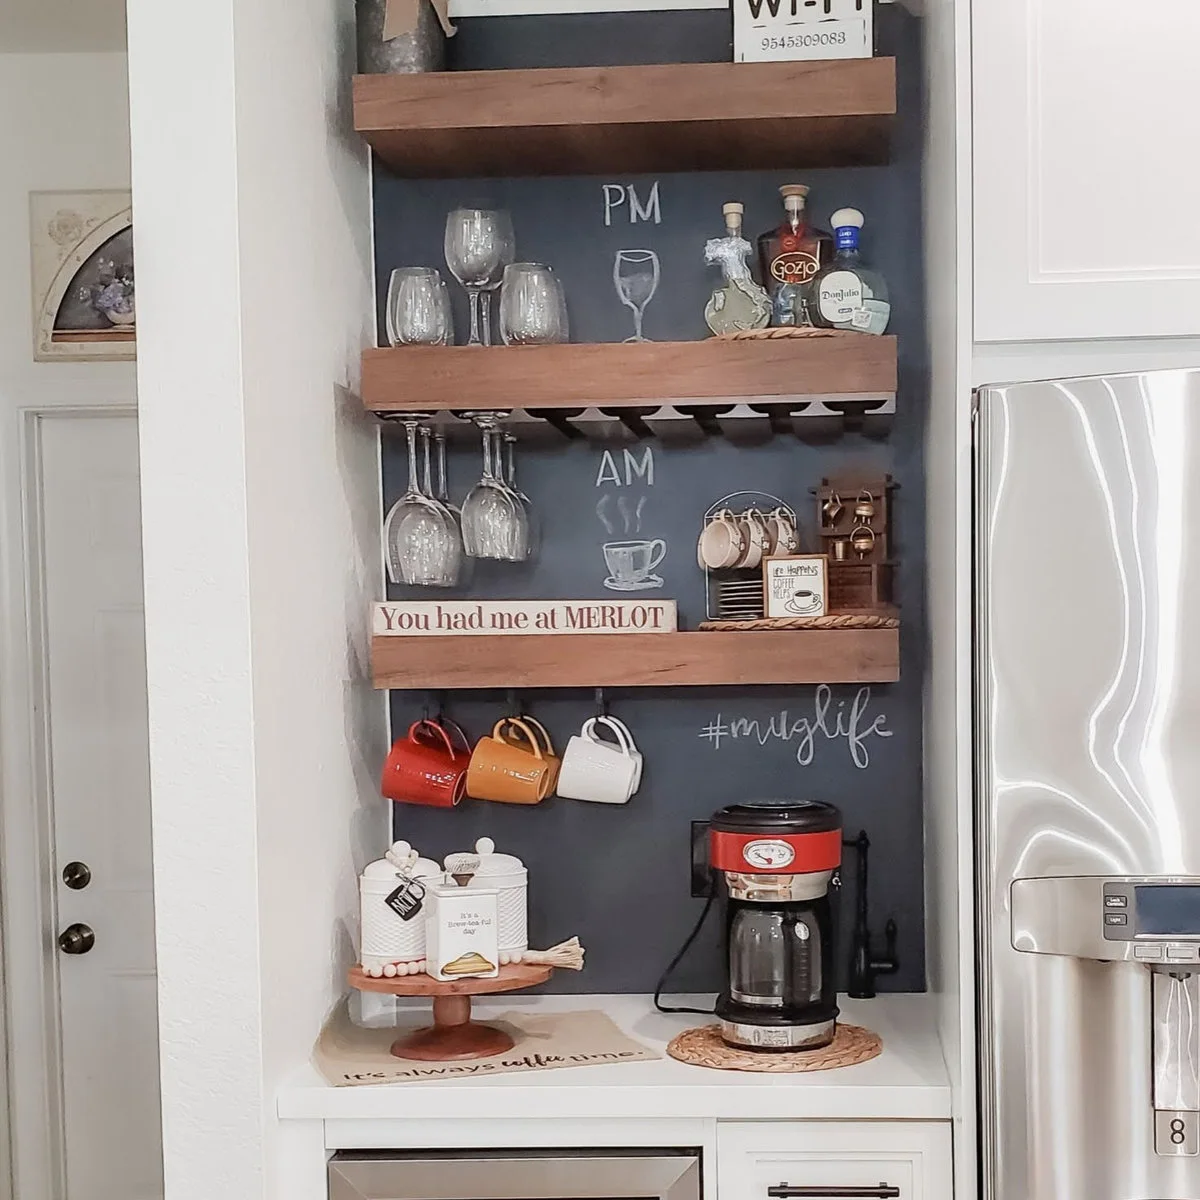
This slim station uses the gap beside a refrigerator, placing the coffee maker beneath hanging mugs and wooden shelves. A dark chalkboard background defines the space, while canisters sit on a small stand. The shallow layout keeps the drinks area contained within a narrow strip of counter.
Treat the displayed words and ornaments as optional. Check that mug handles stay clear of anyone operating the machine and that the refrigerator door can open fully. Keep heavy containers low and secure shelves for their loaded weight, leaving breathing room above the appliance as its instructions require.
IDEA 04 / 20
Create a Recess Beside the Fridge
 SaveSupport Non AI Creator
Image credit: Project: KraftMaid (via Houzz)
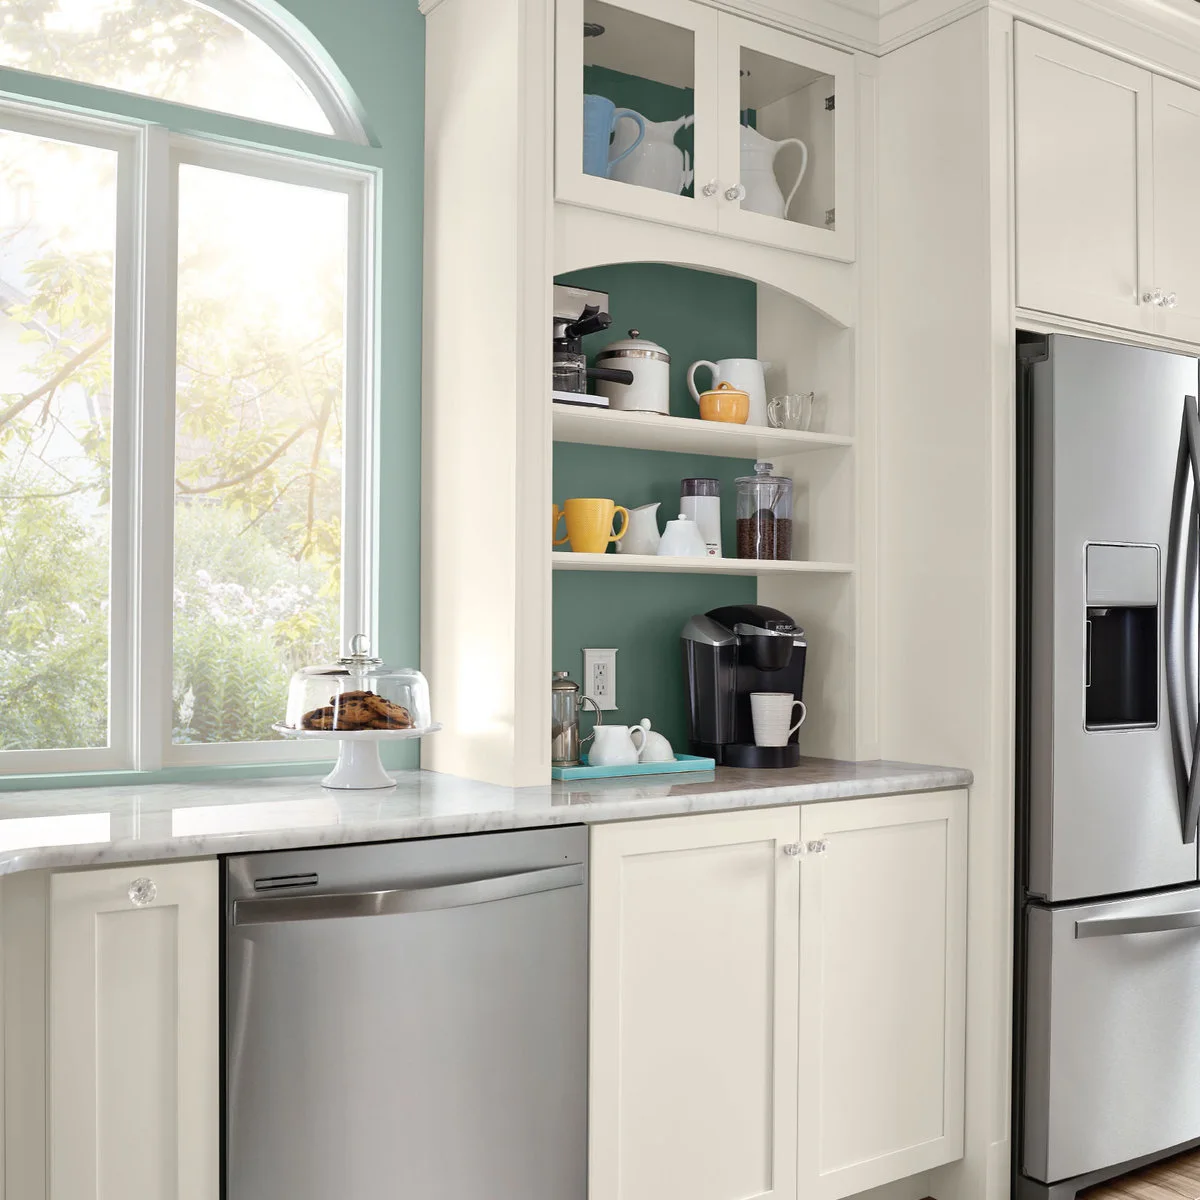
Open shelves and a pale blue-green backing give this coffee recess an identity beside the refrigerator. Yellow mugs brighten the middle shelf, while a small tray gathers serving pieces on the counter. The machine occupies one side rather than taking over the entire opening.
Measure the machine with its reservoir and lid in their refill positions. A narrow recess works only if you can remove those parts comfortably. Keep the lowest shelf high enough for steam clearance and avoid crowding the corner with extra equipment you do not use each morning.
IDEA 05 / 20
Serve Cups on a Simple Tray
 SaveSupport Non AI Creator
Source: houzz.com
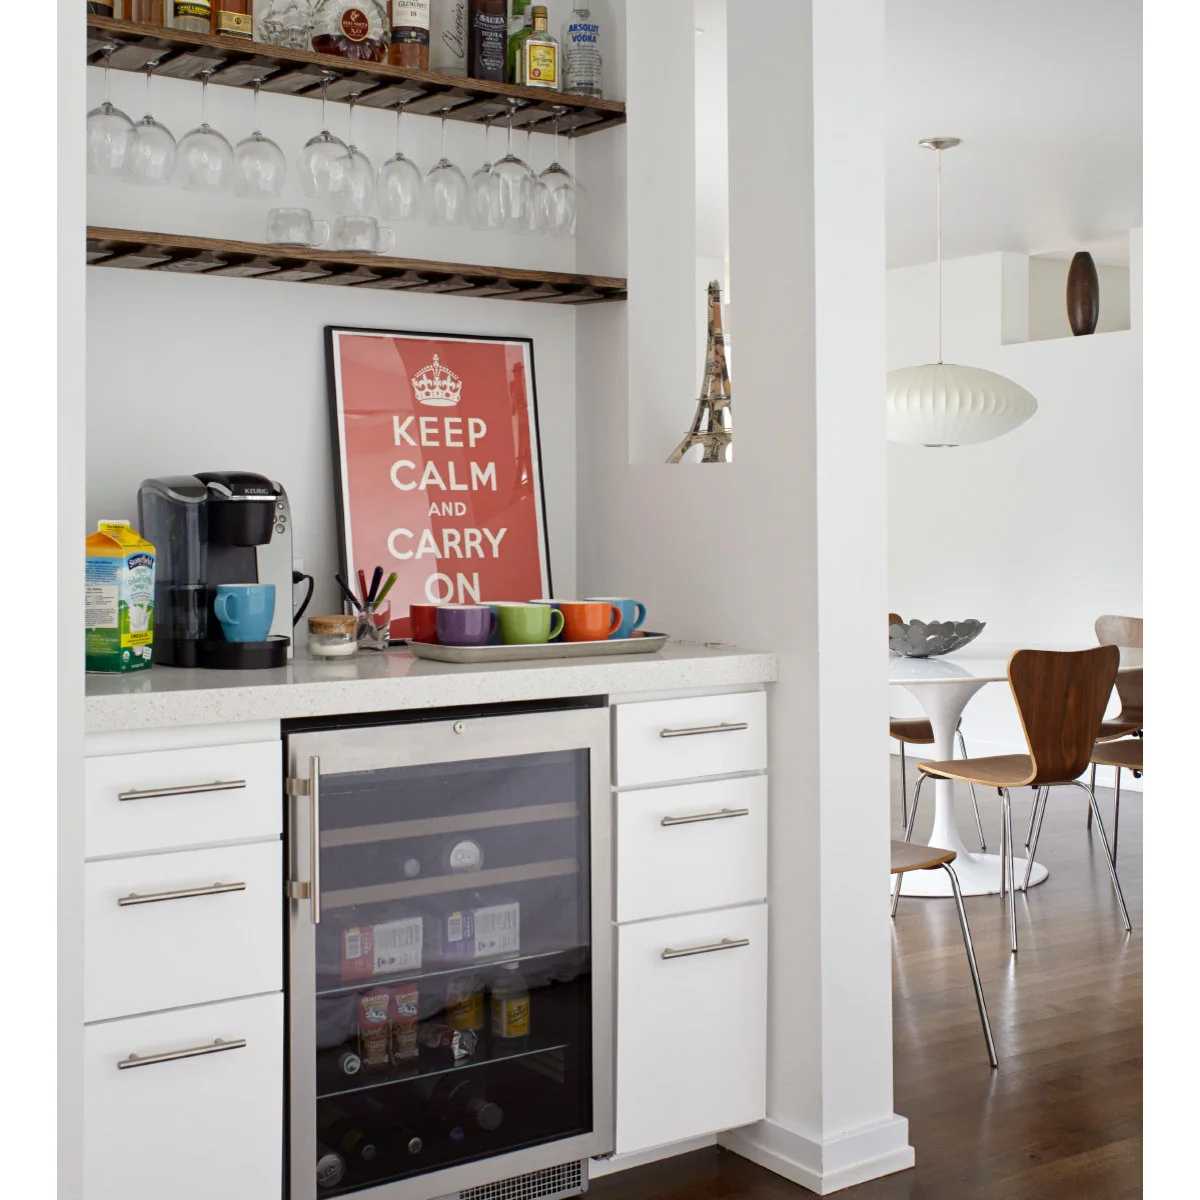
A row of colorful cups sits on a shallow tray beside the coffee maker on this compact white counter. Open racks above hold glasses, and a small fridge occupies the base. The tray gives the cups a defined home while leaving a usable strip of counter in front.
Choose a tray you can lift with cups aboard and leave handles easy to grasp. Put chilled additions back in a suitably cold fridge after use rather than leaving cartons on the counter. If the bar opens toward a dining area, keep cords and refilling movements within the working side.
PART 02
Use Cupboards Thoughtfully
IDEA 06 / 20
Reserve a Full Cupboard Opening for Coffee
 SaveSupport Non AI Creator
Image credit: Project: Great Rooms Building Group (via Houzz)
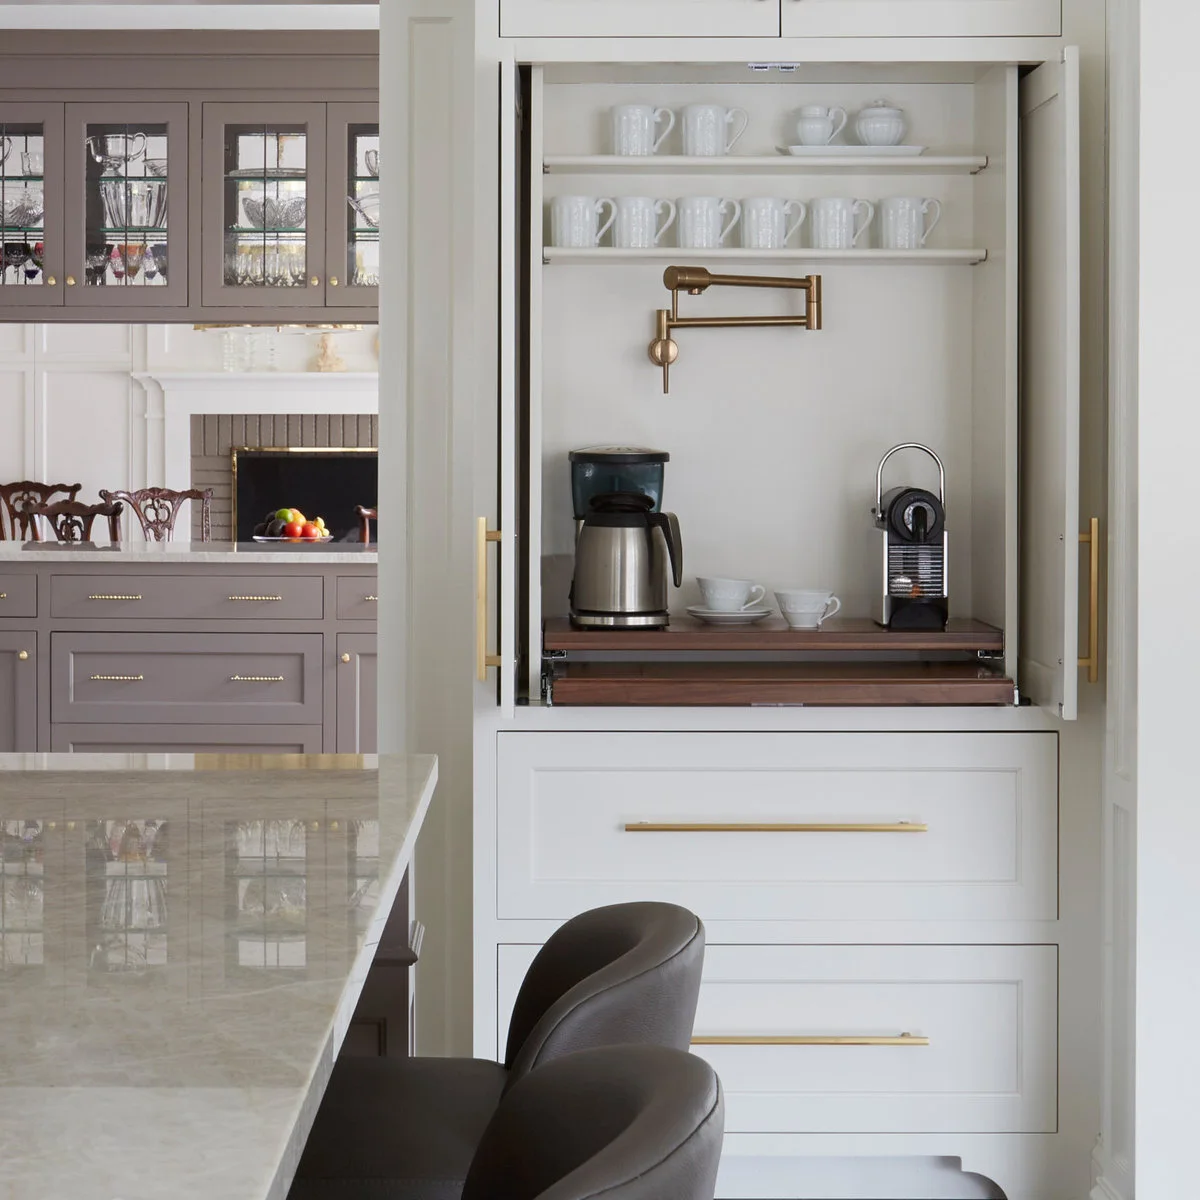
Two coffee makers share a dedicated white cupboard, with rows of mugs above and drawers below. A projecting wooden shelf offers a defined work surface in front of the machines. The broad opening keeps serving pieces visible while the surrounding doors can close off the stored equipment.
A cupboard needs more than enough room for the appliance body. Check instructions for ventilation, steam and heat, and use a suitable clear worktop when required. A pull-out work surface must support the loaded equipment and remain stable while you fill a reservoir or press the controls.
IDEA 07 / 20
Use a Larder for Coffee and Cups
 SaveSupport Non AI Creator
Image credit: Project: Dura Supreme Cabinetry (via Houzz)
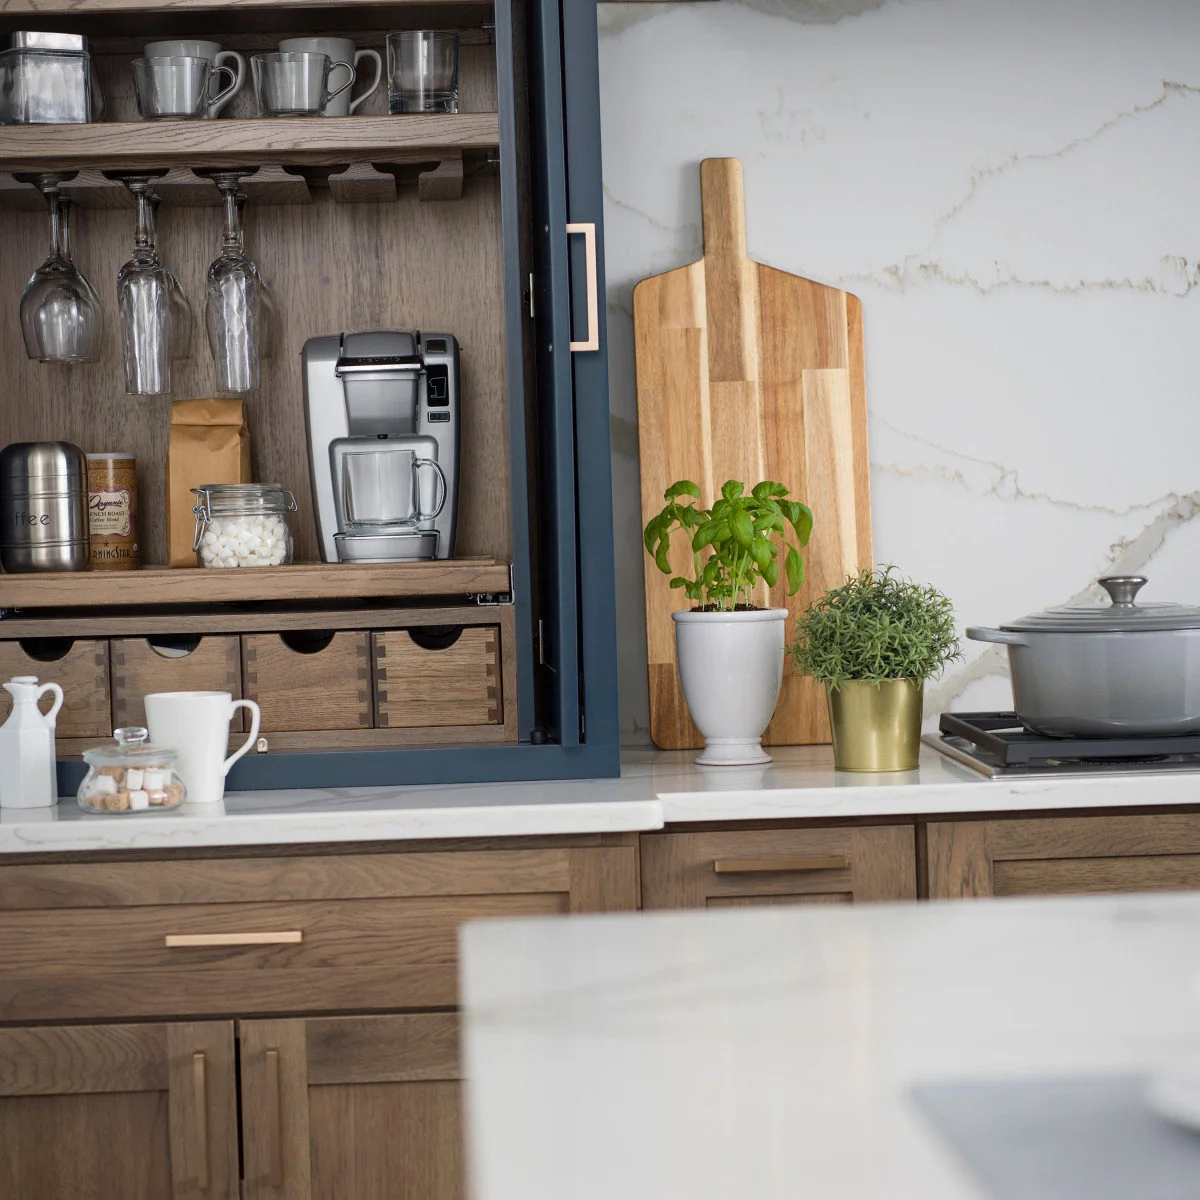
A blue frame surrounds the wooden interior of this coffee cupboard. Mugs sit above the pod machine, with small drawers below for loose supplies and hanging glasses along the upper section. Keeping these pieces in one cupboard makes the coffee setup easy to locate without spreading accessories across adjacent counters.
Give the machine a clear place to operate according to its instructions, keeping heat and steam away from shelves and stored glasses. Choose small drawers for packets that otherwise scatter. Leave enough room to remove the water tank and drip tray without first unloading the neighboring cups.
IDEA 08 / 20
Choose Doors That Clear the Working Area
 SaveSupport Non AI Creator
Source: www.houzz.com
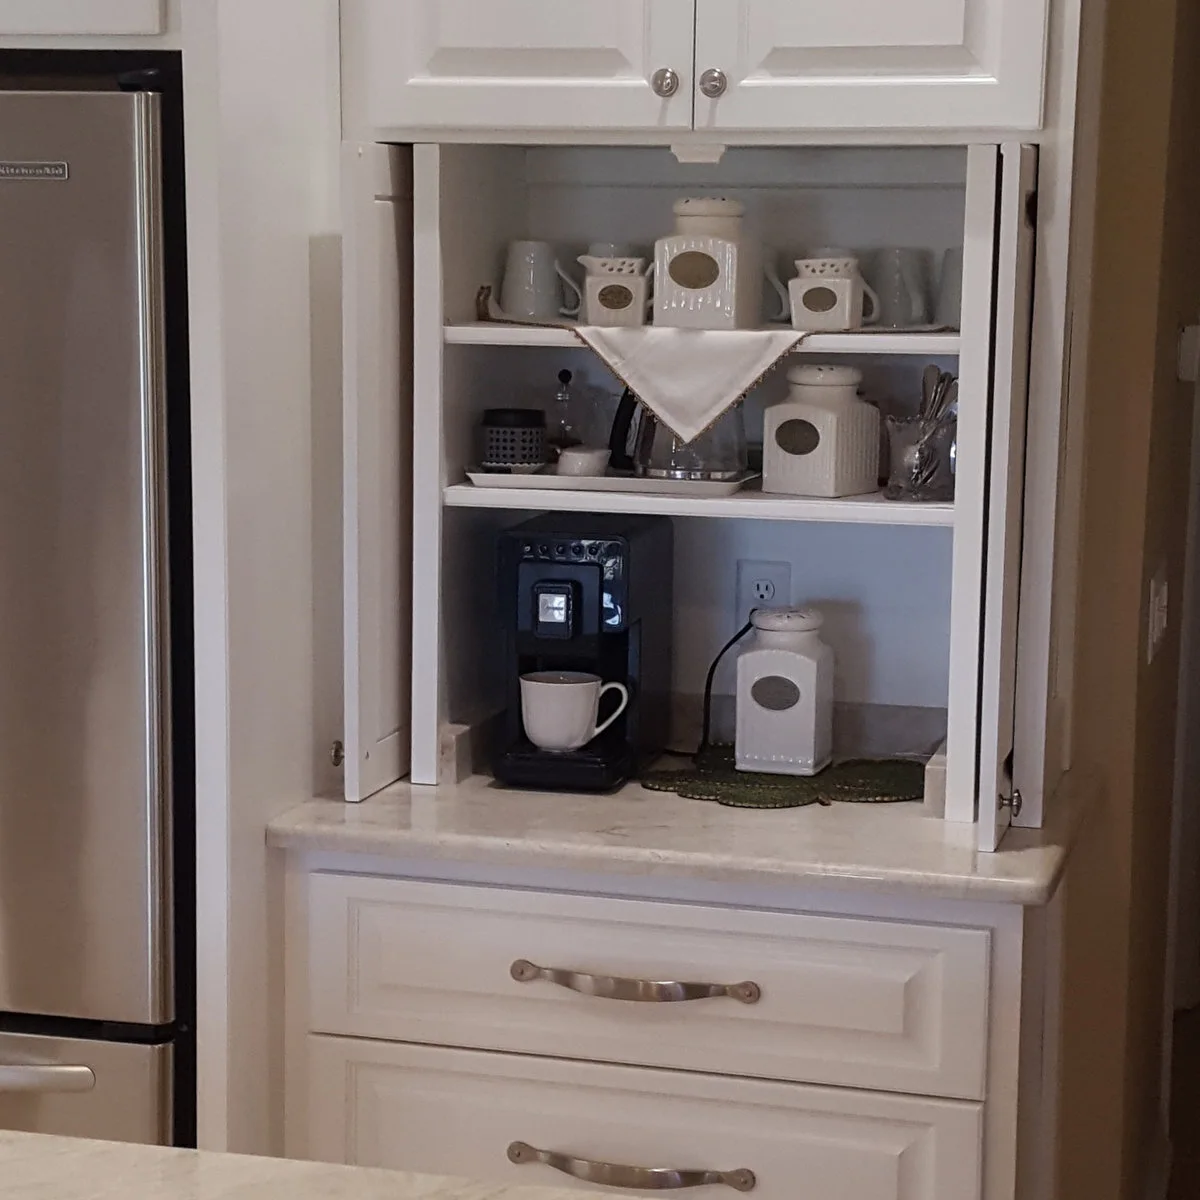
The doors of this countertop cupboard fold back beside the opening, revealing shelves of mugs and canisters above the machine. Drawers below offer another storage level. The opening feels useful because the door panels are kept to the sides rather than projecting across the place where someone would stand.
Test the full door movement with the refrigerator and adjacent drawers open. A compact cupboard becomes frustrating if access depends on shutting something else first. Keep the shelf closest to the machine simple so removable parts can come out easily for rinsing and drying.
IDEA 09 / 20
Add Narrow Mug Shelves Around One Machine
 SaveSupport Non AI Creator
Image credit: Project: Fabuwood Cabinetry (via Houzz)
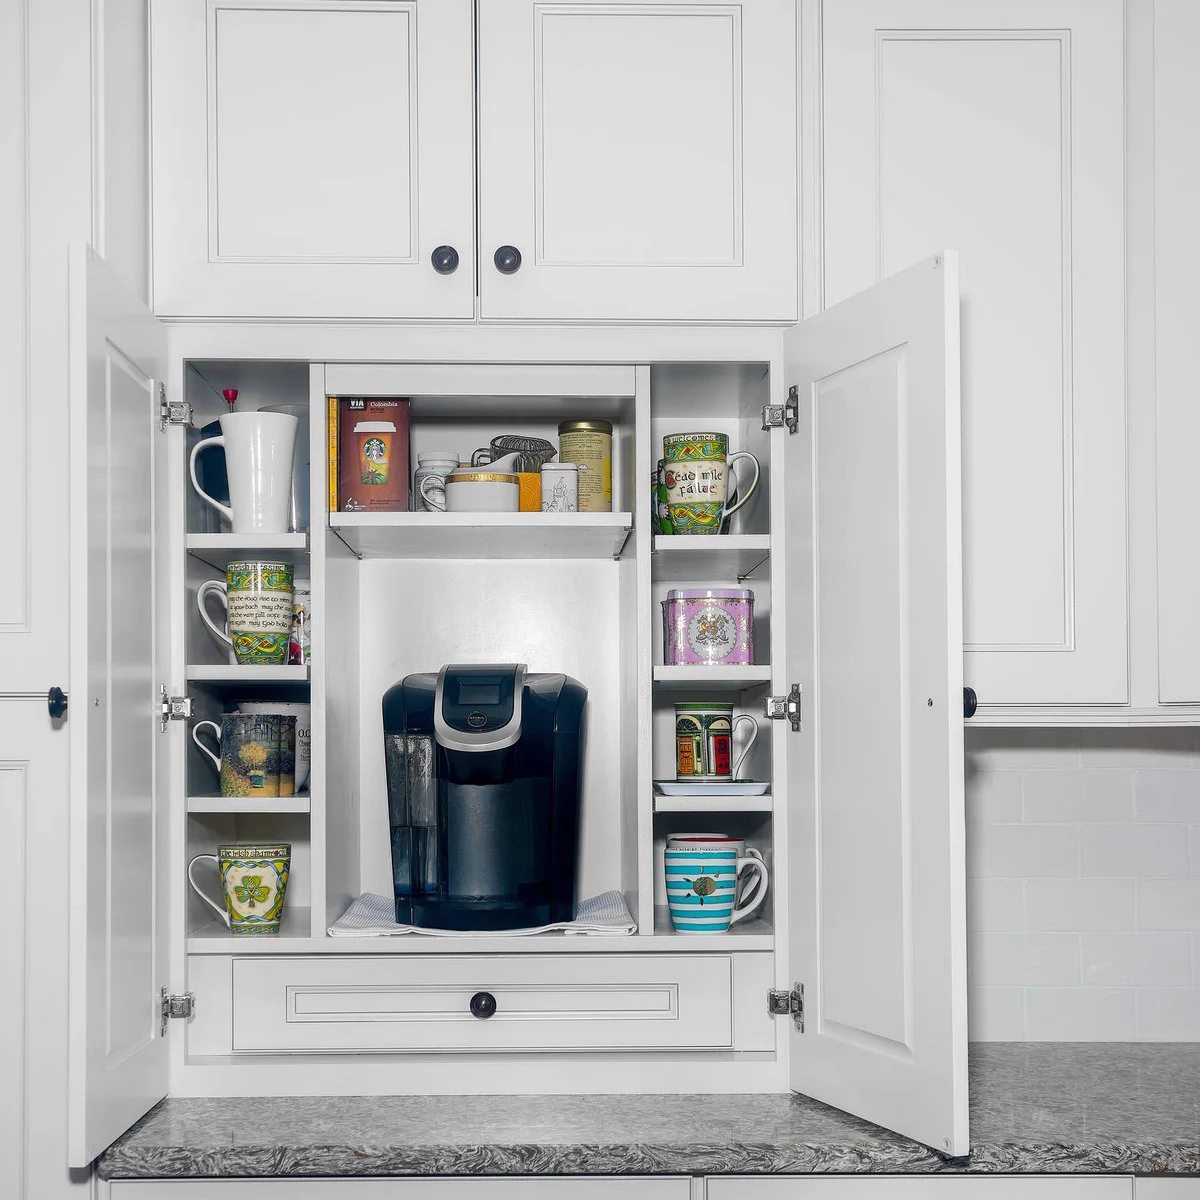
Narrow mug shelves flank a single black coffee machine inside this white cupboard. Each little opening holds only a few cups, making the collection easy to see. A shallow drawer below provides a place for supplies without requiring extra containers on the counter in front.
Measure favorite mugs including their handles before planning little cubbies. Small shelves can become restrictive when cups vary in height or width. Leave the machine’s refill route open and choose a removable protective surface beneath it that can be cleaned without trapping moisture against the cabinet.
IDEA 10 / 20
Combine a Coffee Cupboard with Drinks Storage
 SaveSupport Non AI Creator
Image credit: Project: Herrick Design Group (via Houzz)
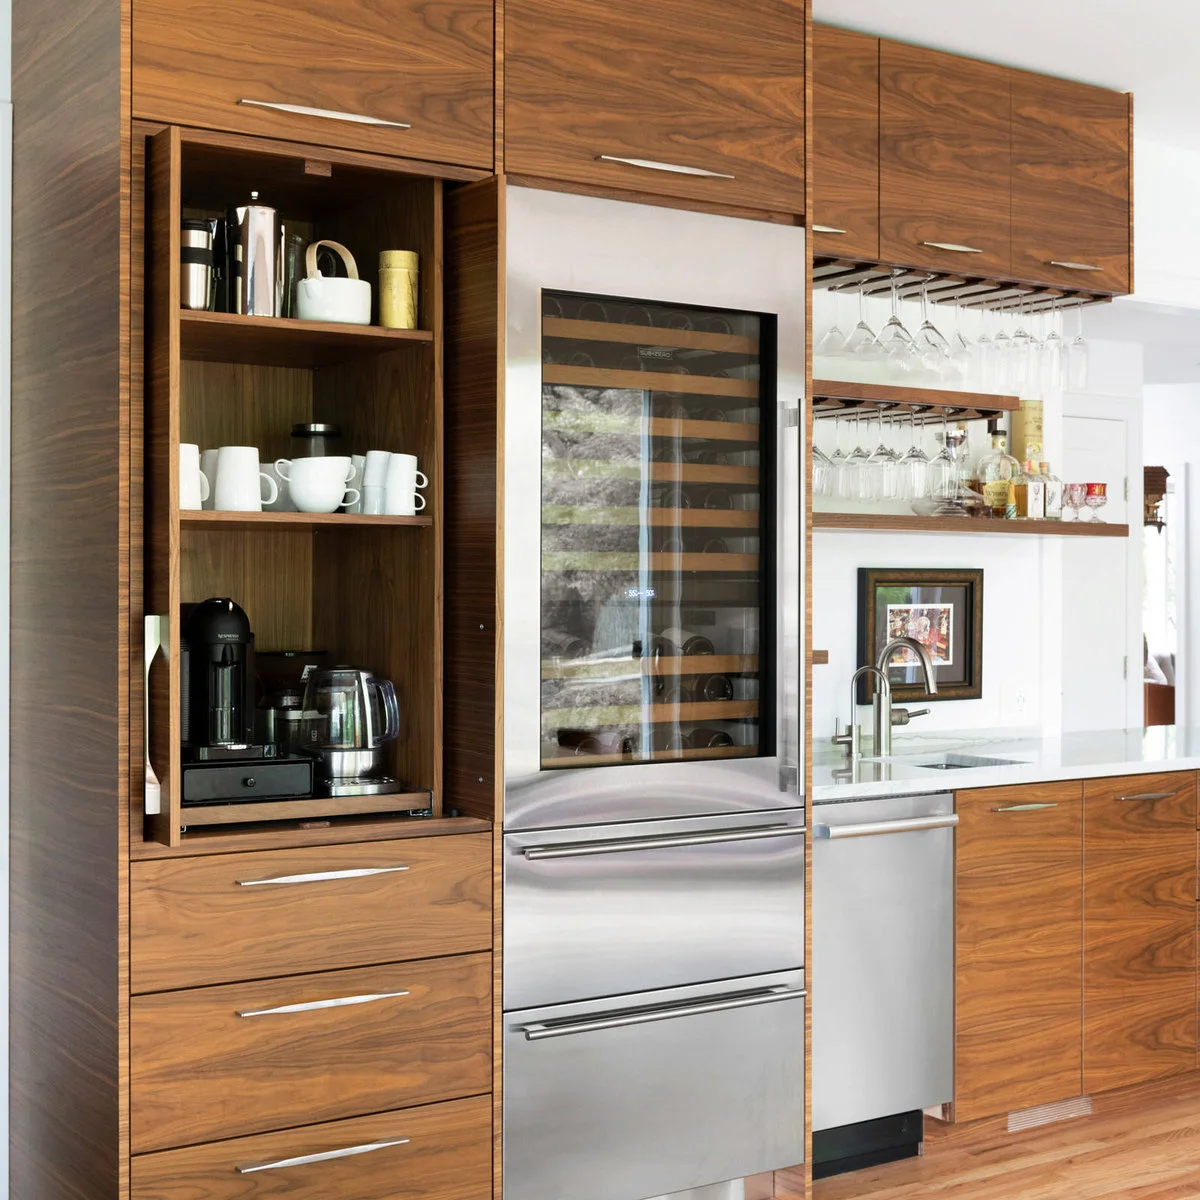
A tall wooden compartment contains coffee equipment and white mugs beside a glass-front drinks fridge. Drawers occupy the lower part of the coffee section, while a sink sits farther along the counter. The arrangement separates equipment by purpose within one continuous beverage area.
Keep coffee supplies in the part of the cabinet you can reach without opening the fridge. Check whether the stored appliances need to move out for operation and allow the required ventilation. Do not let the neighboring drinks storage consume the empty counter space needed for refilling and cleaning.
PART 03
Organize Cups and Supplies
IDEA 11 / 20
Divide a Shallow Drawer for Pods and Tea
 SaveSupport Non AI Creator
Image credit: Project: Abundance Organizing (via Houzz)
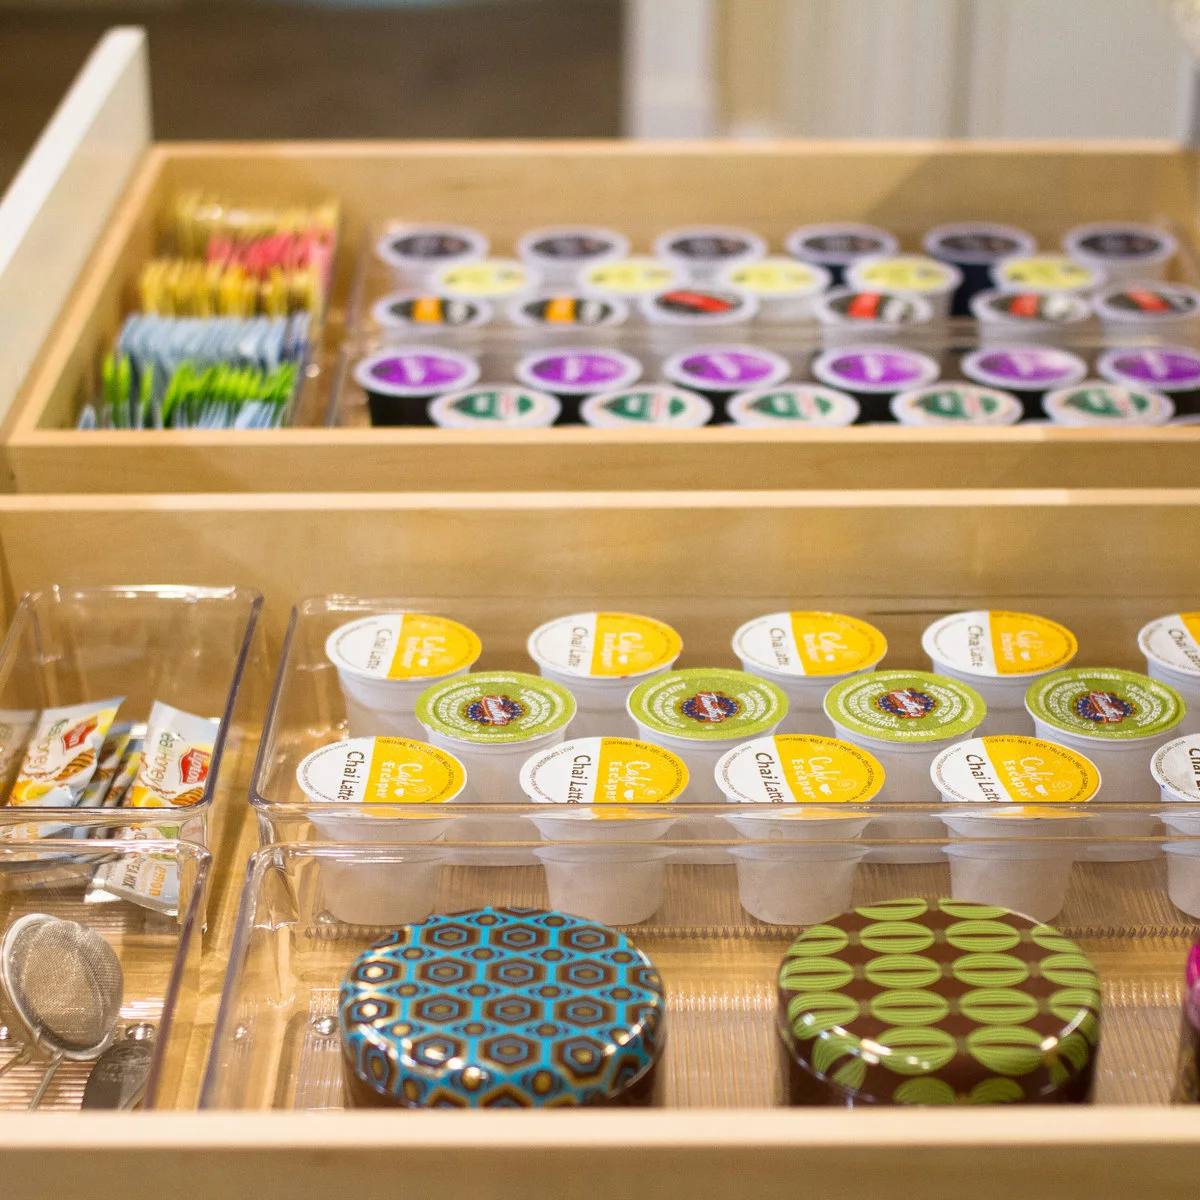
Clear organizers separate pods, tea packets and small accessories inside these shallow drawers. Everything sits in a visible layer rather than a deep loose pile. The layout makes different drink choices easy to compare without placing a collection of boxes beside the coffee maker.
Measure the drawer’s usable height before choosing an organizer, including clearance beneath any runners or frame. Keep a small working supply here and backups elsewhere. Arrange older pods and tea toward the front so the display remains useful rather than becoming a place where forgotten varieties accumulate.
IDEA 12 / 20
Use an Inner Tray Above Deeper Storage
 SaveSupport Non AI Creator
Image credit: Project: Bay Area Kitchens (via Houzz)
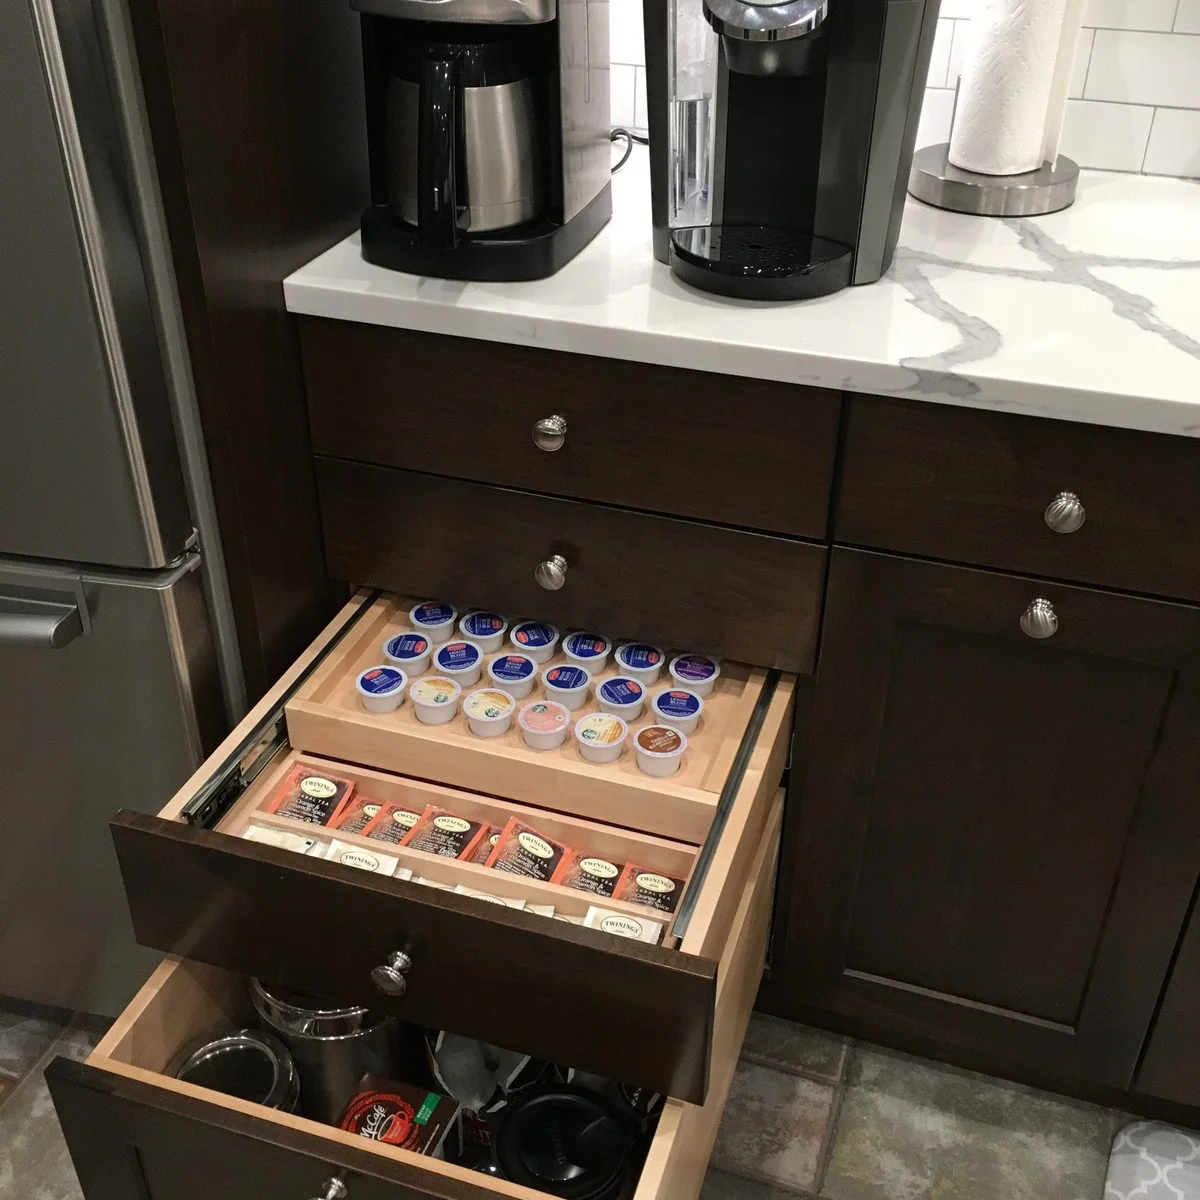
An inner tray holds pods above a lower section of tea packets in this coffee drawer. A deeper drawer below stores spare equipment. The stacked arrangement gives small supplies a visible level while keeping bulkier pieces out of the space immediately around the machines.
Check that the inner tray slides far enough to expose everything underneath. Keep the working layer light so it moves smoothly when full. A drawer divider should match your usual pod size, and the lower drawer should hold only cool, dry equipment before being closed.
IDEA 13 / 20
Light a Compact Tea and Coffee Counter
 SaveSupport Non AI Creator
Image credit: Project: Abundance Organizing (via Houzz)
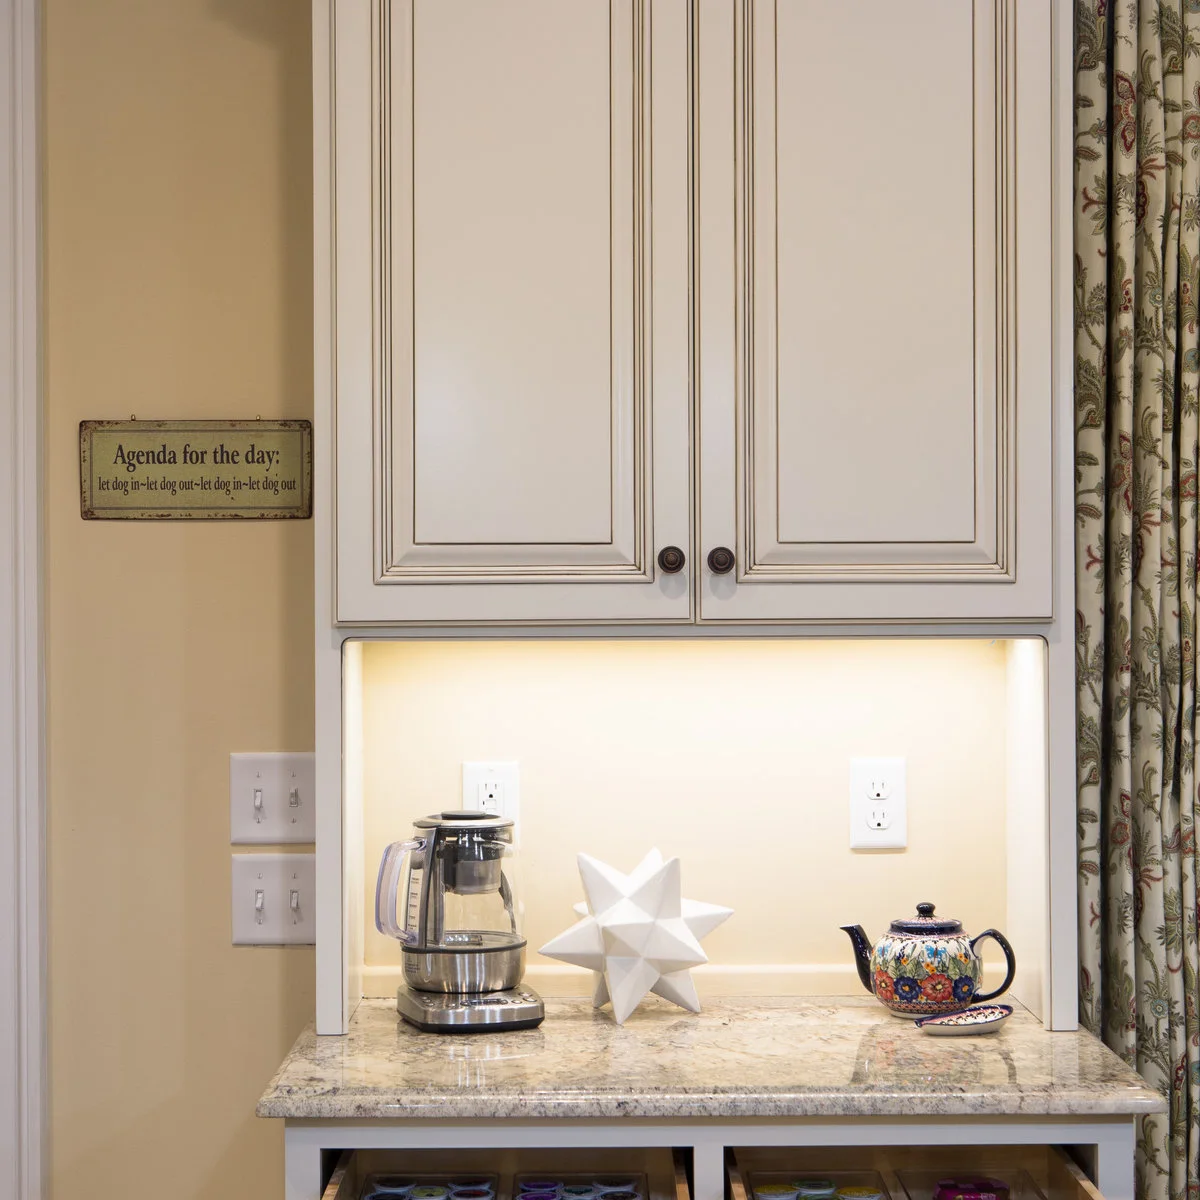
Under-cabinet lighting brightens this small counter, where a glass brewer and patterned teapot sit against a pale background. A closed cupboard above hides extra supplies, while the open drawer edges below reveal organized drink portions. The lighting makes a modest station easier to use without a larger footprint.
Place task lighting so your body does not cast a shadow over the cup or water level. Keep decorative objects from taking the only clear preparation space. Follow the brewer’s heat and steam clearances, and choose a counter protection method suited to the actual surface finish.
IDEA 14 / 20
Keep Daily Equipment Below Display Glassware
 SaveSupport Non AI Creator
Image credit: Project: 20|20 Builders (via Houzz)
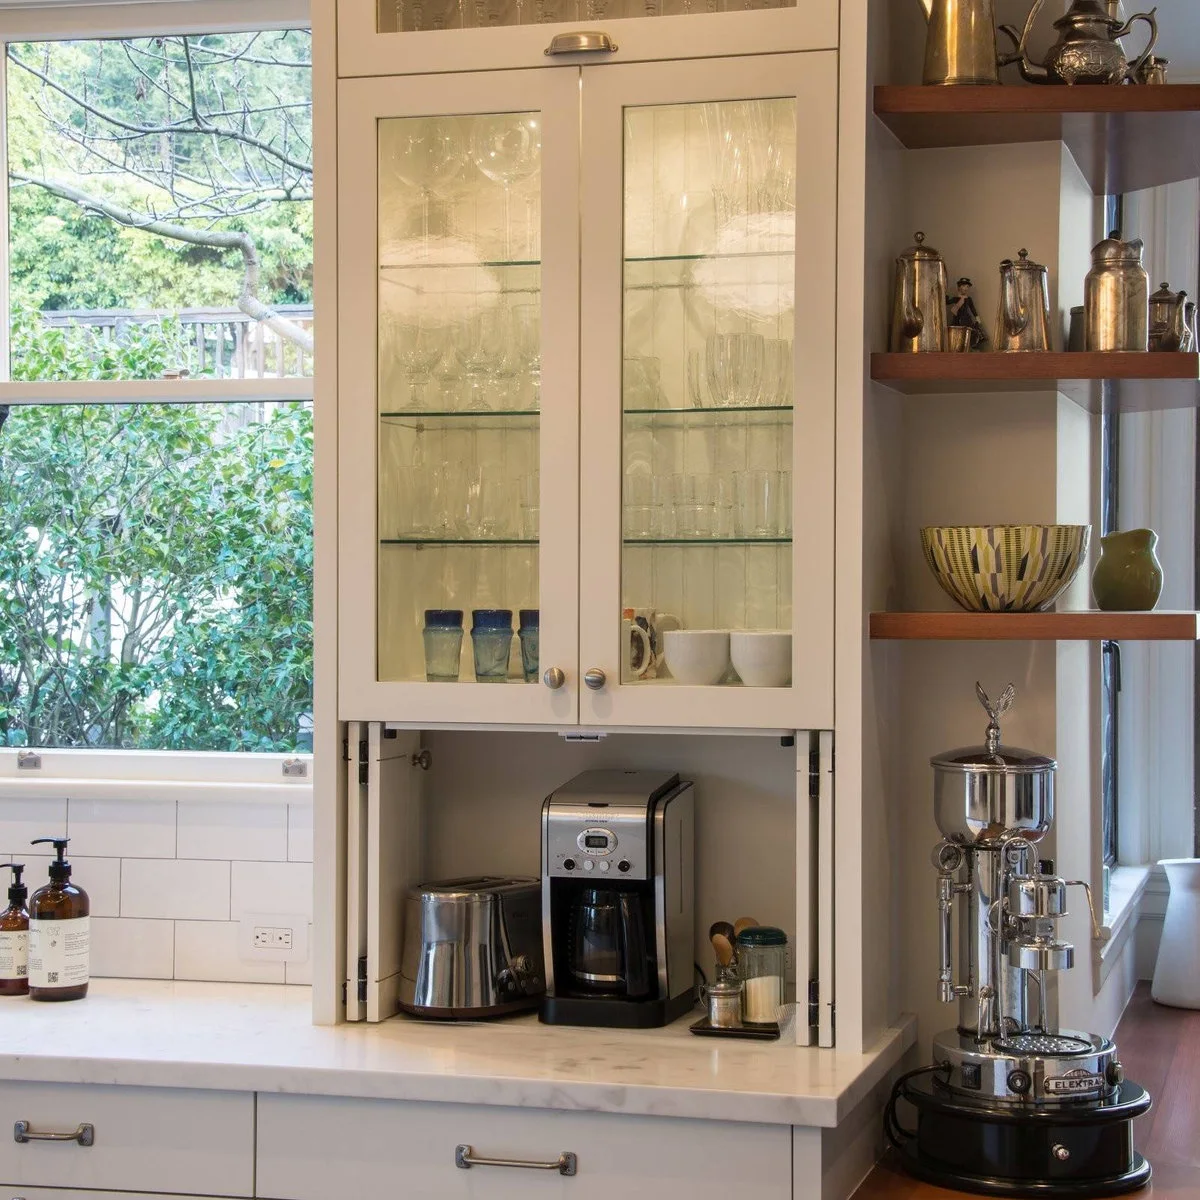
A coffee machine and toaster occupy a counter opening beneath glazed glassware cupboards. A little tray gathers small supplies to the right, keeping them together beside the equipment. More reflective serving pieces appear on nearby open shelves, giving the station a collected character without filling its whole counter.
Separate the items used every morning from the occasional collection above. Keep a clear heat-safe operating area for the toaster and other appliances according to their instructions. A tray should be small enough to lift for cleaning but large enough that its containers do not balance on the rim.
IDEA 15 / 20
Give Espresso Tools Their Own Working Space
 SaveSupport Non AI Creator
Image credit: Project: Crisp Architects (via Houzz)
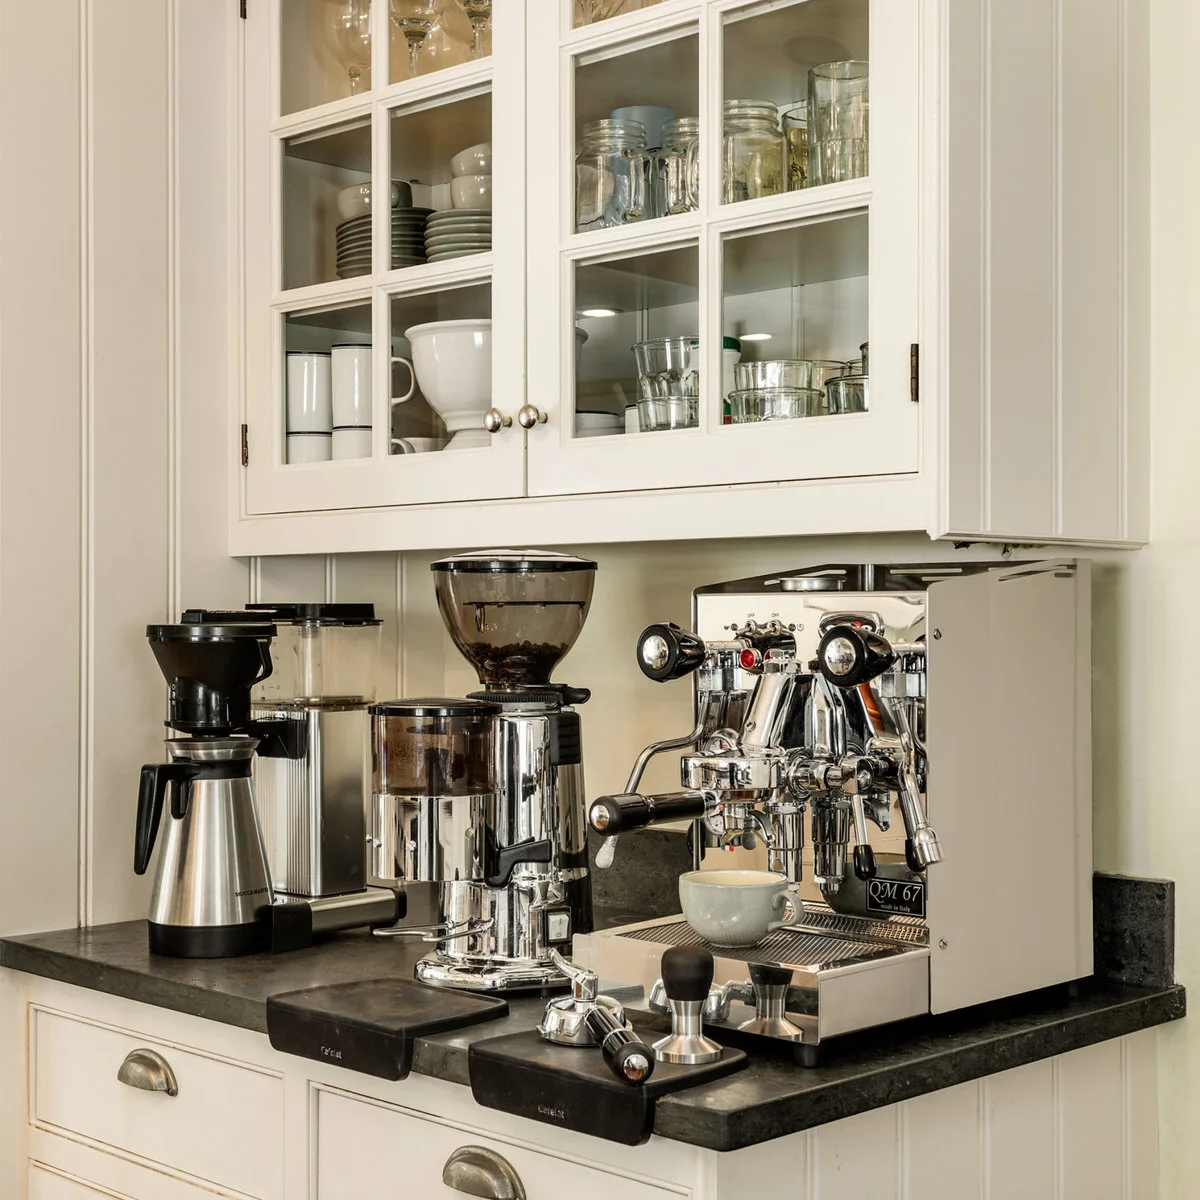
An espresso machine and grinders fill this dark counter beneath glazed white cupboards. Tampers and other small tools sit on separate dark mats near the front. The setup makes a more involved coffee routine visible, with preparation space shaped around the equipment rather than added as decoration afterward.
Allow space to tamp, knock out grounds and set down a hot cup without reaching across the machine. Mats help contain mess but still need regular lifting and cleaning underneath. Compare the full equipment footprint, including projecting handles and removable tanks, before choosing the length of your coffee counter.
PART 04
Plan a Fitted Drinks Area
IDEA 16 / 20
Include a Sink for Frequent Cleanup
 SaveSupport Non AI Creator
Image credit: Project: Denise Davies (via Houzz)
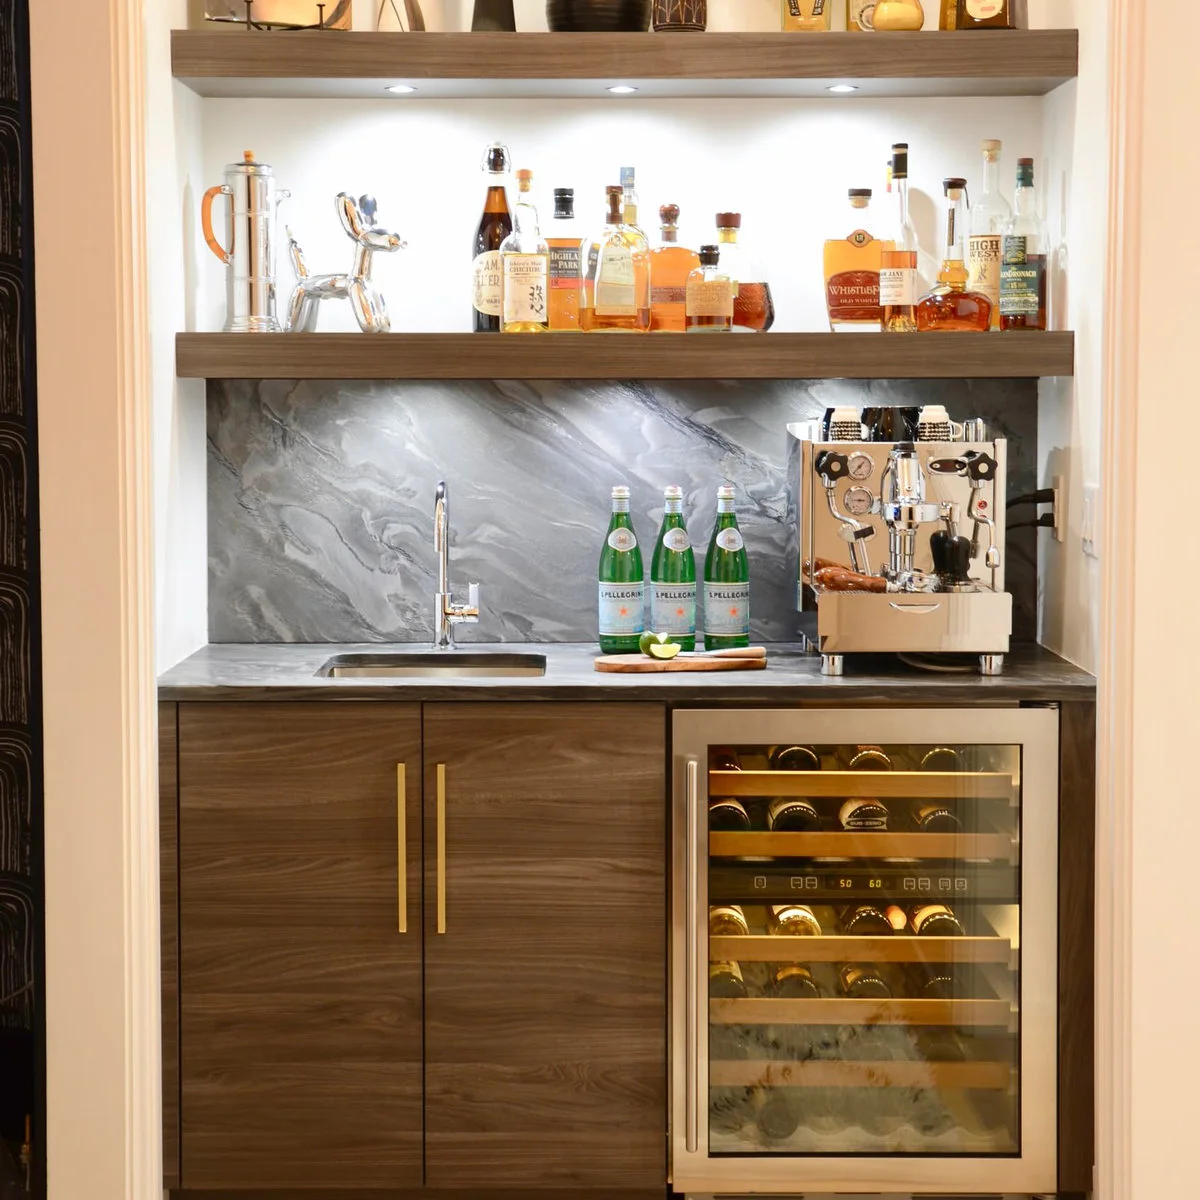
A small sink and espresso machine share this wood-fronted beverage station, with a drinks fridge below and open shelves above. The layout gives used cups and water filling a nearby destination. Its veined counter and backing provide visual detail without another row of accessories around the machine.
A dedicated sink can reduce trips through the kitchen, but it also takes away counter width. Leave enough dry space between washing and electrical equipment and have the installation planned appropriately. Keep the machine’s cleaning supplies close while reserving the sink cabinet for items that can tolerate possible drips.
IDEA 17 / 20
Keep a Long Serving Space Beside the Machine
 SaveSupport Non AI Creator
Image credit: Project: Cummings Architecture + Interiors (via Houzz)
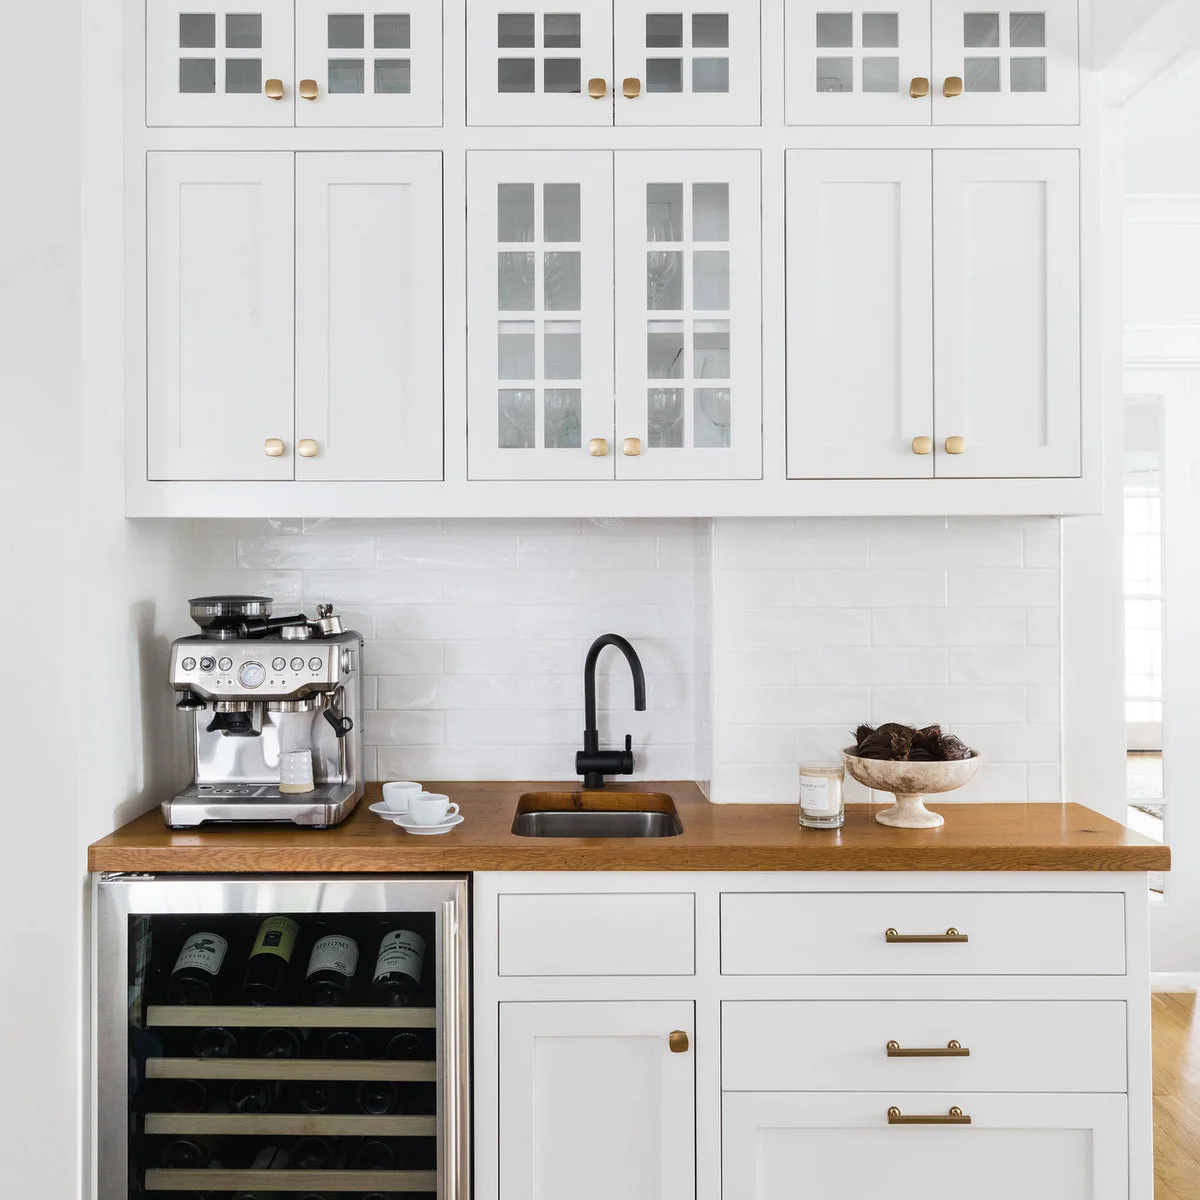
The espresso machine sits at the left end of this wood-toned counter, with the sink near the center and an open serving stretch to the right. White glazed cupboards provide storage above. The arrangement leaves space to prepare several cups without lining them up directly against the machine.
Think through serving more than one person when deciding where equipment belongs. Keep the dry working area distinct from the sink, and wipe spills promptly on a wood-toned surface using care suited to its actual finish. Avoid placing decorative bowls where they interrupt the route between cups and equipment.
IDEA 18 / 20
Place the Coffee Bar Near a Breakfast Nook
 SaveSupport Non AI Creator
Image credit: Project: BMC Cabinet Specialists (via Houzz)
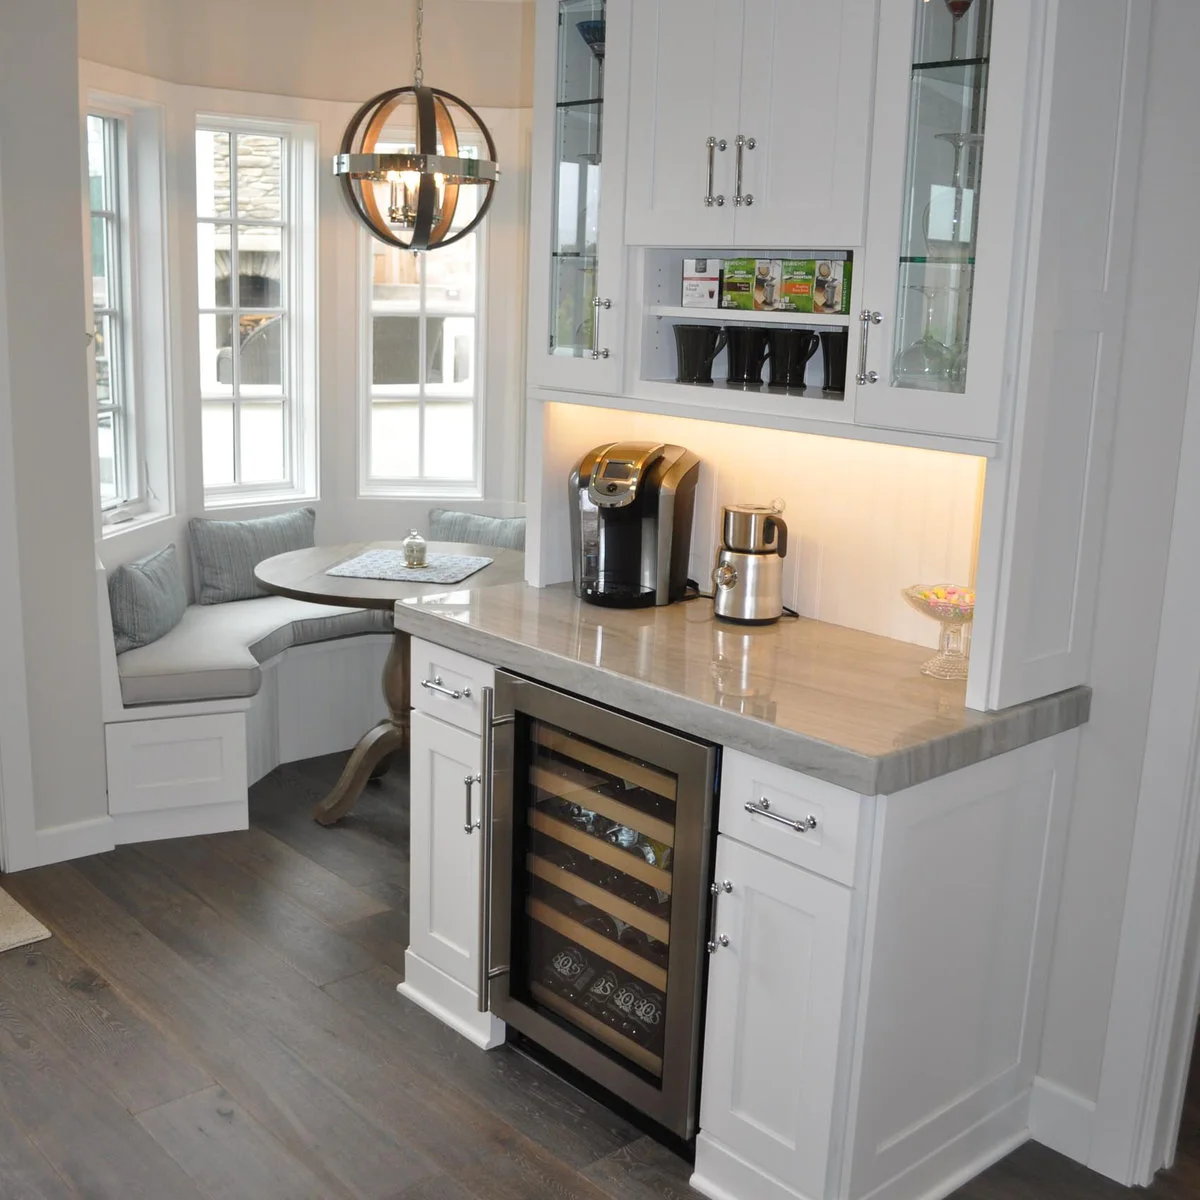
This white coffee counter sits directly beside a curved breakfast nook, keeping drinks close to the place people gather. Small open shelves hold cups and drink boxes above the machines. Lighting beneath the cupboard makes the counter useful even before daylight fills the neighboring windows.
Check the walking route between the bench and the bar with someone seated. A drinks fridge door needs room to open without trapping that route. Keep daily cups on the lowest reachable shelf and leave a landing space for a tray when carrying drinks to the table.
IDEA 19 / 20
Give an Alcove a Chalkboard Backing
 SaveSupport Non AI Creator
Image credit: Project: KabCo Kitchens (via Houzz)
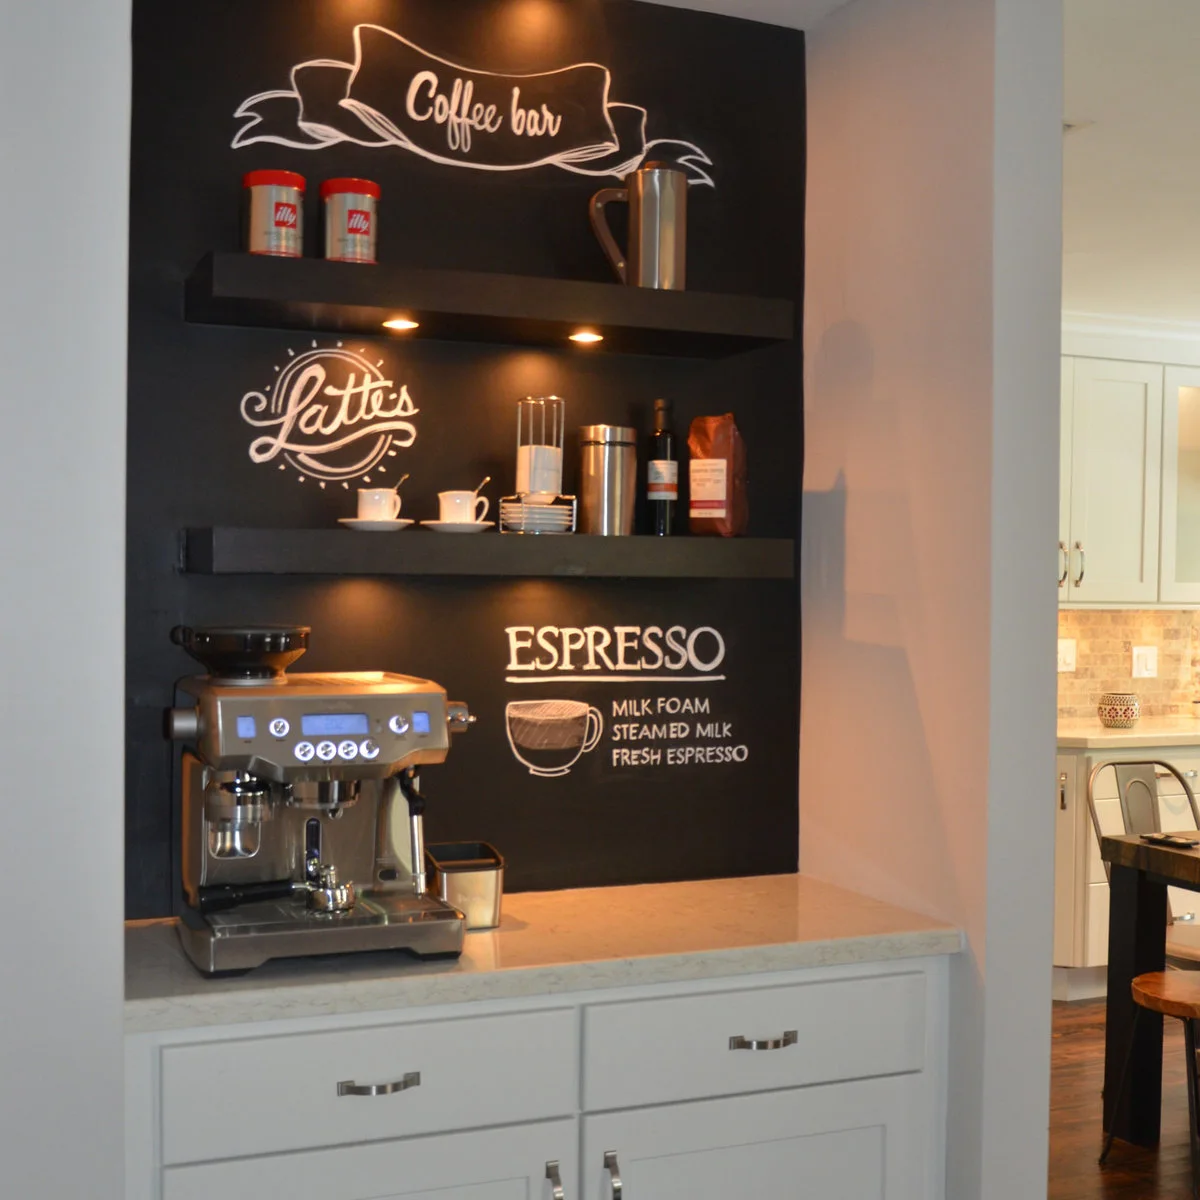
A dark chalkboard backing gives this alcove a small café character. Two lit shelves hold cups and supplies above the espresso machine, while the counter stays open beside it. The lettering draws attention to the station without requiring a larger or more elaborate set of cabinets.
Use the chalkboard as a backdrop rather than another task to maintain every day. Keep chalk dust away from drinks and equipment, and choose shelf positions that allow the required steam clearance. Simple closed containers are easier to clean here than a large assortment of open decorative jars.
IDEA 20 / 20
Let a Built-In Machine Free the Counter
 SaveSupport Non AI Creator
Image credit: Project: Z+ Interiors (via Houzz)
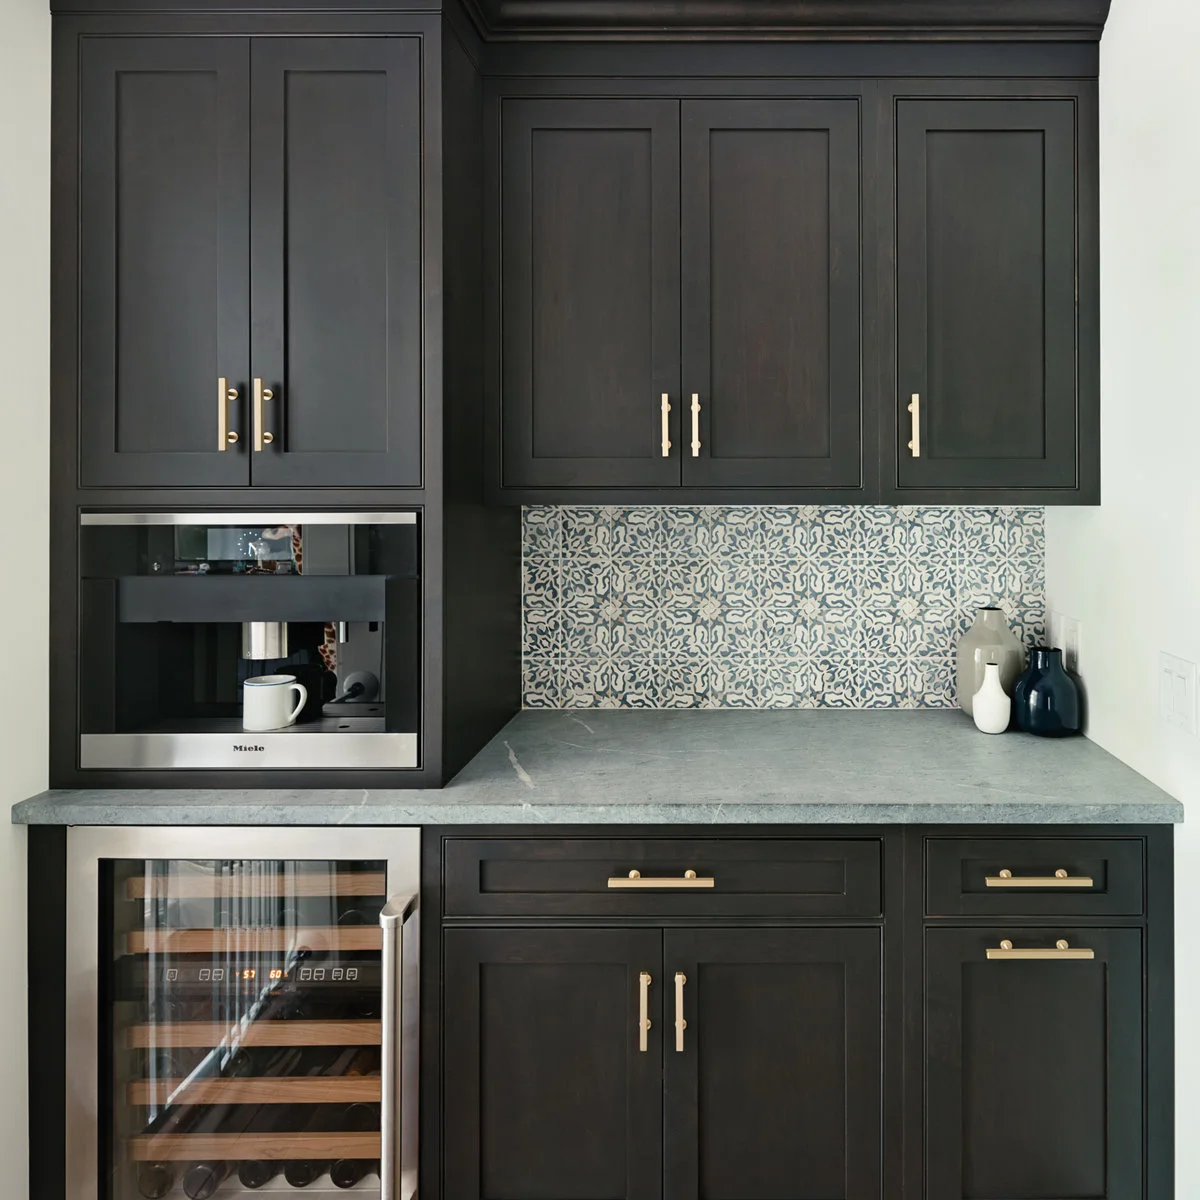
A built-in coffee machine sits in the left column of this dark beverage cabinet, leaving a broad clear counter beside it. Patterned tile adds detail to the backing, while small vessels stay at the far end. Closed cupboards above and below keep the working surface from becoming a storage shelf.
A built-in machine needs the installation, ventilation and service access specified for that model. Confirm how the water reservoir and waste container come out before planning adjacent trim. Keep a nearby place for cups and a clean cloth, but preserve the open counter that makes the arrangement useful.
BRING IT ALL TOGETHER
Make Refill and Cleanup Easy
Lay out your machine, usual mugs and supplies before adding decorations. Refill the water, prepare a drink and remove the drip tray to see whether the arrangement leaves enough working space.
Keep only daily quantities near the machine and review the setup after a week. An empty patch of counter is often more valuable than another canister or sign.