A basement bar can be a short cabinet run or a larger place to gather. Start with what you want to serve and how you will clean up afterward. A sink, refrigerator and row of stools all take space, so each should earn its place in the room.
These photographed projects show different arrangements and finishes. They are inspiration for planning, not evidence that the same services or construction will work in your basement. Resolve damp, drainage, ventilation and appropriate professional installation before covering walls or ordering fitted furniture.
PART 01
Start with a Useful Cabinet Run
IDEA 01 / 20
Combine Closed Cabinets with a Small Open Center
 SaveSupport Non AI Creator
Image credit: Project: Kimberlee Kristine (via Houzz)
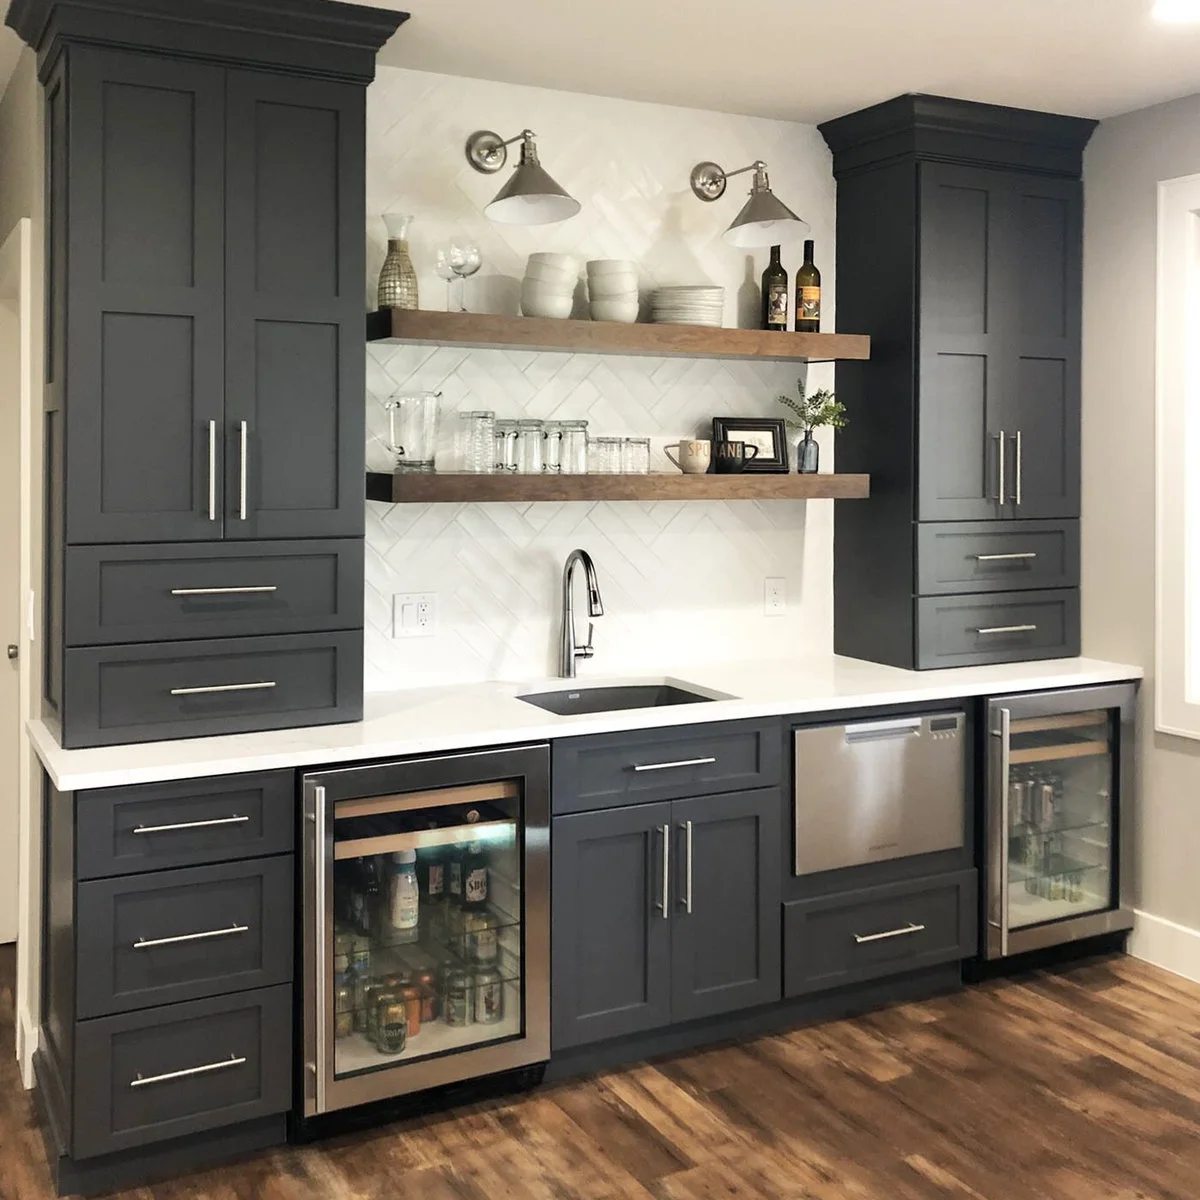
Tall dark cabinets frame two open shelves above the sink, leaving a lighter center against the pale patterned backsplash. Drawers and lower cupboards provide concealed storage. Glass-front appliances sit under the counter, keeping the working surface available instead of filling it with several separate small machines.
List the appliances you actually need before designing the cabinet run, then follow their ventilation and access requirements. Keep frequently used glasses within easy reach. Compare this arrangement with the coffee bar ideas if a downstairs drinks station would be used more for coffee and refreshments than a full bar.
IDEA 02 / 20
Keep a Straight Wet Bar Simple
 SaveSupport Non AI Creator
Image credit: Project: Decor by Christine Interior Decorating & Design (via Houzz)
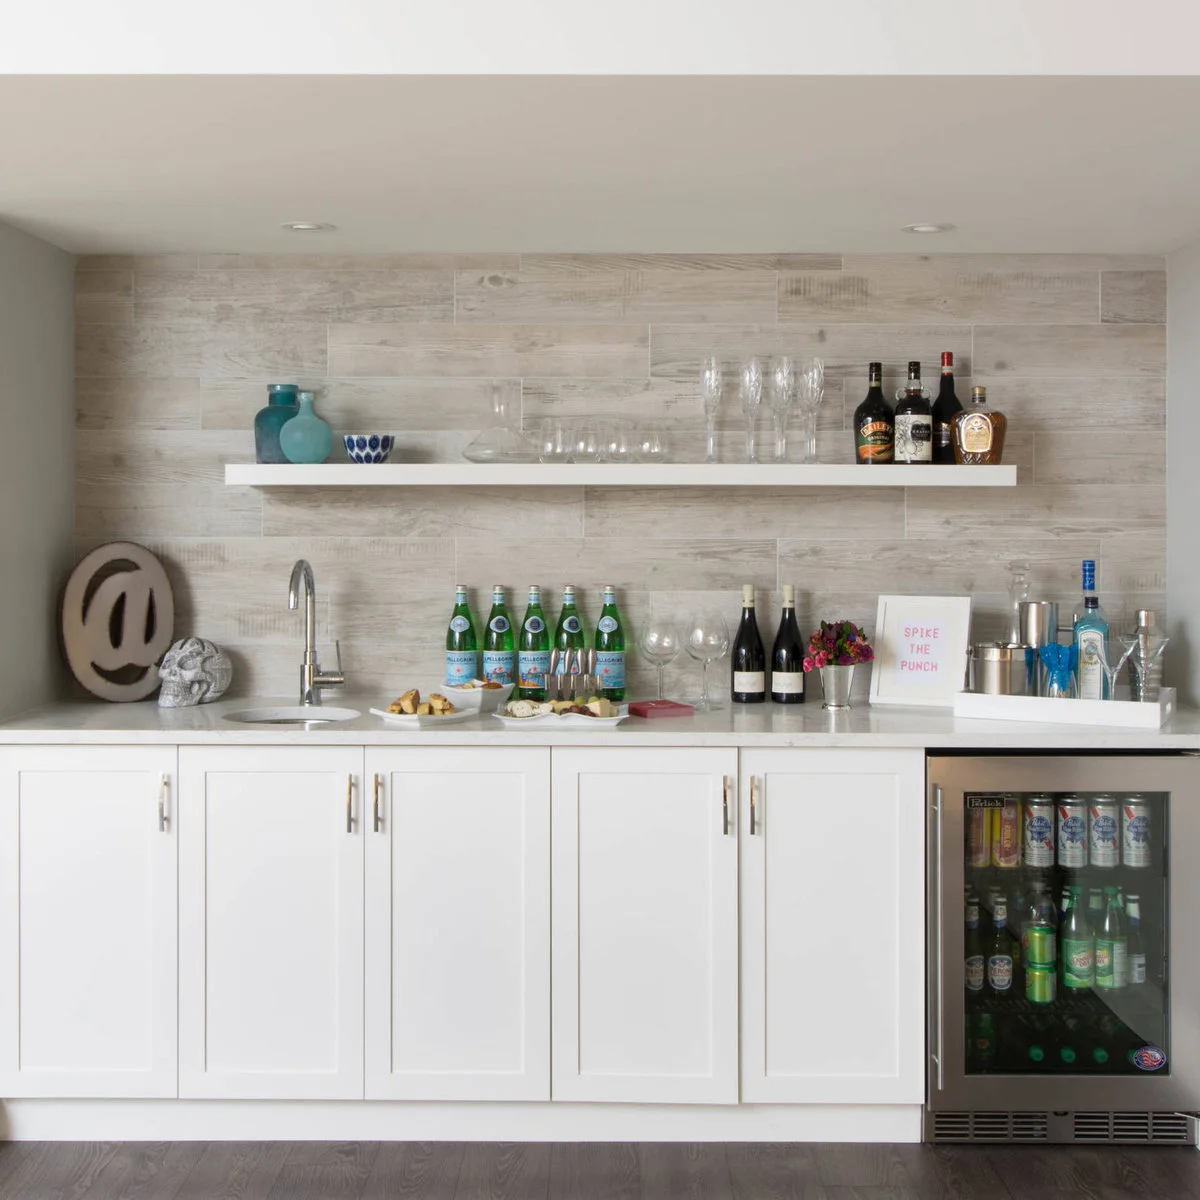
One open shelf runs above the white cabinet fronts, keeping the bar’s outline simple. A small round sink sits at left, with the beverage refrigerator at the opposite end. Glasses and a few serving pieces are grouped together rather than spread across every part of the counter.
Leave a clear preparation area between sink and refrigerator, including room to set down a tray. Check shelf load and secure installation before storing glasses above the counter. Choose surfaces for spill cleanup and keep the appliance door able to open fully without blocking the main room route.
IDEA 03 / 20
Give a Compact Niche Its Own Light
 SaveSupport Non AI Creator
Image credit: Project: Legacy Contracting LLC (via Houzz)
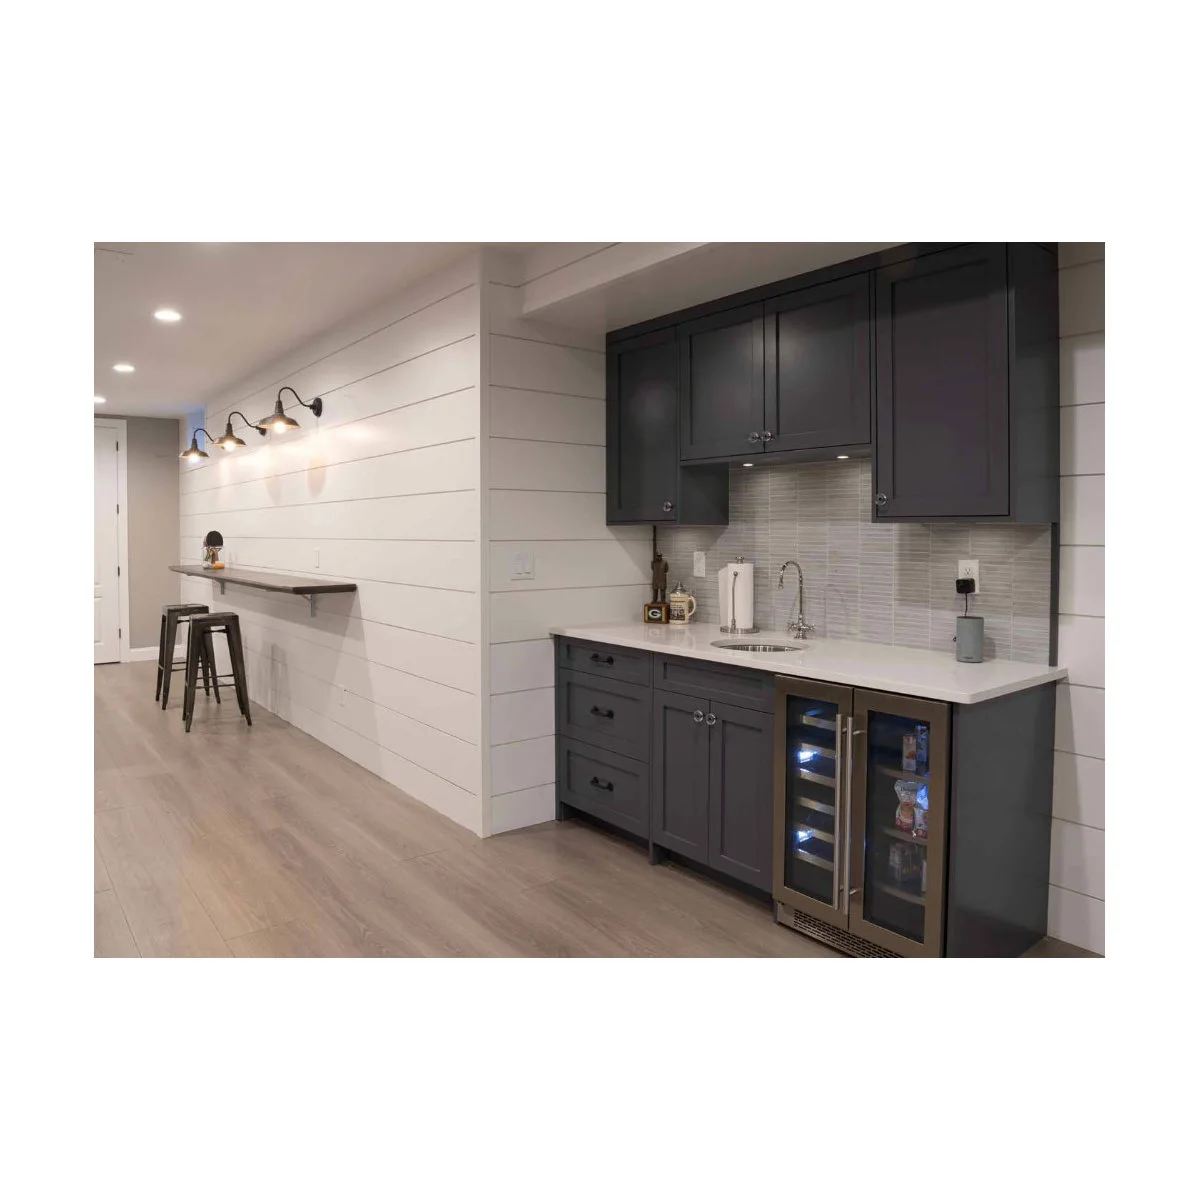
A compact dark cabinet niche contains the sink and beverage cooler, with cupboards above for additional storage. Its pale counter and backsplash give the working area contrast. A separate narrow wall ledge nearby offers another landing place without requiring a full peninsula in front of the bar.
Measure the niche around the appliance’s required clearances and allow access for repairs. Add task light where drinks are prepared rather than relying only on room lighting. A wall ledge can be useful, but confirm its support and keep any stools clear of the door or passage nearby. For a small cabinet run that also prepares food, compare these kitchenette ideas for small spaces.
IDEA 04 / 20
Use a Raised Guest Counter beside the Stairs
 SaveSupport Non AI Creator
Image credit: Project: Board & Vellum (via Houzz)
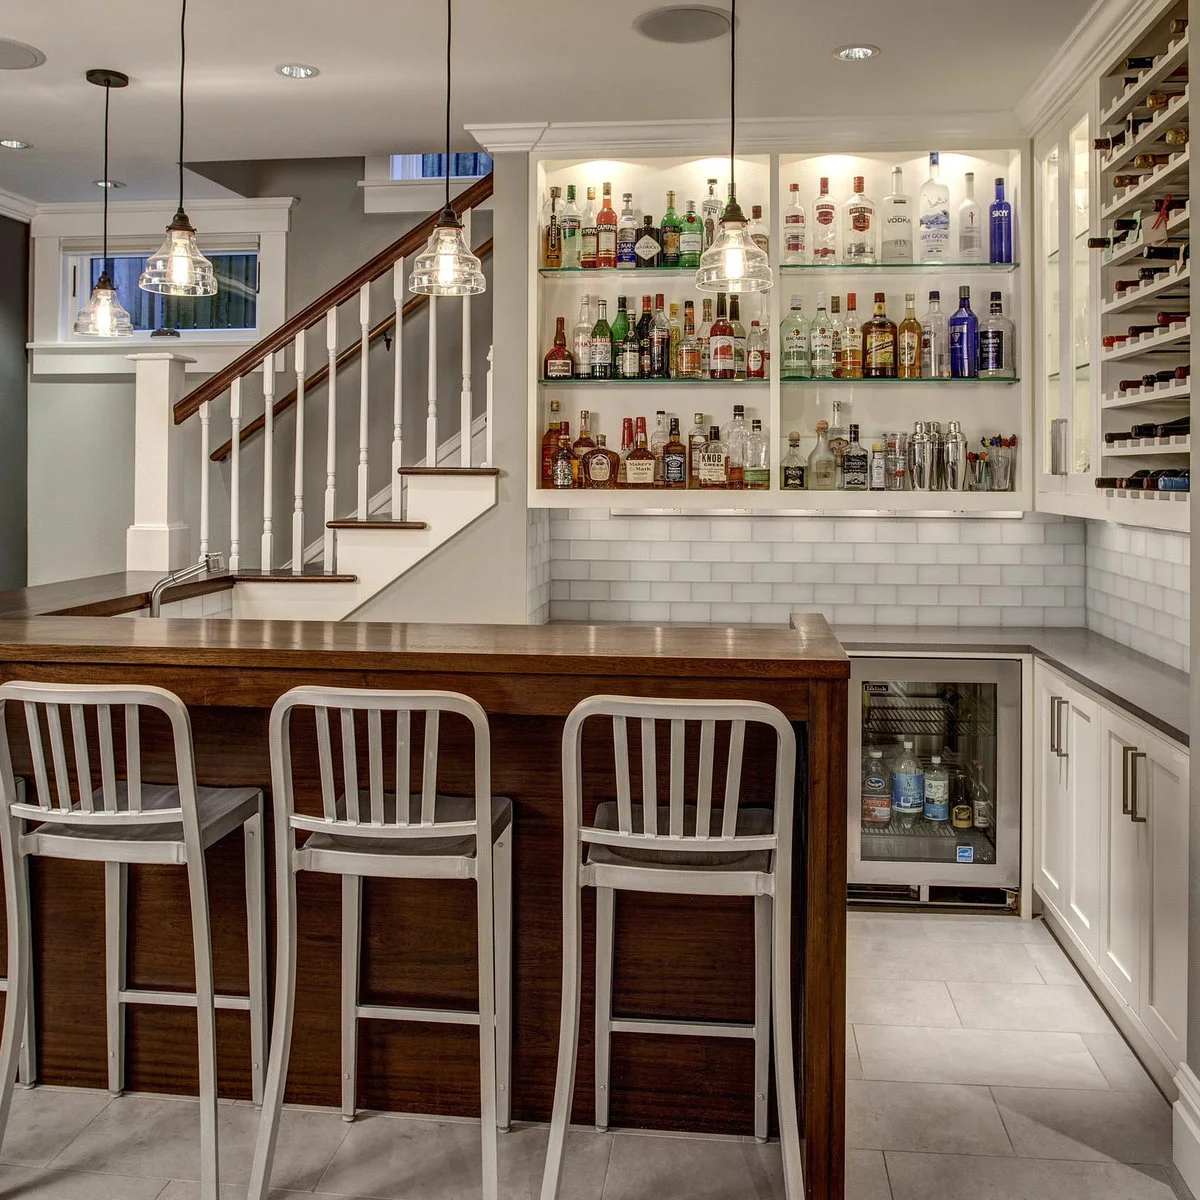
A raised wood-colored counter separates the guest stools from the preparation area. White cabinets and bottle shelves keep the background lighter, while glass pendants mark the counter above. The stairs remain visible at one end, showing why a bar beside circulation needs careful furniture placement.
Keep the route to the stairs unobstructed even when stools are occupied. Choose stool height from the actual counter and allow comfortable leg space. Have lighting and services planned appropriately, and avoid copying a tight arrangement simply because it appears balanced in a photograph.
IDEA 05 / 20
Let Existing Posts Shape the Bar Layout
 SaveSupport Non AI Creator
Image credit: Project: Just Basements (via Houzz)
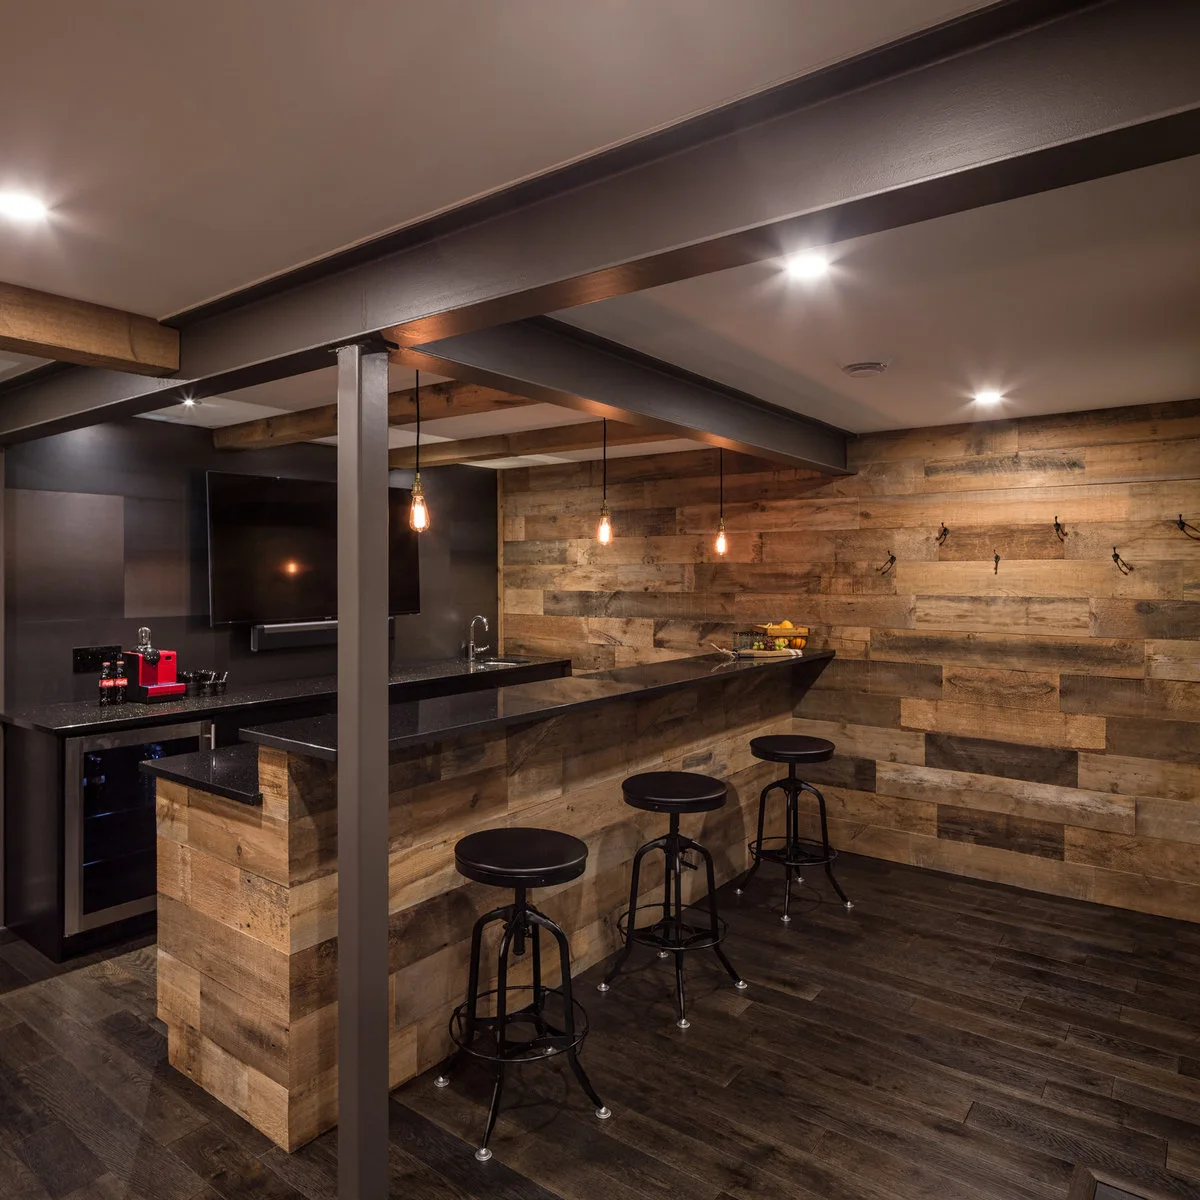
Dark posts and beams remain visible around the wood-colored bar facing. Black round stools fit along the guest side, with the sink and refrigerator positioned behind. The repeated darker finish connects the structure and furniture without trying to hide every interruption in the basement ceiling.
Treat existing posts as constraints until a qualified professional confirms otherwise. Plan the counter around a comfortable route and check headroom beneath beams and fittings. Use the visible structural rhythm as inspiration for finishes without assuming any column can be moved or enclosed without further assessment.
PART 02
Give Guests Comfortable Space
IDEA 06 / 20
Give a Traditional Bar a Clear Serving Edge
 SaveSupport Non AI Creator
Image credit: Project: Dave Fox Design Build Remodelers (via Houzz)
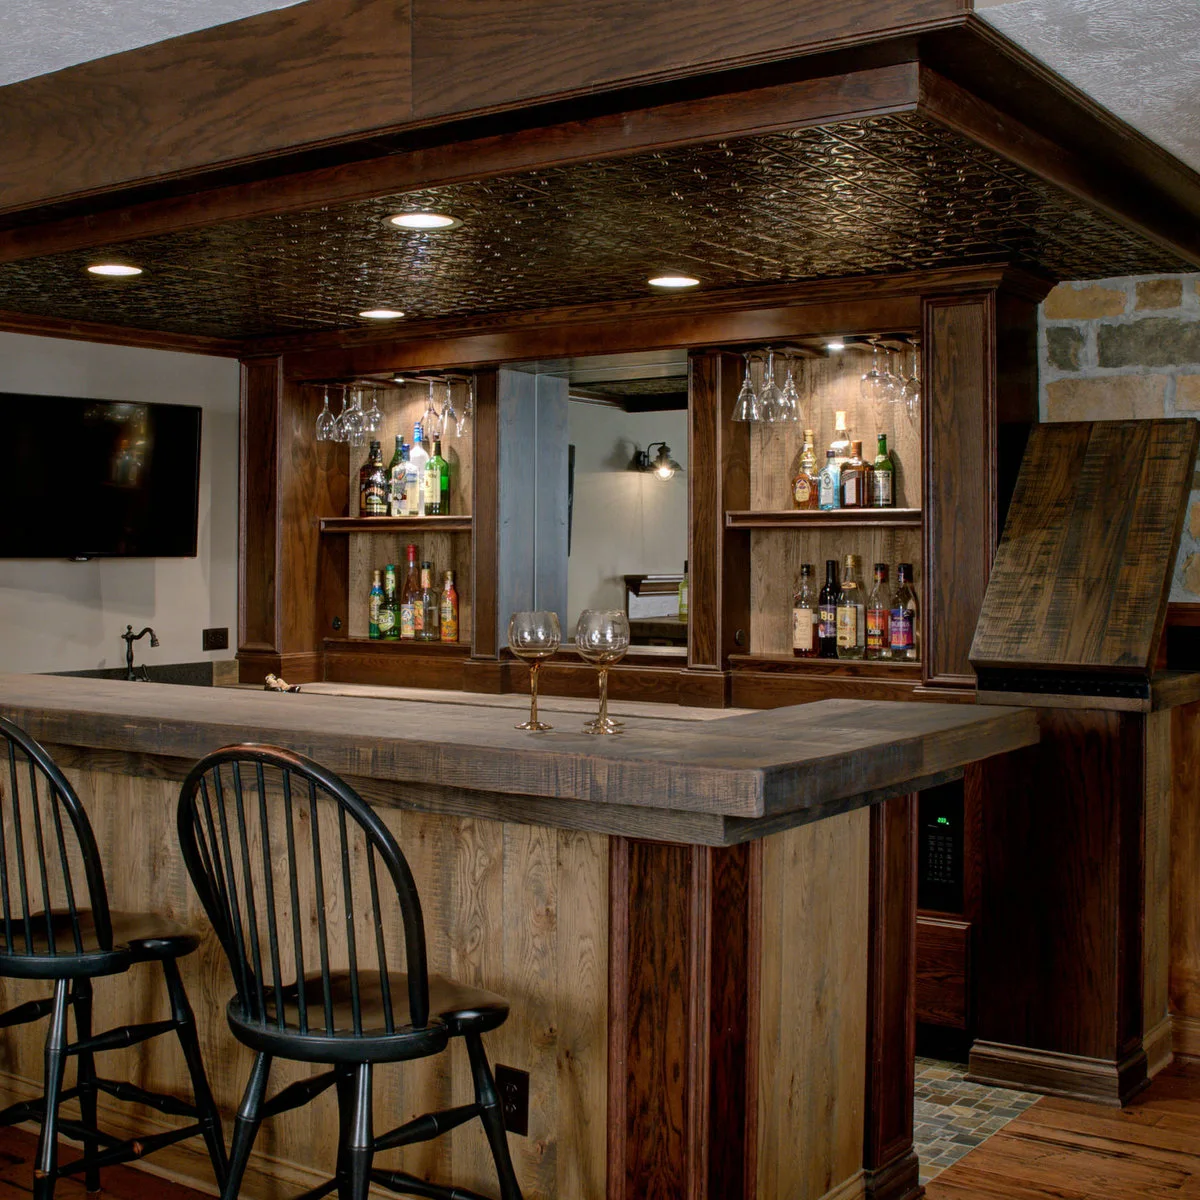
A broad wood-colored counter provides a clear serving edge in front of the mirrored back bar. Black stools repeat the darker ceiling detail, while hanging glass storage keeps stemware visible above. The raised counter separates the guest side from the preparation surfaces behind it.
Check knee space, stool width and the route behind seated guests before building a similar counter. Plan the glass racks around the actual glasses you own and secure them correctly. A decorative ceiling can define the bar, but it should not reduce headroom or hide service access that will be needed later.
IDEA 07 / 20
Keep Preparation Lower than the Guest Counter
 SaveSupport Non AI Creator
Image credit: Project: Gonyea Custom Homes (via Houzz)
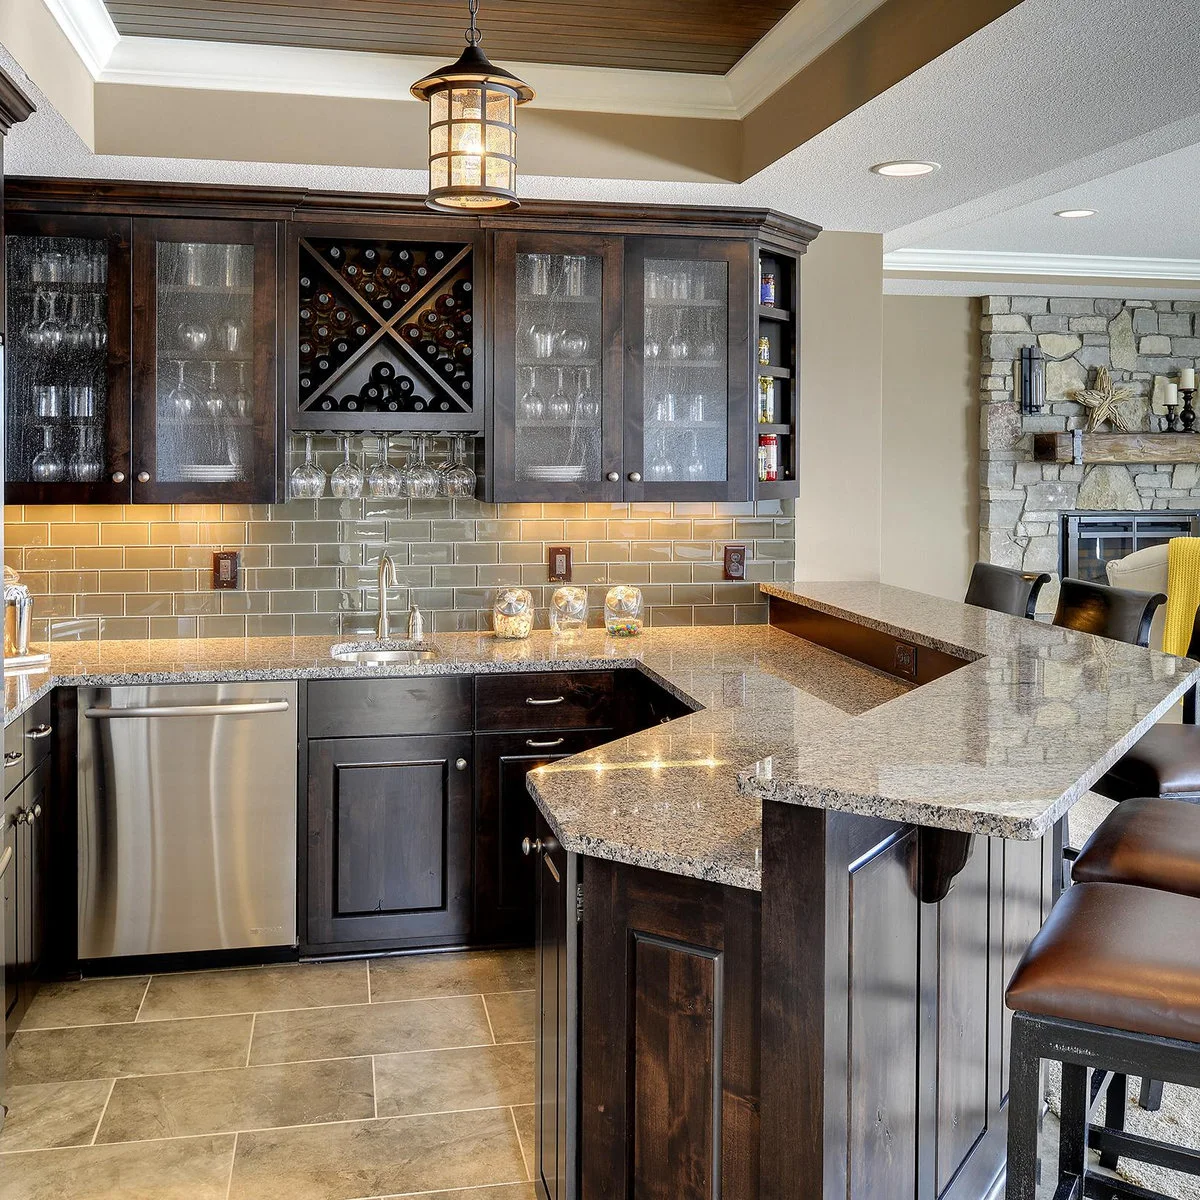
The lower work counter wraps around the sink while the raised guest edge faces the room. Dark cabinets hold glassware above, with a small diamond wine rack breaking up the doors. The pale counter connects the two levels without making them appear to serve exactly the same task.
Measure the working aisle with cupboard and appliance doors open, including the cleanup area. Two counter levels can separate activities but take more depth than a simple wall bar. Keep the guest overhang properly supported and confirm that stools fit without blocking access to the preparation side.
IDEA 08 / 20
Mark the Bar with a Smaller Ceiling Area
 SaveSupport Non AI Creator
Image credit: Project: NIH Homes (via Houzz)
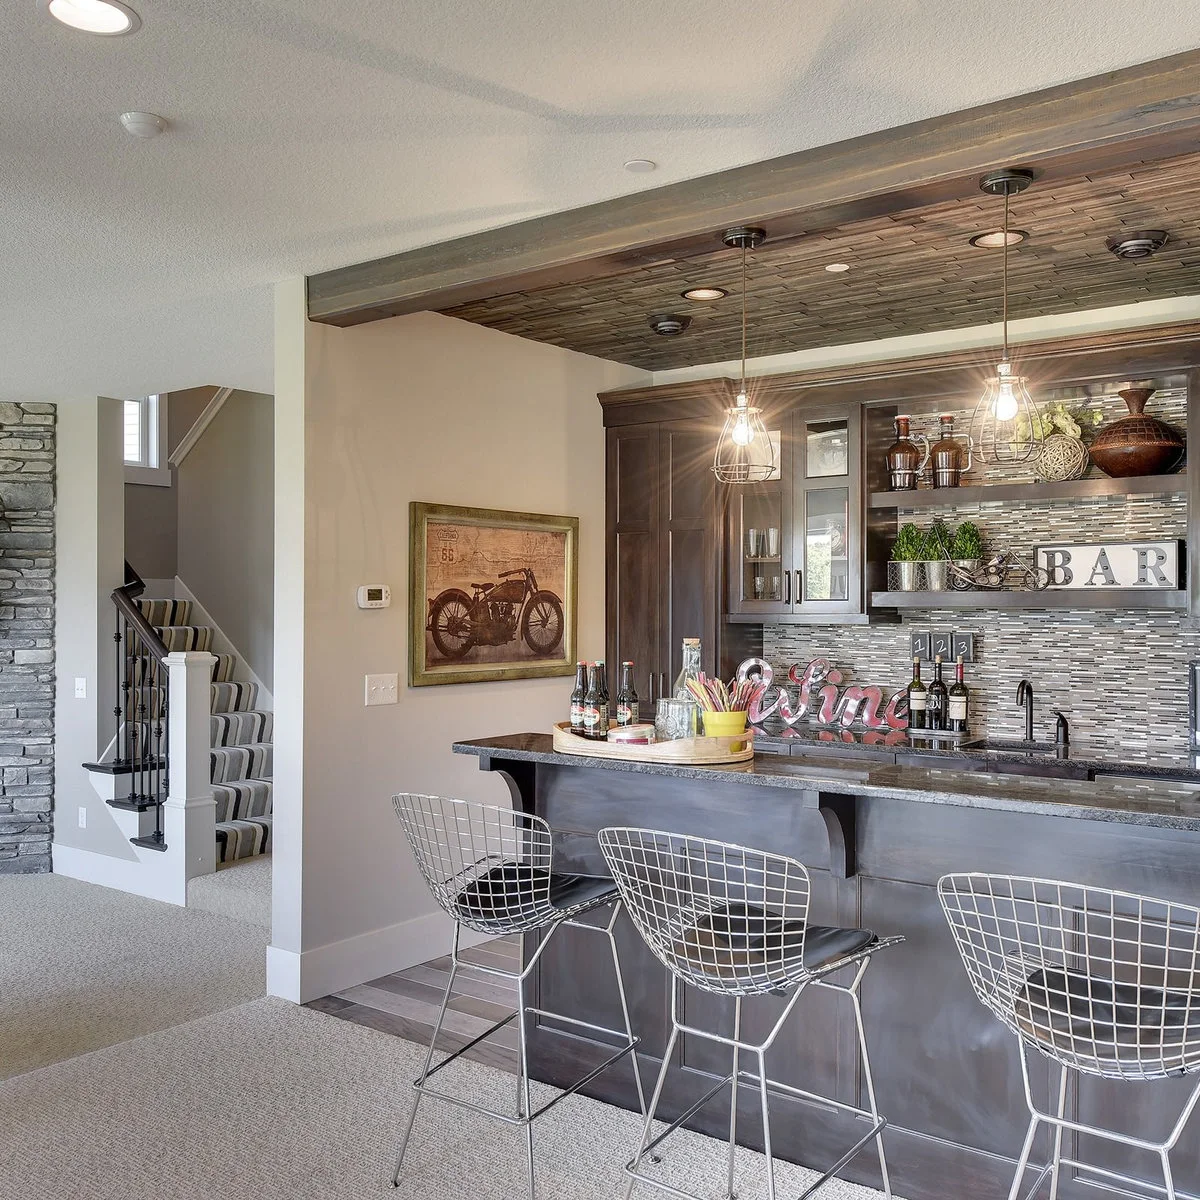
A wood-colored ceiling inset marks the bar as a separate area within the basement. Wire stools give the guest side lighter outlines, while the small-scale backsplash provides most of the pattern. The stair opening beside it remains distinct rather than being hidden behind another piece of furniture.
Check available headroom before adding ceiling finishes or pendant lights. Keep the bar’s edge and stools outside the stair route. Choose a backsplash for cleaning as well as appearance, since a heavily patterned surface can hide splashes visually without making them any easier to remove.
IDEA 09 / 20
Connect Pale Stools with Nearby Seating
 SaveSupport Non AI Creator
Image credit: Project: Whonsetler Photography (via Houzz)
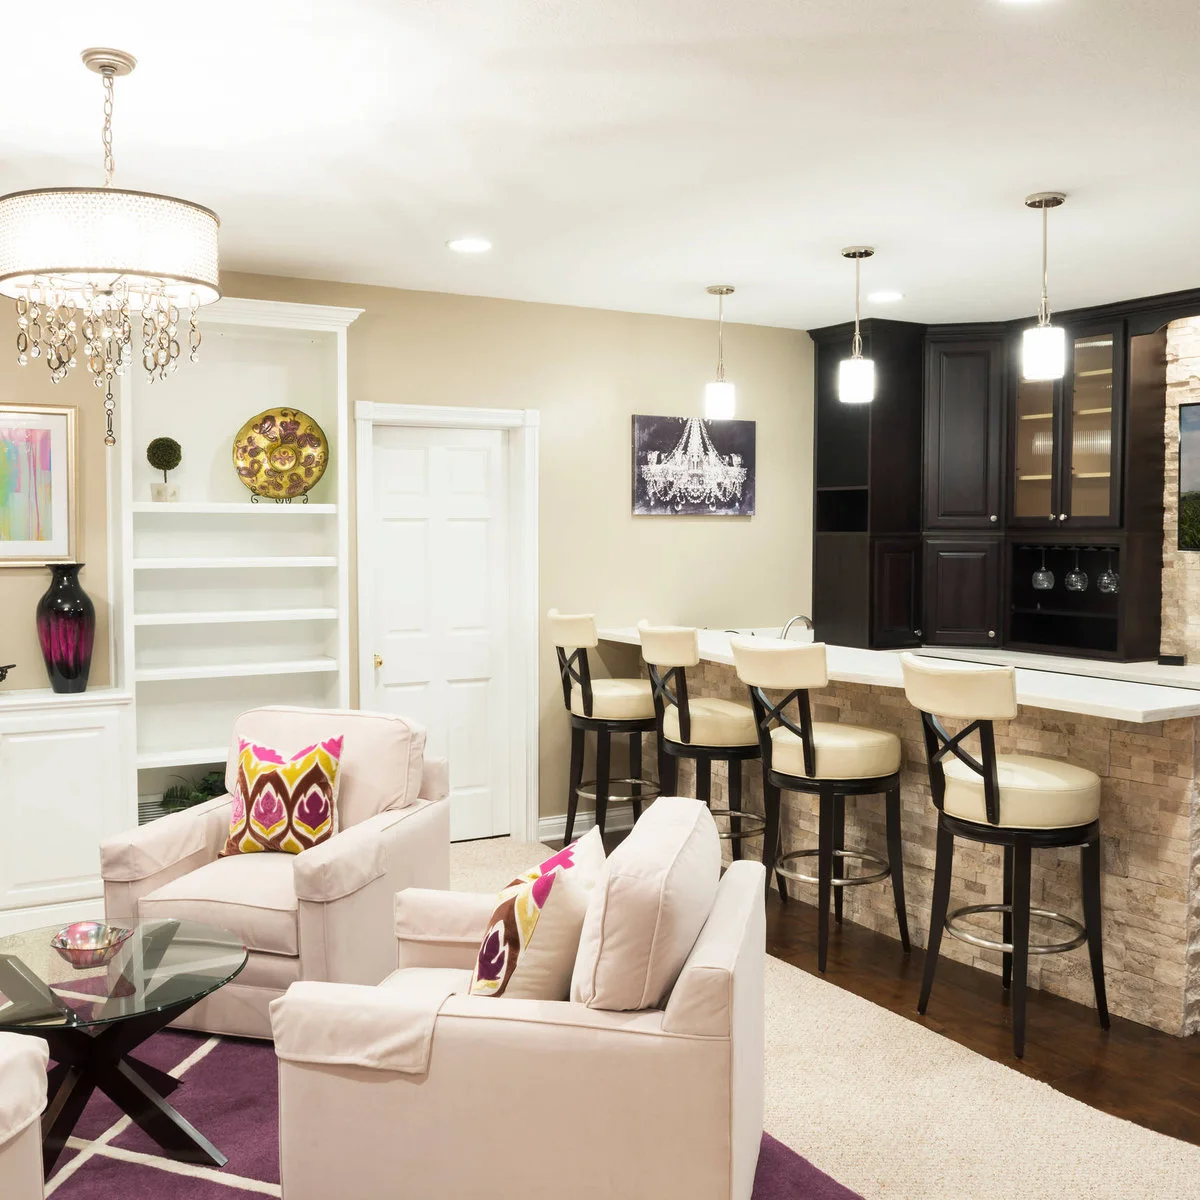
Pale stool upholstery connects the bar with the soft chairs in the sitting area. Dark upper cabinets give the serving wall contrast, while a pale counter separates them from the lower facing. Small pendants light the bar without requiring the adjoining room to use the same type of fitting.
Test upholstery cleaning needs before using pale fabric where drinks are served. Keep stools far enough from the chairs for people to pass when both areas are occupied. Coordinate a few finishes if you want the room to connect, but choose each seat for its intended height and use.
IDEA 10 / 20
Try a Curved Guest Edge with Simple Stools
 SaveSupport Non AI Creator
Image credit: Project: Gonyea Custom Homes (via Houzz)
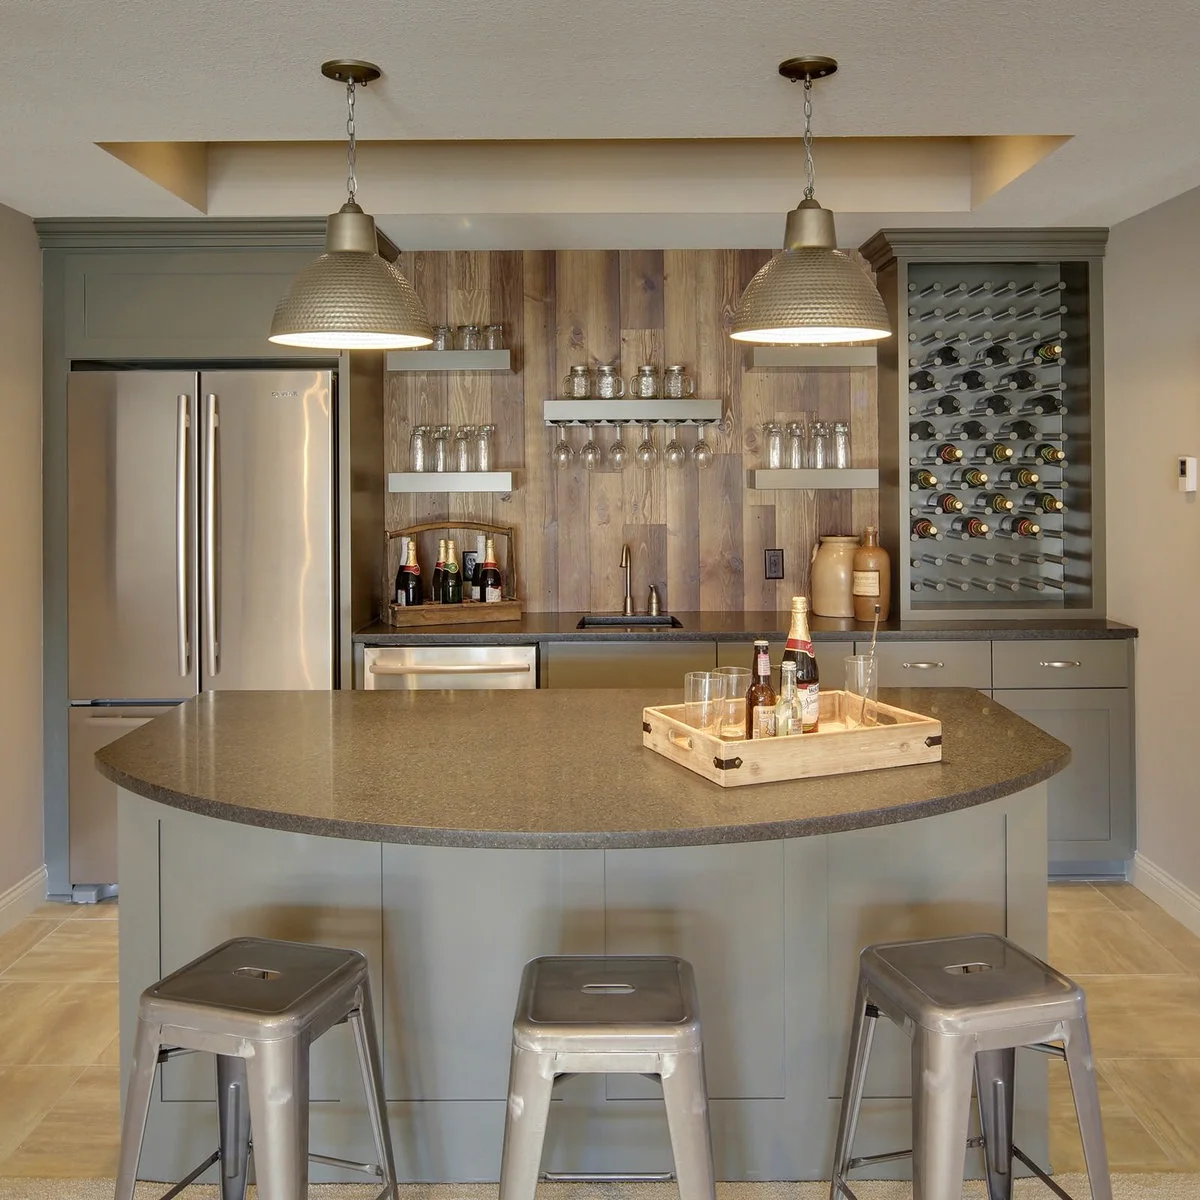
A curved guest edge softens the front of this gray bar, with three simple metal stools spaced around it. Open shelves and a hanging glass rack keep the back wall readable. A tall refrigerator and bottle display occupy opposite sides, framing the smaller preparation area between them.
Check the curved counter’s usable legroom rather than assuming it seats more people than a straight edge. Leave enough room behind each stool. Follow refrigerator ventilation requirements and plan a clear landing surface nearby so drinks do not have to be carried across the whole working aisle.
PART 03
Make Display and Storage Work Together
IDEA 11 / 20
Use Shelves and Closed Glass Cabinets Together
 SaveSupport Non AI Creator
Image credit: Project: Ed Saloga Design Build (via Houzz)
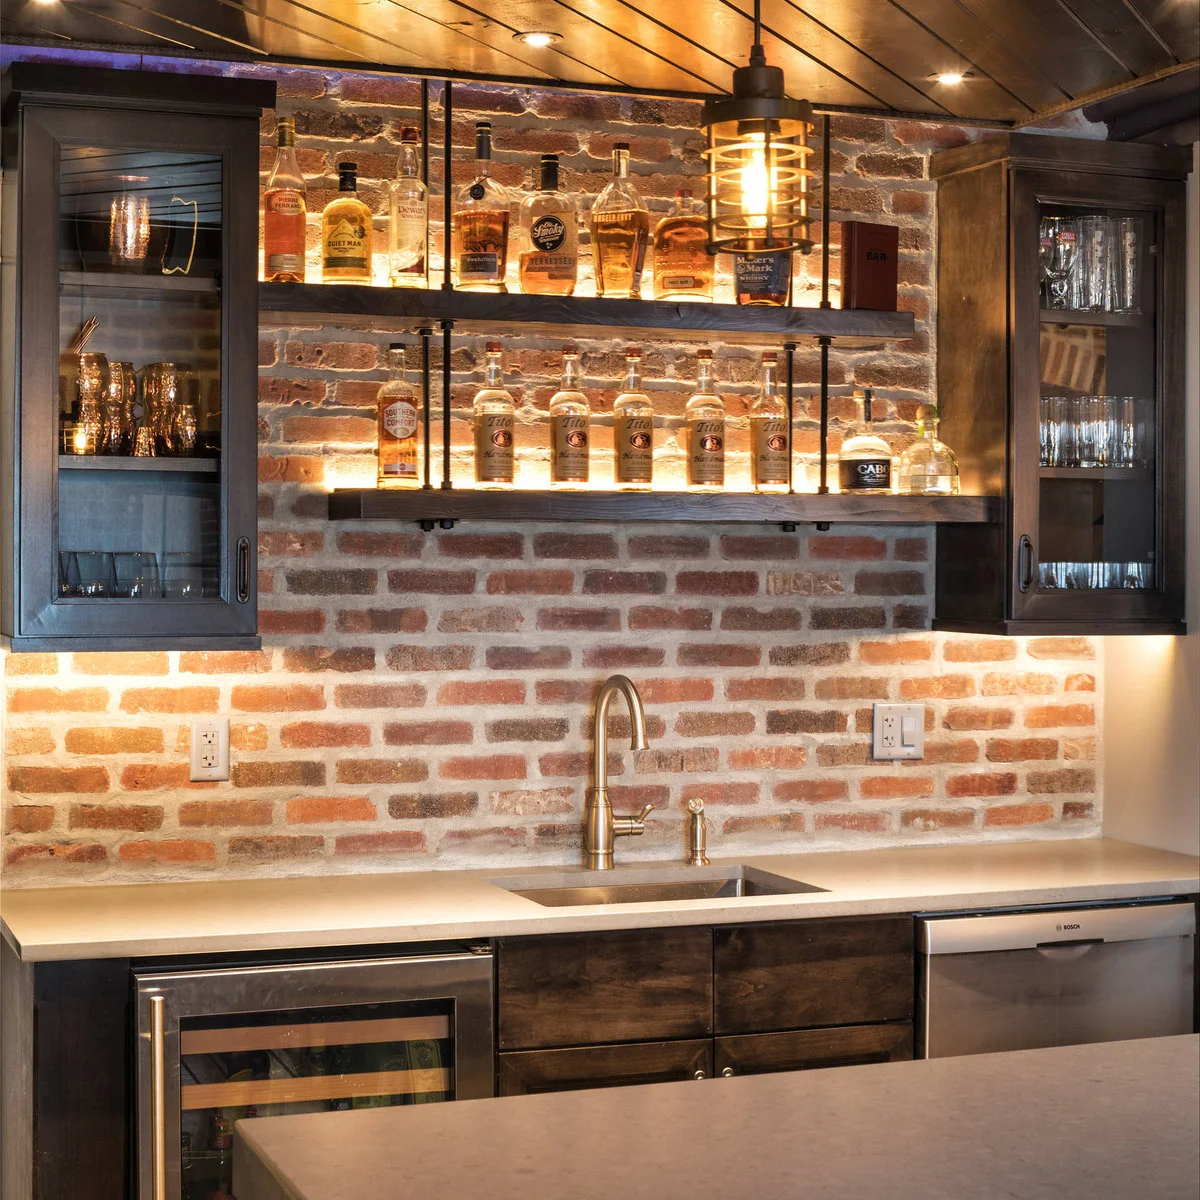
Open bottle shelves sit between glass-front cupboards above the sink. The brick-patterned backsplash gives the background texture, while the pale worktop stays relatively clear. Separate appliance fronts below make the working functions visible without requiring every item to remain on the counter.
Use open shelves for items you can reach and clean easily, keeping heavier bottles securely supported. Closed cupboards can help with dust but still need practical internal heights. Plan task lighting for the counter separately from display light so preparation remains comfortable when the room is dimmed.
IDEA 12 / 20
Use a Corner for a Smaller Bottle Display
 SaveSupport Non AI Creator
Image credit: Project: FBC Remodel (via Houzz)
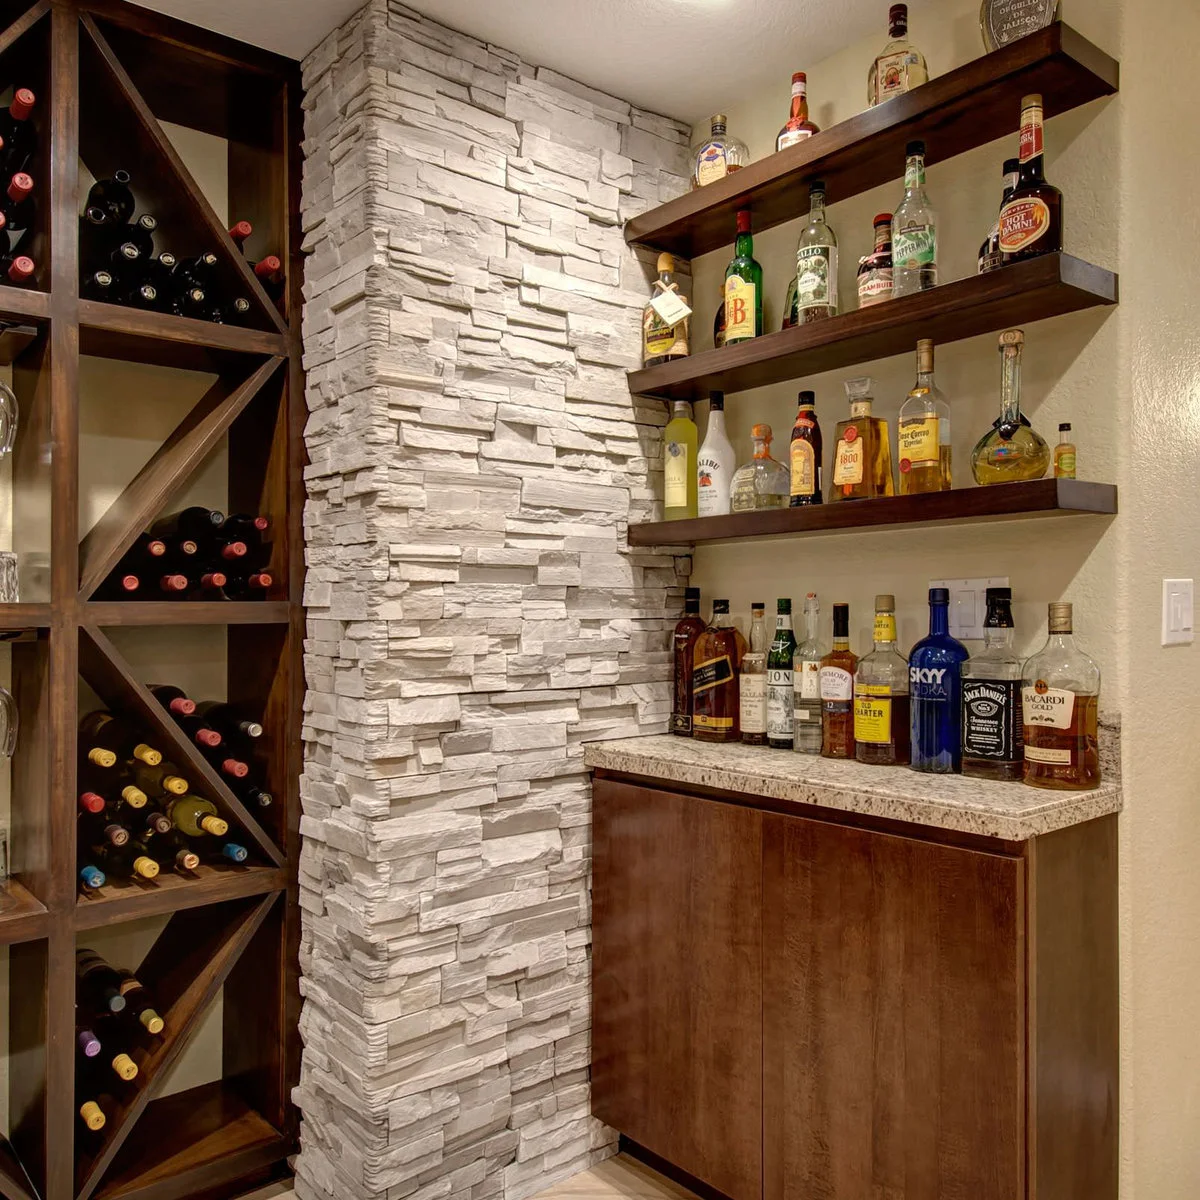
Wood-colored shelves and a narrow counter fit beside the pale textured column. A separate diagonal rack stores bottles at left, keeping the shelving’s purpose clear. The arrangement uses a corner for display without adding another deep cabinet to the floor in front of it.
Assess the number and weight of bottles before specifying shelves or racks. Keep everyday preparation space separate from the display so it stays usable. Textured finishes need cleaning access around their edges, and existing columns should be treated as part of the room’s constraints rather than altered for appearance alone.
IDEA 13 / 20
Use a Deep Cabinet Color with Lighter Fittings
 SaveSupport Non AI Creator
Source: houzz.com
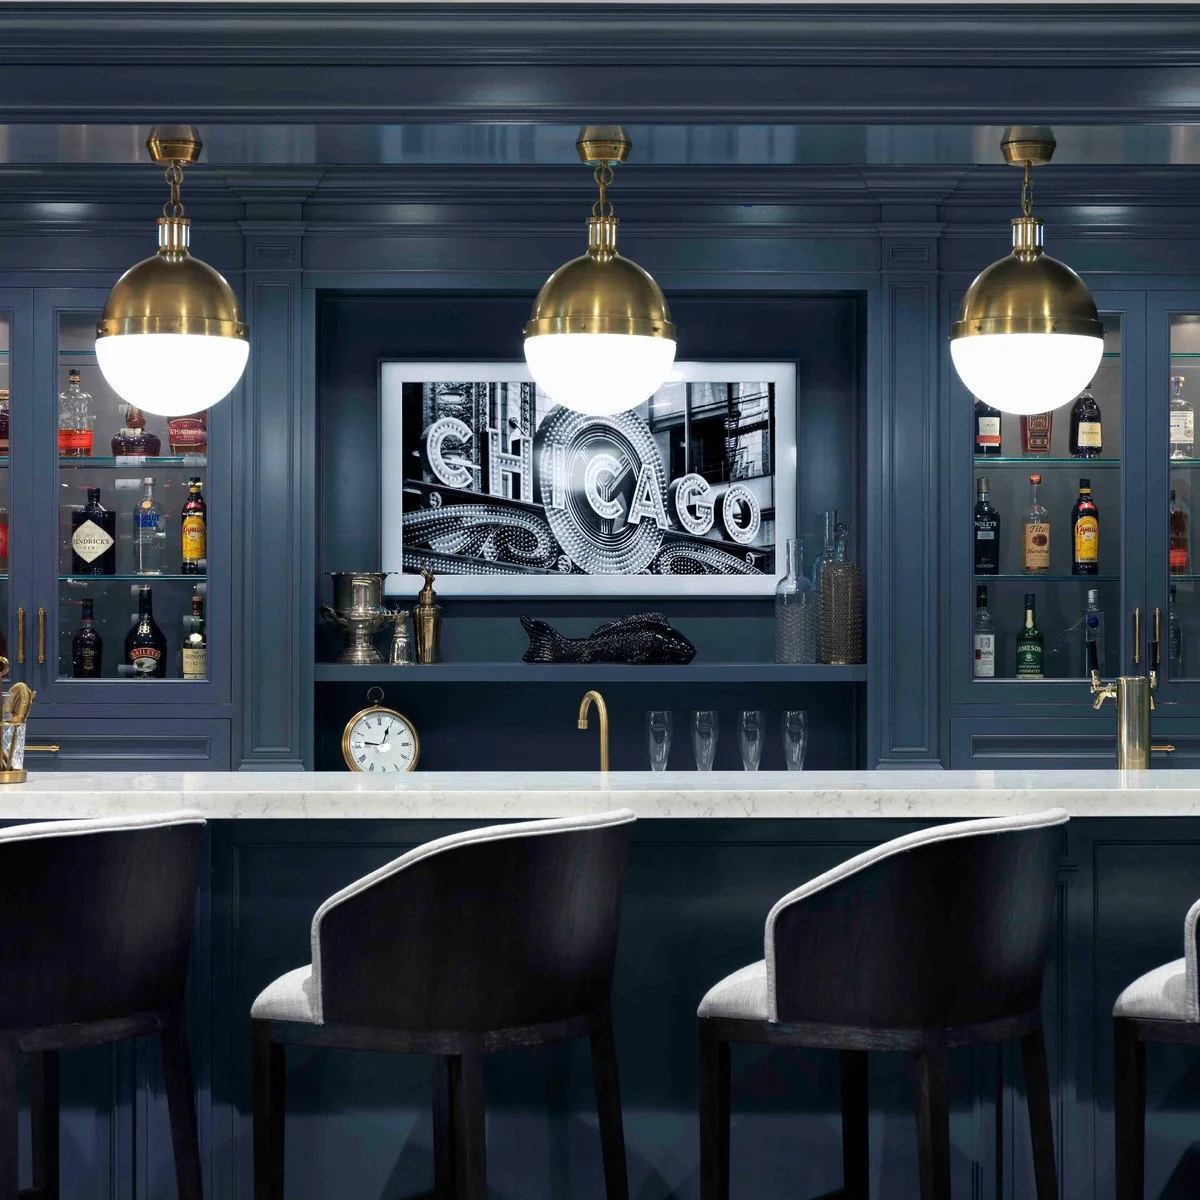
Deep blue cabinetry surrounds a central framed photograph, with glass-front cupboards keeping the bottle storage visible. Gold-colored fittings and pale globe pendants provide lighter shapes against the darker finish. The counter remains a plain horizontal surface rather than carrying another strong pattern beside the cabinetry.
Test the cabinet color under the lighting you intend to use at night. Keep the central display smaller than the practical storage around it if space is limited. Plan independent task light for preparation and choose handles, taps and fixtures by care needs as well as their matching appearance.
IDEA 14 / 20
Choose a Counter Finish You Can Maintain
 SaveSupport Non AI Creator
Image credit: Project: Dave Fox Design Build Remodelers (via Houzz)
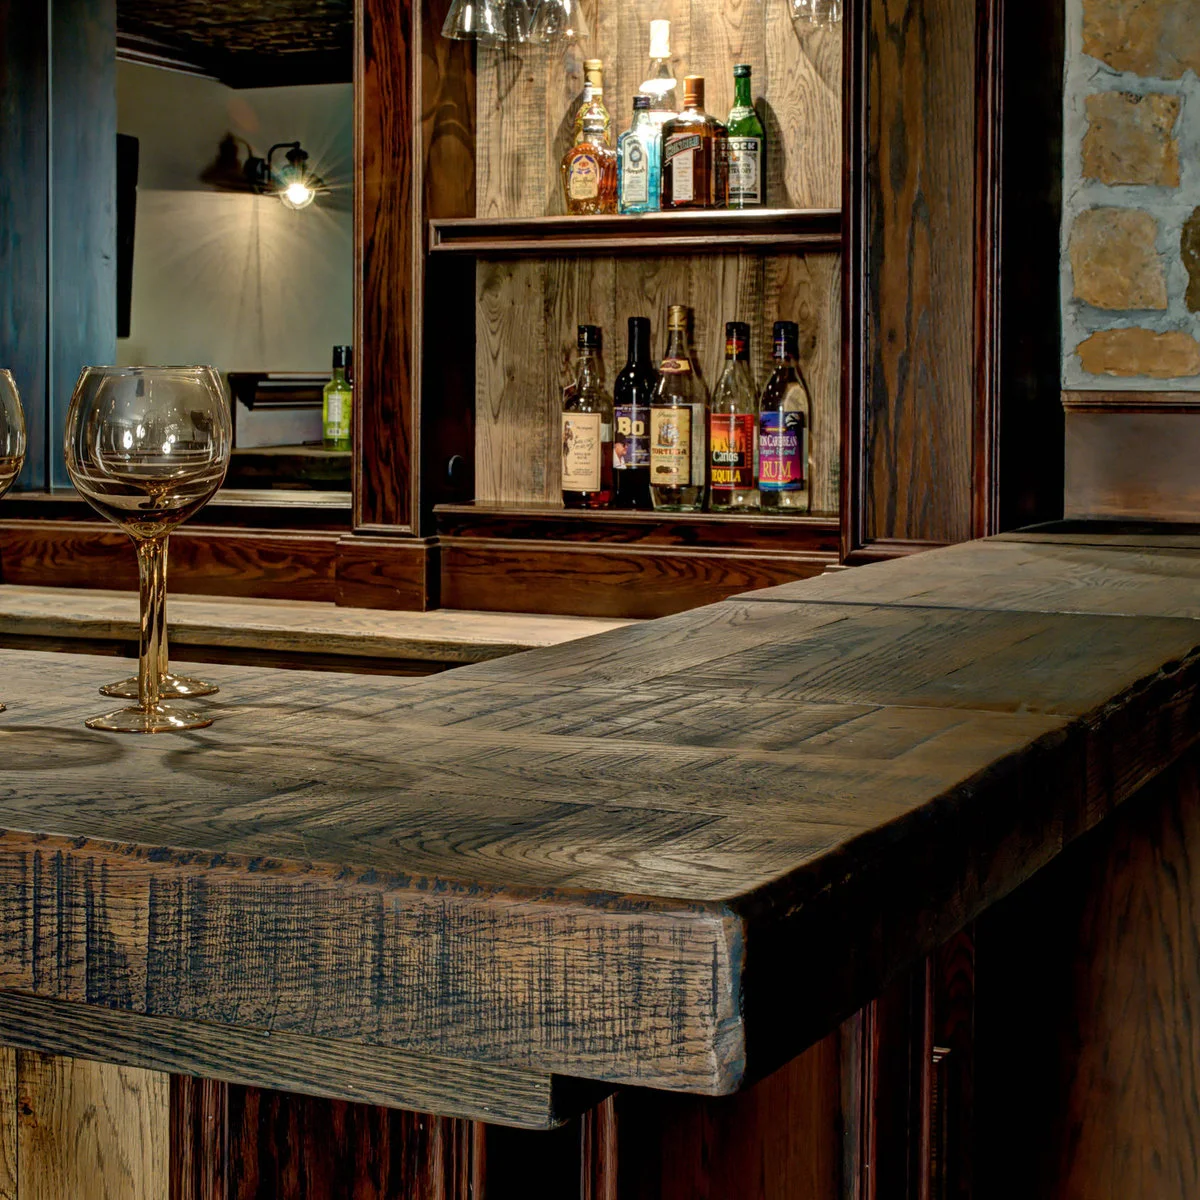
The close view shows a broad wood-colored counter with prominent grain and irregular-looking surface marks. Bottle shelves and a mirror sit behind it, keeping the same warmer color group. The counter’s texture supplies much of the character without another patterned accessory on top.
Do not identify wood species or finish from a photograph alone. Ask how the actual surface handles water, staining and repeated cleaning before choosing it for a bar. Check that the edge feels comfortable to lean against and use suitable protection beneath wet glasses where the finish requires it.
IDEA 15 / 20
Plan Equipment Space beside the Bottle Shelf
 SaveSupport Non AI Creator
Source: houzz.com
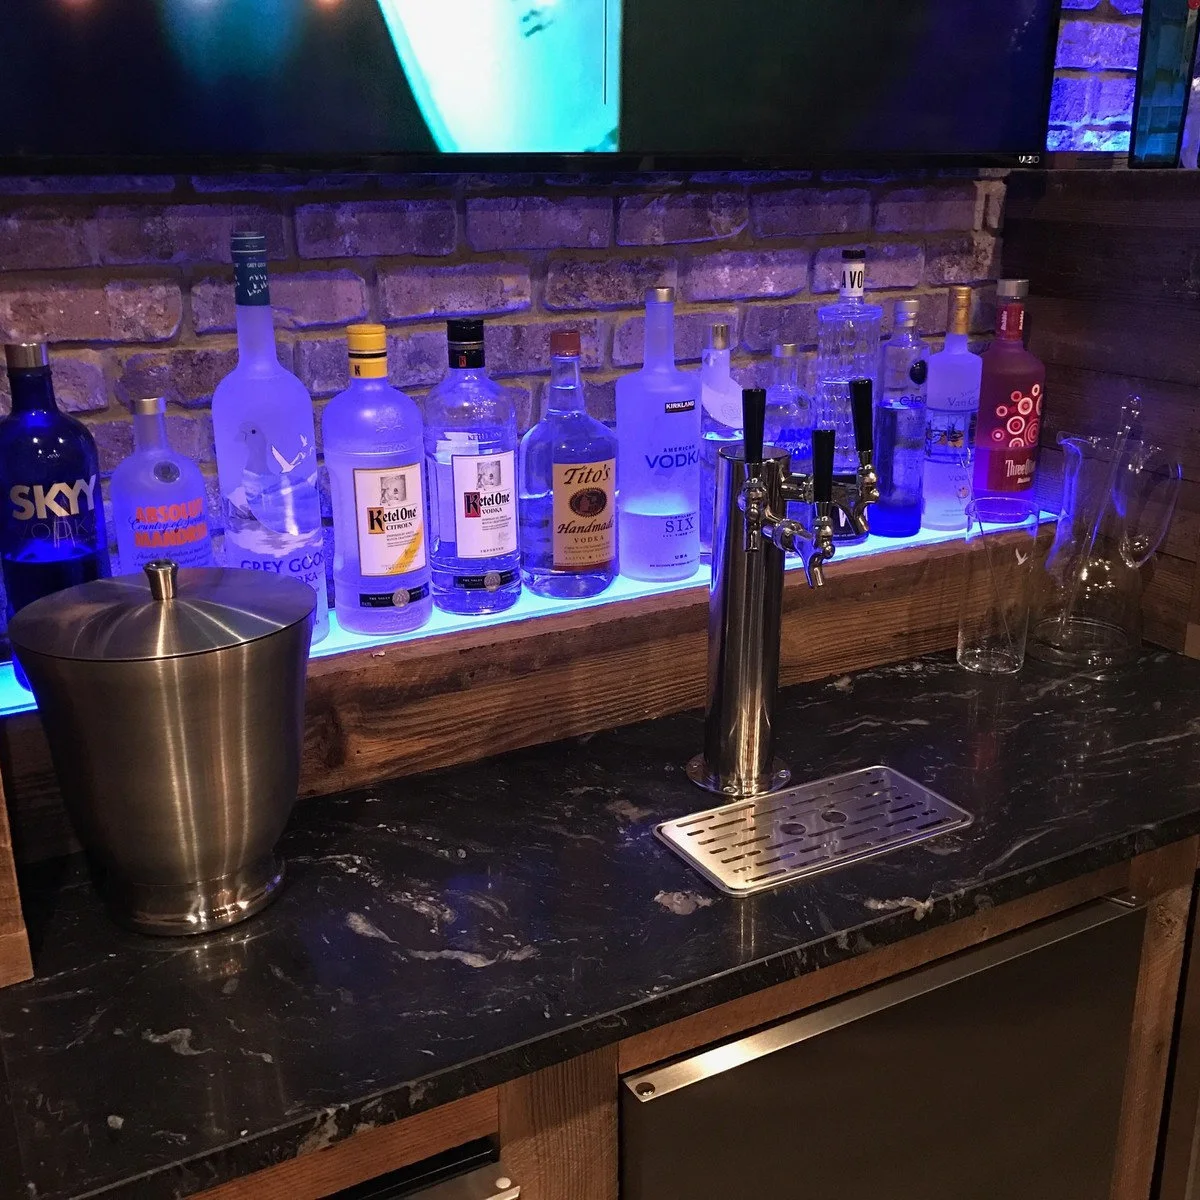
An illuminated bottle shelf sits behind a draft tap and drip tray on the dark patterned counter. Glassware occupies one side, leaving the tap easy to identify. This close view highlights how serving equipment takes a specific part of the worktop rather than functioning as a small decorative accessory.
Add draft equipment only if its cooling, cleaning and maintenance needs fit your plans. Leave room for the drip tray, glass handling and service access. Decorative shelf light should not replace useful task light, and the preparation surface needs regular cleaning even when a busy pattern makes small marks less obvious.
PART 04
Connect the Bar with the Rest of the Room
IDEA 16 / 20
Keep the Bar Distinct from the Cinema Seats
 SaveSupport Non AI Creator
Source: www.houzz.com
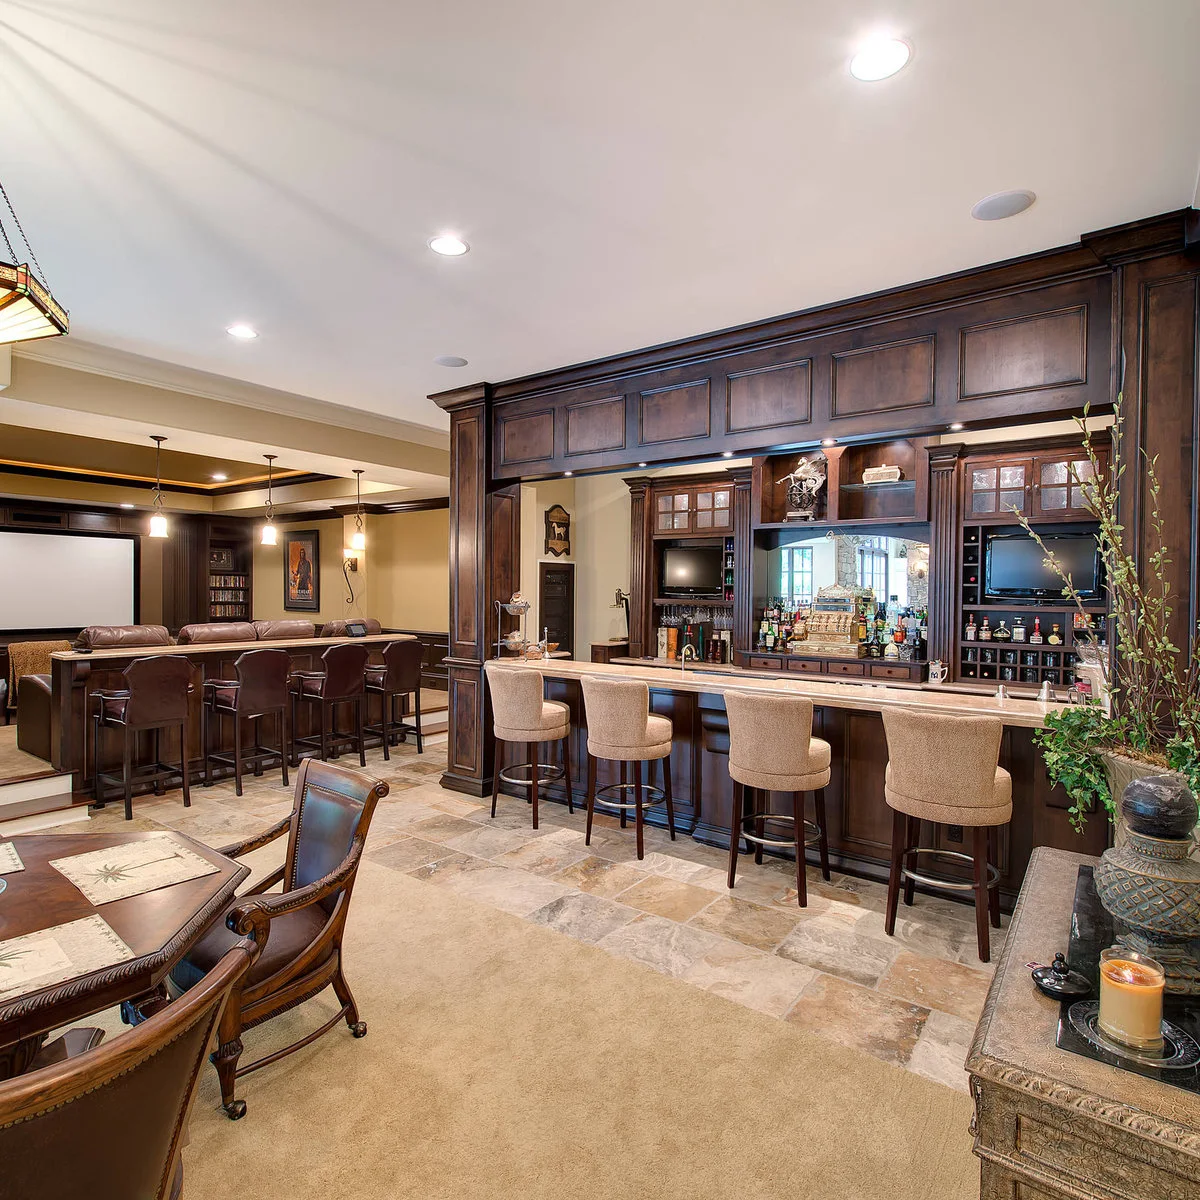
The wood-colored bar forms one side of this larger basement, with pale stools facing its serving counter. Cinema seating occupies a separate area beyond. Repeated darker finishes connect the activities, while different counter and seating positions keep them from all requiring the same floor space.
Borrow the separation of uses rather than the full scale if your basement is smaller. Leave a route between bar and viewing seats that remains clear during gatherings. Plan lighting so drinks can be prepared without bright glare across the screen, and keep equipment access practical behind fitted cabinetry.
IDEA 17 / 20
Use One Finish to Connect Bar and Table Seating
 SaveSupport Non AI Creator
Image credit: Project: Emery Design | Build (via Houzz)
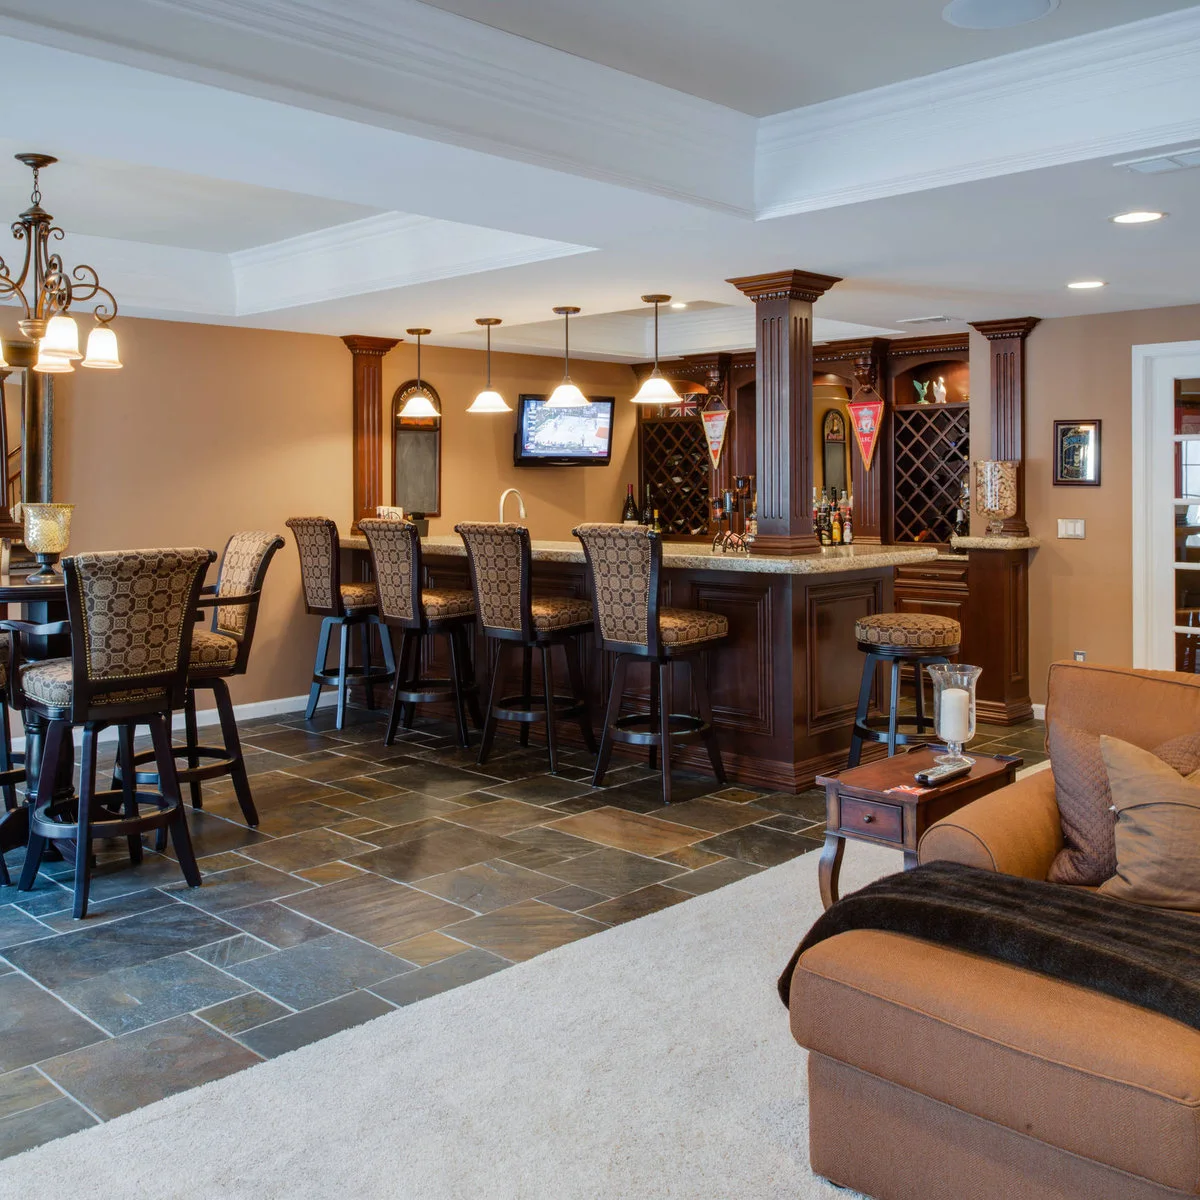
Patterned upholstery connects the bar stools with the tall table seats nearby. Wood-colored cabinetry and warm walls continue the same restrained color group. The sofa sits farther from the serving area, giving the larger basement more than one way for people to gather.
Decide how many seats will realistically be used before adding a second table. Keep access to the sink, refrigerator and room doors comfortable with chairs occupied. Matching upholstery can connect furniture, but choose cleaning-friendly fabric and prioritize practical seat heights over a perfectly uniform set.
IDEA 18 / 20
Use a Bar Counter behind the Sofa
 SaveSupport Non AI Creator
Image credit: Project: TATCOR DESIGN BUILD (via Houzz)
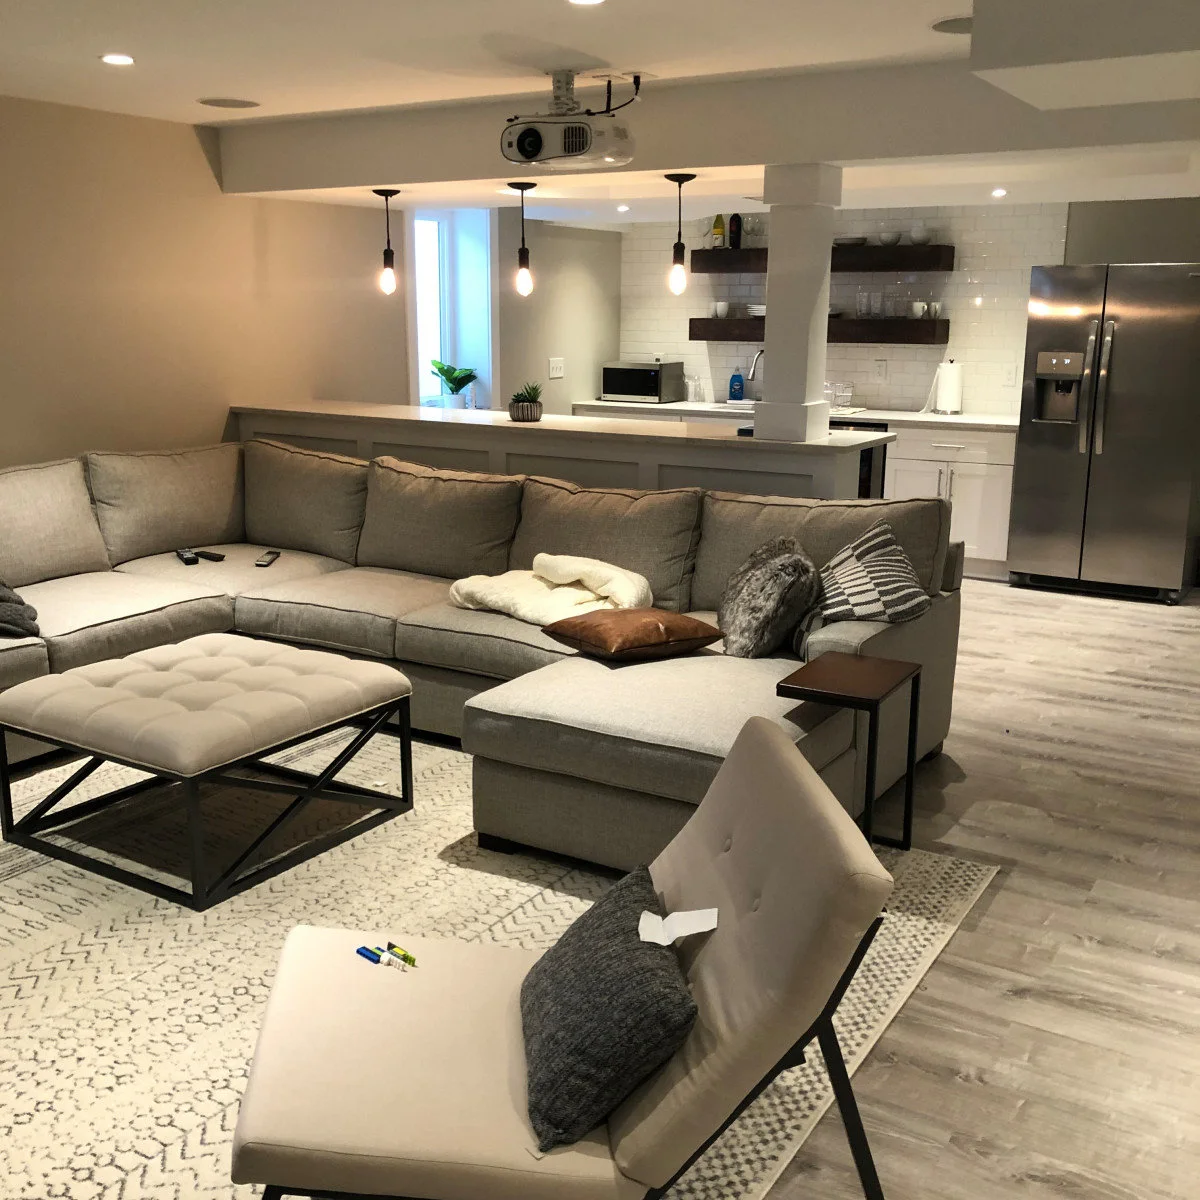
A pale bar counter runs behind the gray sofa, with the sink and refrigerator on the working side beyond. The arrangement places refreshments near the sitting area without adding small tables across every part of the room. A darker floor and rug distinguish the main seating group below.
Measure access behind the sofa before fitting a counter or placing stools there. Keep appliance doors and the cleanup route clear when the sitting area is occupied. A full-sized refrigerator may be useful for regular entertaining, but compare its footprint with a smaller option before reducing valuable living space.
IDEA 19 / 20
Keep a Continuous Preparation Surface inside the Bar
 SaveSupport Non AI Creator
Image credit: Project: Board & Vellum (via Houzz)
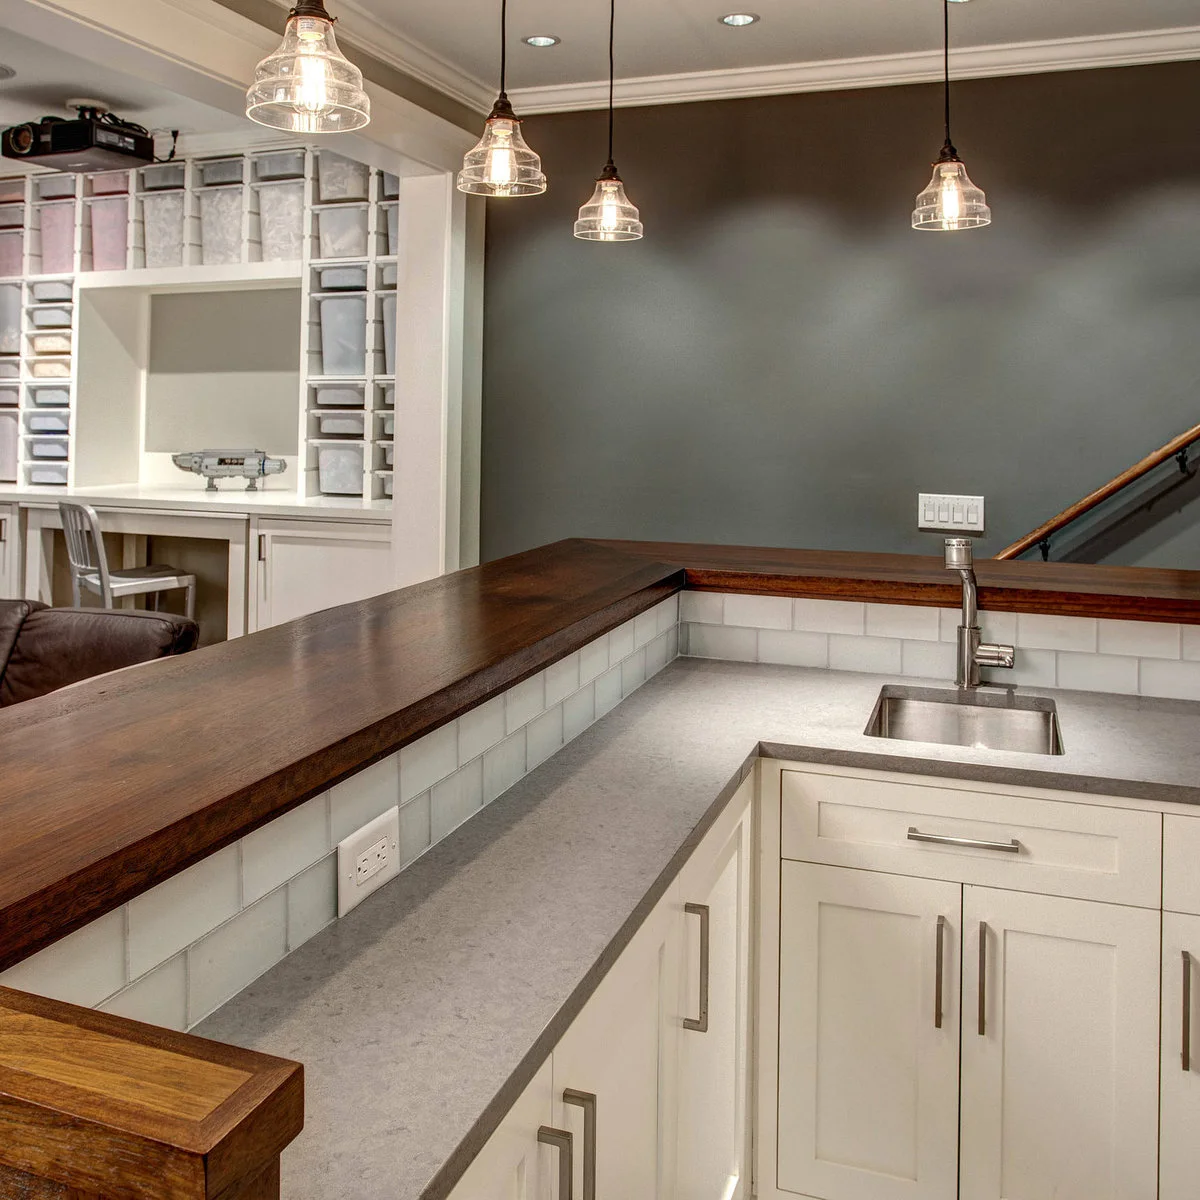
The view from inside the bar shows a continuous pale preparation surface around the sink. Drawers and cupboards sit below, while the raised wood-colored edge separates the working area from the rest of the room. The plain counter offers room to set down a tray and organize cleanup.
Plan the clear work area before adding extra appliances or permanent displays. Keep sockets accessible and use appropriate professional installation around water. If the basement is shared with family activities, provide secure storage where needed and avoid allowing drinks supplies or glassware to spill into neighboring play or hobby space.
IDEA 20 / 20
Close a Small Drinks Niche when It Is Not Needed
 SaveSupport Non AI Creator
Image credit: Project: Charlotte Candillier Interiors (via Houzz)
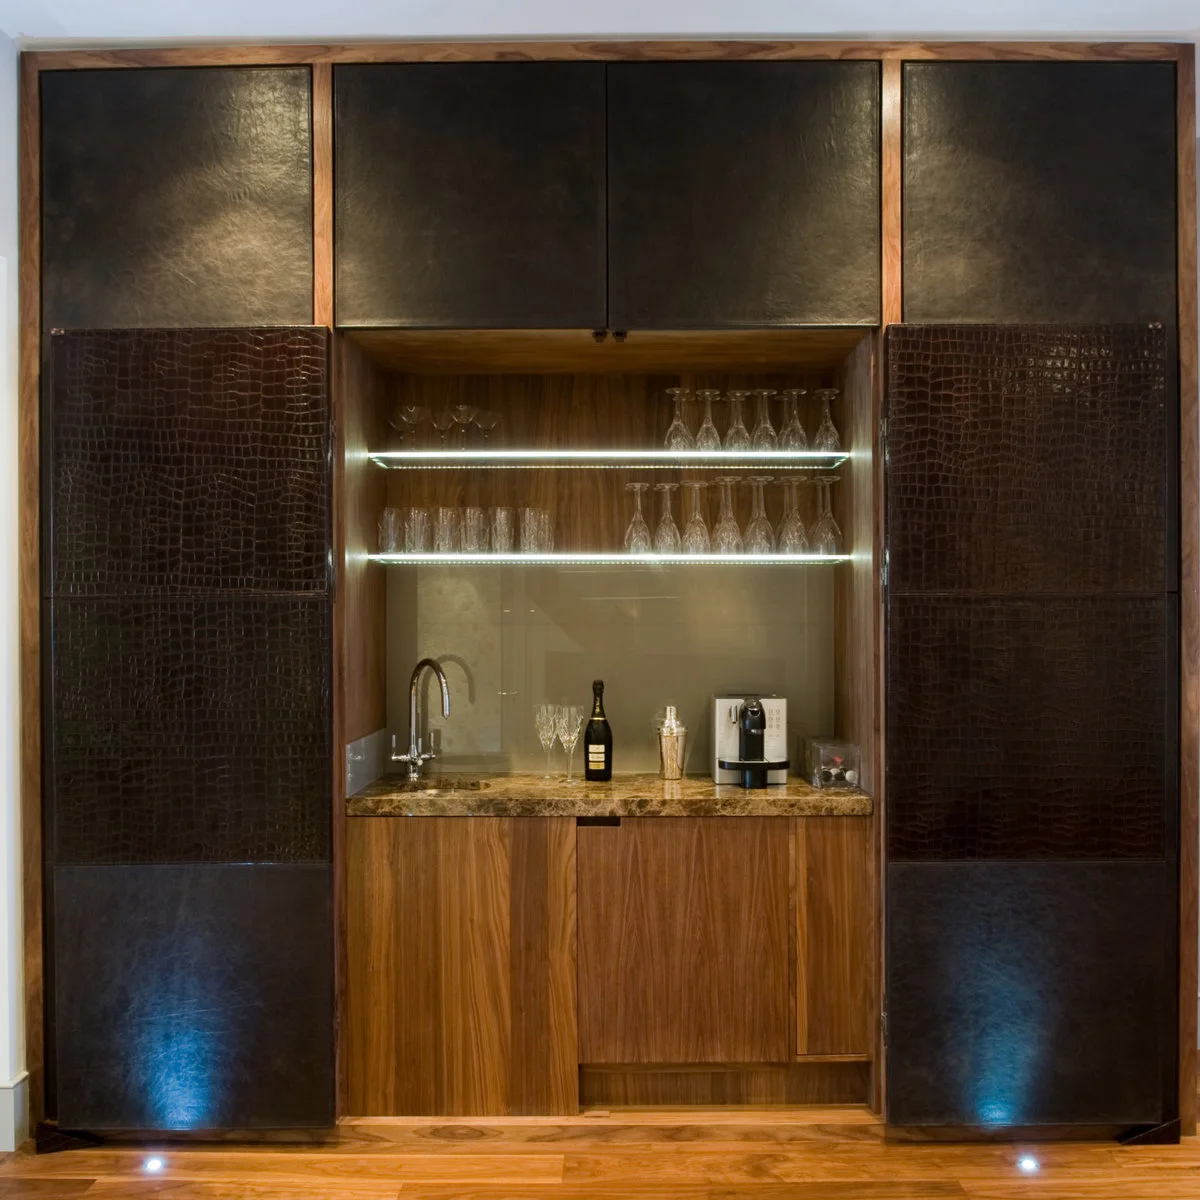
Folding doors open to reveal a compact drinks niche with lit glass shelves, a small sink and lower cupboards. The wood-colored interior contrasts with the darker door faces. This keeps the preparation area within one cabinet composition instead of building a peninsula across the room.
Allow space for the doors in their open position and follow appliance ventilation requirements if adding equipment inside. Secure glass shelves and keep the working surface lit. A closable niche can reduce visual clutter, but it still needs cleaning access and a suitable plan for water and electrical services.
BRING IT ALL TOGETHER
Plan the Working Side First
List drinks, serving pieces and cleanup tasks before adding stools or a decorative back wall. A short cabinet run may serve everyday refreshments better than a large bar that consumes the basement’s walking space.
Confirm the room’s condition and services before fitting finishes. Choose storage, appliances and lighting that you can maintain, then add the display details that suit your household rather than filling every shelf.