A kitchen island earns its place when it makes preparation, storage or serving easier without blocking the room. Decide which job matters most before choosing its size, adding appliances or planning stools.
These kitchens range from a small rolling cart to larger fitted islands. Use the visible details to compare options, then measure your own room with appliance doors open and people moving through it. More countertop is useful only if the surrounding routes still work.
PART 01
Fit the Island to the Room
IDEA 01 / 20
Try a Small Rolling Prep Cart
 SaveSupport Non AI Creator
Image credit: Project: BlueWaterPictures- Dennis Anderson photographer (via Houzz)
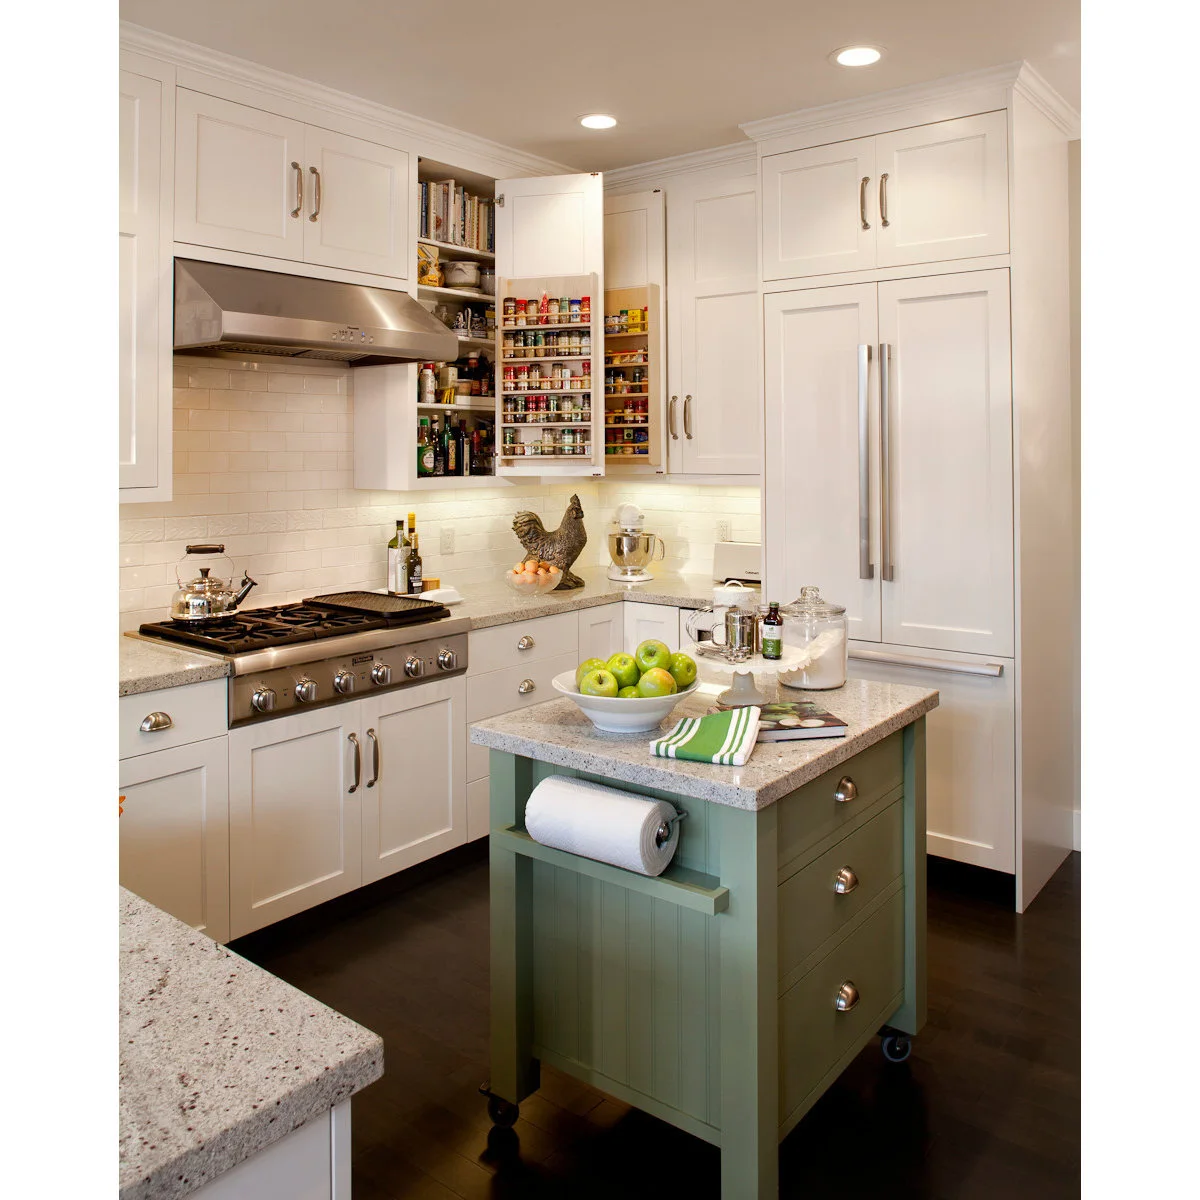
A compact green cart adds a work surface between the fitted cabinets in this small kitchen. Drawers face one side, while a paper towel roll sits on the end. Visible casters distinguish it from a permanently fitted island and suggest a more flexible layout.
Measure the cart in both its working and parked positions. Choose stable construction and suitable locking casters, and keep it clear of appliance doors. A small kitchen benefits from a movable surface only when there is somewhere useful to move it without blocking the main route.
IDEA 02 / 20
Use an Open-Leg End to Reduce Bulk
 SaveSupport Non AI Creator
Image credit: Project: Celeste Lewis Architecture (via Houzz)
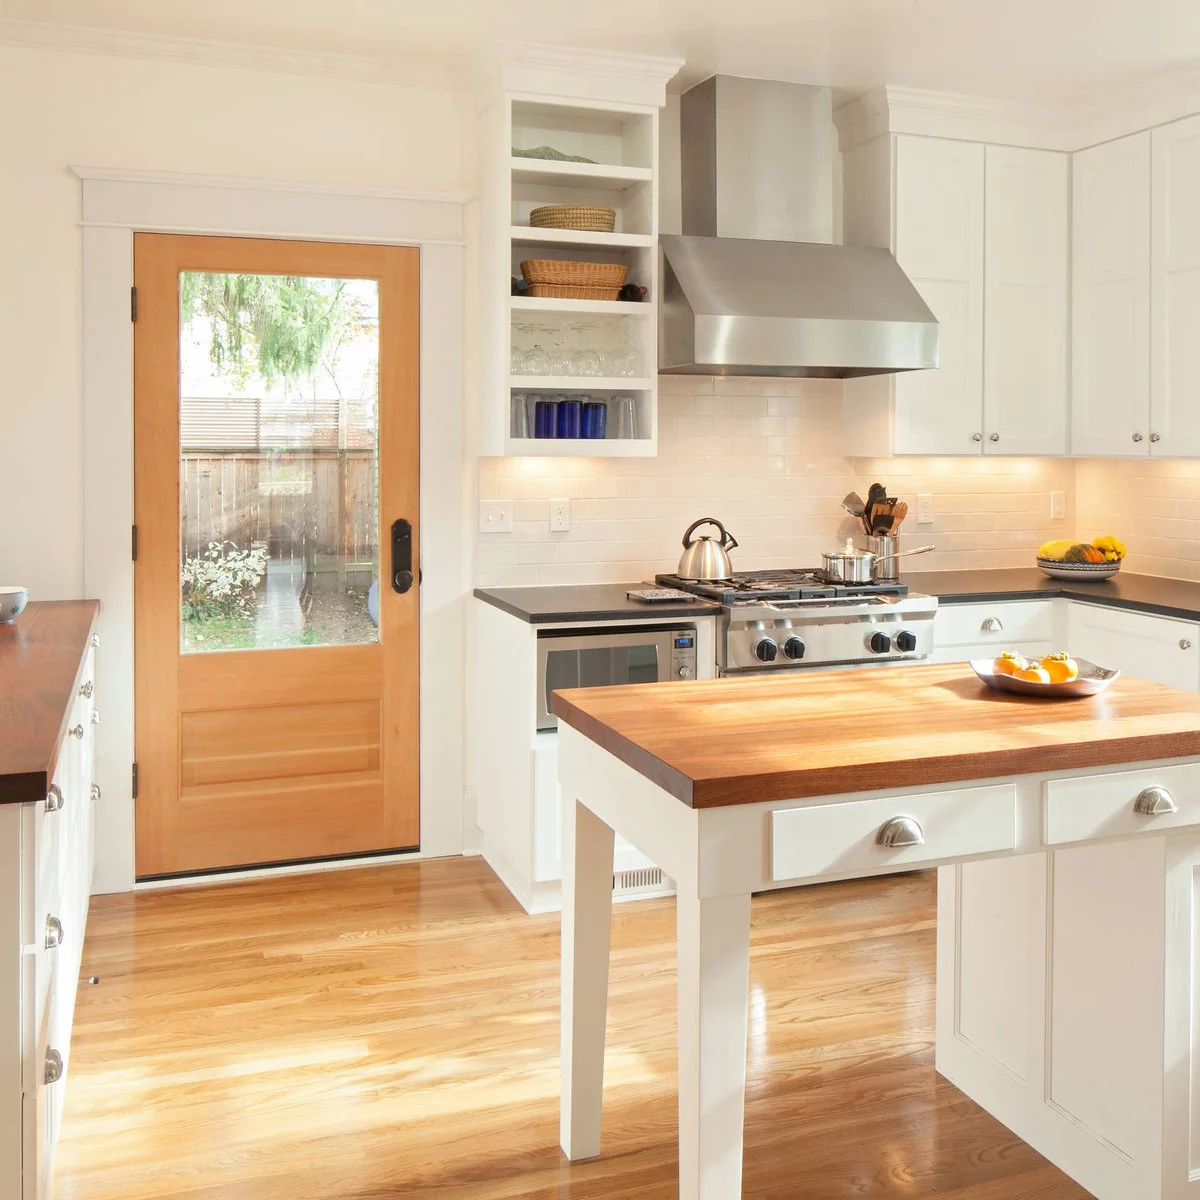
A wood top rests over white drawers and an open-legged end in this small kitchen. The visible floor beneath part of the island makes the furniture feel lighter than a fully enclosed block. The warm surface also connects with the nearby wood door and flooring.
Compare storage needs with the benefit of a more open base. Leave enough knee room if the open end will be used for sitting, and confirm support for the countertop. Check the wood finish’s care instructions, especially around water, hot cookware and daily food preparation.
IDEA 03 / 20
Keep a Compact Island Clear for Preparation
 SaveSupport Non AI Creator
Image credit: Project: Designer's Choice Inc (via Houzz)
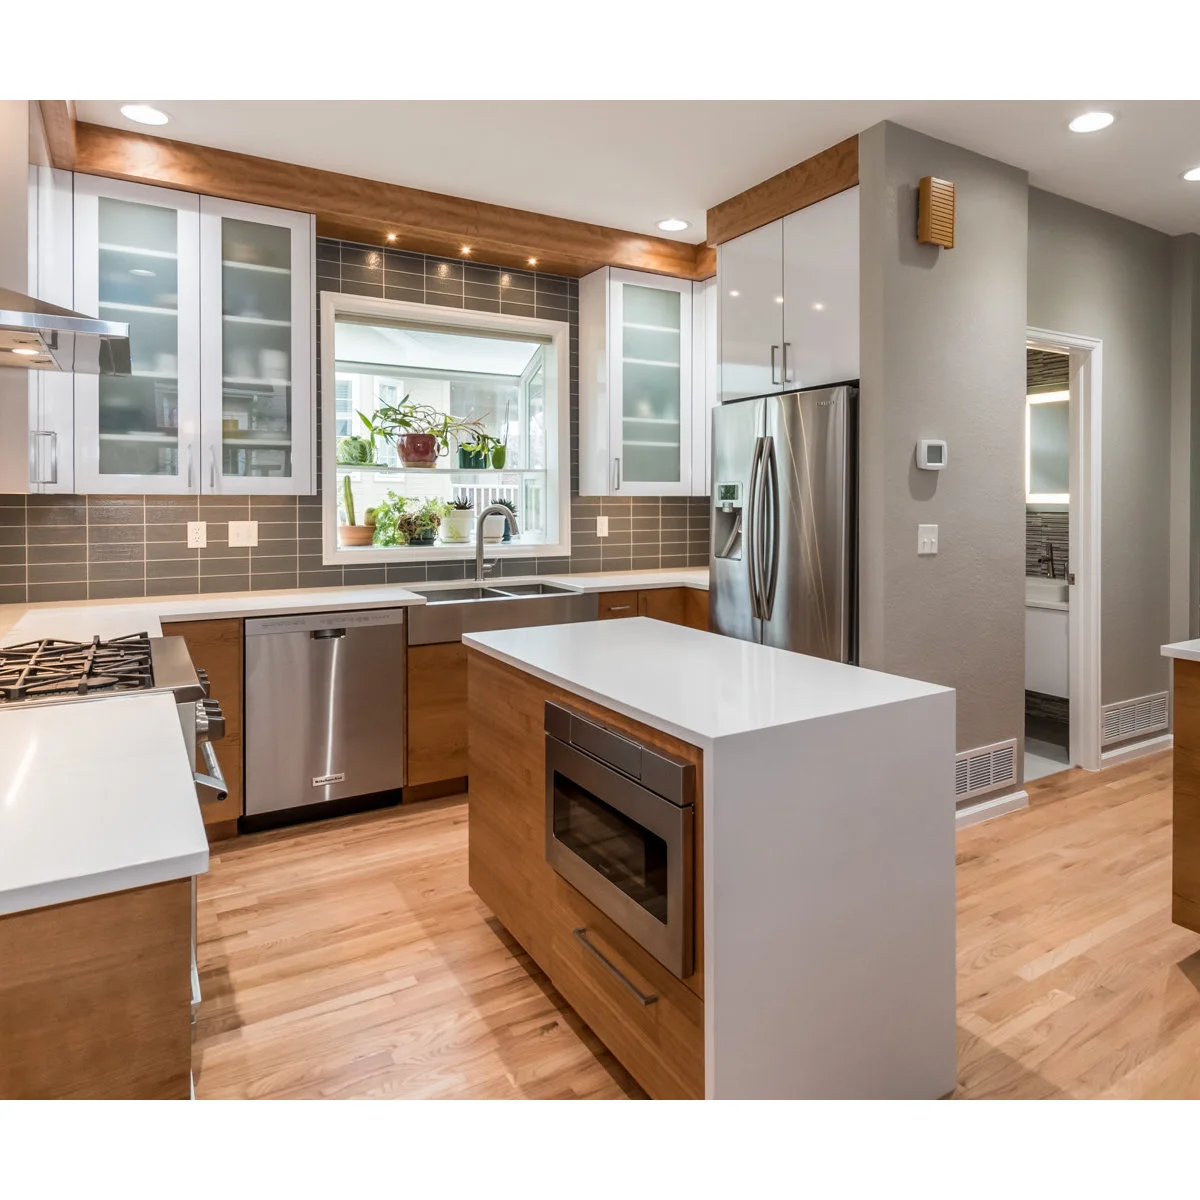
This compact island combines wood cabinetry with a white top that returns down one end. An appliance sits below the working surface, leaving the top relatively clear. The rectangular footprint fits within the kitchen rather than stretching across the doorway beyond it.
Choose the footprint around usable circulation before adding seating. Check the appliance model’s ventilation, installation and electrical requirements, including room to open it. A clean waterfall end can look simple, but its extra material and joints should be included in the budget from the beginning.
IDEA 04 / 20
Give a Small Island One Main Job
 SaveSupport Non AI Creator
Image credit: Project: HA Architecture (via Houzz)
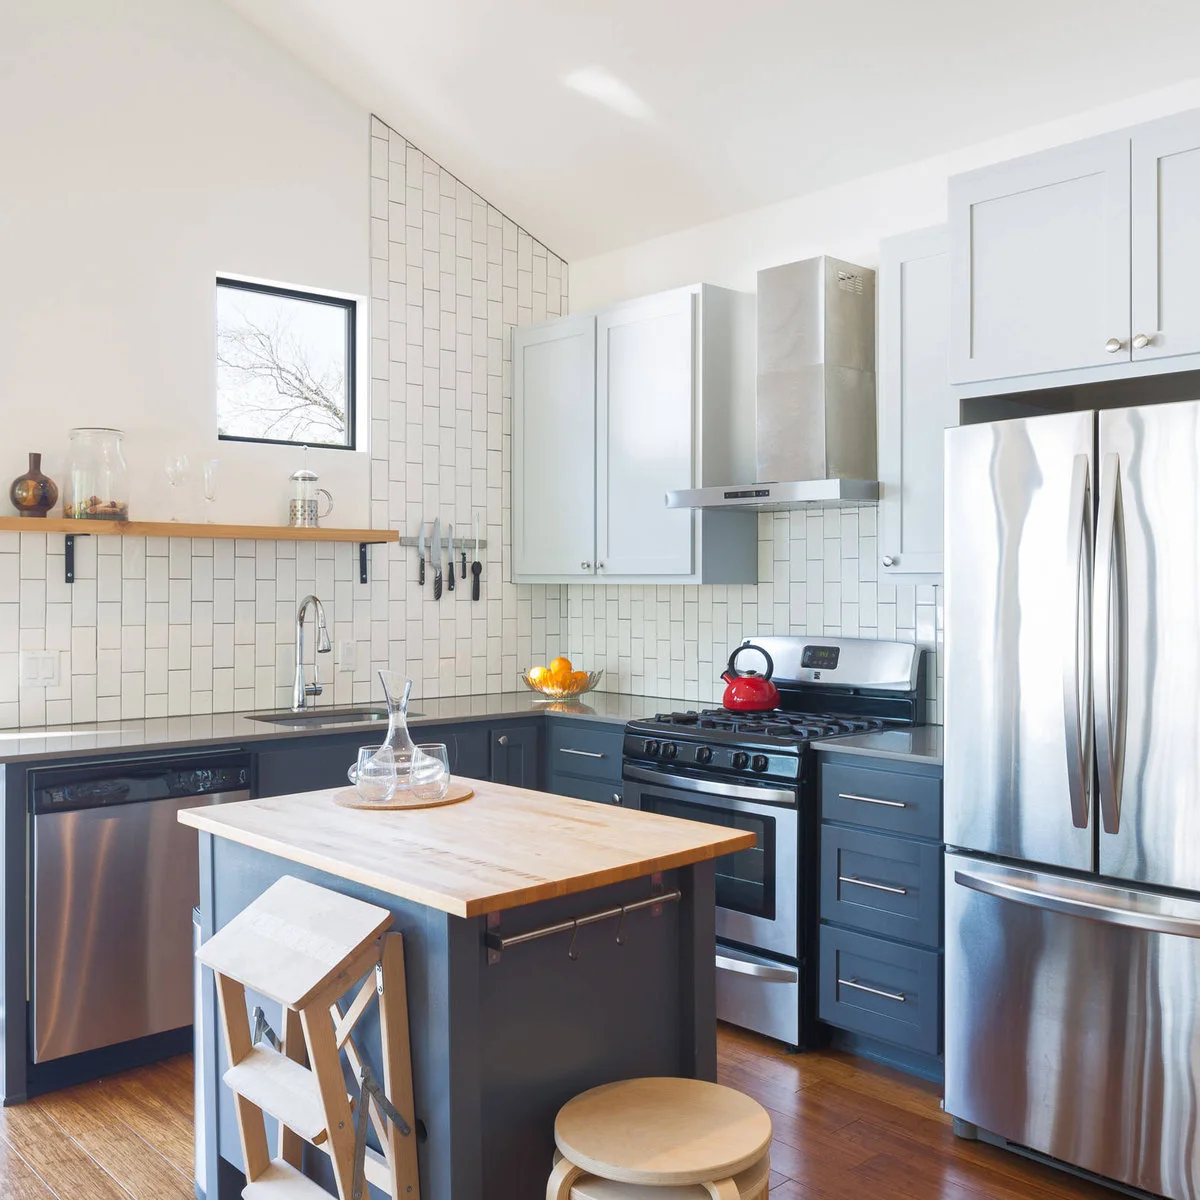
A small wood-topped island adds a central surface to this blue-gray kitchen. A side rail supplies a useful hanging point without filling the top. The sink and cooker remain on the perimeter, so the island can function primarily as a clear preparation or serving area.
Before adding more fittings, decide what you most need the surface to do. Keeping plumbing and cooking on the perimeter can preserve workspace and simplify the island. Store the step stool and other loose pieces where they will not narrow the route between the island and appliances.
IDEA 05 / 20
Scale the Base to a Narrow Kitchen
 SaveSupport Non AI Creator
Image credit: Project: Home Ingredients (via Houzz)
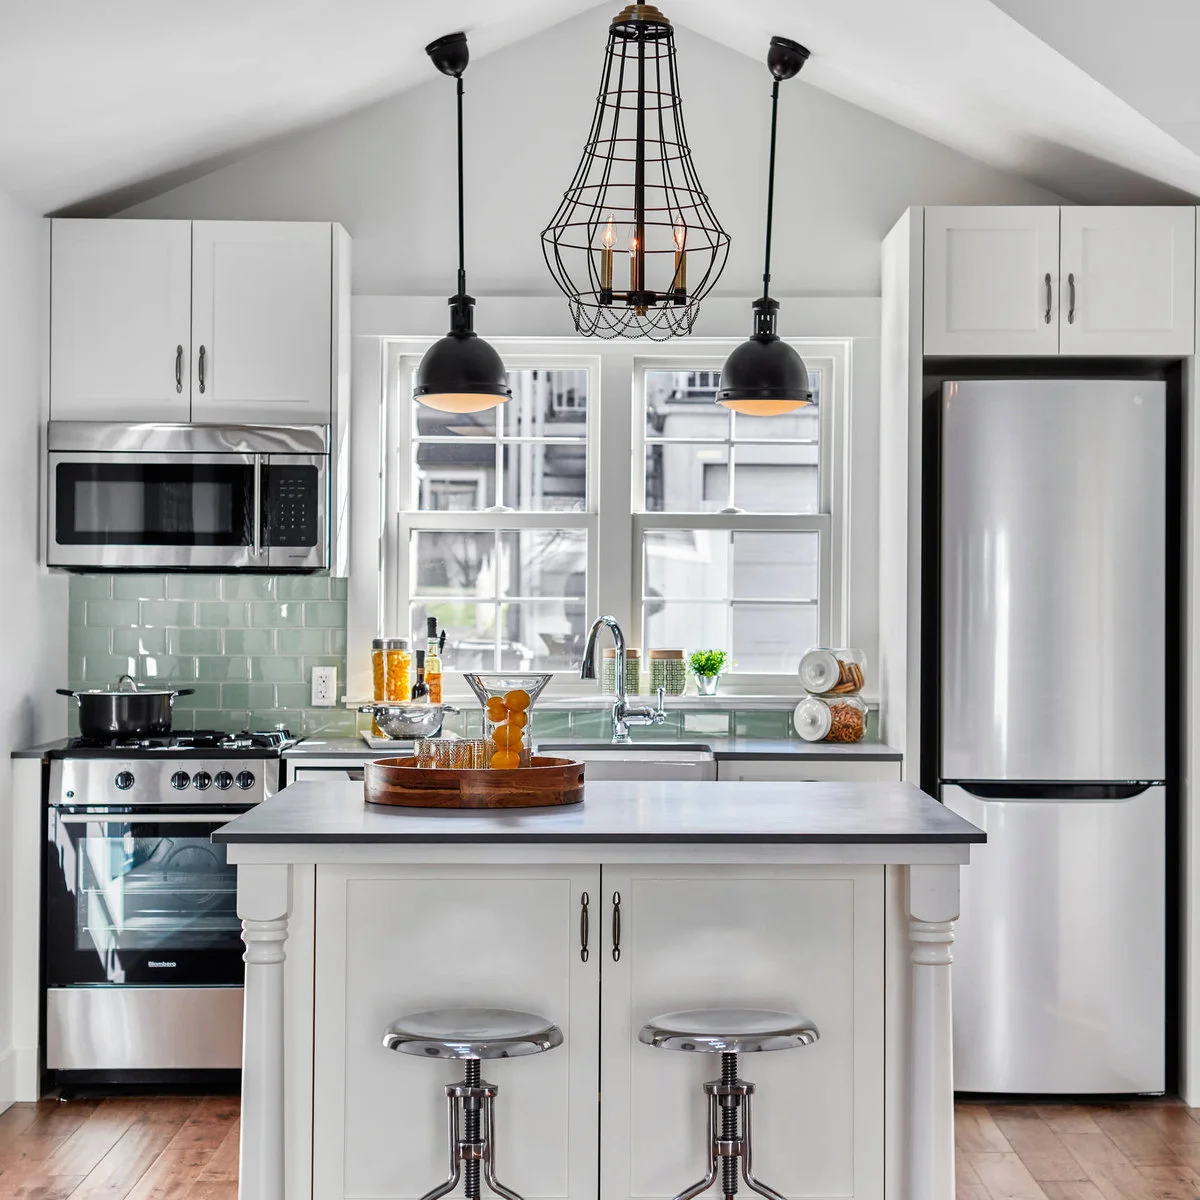
A compact white island sits in front of the window in this small vaulted kitchen. The dark top relates to the fittings, while the pale base connects with the cabinets. Keeping the island relatively short leaves the refrigerator and cooker visible on either side.
Test a temporary outline on the floor before ordering a fitted island. Open the refrigerator and oven doors and rehearse the busiest part of a meal. Two stools still need pull-back space; if seating restricts the route, a smaller working surface may serve the room better.
PART 02
Make the Base Work Harder
IDEA 06 / 20
Put Useful Drawers on the End
 SaveSupport Non AI Creator
Image credit: Project: collaborative interiors (via Houzz)
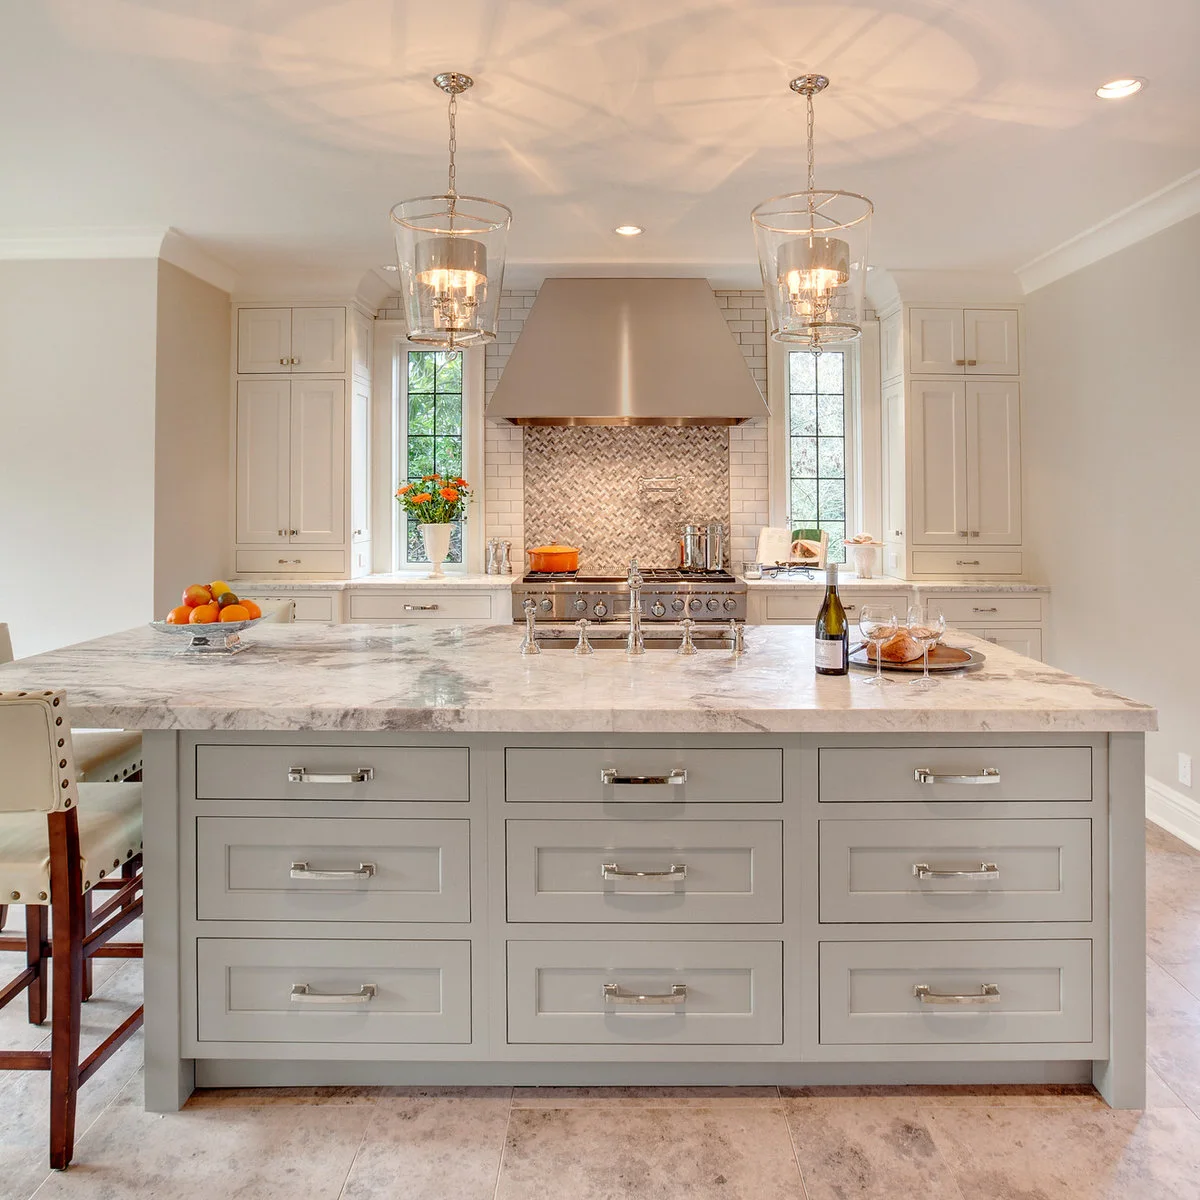
Drawers cover the broad end of this gray island beneath a pale veined countertop. Different front heights suggest space for a mix of smaller tools and bulkier kitchenware. Locating storage at the end makes it accessible without reaching across the sink or seated side.
Plan drawer contents before choosing the internal divisions. Measure the utensils, pans or serving pieces you use most, then confirm runners and load ratings. Leave enough room for a drawer to open fully while someone stands in front of it, especially near the cooking route.
IDEA 07 / 20
Place Drawers Close to the Prep Surface
 SaveSupport Non AI Creator
Source: www.houzz.com
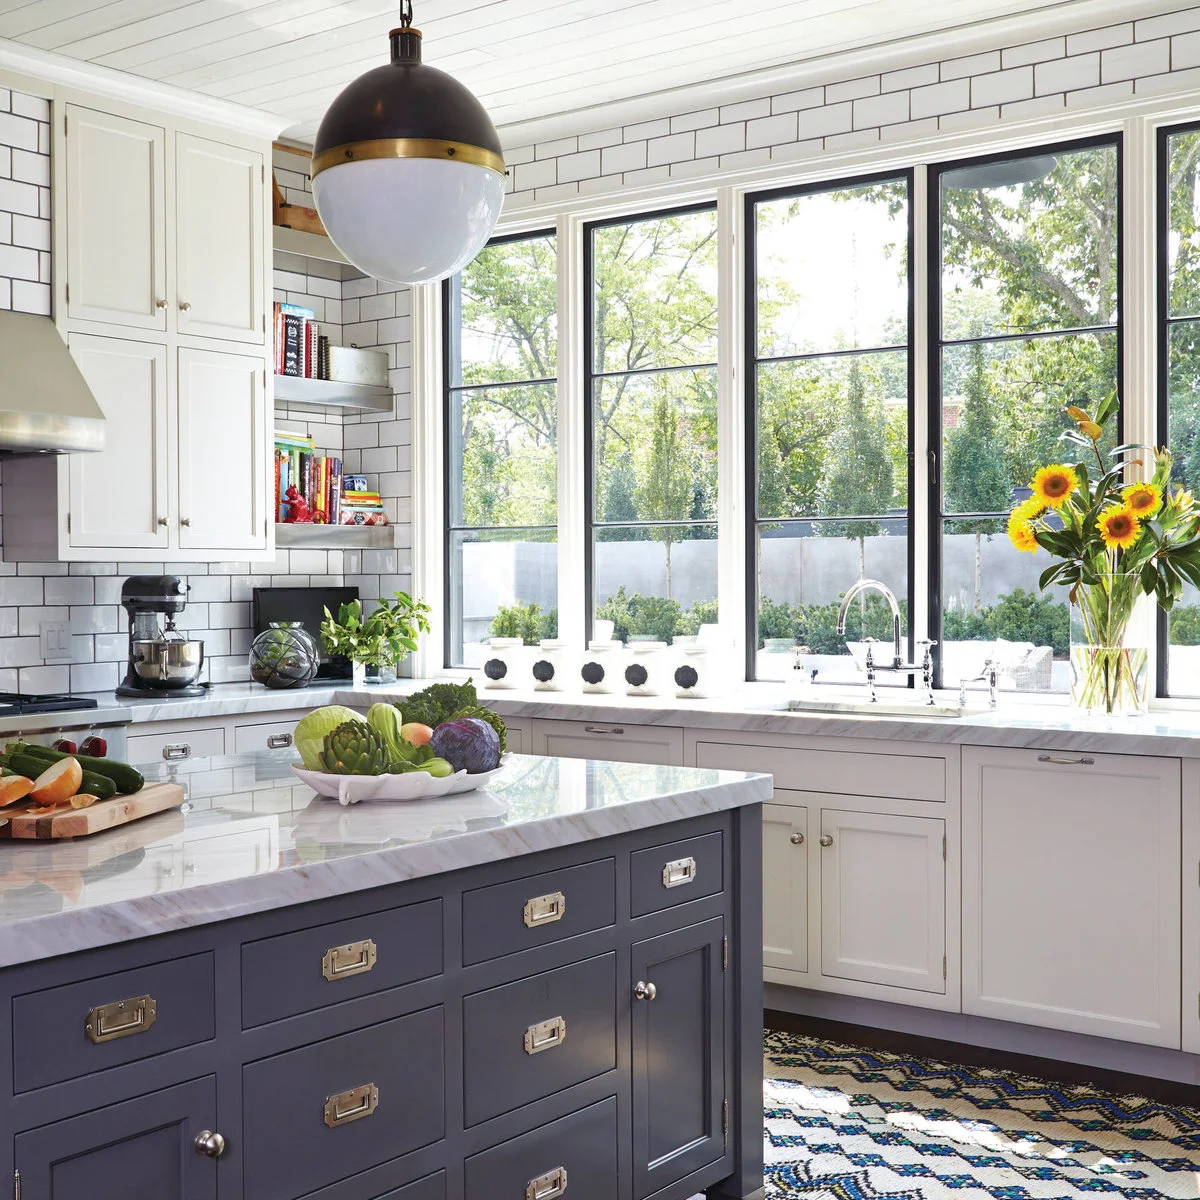
Small upper drawers and broader lower drawers face the working side of this dark island. Metal label-style pulls give each front a distinct outline. The pale countertop and nearby sink create a practical preparation area without requiring the whole island to become an appliance station.
Keep frequently used tools in the drawers nearest their task. A kitchen cabinet organization plan should account for handle reach and the space needed to stand beside an open drawer. Choose dividers after measuring the interior so the storage fits your actual equipment.
IDEA 08 / 20
Use Open End Shelves for Reachable Items
 SaveSupport Non AI Creator
Image credit: Project: Divine Custom Homes (via Houzz)
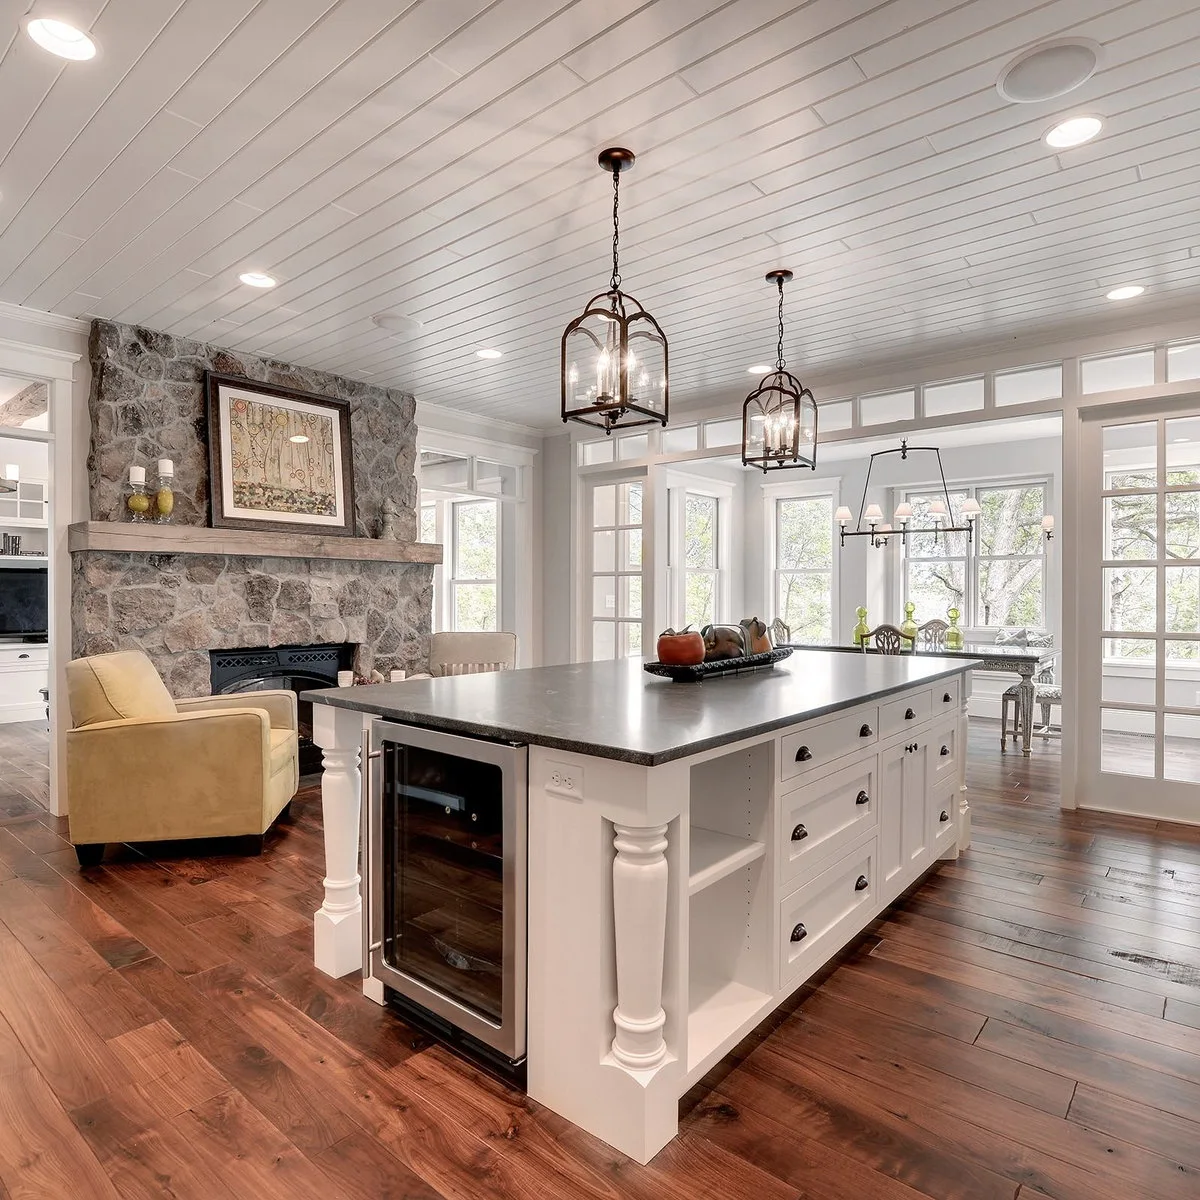
An end-mounted glass-front cooler and narrow open shelves give this white island more than one storage function. Drawers along the long side provide enclosed space, while the dark top remains largely clear. The open end faces the room rather than hiding against perimeter cabinets.
Reserve open shelves for items used often enough to stay clean, and avoid fragile stacks near a busy route. Check appliance ventilation and servicing access before finalizing the base. A visible cooler is useful only if its door opens comfortably without making people step into the main cooking aisle.
IDEA 09 / 20
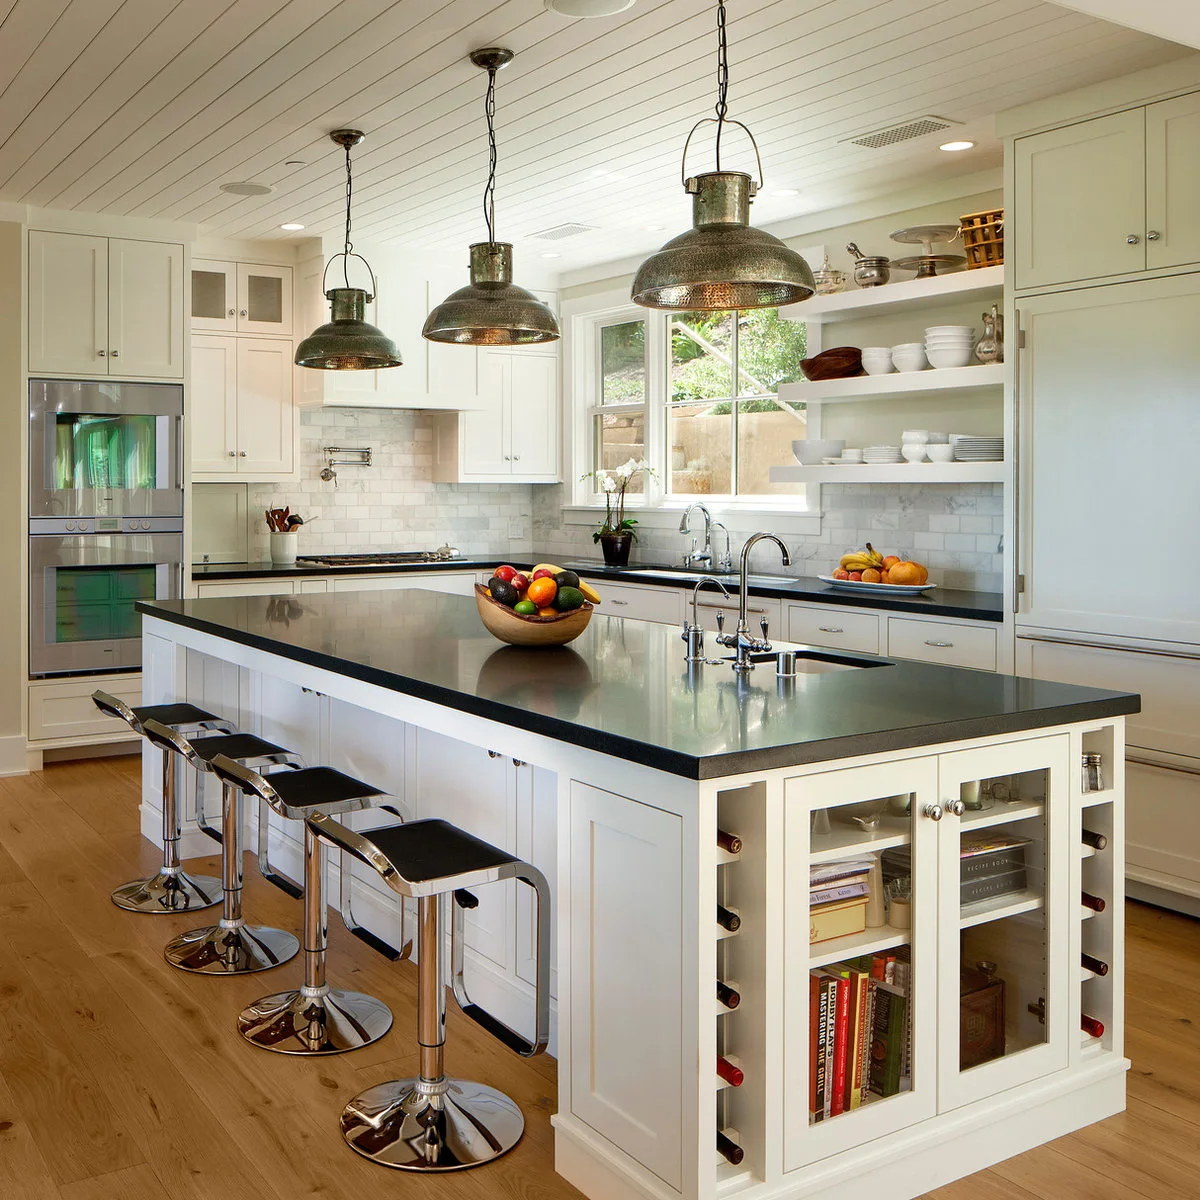
Protect Books Behind Glass Doors
 SaveSupport Non AI Creator
Image credit: Project: Neumann Mendro Andrulaitis Architects LLP (via Houzz)
Glass-front cupboards hold books and small items at the end of this white island. Narrow bottle slots flank the doors, while stools occupy the long side. The dark countertop gives the varied storage a clear upper edge and leaves the working surface visually continuous.
Keep books and paper away from the sink’s splash path and confirm that the cupboard doors can open past nearby seating. Glass doors reduce direct dust exposure but still need wiping. Use bottle slots for suitable everyday storage rather than assuming an island provides controlled conditions for long-term wine keeping.
IDEA 10 / 20
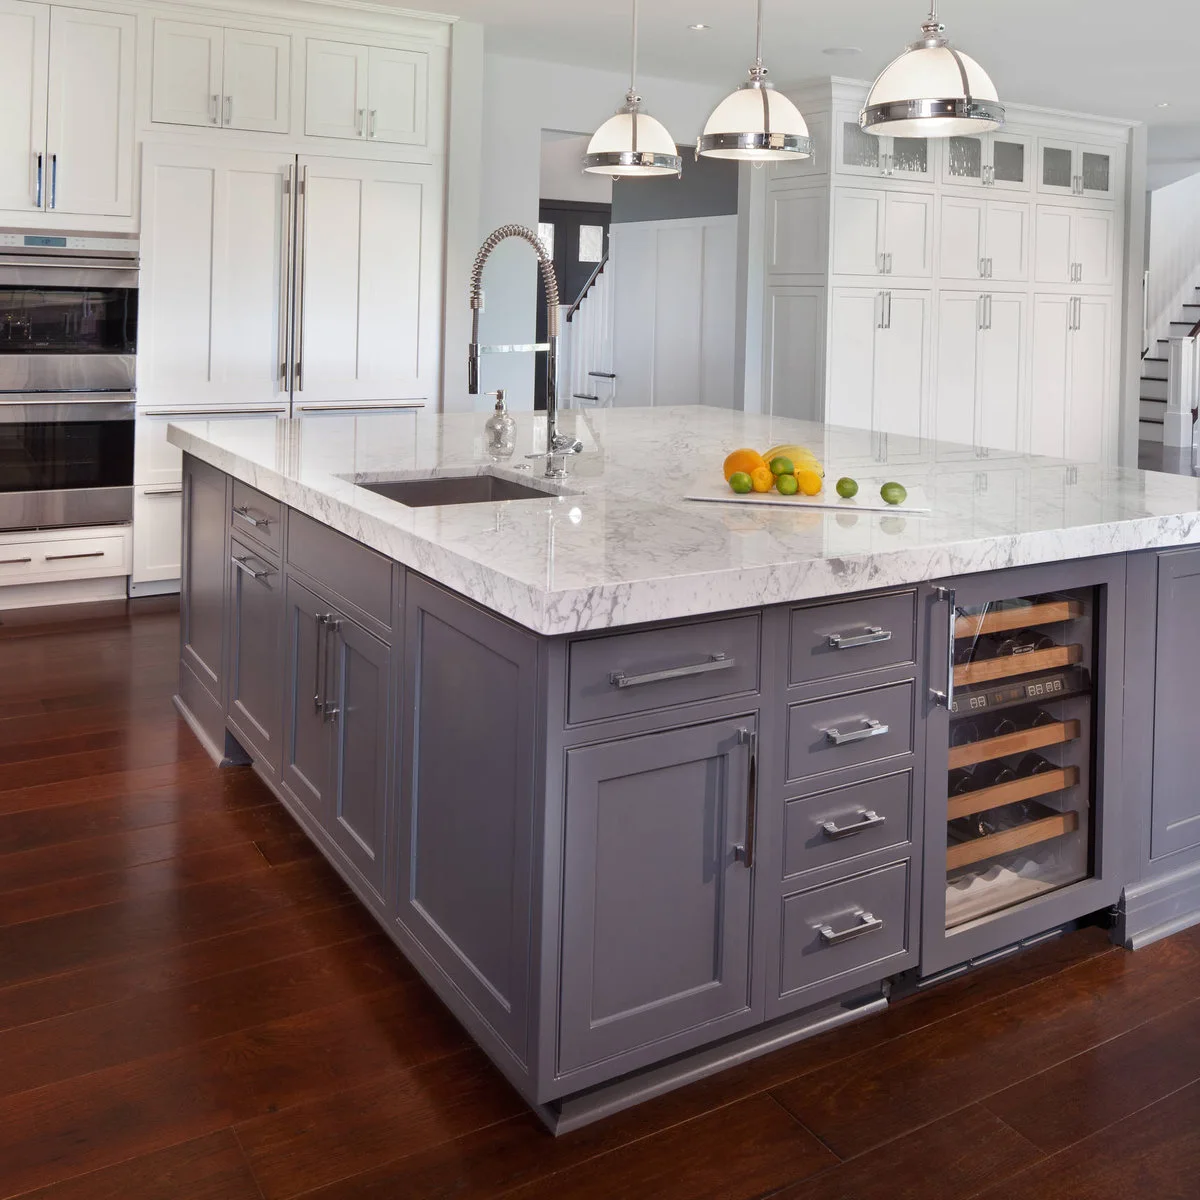
Place a Cooler on the Social Side
 SaveSupport Non AI Creator
Image credit: Project: Morgan Howarth Photography (via Houzz)
A glass-front cooler sits beside drawers on the outer face of this gray island. The sink occupies the top closer to the working area, allowing drinks storage to be approached from a different side. Matching fronts make the appliance part of the base rather than a separate freestanding object.
Think through who opens the cooler while someone is cooking. Keep its door swing out of the busiest route and follow the appliance’s ventilation requirements. Allow maintenance access and include the electrical connection in the plan; a tidy front does not remove those practical needs.
PART 03
Choose a Finish with a Purpose
IDEA 11 / 20
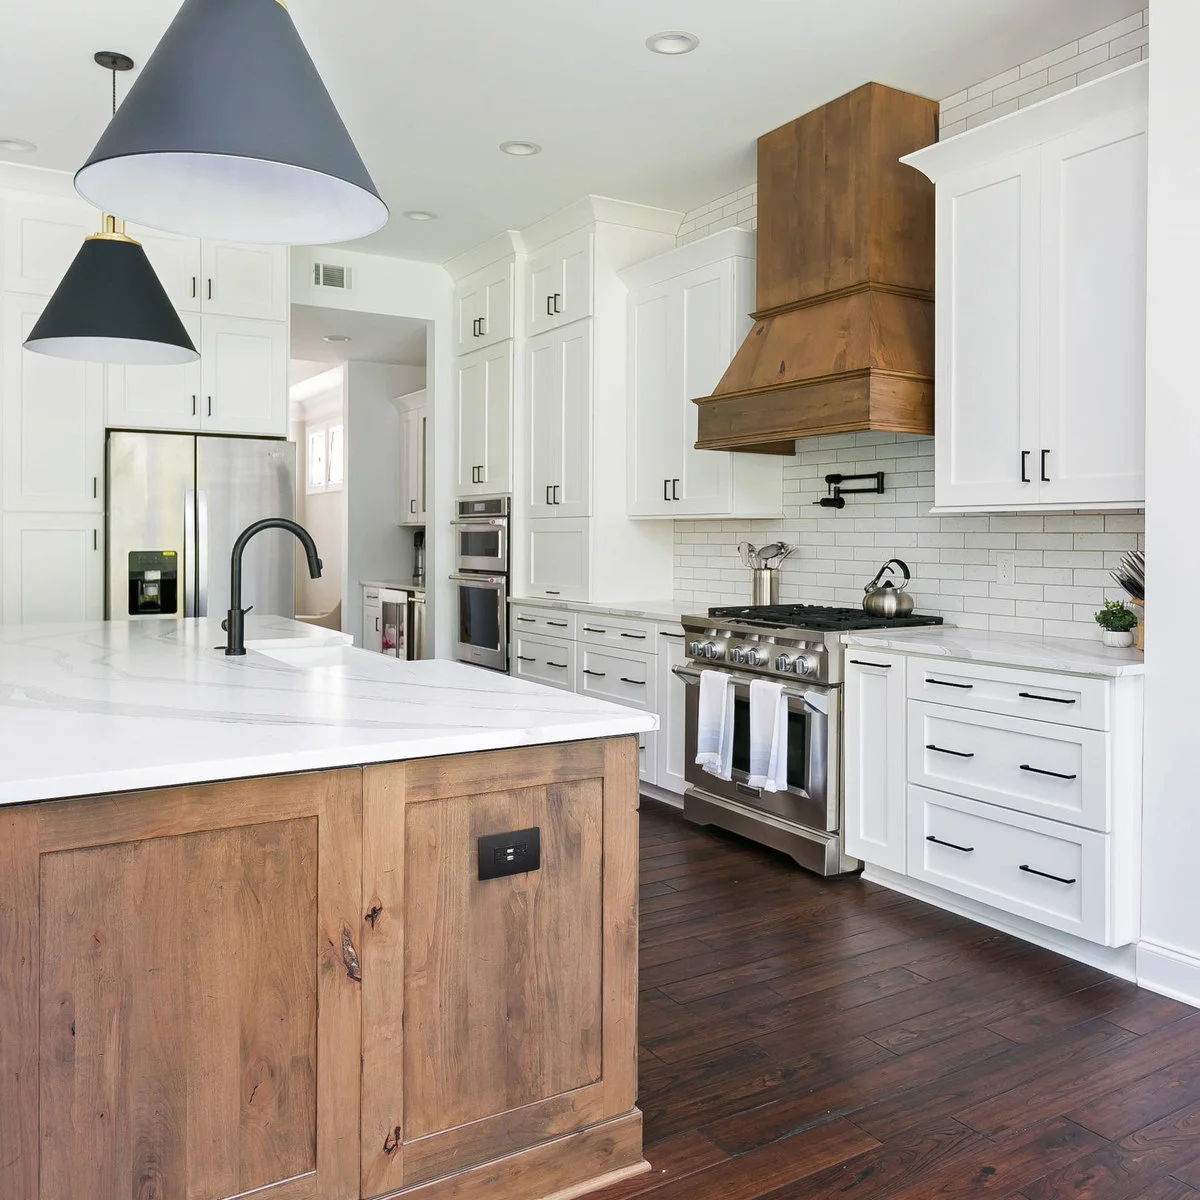
Connect a Wood Base with Another Room Detail
 SaveSupport Non AI Creator
Image credit: Project: Delpino Custom Homes (via Houzz)
The warm wood island base repeats the tone of the large range hood in this white kitchen. Dark handles and a black faucet provide a consistent outline around the lighter countertop. Repeating the timber in two places makes the island feel connected without matching every cabinet.
Compare finish samples beside the floor as well as the cabinet doors. Several warm wood tones can work together when their contrast is deliberate. Choose a cabinet finish suited to knocks and cleaning, and plan electrical outlets with the installer before the island panels are completed.
IDEA 12 / 20
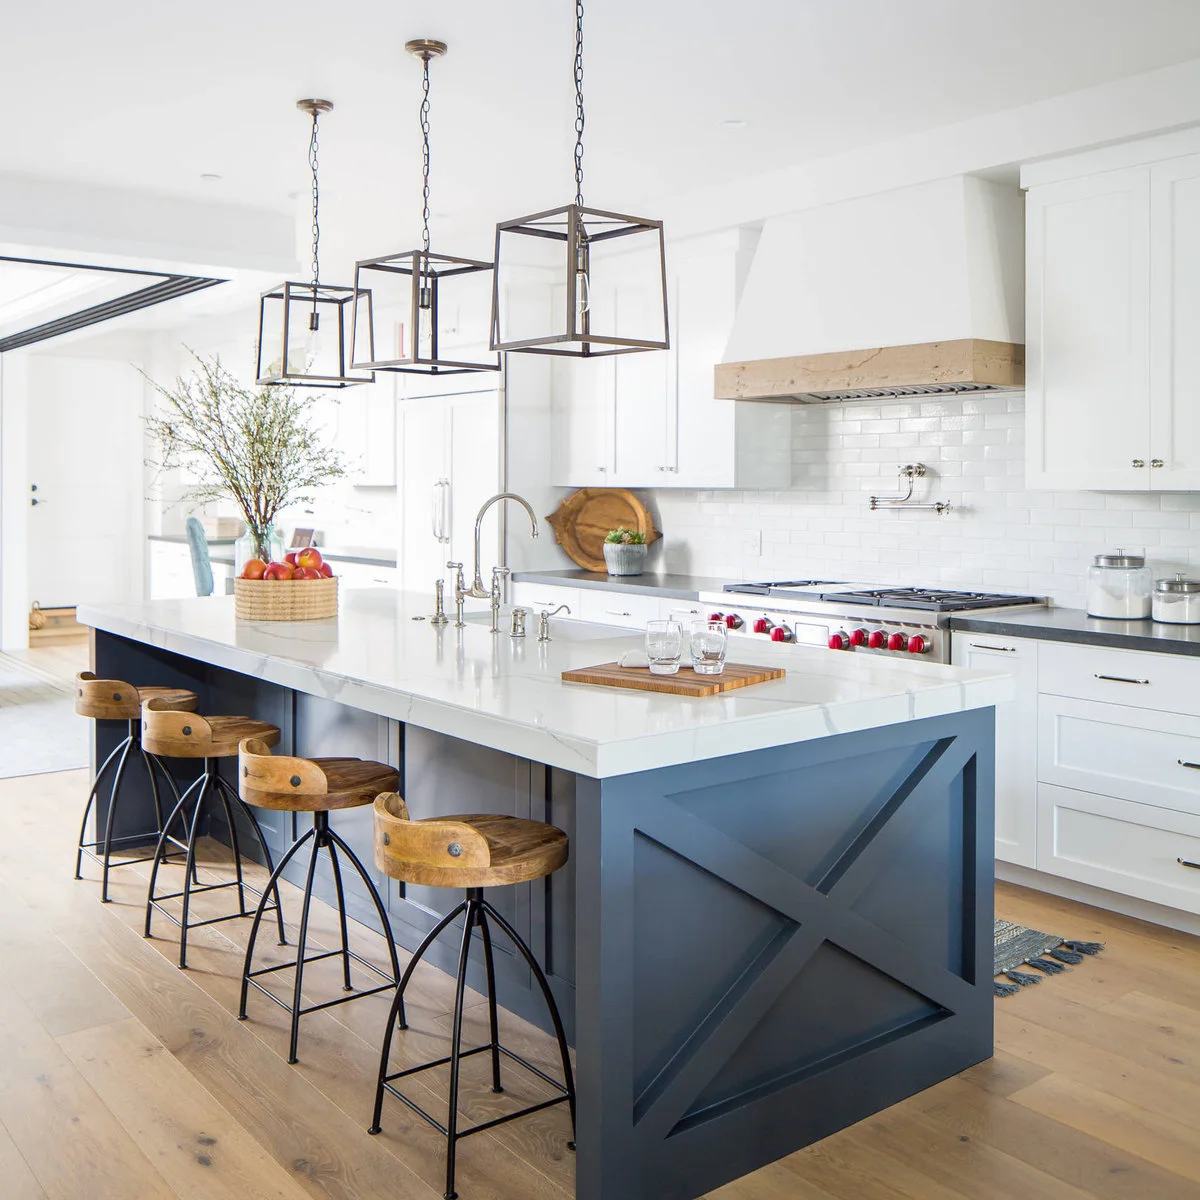
Give a Plain End an X Detail
 SaveSupport Non AI Creator
Image credit: Project: Teale Architecture (via Houzz)
A large X-shaped detail defines the blue island’s end in this white kitchen. The broad panel supplies character while the countertop stays simple and useful. Wood stools and a matching warm hood trim keep the painted base from becoming the room’s only strong contrast.
Use an end detail where it can be seen without occupying storage you need. Check how the grooves and trim will be cleaned near food preparation. If a plain island already works, a finish change may be enough; decorative panels should not force a larger footprint.
IDEA 13 / 20
Use a Dark Base Under a Lighter Counter
 SaveSupport Non AI Creator
Image credit: Project: Keith Wing Custom Builders (via Houzz)
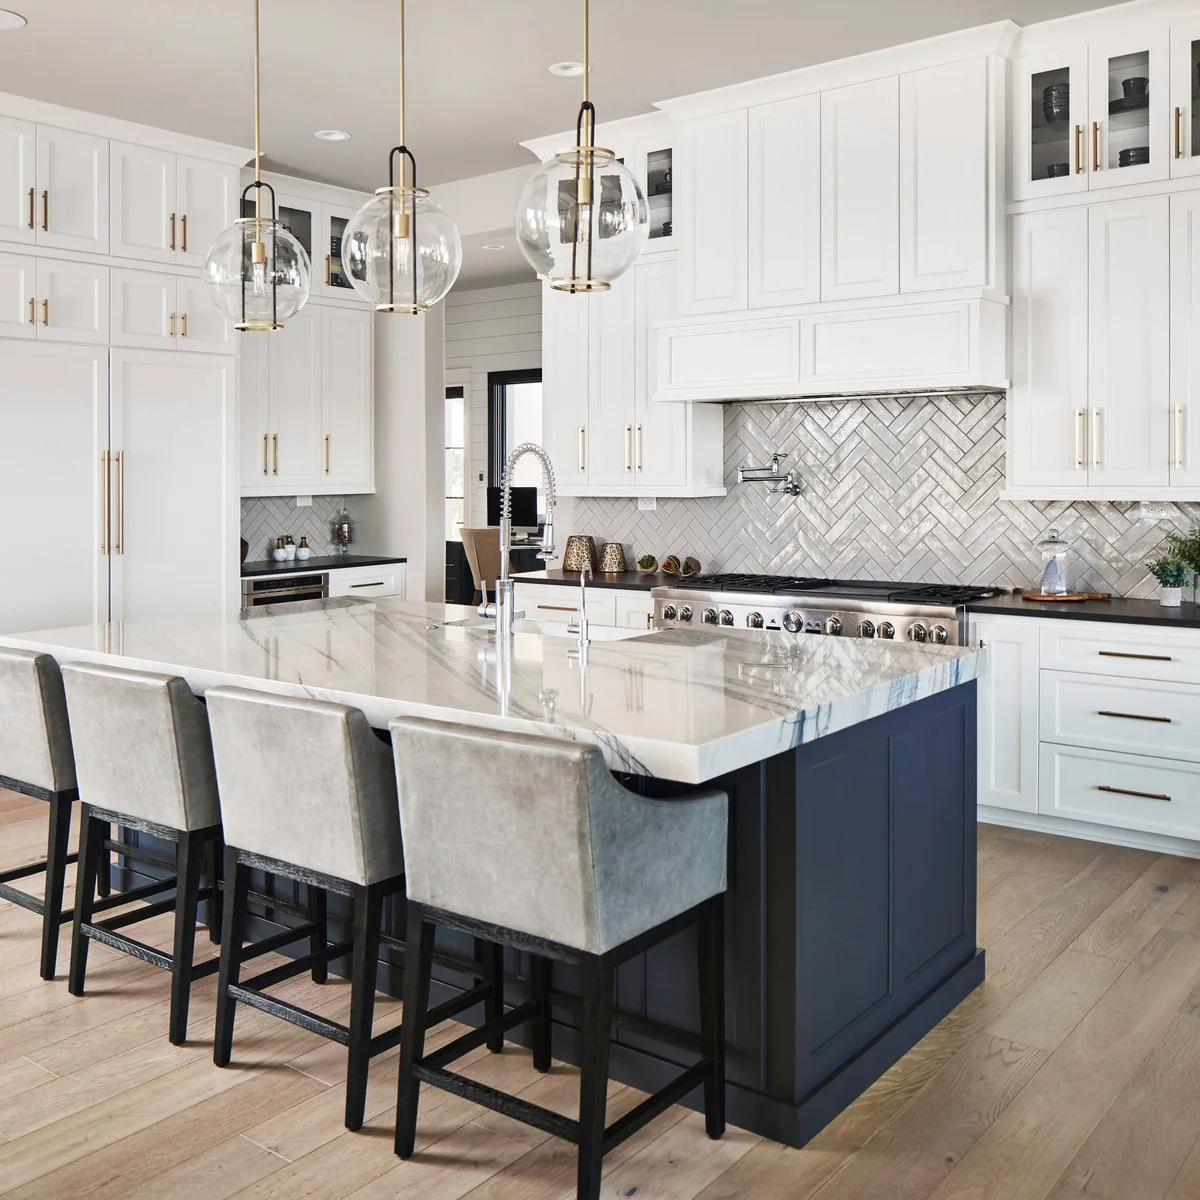
A dark blue base anchors the pale veined countertop in this white kitchen. Upholstered stools line one side, while clear pendant shades leave the cabinetry visible behind them. The contrast gives the island a distinct shape without introducing a different pattern on every surface.
Test the dark finish in both daylight and evening light before committing. Navy-blue kitchen cabinets can provide a useful color reference, but the island should still suit your own floor and counter. Choose a surface and edge detail around cleaning, durability and support as well as appearance.
IDEA 14 / 20
Keep the Base Consistent with Wood Cabinets
 SaveSupport Non AI Creator
Image credit: Project: Benvenuti and Stein (via Houzz)
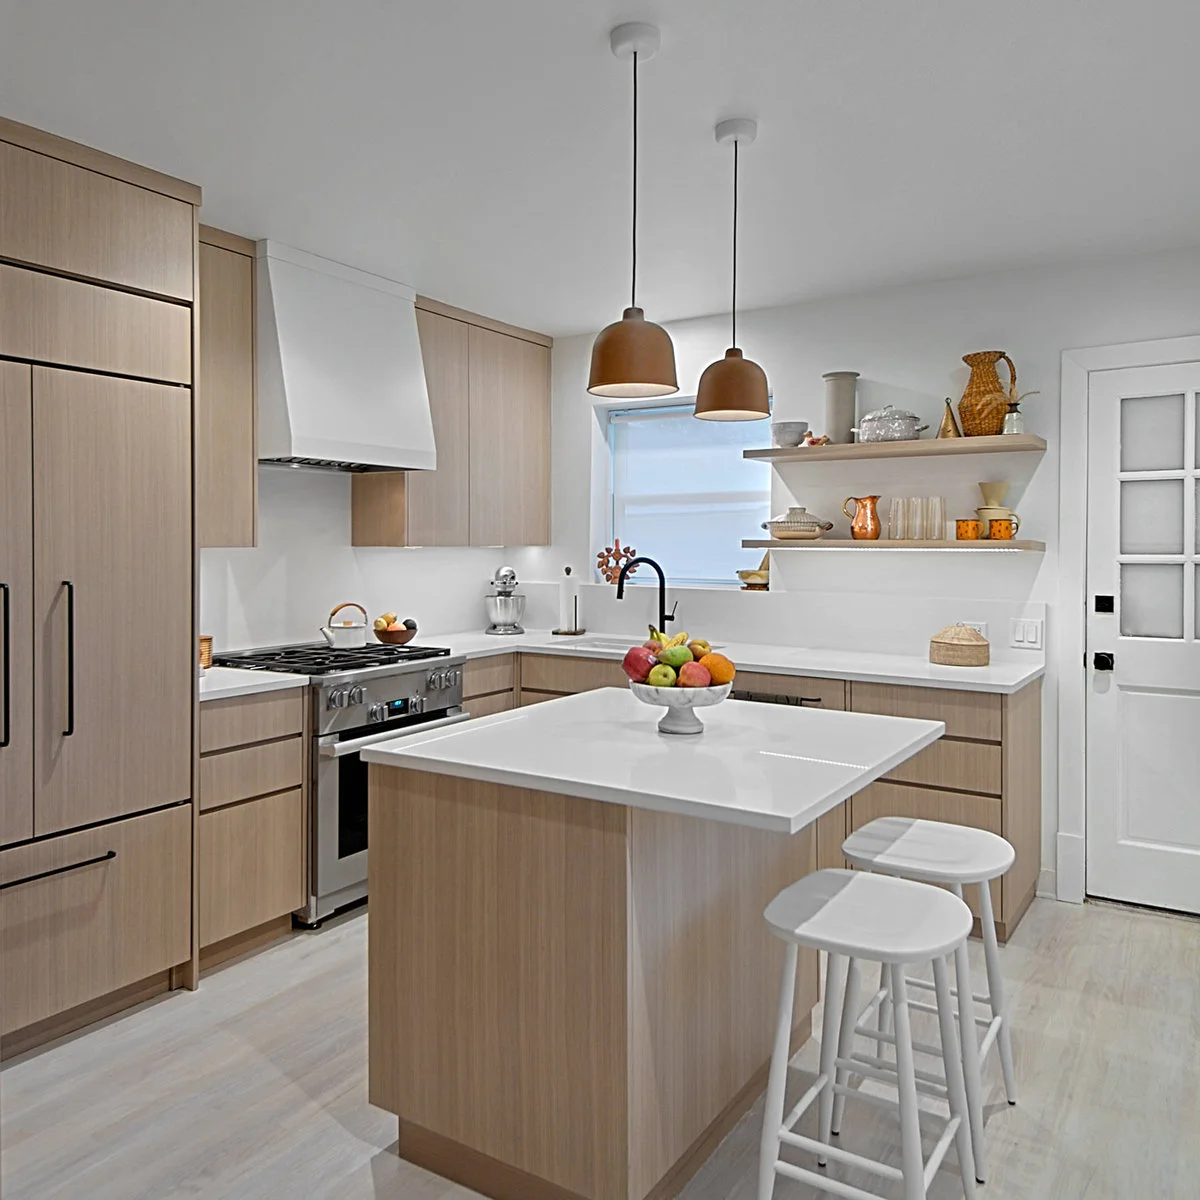
This compact island uses the same pale wood appearance as the flat-front perimeter cabinets. A light top and white stools keep the small room from feeling crowded by contrasting blocks. Dark pulls and a black faucet add definition without needing a patterned island front.
Matching the base to the cabinets can make a small fitted kitchen feel more continuous. Compare a full-size finish sample with the room’s light before ordering. Keep the island’s sides easy to wipe, and avoid adding decorative trim that makes a compact base harder to clean.
IDEA 15 / 20
Let a Simple Paneled Front Stay Quiet
 SaveSupport Non AI Creator
Image credit: Project: KBE Design & Build (via Houzz)
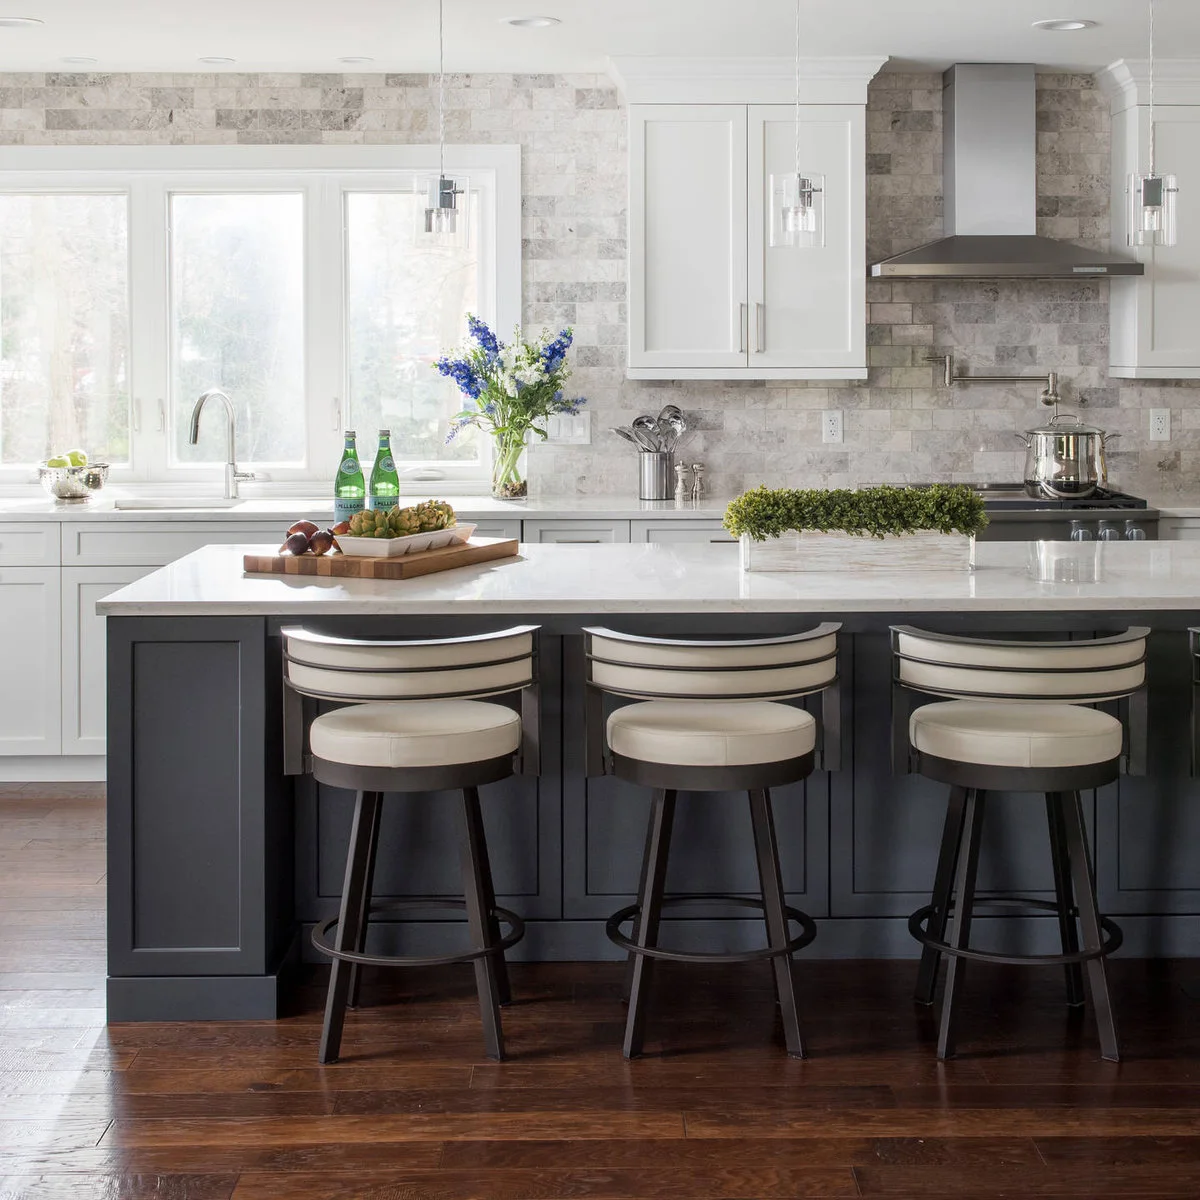
Plain recessed panels give this dark gray island a quiet front beneath the white countertop. Three pale stools provide contrast without hiding the base completely. Clear pendants and a textured backsplash supply detail elsewhere, allowing the island face to remain relatively restrained.
Choose a front you can maintain around shoe marks and daily contact. A simple panel is often easier to coordinate with several cabinet styles than a highly decorative treatment. Check the countertop overhang and supporting structure with the supplier rather than assuming the photograph shows a suitable depth for your stools.
PART 04
Plan for Your Daily Routine
IDEA 16 / 20
Place the Working Surface Under Available Daylight
 SaveSupport Non AI Creator
Image credit: Project: Morrison Interiors (via Houzz)
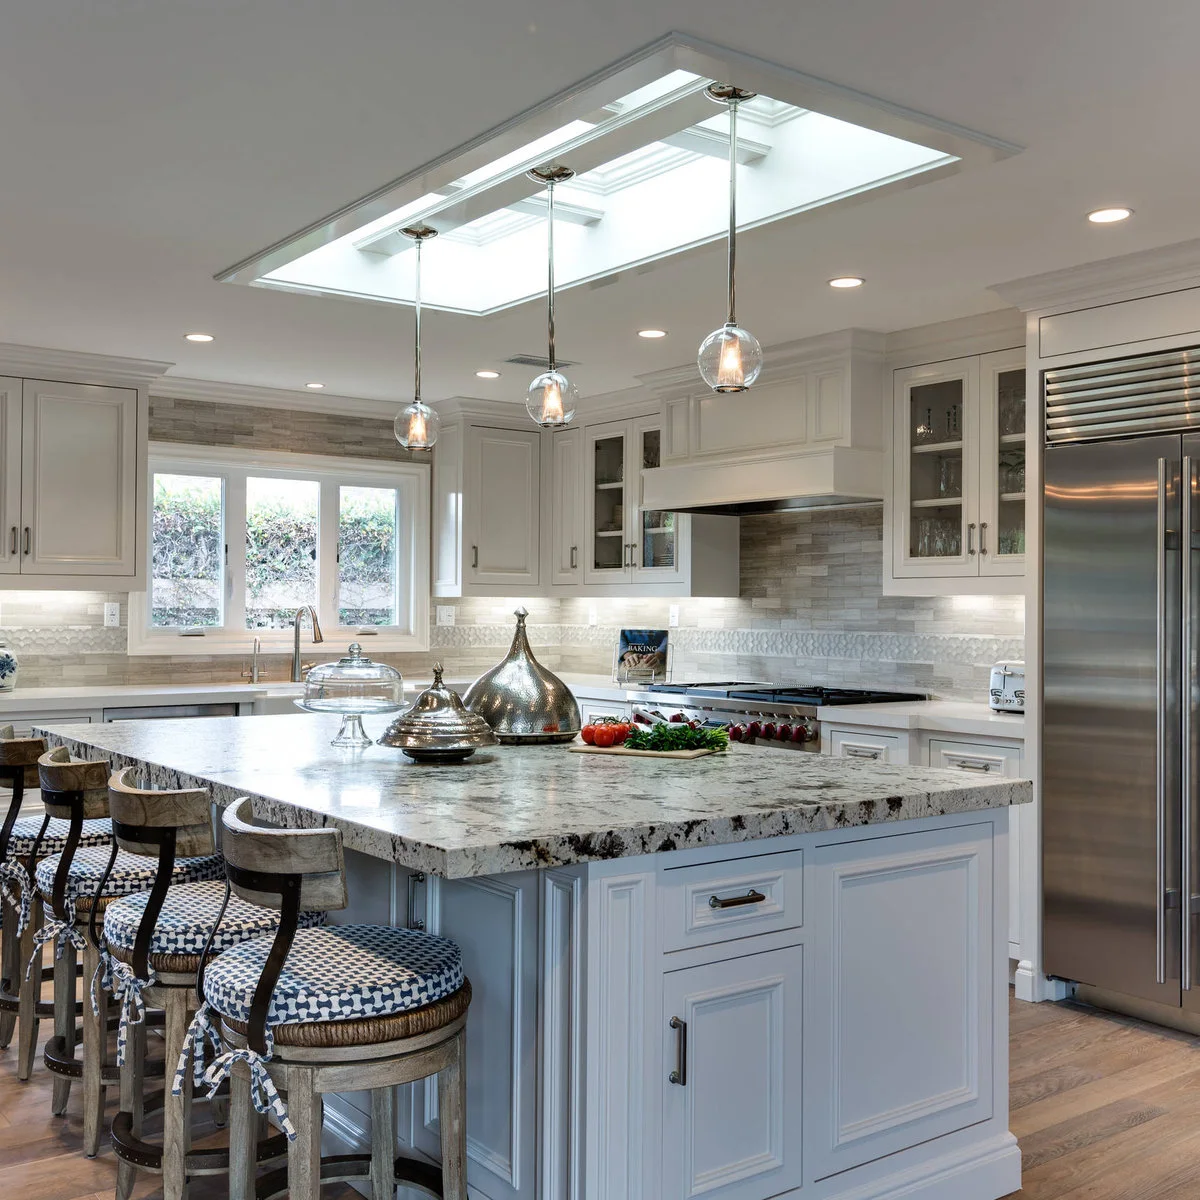
A broad pale island sits beneath a long skylight in this kitchen. Glass pendant lights continue the line without obscuring the ceiling opening. End storage and a clear stretch of countertop let the island serve as both a work surface and a gathering point.
Use existing daylight when choosing the island position, then plan task lighting for darker hours. A skylight is a separate building decision, not a requirement for this arrangement. Check reflections on the countertop and make sure lights illuminate where hands work rather than only the center of the room.
IDEA 17 / 20
Keep a Separate Table Area Useful
 SaveSupport Non AI Creator
Image credit: Project: CJS Woodworking & Design (via Houzz)
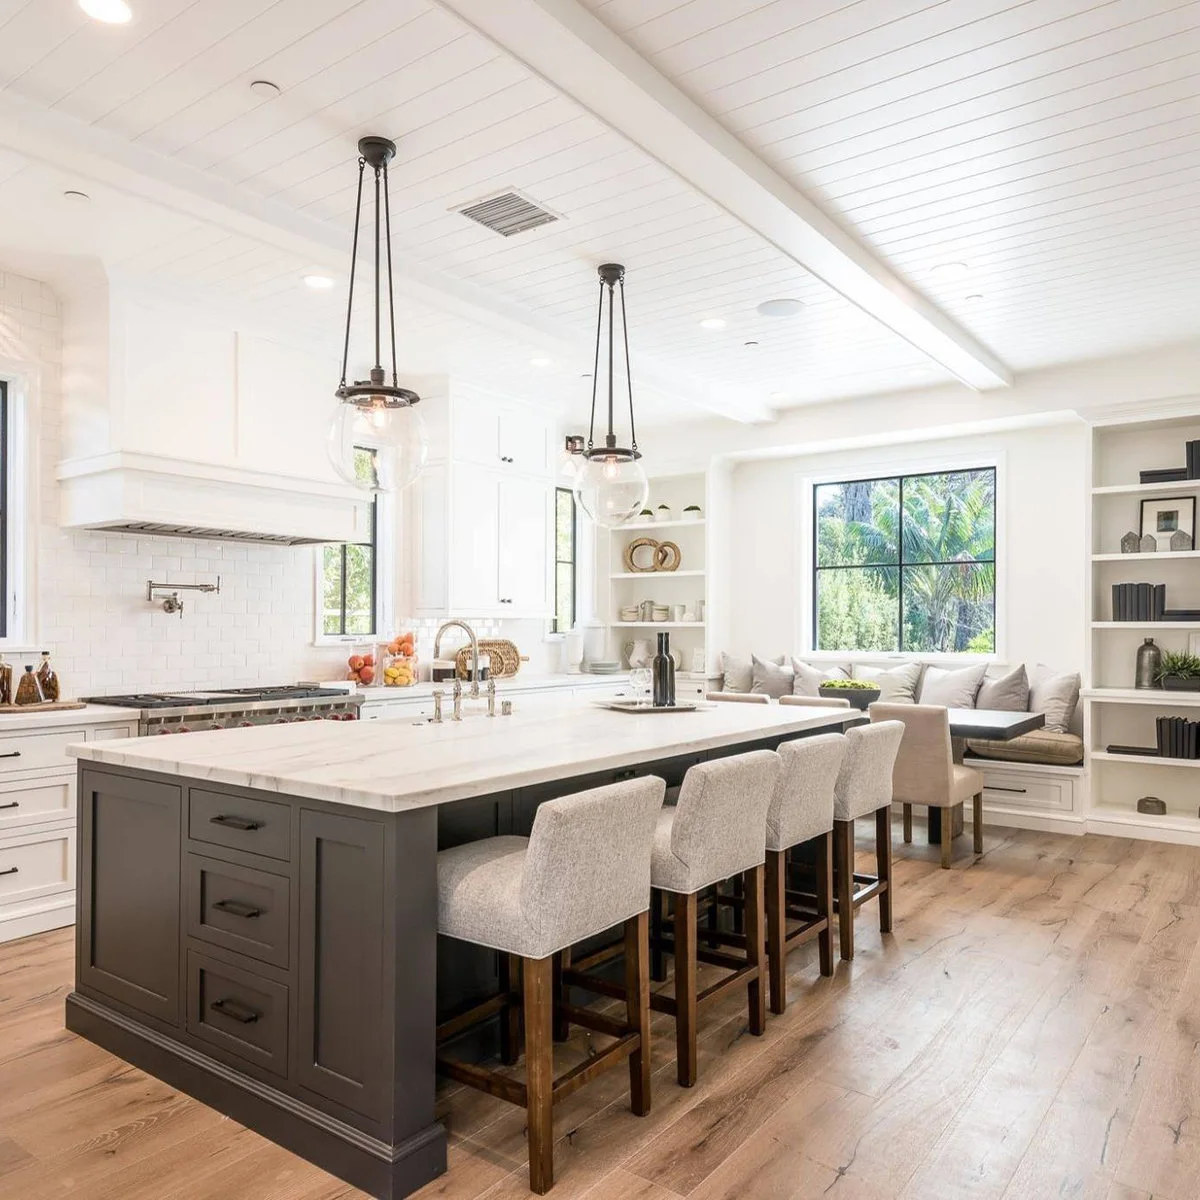
A long dark island stands near a window banquette and separate table in this bright kitchen. Drawers on its end provide storage, while stools run along the opposite side. The nearby dining nook offers a different place to sit, so the island need not handle every meal. The white plank ceiling keeps the overhead surface light.
Decide whether two seating areas genuinely serve different routines before filling both with chairs. Keep the route between the island and table comfortable with seats in use. If the nook handles longer meals, reserve more island space for preparation instead of extending the overhang solely to add stools.
IDEA 18 / 20
Keep Preparation and Gathering at Opposite Ends
 SaveSupport Non AI Creator
Source: houzz.com
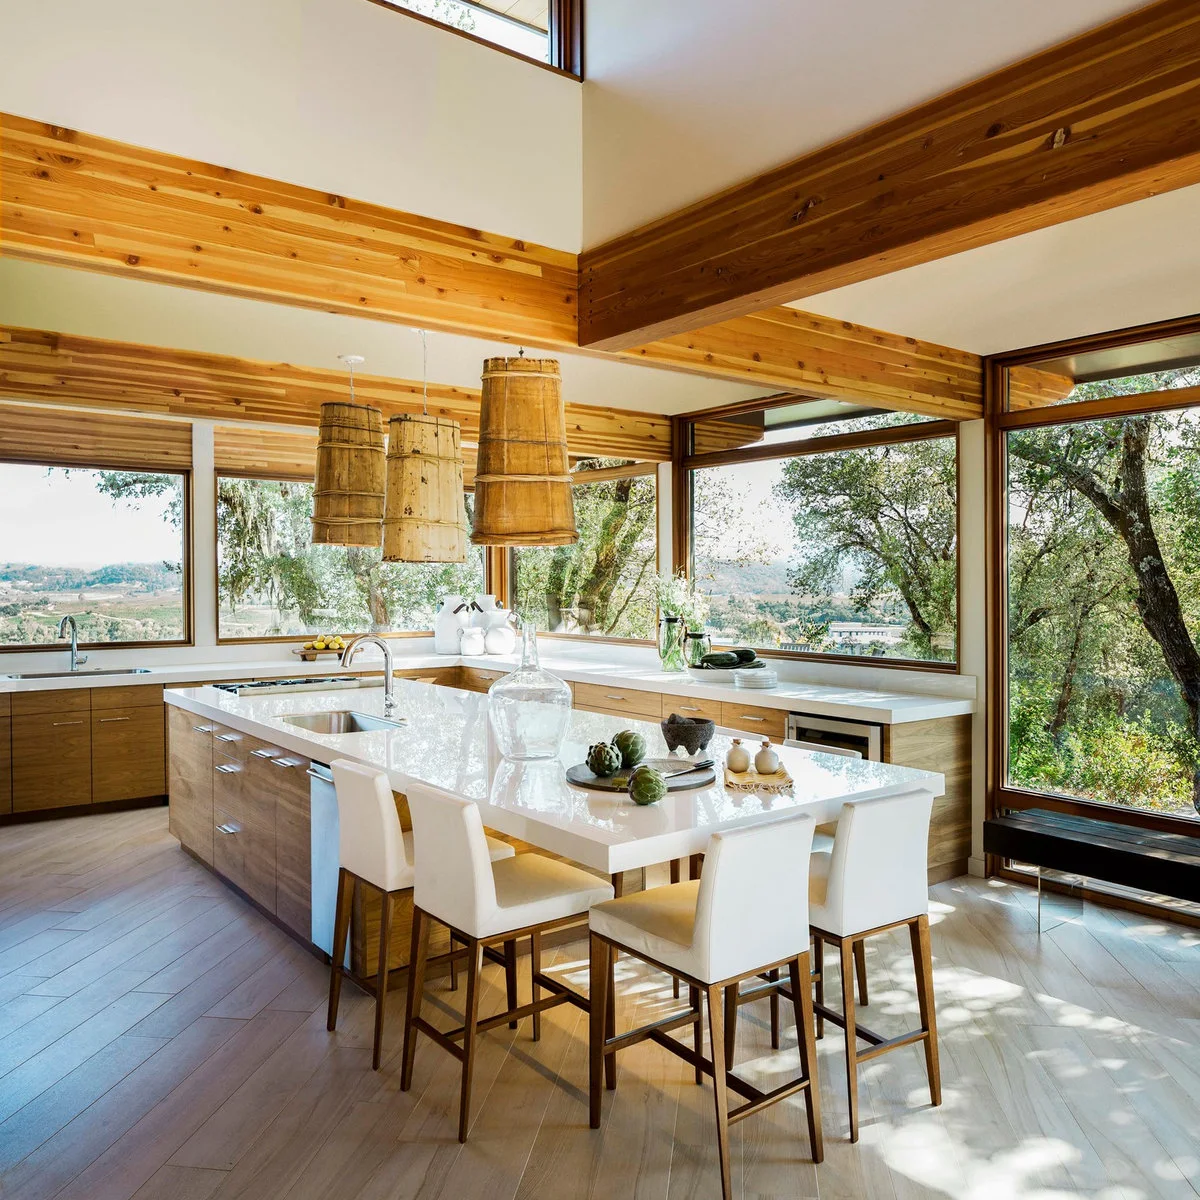
A sink occupies one end of this wood island, with light chairs grouped around the other. The long pale countertop links the two uses beneath warm woven pendants. Large windows and wood beams frame the room without requiring more decoration on the island itself.
Separate the food-preparation zone from the place where people sit and put down drinks. Check the sink’s splash reach and leave a useful landing surface beside it. A longer island also needs clear routes around both ends; its extra length should support the routine rather than divide the room awkwardly.
IDEA 19 / 20
Plan Ventilation Before an Island Cooktop
 SaveSupport Non AI Creator
Image credit: Project: DANIELLE Interior Design & Decor (via Houzz)
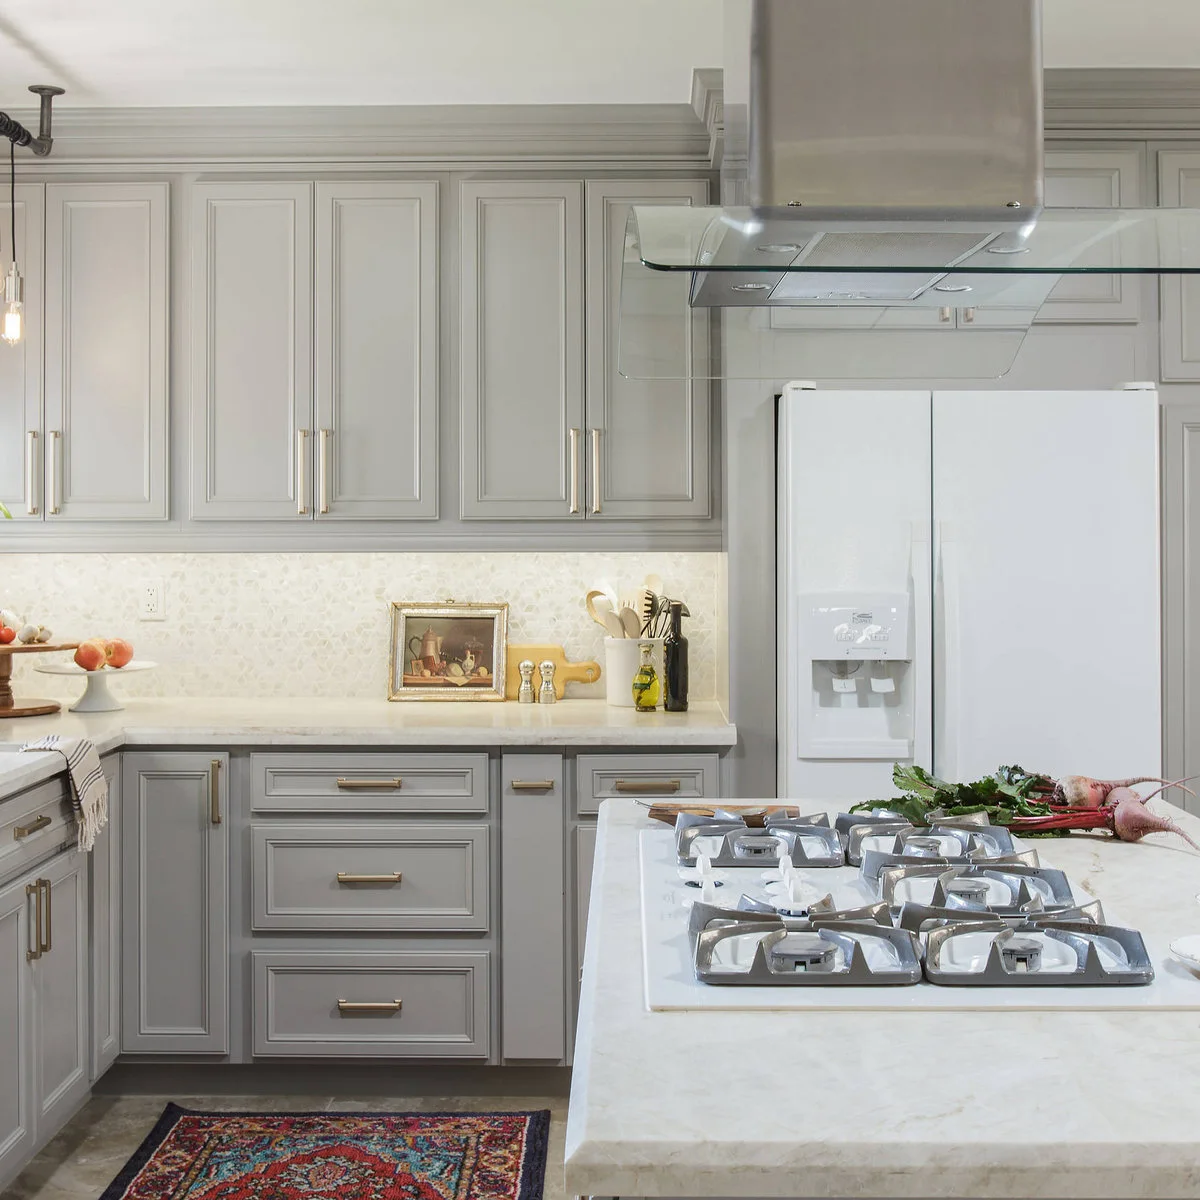
A cooktop occupies the island beneath a suspended hood in this gray and white kitchen. The arrangement keeps cooking visible from the room, while perimeter counters provide another surface for equipment and ingredients. The hood becomes a prominent overhead element rather than disappearing into wall cabinetry.
Resolve ventilation, utilities and safe landing areas before choosing an island cooktop. Check the appliance manufacturer’s requirements and local installation provisions with qualified trades. Keep casual seating and passing traffic away from hot cookware, and compare this layout with retaining cooking on a perimeter wall.
IDEA 20 / 20
Keep Everyday Styling Easy to Move
 SaveSupport Non AI Creator
Image credit: Project: Christine Sheldon Design (via Houzz)
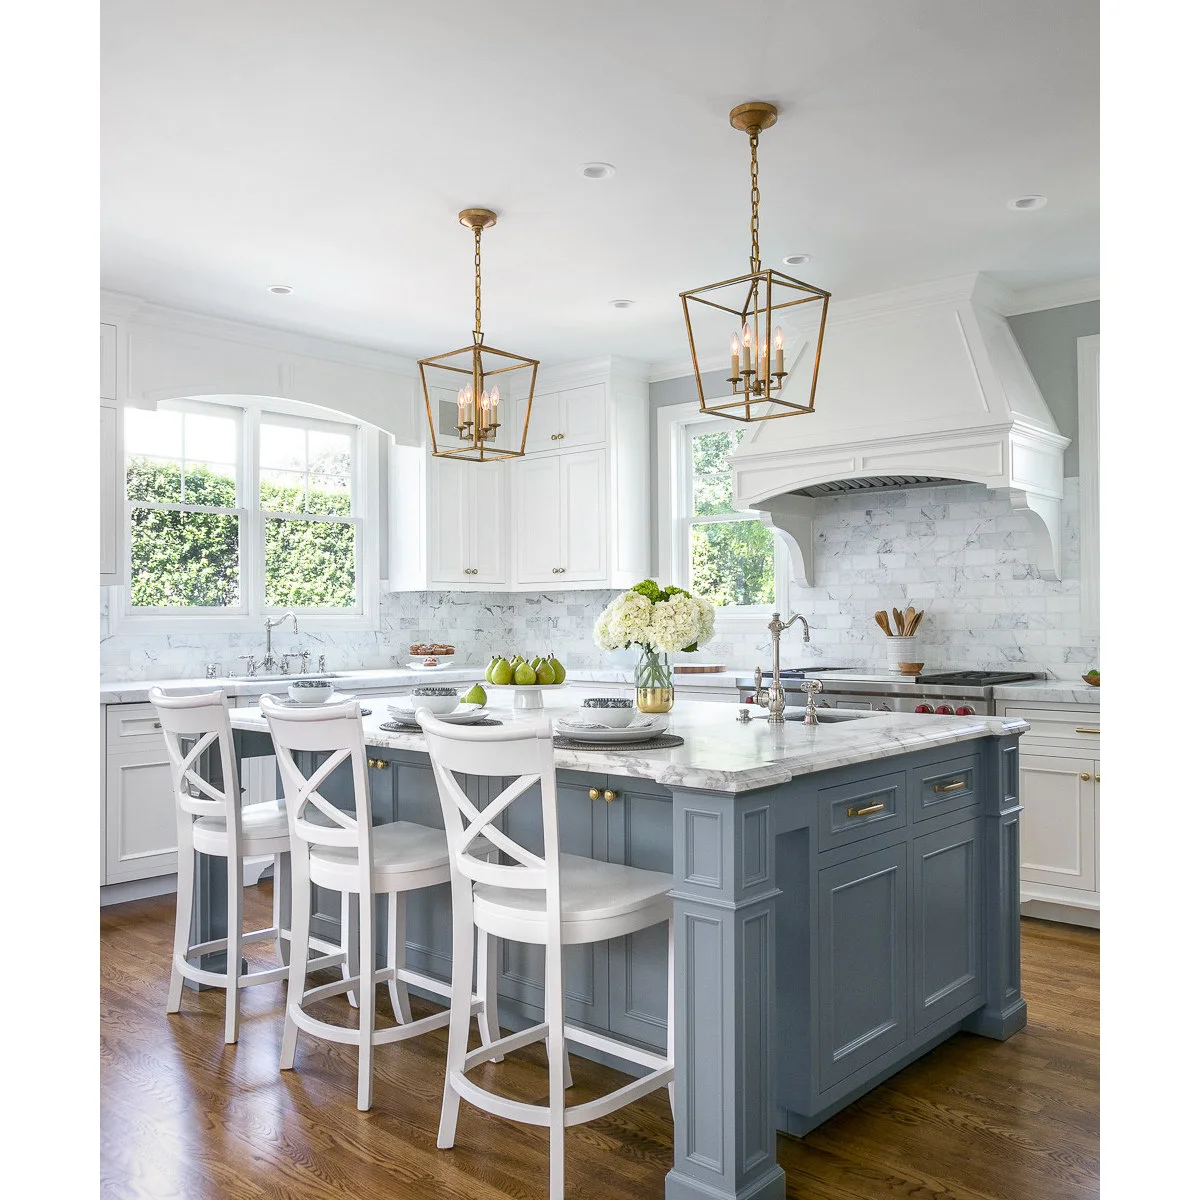
A small vase and a bowl of fruit decorate this blue-gray island alongside place settings. White stools and warm-colored pendants repeat details from the surrounding kitchen. The objects add interest without covering the entire countertop, leaving the island’s shape and storage fronts visible.
Use a small group you can lift away when preparation starts. Keep tall stems away from sightlines and avoid storing fragile display pieces beside active work. A useful island should reset quickly after meals, with clear space for chopping, serving and the occasional grocery bag.
BRING IT ALL TOGETHER
Choose the Job Before the Shape
List what you want the island to do: preparation, accessible storage, washing, cooking or casual meals. Give the most important task enough space, then check that additional features will not crowd it out.
Test the footprint with appliance doors and drawers open, stools pulled back and someone walking through the room. Keep the surface easy to clear and select finishes you can maintain. A smaller island that supports the routine is more useful than a larger one that interrupts it.