A wood ceiling budget depends on more than the boards. Preparation, access, fixings, finishing and electrical work can change the total considerably. Start with a sound ceiling, measure the area, and compare installed costs before choosing a finish.
These photographs illustrate ways to simplify the work or reduce the area covered; they do not establish what any pictured project cost. Retaining suitable existing timber, working on a small flat surface and avoiding elaborate trim are useful starting points.
PART 01
Start with a Smaller Area
IDEA 01 / 20
Begin with One Small Sunroom
 SaveSupport Non AI Creator
Image credit: Project: Cindy Hayes (via Houzz)
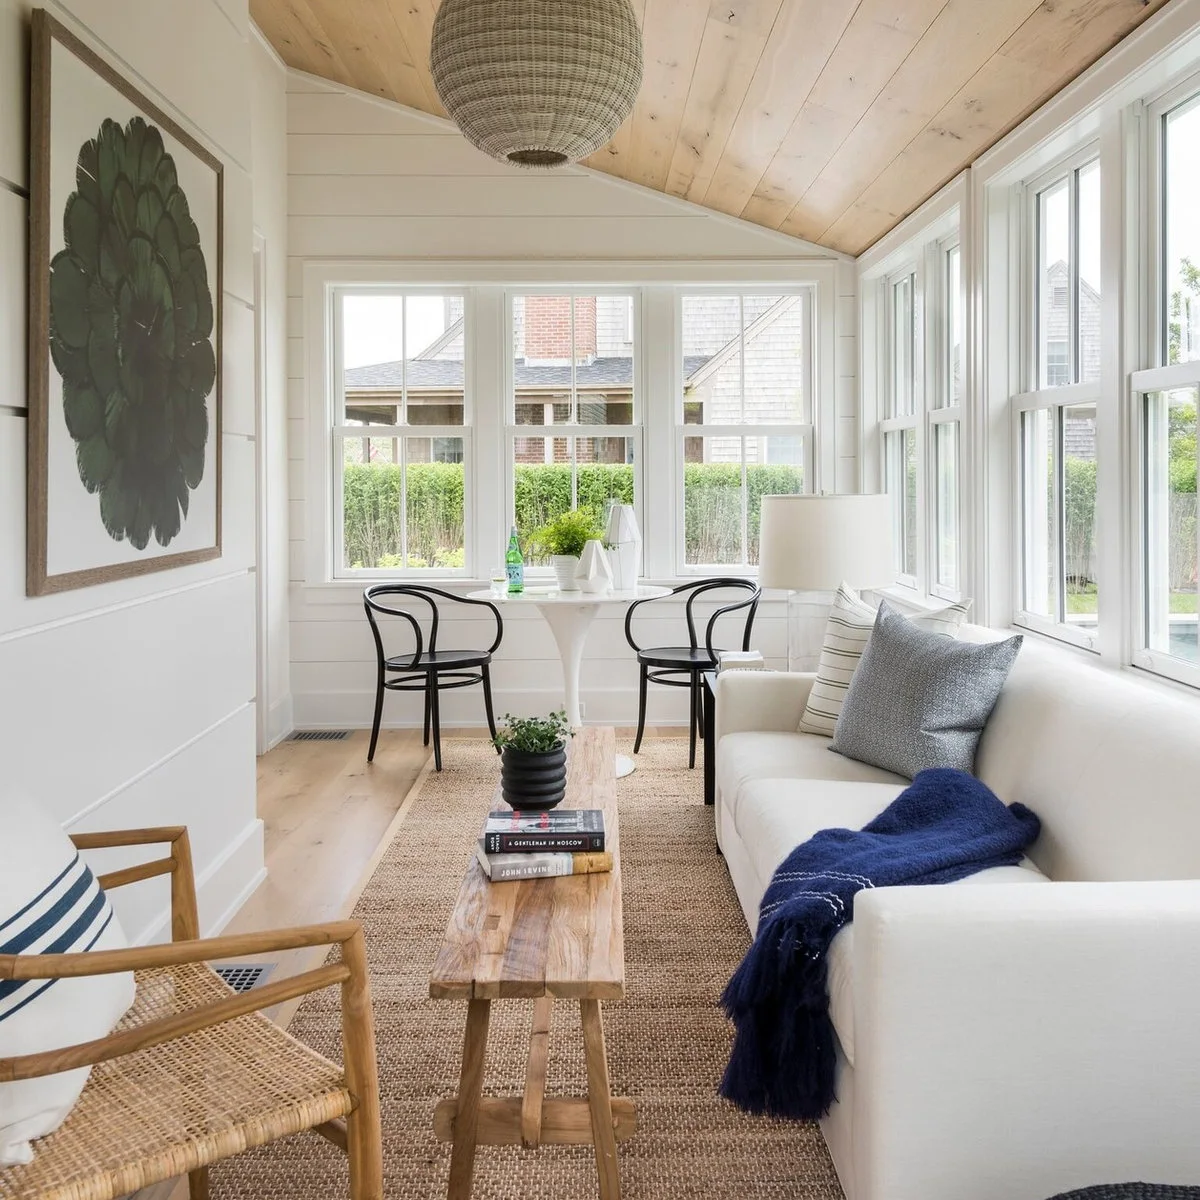
Pale wood boards cover the sloping ceiling above a white sofa and small round table. Large windows leave relatively little wall decoration, so the timber supplies much of the room’s texture. One consistent board direction keeps the surface easy to follow from the doorway.
Copy the limited footprint rather than rebuilding a roof shape. Measure an existing small room first and price the ceiling separately from lighting or furniture. Include perimeter trim and offcuts in the quote; a modest surface can still become expensive if every junction needs custom work.
IDEA 02 / 20
Finish a Compact Dining Nook
 SaveSupport Non AI Creator
Image credit: Project: Kustom Home Design (via Houzz)
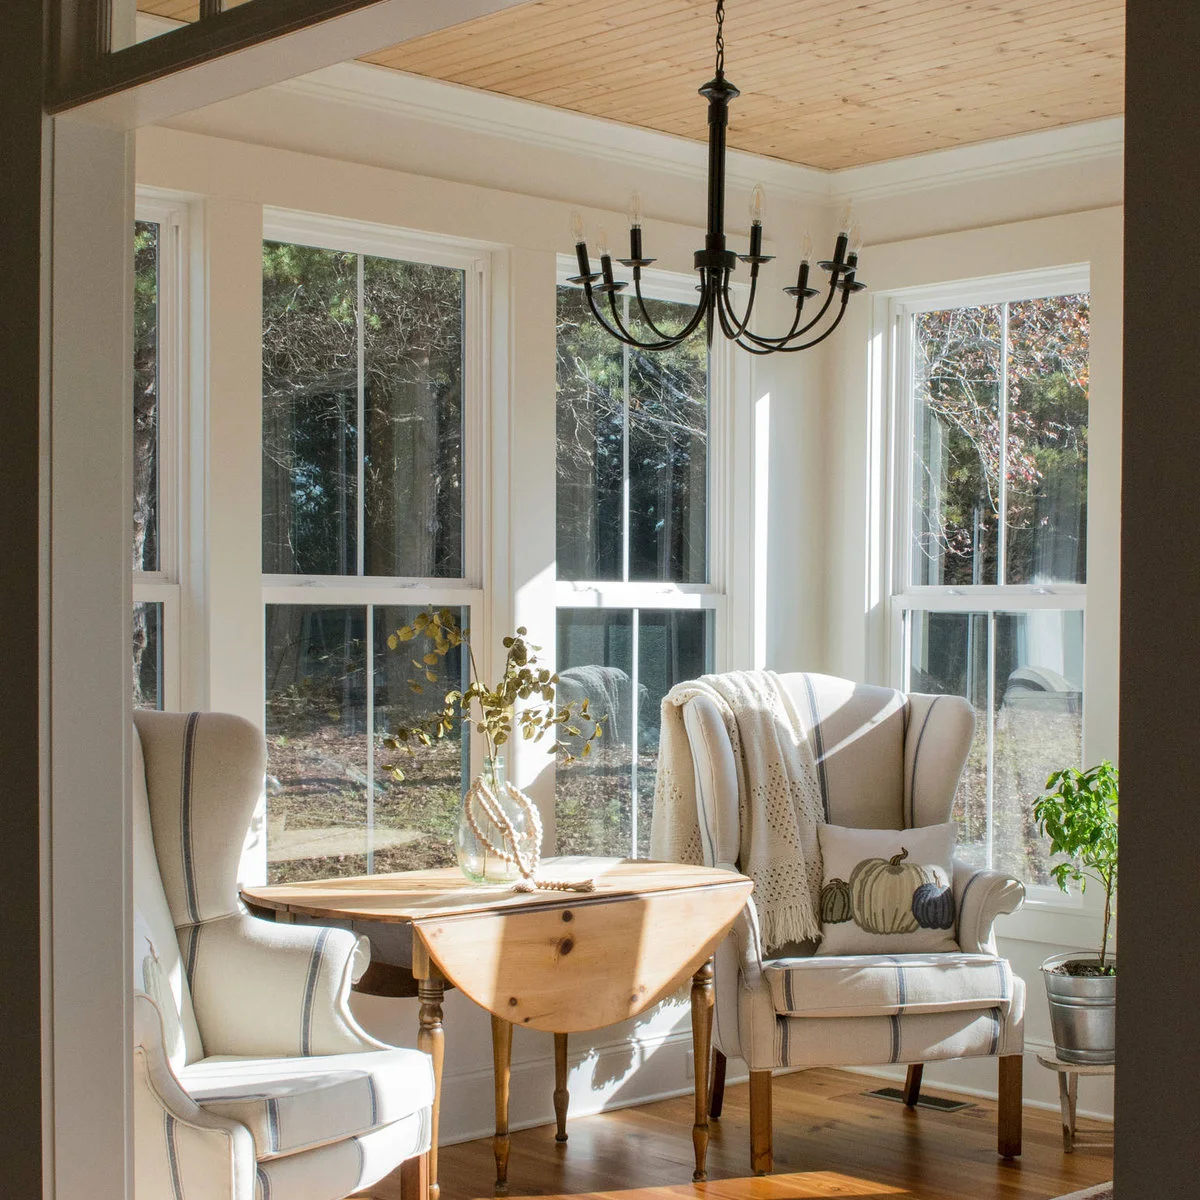
A light plank ceiling sits above this compact dining nook, with a simple dark chandelier marking the table. The grain adds interest without needing a pattern or several different finishes. Pale walls keep the small seating area bright around the windows.
Choose a board width and length that suit the existing ceiling dimensions. Ask the installer to compare layouts before ordering, since fewer awkward short pieces can reduce waste. Keep the lighting position if it already works; moving wiring may cost more than changing the visible ceiling finish.
IDEA 03 / 20
Line Only the Desk Canopy
 SaveSupport Non AI Creator
Image credit: Project: Vita Design Group (via Houzz)
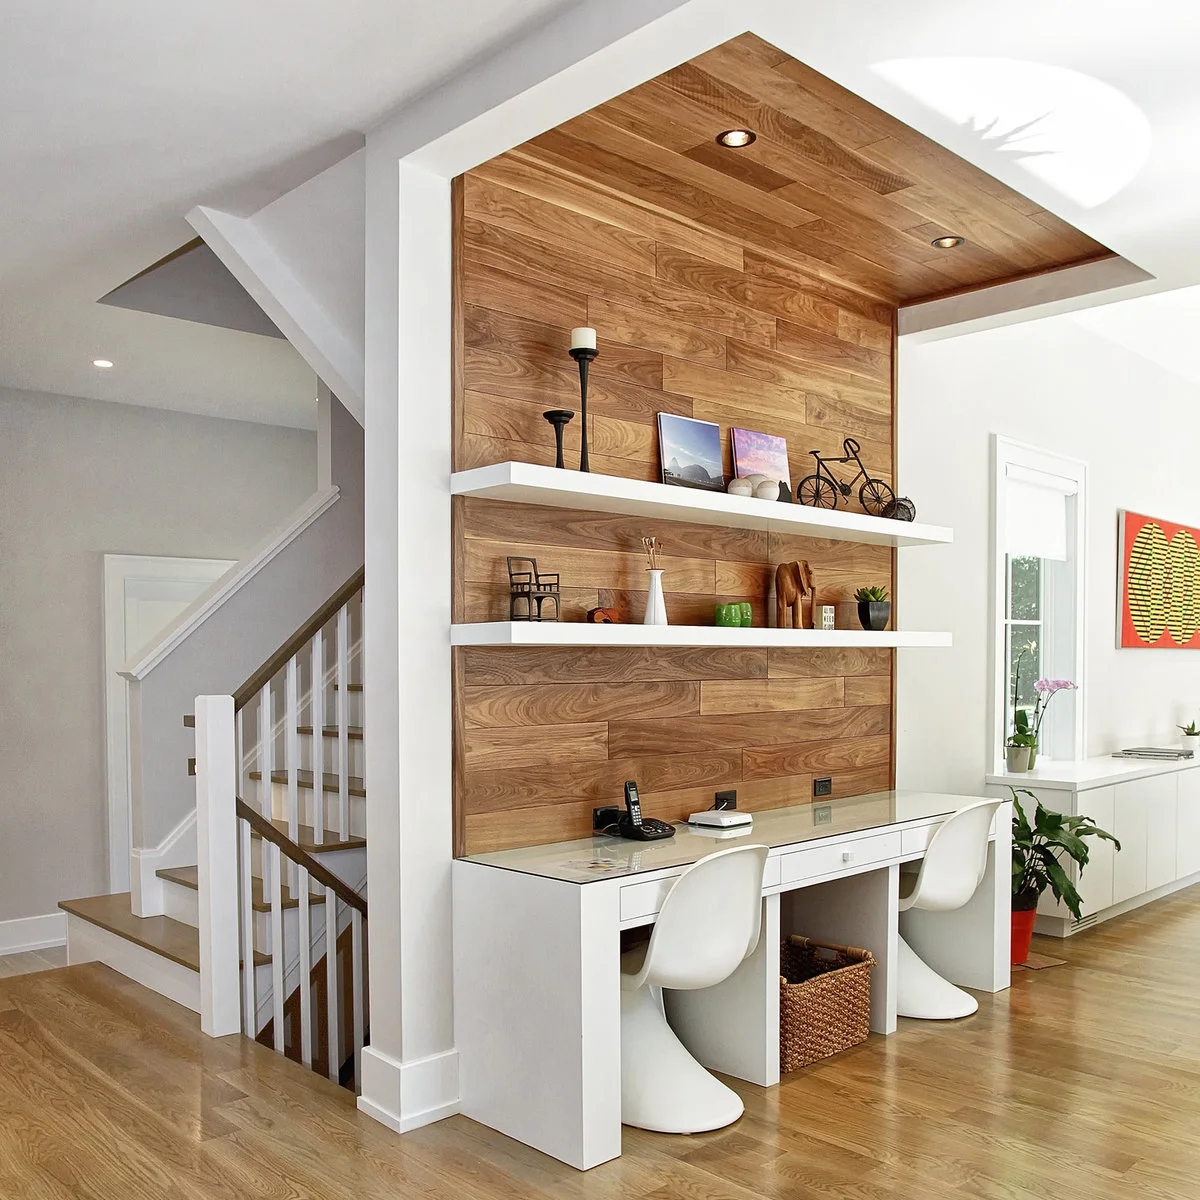
Wood wraps from the back of this desk recess onto its short ceiling return. White shelves and pale chairs keep the workspace light, while the limited wood surface makes the nook distinct. The surrounding ceiling stays plain instead of carrying timber across the whole room.
Use an existing recess as a natural stopping point for a smaller project. Price the return, edging and shelves separately so the ceiling change stays manageable. Select a product approved for overhead use and suitable fixings; leftover flooring is not automatically safe or appropriate as ceiling cladding.
IDEA 04 / 20
Clad an Existing Tray Recess
 SaveSupport Non AI Creator
Image credit: Project: Set To Sell, LLC (via Houzz)
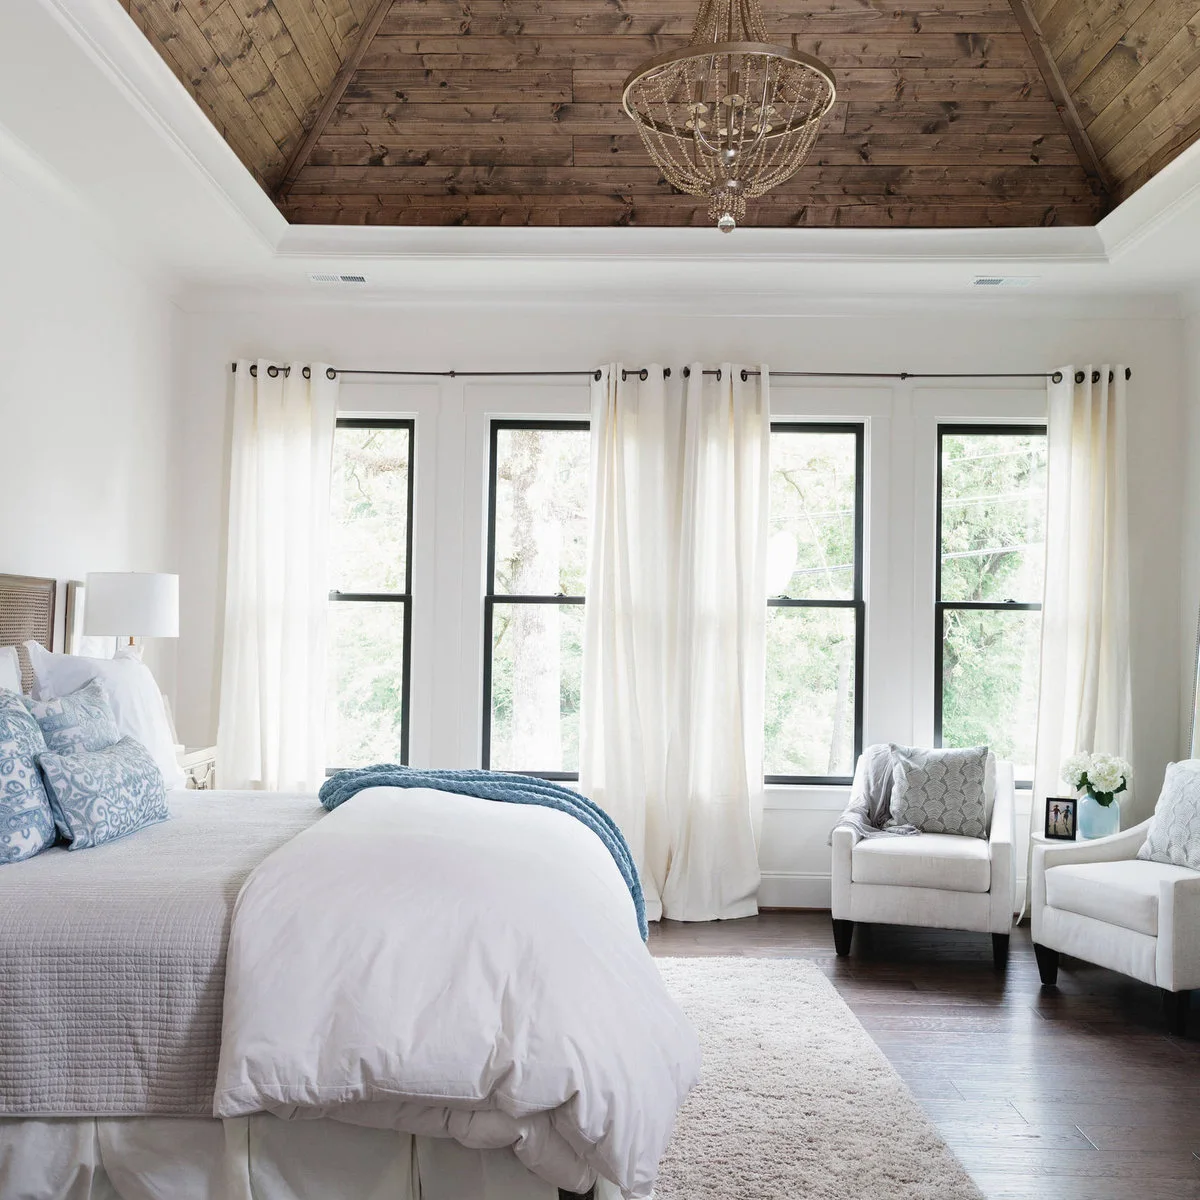
Wood boards fill the recessed part of this bedroom ceiling, leaving the surrounding border white. The warm surface adds contrast above the blue bedding without taking over the walls. A hanging light sits within the wood-lined section, making the existing recess easy to read.
If your room already has a tray ceiling, finishing only its center can limit material quantities. Building a new tray is a separate construction expense and may defeat the saving. Check access around the pendant and allow for safe electrical work when adding thickness near an existing fitting.
IDEA 05 / 20
Use a Narrow Bathroom Ceiling Carefully
 SaveSupport Non AI Creator
Image credit: Project: Zimmerman Miller Montanari (via Houzz)
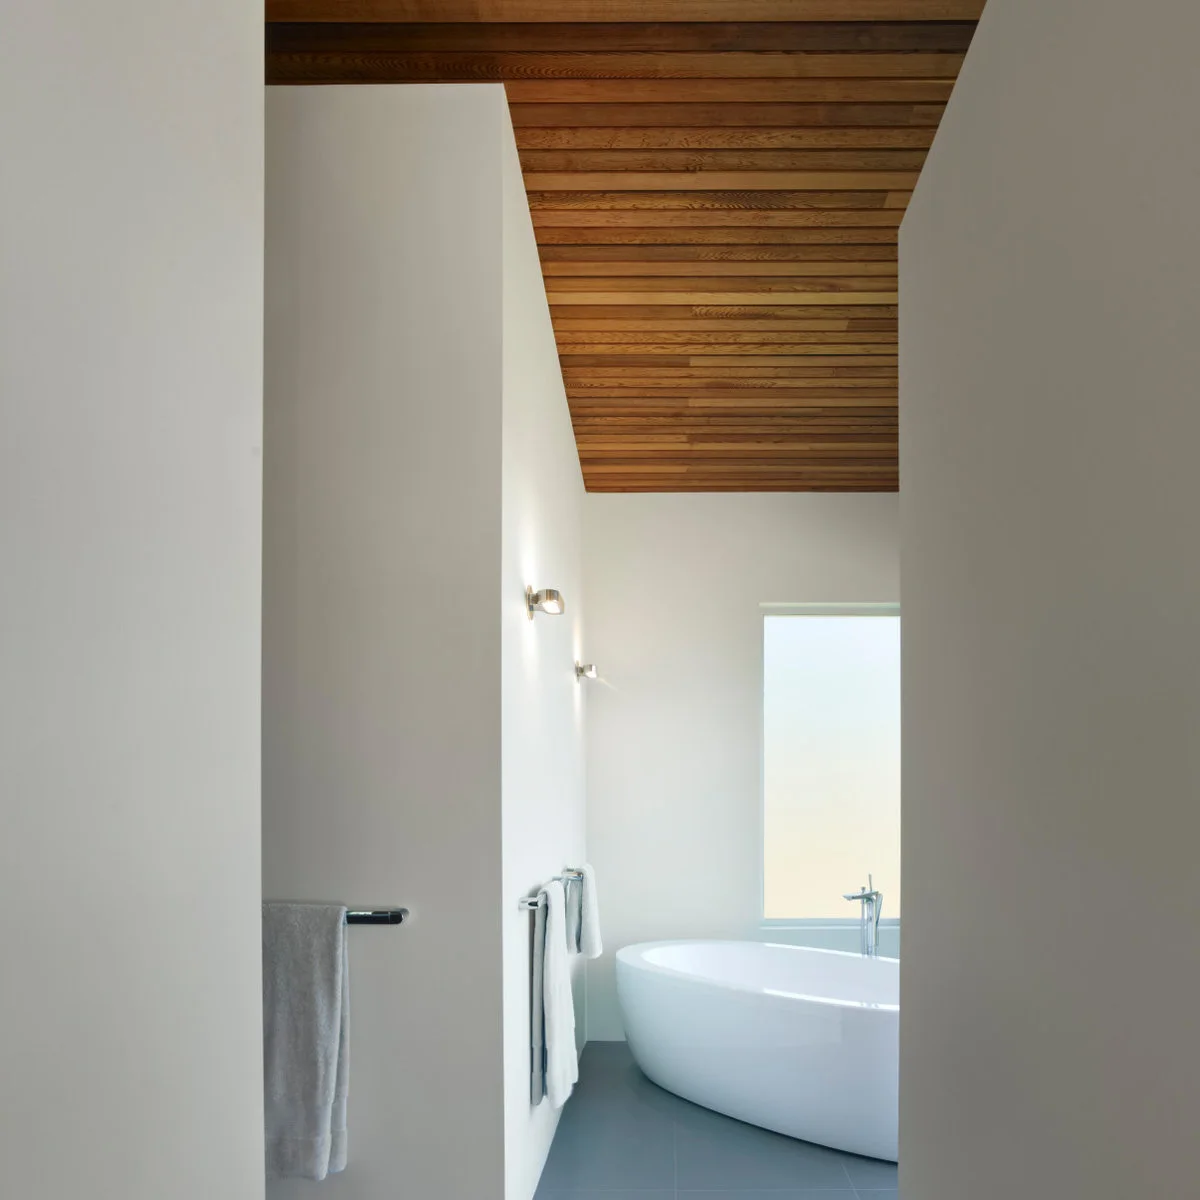
Pale planks follow the narrow sloping ceiling above this white freestanding bath. Their soft color connects with the light room without making the upper surface look heavy. The small ceiling area illustrates how timber can be concentrated where its grain is easy to see.
A small bathroom uses fewer boards, but moisture suitability matters more than a low shelf price. Check the product’s permitted use, finish, ventilation needs and fixing instructions before buying. Repair condensation or leaks first; covering a damp ceiling does not solve the problem underneath.
PART 02
Keep Board Layouts Straightforward
IDEA 06 / 20
Keep a Flat Kitchen Ceiling Simple
 SaveSupport Non AI Creator
Image credit: Project: Coyote Design Architecture + Planning PLLC (via Houzz)
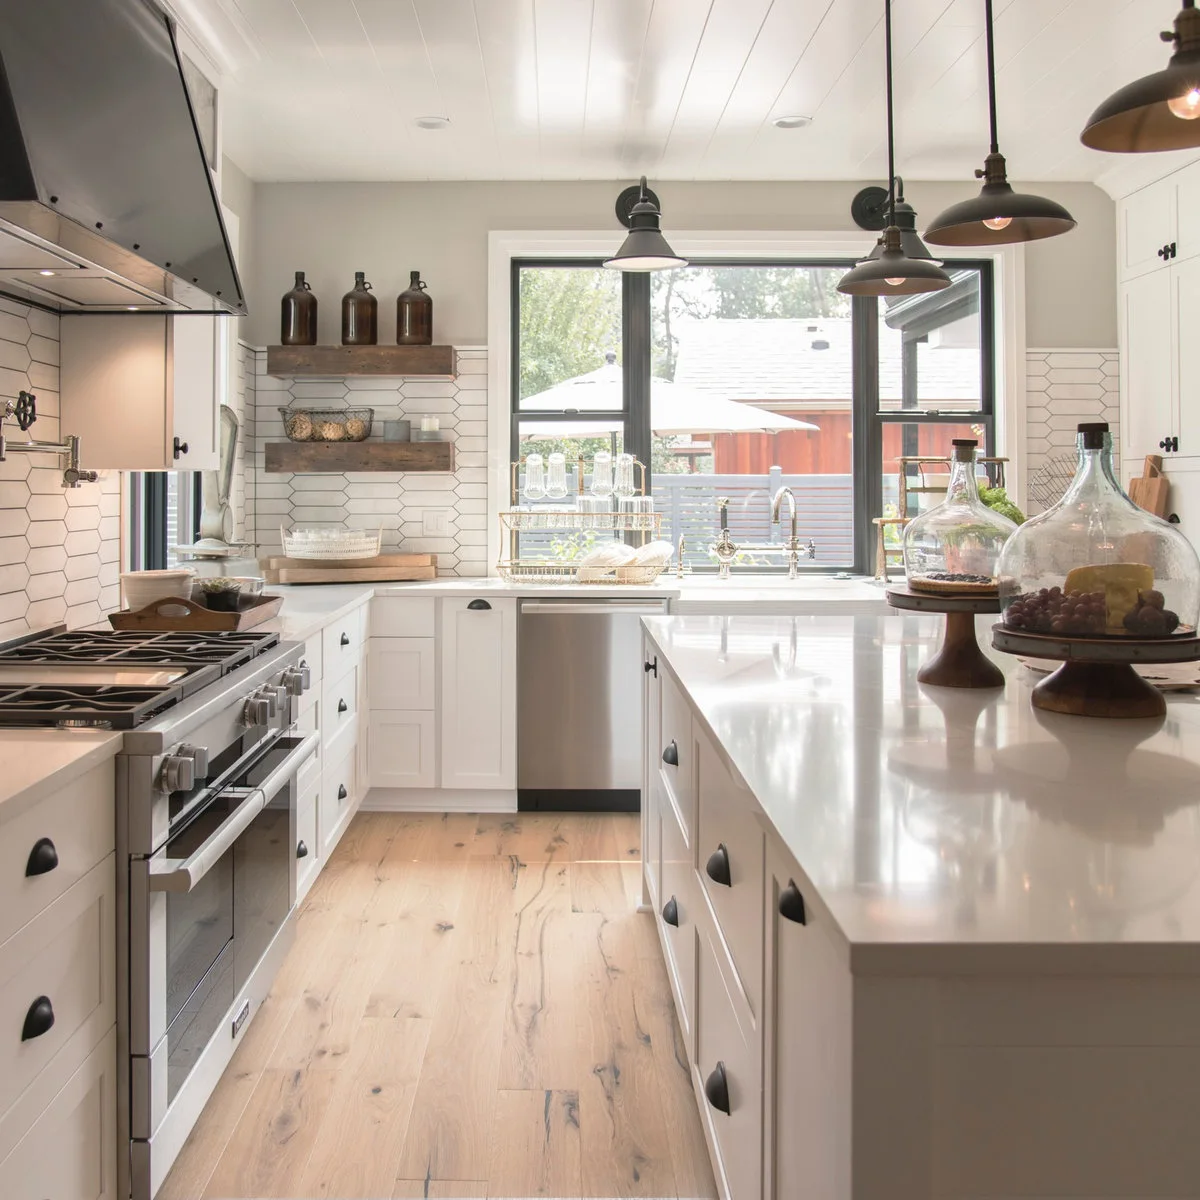
Straight white ceiling boards run across this compact kitchen above pale cabinets and dark pendants. There is no elaborate ceiling pattern competing with the work areas. The repeated lines introduce texture while preserving the brightness of an otherwise mostly white room.
A straightforward flat ceiling is easier to price than intersecting slopes or decorative coffers. Compare the full installed cost of boards and grooved panels, including support and finishing. Keep access to necessary services and do not cover ventilation openings to achieve an uninterrupted appearance.
IDEA 07 / 20
Paint Existing Bedroom Boards White
 SaveSupport Non AI Creator
Image credit: Project: Grove Park Construction (via Houzz)
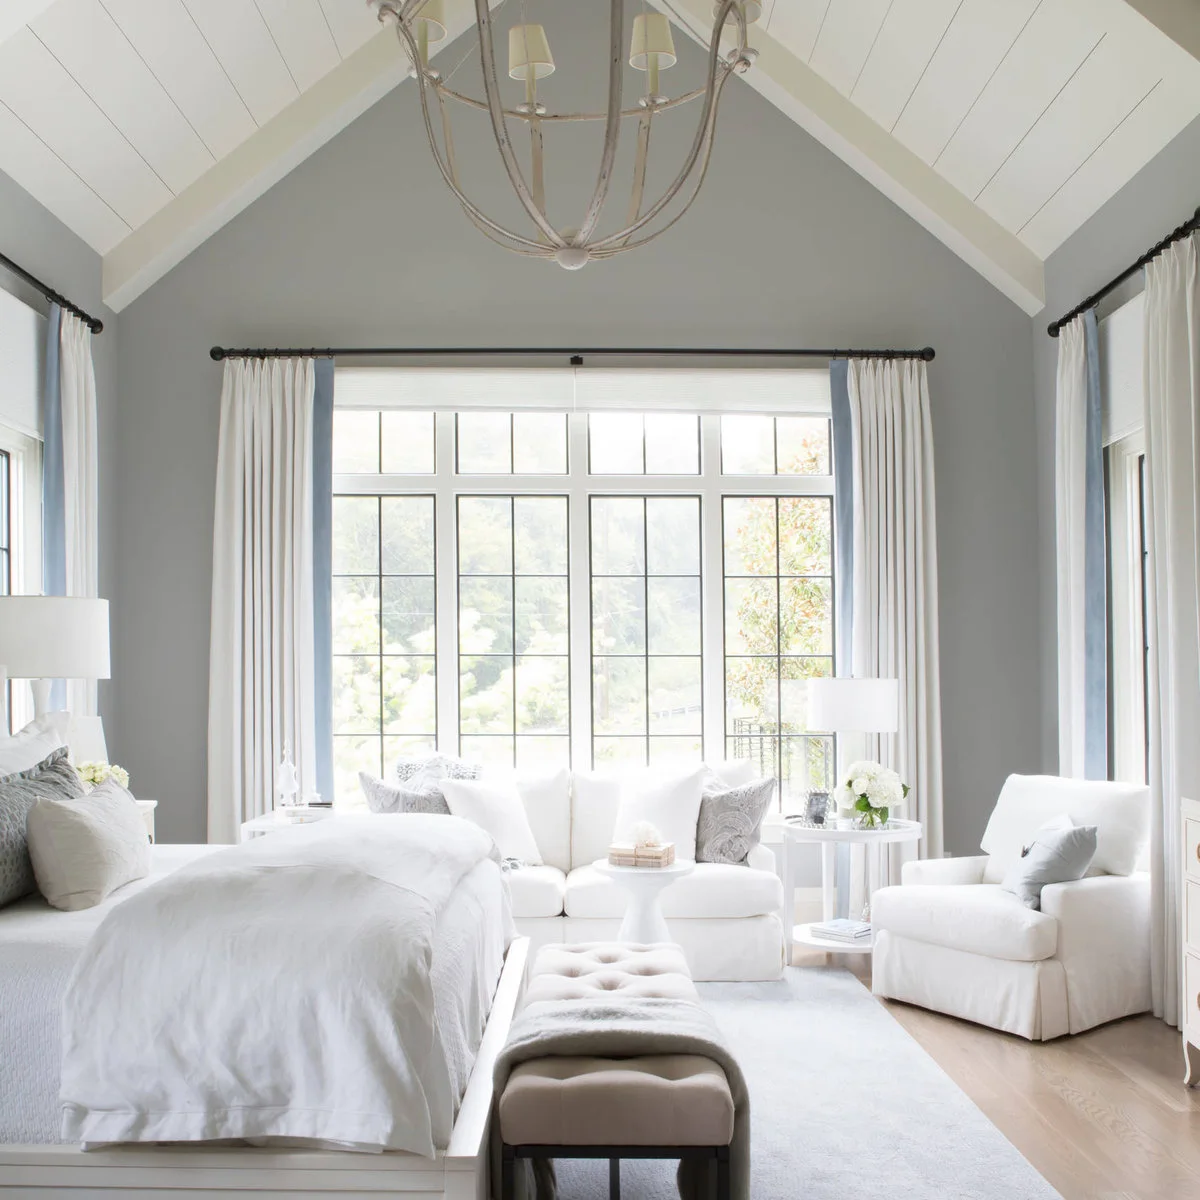
White ceiling boards and a matching beam brighten this gray bedroom above the bed and small sitting area. The painted finish makes the timber lines visible without a strong contrast. Existing ceiling geometry supplies the interest, so additional decorative elements would contribute relatively little.
Where the boards are sound and suitable for painting, a finish refresh may avoid replacing them. Budget for cleaning, preparation, primer where required and safe access. Test the finish first, especially over knots or old coatings, and investigate older paint before sanding or disturbing it.
IDEA 08 / 20
Match Ceiling Boards to White Cabinetry
 SaveSupport Non AI Creator
Image credit: Project: Chelsea Design + Construction (via Houzz)
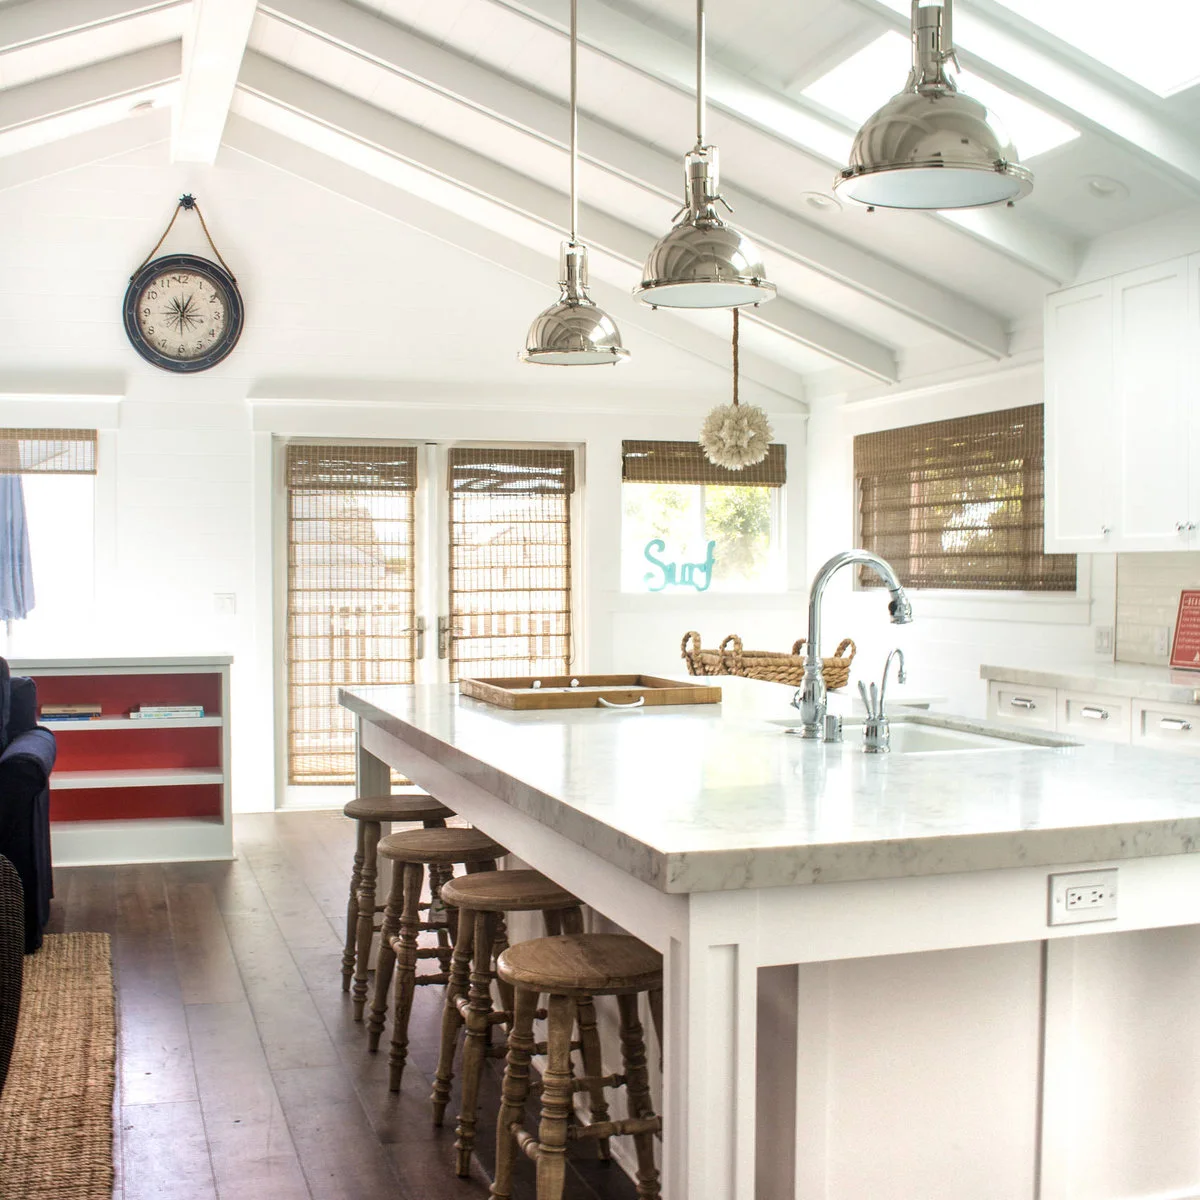
White boards and white beams carry the color of the cabinetry upward in this bright kitchen. Metal pendants provide darker outlines without adding another timber tone. The ceiling remains a separate textured surface even though its color is close to the walls.
The transferable idea is a consistent paint finish, not the cost of creating a vault or skylights. If your existing ceiling has several wood tones, compare a repaint with replacement. Check coating compatibility and allow for the extra preparation needed around beams and light fittings.
IDEA 09 / 20
Echo Grooved Cabinet Fronts Overhead
 SaveSupport Non AI Creator
Image credit: Project: Chace Building Supply (via Houzz)
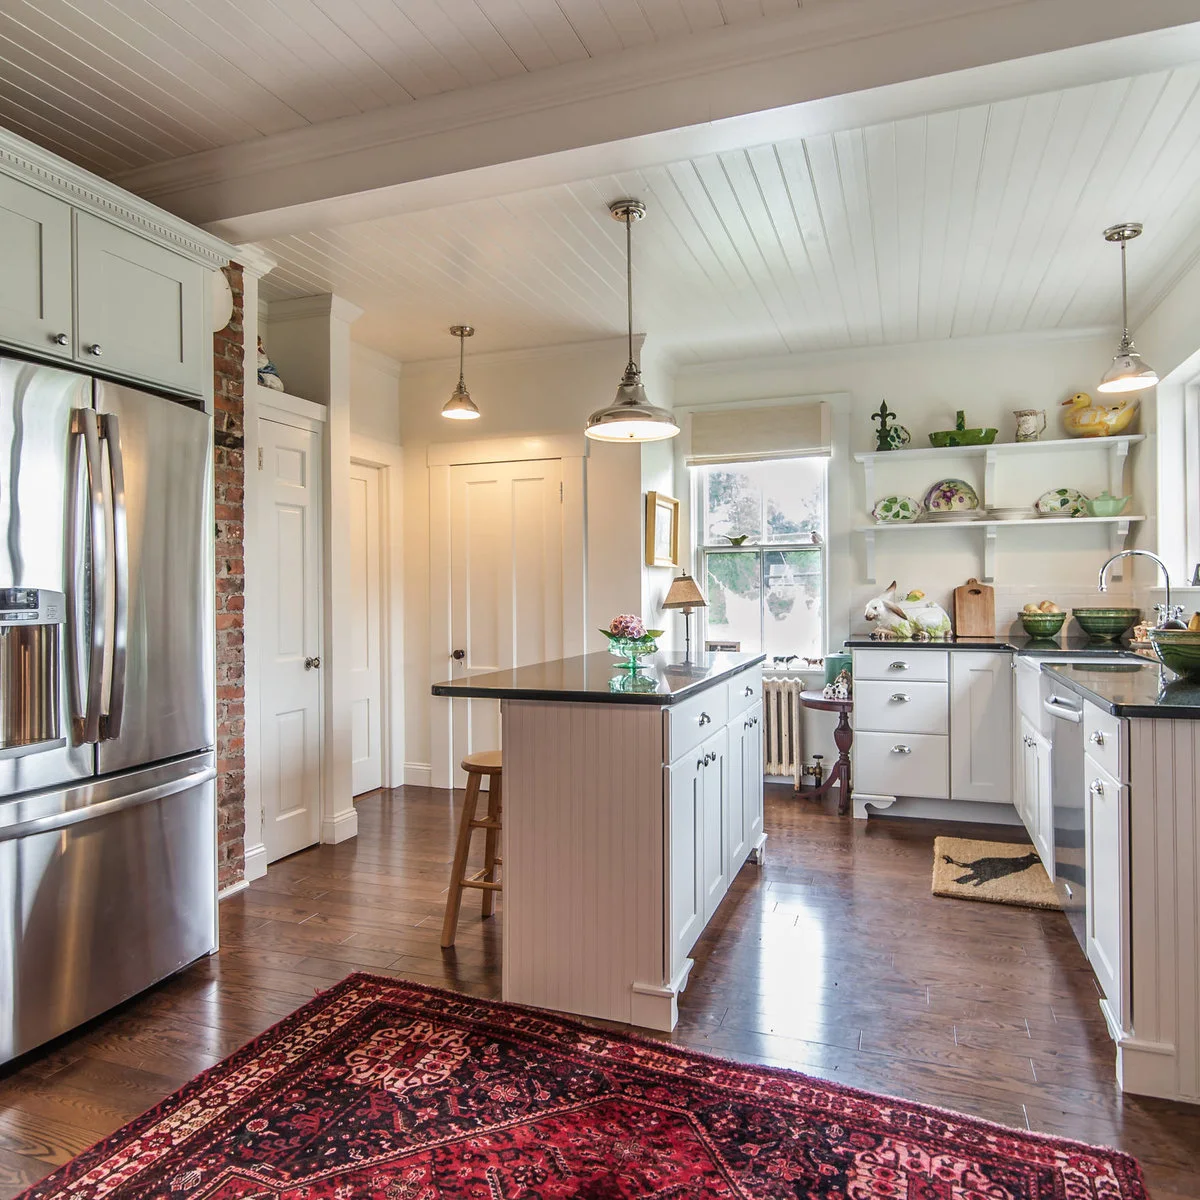
Fine ceiling grooves repeat the vertical texture on the side of this small kitchen island. White paint links the two surfaces while wood flooring and a red rug provide warmth below. Simple pendant fittings interrupt the ceiling only where the work areas need light.
Repeating an existing detail can reduce the temptation to add expensive decorative trim. Compare ceiling-rated grooved sheet products with individual boards and include finishing the joints in either quote. Choose the simplest edge that works with your cabinets rather than extending cabinetry solely to meet the new ceiling.
IDEA 10 / 20
Use Regular Trim to Divide Long Runs
 SaveSupport Non AI Creator
Image credit: Project: Patrick Ahearn Architect (via Houzz)
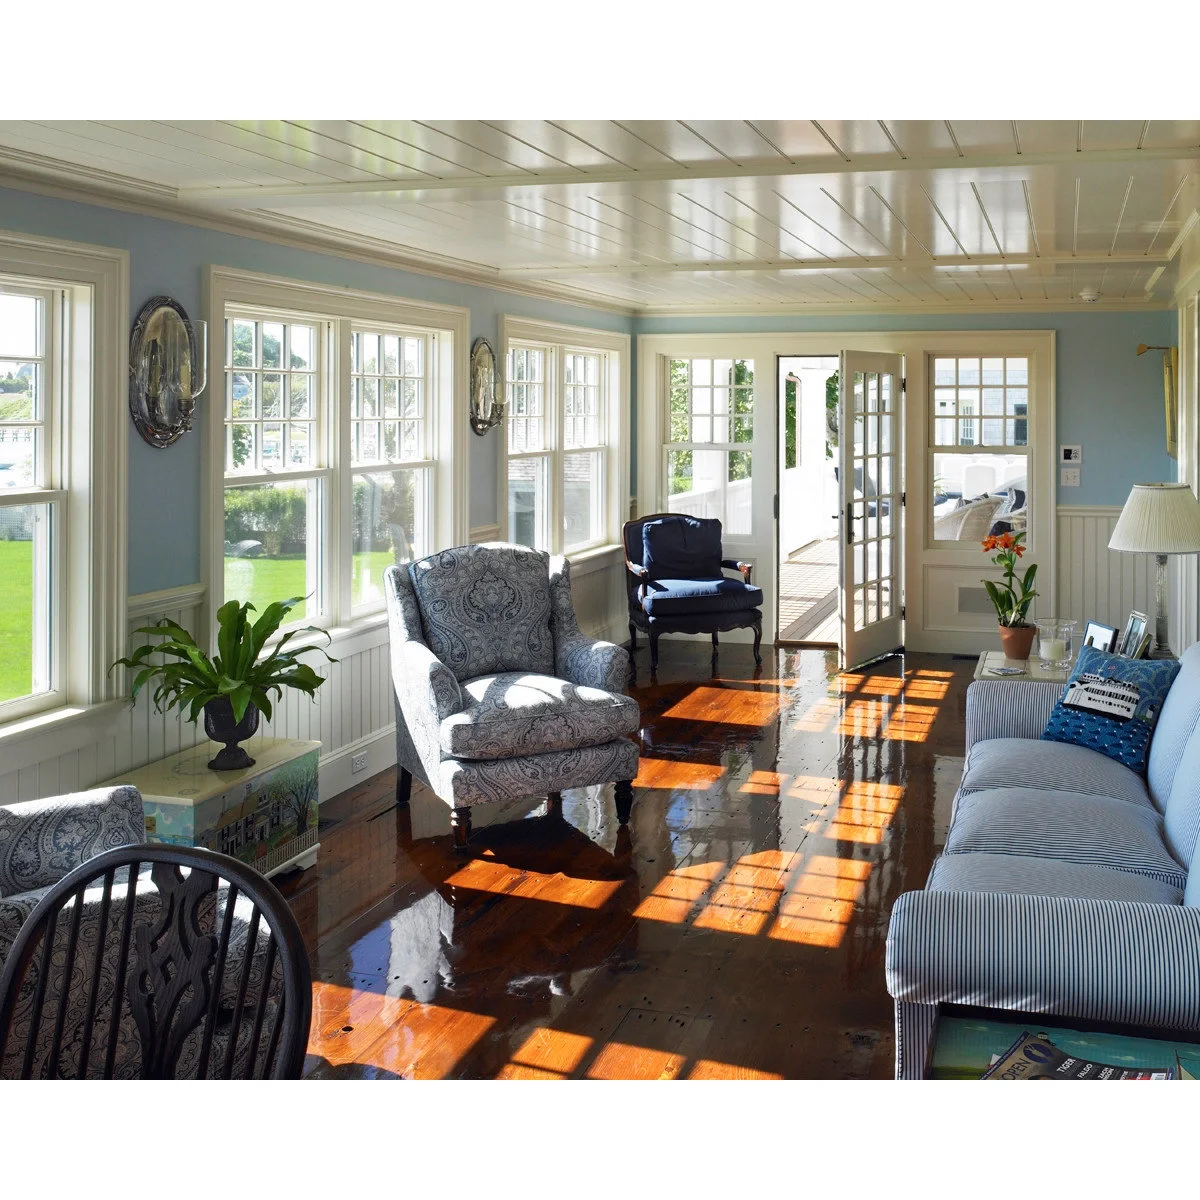
Cream ceiling boards are divided by straight cross strips in this blue sunroom. The simple divisions break up a long surface without an intricate pattern. White window trim and lower wall paneling make the ceiling feel connected to the rest of the room.
Where panel joints need covering, a regular layout can make the trim look intentional. Plan the divisions around sheet or board lengths before buying. Keep the strips modest and consistent, and confirm their fixings; decorative trim should not be relied on to support poorly secured ceiling panels.
PART 03
Work with What Is Already There
IDEA 11 / 20
Retain Sound Timber in a Workroom
 SaveSupport Non AI Creator
Image credit: Project: Ike Kligerman Barkley (via Houzz)
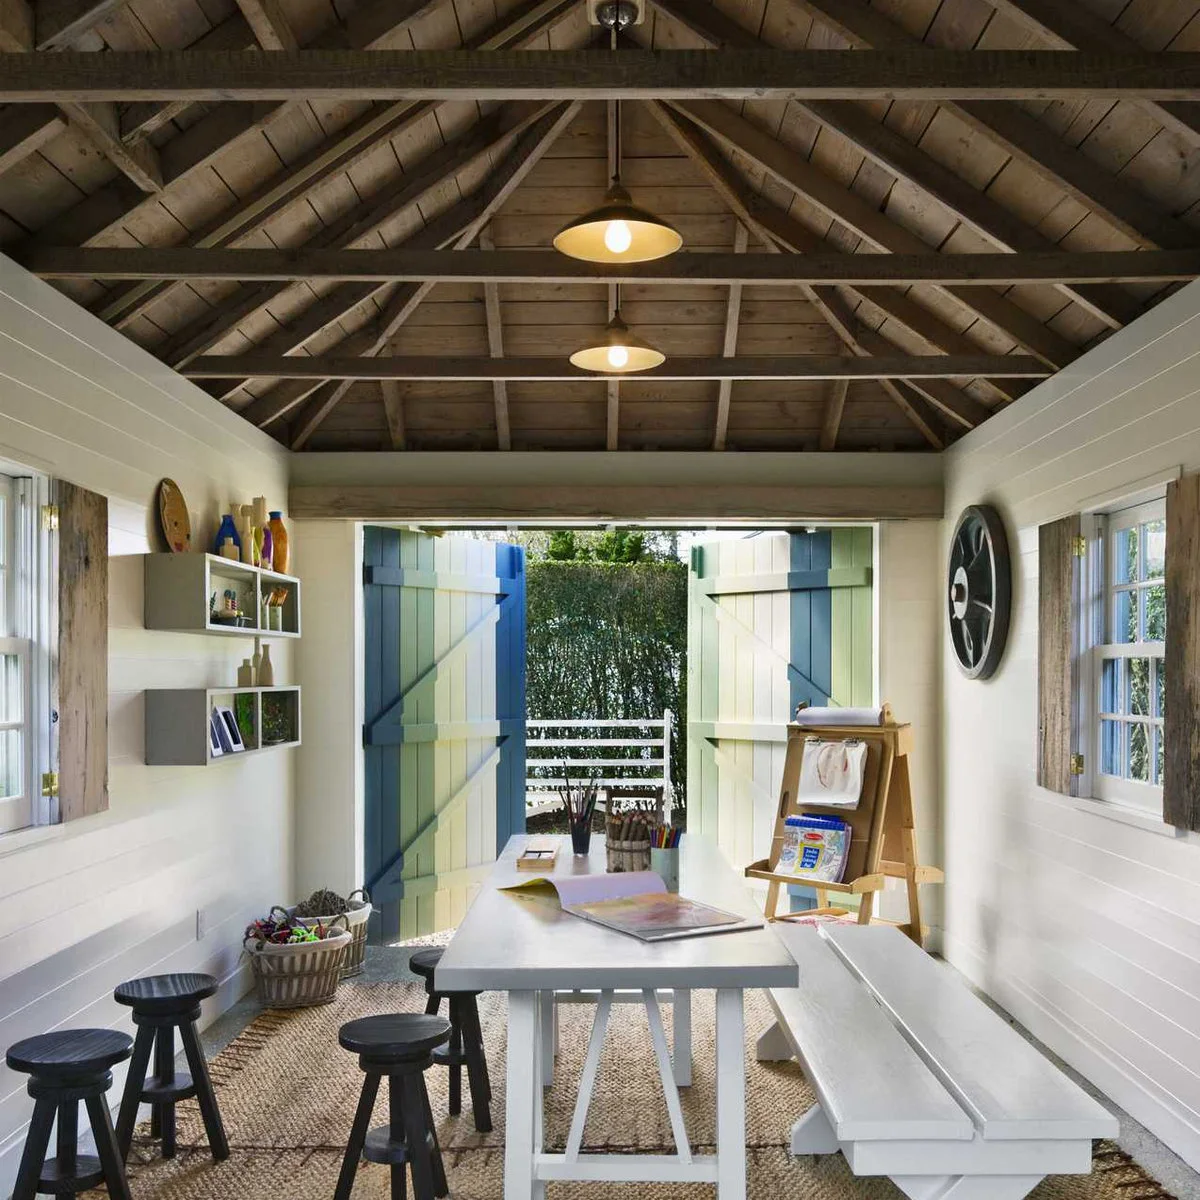
The timber ceiling in this small workroom remains visible above white walls and a broad worktable. Its straightforward surface suits a practical space without polished decorative finishes. Dark stools and a sliding door add contrast below, leaving the roof timbers easy to distinguish.
Keeping an existing suitable ceiling may cost less than replacing it for a different appearance. Have its condition and required fire, insulation and ventilation provisions checked before making changes. Do not strip out a finished ceiling simply to expose rafters; hidden assemblies may be doing essential work.
IDEA 12 / 20
Lighten Boards Between Existing Rafters
 SaveSupport Non AI Creator
Source: houzz.com
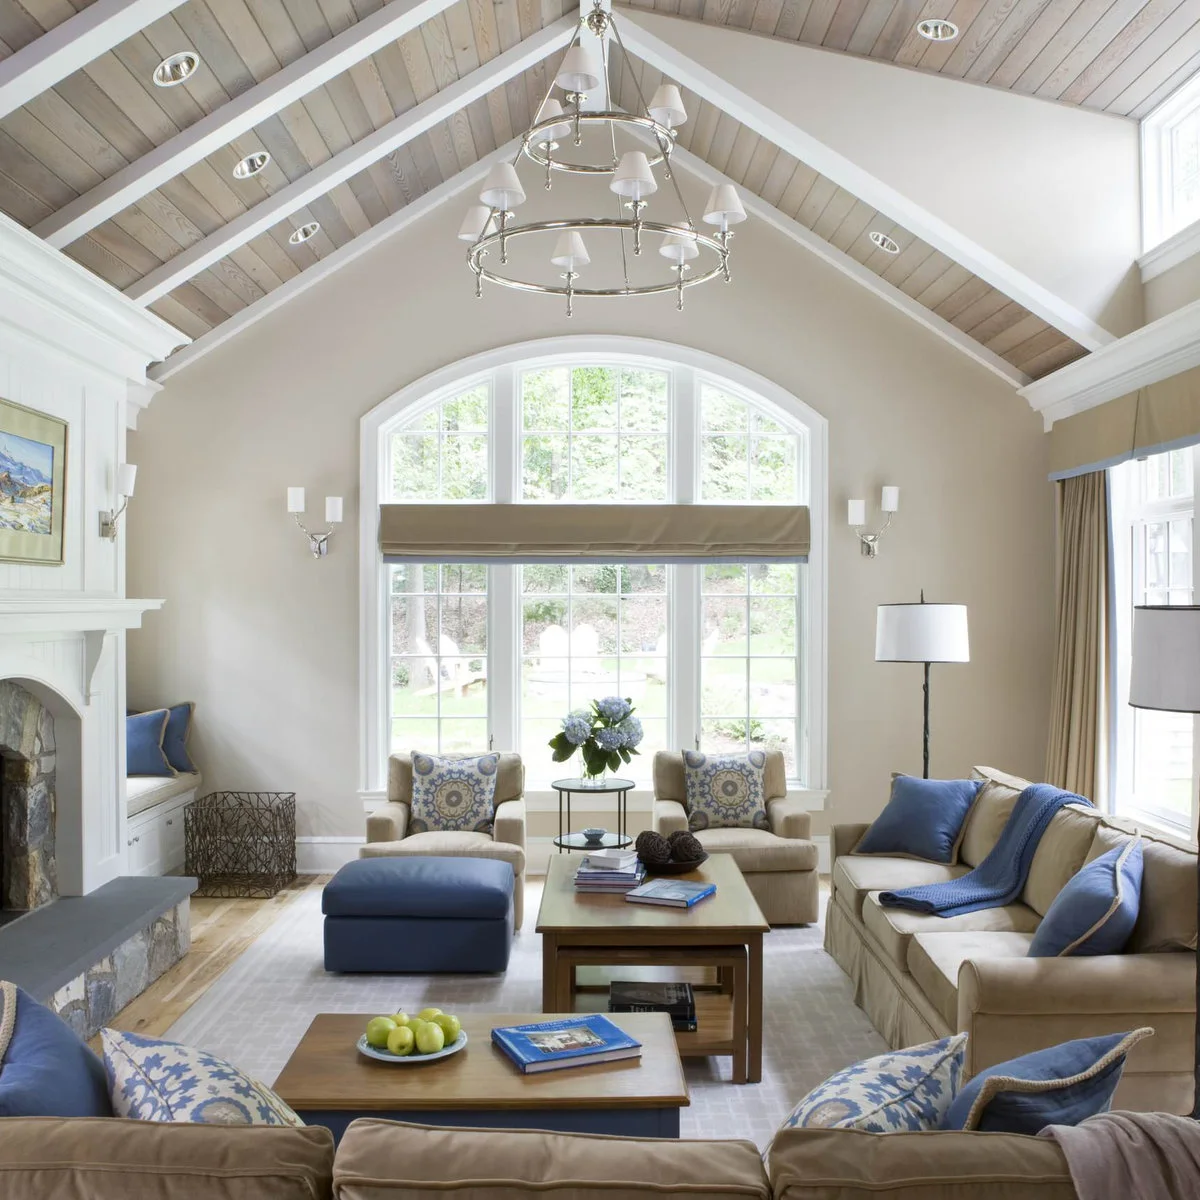
Light-toned boards sit between white rafters above the blue and cream furniture in this living room. The distinction between boards and framing stays gentle, giving the ceiling texture without a dark overhead band. Plain walls allow that subtle finish difference to remain visible.
If similar framing is already present, compare a light finish sample against full opaque paint. A wash may reveal uneven old stain, so test a representative area before committing. Retain safe existing components and avoid adding a new rafter pattern purely to recreate this photograph.
IDEA 13 / 20
Keep Existing Beams and Refresh the Infill
 SaveSupport Non AI Creator
Image credit: Project: Divine Custom Homes (via Houzz)
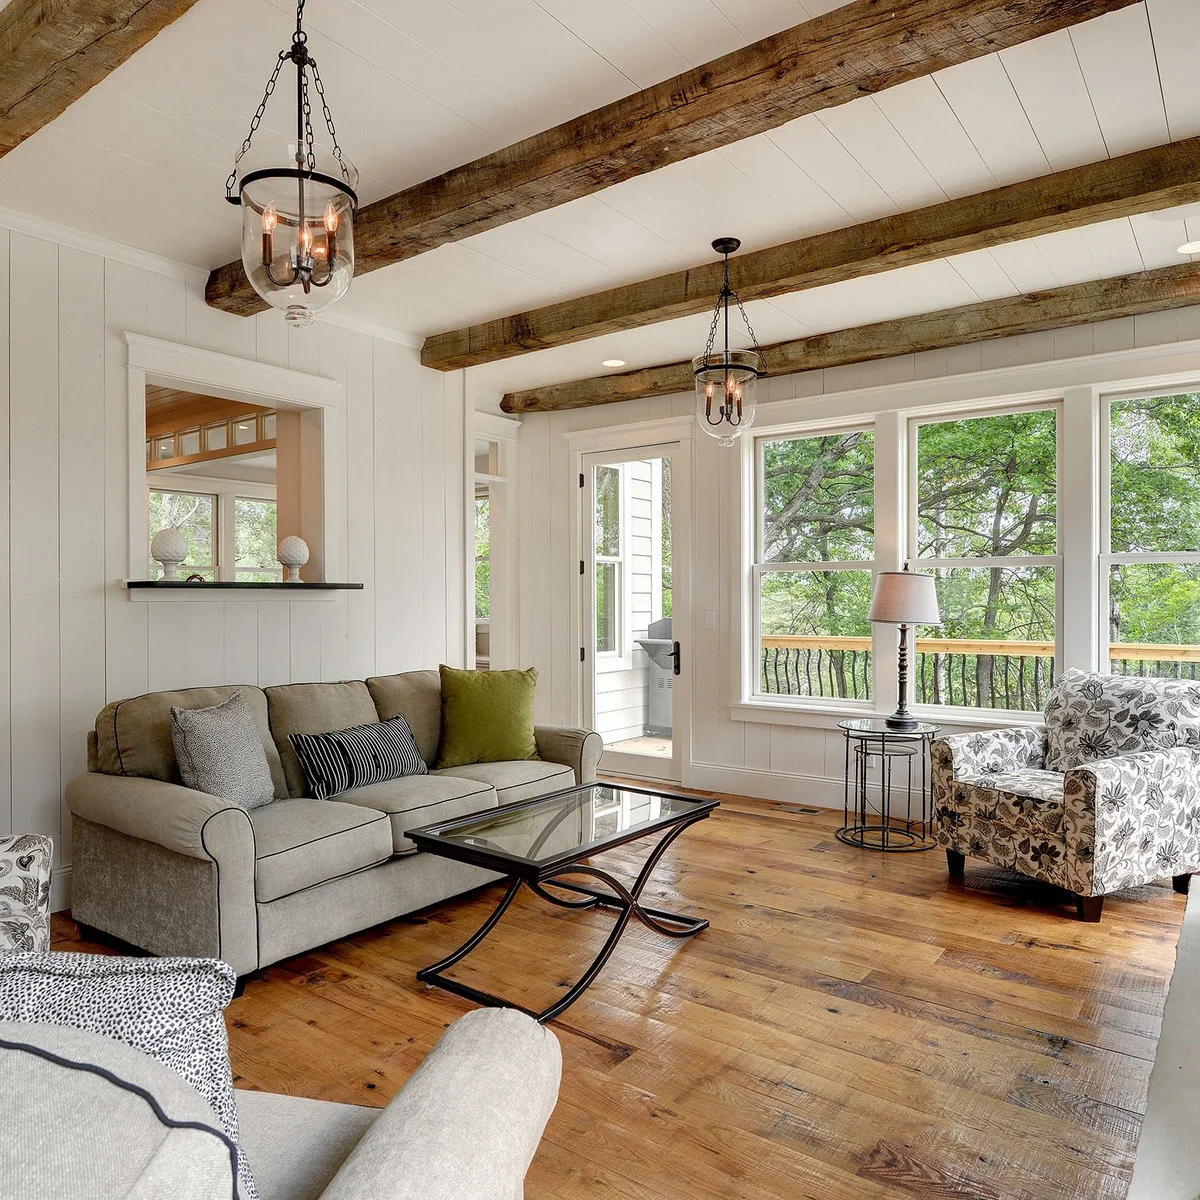
White ceiling boards sit between rough dark beams in this small living room. The contrast preserves the timber character while the light infill keeps the room open. A gray sofa and wood floor leave the ceiling as the strongest source of rustic texture.
Treat existing sound beams as a feature rather than assuming they need replacement. Cleaning and refinishing the surrounding boards may be enough to change the room. Establish whether the beams are structural before altering them, and include difficult masking or access work in your finishing budget.
IDEA 14 / 20
Consider a Dark Finish for Existing Boards
 SaveSupport Non AI Creator
Image credit: Project: Emerick Architects (via Houzz)
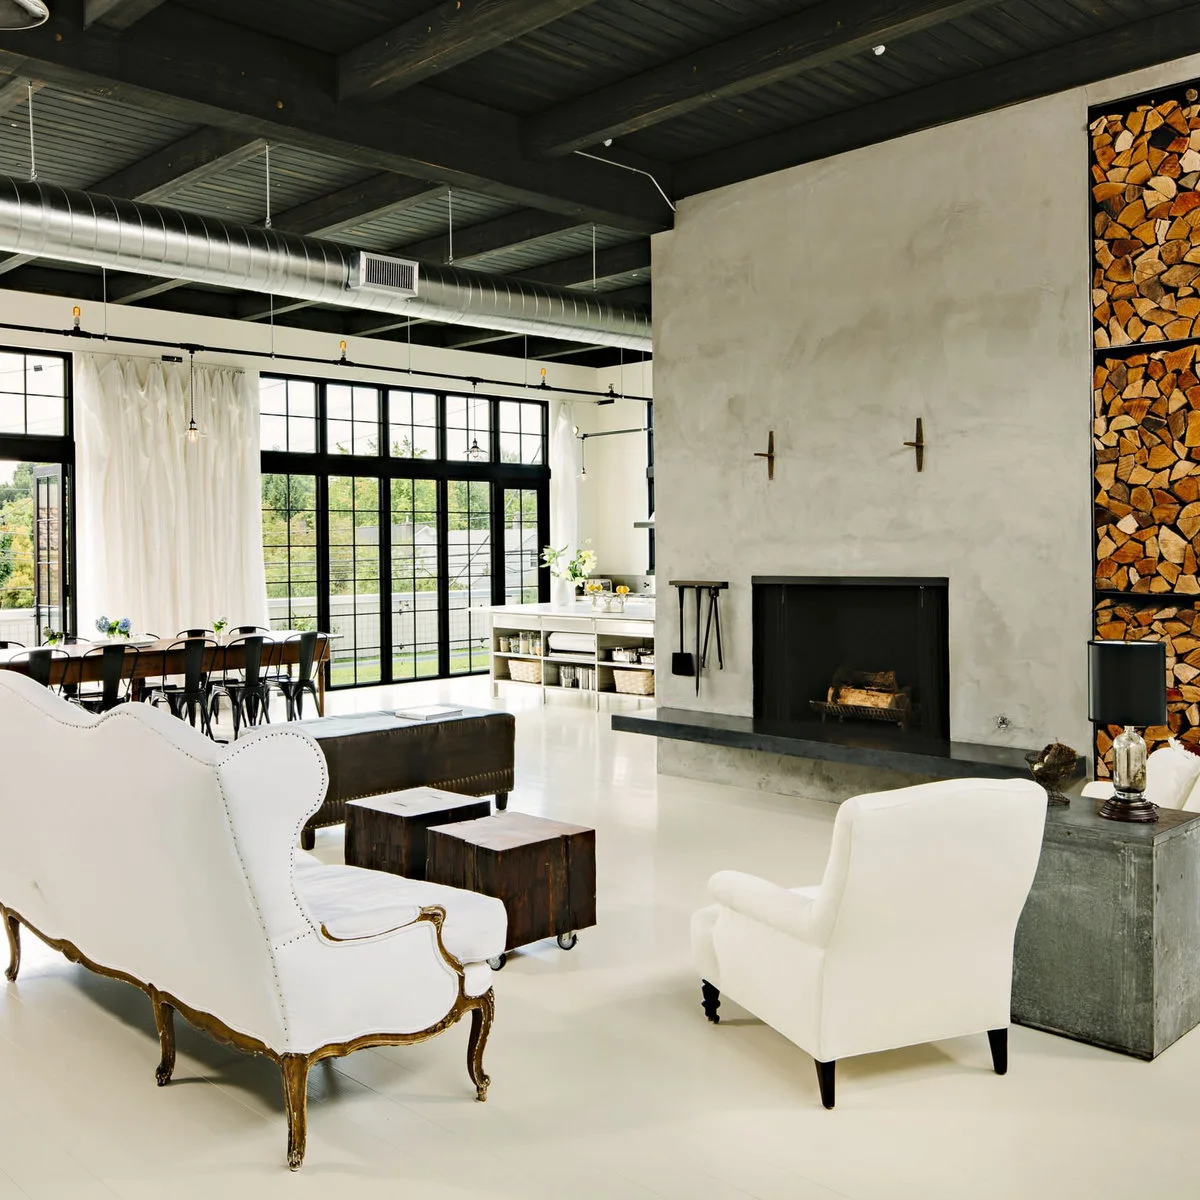
A dark boarded ceiling and matching beams sit over a bright room with large windows and white furniture. The finish visually groups the exposed overhead elements, while a metal duct remains visible. Strong daylight helps the dark surface feel deliberate rather than simply unlit.
A dark repaint can refresh an existing ceiling without buying new cladding, but test it under your evening lighting first. Do not paint equipment, detectors or ventilation grilles indiscriminately. Keep essential components accessible and price preparation carefully, especially where the ceiling includes several different materials.
IDEA 15 / 20
Refresh an Existing Porch with Pale Blue
 SaveSupport Non AI Creator
Image credit: Project: J.T. Turner Construction (via Houzz)
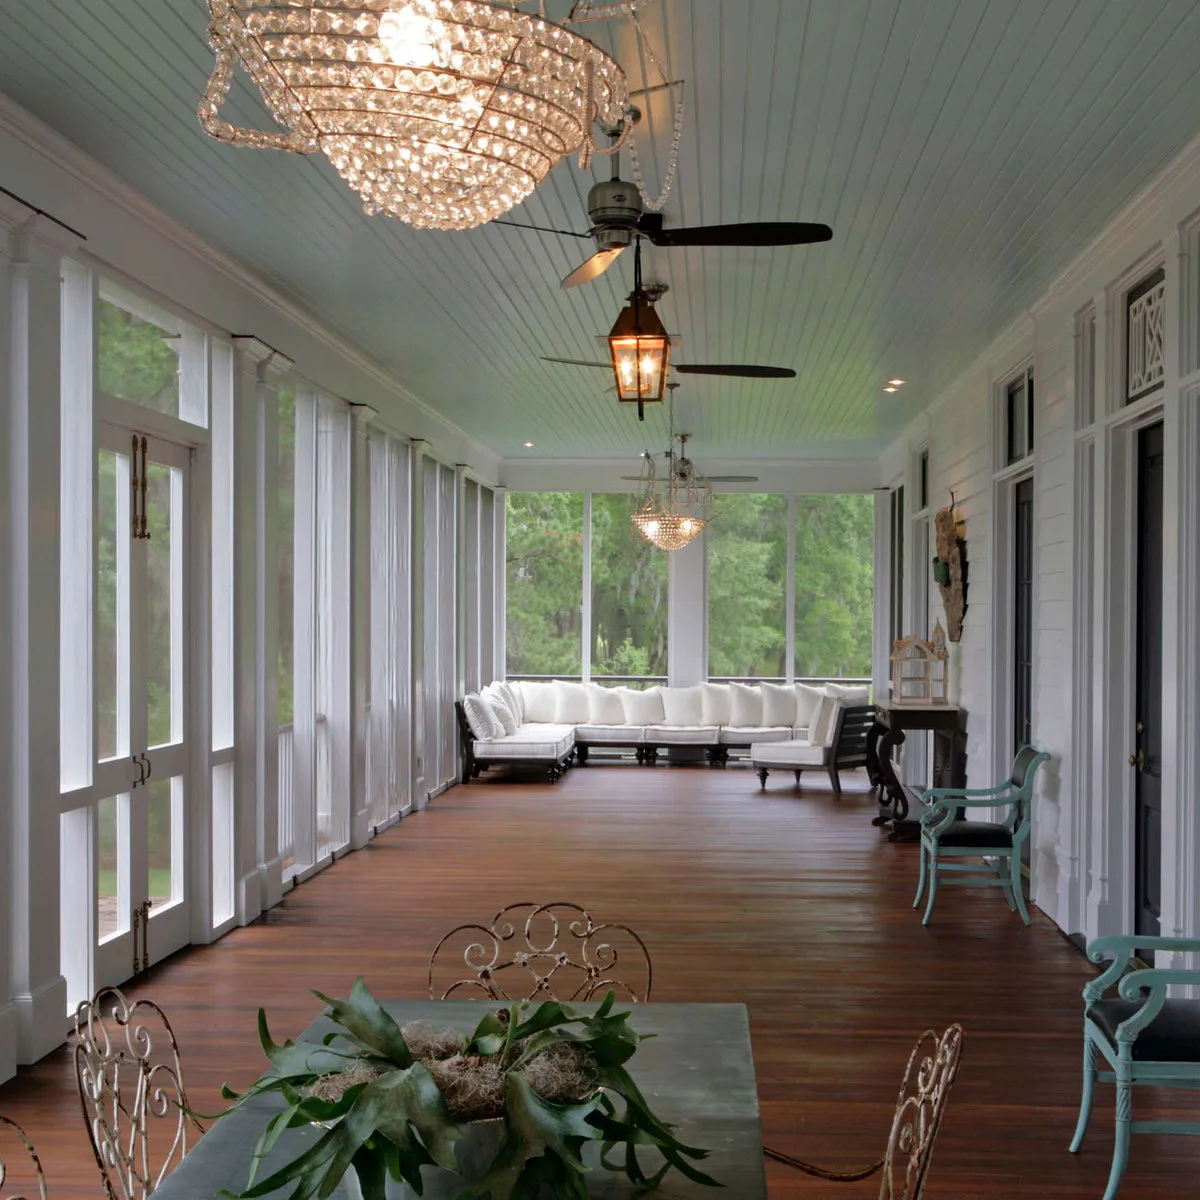
A pale blue grooved ceiling stretches along this screened porch above white seating and a wood floor. Its color adds interest to a simple continuous plane. Several existing lights and fans remain visible rather than being hidden behind a decorative ceiling arrangement.
For a covered porch, compare repainting sound boards with replacing the whole surface. Use finishes and cladding suitable for the exposure and local conditions. The saving comes from retaining a serviceable ceiling; the chandeliers, fans and screened enclosure shown here are separate costs, not essential parts of the idea.
PART 04
Compare Panels and Finishes
IDEA 16 / 20
Compare Broad Panels for a Small Kitchen
 SaveSupport Non AI Creator
Source: houzz.com
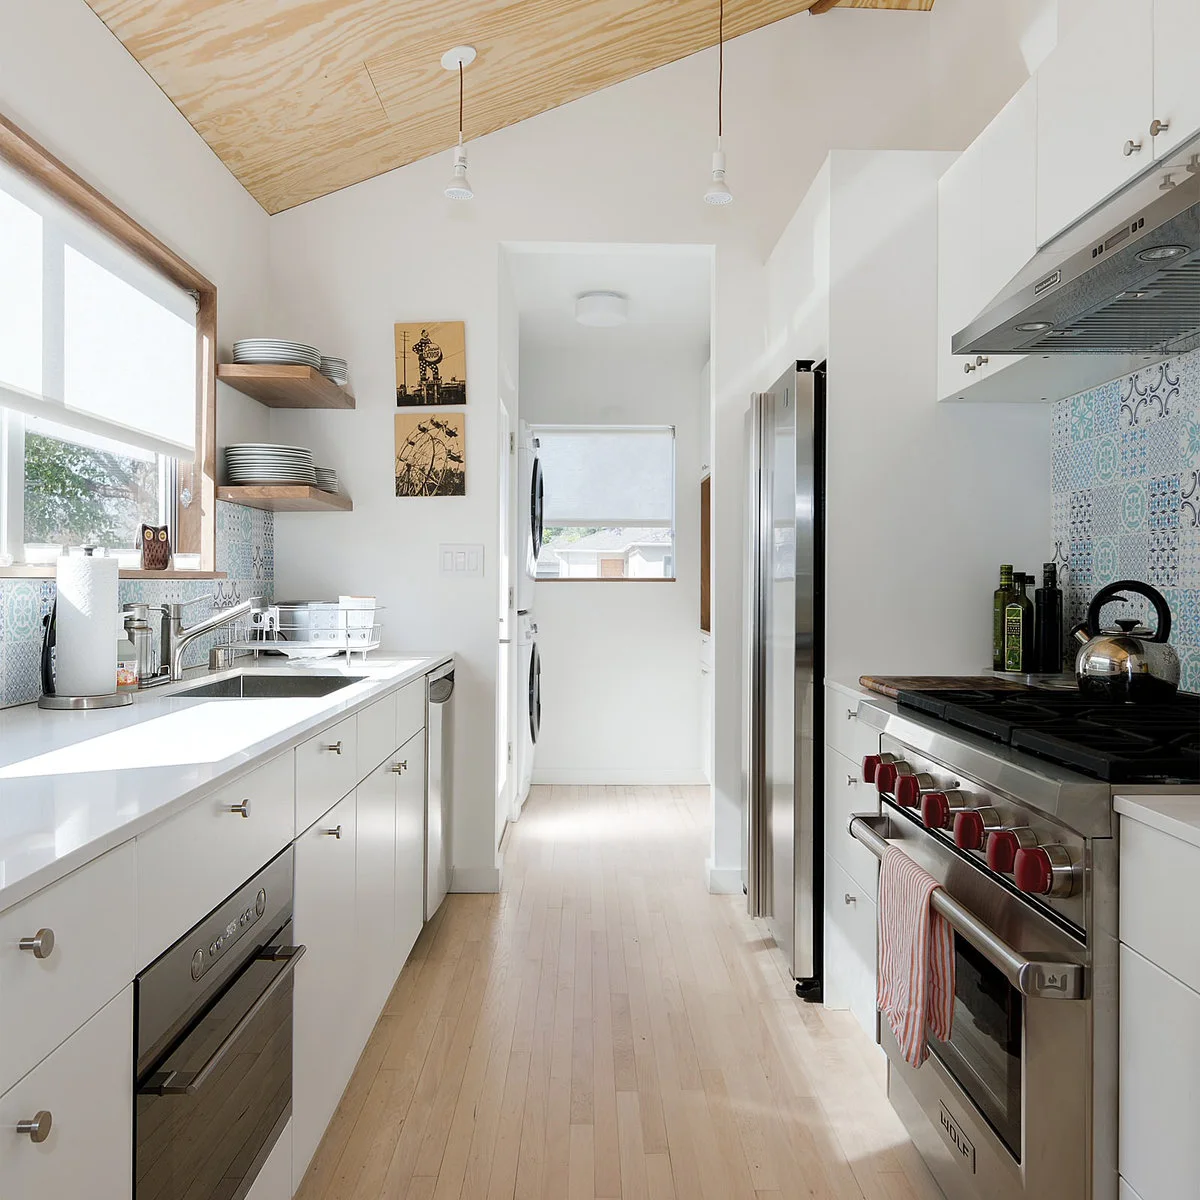
Broad wood panels cover the ceiling of this narrow white kitchen, with the seams left visible. The larger grain pattern contrasts with the smaller blue backsplash details. Plain cabinets and simple hanging lights keep the overhead surface from needing elaborate decorative treatment.
Compare ceiling-suitable plywood or other wood panels with individual planks, including edge treatment and support costs. Panel size can reduce the number of pieces but makes overhead handling harder. Ask how the joints will be supported and finished before assuming sheet material is the cheaper installed option.
IDEA 17 / 20
Make Panel Seams Part of the Layout
 SaveSupport Non AI Creator
Image credit: Project: ZeroEnergy Design (via Houzz)
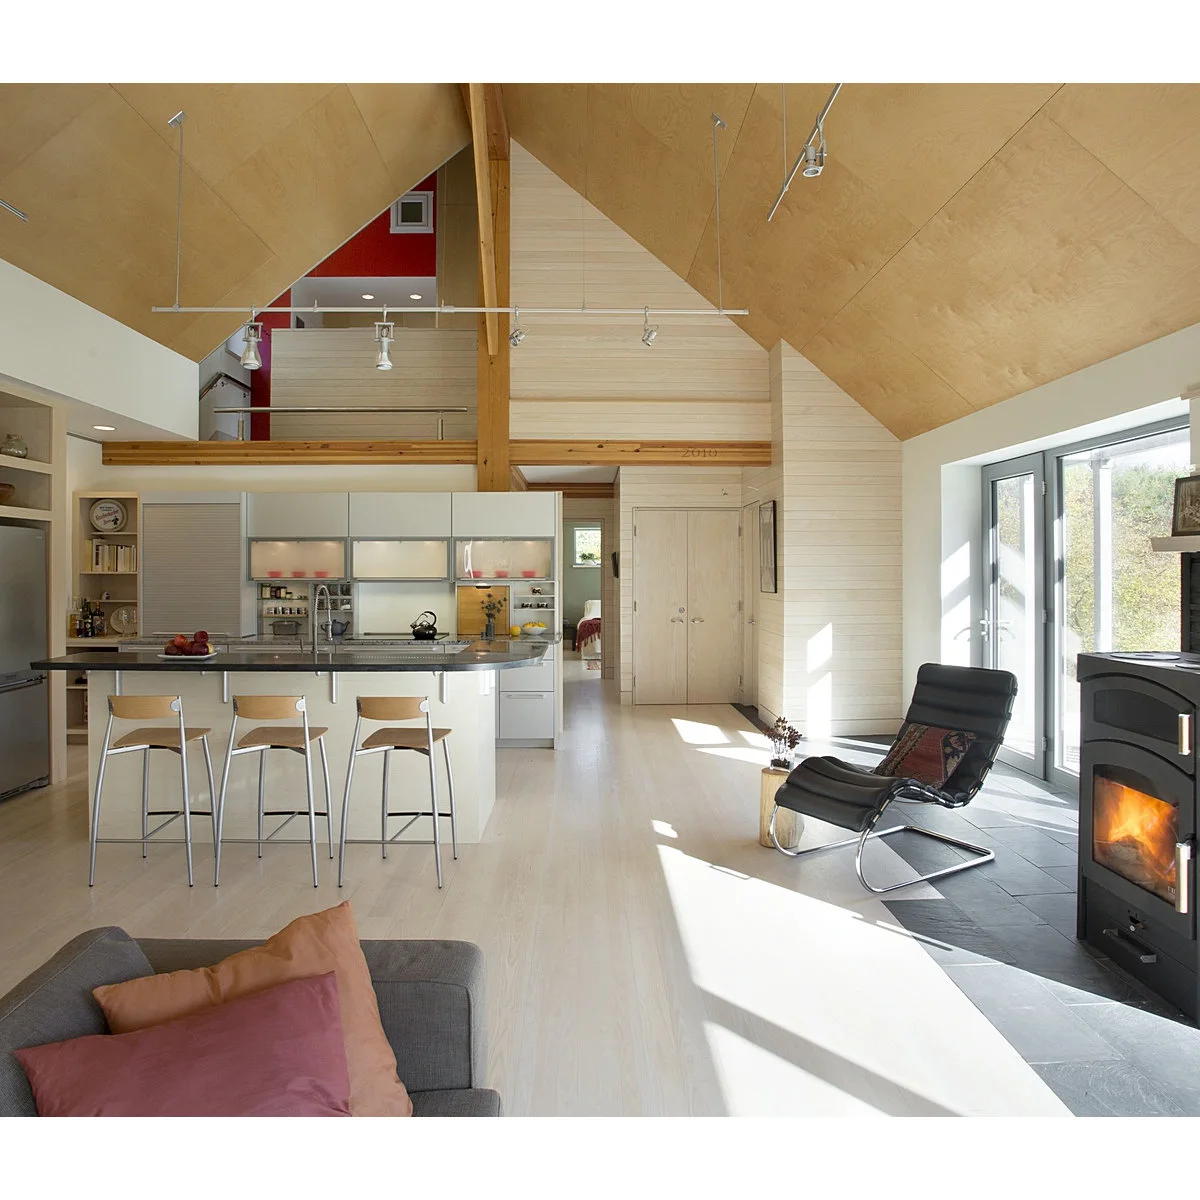
Large pale wood panels span the existing slopes above this open kitchen and living area. Straight seams form a simple visible layout instead of being disguised by decorative moldings. White walls and cabinets leave the broad grain as the main warm surface overhead.
Use this as a lesson in accepting regular panel joints, rather than copying the room’s high roof structure. Plan sheet sizes with an installer to limit narrow leftover strips. Include lifting, access equipment and secure edge support when comparing costs for any high or sloped ceiling.
IDEA 18 / 20
Use a Simple Grid Around Wood Panels
 SaveSupport Non AI Creator
Image credit: Project: NB Design Group, Inc (via Houzz)
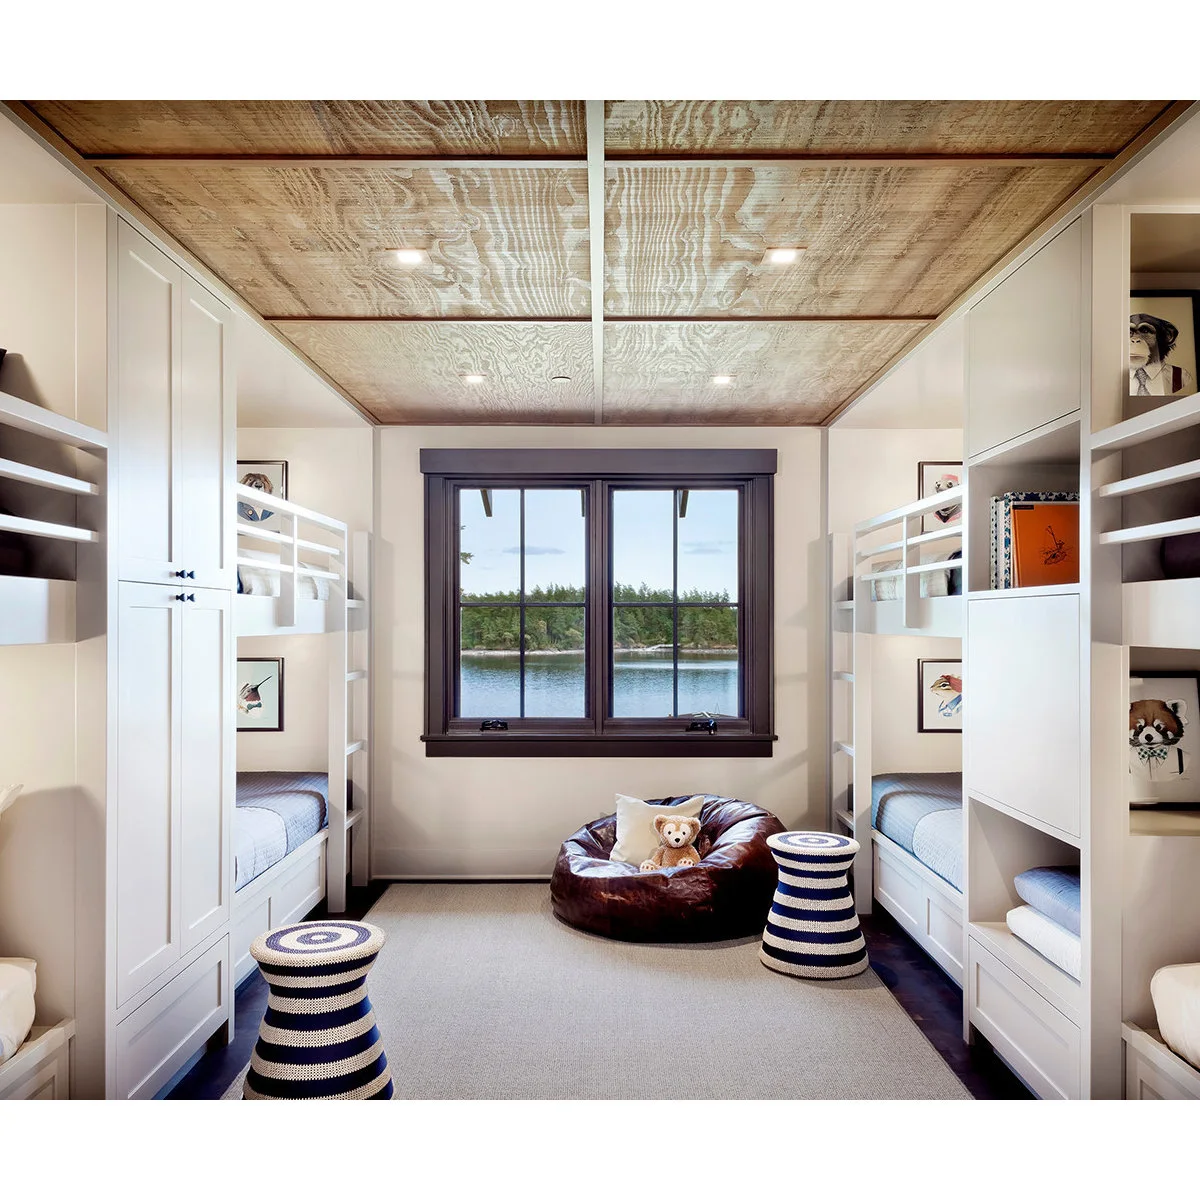
Wood panels and narrow dividing strips form a regular ceiling grid above this compact bunk room. White built-ins make the warm overhead surface stand out, while a dark window frame gives the room a clear focal point. The panel divisions remain straightforward and evenly repeated.
A simple grid can finish sheet joints without requiring deep decorative coffers. Compare trim quantities and labor before choosing smaller panels, since more divisions add work. In a bedroom, verify product suitability and required fire provisions, and keep the added ceiling thickness clear of existing fittings and vents.
IDEA 19 / 20
Keep Fine Grooves Light in a Small Room
 SaveSupport Non AI Creator
Image credit: Project: McLaughlin & Buie Housewrights (via Houzz)
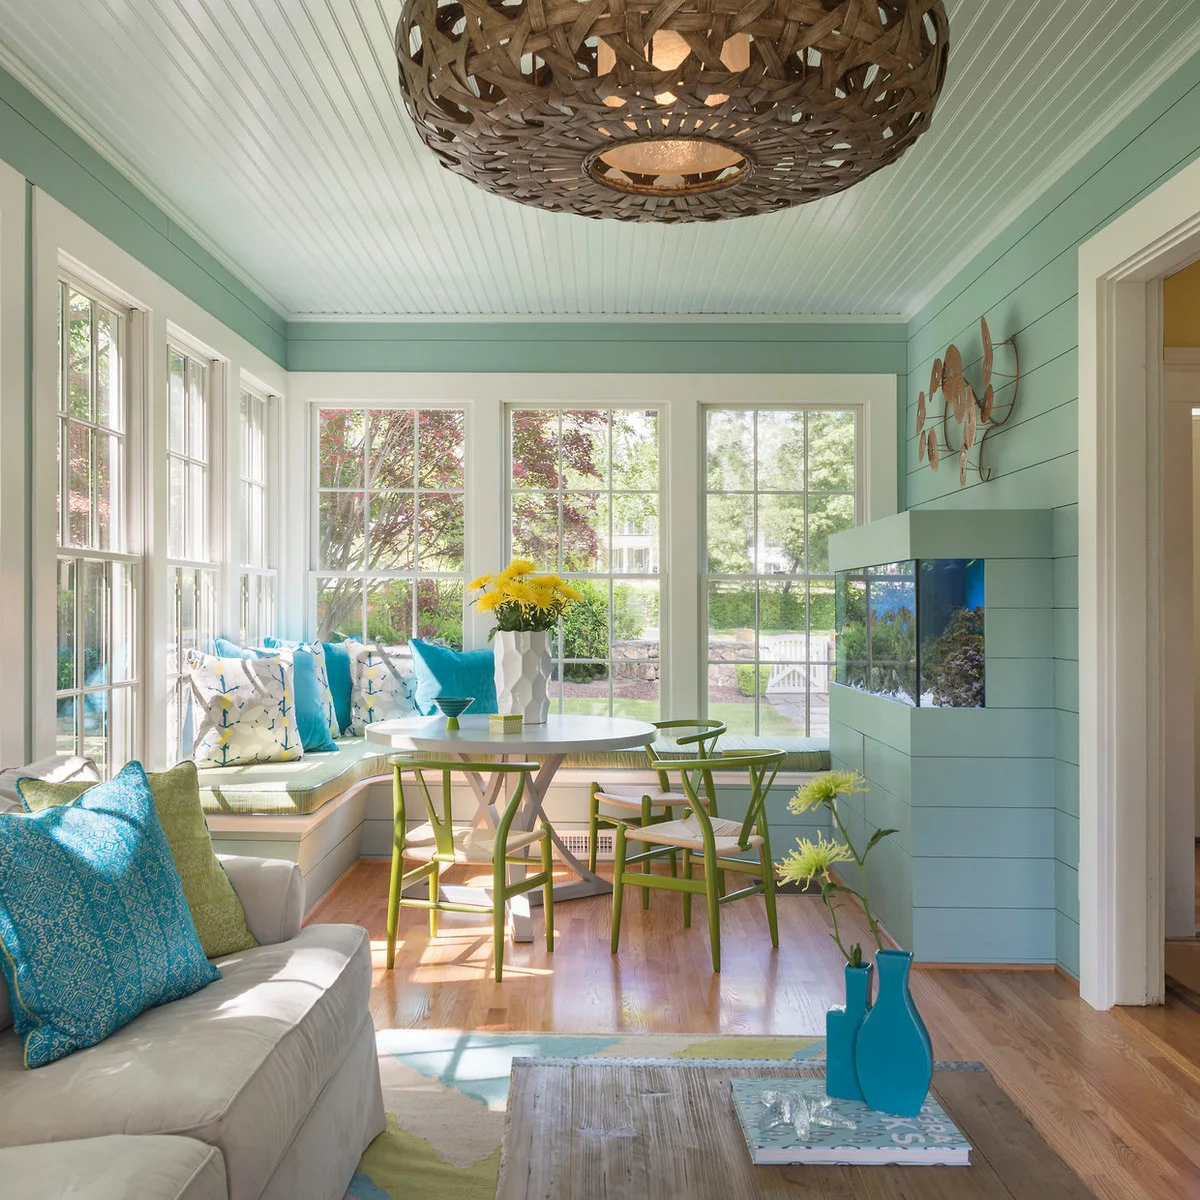
Fine white ceiling grooves add texture above this turquoise sitting and dining room. The light ceiling leaves the blue-green walls and bright cushions as the stronger colors. A large woven pendant adds its own texture, so the ceiling needs no additional decorative pattern.
For a similar small room, compare factory-finished ceiling products with boards painted after installation. Include touch-ups at cut ends and fasteners in the comparison. Test a sample under the room’s light; a subtle groove can supply enough detail without the cost of larger moldings.
IDEA 20 / 20
Keep Porch Edges and Lighting Straightforward
 SaveSupport Non AI Creator
Image credit: Project: Todd Remington Architect (via Houzz)
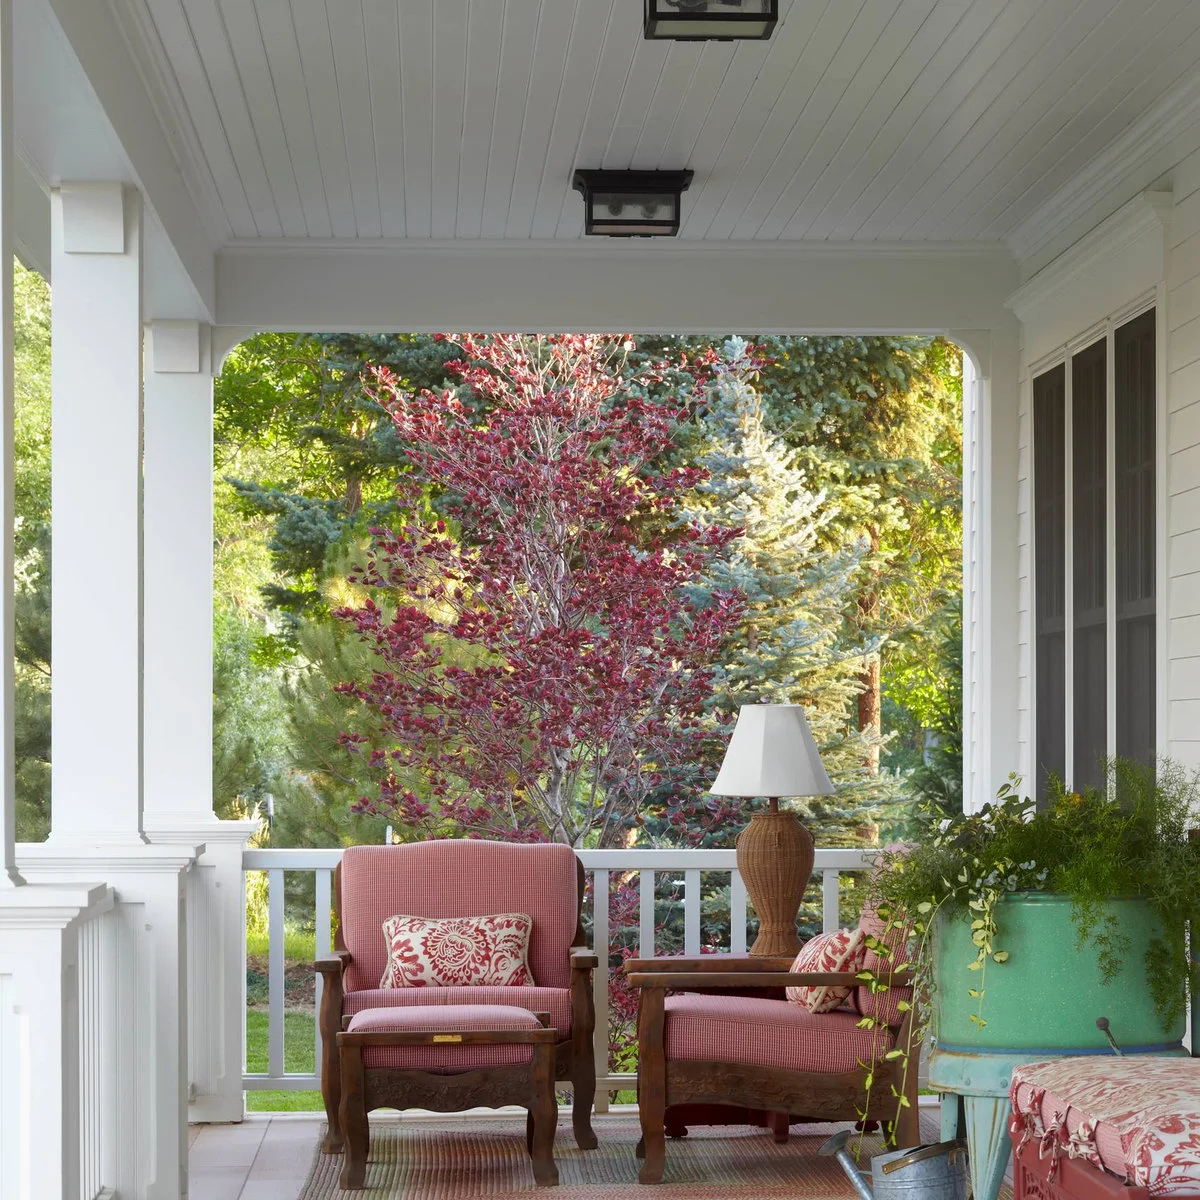
White boards meet plain perimeter trim on this covered porch, above two red upholstered chairs. Simple dark ceiling lights punctuate the surface without a complicated lighting recess. The restrained ceiling allows the garden and colorful furniture to carry most of the visual interest.
When replacing a porch ceiling, ask for a quote with a simple edge detail and suitable standard fixtures retained where practical. Check outdoor exposure ratings and ventilation requirements with the installer. Avoid choosing an indoor board solely for its price; premature swelling or peeling can erase the initial saving.
BRING IT ALL TOGETHER
Price the Whole Ceiling Before Buying Boards
Choose the smallest useful change first: a sound ceiling refinished, a compact nook lined or one flat plane covered. Measure the surface, identify the fixing method and decide where joints and edges will fall before ordering materials.
Compare complete installed quotes rather than board prices alone. Preparation, access, waste, finishing and electrical work deserve their own allowances. A simple finish that suits the existing room is usually easier to keep within a defined budget than a new ceiling shape.