A terraced-house kitchen has to work with more than a narrow footprint. Routes from the front rooms, changes in floor level, chimney breasts and limited side light can all shape the layout. Start by identifying those fixed conditions before choosing an island or extending cabinetry into every available corner.
These photographs come from projects identified as terrace houses, showing both modest rooms and larger renovations. Compare the arrangement that matches your home rather than treating a major extension as the starting point. Structural openings, glazing and changes around shared walls require a properly assessed project; the room photographs provide ideas, not construction specifications.
PART 01
Work with the Available Width
IDEA 01 / 20
Use Tall Storage on One Side of a Galley
 SaveSupport Non AI Creator
Image credit: Project: Studio Dean (via Houzz)
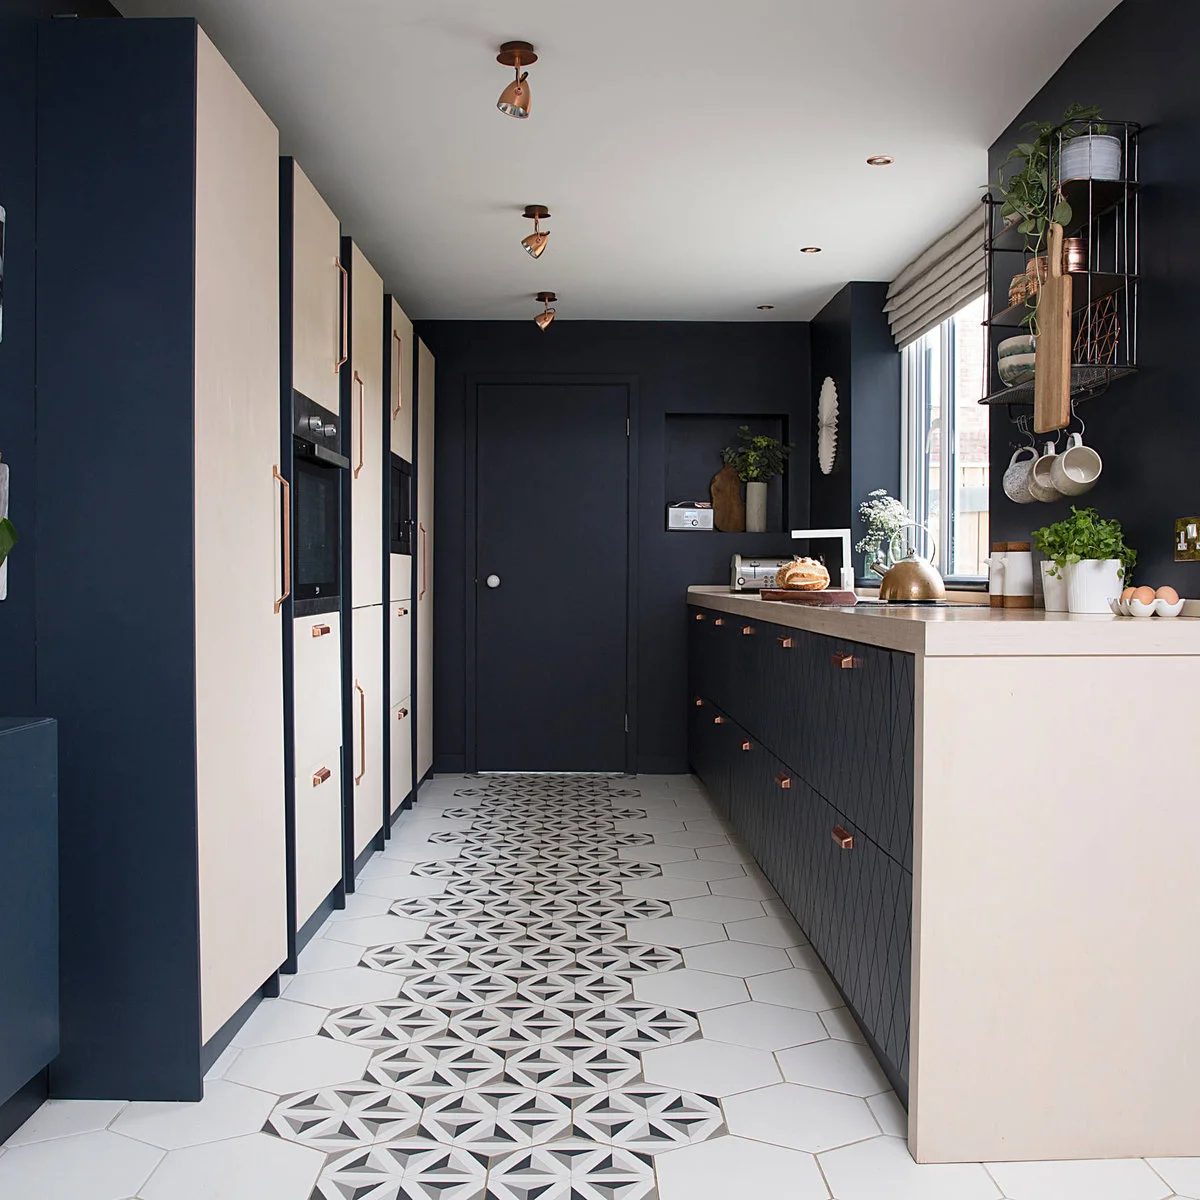
Pale tall cabinet doors line one side of this dark galley, while the opposite side keeps a lower counter beneath the window. The contrast separates storage from preparation space. A patterned strip through the floor gives the narrow room a clear center without placing furniture in the route.
List what needs full-height storage before committing an entire wall to cupboards. Check doors and drawers open comfortably across the aisle, including oven access. These galley kitchen ideas offer more comparisons of narrow arrangements, but use your actual appliance dimensions and walking space to decide what fits. For the rooms beyond the kitchen, these terraced house living room ideas explore bay seating, alcove storage and clear routes through connected spaces.
IDEA 02 / 20
Keep a Galley Open toward the Dining End
 SaveSupport Non AI Creator
Image credit: Project: Cream & Black Interior Design (via Houzz)
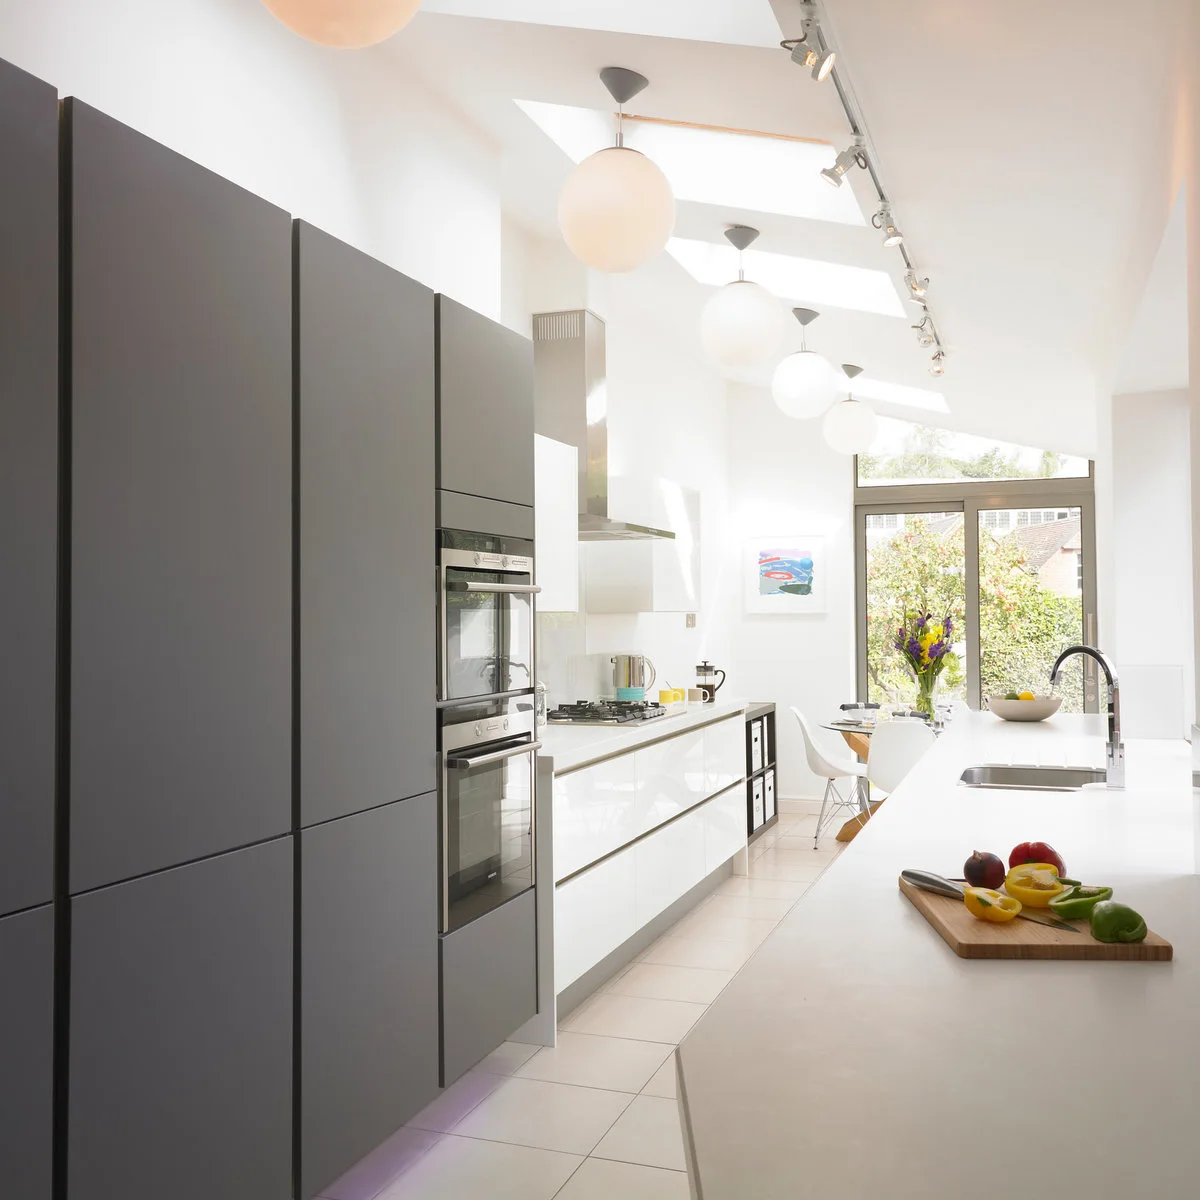
Gray tall storage sits at the near end of this galley, leaving the farther stretch lighter around the small dining table. White lower cabinets run toward the glazed doors. The sequence makes the room read as preparation space followed by a place to eat, instead of one uninterrupted storage corridor.
Check the table with chairs pulled out and someone passing through to the doors. Keep the main route useful when appliances are open, not just when everything is closed. Choose fewer seats or a smaller table if the dining end otherwise becomes the narrowest point in the room.
IDEA 03 / 20
Put the Dining Table beside the Working Run
 SaveSupport Non AI Creator
Image credit: Project: Plus Rooms (via Houzz)
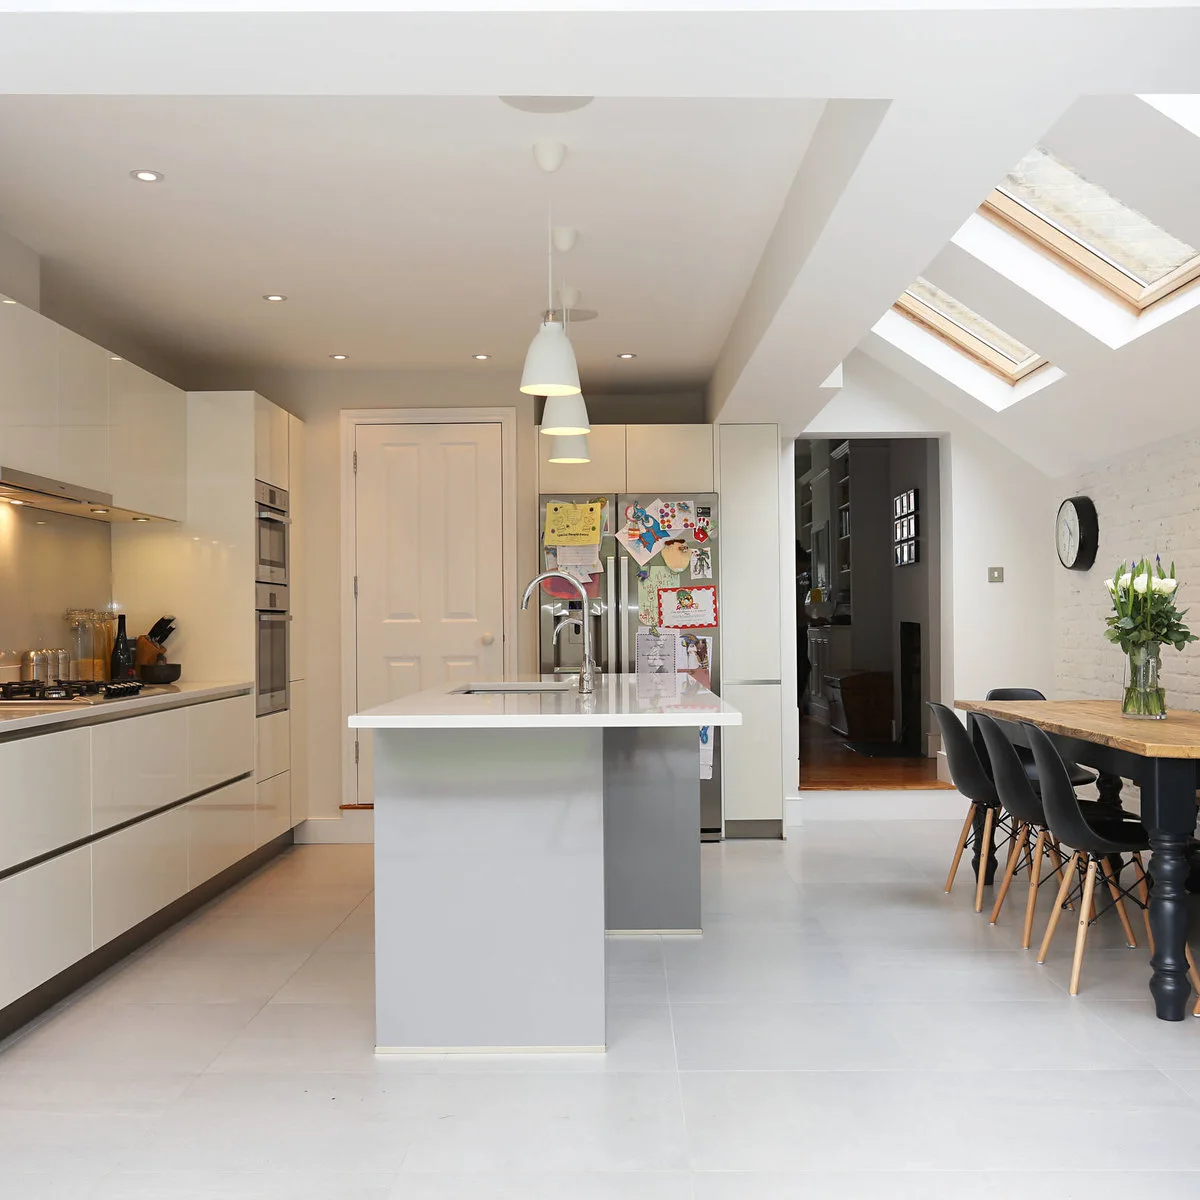
A dining table occupies the brighter strip beside the island in this kitchen. White cabinets and a compact sink island define the working area, while rooflights illuminate the separate eating space. The doorway to the older part of the house remains visible at the back of the room.
Plan the route from that doorway to the garden before selecting island depth or table width. Allow for occupied chairs, a person at the sink and an open refrigerator. A kitchen can look spacious from one camera angle while still becoming awkward when several everyday activities happen together.
IDEA 04 / 20
Use a Breakfast Overhang without a Second Table
 SaveSupport Non AI Creator
Image credit: Project: Sam Crawford Architects (via Houzz)
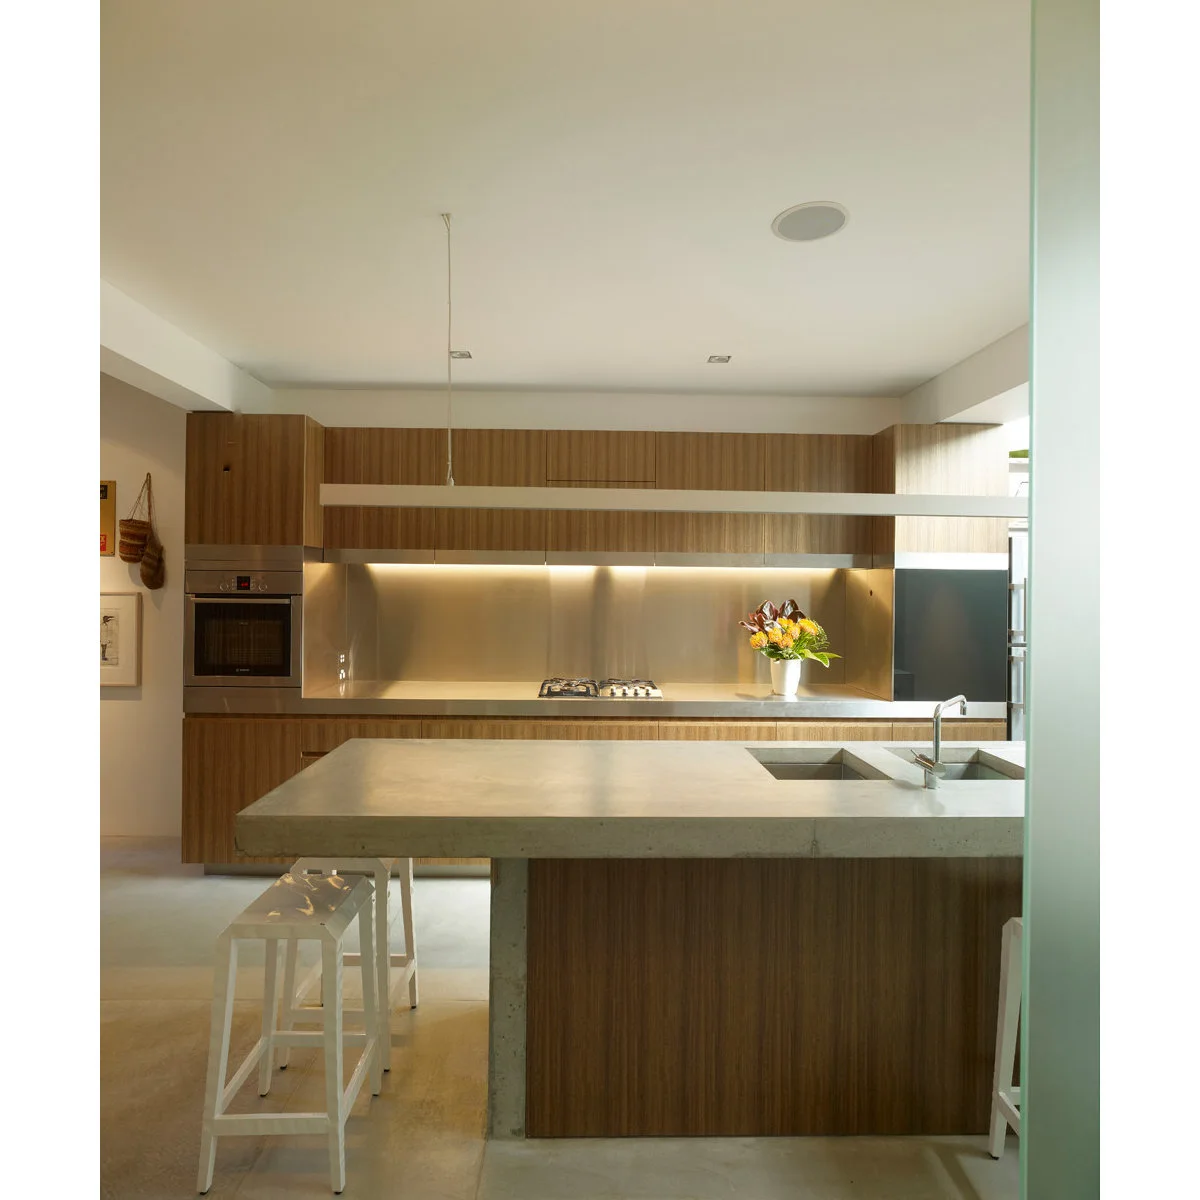
Two white stools sit beneath the island overhang in this wood-colored kitchen. A clear preparation surface remains beside the double sink, while the main cooking run stays against the wall. The stools supply casual seating without adding another full dining table to the visible floor area.
Check comfortable knee space and the stool footprint when someone is sitting, not only when the seats are tucked away. Keep enough preparation surface beside the sink for actual cooking. Choose a separate table elsewhere if the overhang would otherwise become the household’s only cramped place to eat.
IDEA 05 / 20
Connect Warm Cabinetry with a Plain Dining Table
 SaveSupport Non AI Creator
Image credit: Project: Lochbuild (via Houzz)
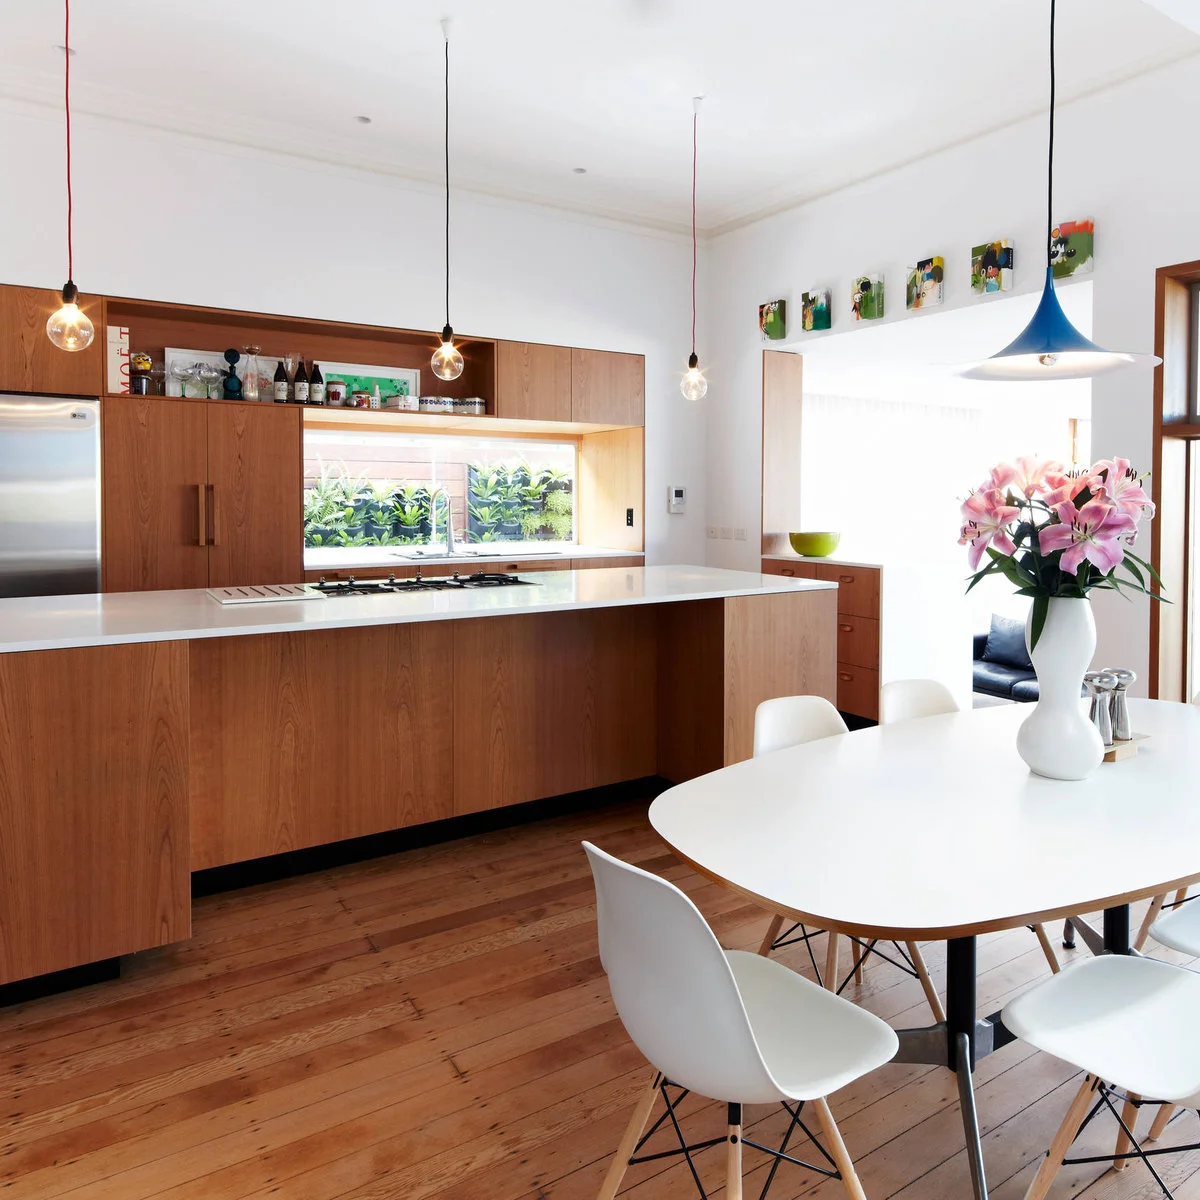
Wood-colored cabinetry and a narrow island give this room a consistent warm band through the center. A plain oval table and white chairs keep the dining area lighter beside it. The high ceiling and simple hanging lights leave the main furniture shapes easy to distinguish.
Compare the table’s widest point with the island clearance and test how people reach the rear doorway. Rounded corners can ease movement but do not replace adequate space for occupied chairs. Keep the dining pendant positioned for the table’s final location rather than choosing the light before the furniture plan.
PART 02
Bring Light through the Plan
IDEA 06 / 20
Combine Roof Glazing with a Compact Island
 SaveSupport Non AI Creator
Image credit: Project: Sarah Ross Design (via Houzz)
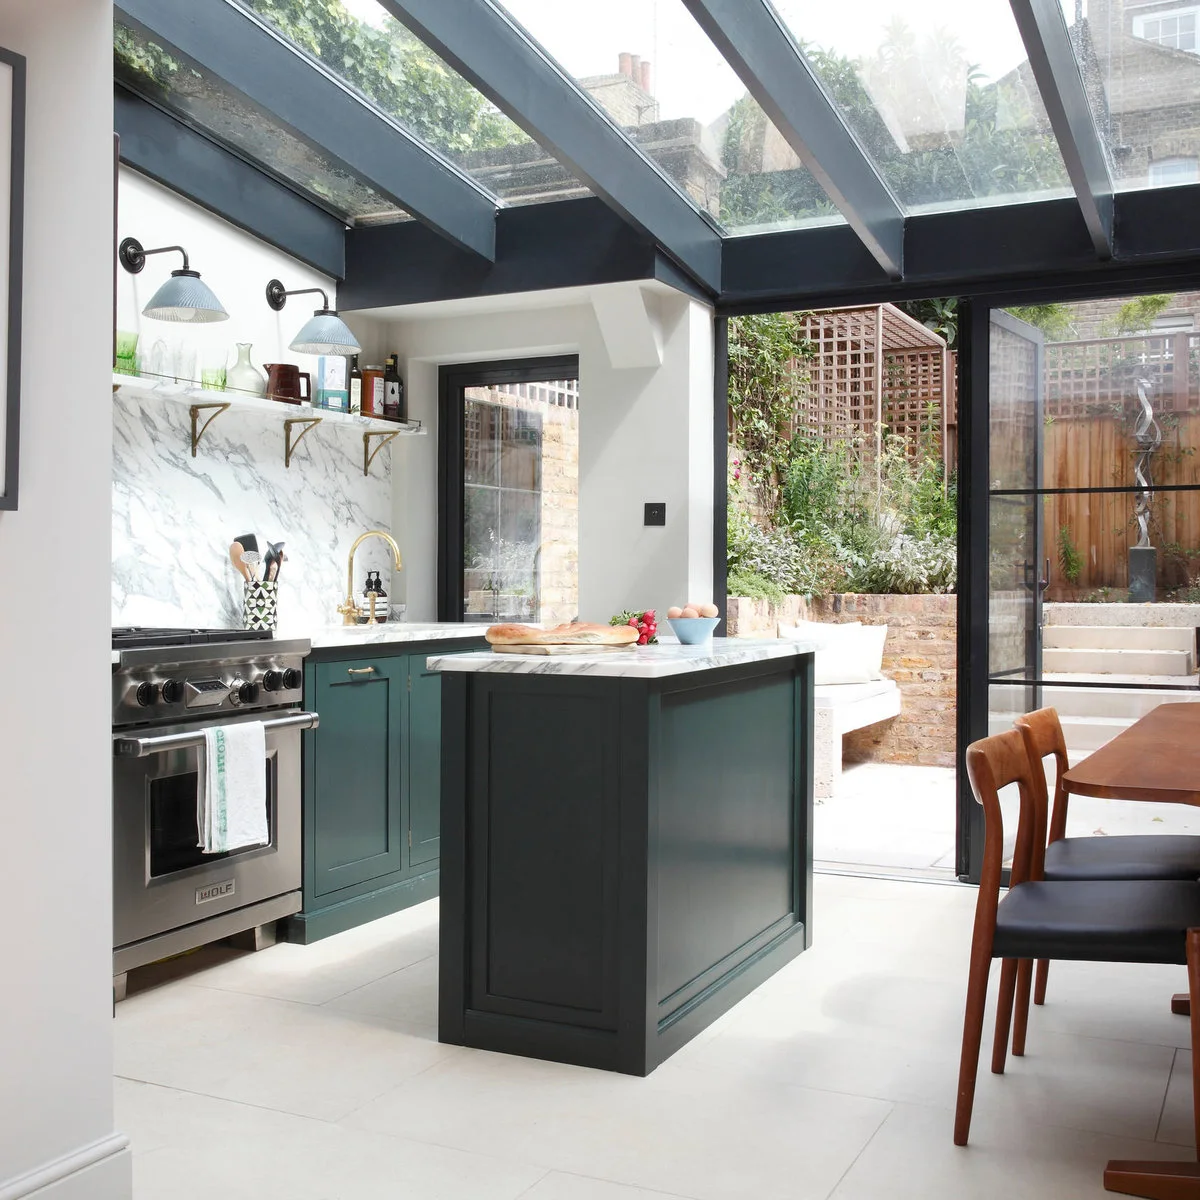
A compact green island sits beneath the glazed roof, with the dining table kept to one side. Dark roof framing connects with the door frames and cabinetry. The room gains much of its brightness from above, leaving the side walls available for cooking and storage.
Assess sun exposure, glare, ventilation and cleaning access when considering extensive roof glazing. The smallest island that supports the task may be more useful than a large block that narrows every route. Keep a comfortable passage between the cooking run, table and garden doors when the room is occupied.
IDEA 07 / 20
Spread Rooflights along the Deeper Side
 SaveSupport Non AI Creator
Image credit: Project: Carman Furniture (via Houzz)
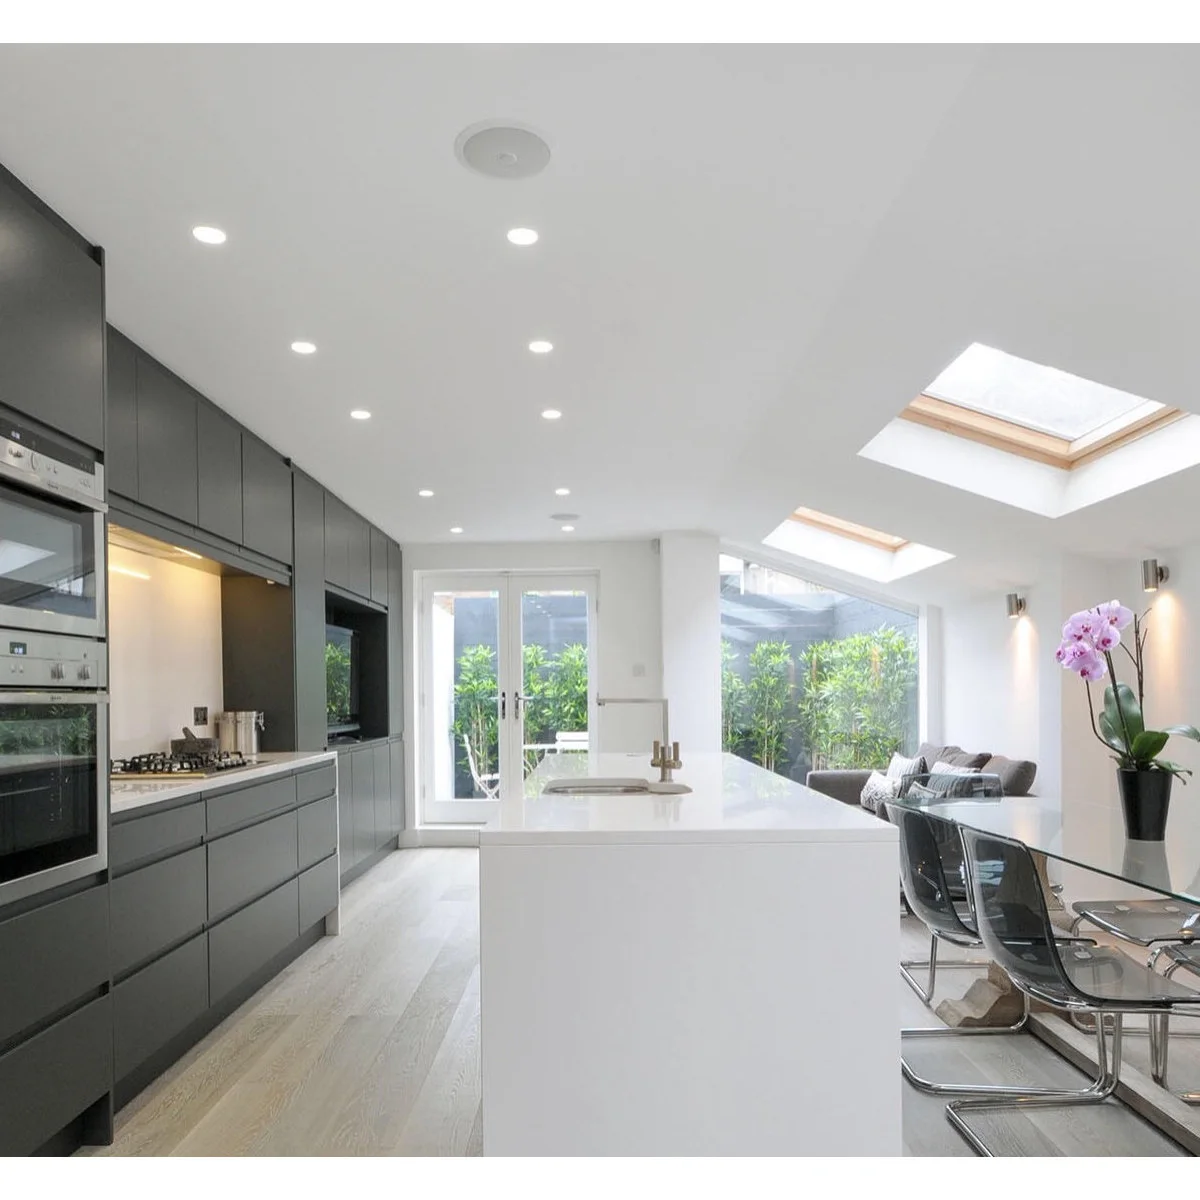
A row of rooflights follows the side of this extended room, bringing daylight above the table and seating area. The gray cabinet wall contains the main appliances, while the pale island stands opposite. This keeps the brighter edge available for activities beyond food preparation.
Plan daylight and artificial lighting together so the room also works on dark evenings. Check glare from reflective counters and consider how rooflights will be maintained. Keep the long route to the rear doors clear rather than filling every bright corner with another seat or small table.
IDEA 08 / 20
Light a Split-Level Kitchen from the Rear
 SaveSupport Non AI Creator
Source: houzz.co.uk
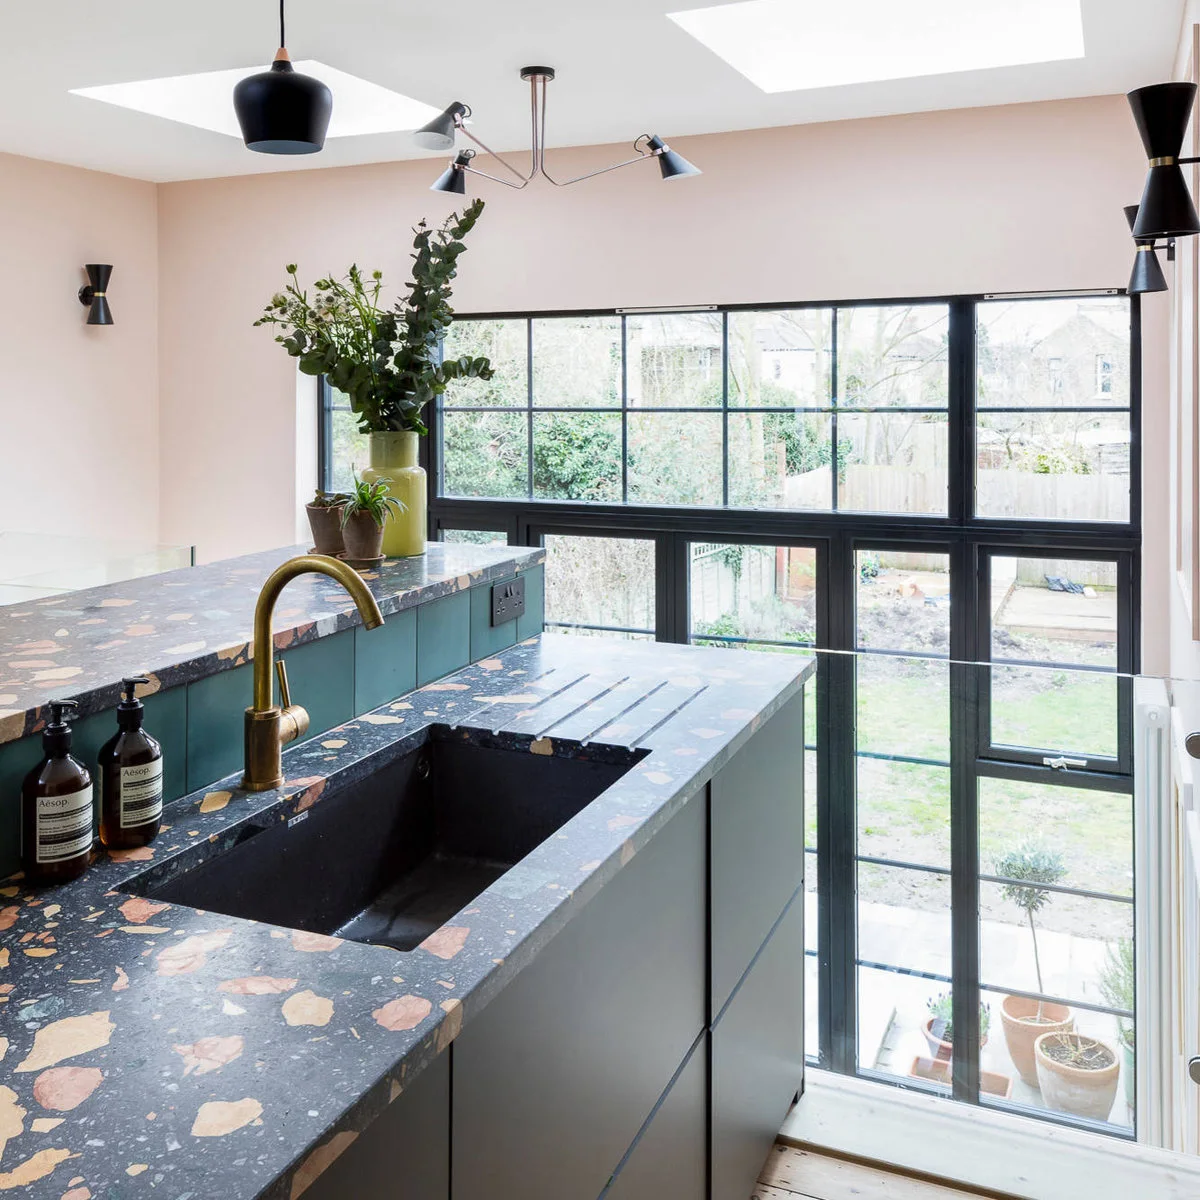
Tall rear glazing brings light beside this kitchen’s change in floor level. Patterned counters and darker cabinet fronts define the working area, while pale pink walls soften the large glazed opening. The view makes the level change part of the room rather than hiding it behind extra furniture.
Keep the steps easy to see and leave their approach clear of stools, plants and stored bags. Plan practical lighting for the route after dark as well as the countertop. Any change to levels, glazing or protective barriers needs an appropriate assessment rather than assumptions drawn from the photograph.
IDEA 09 / 20
Use a Double-Height Opening to Connect Levels
 SaveSupport Non AI Creator
Image credit: Project: VC Design Architectural Services (via Houzz)
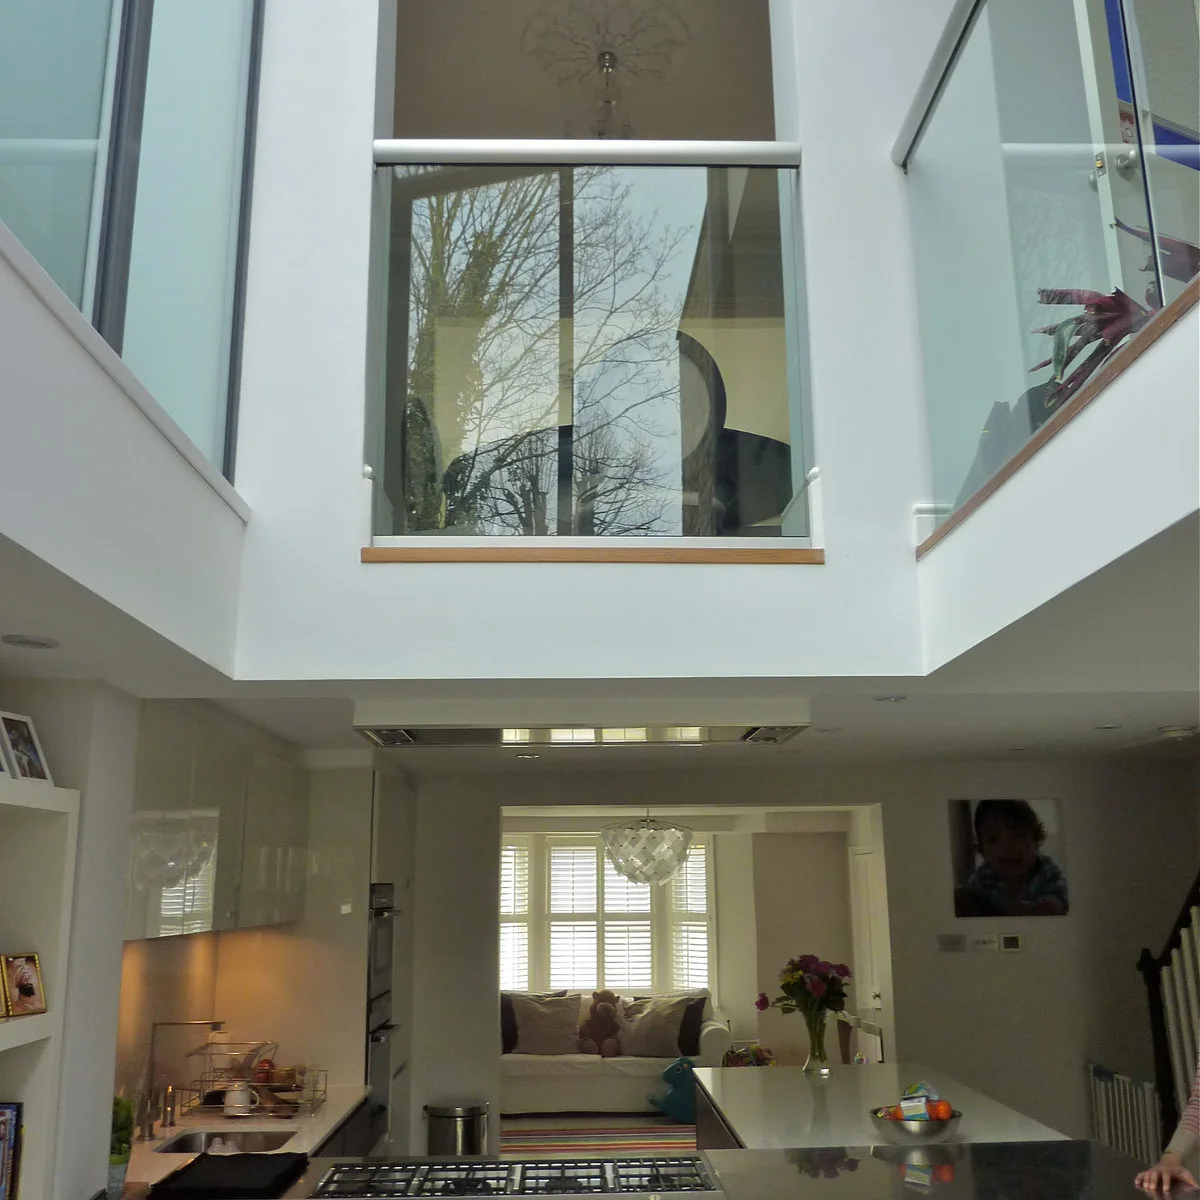
A double-height opening connects this kitchen with the room above, with glazed barriers preserving the view between levels. Pale surfaces help the opening feel connected to the surrounding cabinetry. The arrangement shows an ambitious way to address a deeper plan rather than relying only on a rear window.
Treat this as a whole-house project, since the opening affects structure, sound and how different rooms relate to each other. Assess extraction and privacy alongside daylight. Keep the kitchen layout practical at its own level, with usable work surfaces and clear routes even if the space above remains visually open.
IDEA 10 / 20
Borrow a View through a Glazed Partition
 SaveSupport Non AI Creator
Image credit: Project: Alberts House Ltd (via Houzz)
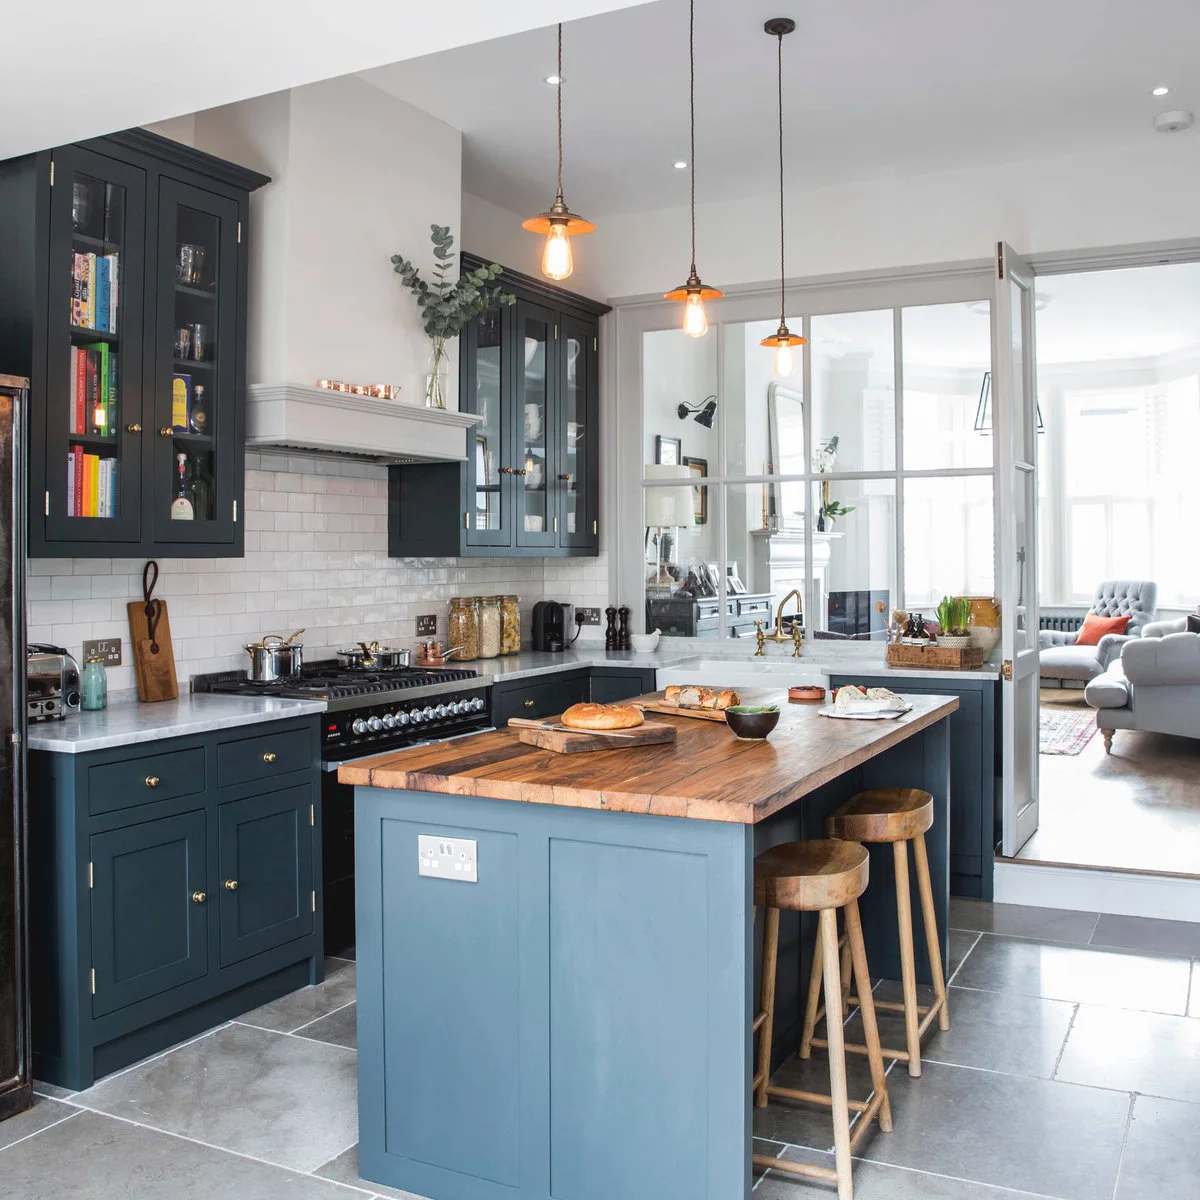
A glazed partition beside the sink keeps a view into the sitting room while defining the kitchen edge. Dark green cabinetry and a wood-colored island top give the working area its own character. The open doorway supplies a clear route without removing every dividing surface between the rooms.
Consider which activities benefit from separation before opening the whole ground floor. Discuss suitable glazing, ventilation and the proposed arrangement with the project professional. Keep handles, door movement and countertop use comfortable on both sides, and remember that transparent partitions also need regular cleaning to retain the intended view.
PART 03
Keep Useful Period Character
IDEA 11 / 20
Plan around a Retained Chimney Breast
 SaveSupport Non AI Creator
Image credit: Project: Sheffield Sustainable Kitchens (via Houzz)
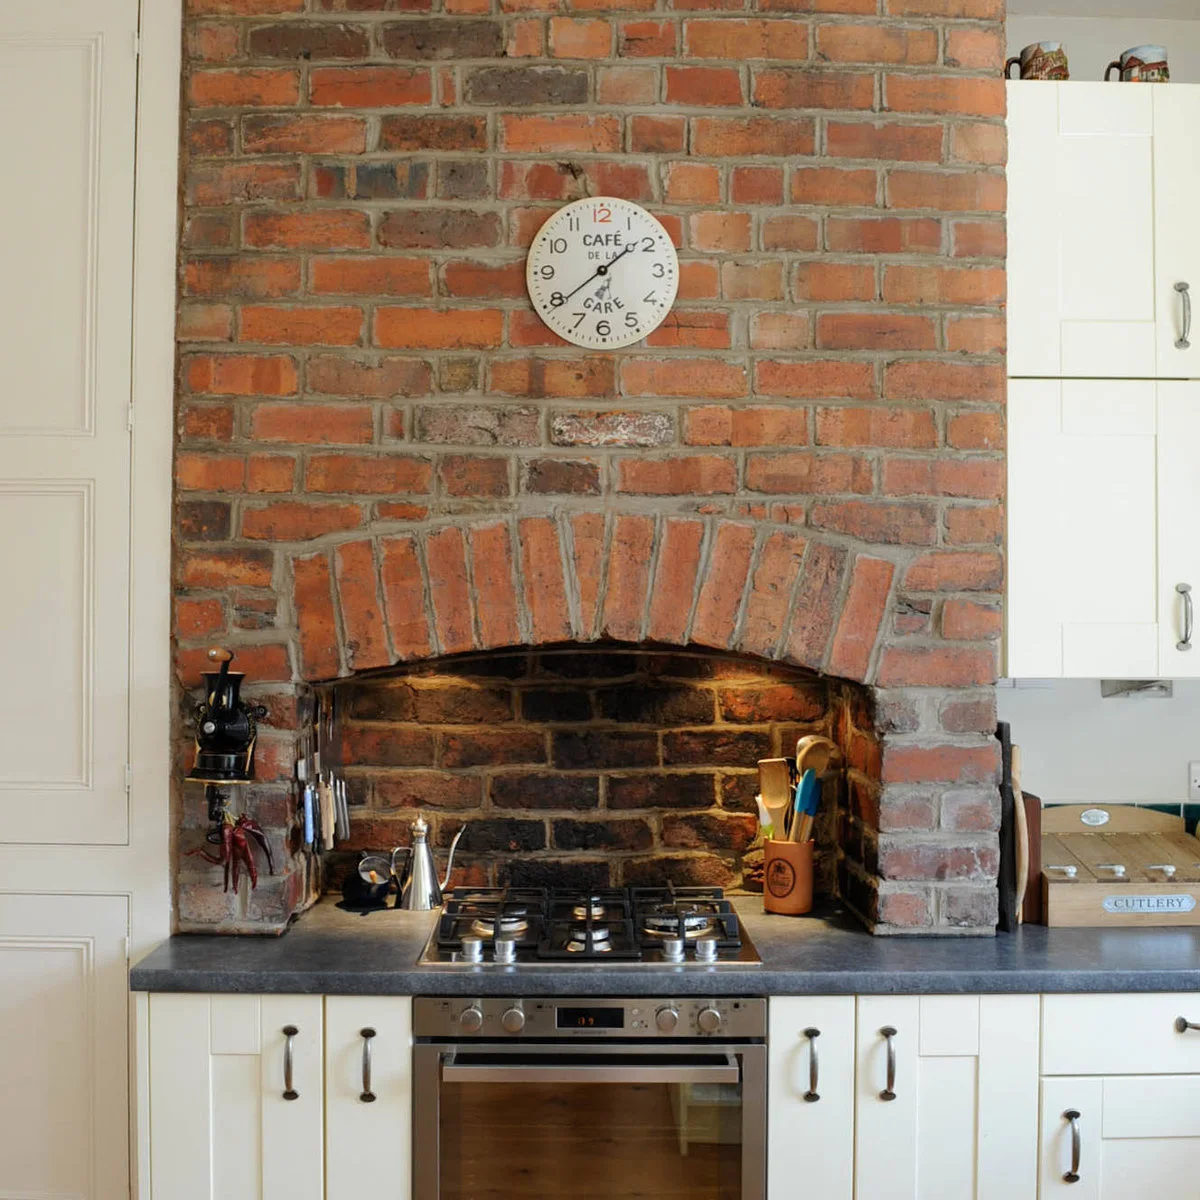
The exposed brick chimney breast gives this kitchen a strong central feature, with white cabinets fitted on either side. The cooking area occupies the recess below the brick arch. The darker counter provides a continuous line beneath the uneven brick surface and the surrounding pale fronts.
Assess the existing chimney and proposed appliance arrangement with qualified professionals before copying this use of the recess. Confirm extraction, access and required clearances for the actual appliances. Retaining the brick feature can preserve character, but the visible arch does not establish whether a particular installation is suitable.
IDEA 12 / 20
Keep a Rear Door beside a Compact Sink Run
 SaveSupport Non AI Creator
Image credit: Project: Inside Ours (via Houzz)
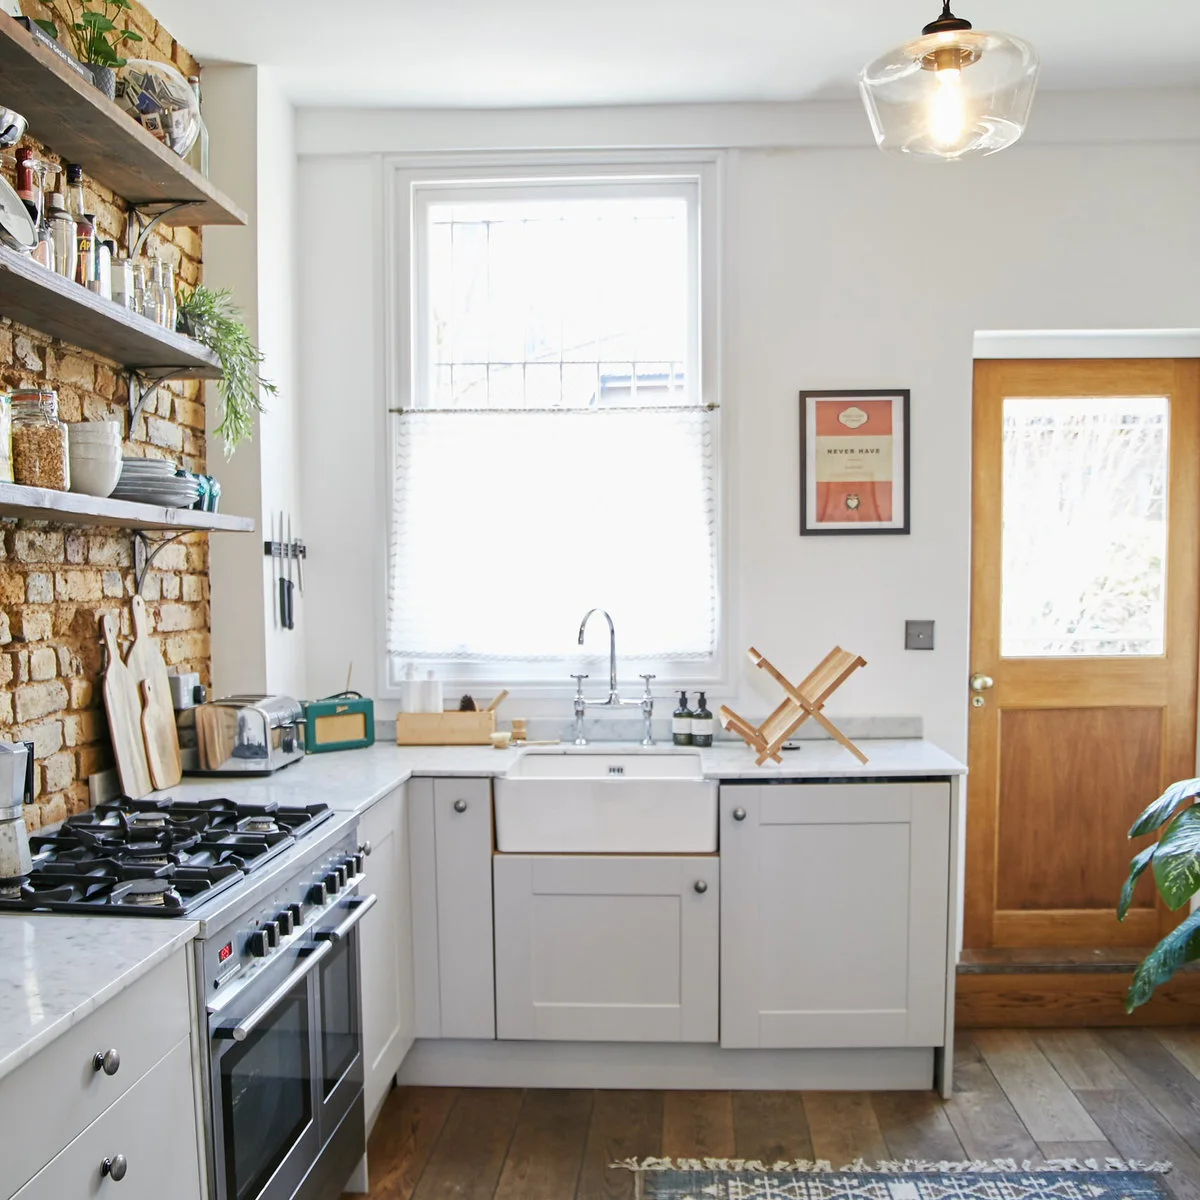
A sink sits beneath the window in this compact terrace kitchen, with a wood-colored rear door immediately beside the cabinet run. Pale fronts keep the lower part of the room consistent, while exposed brick and shelves add texture along the side. The doorway remains a distinct part of the arrangement.
Check the rear door’s full movement before choosing the sink cabinet or placing a drying rack nearby. Reserve enough usable counter for washing and putting things away. Keep shelves and stored objects appropriately positioned away from the cooking area, checking the actual appliance guidance rather than copying every styled detail.
IDEA 13 / 20
Mix Freestanding Furniture with Fitted Cabinets
 SaveSupport Non AI Creator
Image credit: Project: Blakes London (via Houzz)
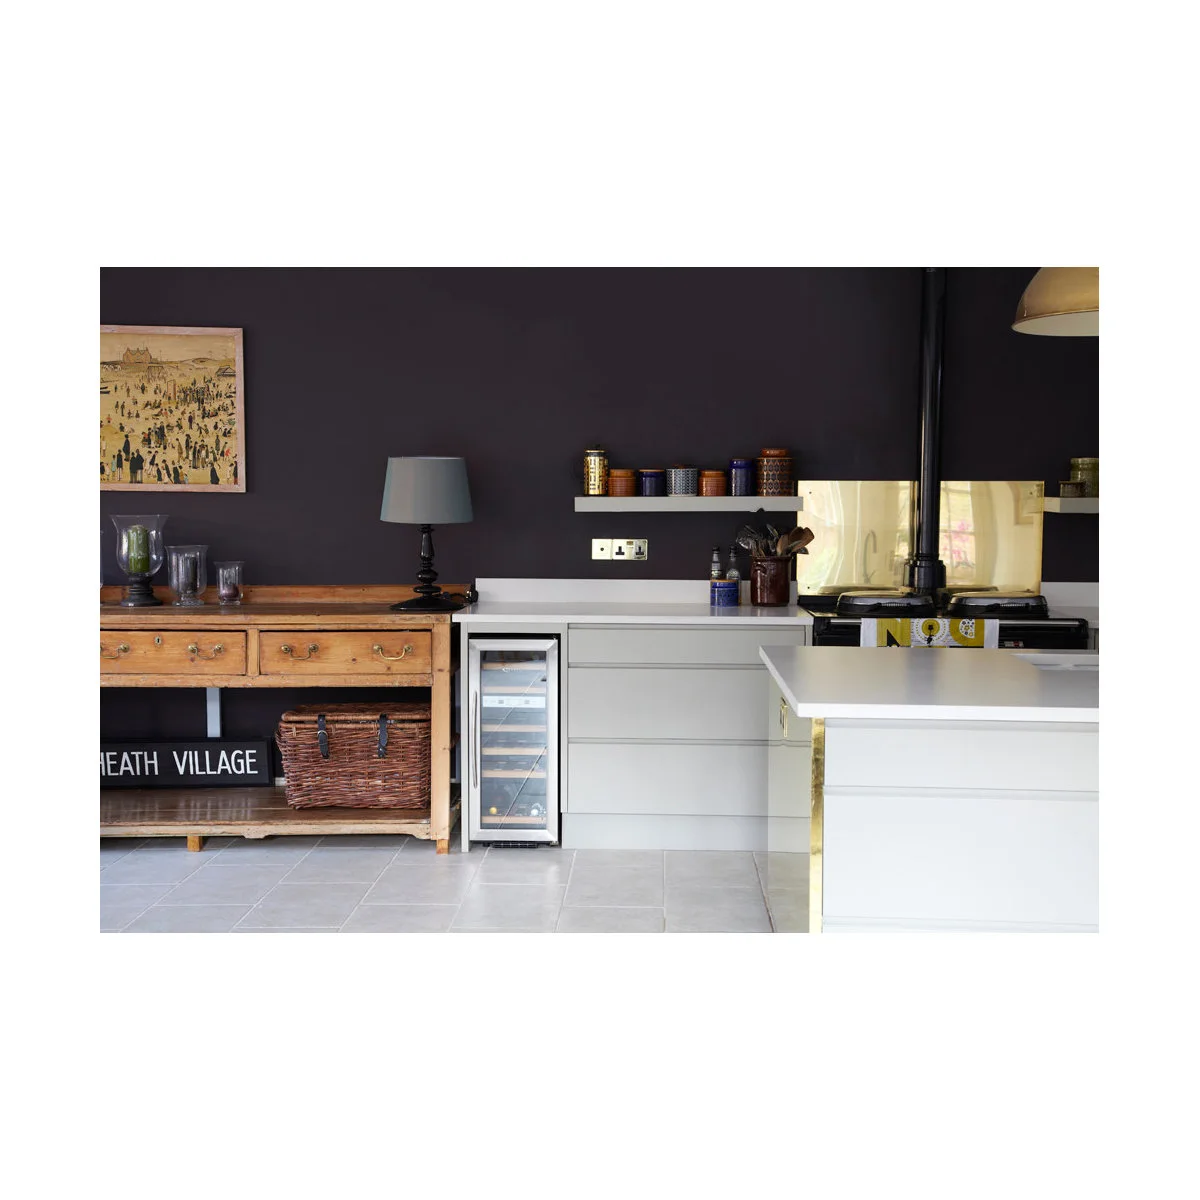
A wood-colored console stands beside pale fitted drawers and a narrow drinks refrigerator in this Victorian terrace kitchen. Dark plum walls connect the separate pieces, while a few containers and a small lamp supply detail. The mixed arrangement feels less uniform than a continuous set of matching fronts.
Use freestanding furniture where it genuinely serves storage or preparation needs, checking stability and suitability for the intended use. Keep electrical items away from splash and heat as required. If the surface is decorative rather than durable enough for food preparation, leave the serious work to the adjacent fitted counter.
IDEA 14 / 20
Keep a Dining Place beside Older Room Details
 SaveSupport Non AI Creator
Source: houzz.co.uk
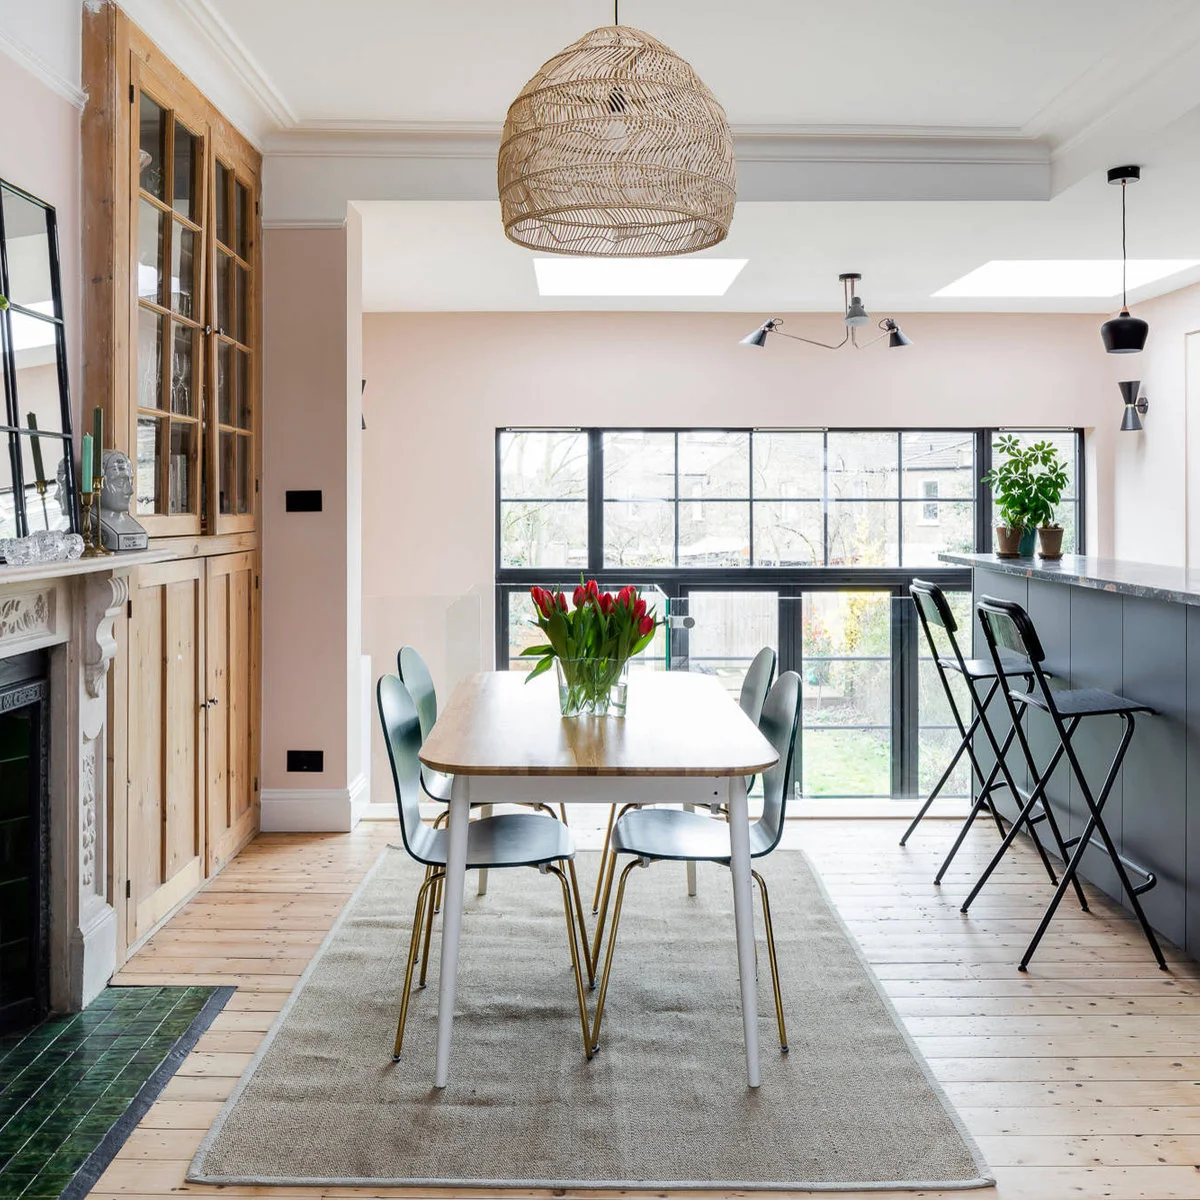
A small dining table sits beside the older fireplace and glass-front cupboard, while the newer kitchen counter remains along the opposite side. The view toward the rear glazing links the two parts of the room. Pale pink walls help the period details and modern furniture sit together.
Measure chair pullback beside the cupboard and keep the route to any level change unobstructed. Retain older features that fit the room’s use, but assess condition and any working fireplace separately. A compact table may provide a more comfortable daily meal space than adding more stools along an already busy counter.
IDEA 15 / 20
Give a Range a Clear Central Position
 SaveSupport Non AI Creator
Source: houzz.co.uk
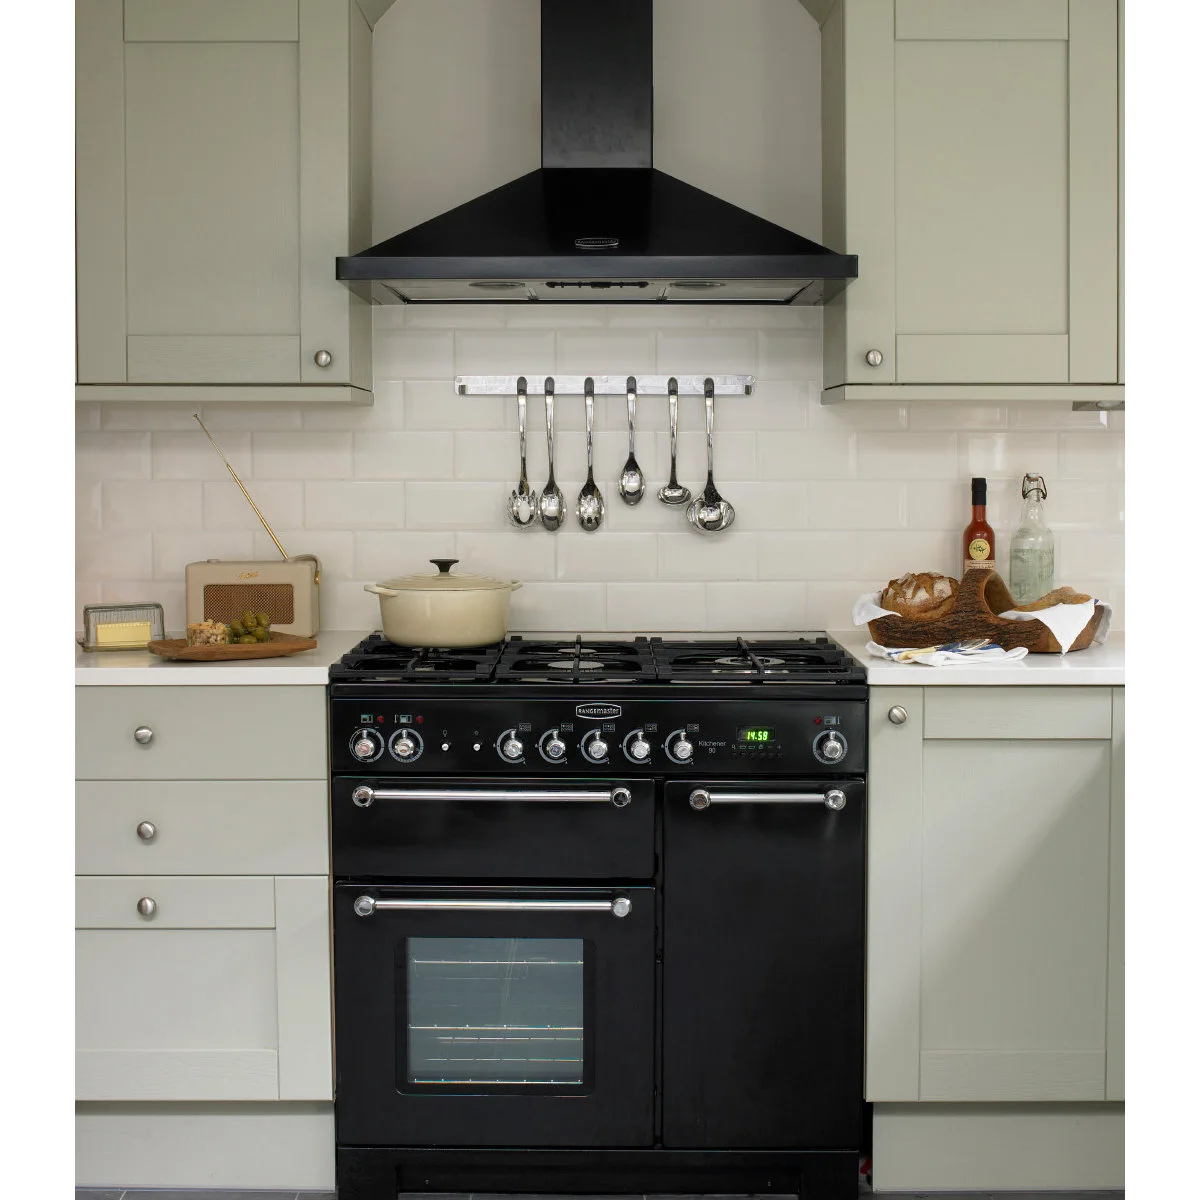
A black range and matching hood form a clear center between pale cupboards. White rectangular tiles keep the wall behind the cooking area visually simple. Small counter sections remain on either side, making the appliance feel integrated into the cabinet run rather than squeezed into an unrelated corner.
Choose the cooking appliance around how it will be used and the space it requires, including service access and opening doors. Confirm ventilation and clearances for the actual model. Keep nearby work surfaces useful for setting down ingredients and cookware instead of filling both sides with permanent decorative objects.
PART 04
Make Everyday Details Work
IDEA 16 / 20
Put the Sink beneath Existing Windows
 SaveSupport Non AI Creator
Image credit: Project: JLV Design Ltd (via Houzz)
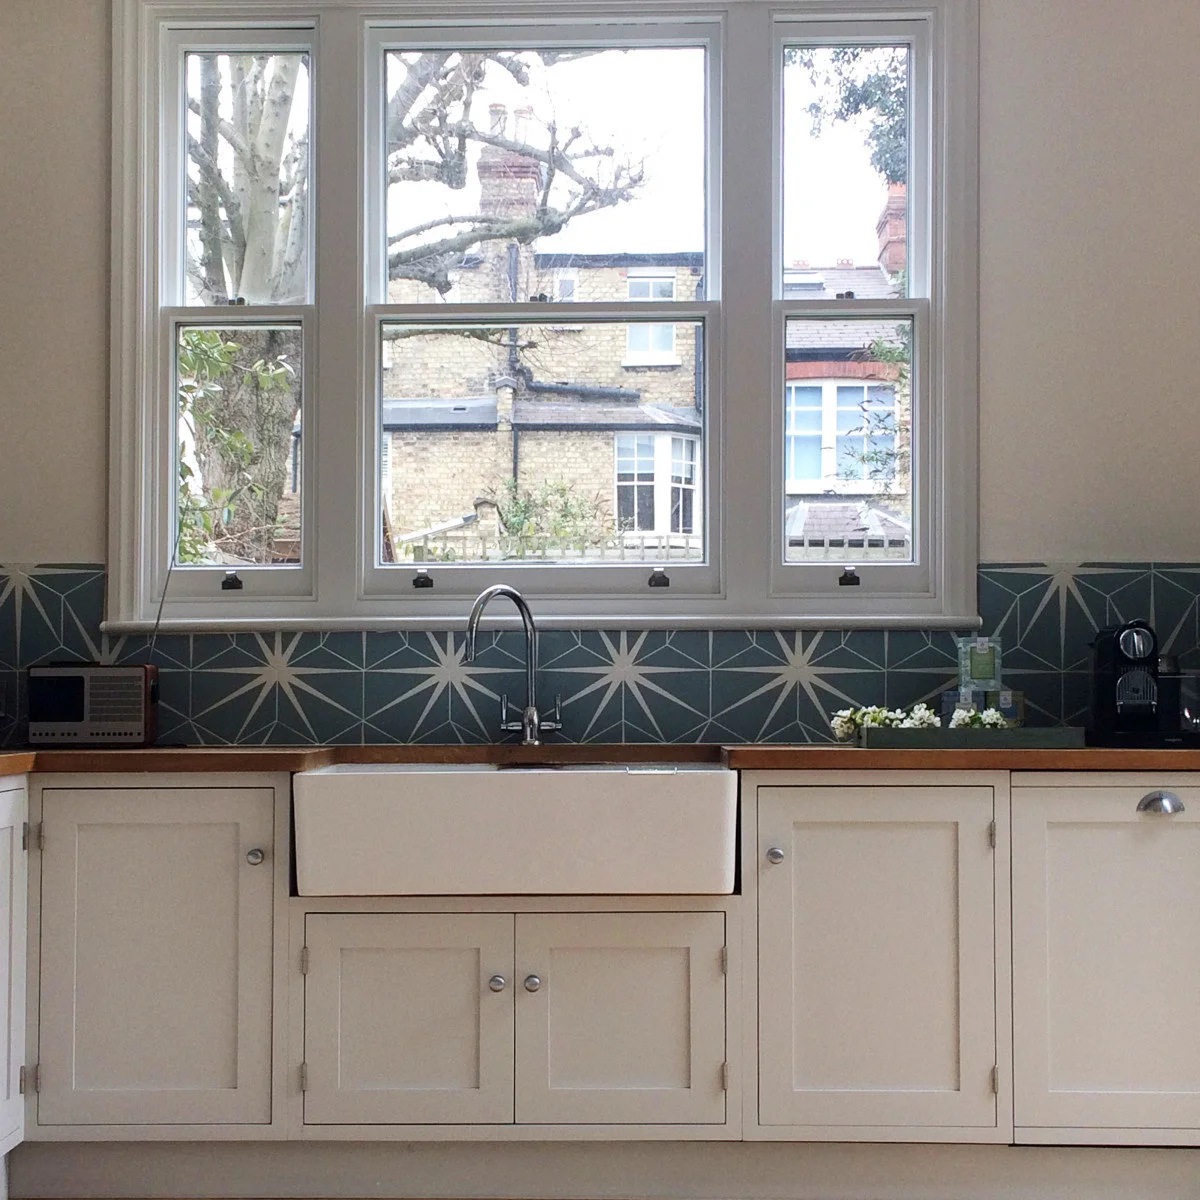
Tall windows give the sink area a strong vertical frame in this Edwardian terrace kitchen. Pale cupboards and a wood-colored counter keep the lower section calm, while the blue geometric splashback supplies the main pattern. The faucet sits centrally without hiding the window’s overall shape.
Check faucet height and window movement together before choosing either fitting. Protect counter edges around the sink according to the actual material’s care instructions, and keep daily washing items contained. These green kitchen tile ideas offer another color direction if the surrounding room calls for a different patterned accent.
IDEA 17 / 20
Use a Patterned Splashback in a Limited Area
 SaveSupport Non AI Creator
Image credit: Project: JLV Design Ltd (via Houzz)
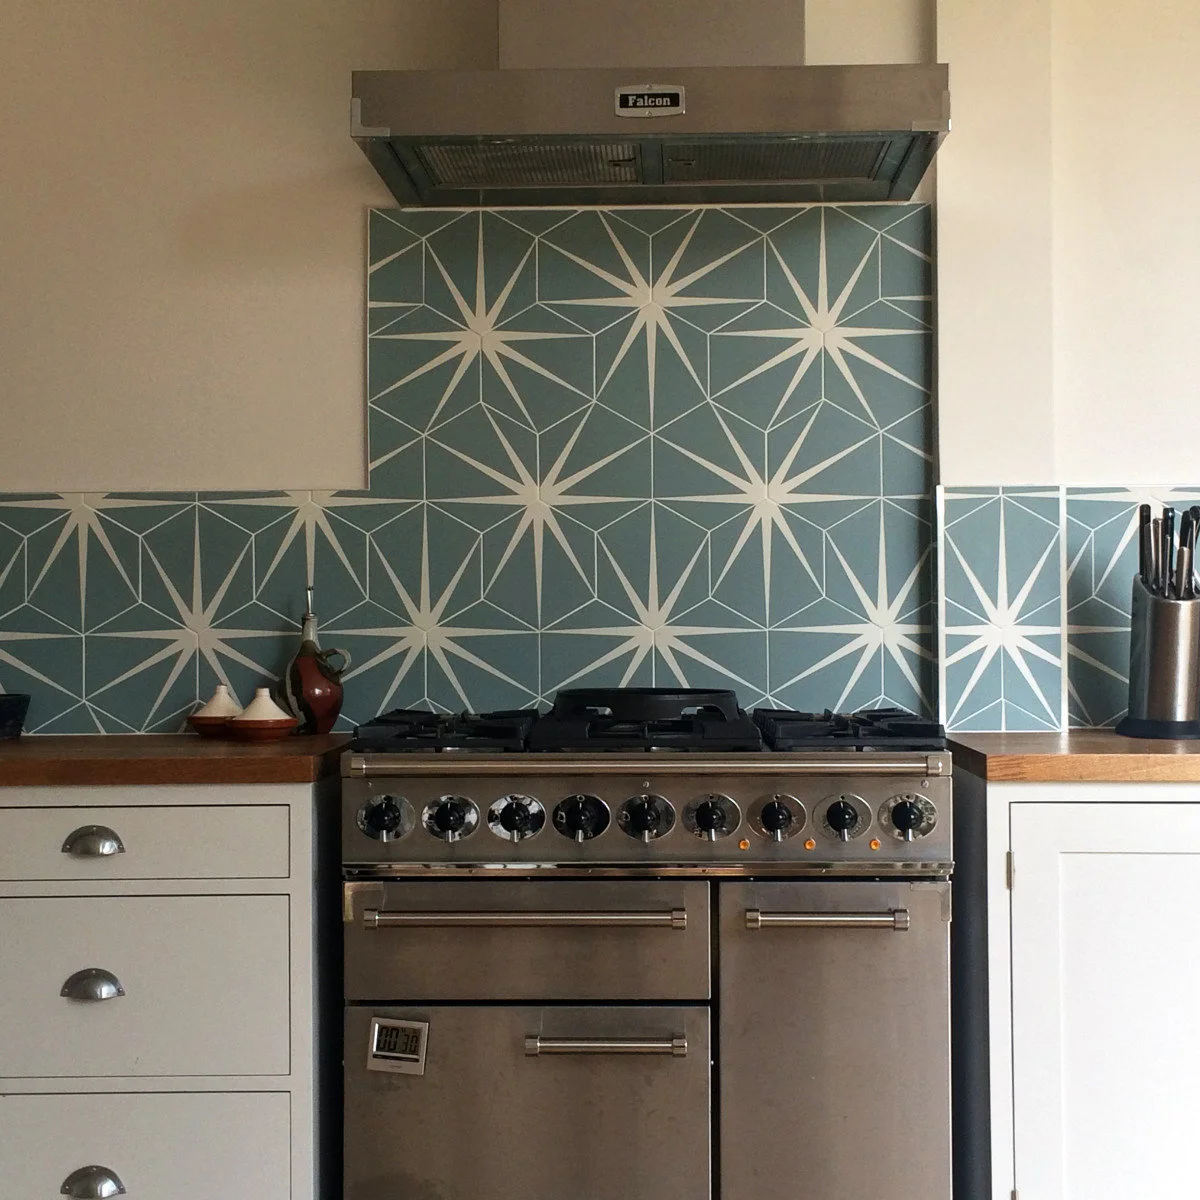
Blue geometric tiles climb behind the range and continue as a lower band along the adjacent counters. The pale cabinetry leaves the pattern readable without another strong finish beside it. The higher tiled section gives the cooking area a clear focal point within a relatively restrained room.
Look at several tiles together before ordering so you understand the full repeat rather than judging from one sample. Choose a surface suitable for the actual cooking position and follow its cleaning guidance. Keep the pattern deliberate by leaving surrounding fronts simpler, especially where the room already contains varied period details.
IDEA 18 / 20
Group Tall Appliances at the End of an L-Shape
 SaveSupport Non AI Creator
Image credit: Project: Lacey Architecture (via Houzz)
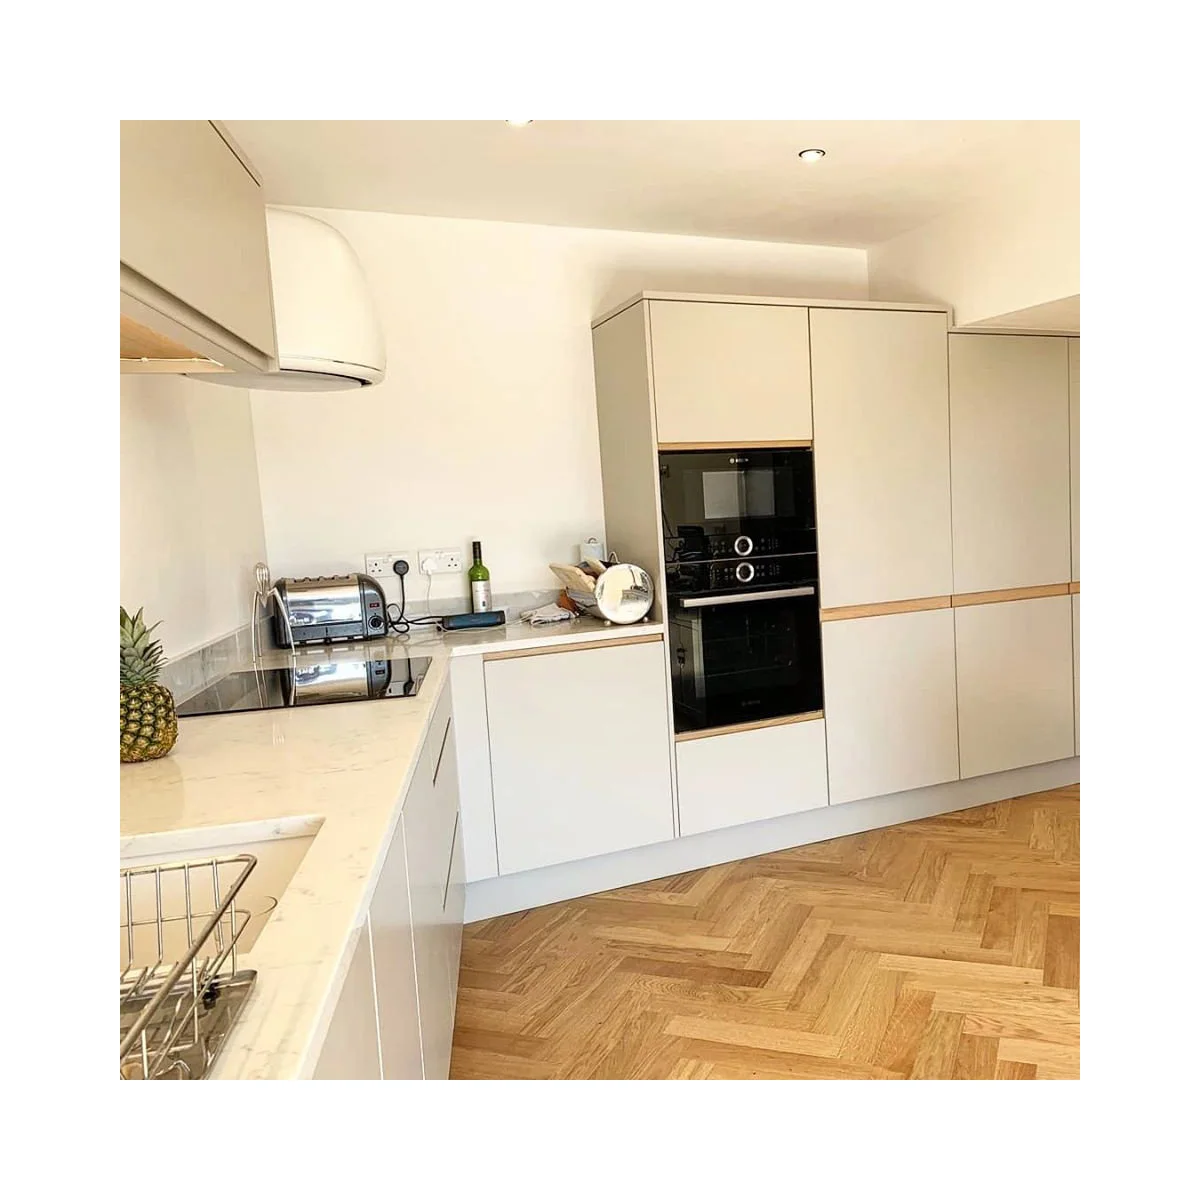
Stacked dark ovens occupy the tall cabinet section at the end of this pale L-shaped kitchen. The horizontal wood-colored handle lines connect upper and lower doors. Keeping the appliance stack together leaves a clearer stretch of counter around the corner for everyday preparation.
Check the comfortable operating height of both ovens and where hot dishes will be placed after use. Leave the corner practical rather than filling it with small appliances that are rarely used. A compact grouping works best when cupboard doors, appliance doors and the main route can all function comfortably together.
IDEA 19 / 20
Create a Counter Connection to the Courtyard
 SaveSupport Non AI Creator
Image credit: Project: Danny Broe Architect (via Houzz)
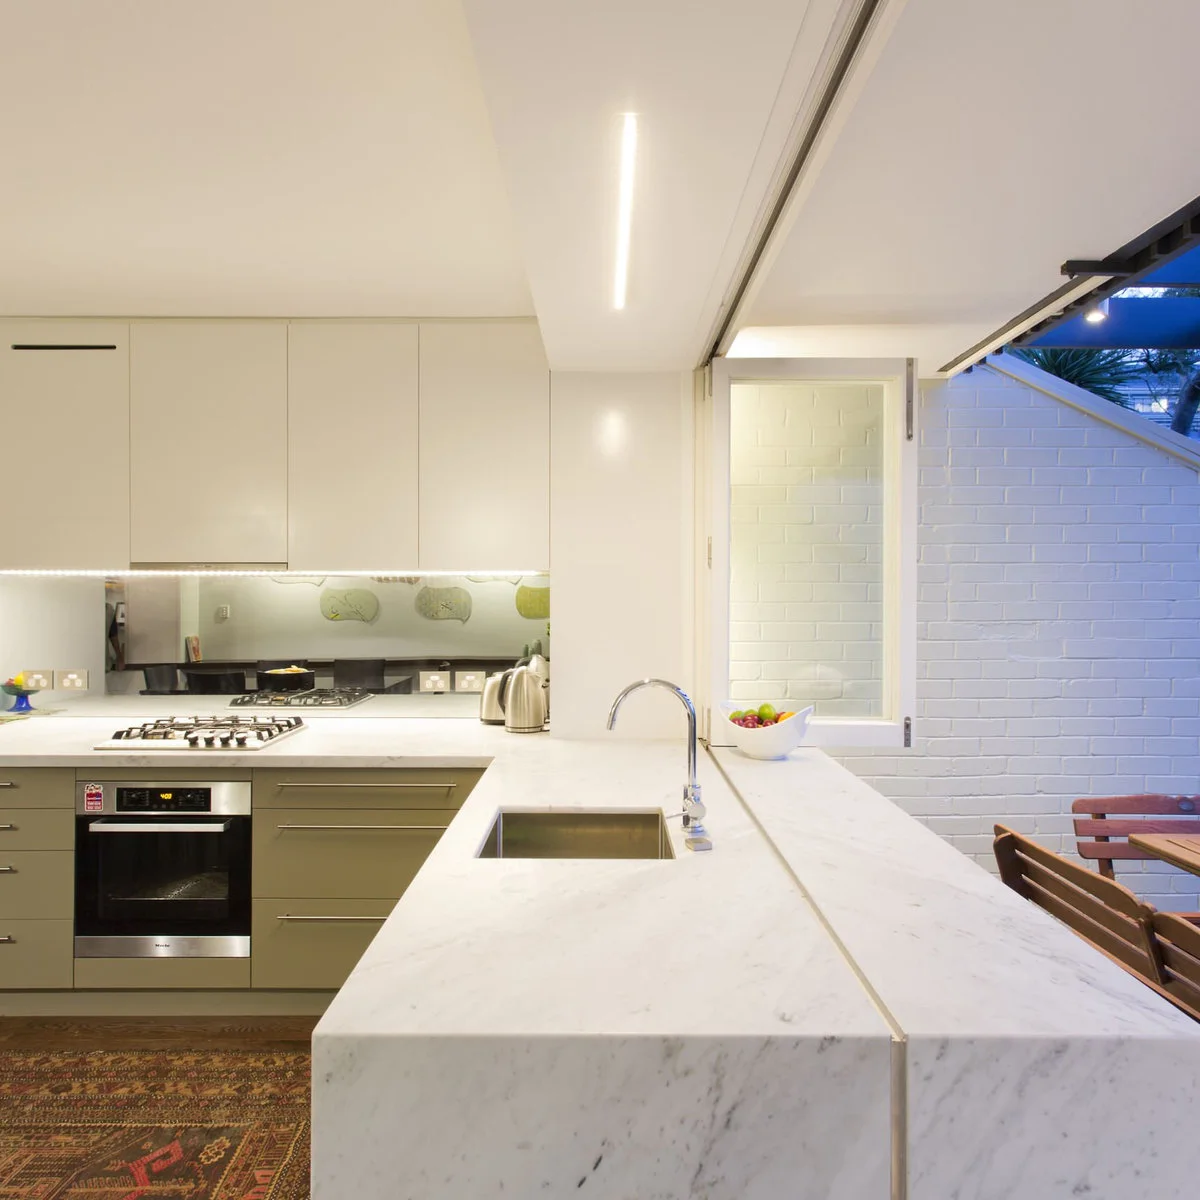
The pale sink counter runs toward a large opening beside the courtyard seating. A darker cooking run stays against the back wall, keeping the working arrangement easy to read. The connection lets the kitchen relate directly to the small outdoor area without moving the whole cooking zone outside.
Assess weather exposure, drainage and the opening’s hardware before considering a similar connection. Keep a reliable indoor work area for days when the opening stays closed. Confirm the counter finish suits each exposure and avoid treating an apparently continuous surface as evidence that every material will work indoors and outdoors.
IDEA 20 / 20
Keep Dining and Island Seating on Separate Sides
 SaveSupport Non AI Creator
Image credit: Project: Paper House Project (via Houzz)
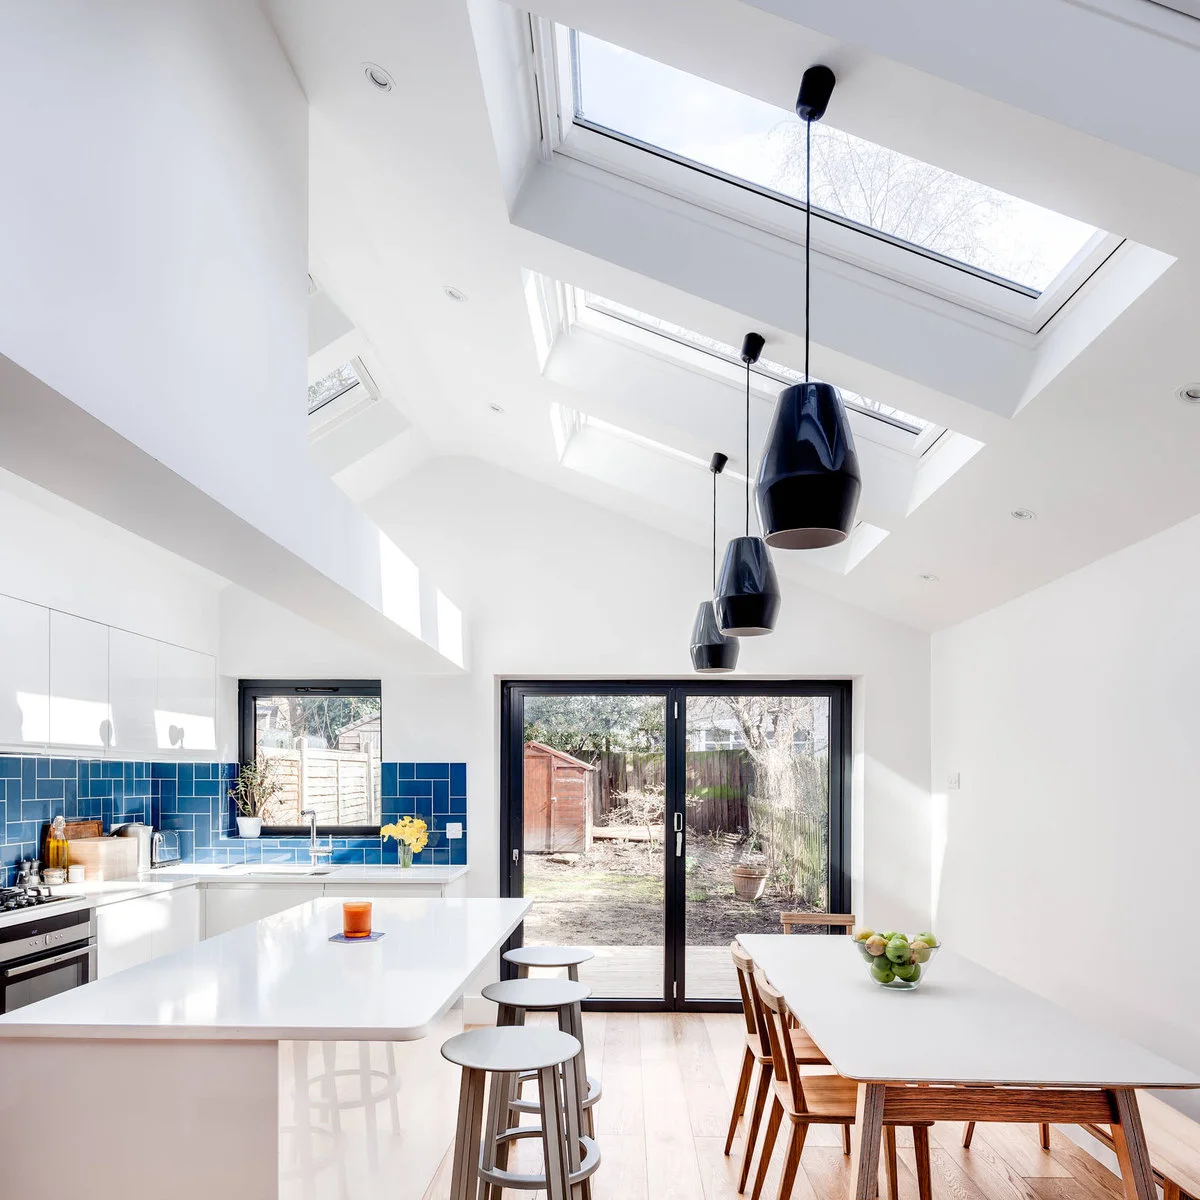
A white island provides a breakfast edge on one side of this room, while a dining table occupies the opposite side. Blue tiles give the cooking wall a clear identity beneath the high rooflights. The central view remains open toward the rear doors rather than ending at a tall cupboard.
Decide whether both seating types will be used before allocating space to them. Check the island stools and dining chairs together in their occupied positions, keeping a clear route to the doors. Fewer seats can make the room more comfortable if duplicating the photograph would leave every passage tight.
BRING IT ALL TOGETHER
Solve the Route and Light before Choosing Finishes
Mark the routes through the house and into the garden, then test the proposed furniture with chairs and appliance doors open. Keep enough preparation surface near the cooking and washing areas. An island is useful when it supports those tasks; it is optional when it makes a narrow plan harder to use.
Next decide which older details to retain and where more daylight would help most. Some rooms need a better cabinet arrangement and lighting, while others involve a larger assessed renovation. Choose finishes after those decisions so the kitchen works with the house rather than simply reproducing another project’s photograph.