Slate can form a quiet base beneath a stove or become the textured face of a whole chimney breast. Start by deciding which part of the fireplace you want to change. A square hearth, a fitted T shape and a curved corner slab solve different layout problems, even when their color looks similar.
These photographs combine installed examples with clearly labelled workshop details. The latter show outlines, edges and joins that are often hidden in room pictures. The suppliers identify the featured hearths or cladding as slate; other wall and surround materials are described separately. Use the arrangements for inspiration and have the full appliance installation assessed before ordering.
PART 01
Compare slate hearths in real settings
IDEA 01 / 17
Frame a Wide Opening with a Dark Slate Base
 SaveSupport Non AI Creator
Image credit: Ribble Valley Slate
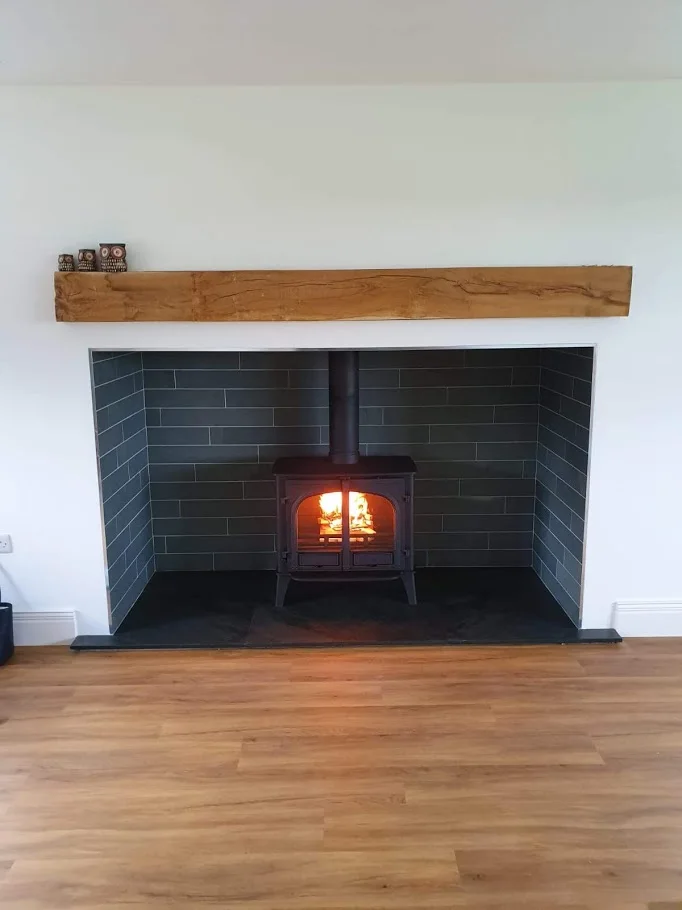
The dark hearth defines the base of this broad white chimney breast, continuing across the opening before projecting into the room. Rectangular tiles inside the recess provide another layer of texture. A simple timber mantel keeps the upper outline quieter than the patterned lining below.
Have the hearth measured around the actual opening and appliance requirements rather than copying its proportions from a photograph. A projecting edge also affects the floor route in front. Compare a slate sample with the lining tile and floor covering so their different dark tones work together.
IDEA 02 / 17
Use a Square Hearth beneath a Freestanding Stove
 SaveSupport Non AI Creator
Image credit: Ribble Valley Slate
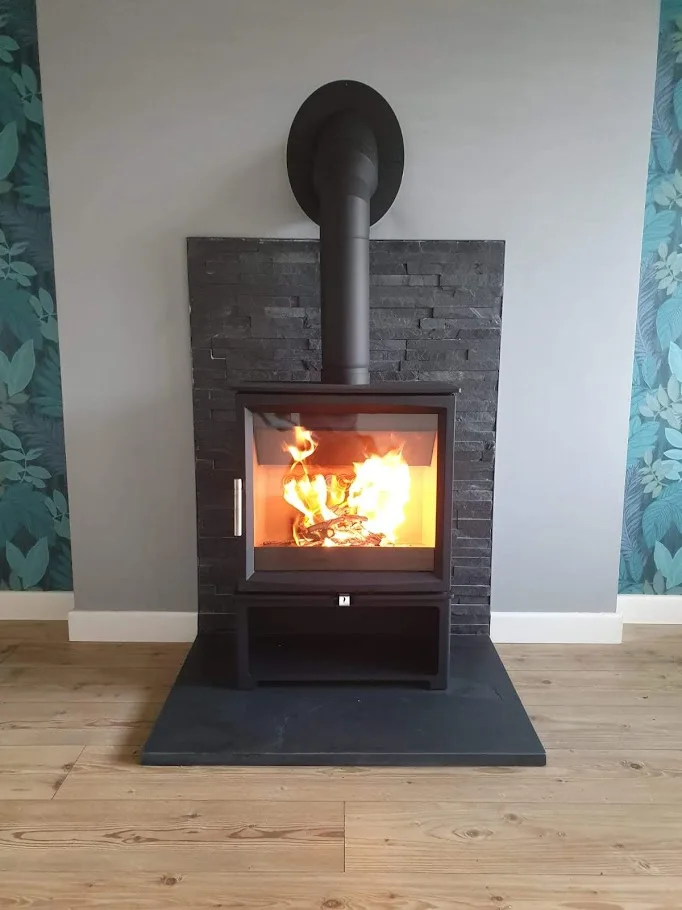
A square slate base gives this freestanding stove a distinct footprint against the gray wall. The darker textured backing extends above the appliance, while patterned wallpaper appears at the sides. Leaving the lower compartment empty keeps the stove’s vertical outline and the hearth surface easy to see.
Check the required hearth size, support and surrounding construction for the chosen stove before selecting a square format. The wall finish cannot be identified as slate from this photograph. Keep enough access around the appliance for cleaning and servicing, and ask the supplier which care products suit the hearth’s finish.
IDEA 03 / 17
Contrast Slate with an Exposed Brick Opening
 SaveSupport Non AI Creator
Image credit: Ribble Valley Slate
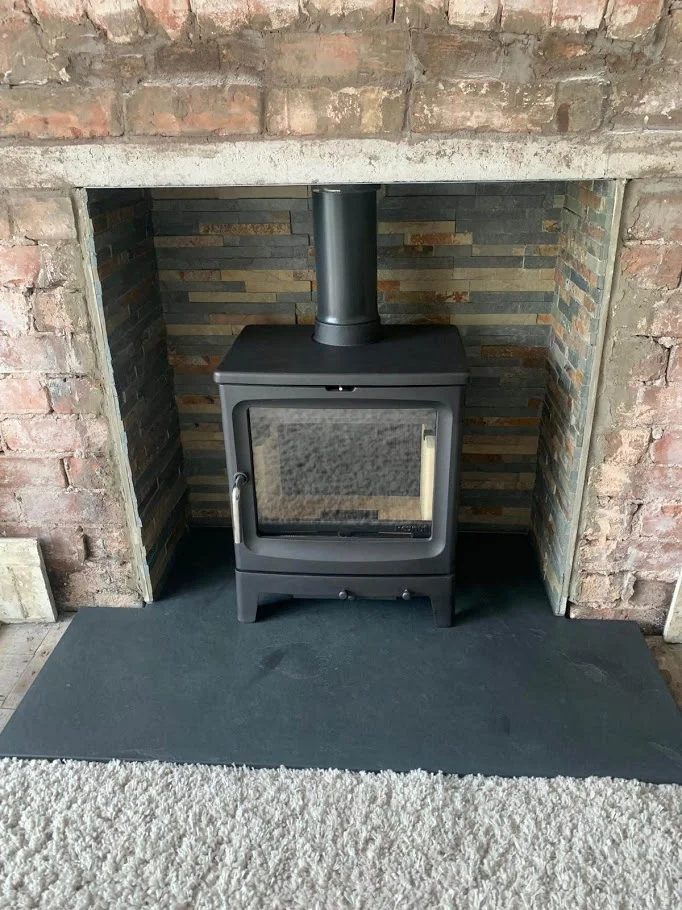
The uneven brick opening brings warmer color around the stove, while the dark slate creates a more continuous plane at floor level. Narrower pieces of lining inside the recess add another scale of detail. The wide front of the hearth balances the breadth of the surrounding brickwork.
Before fitting a new hearth into an existing brick opening, have its condition, support and appliance installation assessed. Allow the template to follow the actual recess rather than assuming the sides are square. Our rustic fireplace ideas offer other ways to combine a simpler base with more irregular surrounding surfaces.
IDEA 04 / 17
Use a Five-Sided Hearth in a Corner
 SaveSupport Non AI Creator
Image credit: Ribble Valley Slate
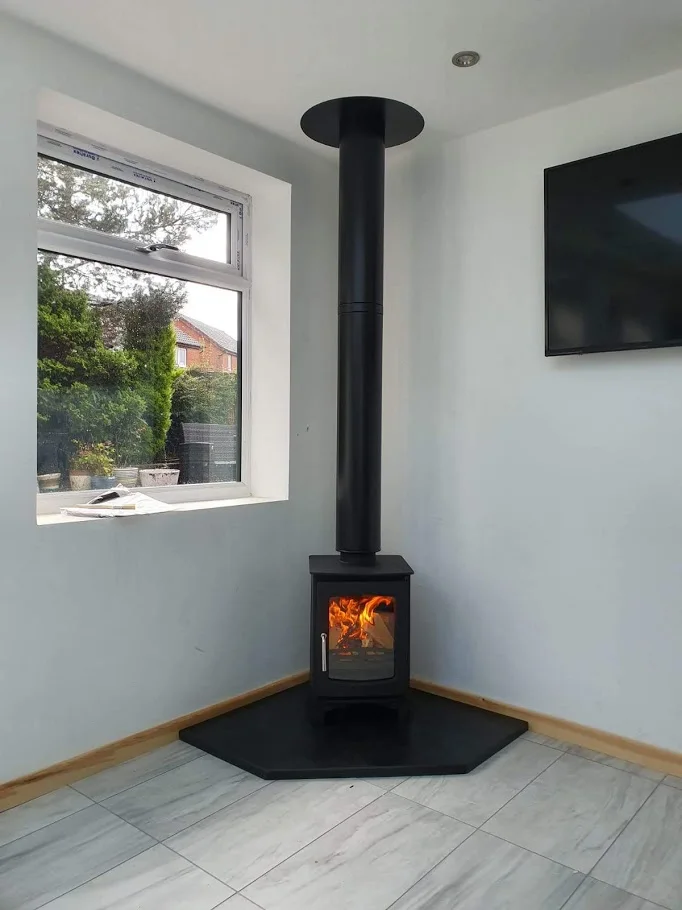
Angled sides allow this hearth to turn across the corner instead of extending as a full rectangle into the room. The slate remains visually distinct from the pale plank-pattern floor. A slender vertical flue continues the stove’s dark outline upward without adding a separate mantel.
Draw the proposed hearth footprint on the floor before ordering so you can judge its effect on the nearby window and walking route. The final outline still needs to meet the appliance’s requirements. Have the flue route and surrounding surfaces assessed together rather than treating the hearth as an isolated decorative piece.
IDEA 05 / 17
Give a Painted Chimney Breast a Clear Base
 SaveSupport Non AI Creator
Image credit: Ribble Valley Slate
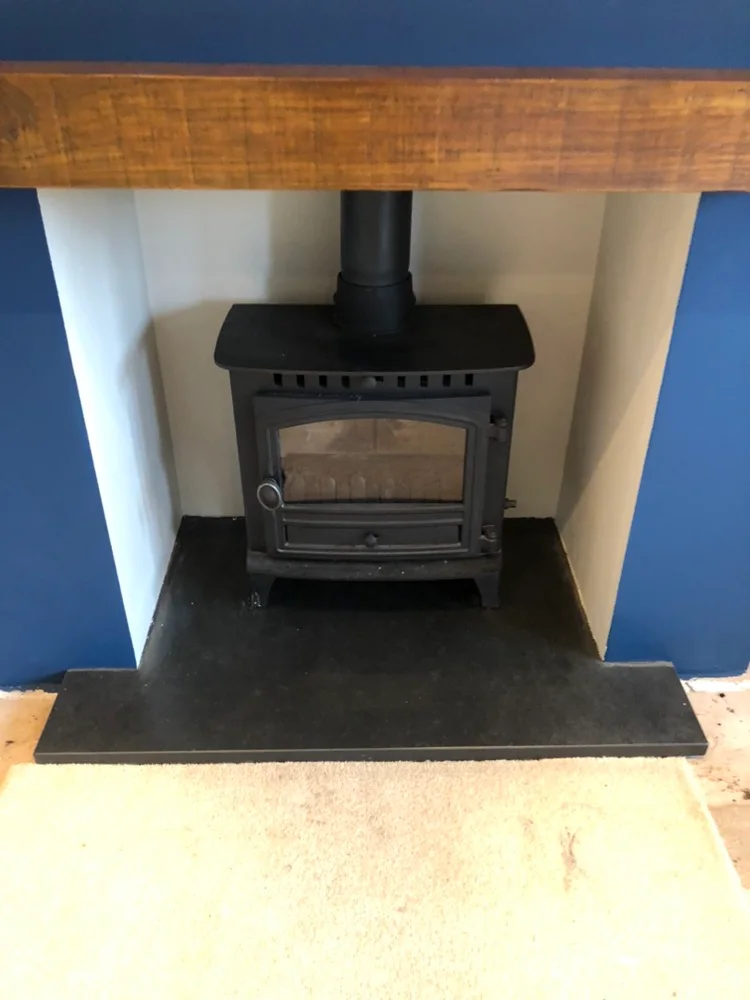
Blue paint emphasizes the chimney breast while the white recess keeps the stove’s outline legible. A timber mantel adds a warmer horizontal band. At the bottom, the slate projects beyond the recess in a T shape, visually connecting the narrow opening with the wider painted wall.
This photograph shows unfinished floor edges around the hearth, so plan the meeting between slate and the final floor covering before installation. Agree the finished levels with the installer and flooring contractor. Check paint and mantel suitability for their positions, and leave the necessary space around the stove regardless of the desired color scheme.
IDEA 06 / 17
Pair a Rounded Stove with an Angled Slate Outline
 SaveSupport Non AI Creator
Image credit: Ribble Valley Slate
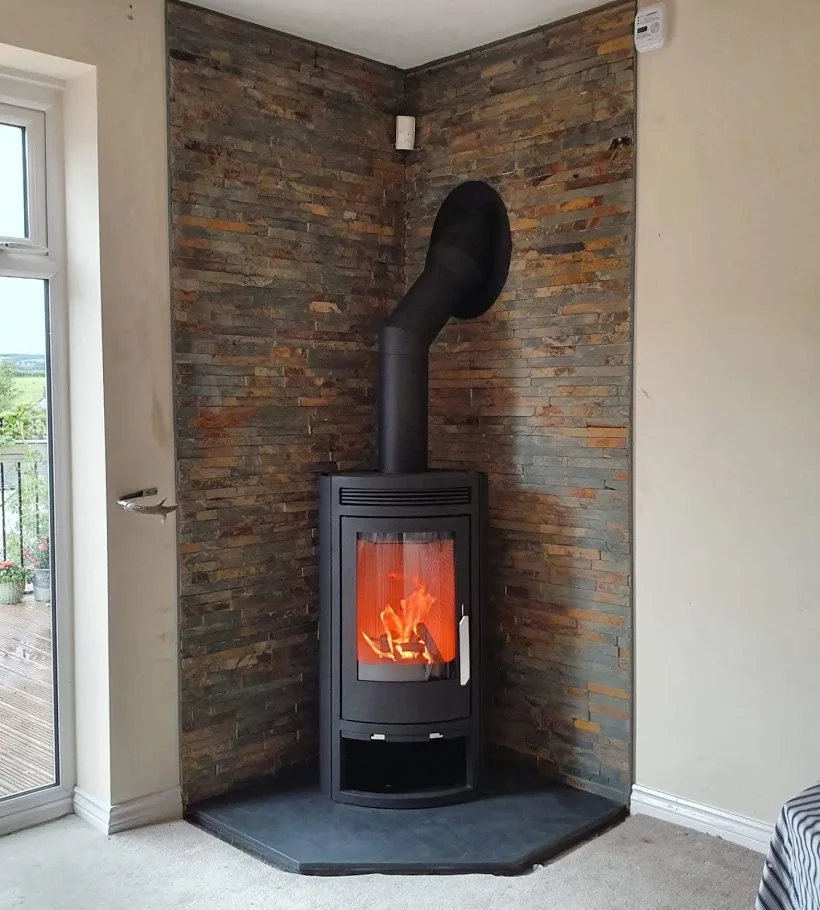
The stove’s curved body contrasts with the straight edges of the pentagonal hearth. Varied rectangular slips turn around the corner behind it, creating a more textured backdrop. The broad dark base gives the appliance a defined area where it meets the lighter carpet.
Compare the hearth outline with the stove’s door movement and the route beside the adjacent glazing. A five-sided shape can reduce a projecting corner, but the correct size depends on the full installation. Confirm the backing material separately; the presence of a slate hearth does not identify the wall slips as slate.
IDEA 07 / 17
Keep a Corner Hearth Distinct from the Carpet
 SaveSupport Non AI Creator
Image credit: Ribble Valley Slate
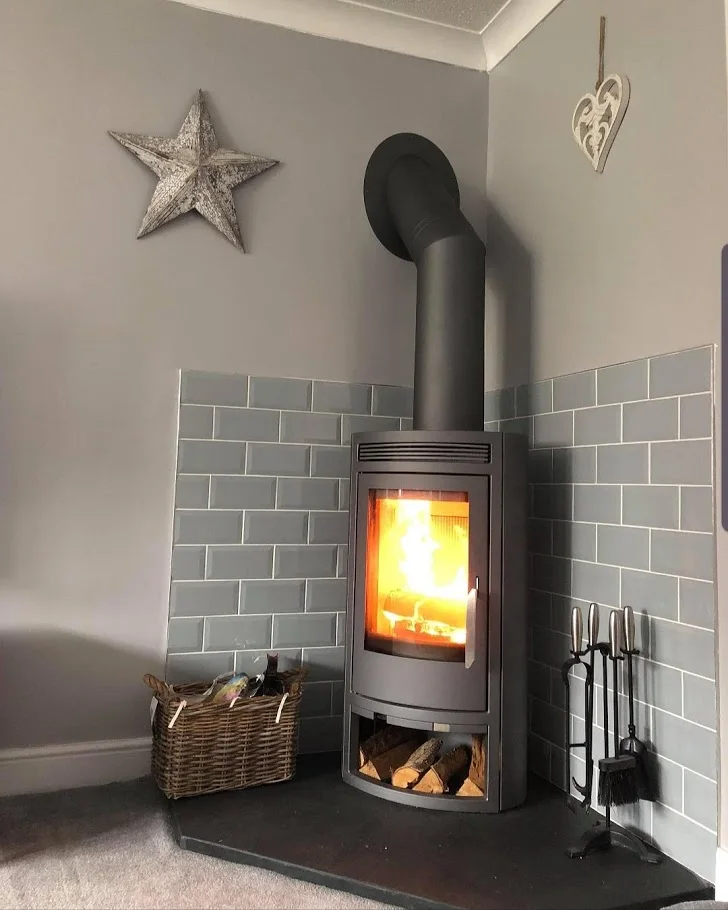
The dark hearth provides a clear change of surface beneath the taller gray stove. Rectangular gray wall tiles create a quieter backdrop than the varied slips in the previous example. A tool stand and basket sit at either side, showing how even a corner installation needs room for accessories.
Reserve space for tools and cleaning without narrowing the walking route around the hearth. Follow the appliance instructions when deciding where fuel or other objects can be stored; the photograph does not establish suitable positions. Check how the carpet edge will be finished against the slate before the floor work begins.
PART 02
Look at curved and rounded outlines
IDEA 08 / 17
Consider a Curved Front for a Corner Hearth
 SaveSupport Non AI Creator
Image credit: Ribble Valley Slate
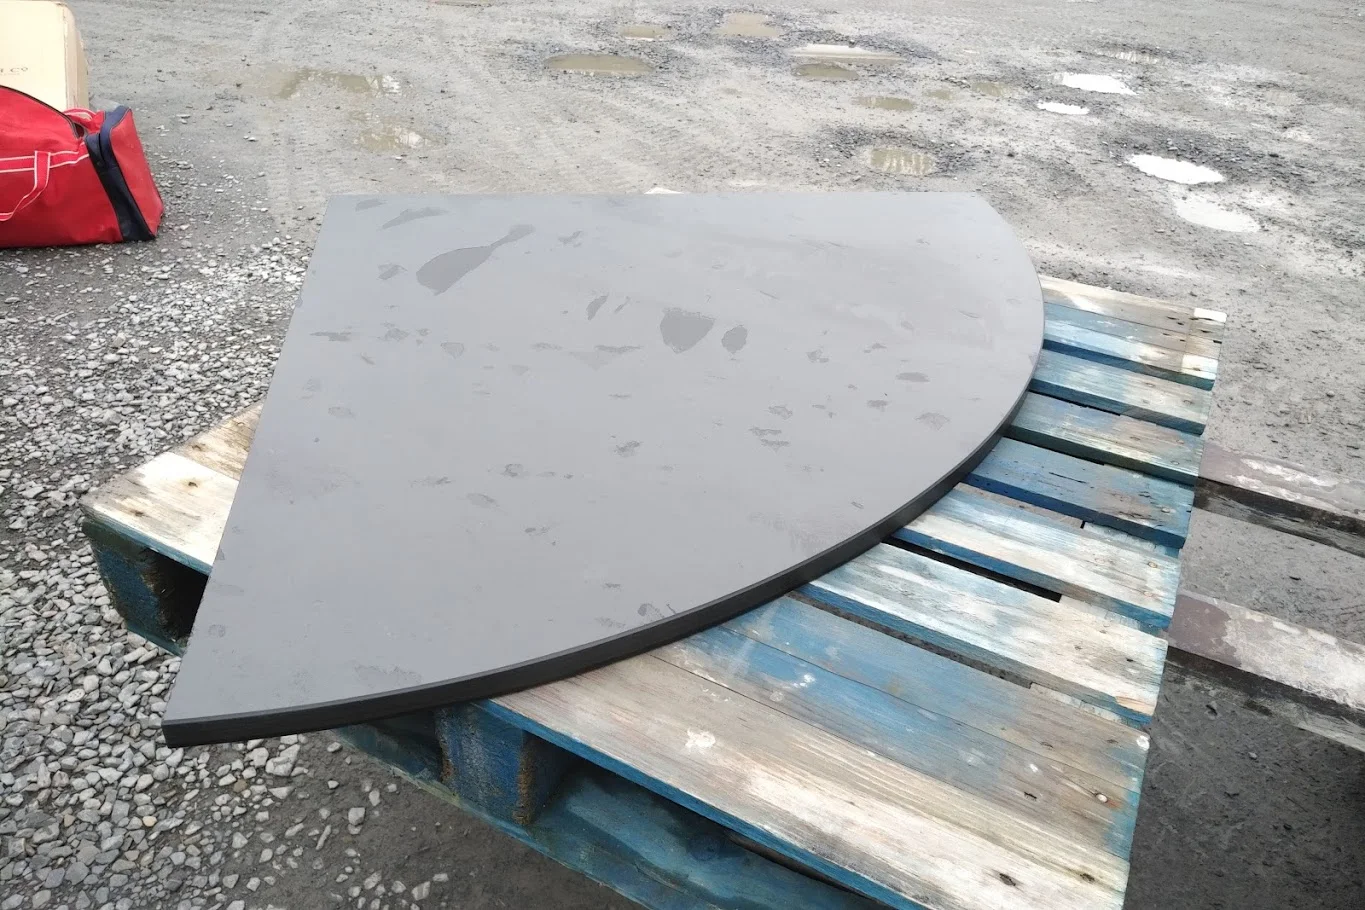
This fabrication photograph shows the outline without a stove obscuring it: two straight sides meet at the back, while a broad curved edge faces the room. The slate is outdoors on a pallet, with uneven damp-looking areas across its face. It is a shape reference rather than a finished-room example.
Use a full-size template to compare the curved footprint with furniture and door routes before asking a supplier to cut the slab. Confirm the required hearth area and construction with the installer first. View a dry finish sample separately, since outdoor handling and surface moisture can change how dark a piece looks.
IDEA 09 / 17
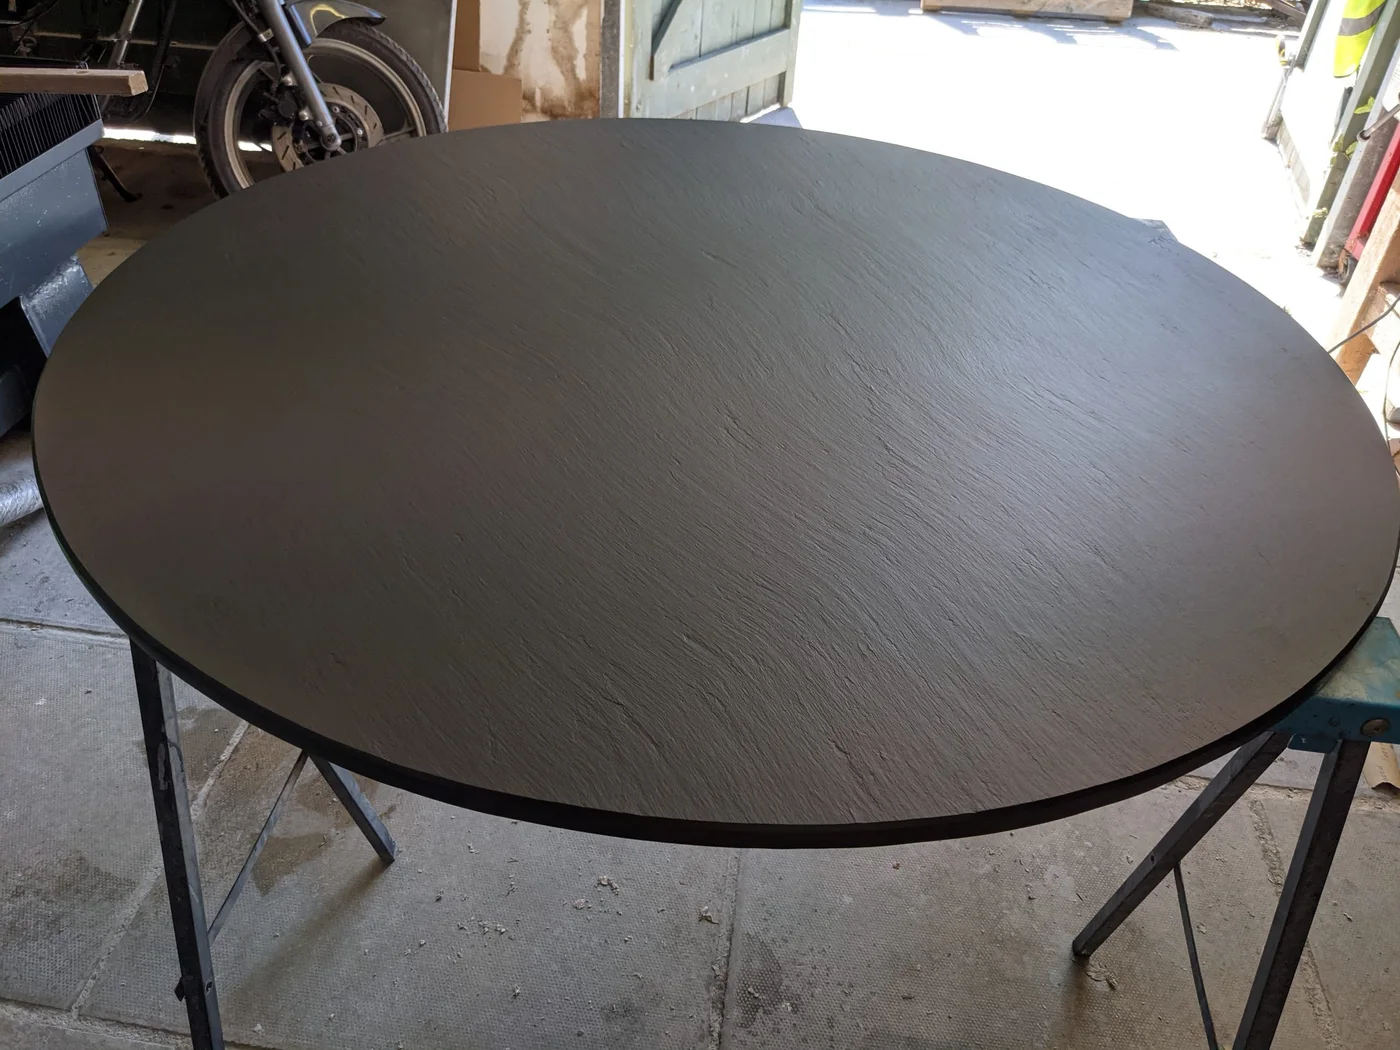
Explore a Circular Hearth as a Freestanding Shape
 SaveSupport Non AI Creator
Image credit: Manthorpe Slate
A full circle creates a different outline from the rectangular and corner hearths shown above. The workshop view reveals the textured upper face and the thickness at the front edge without an appliance covering them. It makes the shape itself the focus of the comparison.
A circular design needs careful coordination with the appliance position and flue route; visual symmetry alone cannot determine the correct size. Ask the fabricator about available slab dimensions, support and handling. Compare the whole footprint with the room layout so the curve does not unexpectedly extend into a passage.
IDEA 10 / 17
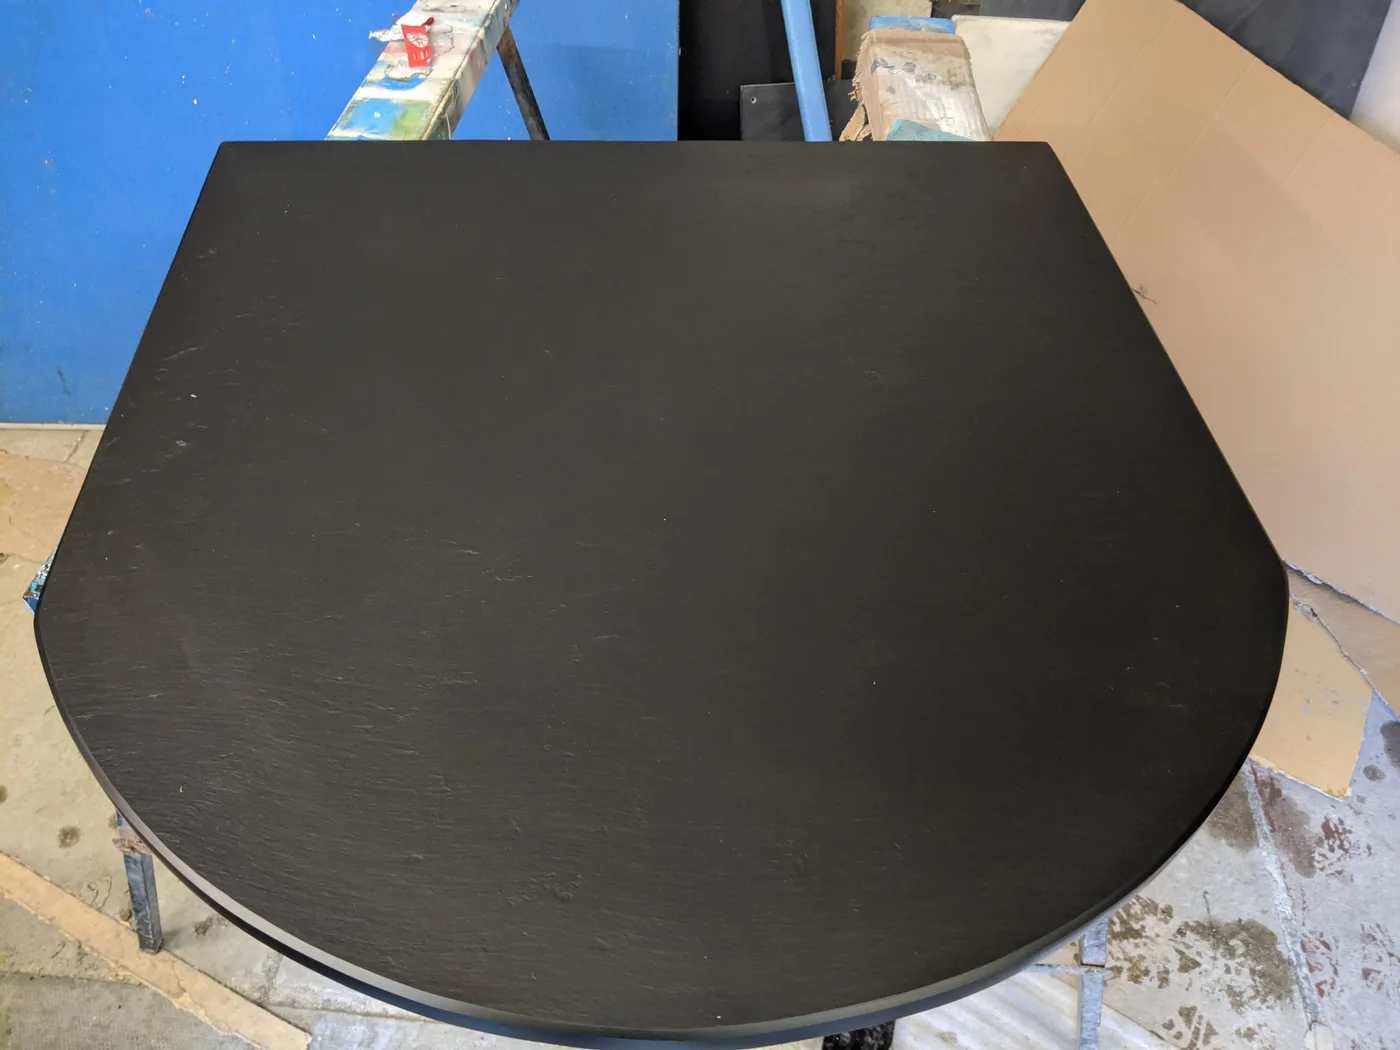
Combine a Straight Back with a Curved Front
 SaveSupport Non AI Creator
Image credit: Manthorpe Slate
The straight back makes this D-shaped slab different from the full circle, while the curved front softens the edge facing the room. Its textured face remains visible in the workshop photograph. The shape offers a useful comparison when a hearth needs to relate to a straight wall behind it.
Check the planned stove position on a scaled drawing before committing to a curve. The usable area around the appliance must satisfy its installation requirements throughout the outline. Ask how the exposed edge will be finished, then compare samples under the room’s light rather than choosing from the workshop photograph alone.
IDEA 11 / 17
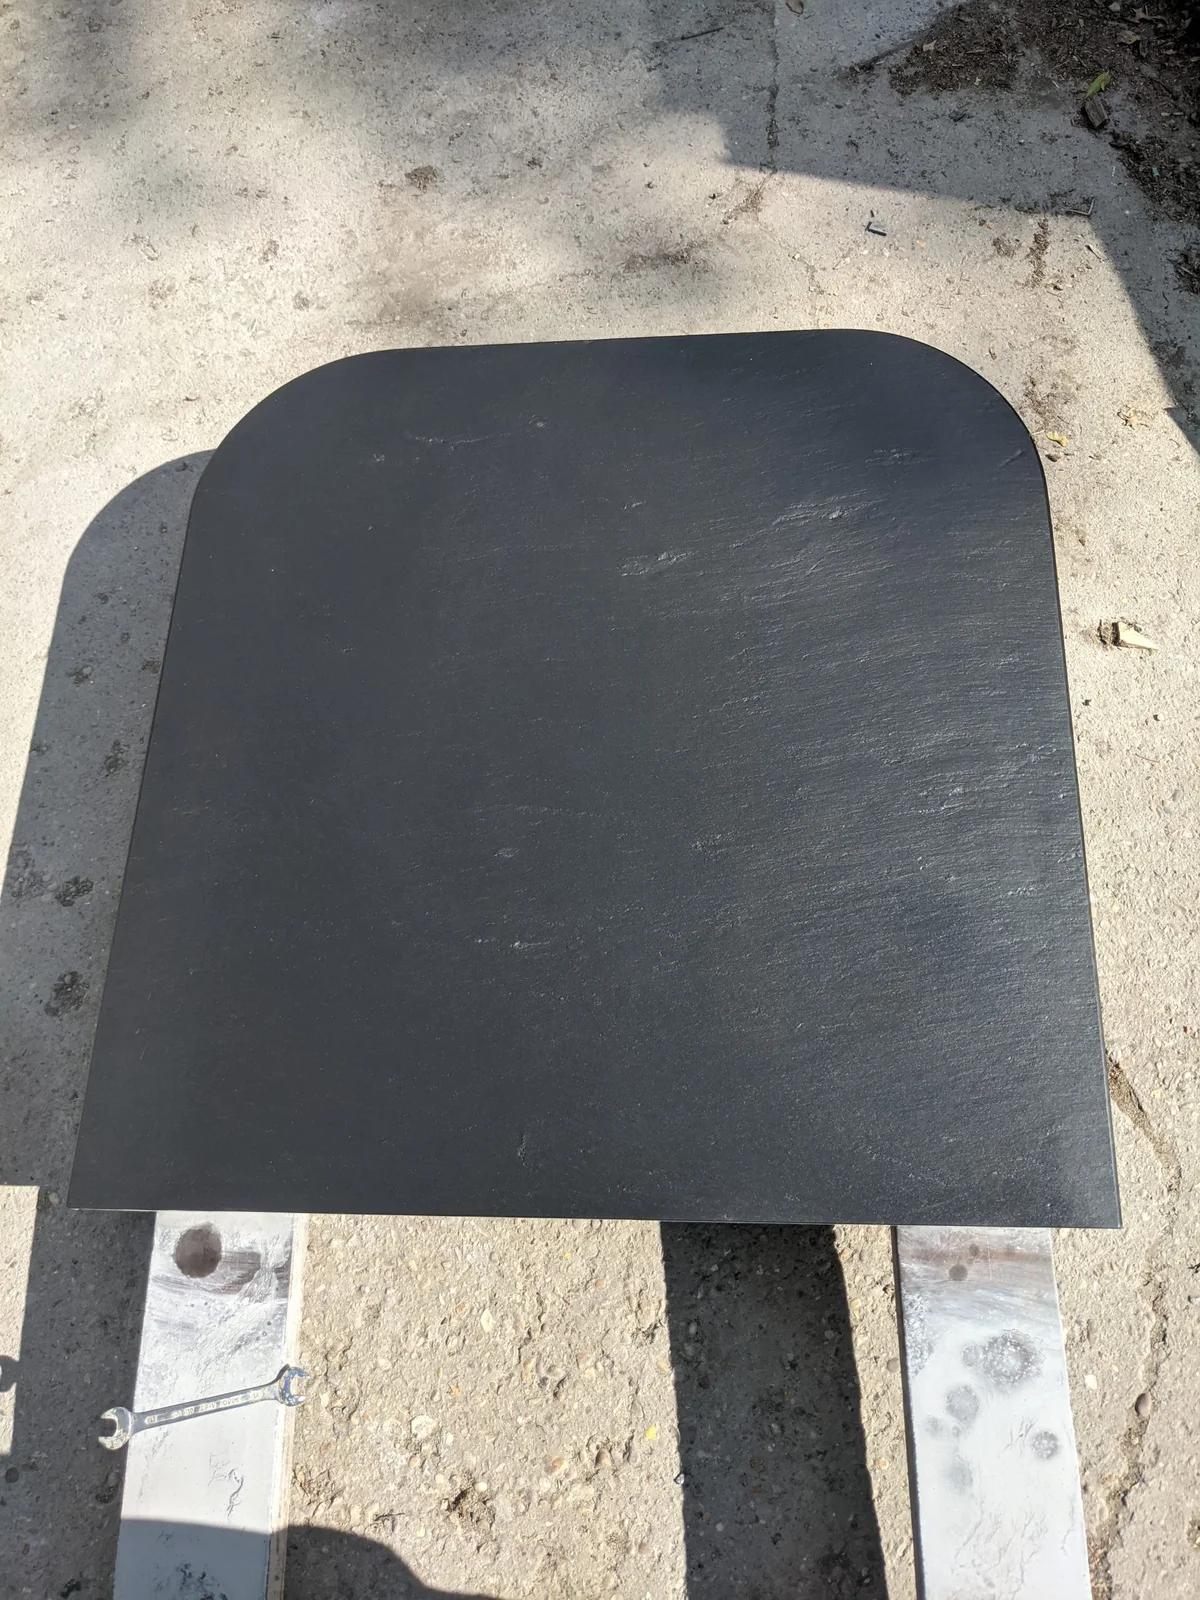
Round the Front Corners of a Rectangular Slab
 SaveSupport Non AI Creator
Image credit: Manthorpe Slate
Rounded corners change the outline of this otherwise rectangular hearth without turning the whole front into a broad curve. The close view also shows the uneven surface texture of the riven finish. This is a fabrication detail, useful for considering how an exposed corner will look at floor level.
Specify the corner radius and which edges remain visible when approving the template. A rounded corner still creates a raised floor edge, so consider its location in everyday walking routes. Ask the supplier how to clean the textured face and edges without using products that could alter the slate’s appearance.
PART 03
Compare finishes and edge treatments
IDEA 12 / 17
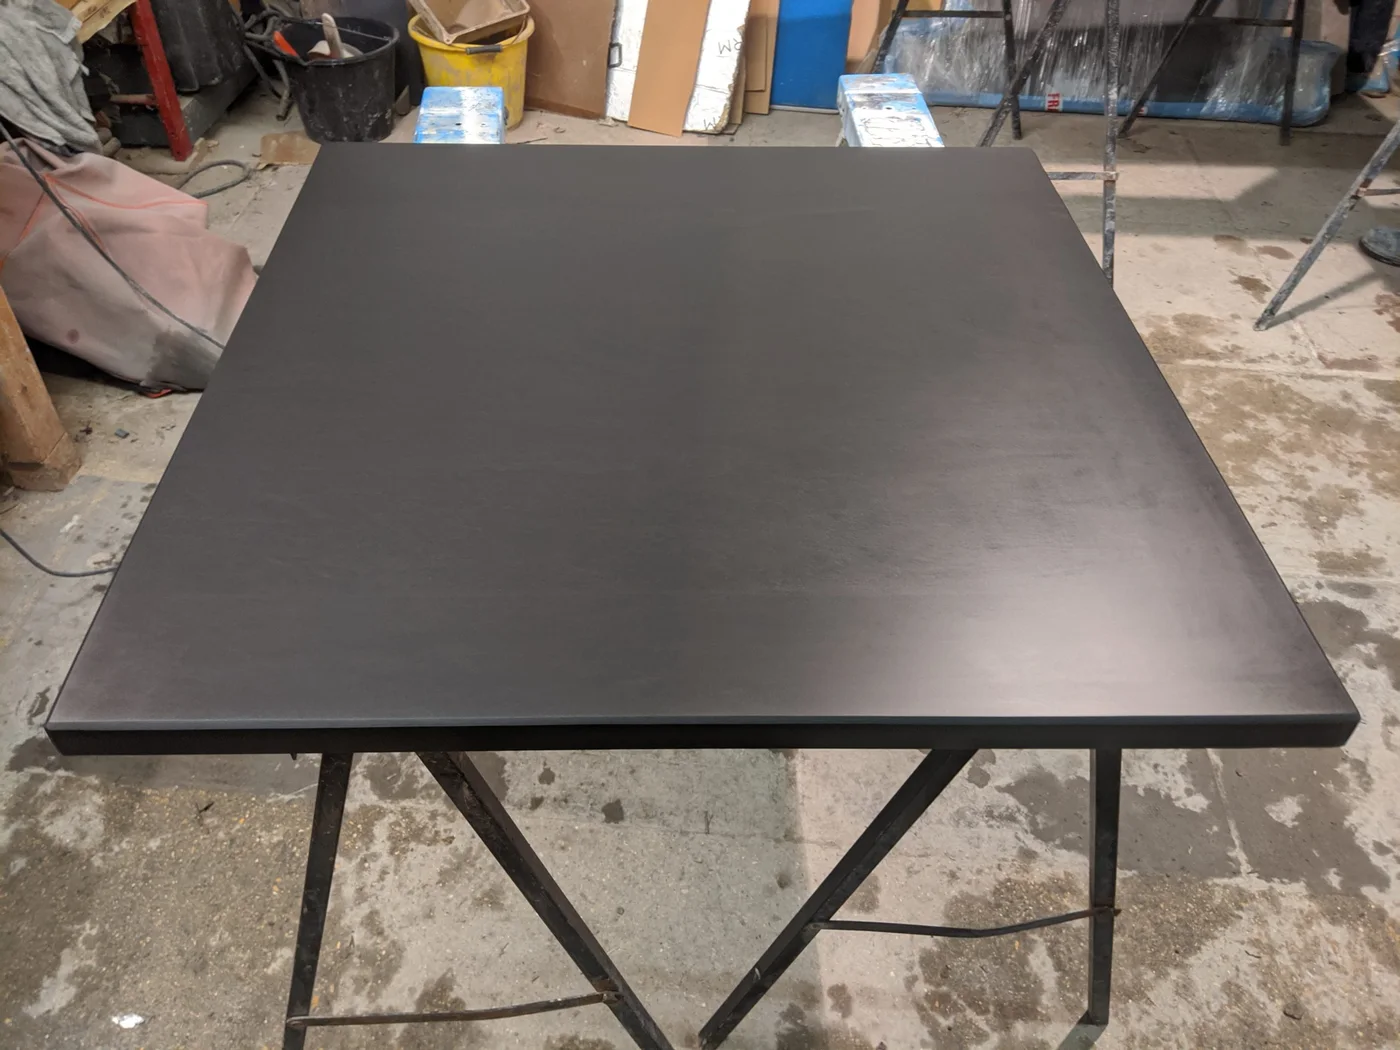
Choose a Honed Face for a Quieter Surface
 SaveSupport Non AI Creator
Image credit: Manthorpe Slate
This square slab has a smoother-looking face than the riven examples, with light reflecting more continuously across the surface. Its plain outline makes the finish easy to compare. The workshop setting keeps the focus on the material sample rather than suggesting a complete room arrangement.
Handle finish samples before deciding between honed and riven slate, and ask about cleaning, sealing and marks from everyday use. Follow the supplier’s guidance for the particular product. Choose the finish alongside the surrounding floor so the two surfaces have a deliberate relationship rather than simply appearing dark in separate photographs.
IDEA 13 / 17
Look Closely at the Exposed Edge
 SaveSupport Non AI Creator
Image credit: Manthorpe Slate
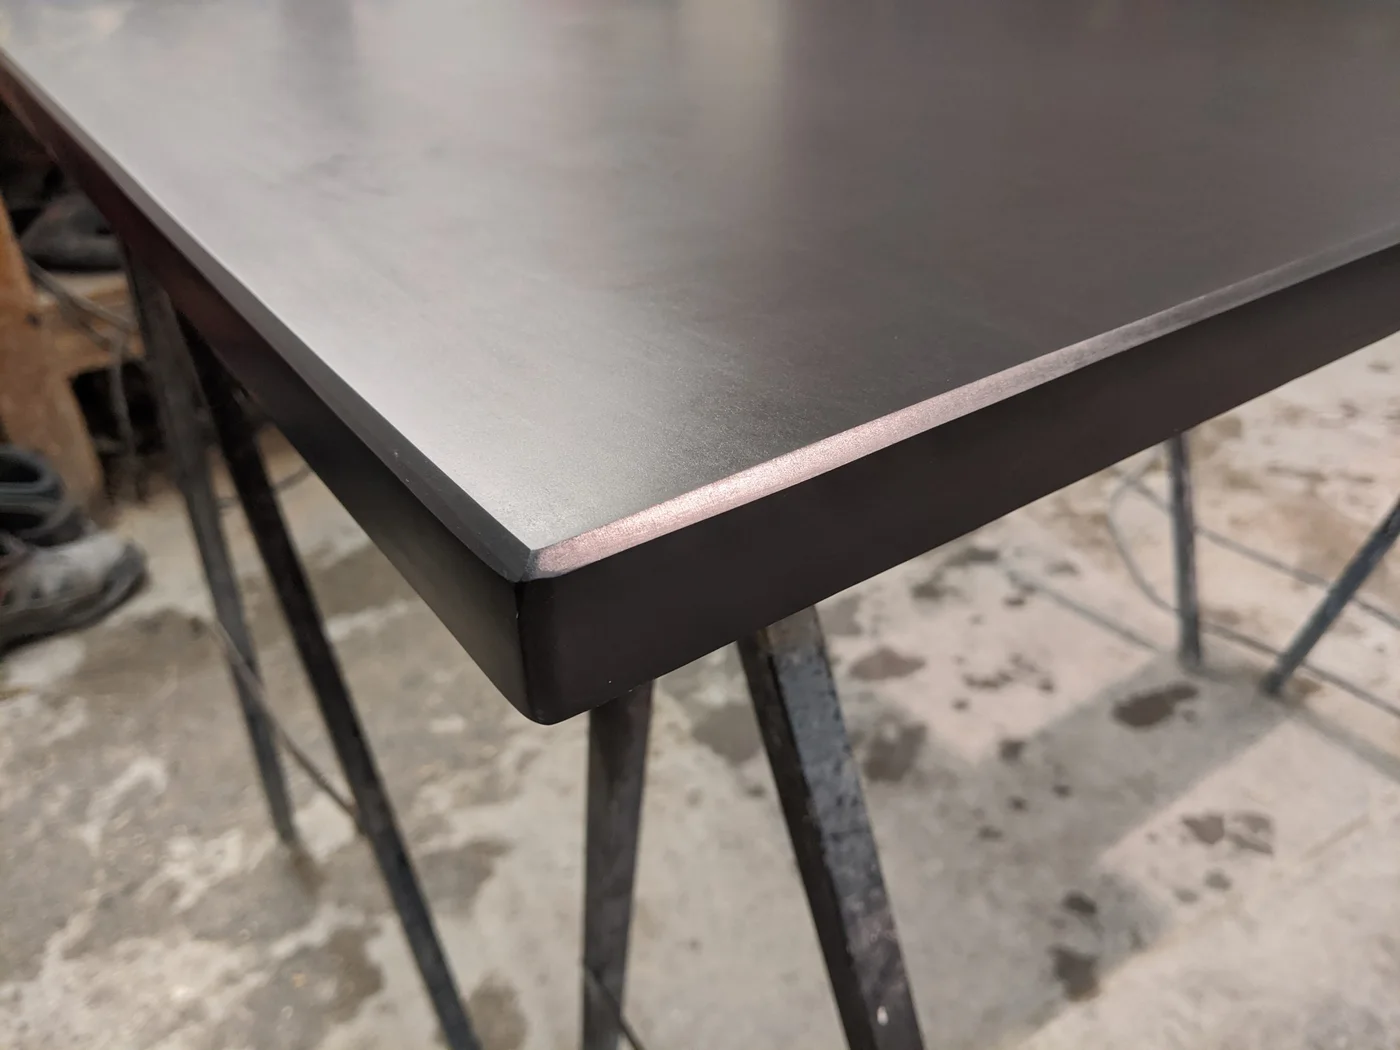
The small bevel along the upper edge creates a narrow change in light between the top face and the darker vertical side. A rounded corner brings those edge treatments together. This close-up is about fabrication detail, complementing the wider honed slab photograph rather than representing another finished fireplace.
Agree the edge profile with the fabricator before the slab is cut, especially where several exposed sides meet. Ask which profiles suit the selected thickness and intended use. Include the finished edge in your sample review, since a top-face sample alone will not show how the hearth looks from a seated position.
PART 04
Plan bespoke cuts and the surrounding wall
IDEA 14 / 17
Template an Irregular Recess Carefully
 SaveSupport Non AI Creator
Image credit: Manthorpe Slate
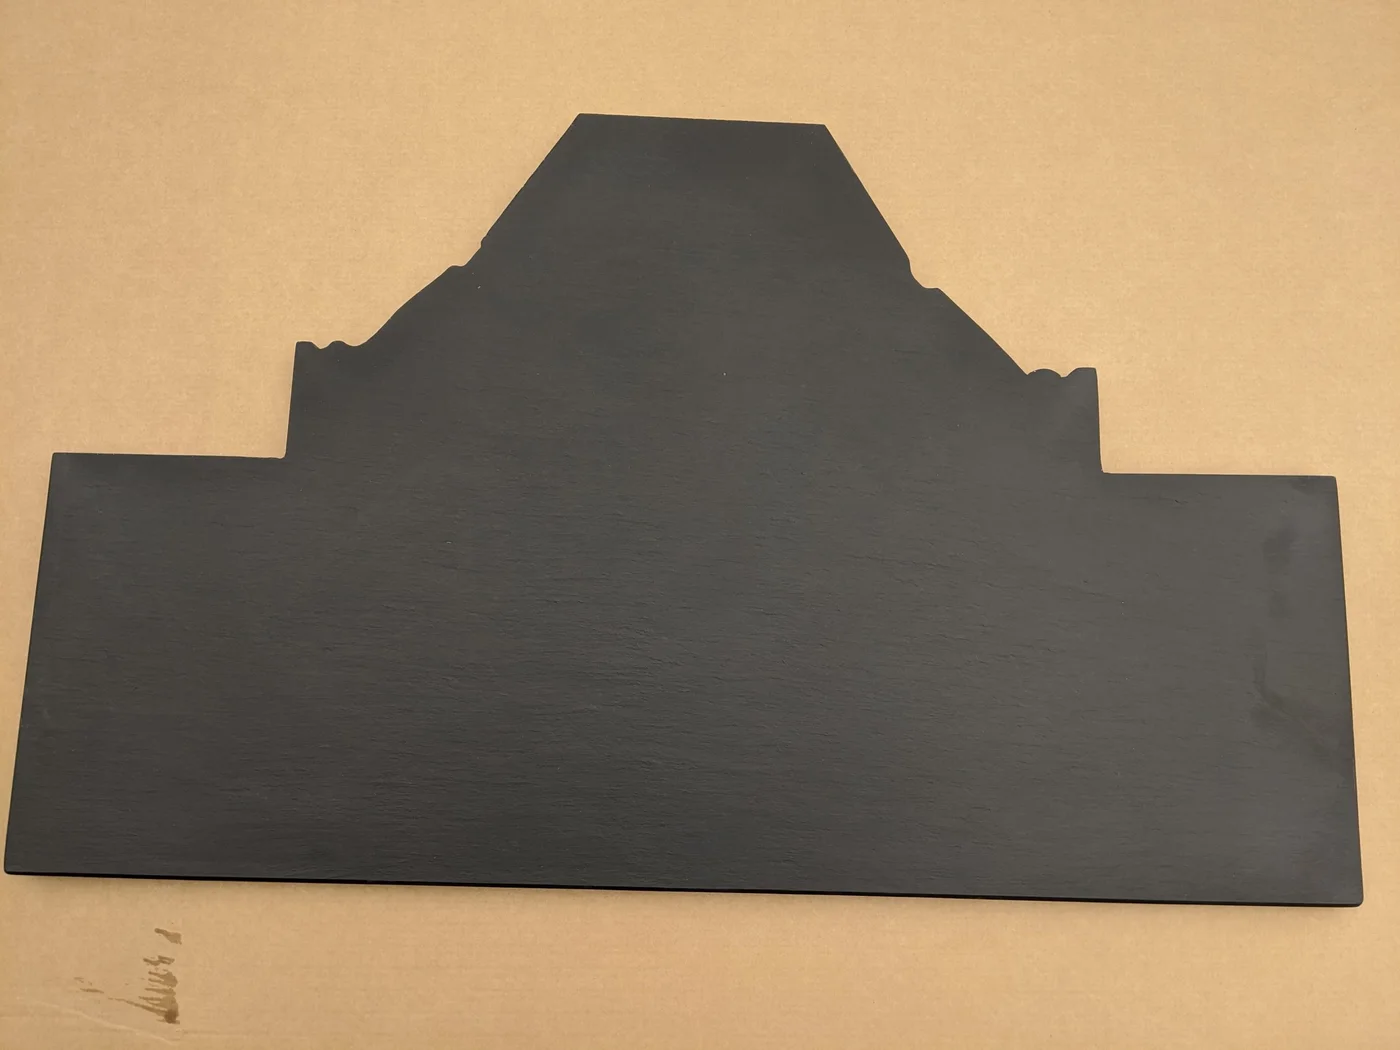
Several changes of direction along the back of this hearth show why a simple width-and-depth measurement is not always enough. The wider rectangular front remains comparatively plain. With no stove installed, the photograph clearly reveals the shaped sections that will relate to the recess behind.
Arrange a site template once the relevant construction dimensions are settled, and confirm who is responsible for checking it before fabrication. Record the orientation as well as measurements. Do not assume an older opening has matching sides or right angles, particularly when the hearth must fit closely around existing masonry.
IDEA 15 / 17
Plan the Join beside a Pale Surround
 SaveSupport Non AI Creator
Image credit: Manthorpe Slate
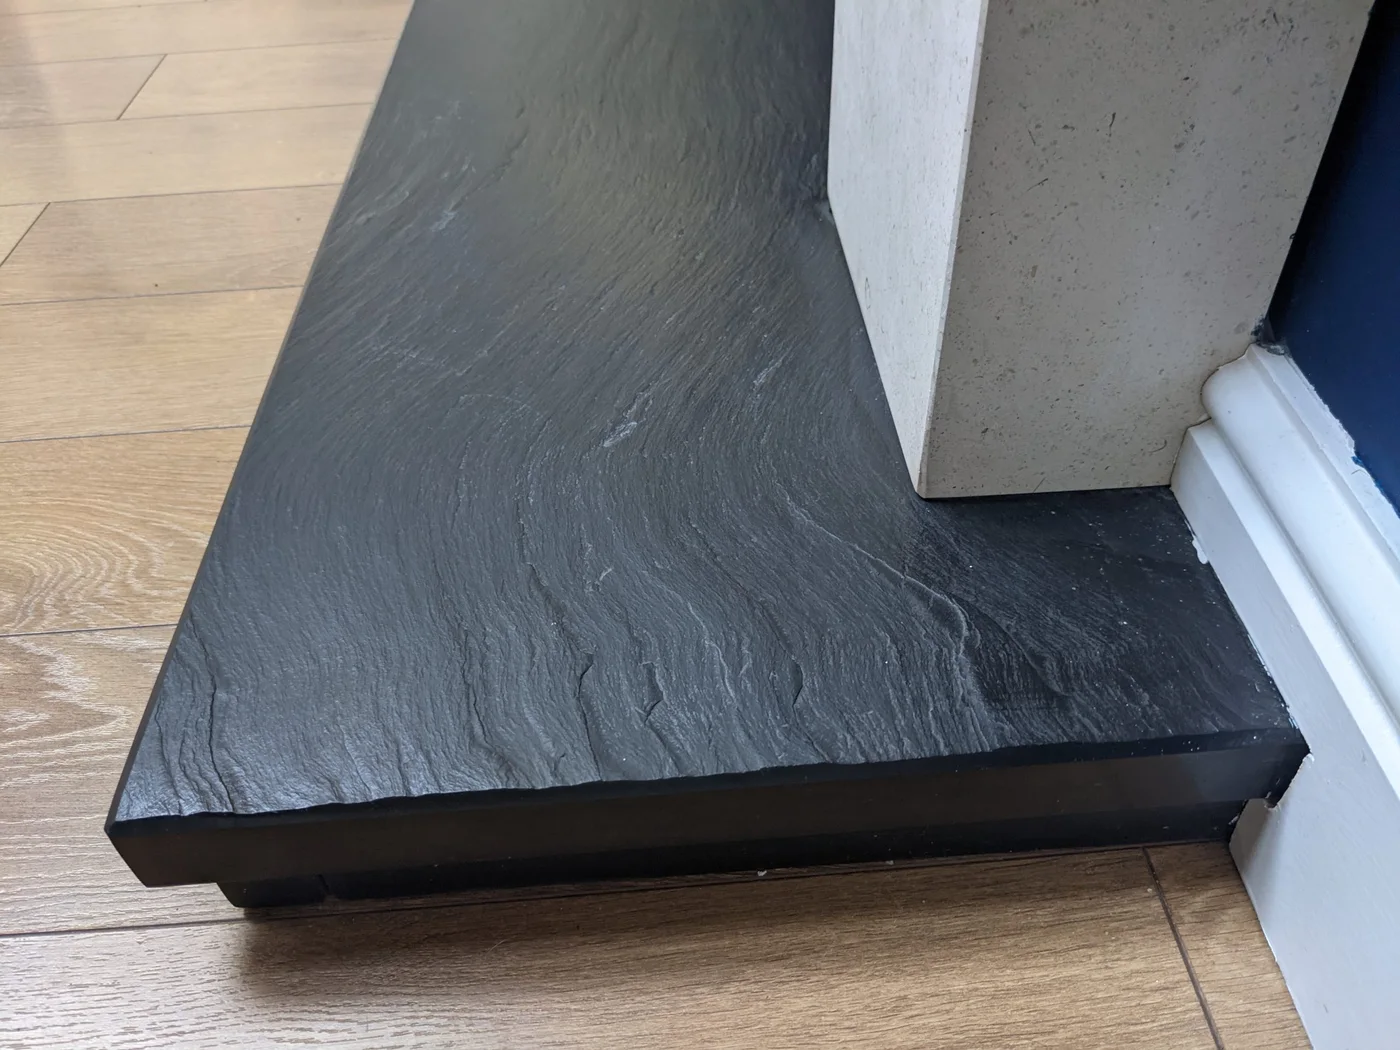
The close view shows slate against two different neighbors: the pale surround upright and the timber floor. Its darker raised front edge makes the change in level visible. Small junctions like these influence the finished appearance even when the wider fireplace arrangement is relatively simple.
Discuss the meeting between hearth, surround and flooring before either trade completes its work. The correct support, joints and allowance for the surrounding construction depend on the installation. Keep access for cleaning at the surround’s foot, and use care products appropriate to each confirmed material rather than one cleaner across all three surfaces.
IDEA 16 / 17
Coordinate a Two-Piece Hearth and Vent Opening
 SaveSupport Non AI Creator
Image credit: Manthorpe Slate
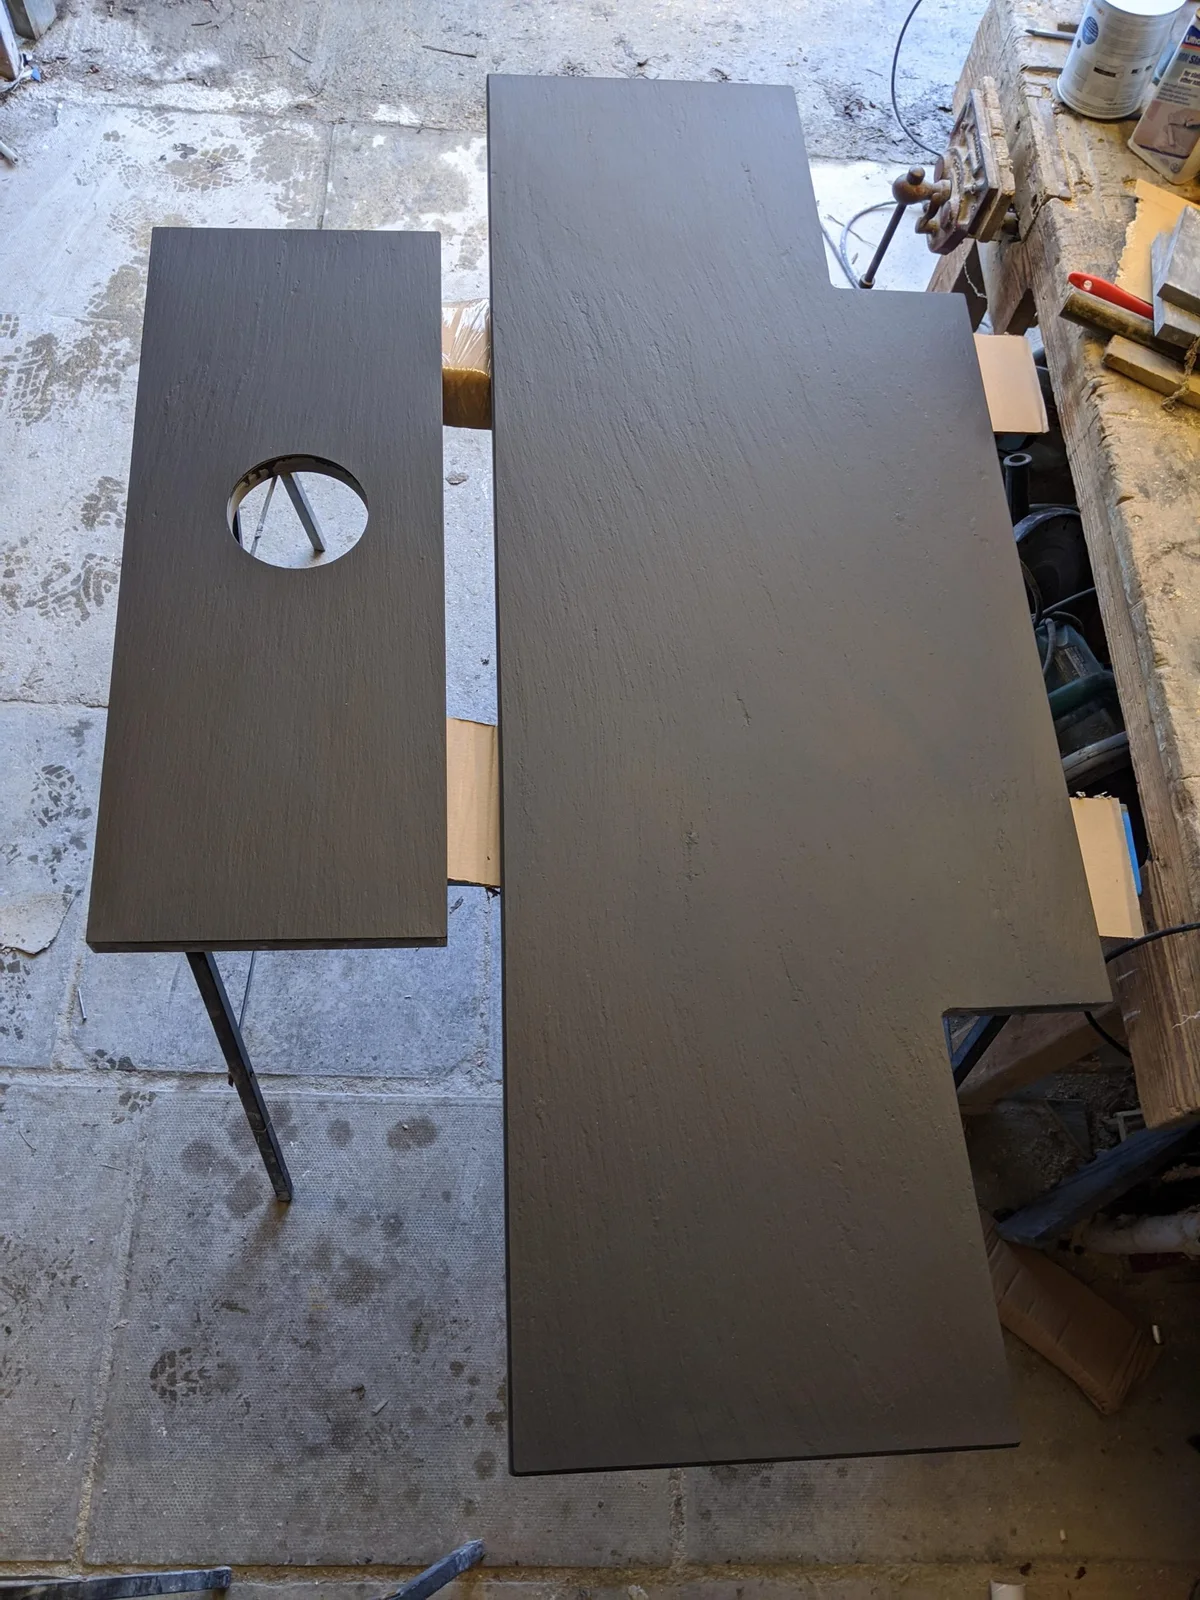
Separating the front and rear sections makes this hearth’s construction visible before installation. A circular cutout appears in the narrower piece, while the wider front section has a T-shaped outline. The photograph is a fabrication reference showing a planned opening, rather than a suggestion to cut an existing hearth at home.
Have the installer and fabricator agree any ventilation opening, joint positions and support before manufacture. A vent must connect with the intended system and remain unobstructed; its purpose cannot be established from appearance alone. Keep the approved drawing with the installation records so future flooring or appliance changes account for it.
IDEA 17 / 17
Take Slate up the Chimney Face
 SaveSupport Non AI Creator
Image credit: Mark Noble Designs
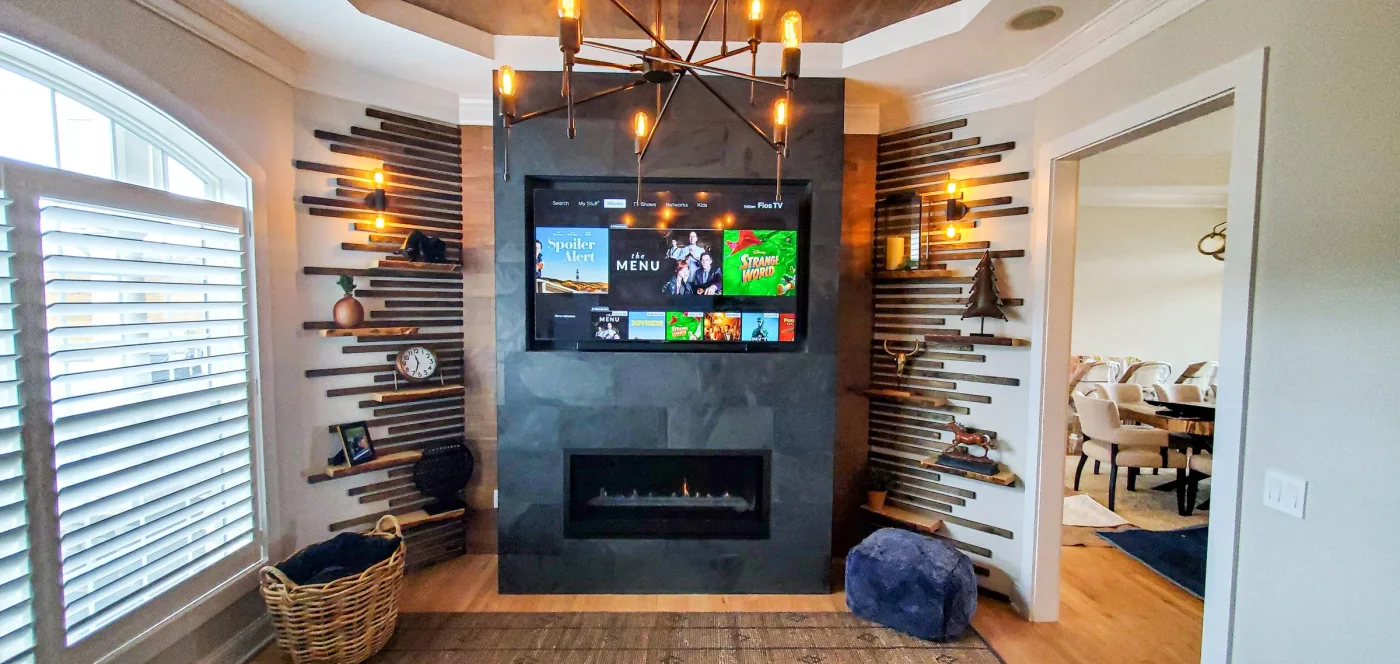
Rectangular slate pieces give the central chimney face varied dark tones and a more textured surface than the flat hearth examples. Timber slats and staggered shelves create lighter vertical areas at either side. The horizontal fire opening and television sit within the same central architectural feature.
Confirm the cladding system, backing and appliance requirements before planning a similar wall. Television placement needs its own assessment against heat and equipment guidance. Our living room accent wall ideas explore other ways to balance a strong central surface with nearby furniture; keep servicing access part of any fitted design.
BRING IT ALL TOGETHER
Choose the outline and the installation together
Begin with the appliance requirements and the measured room rather than choosing a slab by color alone. A template helps you see how a projecting front, curve or angled corner will meet the floor and walking routes. Agree support, joins, exposed edges and any ventilation provision before fabrication.
Compare physical samples of the proposed finish with the floor, lining and surround. A textured riven face and a smoother honed face can produce quite different effects under the same light. Keep the supplier’s care instructions with the installation information so cleaning and later changes suit the actual slate product.