Rustic style kitchens can be built around an existing timber cabinet, an irregular stone wall or just a few well-chosen practical details. The strongest texture does not need to cover every surface. Smooth counters, straightforward storage and enough working space help those more characterful pieces fit everyday cooking.
These photographs range from strongly textured rooms to smaller country-inspired additions. Look at the visible arrangement and the work involved in keeping it useful, rather than assuming every aged-looking item is an antique or every wood surface needs the same treatment. Start with the layout and appliances, then choose the details that suit them.
PART 01
Build around timber, stone and working surfaces
IDEA 01 / 18
Balance Rough Walls with Plain Green Cabinets
 SaveSupport Non AI Creator
Image credit: Photo: Simon Hurst Photography. From: Cornerstone Architects
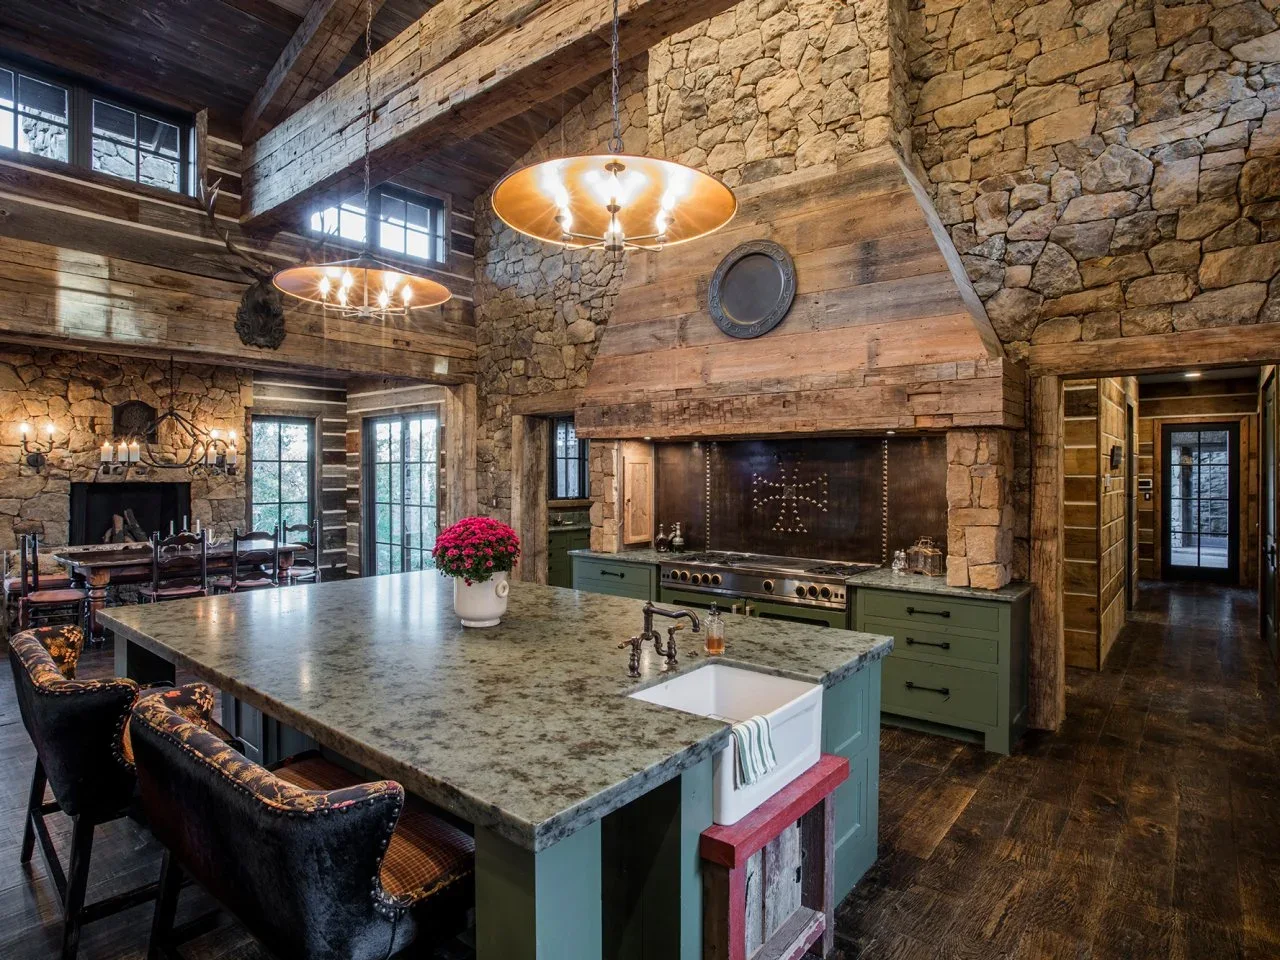
Rough stone and broad timber boards give this kitchen its strongest texture, while the green cabinet fronts provide a calmer surface below. The island repeats the green and introduces a pale patterned top. Upholstered stools make the gathering side feel different from the working range wall behind it.
Keep the most irregular surfaces away from places that need frequent scrubbing, or discuss a suitable protective finish with the installer. A timber hood surround needs a properly specified extraction system and appliance clearances. Plan access to filters before adding decorative cladding, and leave the island sink enough clear counter for everyday preparation.
IDEA 02 / 18
Give a Pale Kitchen One Strong Timber Counter
 SaveSupport Non AI Creator
Image credit: Photo: Marshall Evan. From: Dustin Gerken
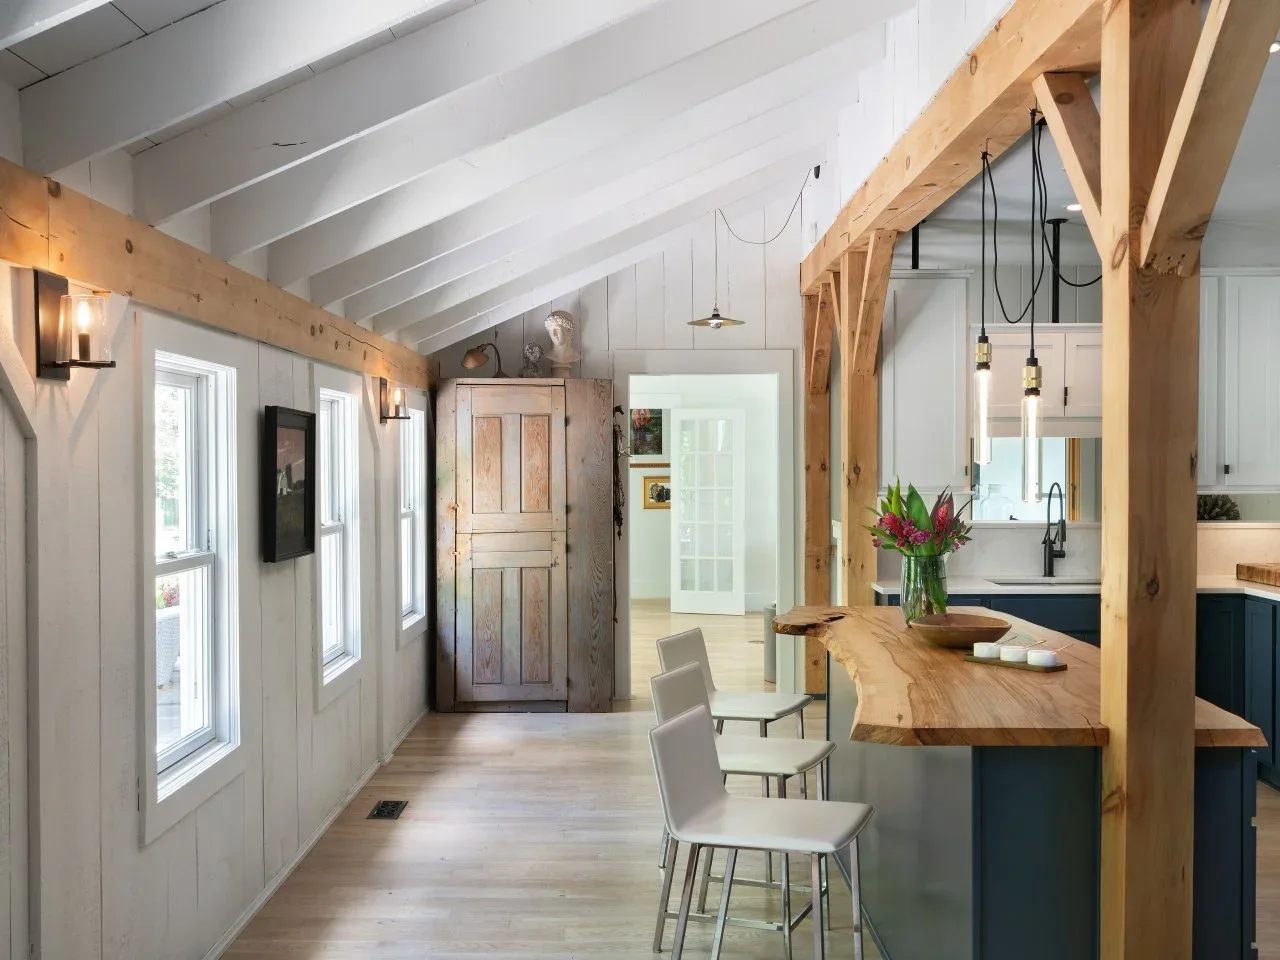
The uneven edge of the breakfast counter introduces a rustic shape against straight white boards and cabinetry. Exposed timber framing repeats its warm color higher in the room. Slim pale stools leave the counter edge visible, while the tall windows keep this narrow shared area connected to the outdoors.
Check that an irregular edge is comfortable where people sit and that the top is finished for its intended use. Confirm the support and overhang with the fabricator rather than copying a photograph. Keep the walking route behind occupied stools clear, and choose a finish whose cleaning and repair requirements suit daily meals.
IDEA 03 / 18
Use a Furniture-Shaped Island with Timber Cabinets
 SaveSupport Non AI Creator
Image credit: Photo: Katey Hamill
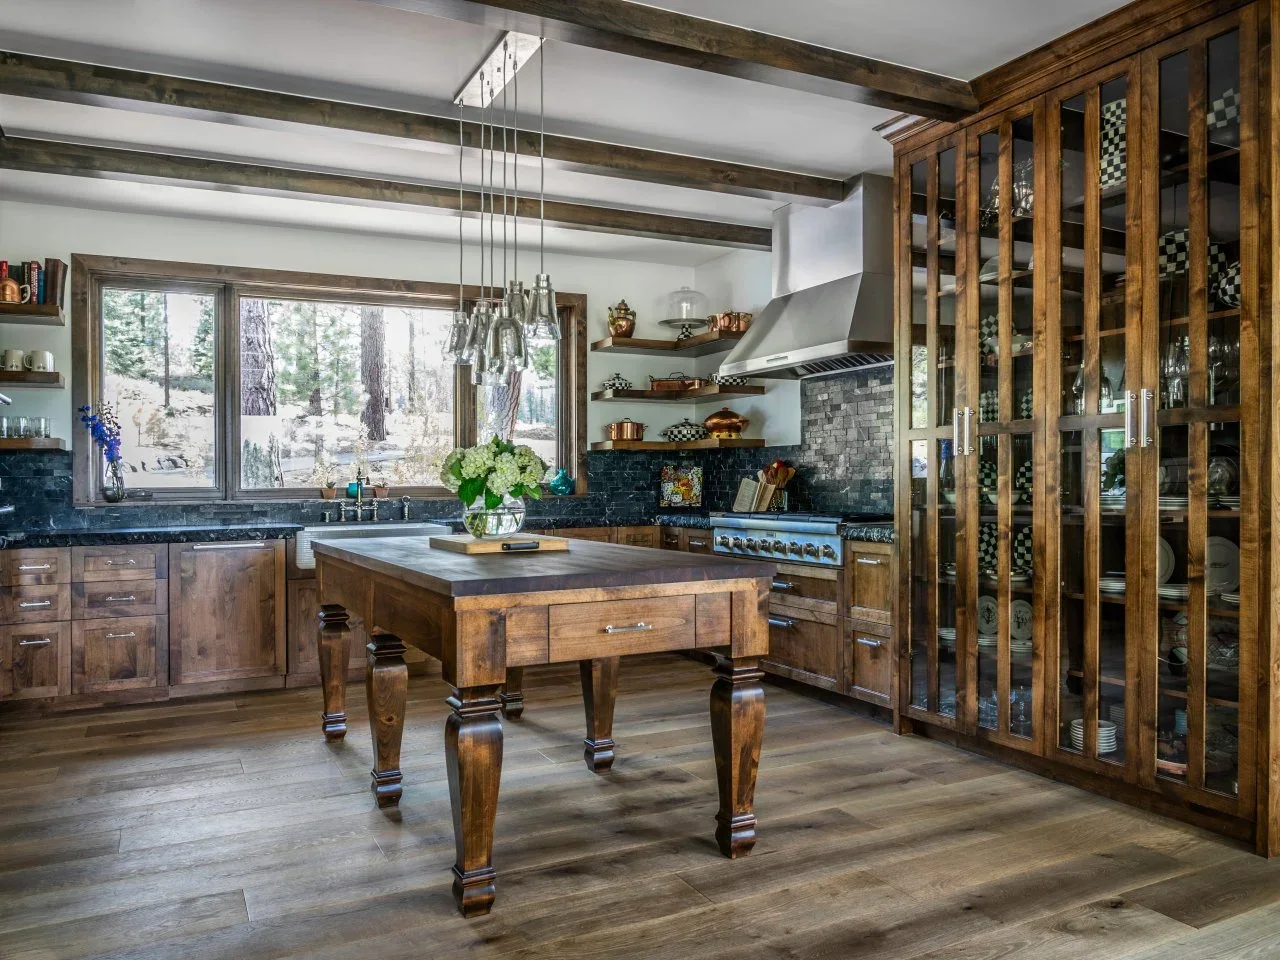
Turned legs and a deep drawer make the central island read like a substantial piece of furniture. Timber doors, window frames and ceiling beams connect it with the rest of the kitchen. Dark backsplash tiles give the perimeter a more continuous line beneath shelves and the broad metal extractor.
An island without a solid cabinet base still needs practical storage and comfortable working height. Check the open leg positions against your route and any seating you plan to add. Compare wood finishes together in daylight, and keep enough contrast between counters and cabinets to distinguish their edges when preparing food.
IDEA 04 / 18
Pair Blue Cabinets with a Working Wood Top
 SaveSupport Non AI Creator
Image credit: Photo: Robert Peterson; Rustic White Photography. From: Tiffany Brooks
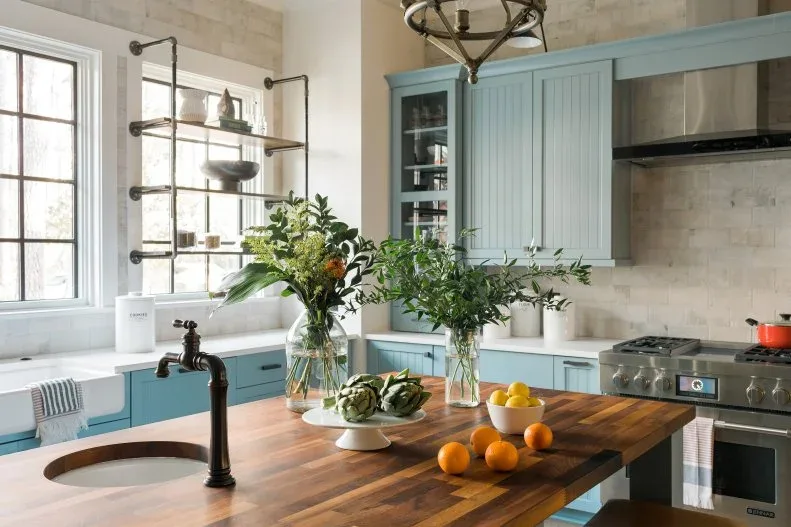
A richly striped wood top supplies warmth beside the pale blue cabinetry. The island sink makes the surface useful for preparation, while glass cabinet doors and pipe-supported shelves offer different kinds of storage. The dark tap and shelf brackets repeat a small accent without making every fitting identical.
Wood around a sink needs particular attention to the cutout, joints and finish. Ask how the chosen top should be cleaned and renewed, wipe up standing water promptly and use a separate cutting board. Leave preparation space clear of tall arrangements, especially if the island is also where other people sit or help cook.
IDEA 05 / 18
Keep Exposed Brick Visible behind a Simple Sink
 SaveSupport Non AI Creator
Image credit: Photo: Rustic White Interiors
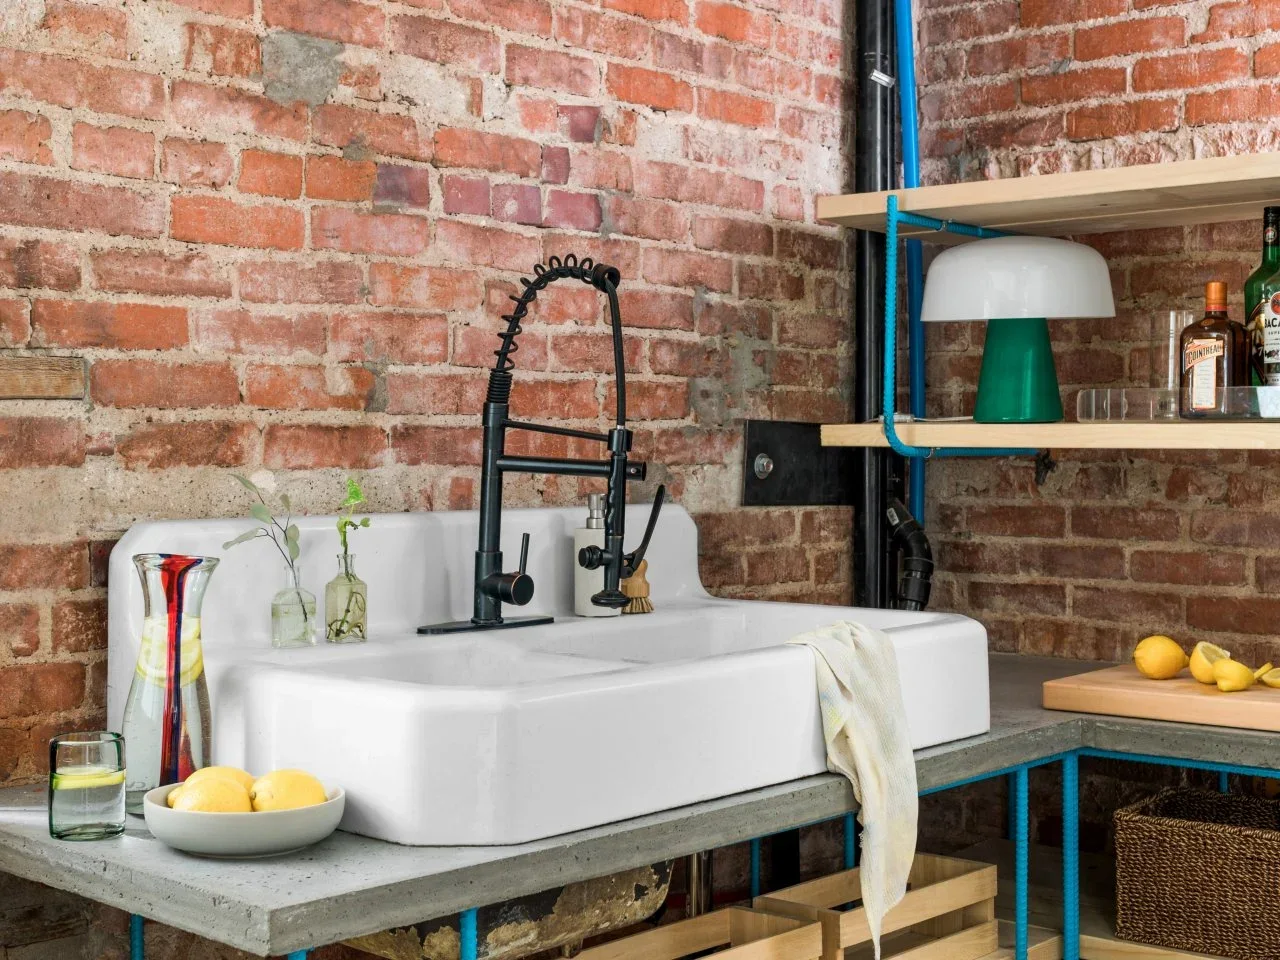
The open sink stand leaves the brick wall visible instead of covering it with a full row of cabinets. Timber shelves and crates give the arrangement a practical, workshop-like character. A dark spring-style tap adds another clear outline, while the white sink separates the busy wall from the work surface.
Check the condition and cleanability of exposed brick near a wet area before deciding to leave it uncovered. A salvaged sink needs suitable support, compatible plumbing and a sound surface; appearance alone cannot establish its condition. Keep electrical lamps and cables appropriately separated from splashes, and make lower baskets easy to remove for cleaning.
PART 02
Balance fitted storage with warm details
IDEA 06 / 18
Put Everyday Dishes on Substantial Open Shelves
 SaveSupport Non AI Creator
Image credit: Photo: Carter Kay. From: Carter Kay
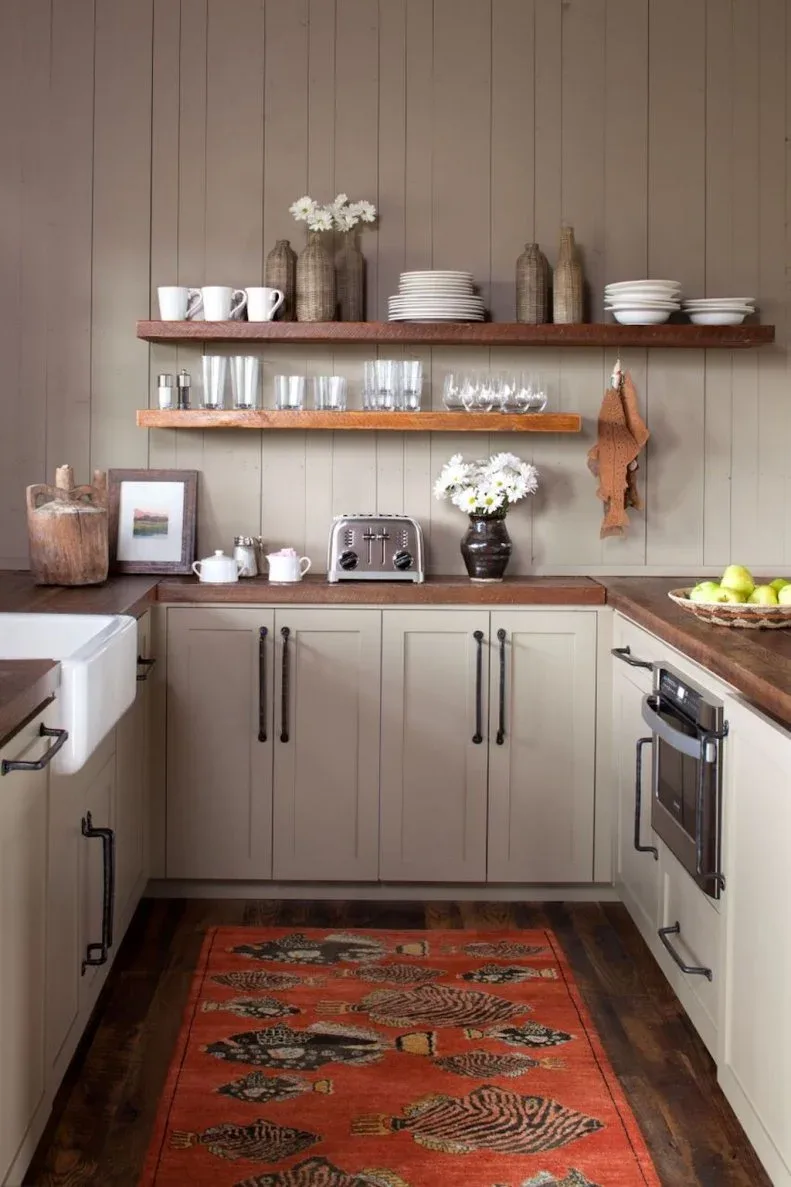
Thick timber shelves repeat the counter’s color, connecting the upper display with the lower cabinets. White plates, mugs and clear glasses form useful groups rather than a wall of unrelated ornaments. Vertical boards behind the shelves add another restrained texture, with dark handles giving the pale doors a stronger outline.
Store frequently used dishes within comfortable reach and check both shelf fixings and the wall for the intended load. Open storage collects cooking residue, so reserve the highest positions for objects you can safely lift down to clean. Leave appliance ventilation clear; a toaster should only operate with the clearances required by its instructions.
IDEA 07 / 18
Soften White Cabinets with Timber and Woven Seats
 SaveSupport Non AI Creator
Image credit: Photo: Raquel Langworthy. From: Karen B Wolf Interiors
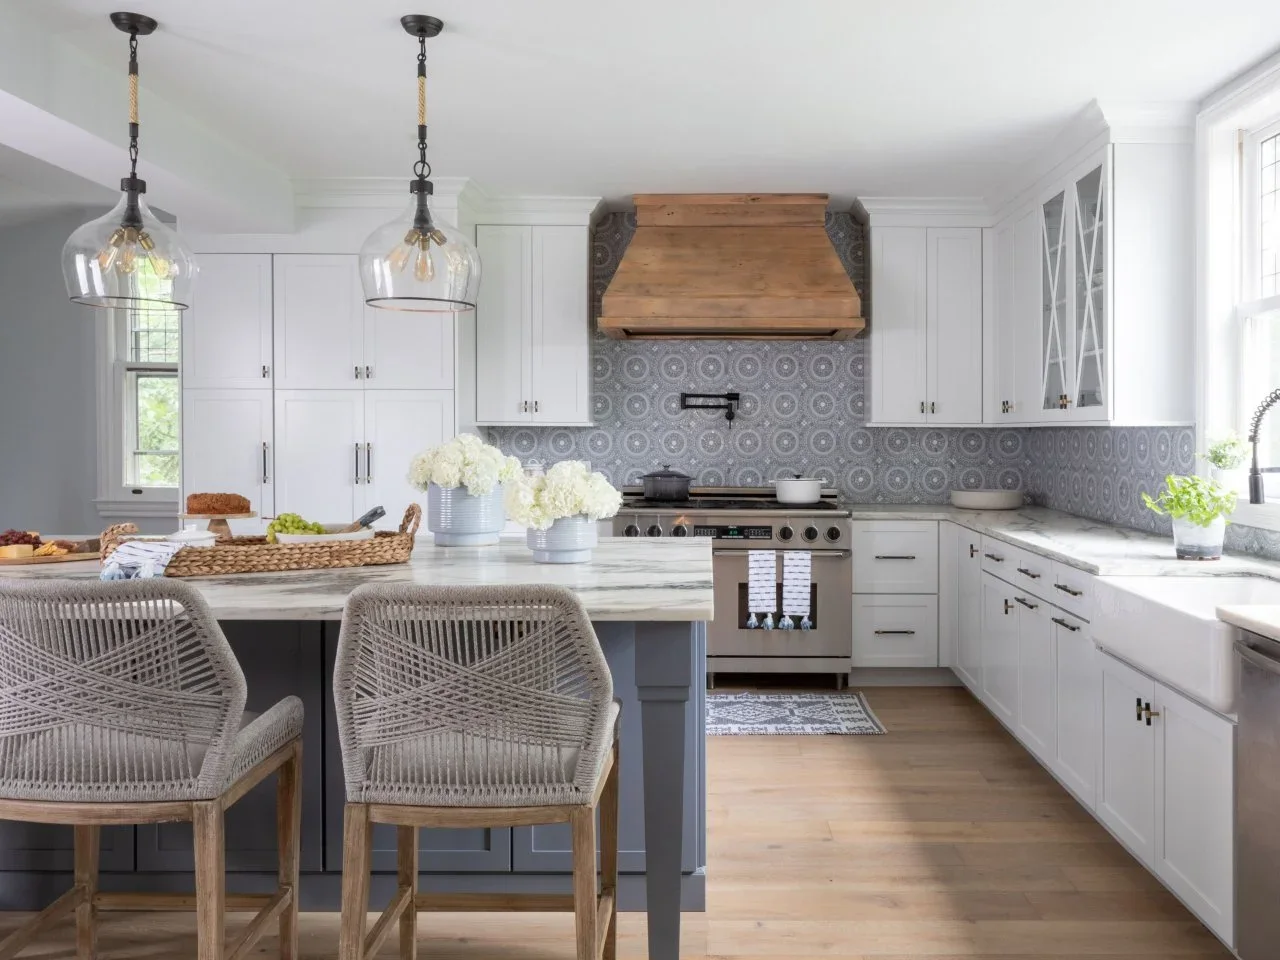
The timber hood supplies a warm focal point within a mostly white kitchen. Woven stools repeat that softer texture at the island, while the patterned backsplash creates a defined cooking zone. Gray on the island links with the tile, so the room can include several textures without relying on several strong colors.
Test the tile pattern beside the actual wood and cabinet samples before ordering. Our white kitchen tile ideas compare quieter and more patterned options. Woven seats can catch crumbs, so check how their material should be cleaned, and keep pendant positions clear of the sightline between people seated and working at the island.
IDEA 08 / 18
Make a Wood Hood the Main Rustic Accent
 SaveSupport Non AI Creator
Image credit: Photo: Austin Lineberry, New River Building Co.
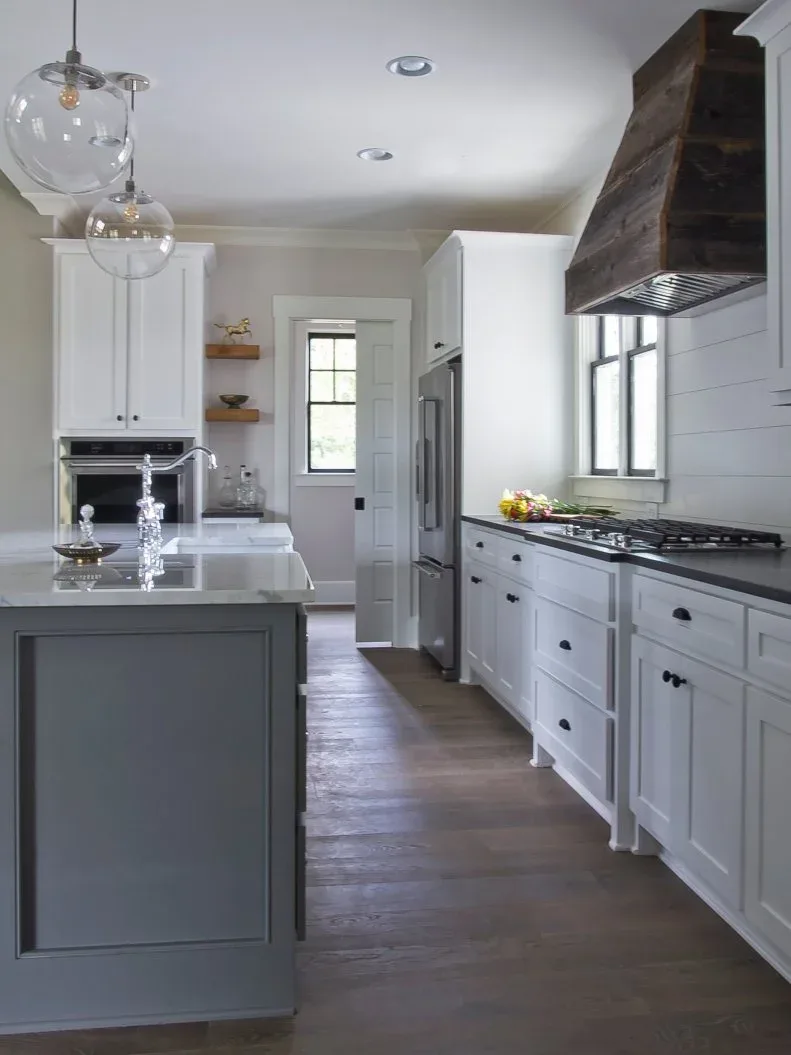
A dark timber hood stands out against the white boards and cabinet fronts, giving the cooking wall one clear rustic detail. Black counters and handles repeat its darker outline lower down. Two small timber shelves add warmth at the far end without turning the entire wall into open storage.
Choose the extraction unit and installation requirements before designing the outer surround. Decorative timber must meet the specified clearances and allow access for maintenance. If the rest of the kitchen is staying, compare the new hood finish against existing flooring and doors so its color feels deliberate rather than an isolated sample.
IDEA 09 / 18
Repeat a Timber Hood in Smaller Shelf Details
 SaveSupport Non AI Creator
Image credit: Photo: Lowes
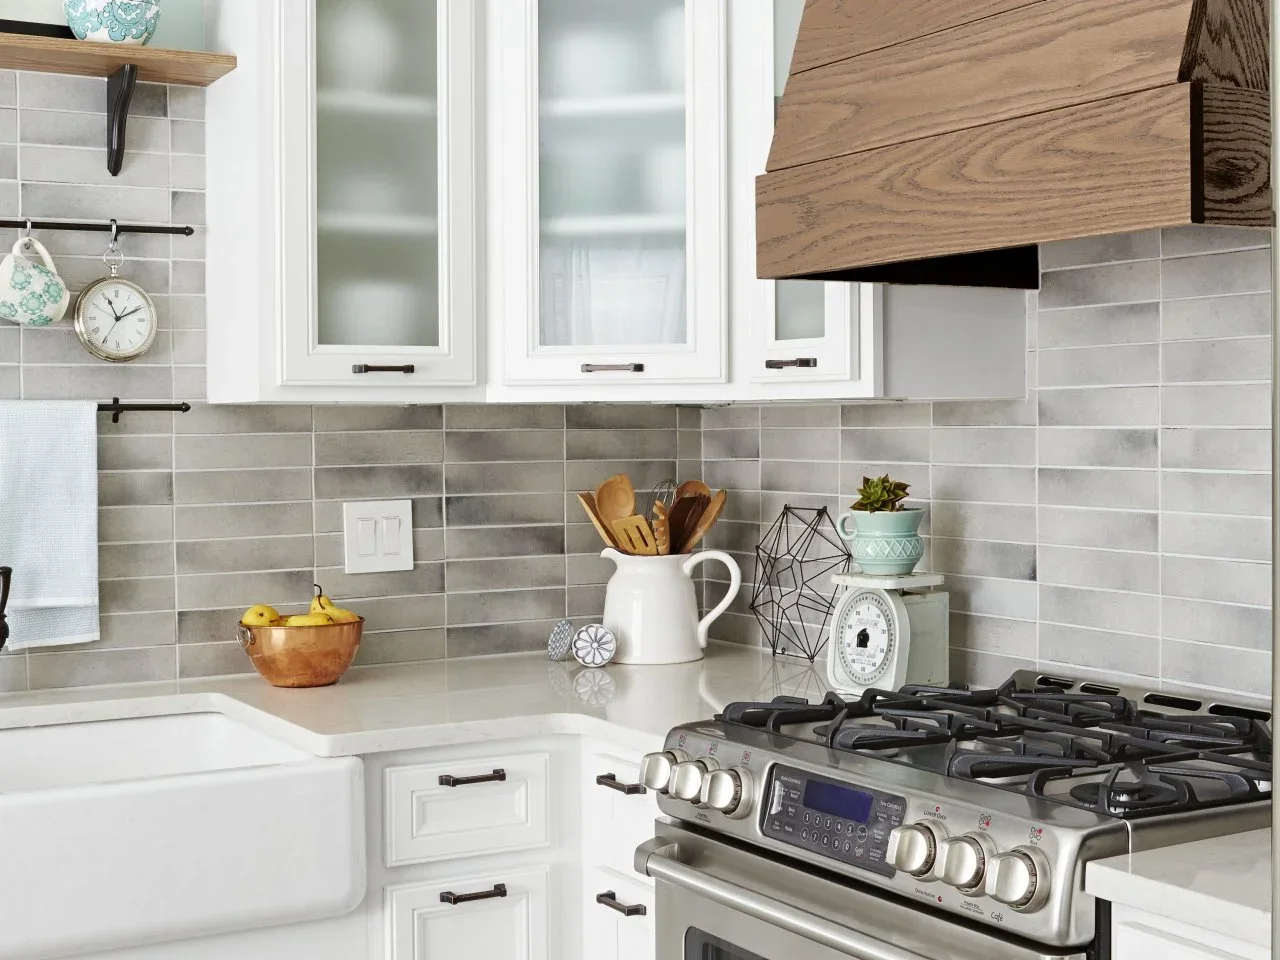
Visible wood grain gives this hood a different character from the smooth white doors around it. A smaller shelf repeats the timber tone on the adjacent wall. Gray tiles connect the two areas, while dark rails and slim handles add a restrained outline beneath the lighter cabinetry.
A decorative hood cover is part of an appliance installation, so confirm the enclosure, heat clearances and service access with the relevant installer. Keep the counter beside the burners available for safe cooking rather than copying every staged object. Use shelf and rail fixings suitable for their loads, and place hanging items where they will not interfere with the cooking area.
IDEA 10 / 18
Combine Warm Wood Doors with Pale Work Surfaces
 SaveSupport Non AI Creator
Image credit: Photo: Terracotta Design Build. From: Terracotta Design Build
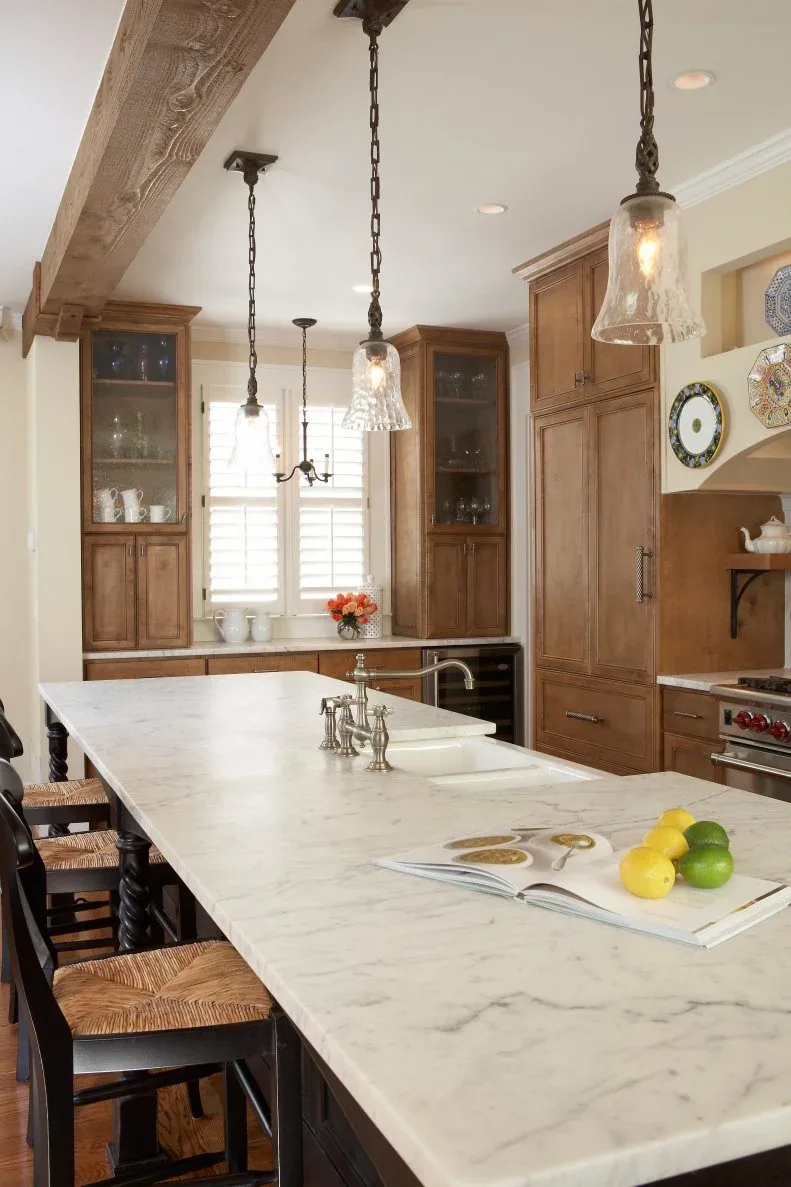
Warm timber fronts create the country character here, while pale counters keep the large island visually distinct. Textured glass breaks up the tall storage on either side of the window. Woven stool seats and a visible beam introduce quieter rustic details within an otherwise carefully fitted traditional kitchen.
Use samples to compare the cabinet finish with the room’s existing timber rather than expecting several wood tones to match perfectly. Plan drawers and appliance access around the island sink and seating. Glass doors soften the view of stored dishes but do not eliminate it, so choose their transparency around what the cupboards actually hold.
PART 03
Add collected character around everyday activities
IDEA 11 / 18
Work a Plate Rack into the Sink Wall
 SaveSupport Non AI Creator
Image credit: Photo: Susan Sully
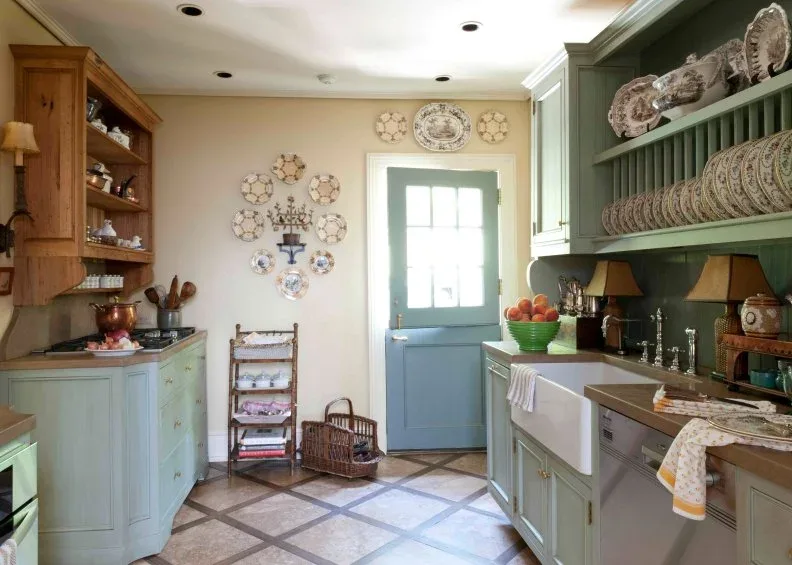
The green plate rack turns a collection of dishes into part of the fitted storage above the sink. Timber cupboards on the opposite side keep the room from becoming entirely painted. Plates arranged around the blue door extend the collected character beyond the cabinetry without needing another piece of furniture.
Check plate sizes and rack spacing before commissioning storage, and keep frequently used pieces within a comfortable reach. Secure decorative plates with suitable fittings rather than balancing them near door movement. Make sure lamps, leads and outlets suit the wet-area location, and leave the counter available for drying and setting down dishes.
IDEA 12 / 18
Let Bright Cabinets Live with Rough Timber
 SaveSupport Non AI Creator
Image credit: Photo: Susan Sully
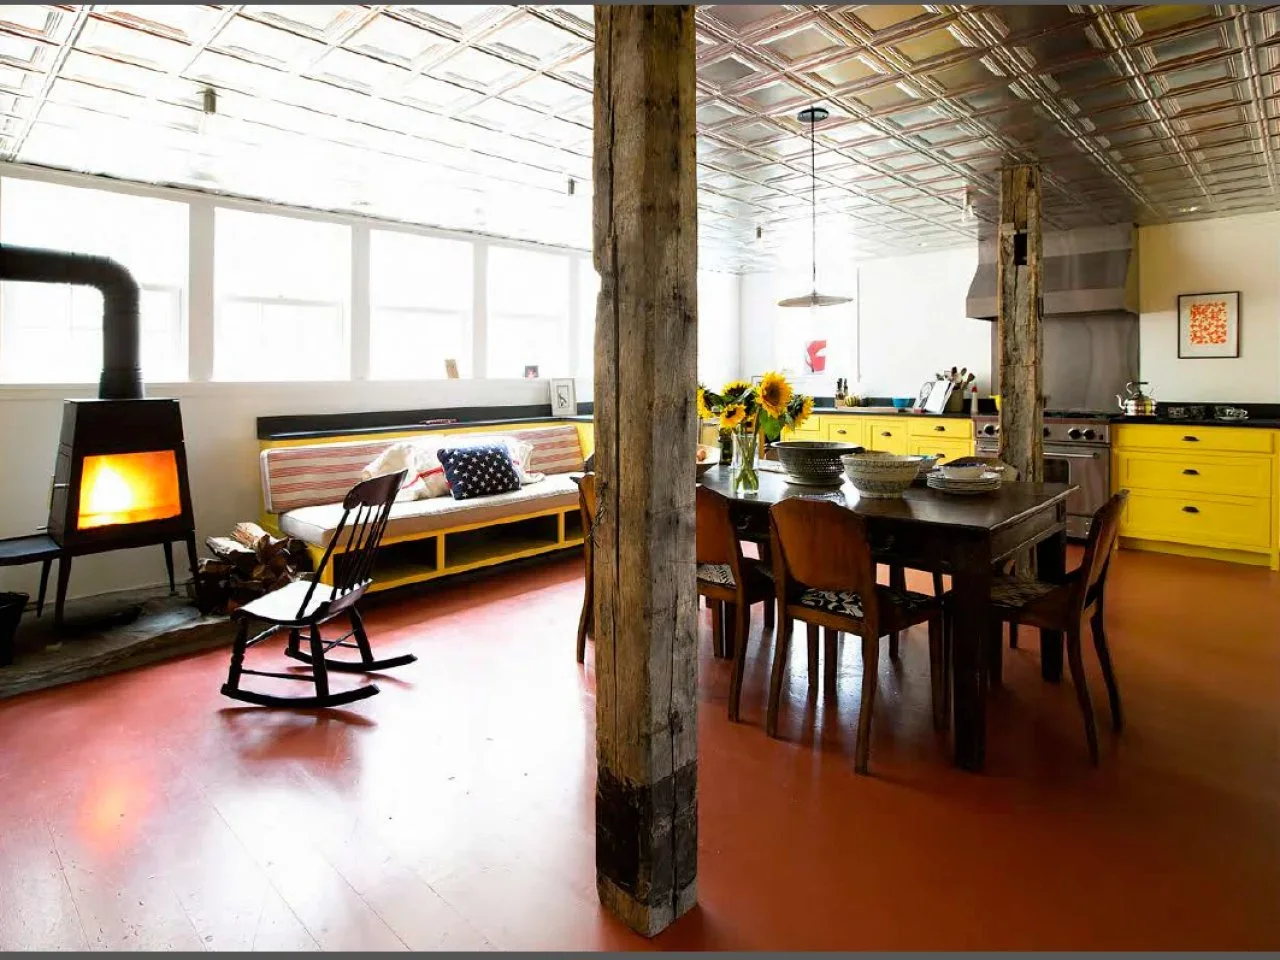
Yellow cabinets make this open kitchen cheerful without concealing its rough timber posts. A dining table occupies the center rather than a second fitted island, leaving the kitchen and eating area easy to read. The pale patterned ceiling and high glazing introduce a lighter layer above the darker furniture.
Check chair movement and appliance-door openings before replacing an island with a dining table. Our open-plan kitchen living room ideas show other ways to connect shared activities. Any change to structural posts needs appropriate professional assessment, and furniture, stored logs and fabrics must remain beyond the stove’s required clearances when it is used.
IDEA 13 / 18
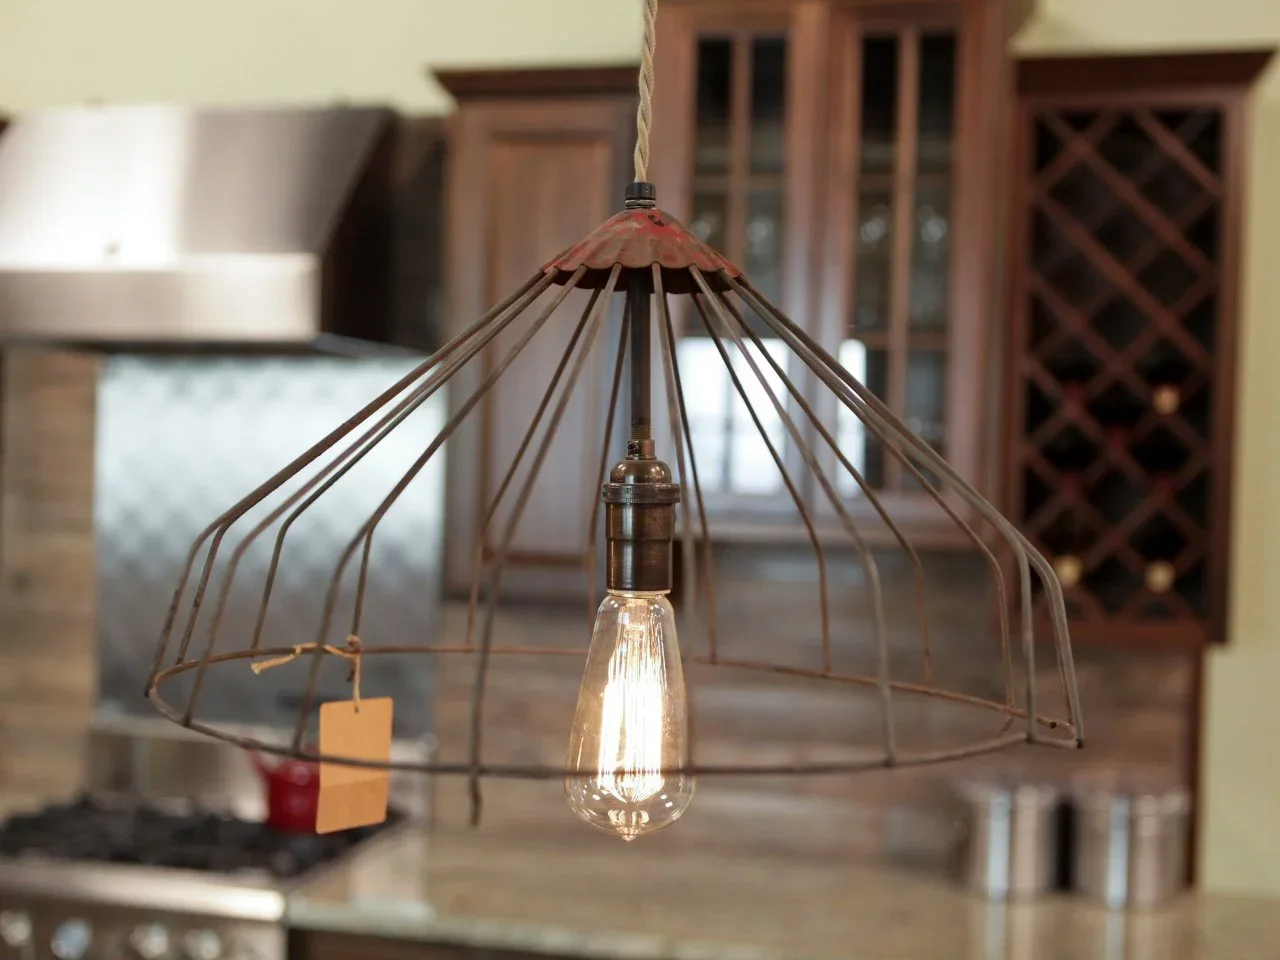
Choose an Open Metal Shade for a Smaller Detail
 SaveSupport Non AI Creator
Source: www.hgtv.com
The open metal shade introduces a leaner texture against the timber kitchen behind it. Its outline remains visible without becoming a solid block over the counter. A single exposed lamp gives the fitting a workshop character, showing how one smaller detail can contribute to a rustic room.
Use a properly rated light fitting intended for the location rather than improvising wiring with a decorative object. Check glare from both seated and standing positions before choosing an exposed bulb. An open frame is easy to see through but still needs dusting, and the hanging height should suit the work or dining surface below.
IDEA 14 / 18
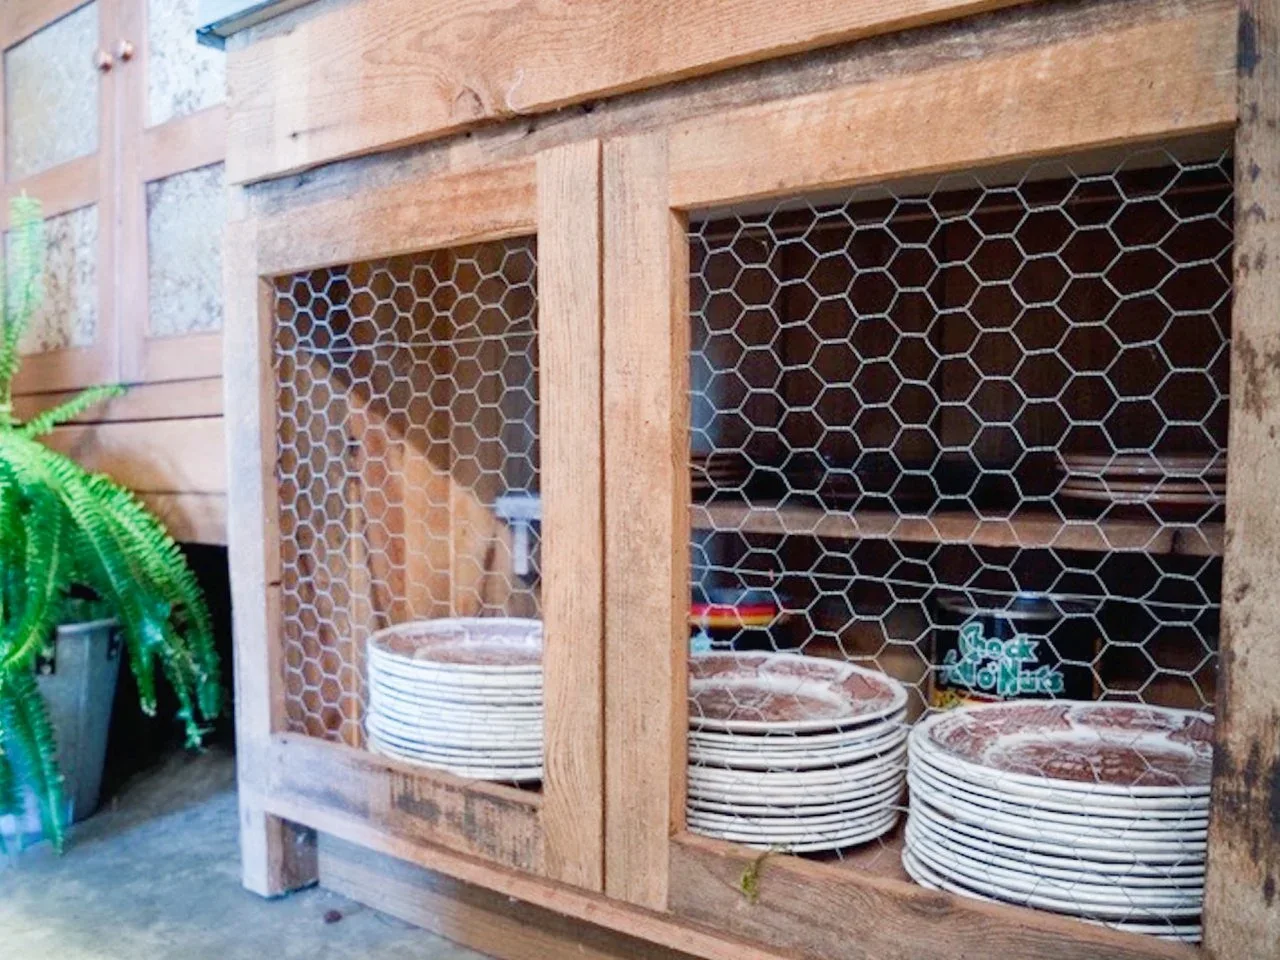
Try Mesh Doors on a Freestanding Dish Cabinet
 SaveSupport Non AI Creator
Image credit: Photo: THRASHERphoto/Athens Building Co.
Wire mesh keeps the stacks of plates visible while giving the cabinet a more informal character than glazed doors. The thick timber frame supplies a substantial outline around the lighter openings. This is a useful detail for a freestanding storage piece when a full kitchen renovation is unnecessary.
Mesh does not seal out dust, so choose this approach for dishes you use and clean regularly. Check edges, fixings and door catches carefully, especially in a busy household. Secure tall or heavy furniture appropriately and confirm that shelves can carry the dish load; distressed appearance says nothing about the cabinet’s structural condition.
PART 04
Make smaller rustic storage pieces earn their space
IDEA 15 / 18
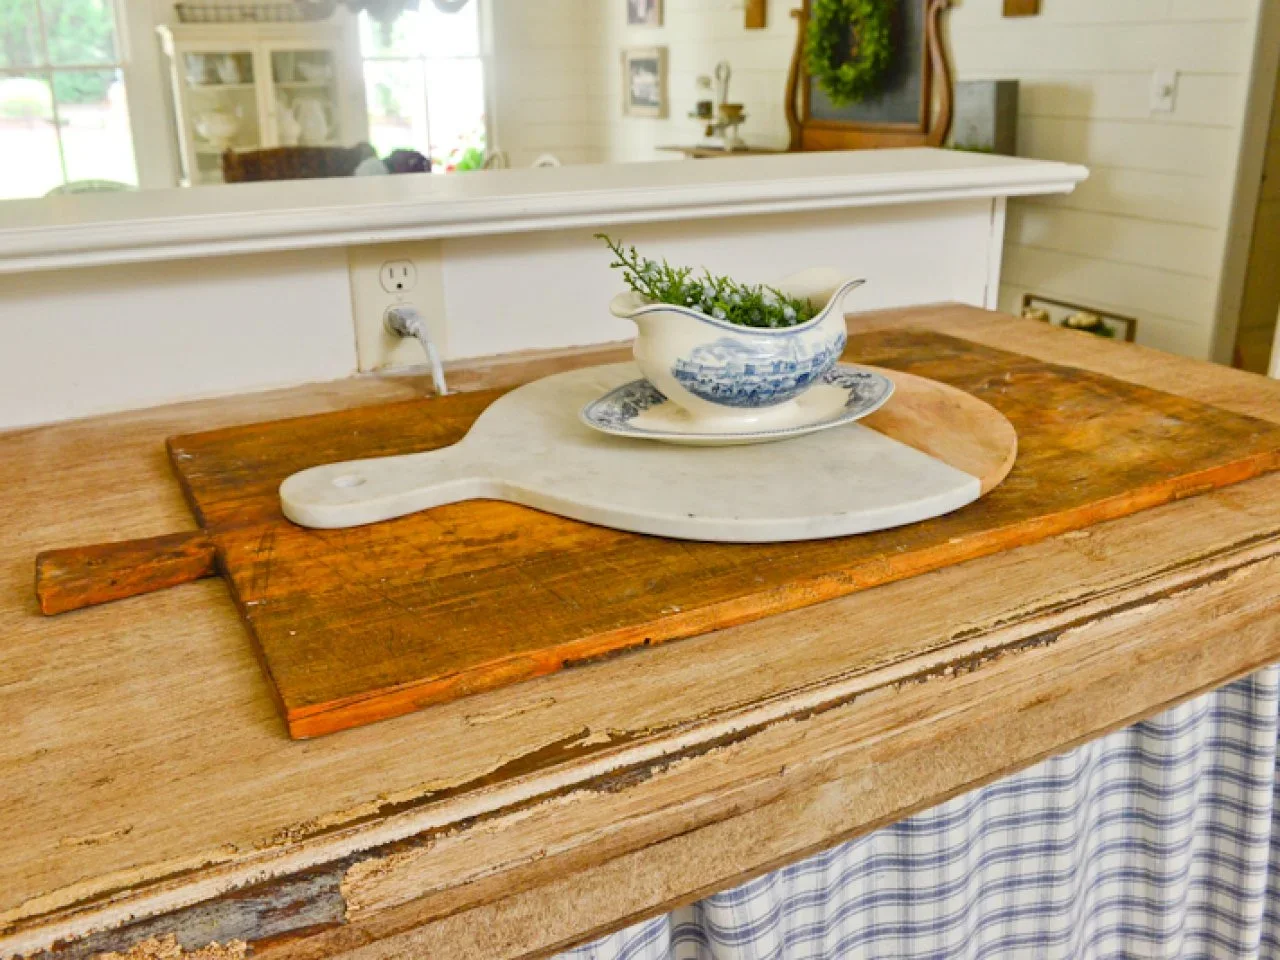
Use an Aged Cabinet as a Separate Storage Piece
 SaveSupport Non AI Creator
Image credit: Photo: Christopher Oquendo
Worn timber and a checked curtain create a softer storage detail than a row of matching cabinet doors. Layered boards provide a background for a small blue-and-white jug. The pale partition behind the piece keeps the darker, irregular surface distinct, making the cabinet read as an individual addition to the kitchen.
Check an older piece for stability, surface condition and an appropriate finish before putting it into kitchen use. Do not assume worn paint or timber is suitable for food contact. If appliances are stored behind a curtain, pull them out to a suitable ventilated working position before use and keep fabric clear of heat and moving parts.
IDEA 16 / 18
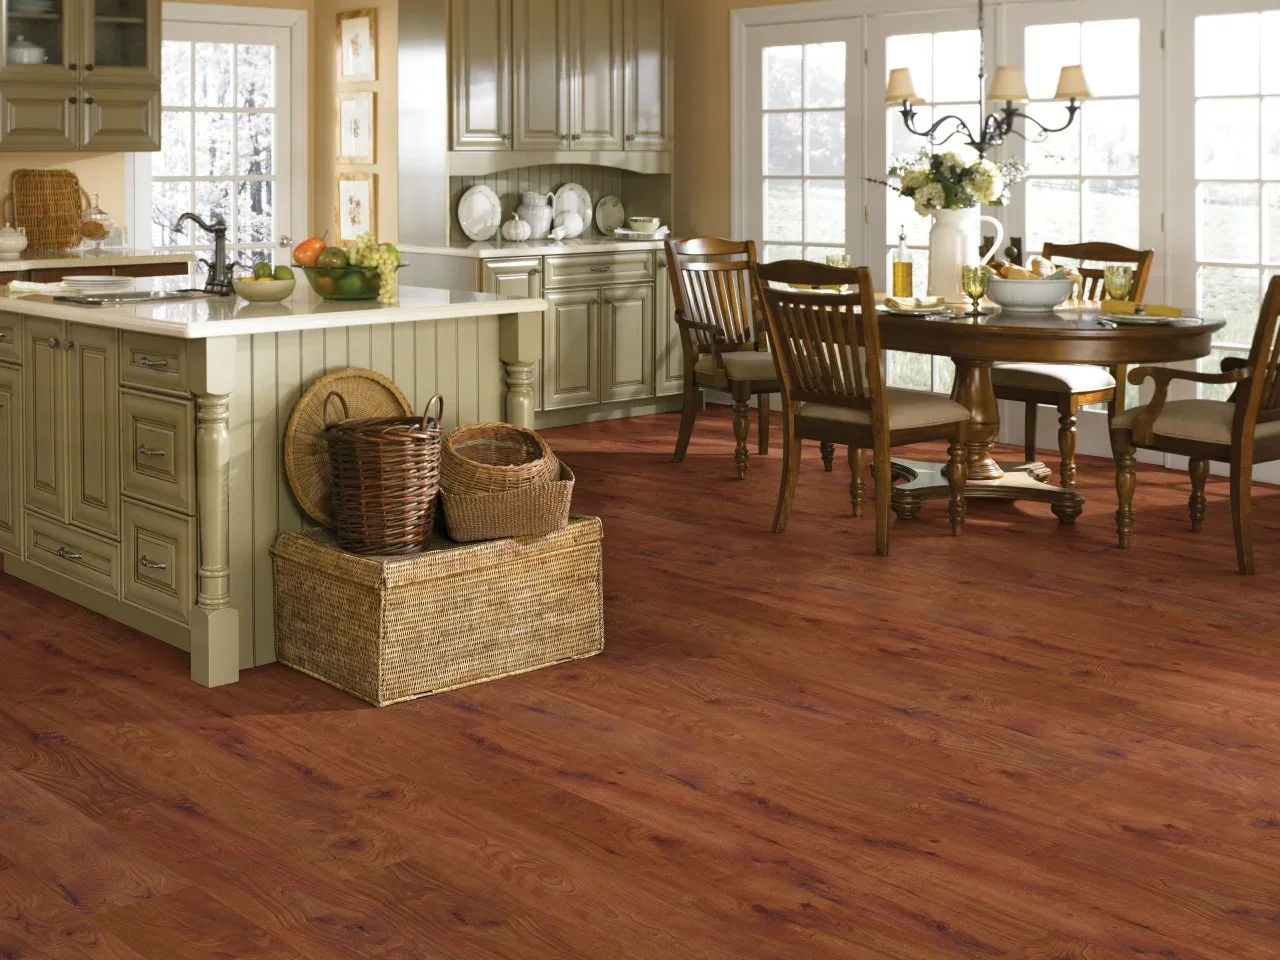
Bring Woven Storage to a Traditional Island
 SaveSupport Non AI Creator
Image credit: Photo: Moda Floors and Interiors
Baskets introduce a rougher woven texture beside the smooth paneled island and formal timber dining table. Their different shapes make the grouping feel collected, while their related color connects with the floor and chairs. The fitted cabinets remain the room’s main storage, leaving the baskets as a smaller rustic addition.
Give each basket a purpose before placing it on the floor. Store light items you can lift out easily, and avoid stacking pieces where they obstruct the island end or chair movement. Keep open baskets away from cooking splashes, and check their bases regularly so trapped crumbs or moisture do not go unnoticed.
IDEA 17 / 18
Organize Daily Dishes in a Divided Crate
 SaveSupport Non AI Creator
Image credit: Photo: Crates & Pallet
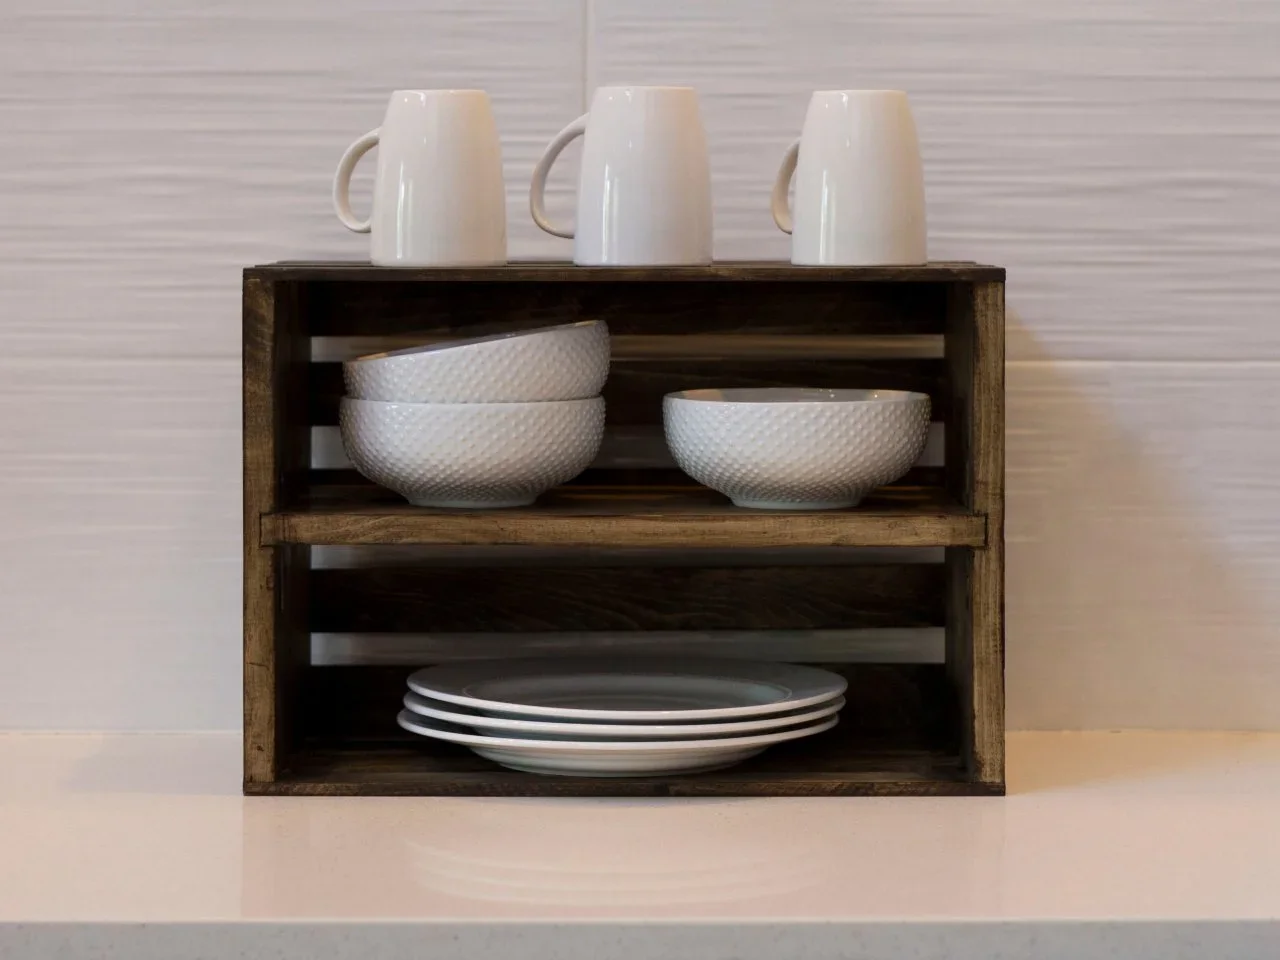
A divided crate separates plates from bowls within one compact counter arrangement. The dark timber gives the pale dishes a clear background, while the open front makes the contents easy to identify. Mugs on top use another surface, showing both the appeal and the capacity limits of this small storage idea.
Choose a sound crate with an appropriate finish, smooth edges and shelves rated for the weight of the dishes. Check that it sits securely and cannot tip when a plate is removed. Keep the surrounding counter easy to wipe, and avoid using mystery packing timber or damaged containers for storage around food preparation.
IDEA 18 / 18
Keep Produce Bins Easy to Lift and Clean
 SaveSupport Non AI Creator
Image credit: Photo: Crates & Pallet
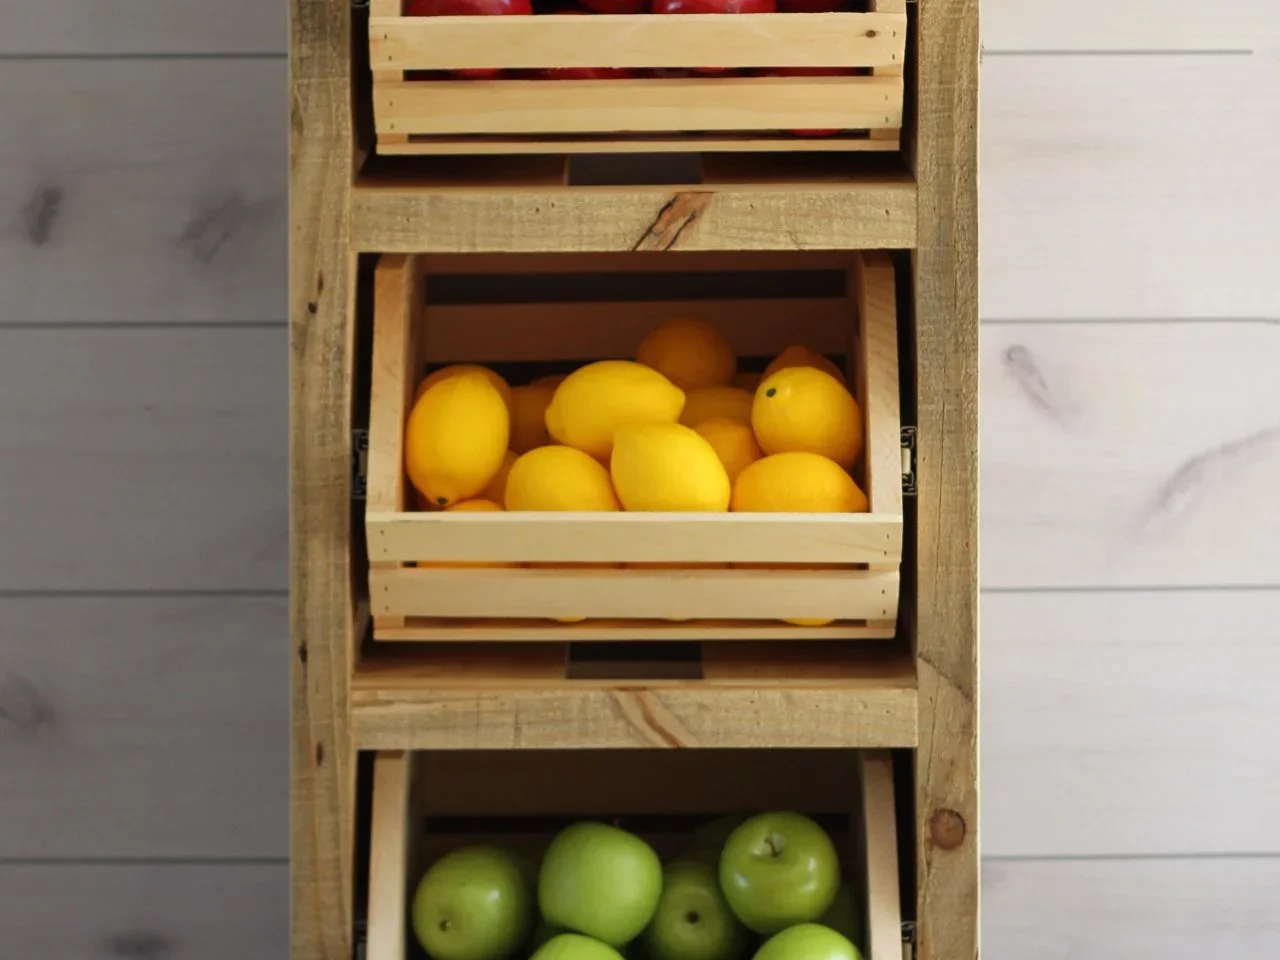
Separate timber bins make different kinds of produce easy to identify without piling everything into one deep basket. The lighter crates stand out against the rougher outer frame, adding texture to an otherwise pale kitchen setting. Open fronts also make it easier to see when a bin needs attention.
Use clean containers suitable for the intended storage and make sure each bin can be removed without pulling the whole unit forward. Inspect produce regularly and clean away spills rather than allowing moisture to remain in the timber. Place the stand away from heat and direct sun, and preserve access to nearby drawers and doors.
BRING IT ALL TOGETHER
Choose texture you can live with
Begin with the parts of the kitchen you use most: the sink, preparation counter, cooking area and routes to storage. Keep those functions easy to reach and clean before adding more exposed shelves, baskets or decorative objects. A single timber cabinet or well-positioned hood can provide enough character for a simpler room.
Ask how each proposed finish handles water, grease and routine cleaning. Check older furniture before adapting it, and use qualified help for extraction, electrical work and structural changes. The most useful rustic details keep their character while supporting the way the household actually cooks and eats.