A useful laundry room needs somewhere for clothes to go before and after the wash. A counter, a drying area and a place for baskets often make a bigger difference than extra decoration. Start by noticing where the piles form and which part of the routine currently takes up space elsewhere in the house.
These real project photographs show different ways to arrange those tasks. Choose ideas that fit your appliances and available floor space, and check installation requirements before enclosing, raising or stacking machines. Keep cleaning products in their labeled packaging and safely stored, and leave the access needed for maintenance.
PART 01
Arrange the Main Work Areas
IDEA 01 / 20
Put the Sink Opposite the Machines
 SaveSupport Non AI Creator
Image credit: Project: Maison Birmingham (via Houzz)
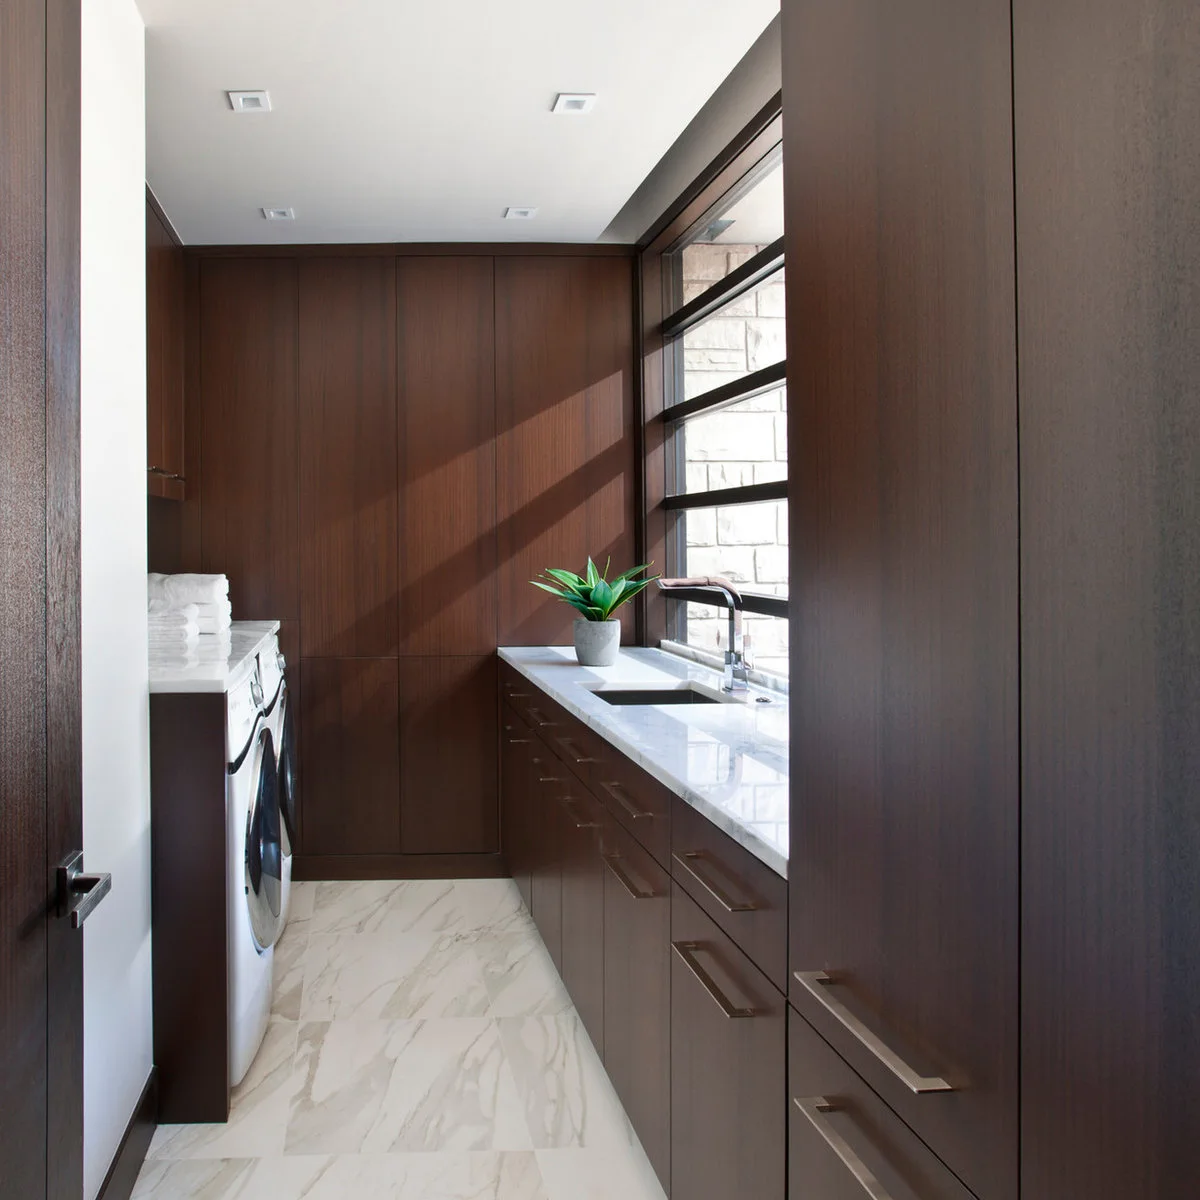
Dark wood cabinets line both sides of this narrow room, with the appliances beneath the left counter and a sink on the right. The window keeps the end of the room light. Separating the wet task from the machine counter creates two distinct places to work.
Check the aisle with appliance and cabinet doors fully open before choosing a galley arrangement. You need room to load a basket without blocking the exit. Keep the counter opposite the machines available for sorting, rather than filling both sides with containers that have no regular purpose. For clean towels and bedding, these linen closet organization ideas compare shelf spacing, labeled baskets and pullout storage.
IDEA 02 / 20
Leave Parking Spaces for Rolling Hampers
 SaveSupport Non AI Creator
Image credit: Project: Divine Custom Homes (via Houzz)
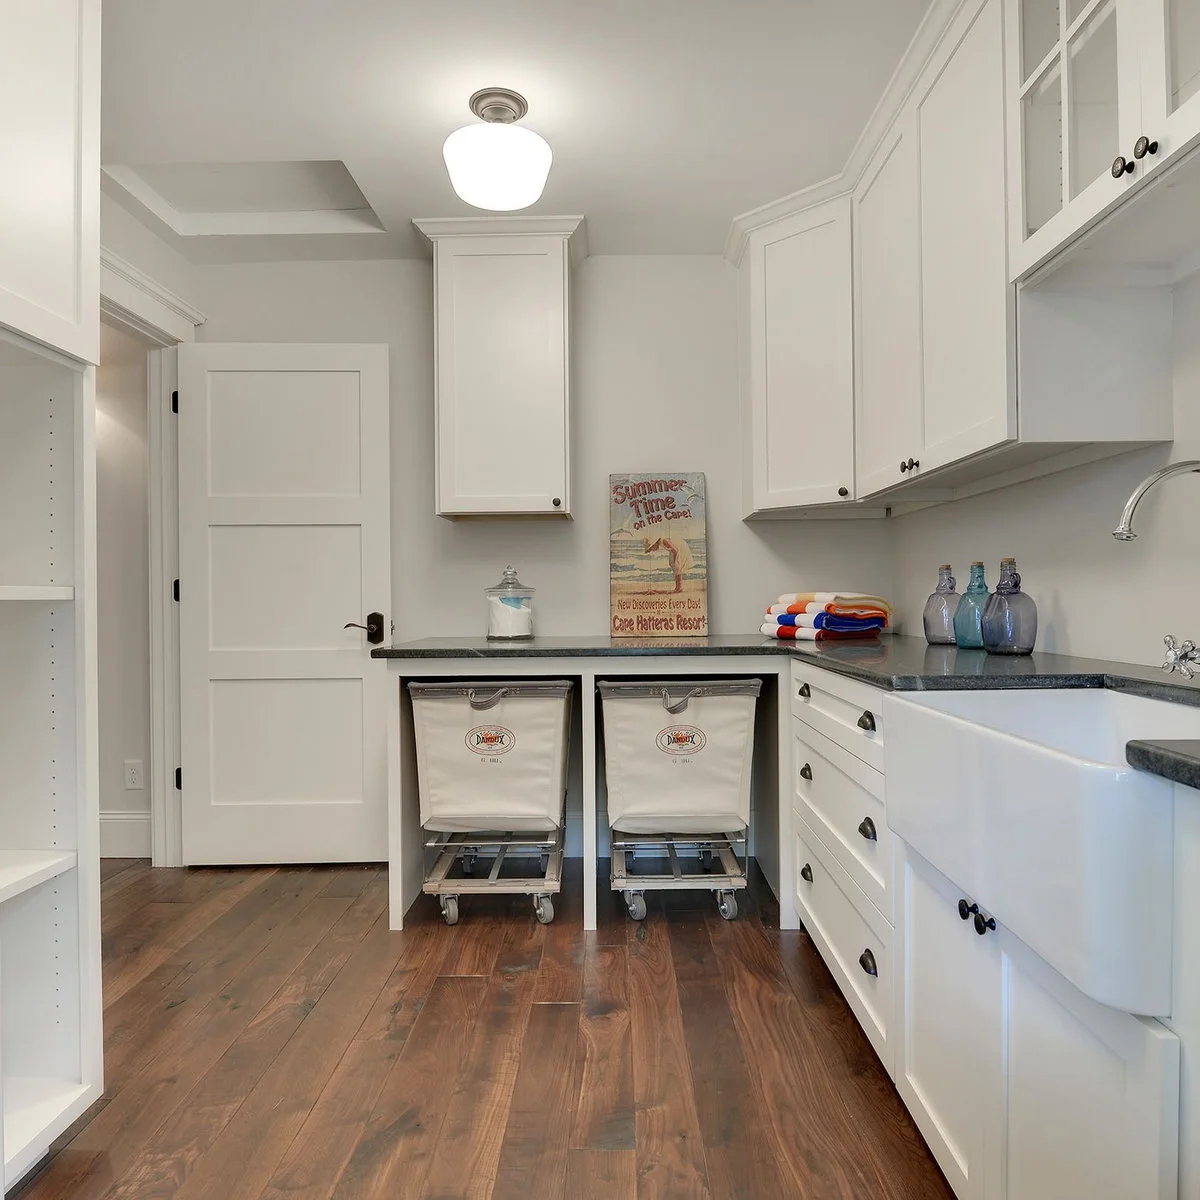
Two rolling fabric hampers tuck beneath the back counter in this white laundry room. A large utility sink occupies the right side, leaving the center floor open. The arrangement gives loose laundry a defined destination without sacrificing the counter used for folding above it.
Choose the hampers before specifying their parking spaces, checking handles, wheels and the height needed to remove a liner. Avoid making the bays such a tight fit that returning a full basket becomes awkward. Use the utility sink separately from the clean folding area when soaking or rinsing dirty items.
IDEA 03 / 20
Reserve an Island for a Wide Room
 SaveSupport Non AI Creator
Image credit: Project: Mina Brinkey (via Houzz)
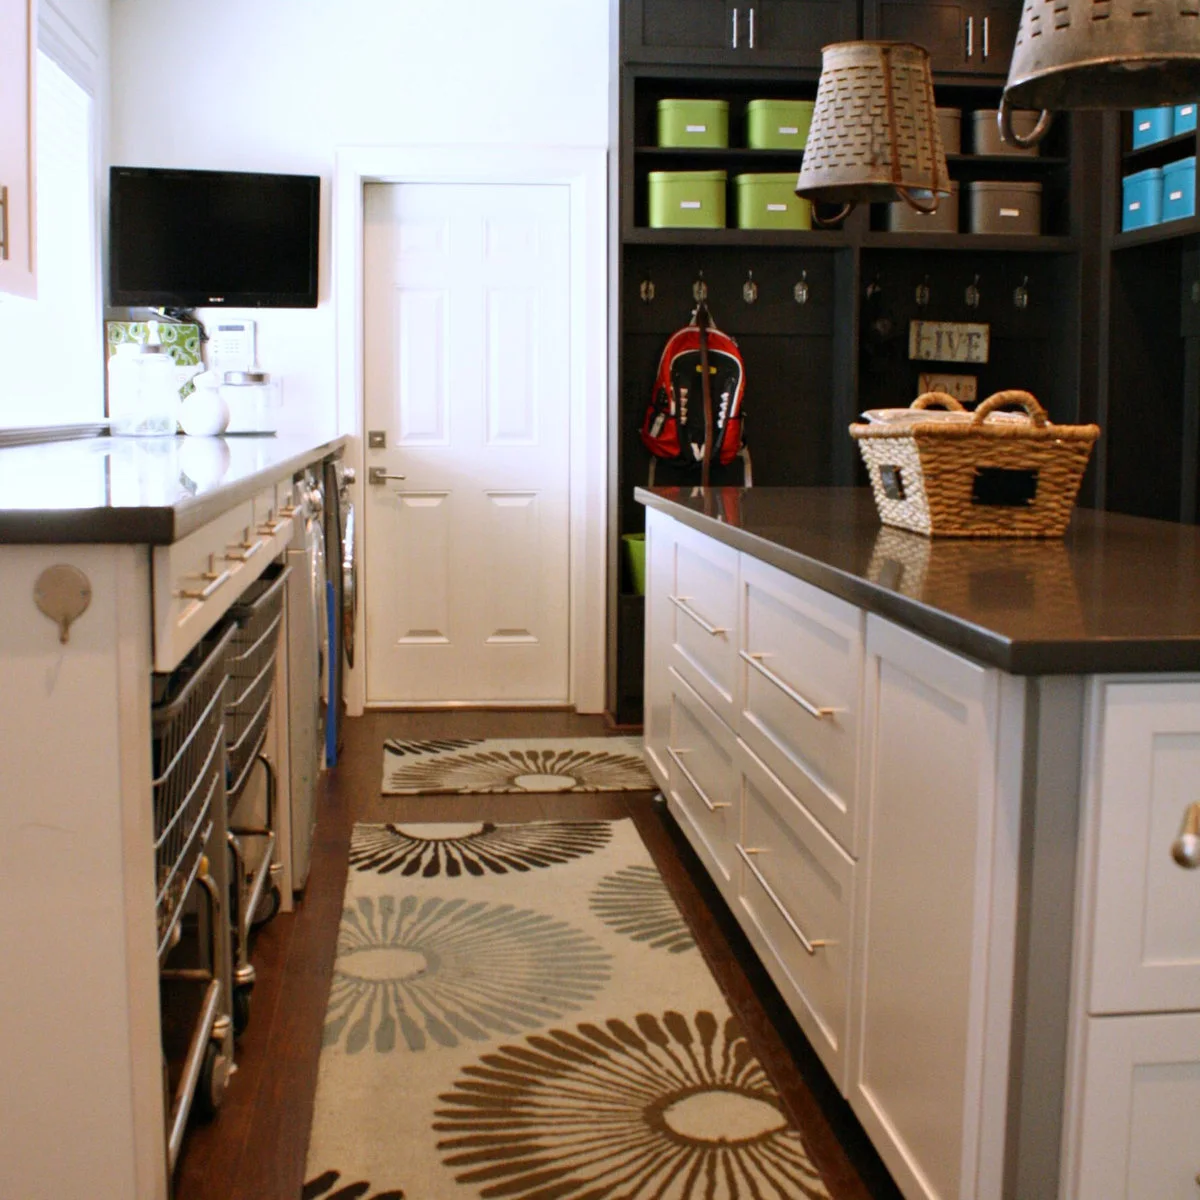
A central island adds another work surface to this large laundry room, while a darker wall of hooks and cubbies handles coats and baskets at the back. Keeping these activities around the edges gives the island a clear role as a place to sort or fold.
An island is useful only when the surrounding routes stay comfortable with appliance doors and drawers open. Mark its footprint on the floor before committing. In a smaller room, keep a clear floor and borrow the island’s function with a counter along the wall instead.
IDEA 04 / 20
Step the Counter Down beside the Machines
 SaveSupport Non AI Creator
Image credit: Project: barlow reid design (via Houzz)
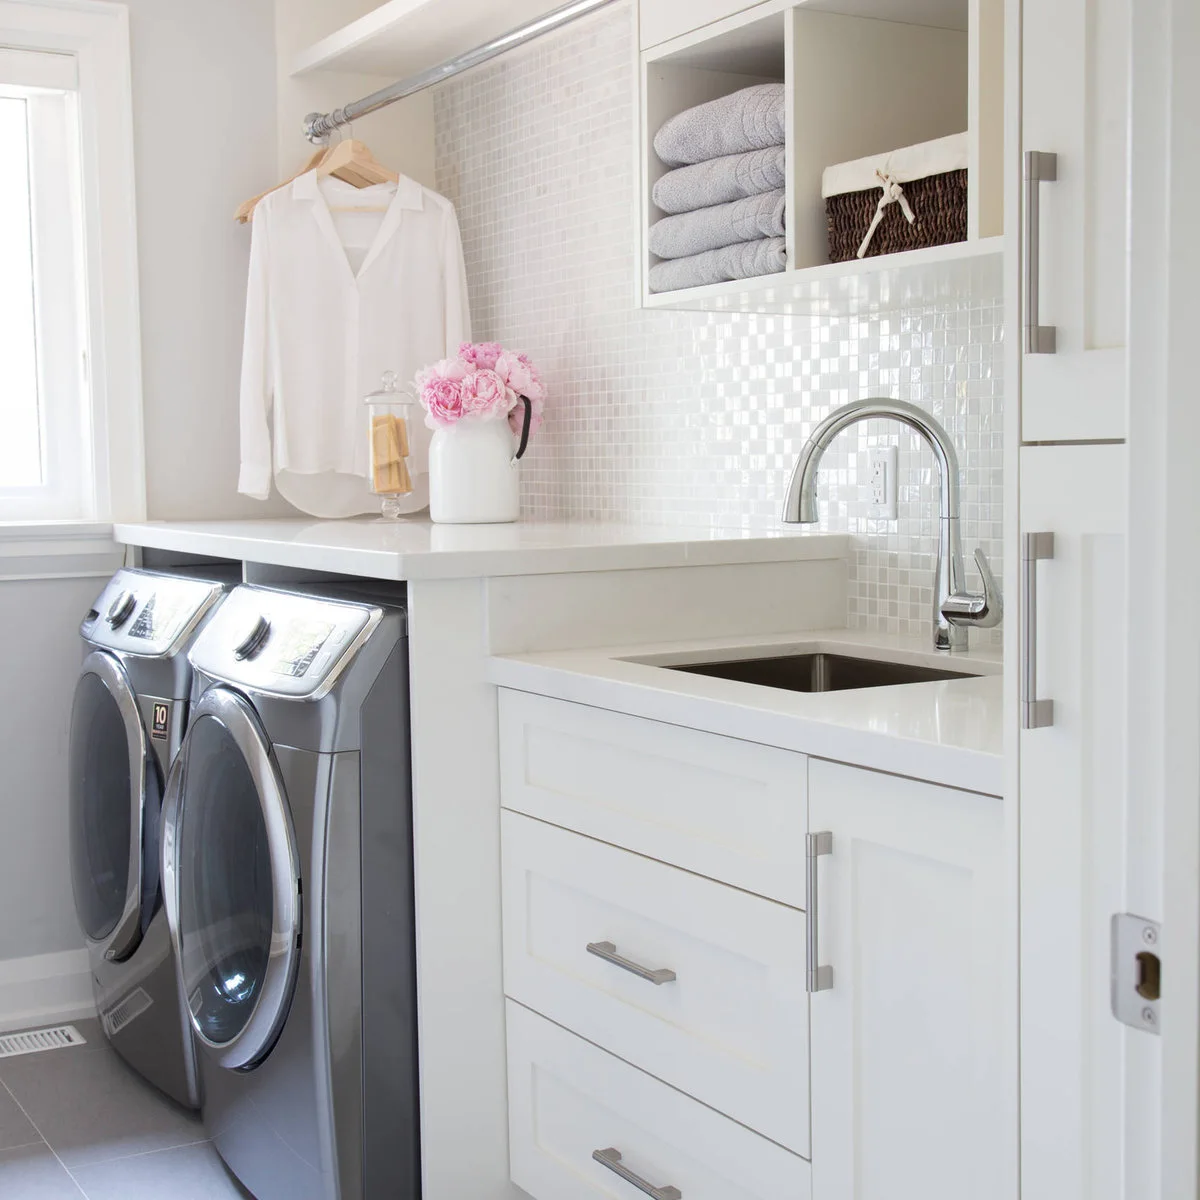
The counter rises above the silver machines and drops to a lower sink area on the right. White cabinetry links the different levels, while a hanging rod sits above the appliances. This arrangement works with the equipment’s height rather than forcing every surface into one continuous line.
Decide where you will actually fold before choosing counter heights. A surface that clears tall machines may be uncomfortable for extended work. Support the counter independently as required and keep appliance servicing possible; a neat surround should not trap a machine that eventually needs repair or replacement.
IDEA 05 / 20
Keep One Long Counter Clear for Folding
 SaveSupport Non AI Creator
Image credit: Project: BRADSHAW DESIGNS LLC (via Houzz)
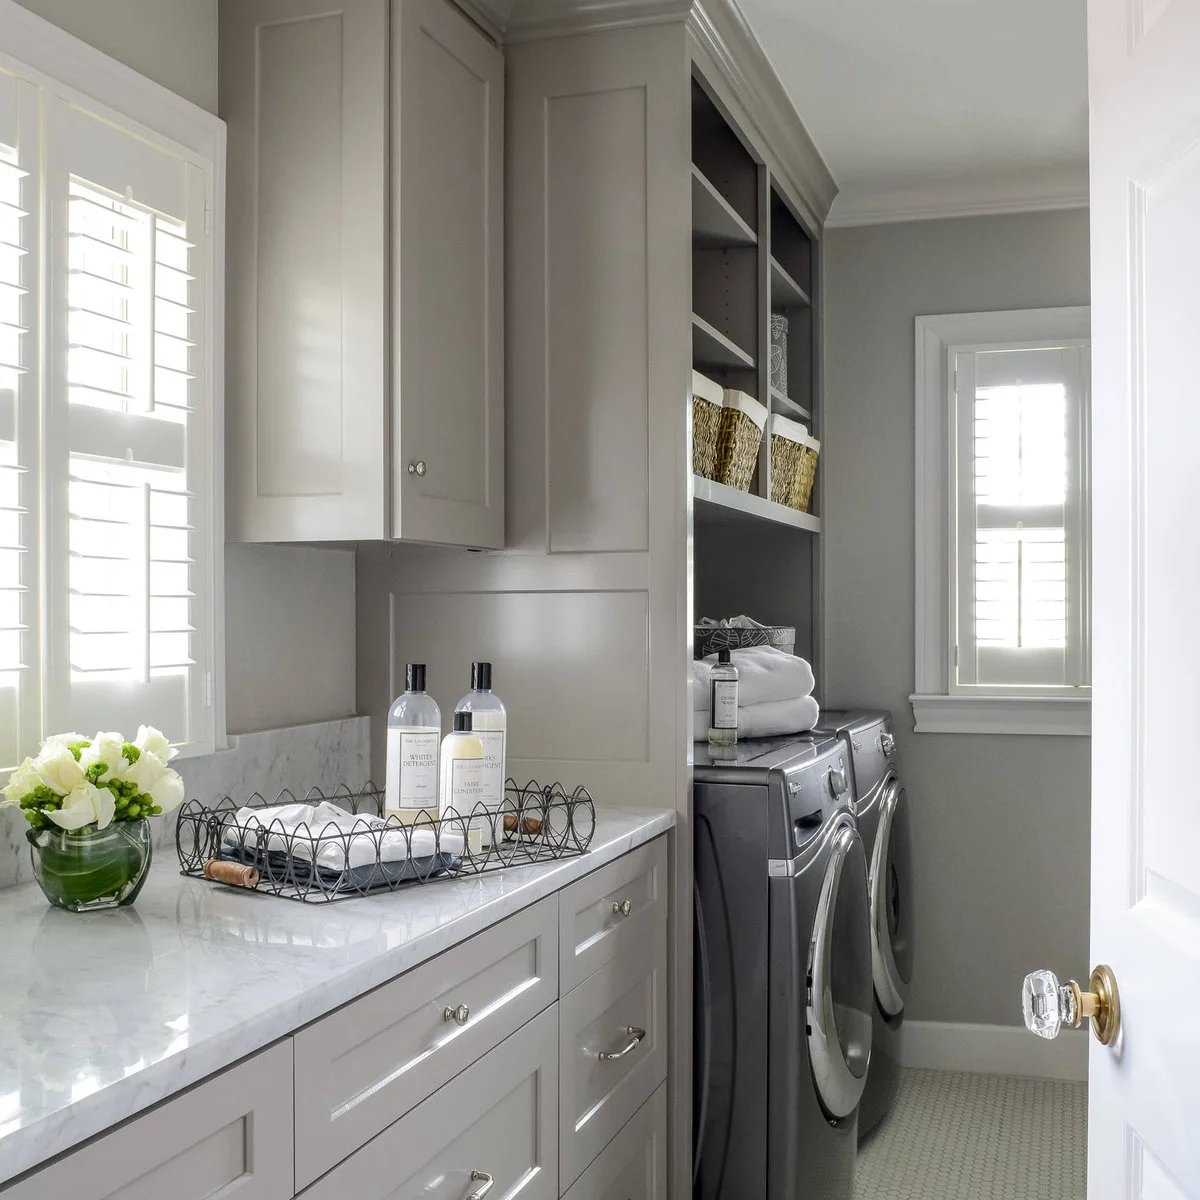
A long clear counter runs down the left side of this narrow laundry room, with the machines grouped at the far end. Shelves and baskets sit above rather than on the work surface. Pale cabinetry and shuttered windows keep the long arrangement visually quiet.
Give the folding counter a protected purpose instead of treating it as spare household storage. Put small supplies in the baskets above and leave the lower surface ready for a clean load. If you use several baskets at once, check that they fit without covering the entire counter.
PART 02
Make Smaller Laundry Spaces Work
IDEA 06 / 20
Fit a Side-by-Side Pair inside a Closet
 SaveSupport Non AI Creator
Image credit: Project: Clean Design (via Houzz)
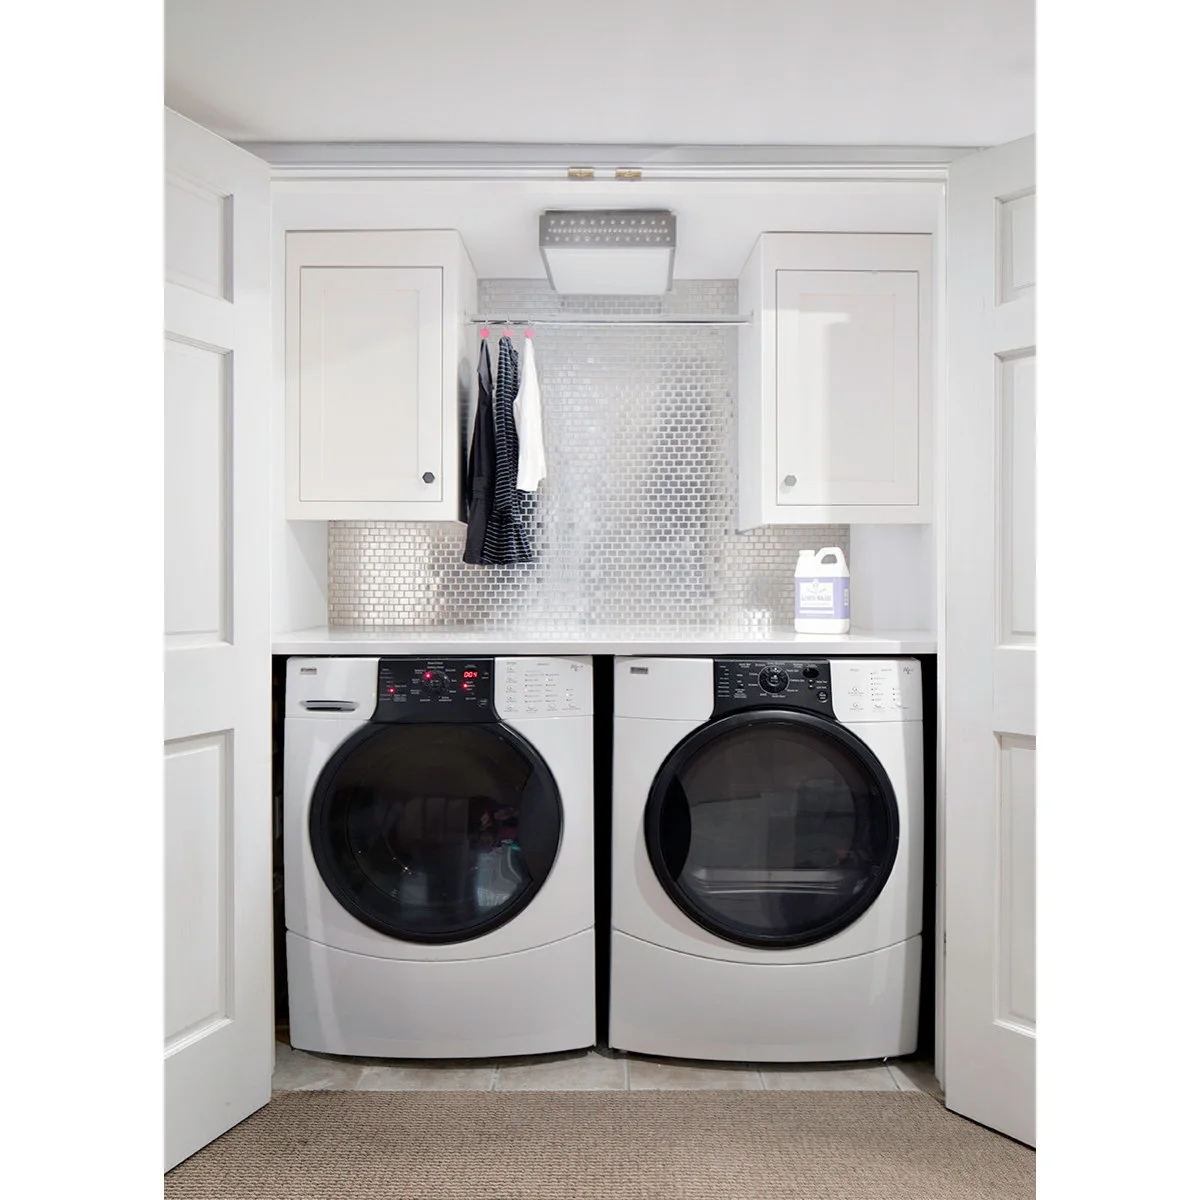
White closet doors open onto two appliances beneath a single counter. Upper cabinets flank a short hanging rail, and a patterned backsplash gives the small recess some character. The basic tasks are gathered in one wall opening rather than spread across a separate room.
Check the appliance maker’s requirements for enclosure, ventilation and door clearance before copying a closet layout. Measure the full opening with the doors folded back. Keep the hanging rail for a manageable number of items so clothing does not crowd the work surface or catch on the machines below.
IDEA 07 / 20
Stack Appliances to Make Room for a Sink
 SaveSupport Non AI Creator
Image credit: Project: CG&S Design-Build (via Houzz)
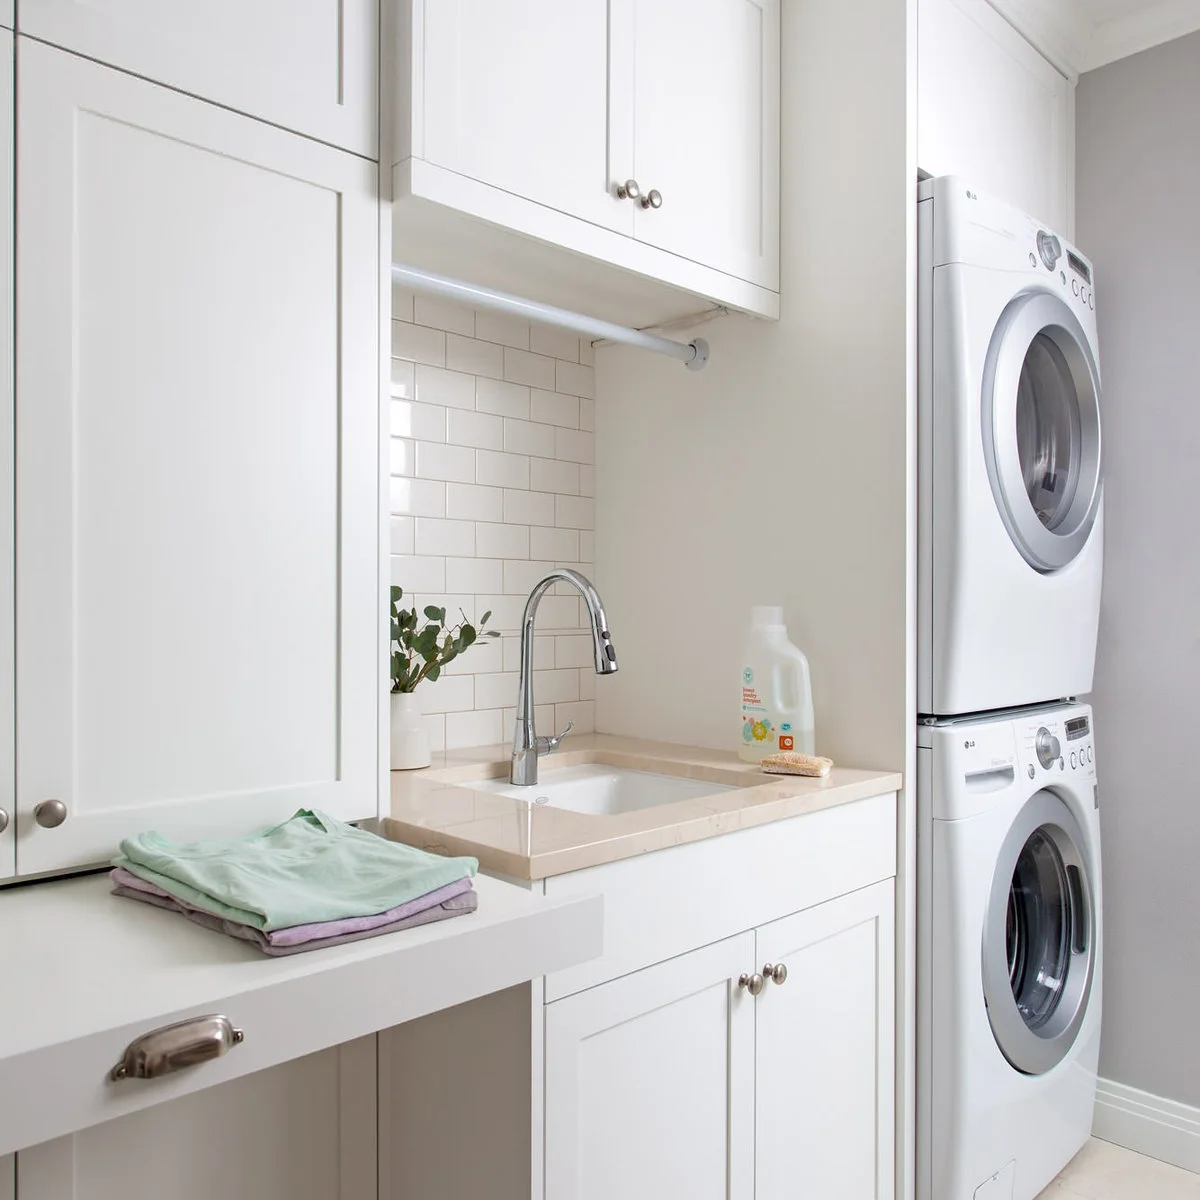
A stacked appliance pair occupies the left side of this white laundry room, freeing the neighboring space for a sink and counter. Tall cabinetry continues the vertical arrangement, while a short rail hangs above the worktop. Several tasks fit along one compact stretch of wall.
Only stack appliances that are approved to work together, using the specified kit and installation method. Check that you can comfortably reach the upper controls. Keep a clear place to set a basket nearby; saving floor space is less helpful if unloading still requires carrying wet clothes across the room.
IDEA 08 / 20
Use Closet Doors to Hide a Bold Backdrop
 SaveSupport Non AI Creator
Image credit: Project: M. Wright Design (via Houzz)
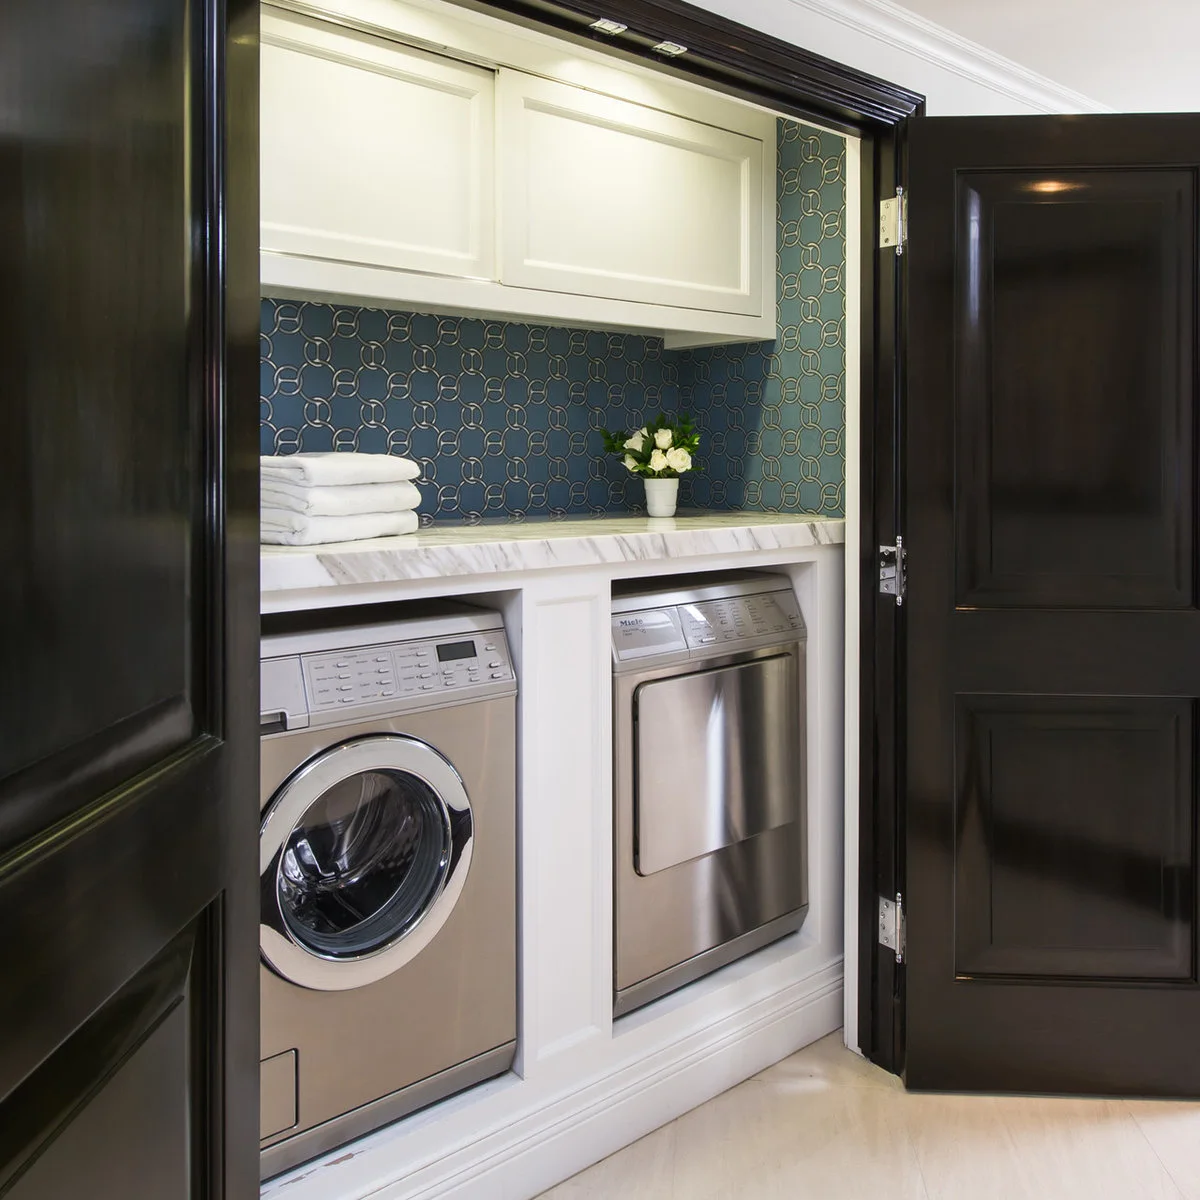
Black closet doors frame a laundry recess with a blue geometric backdrop and white cabinetry. The machines sit on a raised white base beneath a counter. Closing the doors can quieten the view from the neighboring room while leaving a more playful finish inside.
Choose the backdrop for its cleanability as well as its pattern, and test the blue beside the dark door finish. Any raised appliance base needs an appropriate structural design and servicing plan. Confirm the closet’s required ventilation before treating closed doors as part of the everyday arrangement.
IDEA 09 / 20
Keep the Connections Accessible above the Counter
 SaveSupport Non AI Creator
Image credit: Project: Haefele Design (via Houzz)
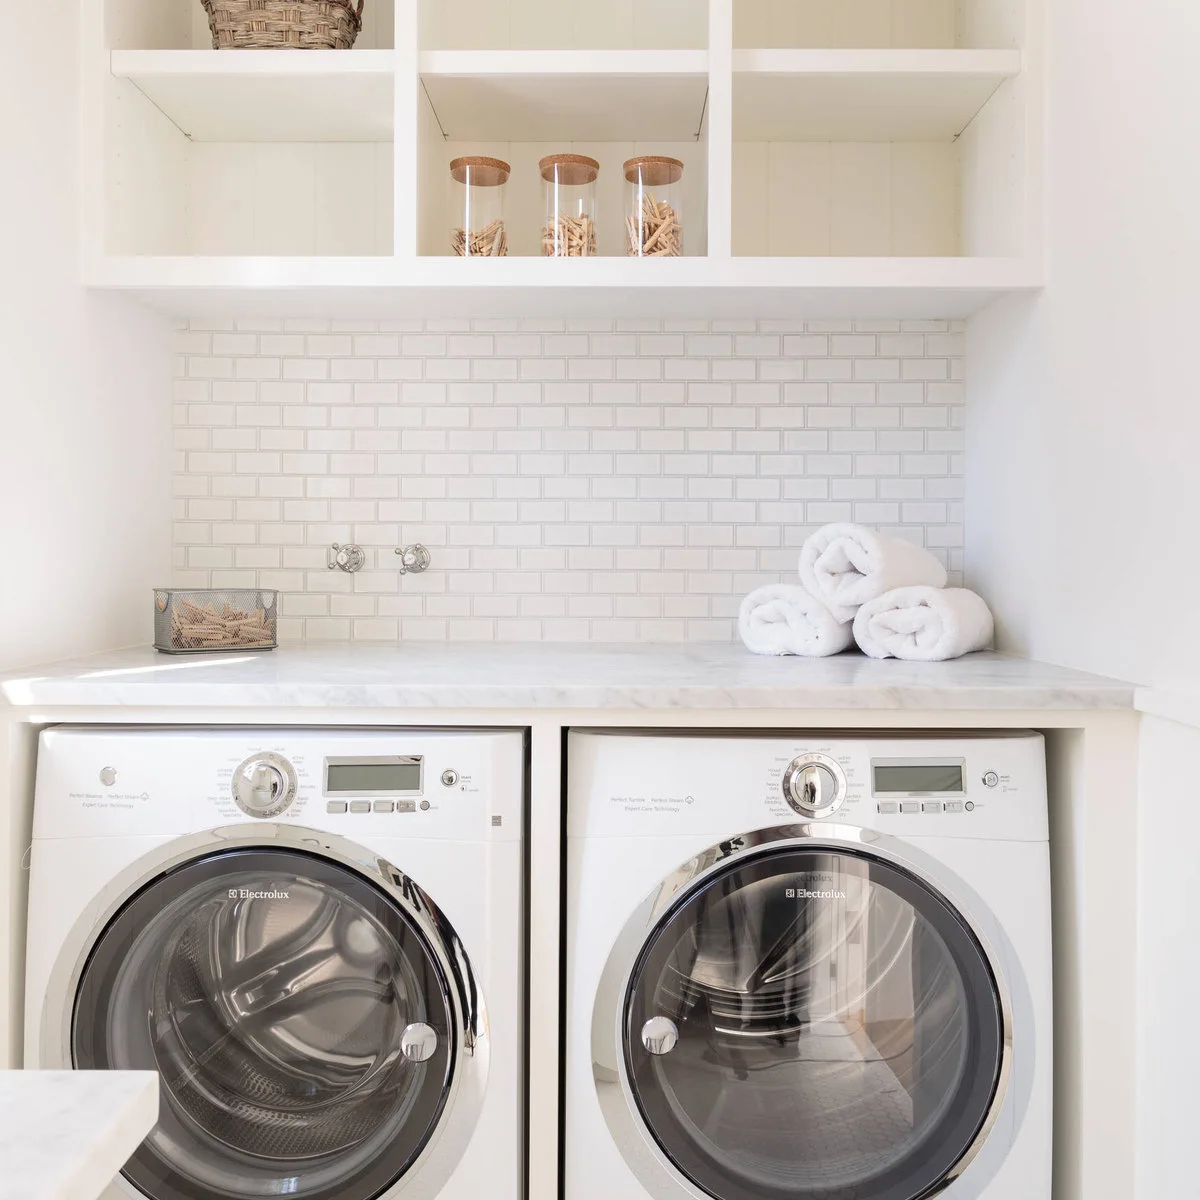
A pale counter spans this appliance pair, with a white brick-pattern backsplash and three open cubbies above. The wall connections remain visible between the machines and shelves. Simple finishes let the storage do its job without pretending the room has no practical equipment.
Plan a removable or accessible route to the connections when adding a counter or backsplash. Keep containers away from shutoffs and do not conceal them behind permanent decoration. Use upper cubbies for lightweight items, with frequently handled supplies stored where they can be reached without leaning awkwardly over the appliances.
IDEA 10 / 20
Leave Adjustable Storage beside a Stacked Pair
 SaveSupport Non AI Creator
Image credit: Project: FitzHarris Designs, Architects + Designers (via Houzz)
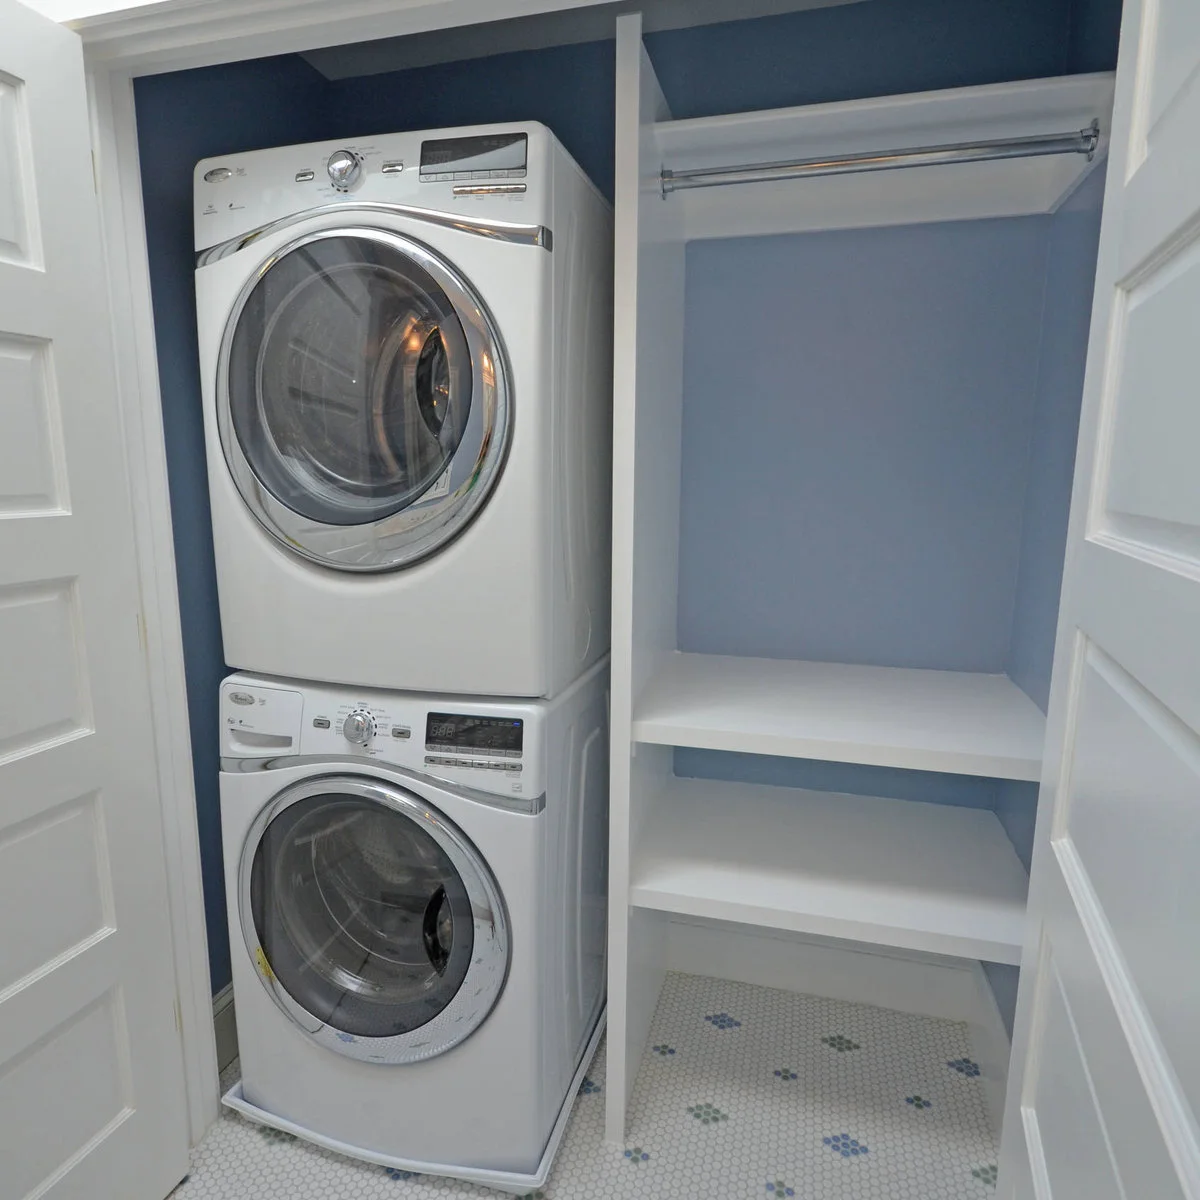
A stacked pair fills the left side of this small blue laundry closet. Open white shelves and a rail occupy the right side, leaving the storage flexible rather than dividing it into many narrow compartments. The empty shelves show how much usable space can remain beside the equipment.
Measure the baskets and folded items you already use before deciding shelf spacing. Leave enough height beneath the rail for your longest regularly washed garments. Confirm that the shelves, appliance doors and closet doors can all be used without moving a basket into the hallway every time.
PART 03
Give Drying and Sorting Their Own Place
IDEA 11 / 20
Give Flat-Dry Garments Sliding Trays
 SaveSupport Non AI Creator
Image credit: Project: Pinney Designs (via Houzz)
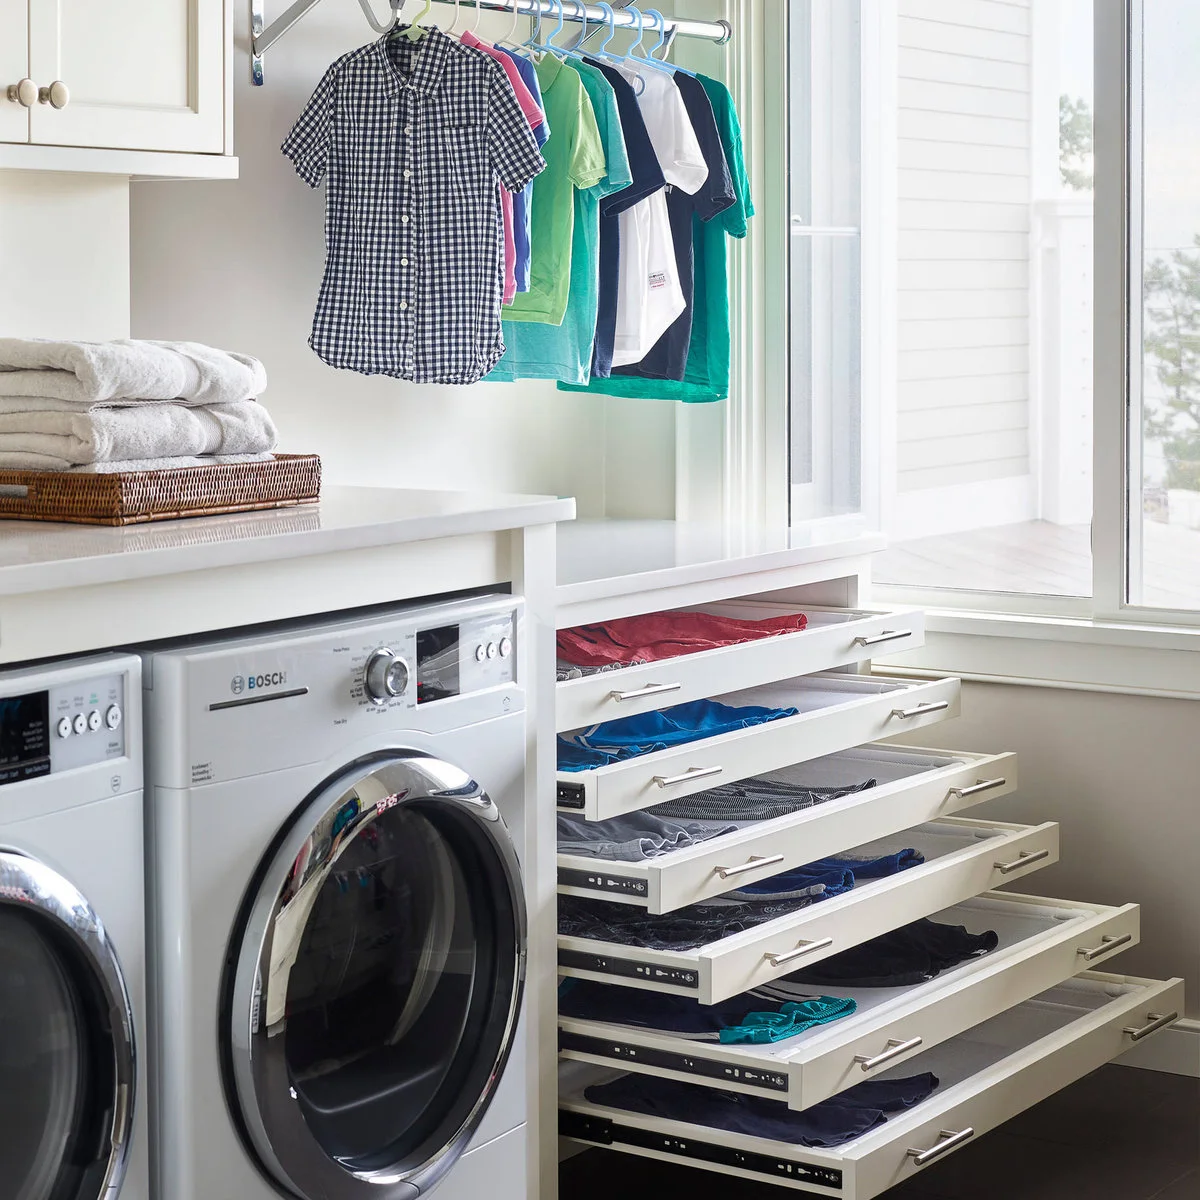
Several mesh trays slide from a cabinet beside the appliances, providing separate flat surfaces for garments. A hanging area above handles items that can go on hangers. The trays bring a drying task into the room without spreading sweaters across the main folding counter.
Follow each garment’s care label and leave space around fabric for air to circulate. Check the tray mechanism, weight limits and cleaning access before ordering a cabinet. Do not assume that a closed cupboard will dry a full load quickly; the arrangement still needs suitable airflow and realistic spacing.
IDEA 12 / 20
Fold Wall Racks Away When They Are Empty
 SaveSupport Non AI Creator
Image credit: Project: Jo Rabaut (via Houzz)
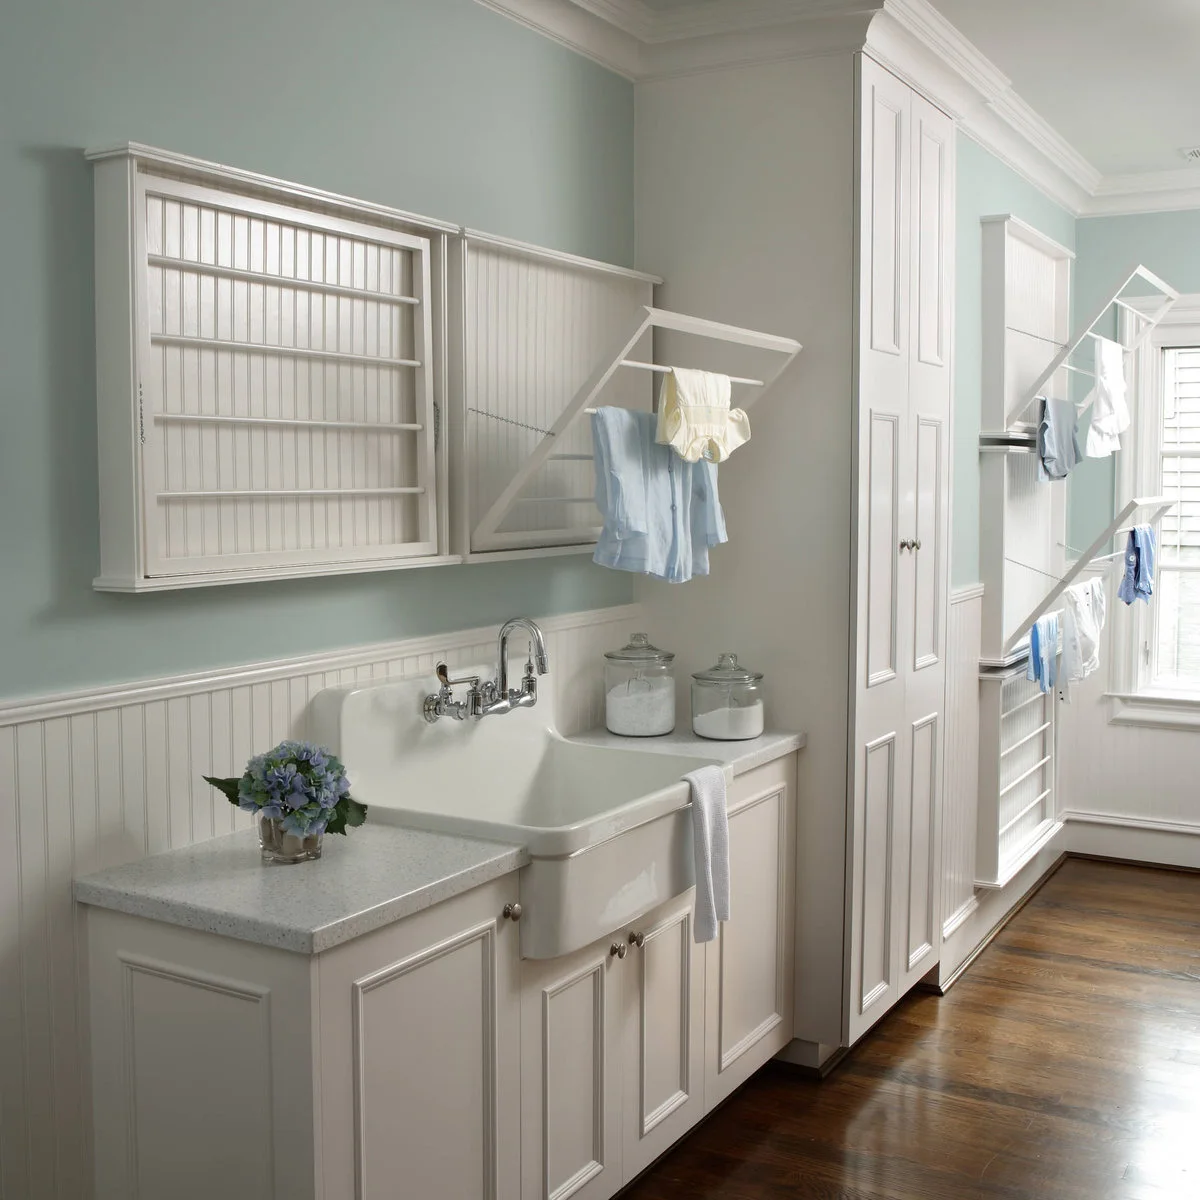
White drying racks fold out from paneled wall frames above the sink and along the far wall. Pale blue paint and white cabinetry give the practical fittings a consistent background. When empty, the racks can return toward the wall and release more of the working space.
Check the opened rack’s depth against the sink, taps and route through the room before positioning it. Fix it appropriately for the wall and intended load. Space clothes apart rather than layering several wet pieces over one rail, and choose a finish that tolerates repeated contact with damp fabric.
IDEA 13 / 20
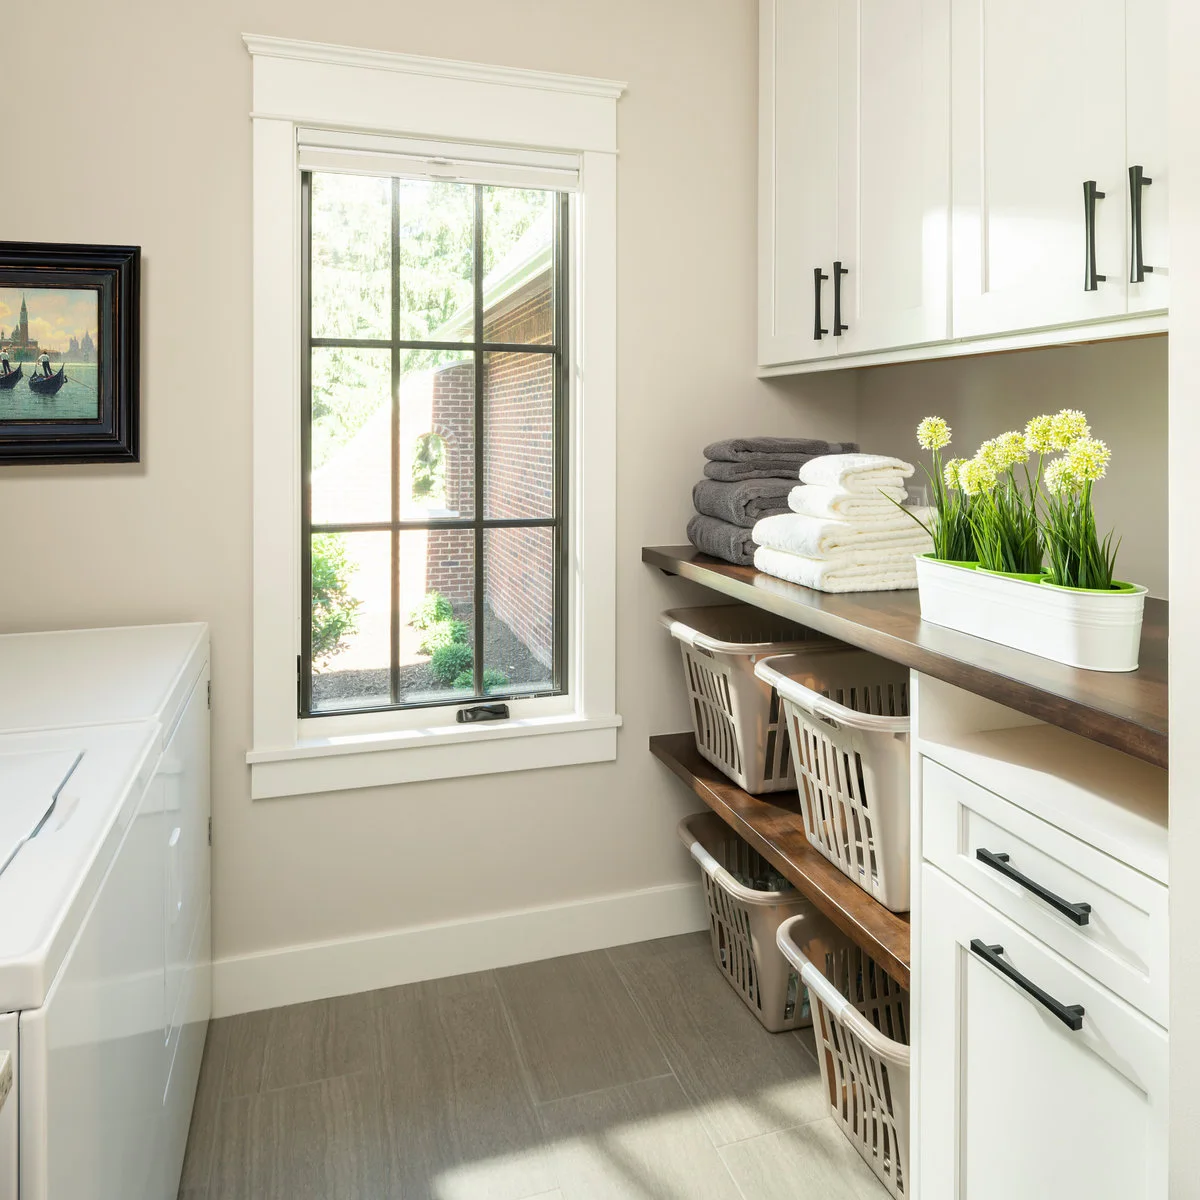
Sort Loads into Baskets beneath Open Shelves
 SaveSupport Non AI Creator
Image credit: Project: Meadowlark Design+Build (via Houzz)
Four pale baskets sit on two open shelves beneath a darker counter in this laundry room. White upper cabinets keep other supplies behind doors, while the tall window brings light beside the sorting area. Matching baskets give the open storage a consistent appearance without hiding each load in a drawer.
Assign each basket a simple purpose that the household will actually follow, such as towels or items waiting to be put away. Check that a loaded basket slides out without lifting it over a lip. Keep the counter mostly clear so sorting does not simply move the pile one level higher.
IDEA 14 / 20
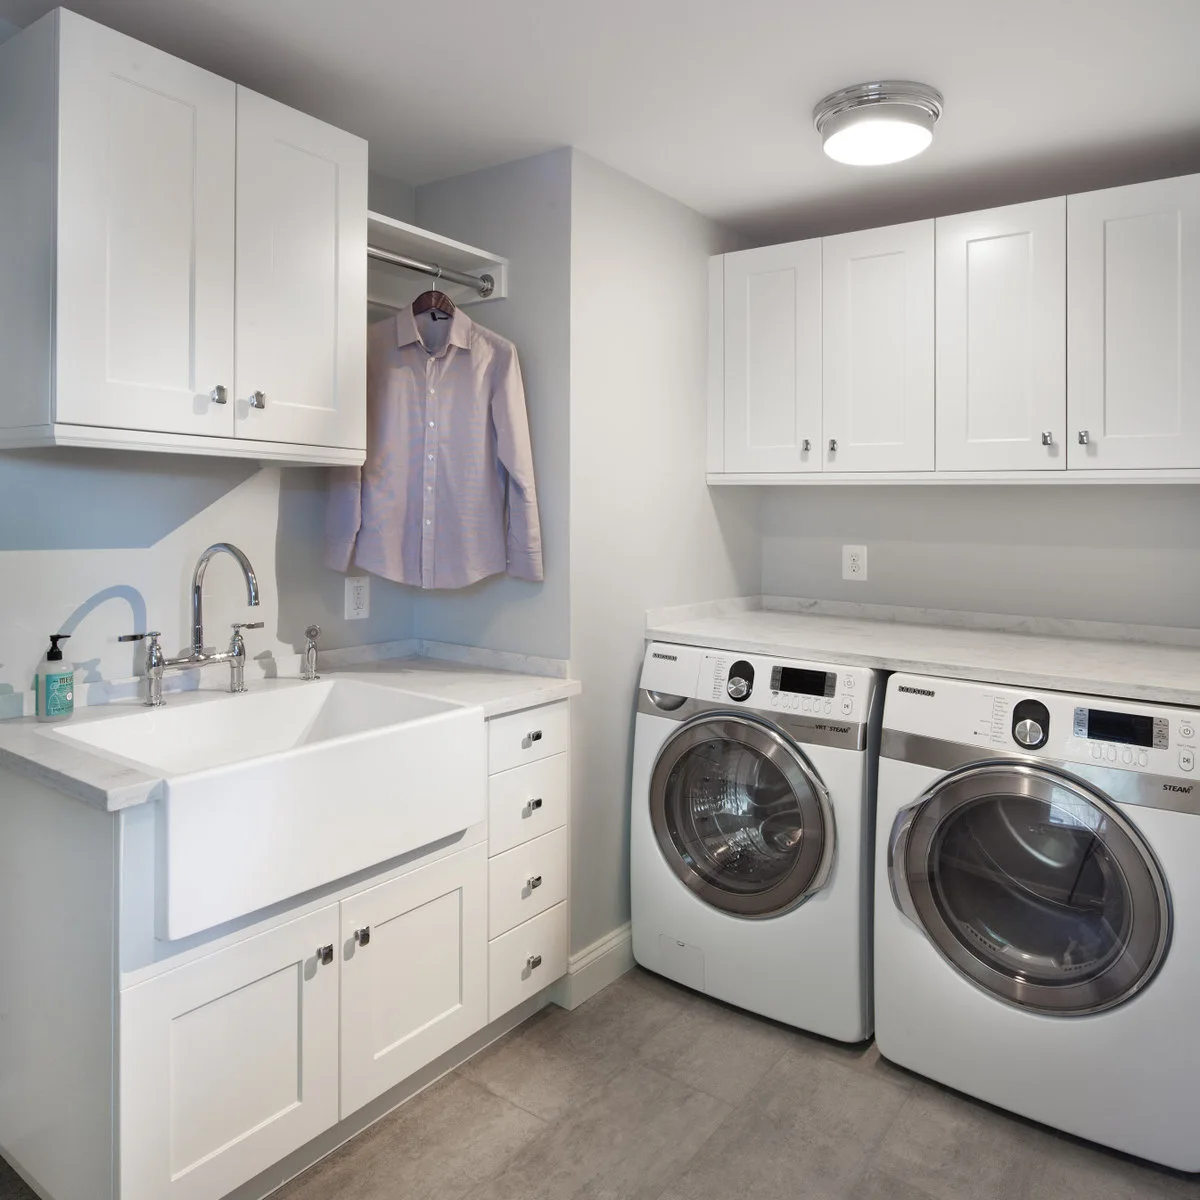
Hang a Shirt beside the Utility Sink
 SaveSupport Non AI Creator
Image credit: Project: Anthony Wilder Design/Build, Inc. (via Houzz)
A short rail beside the utility sink holds a shirt while the silver machines sit beneath a separate counter on the right. White cabinets run above both areas, linking the room. The small hanging space is close to the sink without taking over the entire upper wall.
Position a rail so garments clear the tap, counter and nearby electrical fittings. Follow care labels when deciding whether clothes should hang or lie flat. Leave room between items, and keep the rail short enough that reaching the upper cupboard does not require pushing through a row of wet fabric.
IDEA 15 / 20
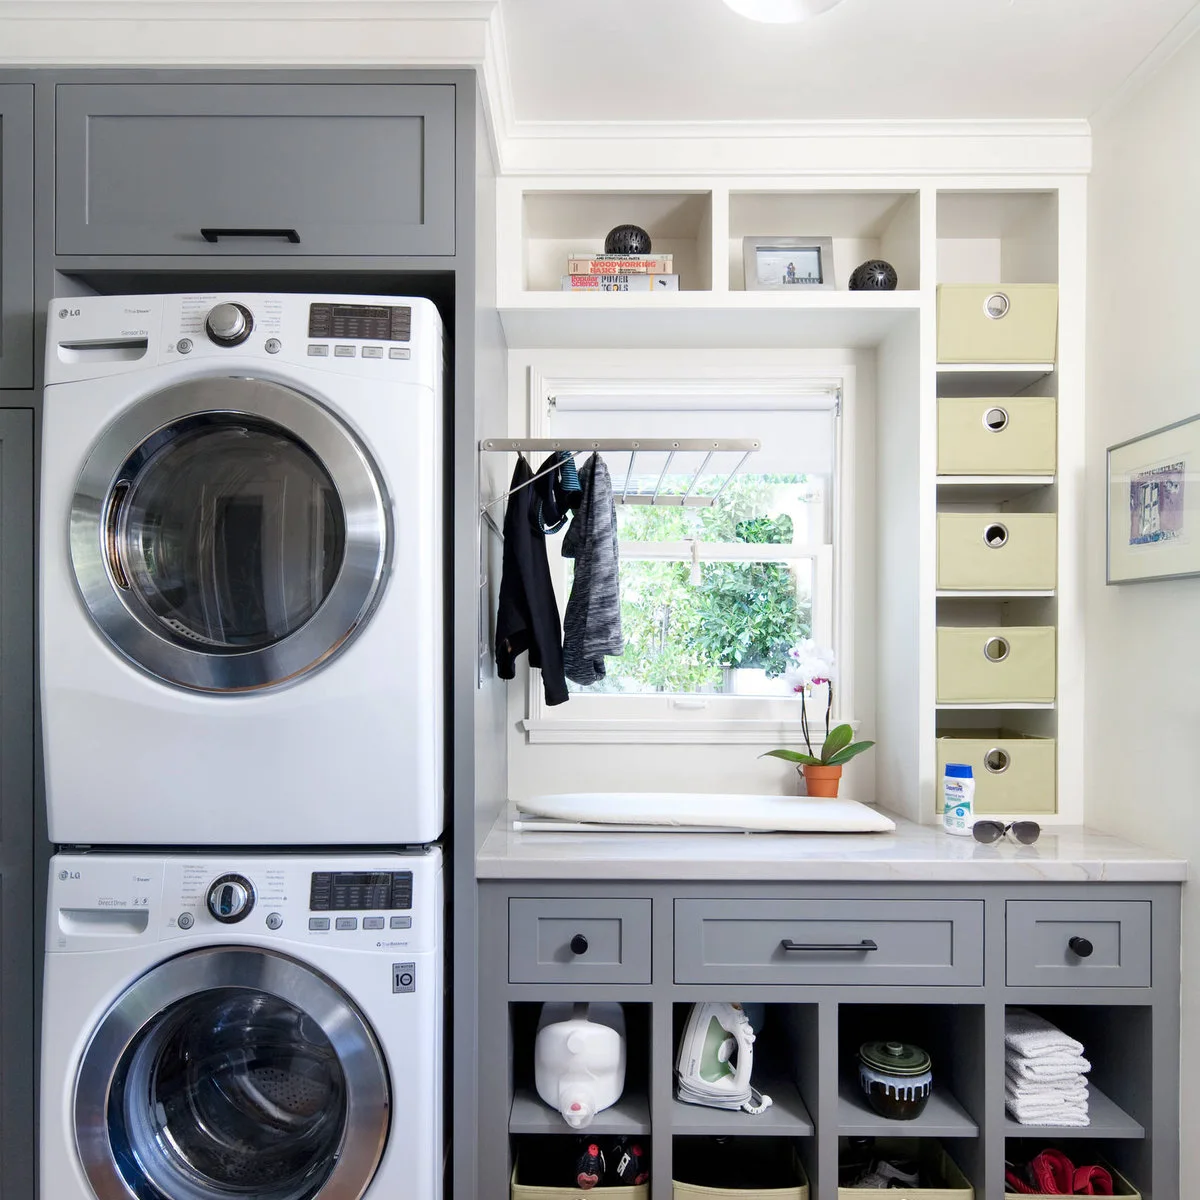
Make an Ironing Spot beside the Window
 SaveSupport Non AI Creator
Image credit: Project: Jessica Risko Smith Interior Design (via Houzz)
A small ironing board rests on the counter beneath the window, beside a stacked appliance pair. Narrow cubbies with pale green bins rise along one side, while larger open bays sit below. The arrangement gives ironing a defined place without requiring a permanently open full-size board.
Check the board’s stability and the counter finish before using a tabletop ironing setup. Follow the iron’s instructions for heat and resting it safely, and return it only after cooling. Keep cords, supplies and hanging garments clear of the working area so the window counter remains useful for more than storage.
PART 04
Finish with Useful Storage Details
IDEA 16 / 20
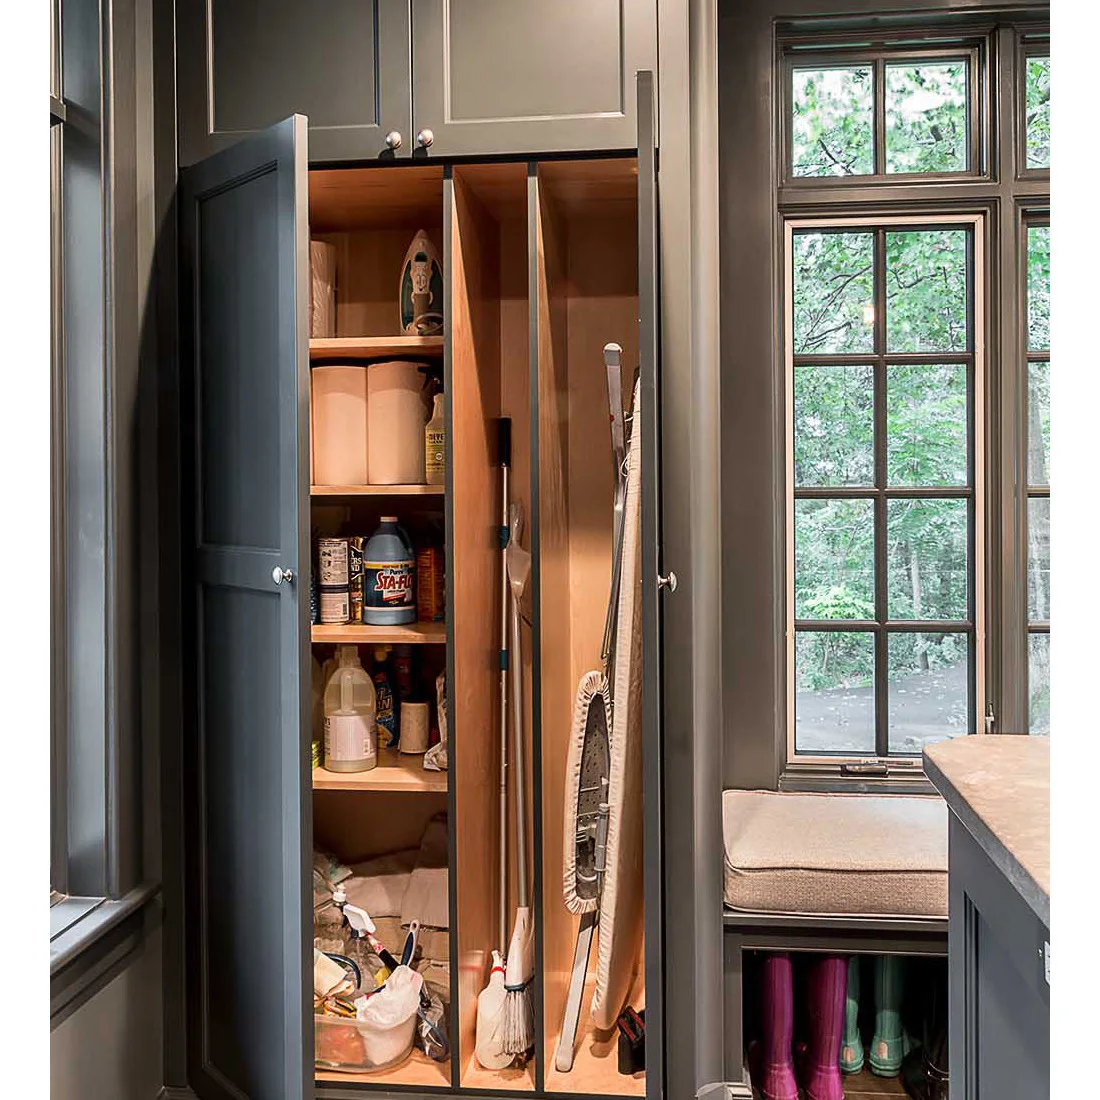
Build a Tall Bay for Long Cleaning Tools
 SaveSupport Non AI Creator
Image credit: Project: PB Kitchen Design (via Houzz)
This open utility cupboard separates shelves from a tall narrow bay holding long cleaning tools and an ironing board. Dark doors conceal the mixed shapes when closed, while the wood-toned interior keeps the divisions easy to see. A separate tall compartment prevents awkward tools from falling across smaller supplies.
List the tools you need to store before dividing the cabinet. Allow space to lift each one out without catching its handle on a shelf. Keep chemicals in their original labeled containers and secured as appropriate for the household; the photographed open door shows storage capacity, not a reason to leave products accessible.
IDEA 17 / 20
Leave a Low Bay for Empty Baskets
 SaveSupport Non AI Creator
Image credit: Project: Distinctive Remodeling Solutions, Inc (via Houzz)
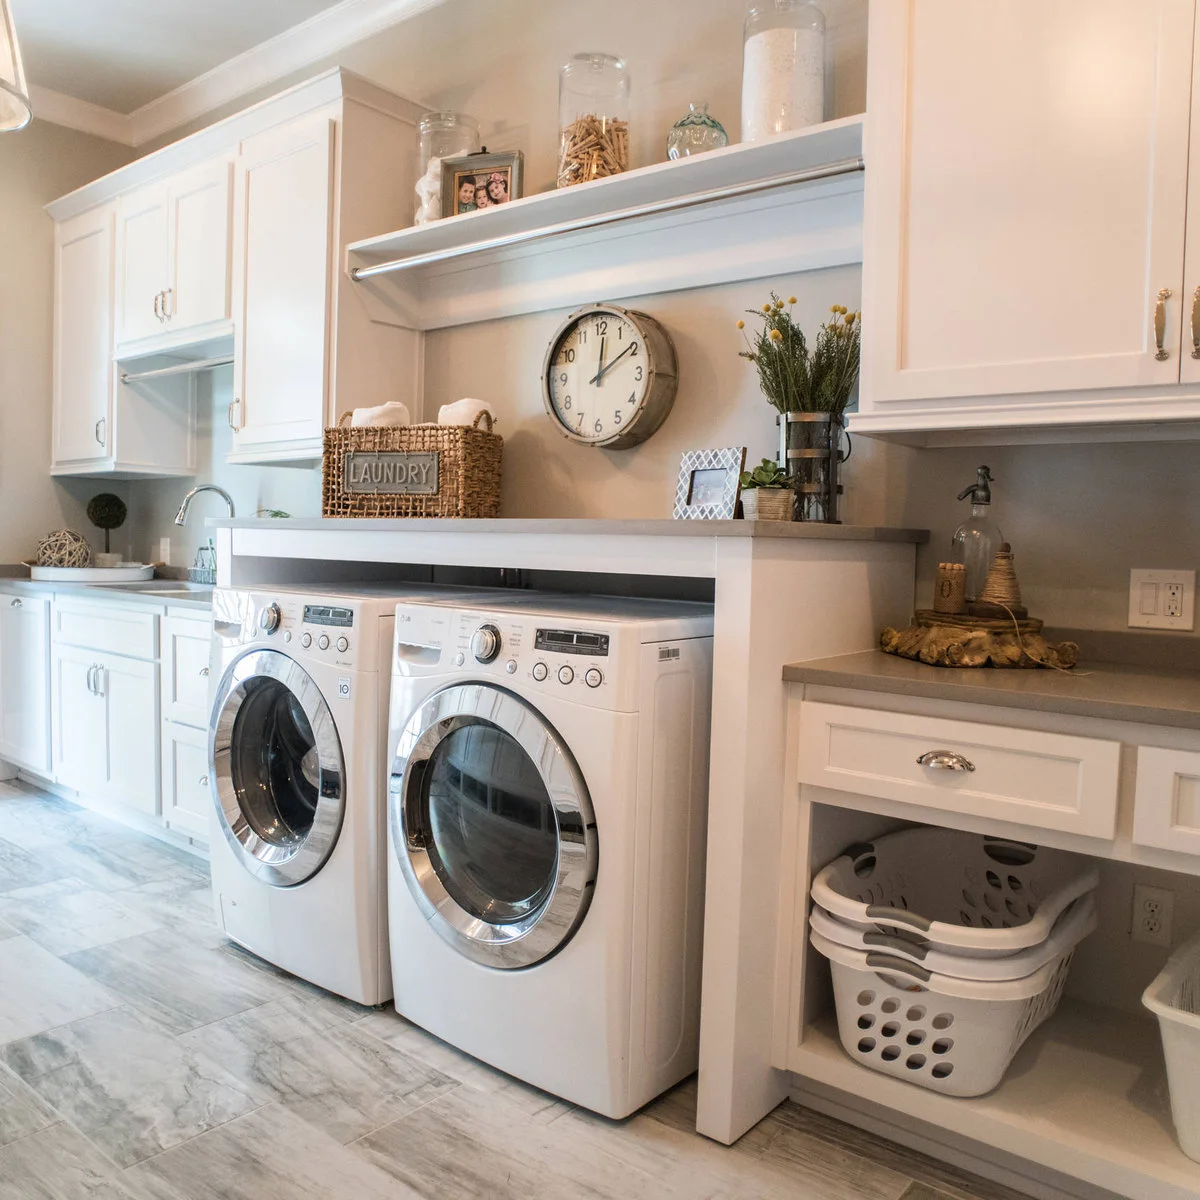
Empty baskets stack inside an open bay beneath the right-hand counter, while a higher bridge spans the machines. White cupboards and a long rail connect the different sections. Giving unused baskets their own parking place prevents them from permanently occupying the main folding surface.
Count the baskets you regularly use and allow room to lift the stack out easily. Keep the bay separate from bottles that could leak onto clean laundry. Support the counter around the appliances appropriately, and leave the clearances needed to move either machine without dismantling the entire surrounding cabinet.
IDEA 18 / 20
Add a Bench along the Coat Wall
 SaveSupport Non AI Creator
Image credit: Project: Levi Design Build (via Houzz)
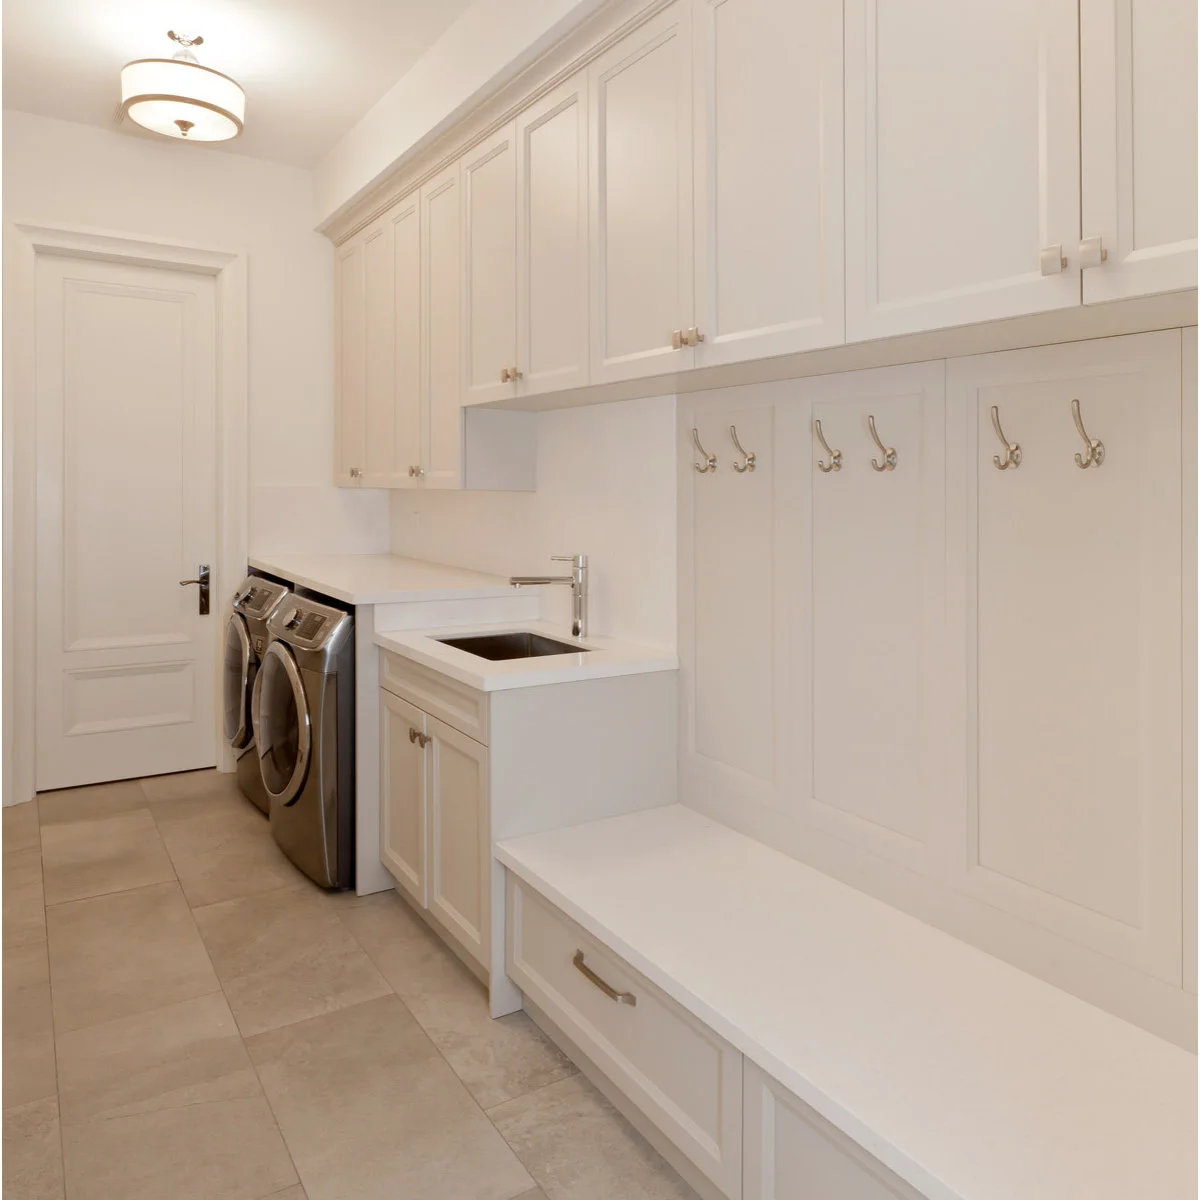
A long white bench sits beneath paired coat hooks, with cupboards above and a drawer below. The machines and sink occupy the far end of the same room. This gives the entrance activity its own stretch of wall rather than asking the appliance counter to hold bags and coats.
Keep the bench outside the working space needed for appliance doors and laundry baskets. Decide which hooks each person can reach comfortably before mounting them. A combined entrance and laundry room also needs a clear separation between wet outdoor gear and freshly folded clothes, even when the cabinetry shares one finish.
IDEA 19 / 20
Use a Shoe Bench near the Exterior Door
 SaveSupport Non AI Creator
Image credit: Project: Design Platform (via Houzz)
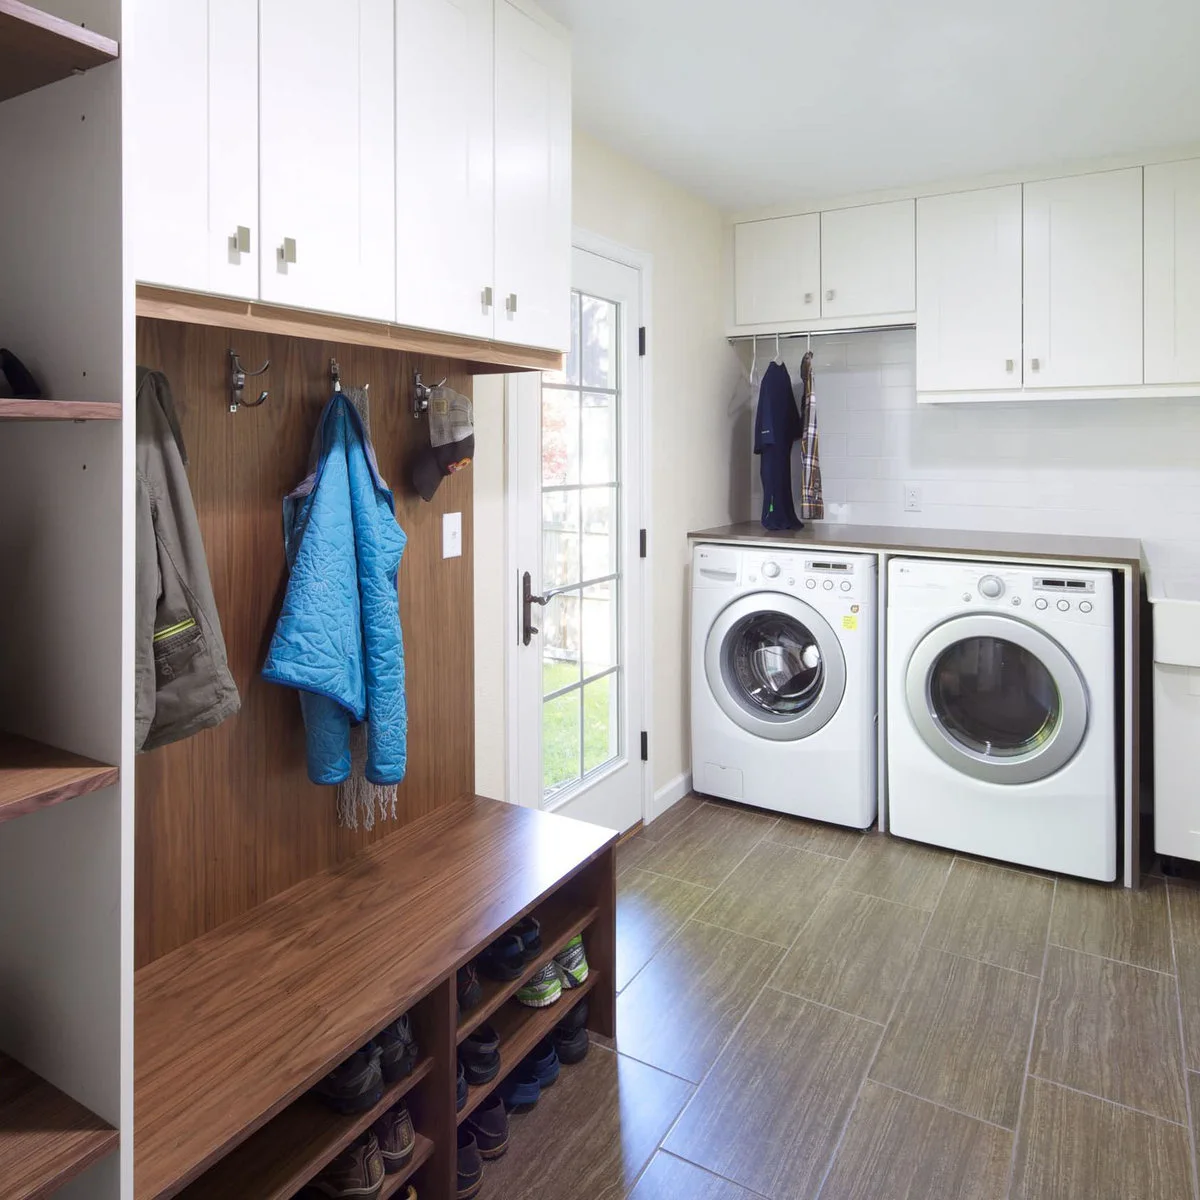
A wood-toned bench with shoe cubbies sits beside the glass exterior door, opposite the laundry work area. Hooks and white upper cabinets continue above it. Shoes have a low storage position near the entrance, while the appliances retain a counter and hanging rail at the back.
Place the shoe storage where muddy footwear can be removed before crossing the laundry area. Choose a floor finish suited to the actual conditions and keep the doorway clear of loose pairs. Compare this arrangement with mudroom ideas if the room must also handle bags, coats and daily outdoor traffic.
IDEA 20 / 20
Raise Machines above Useful Drawers
 SaveSupport Non AI Creator
Image credit: Project: LIDA Homes (via Houzz)
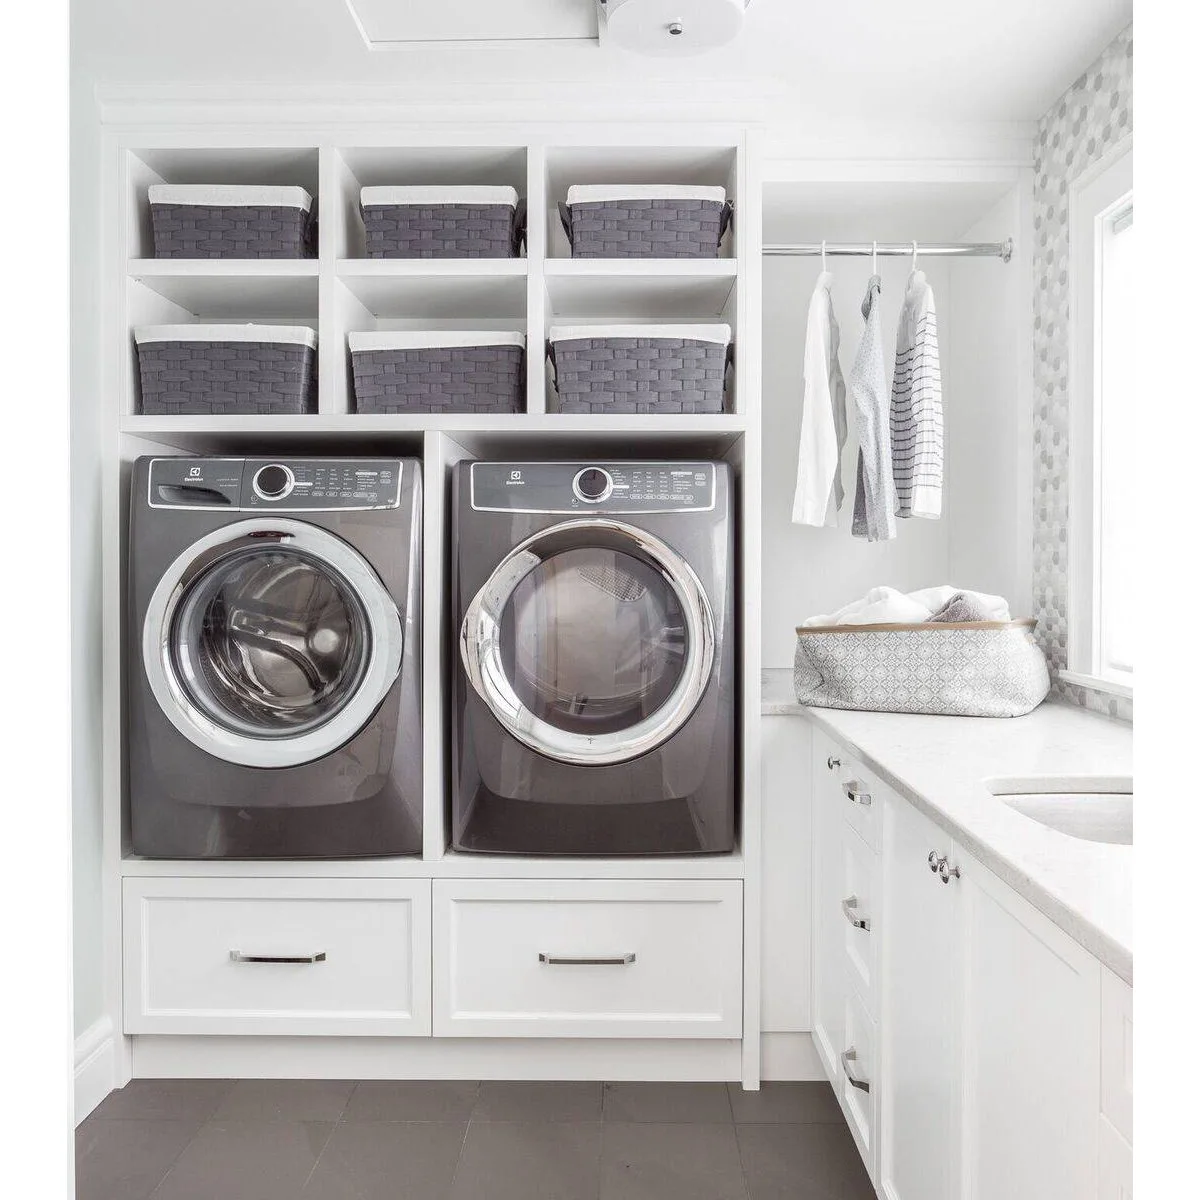
Two gray machines sit above broad white drawers, with six matching baskets arranged in open cubbies above. A separate sink counter continues on the right beneath a hanging rail. The stacked layers use the wall height while leaving a clear patch of floor in front of the appliances.
A raised arrangement needs a base designed for the equipment, its operating loads and future maintenance. Check the finished control height before choosing it. Use the upper baskets for light items you can handle comfortably, and keep frequently used supplies lower so a full laundry basket does not require another awkward reach.
BRING IT ALL TOGETHER
Start with the Task That Has No Home
Choose the improvement that removes the most daily friction: a basket bay, an empty folding counter or a proper drying area. Keep the appliances accessible and work outward from their actual requirements. A simpler room that supports the routine is more useful than a heavily decorated room with nowhere to put a clean load.
Before ordering cabinetry, mark out open appliance doors, full baskets and any folding racks. Check where damp garments will dry and where the clean clothes will wait. Those small practical decisions determine whether the finished room stays comfortable after the photograph-ready moment has passed.