Kitchen lighting needs to work where you prepare food, wash up and sit, as well as looking right from the doorway. A row of decorative pendants may suit the island but leave another counter needing its own light. Start with those everyday positions before choosing fixture shapes.
These photographed kitchens show different combinations of ceiling, wall and cabinet lighting. Compare the visible arrangements, then assess the chosen products in your actual room. Photographs do not establish brightness, wiring details or clearances, so use the fixture and appliance instructions when planning installation with a qualified electrician.
PART 01
Bring Light to the Working Surfaces
IDEA 01 / 20
Put a Light Directly Beneath the Cabinet
 SaveSupport Non AI Creator
Source: Houzz
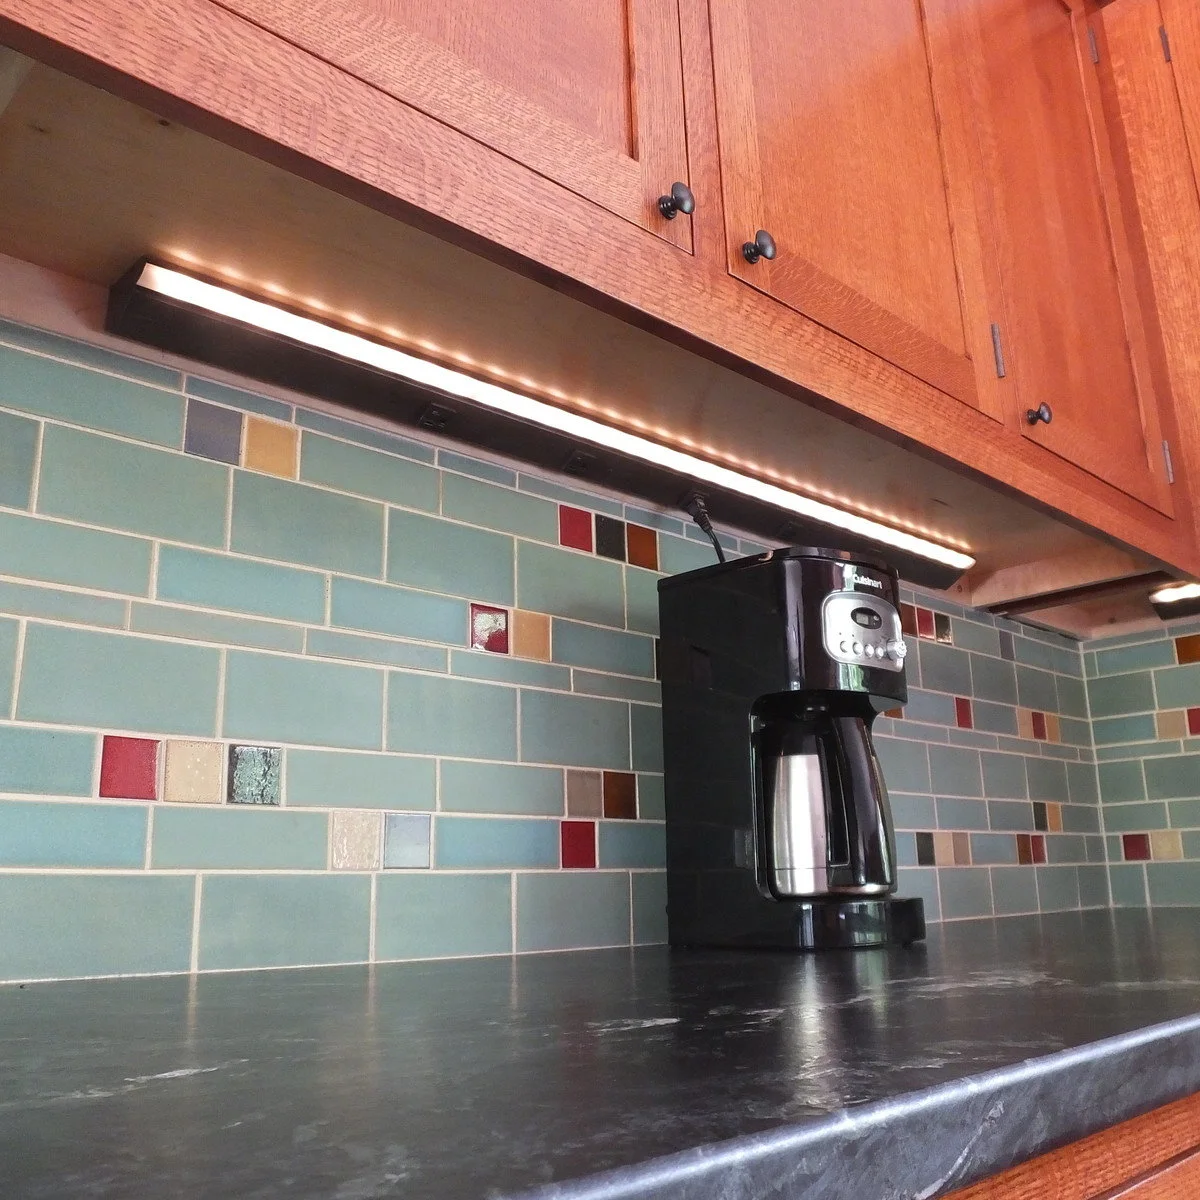
The slim light runs beneath the upper cabinet, placing it near the coffee maker and counter rather than relying only on a ceiling fitting. A dark rail holds the visible connections below the wood doors. The blue tile and dark counter make the bright strip easy to see.
Check the actual light across the working surface before choosing its mounting position. A low viewing angle can expose a bright source that is hidden when standing. Keep switches and connections accessible, follow the system’s installation instructions and have the wiring planned around the appliances used in this corner.
IDEA 02 / 20
Add Task Lighting Beneath an Open Shelf
 SaveSupport Non AI Creator
Image credit: Víctor Hugo / Egue y Seta
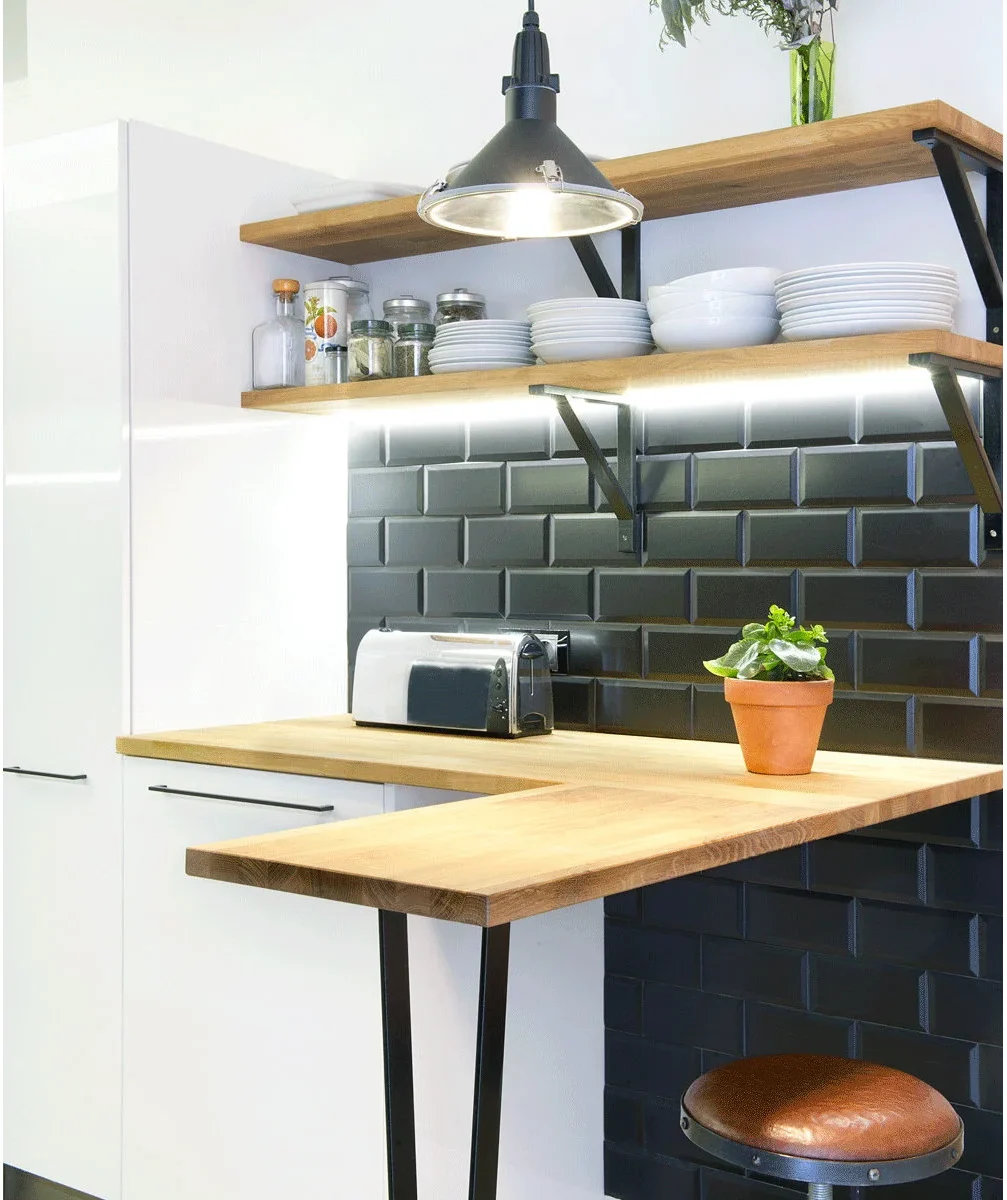
A bright strip beneath the lower wood shelf gives the compact counter its own light. The dark pendant above adds a separate fixture shape near the eating ledge, while the black beveled tiles reflect small highlights. Open shelves leave the task light’s position easy to understand.
Check both direct glare and reflections in glossy tile before committing to a shelf-mounted light. Follow the chosen system’s instructions for its mounting surface and required components. Leave access for cleaning the shelf underside, and keep items on the counter from blocking the area where you prepare food.
IDEA 03 / 20
Plan Cooking Light with the Hood and Nearby Cabinets
 SaveSupport Non AI Creator
Image credit: Unique Design Cabinets
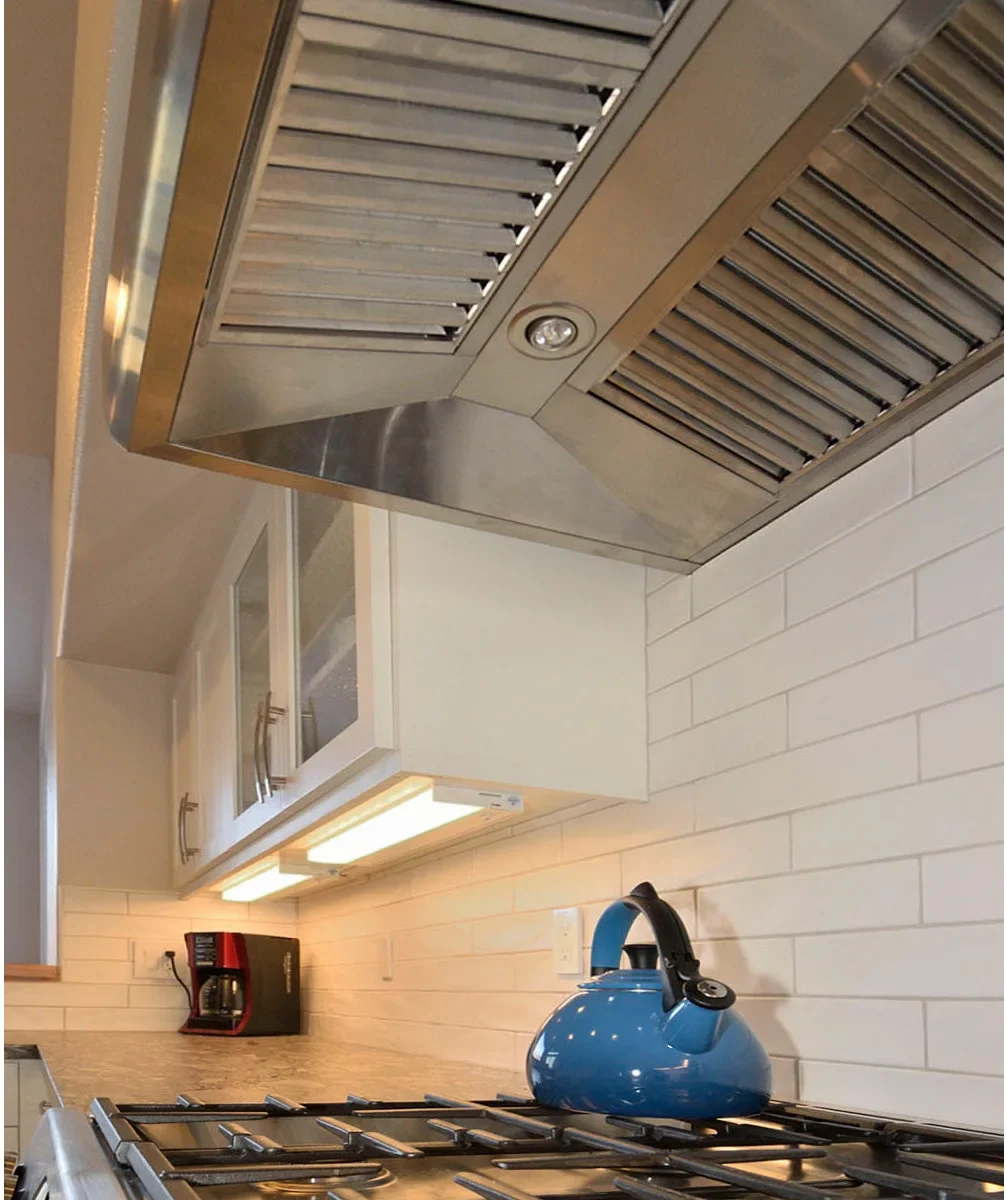
The underside of the hood includes a small round light, while nearby under-cabinet fittings light the adjoining counter. The close view shows that the cooking position and the side workspace have separate fittings. White tile and pale doors form a simple background around the blue kettle.
Check the hood’s actual lighting and maintenance instructions alongside the cooking appliance requirements. Keep access to its filters and lamp components as intended by the manufacturer. Assess the adjacent counter separately so the hood light is not expected to cover a work area beyond its useful reach.
IDEA 04 / 20
Combine Display Lighting with Worktop Lighting
 SaveSupport Non AI Creator
Image credit: Project: Santa I Contracting Corp (via Houzz)
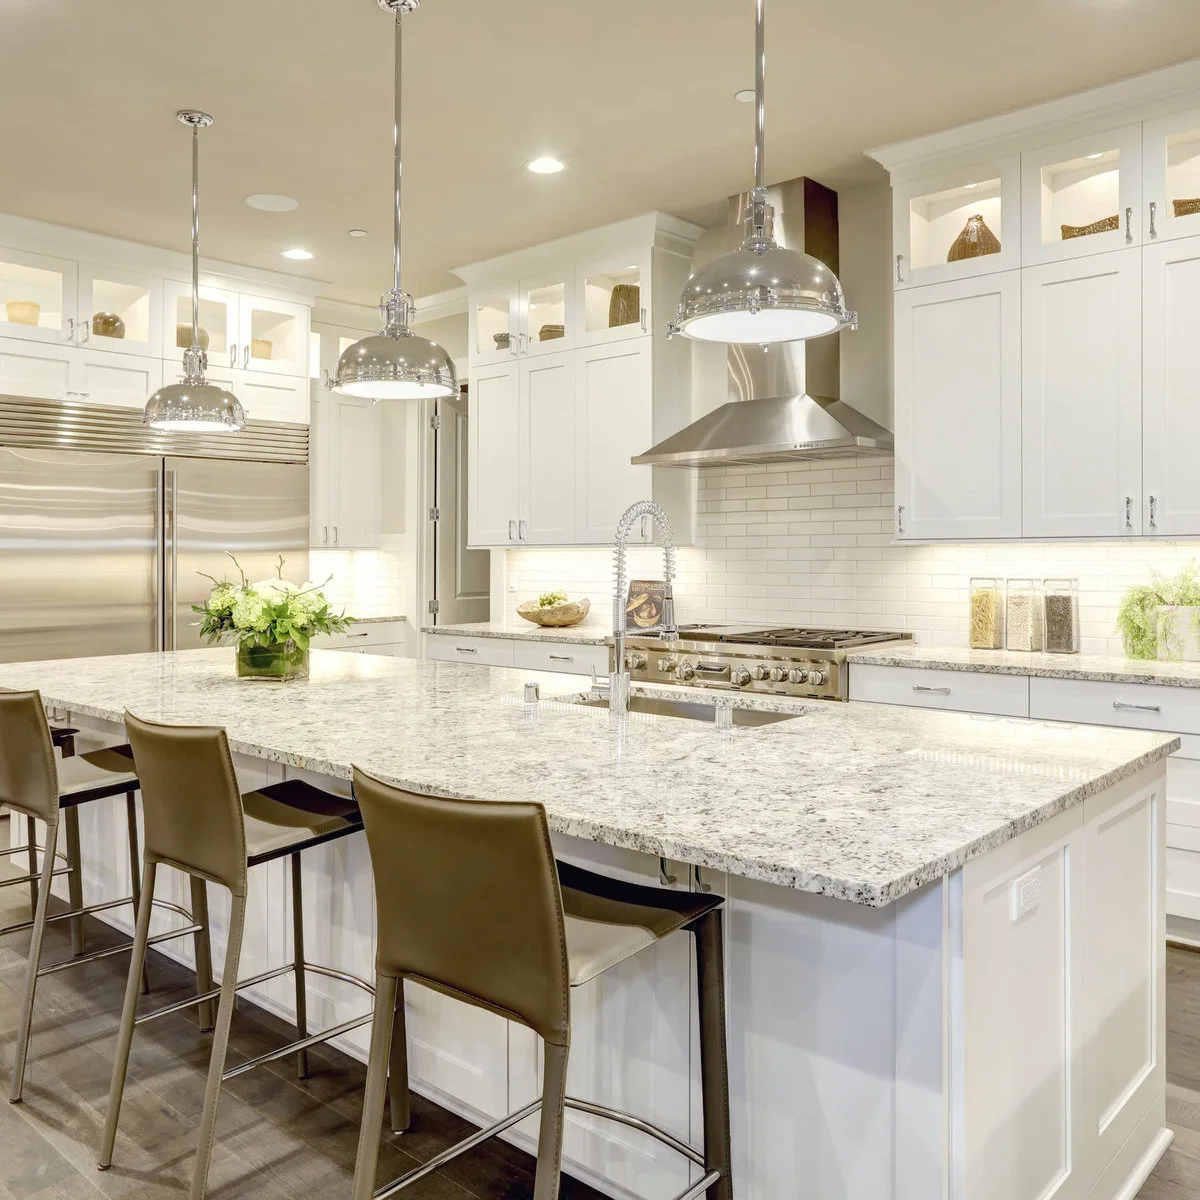
The shiny dome pendants define the island, while smaller lights in the glass-front upper sections make the cabinet displays visible. Light also runs beneath the solid cupboards onto the back counter. These layers occupy different parts of the room rather than repeating one decorative fitting everywhere.
Discuss separate controls for display and working lights before cabinet installation. Compare above fridge cabinet ideas if the upper run will continue across the appliance area, and retain access to lighting components. Keep displayed items limited enough that the light and cabinet interiors can be cleaned without emptying a crowded collection.
IDEA 05 / 20
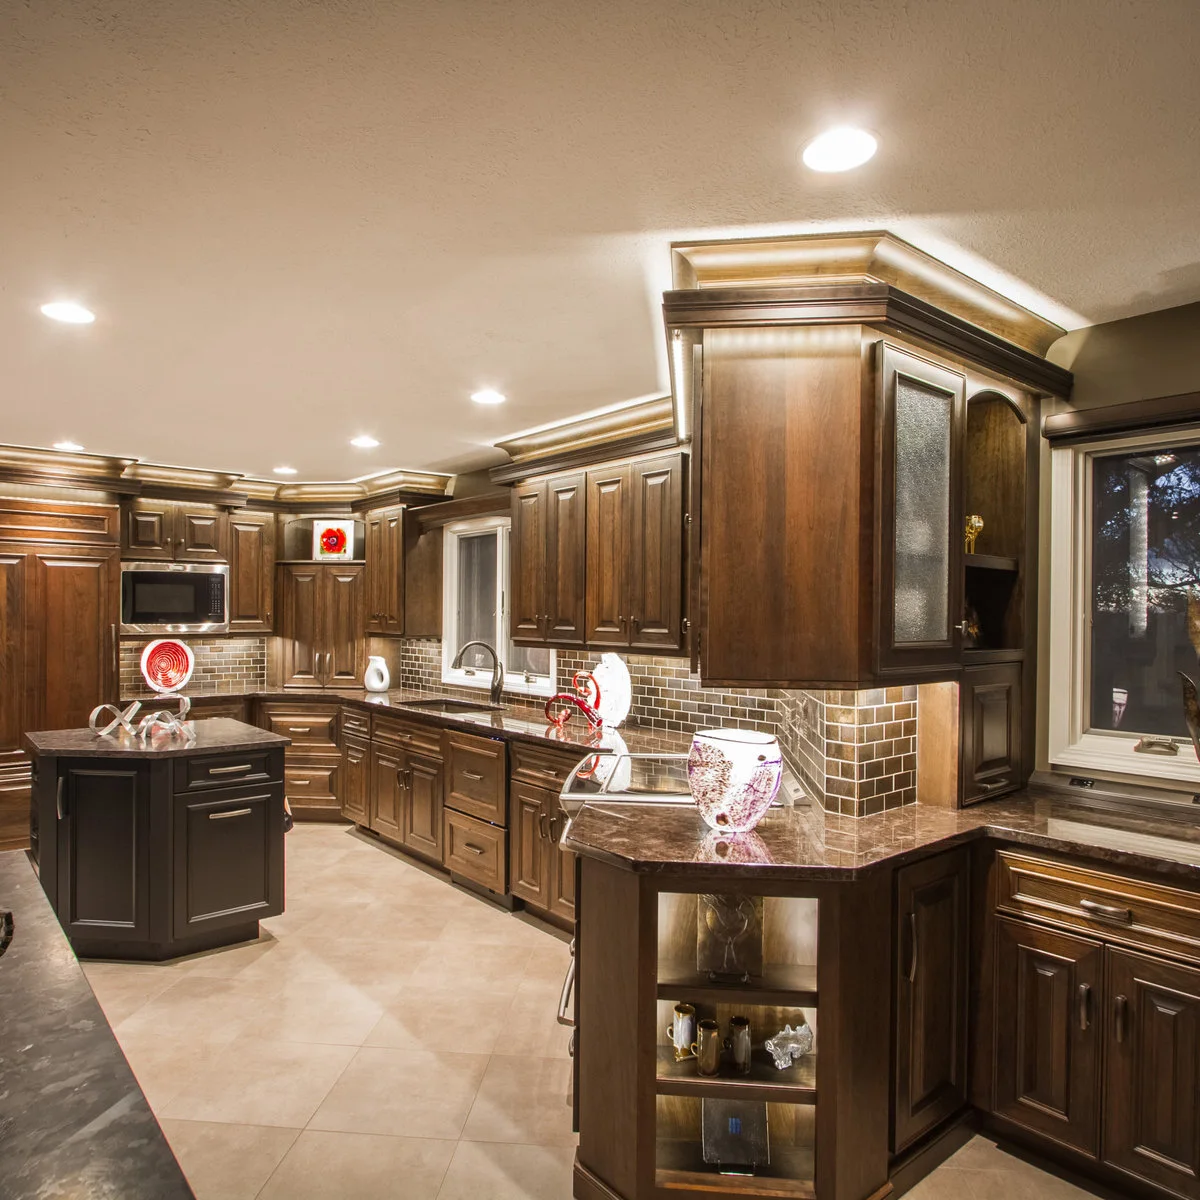
Give Dark Cabinetry More Than One Lighting Layer
 SaveSupport Non AI Creator
Image credit: Three Pillars Media / Task Lighting
Light appears above the cabinet crown, beneath the cupboards and inside the small open display at the end of the run. Round ceiling fittings cover another part of the room. The dark wood makes these separate lit edges visible without needing a row of hanging island shades.
Check the actual effect of each layer rather than adding light solely to outline every cabinet edge. Plan maintenance access above tall cupboards and avoid hiding essential components where they cannot be reached. Test the reflection in the polished counter and choose useful control groups with the electrician.
PART 02
Give Island Lighting a Useful Shape
IDEA 06 / 20
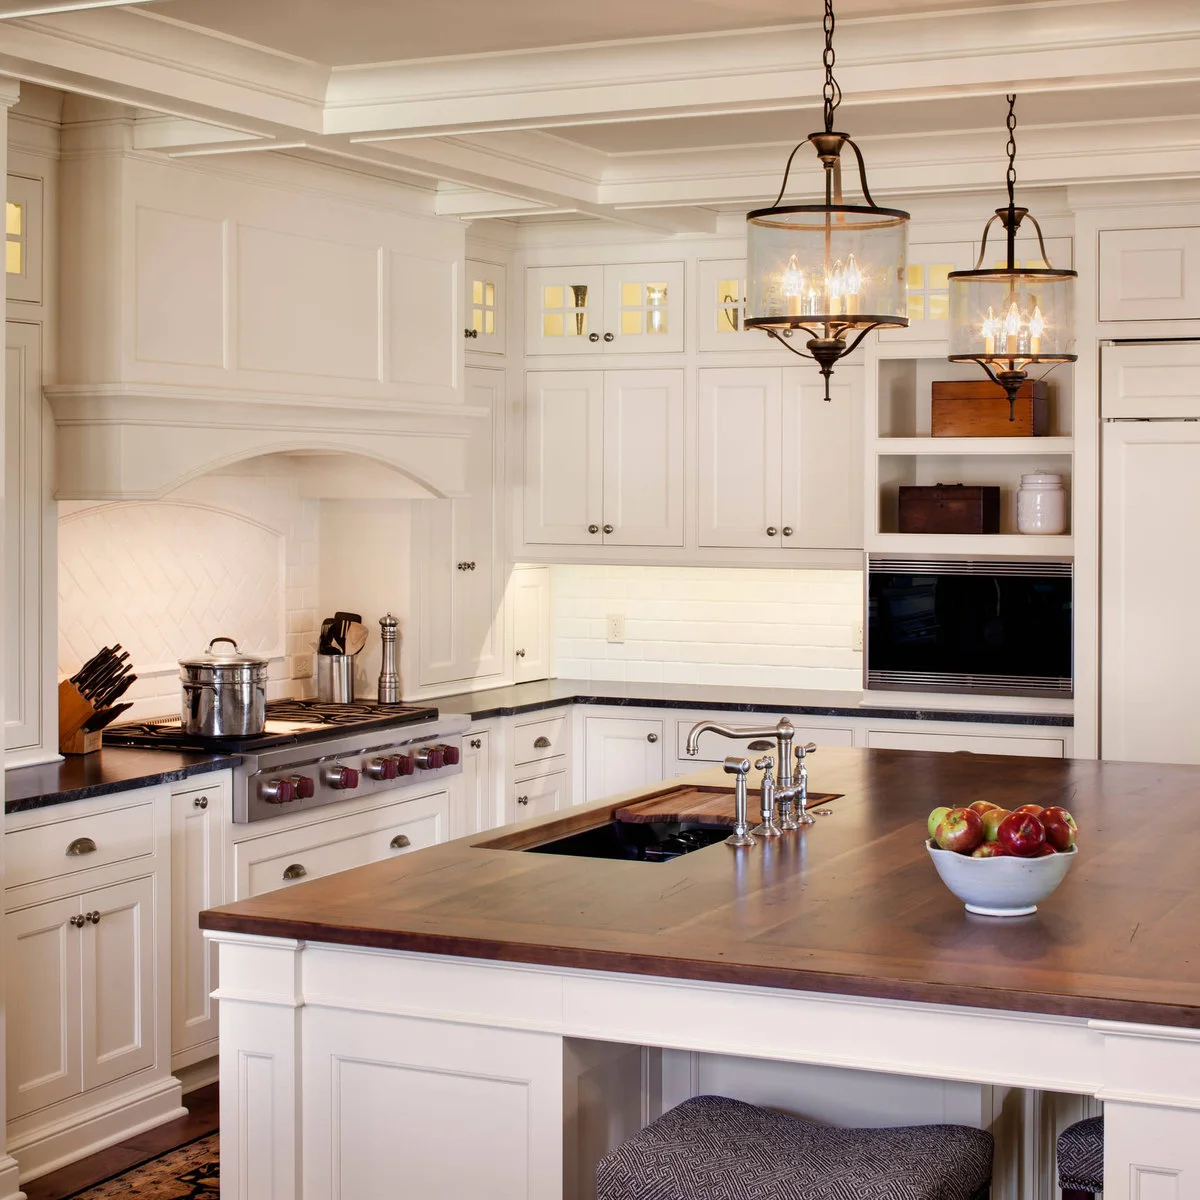
Relate Glass Lanterns to a Detailed Ceiling
 SaveSupport Non AI Creator
Image credit: David Bader / Bartelt, The Remodeling Resource
Two glass lanterns hang above the wood island, their dark frames giving the pale kitchen a clear vertical detail. The coffered ceiling already supplies a strong grid overhead. Smaller cabinet lights remain visible in the background, allowing the lanterns to form part of a broader lighting arrangement.
Compare the lantern outline with the ceiling beams before locating electrical points. Check the full fixture height, including chain and lower details, against the chosen drop. Allow a practical way to clean the glass and reach the lamps without relying on the island surface as a standing platform.
IDEA 07 / 20
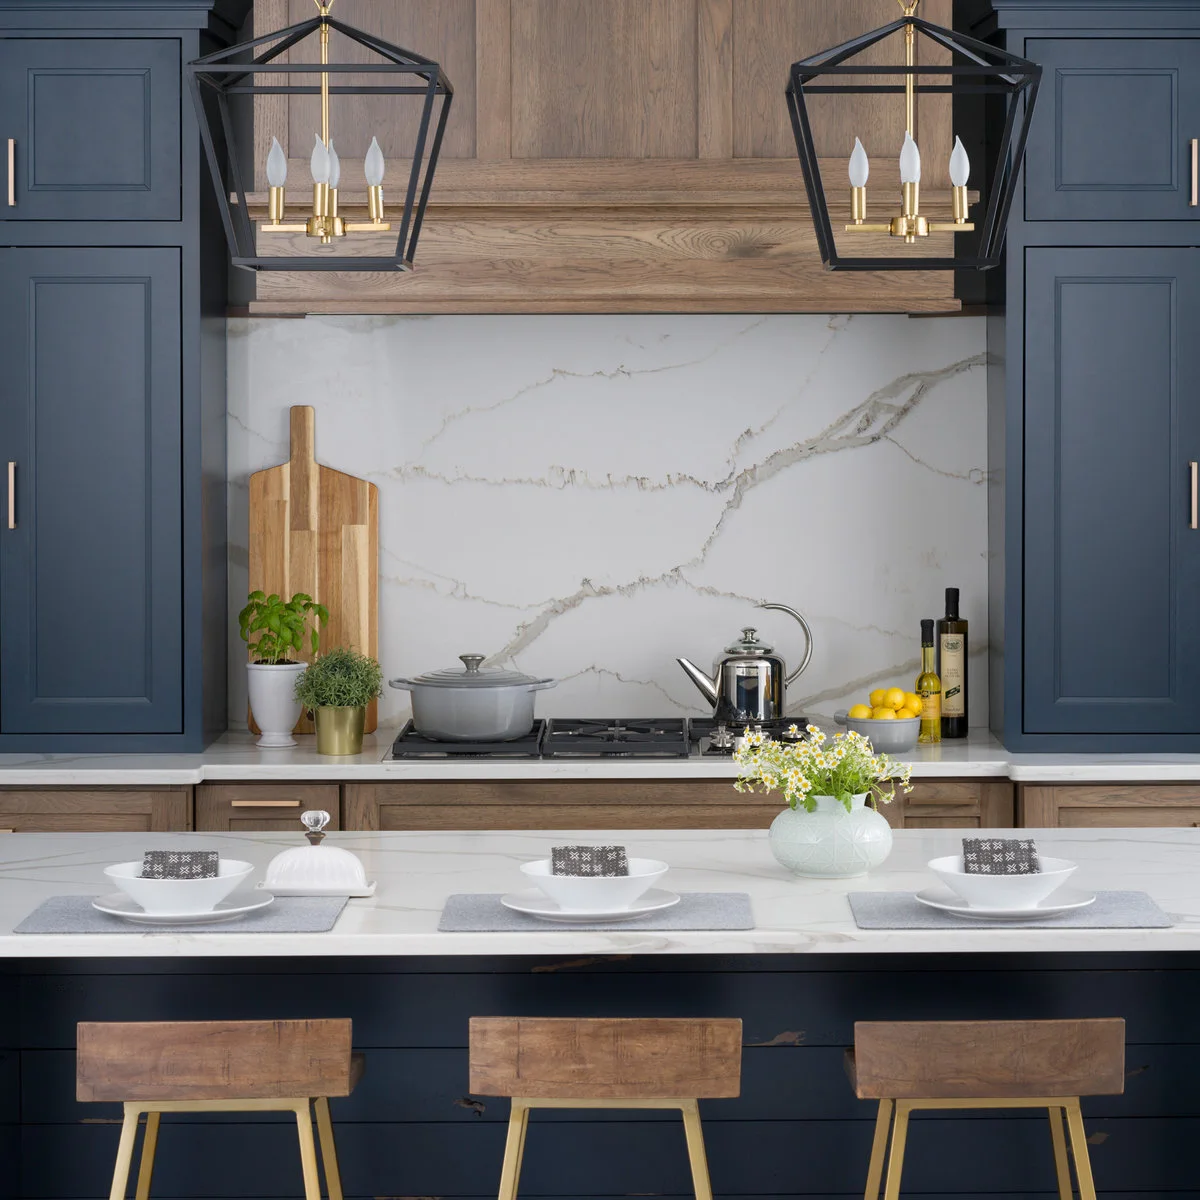
Use Open Lantern Frames Against Strong Cabinet Colors
 SaveSupport Non AI Creator
Image credit: Project: Dura Supreme Cabinetry (via Houzz)
The open lantern frames repeat the deep cabinet color while their warm metal centers relate to the pulls below. Because the frames are open, the broad wood hood and pale veined wall remain visible behind them. The island’s stools add another warm material at a lower level.
Check the exposed lamps from the stool seats before choosing this open style. Compare compatible lamp appearance and controls rather than assuming a decorative candle shape will feel comfortable at eye level. Keep the fixtures’ overall width in the layout so adjacent lanterns do not crowd the kitchen’s main sightline.
IDEA 08 / 20
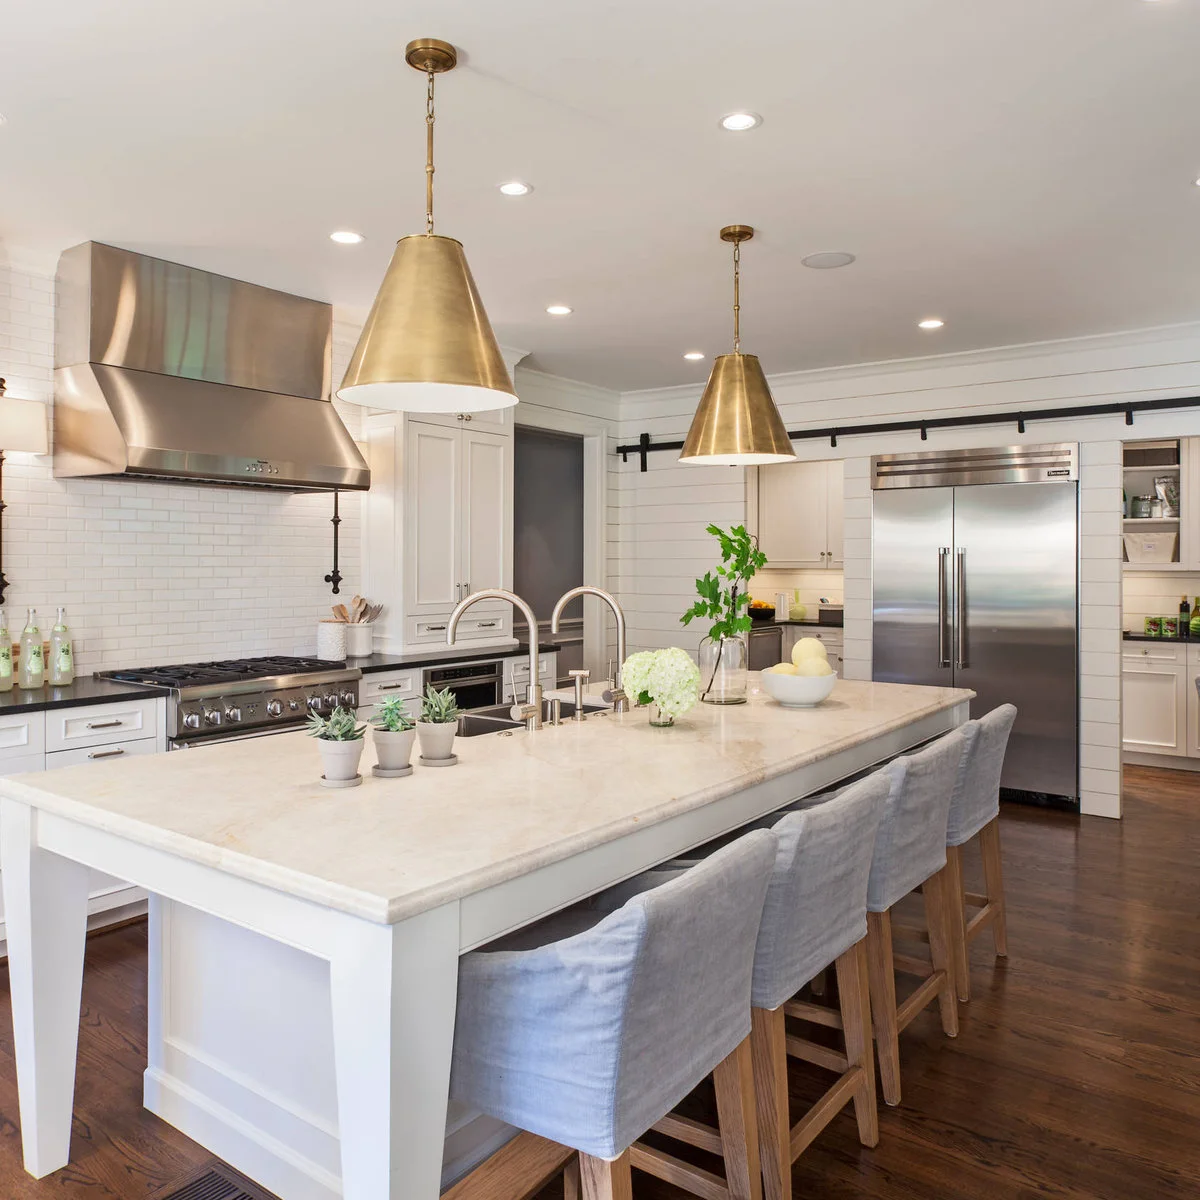
Give a Pale Island Warm Metal Cone Shades
 SaveSupport Non AI Creator
Image credit: Jim Schmid Photography
The broad cone shades add a warm metal surface above the pale island. Their simple shapes stand out against white cabinets without repeating the larger metal range hood exactly. Recessed ceiling fittings provide another visible layer around the room, while gray stool covers keep the seating quieter.
Test the shade width and lower edge from both sides of the island before deciding on the drop. Opaque shades change the view through the room more than open frames do. Check the finish maker’s cleaning guidance and compare the metal sample with nearby appliances and fittings under the actual lights.
IDEA 09 / 20
Keep a Row of Glass Pendants Visually Light
 SaveSupport Non AI Creator
Image credit: Project: Florida Designer Cabinetry (via Houzz)
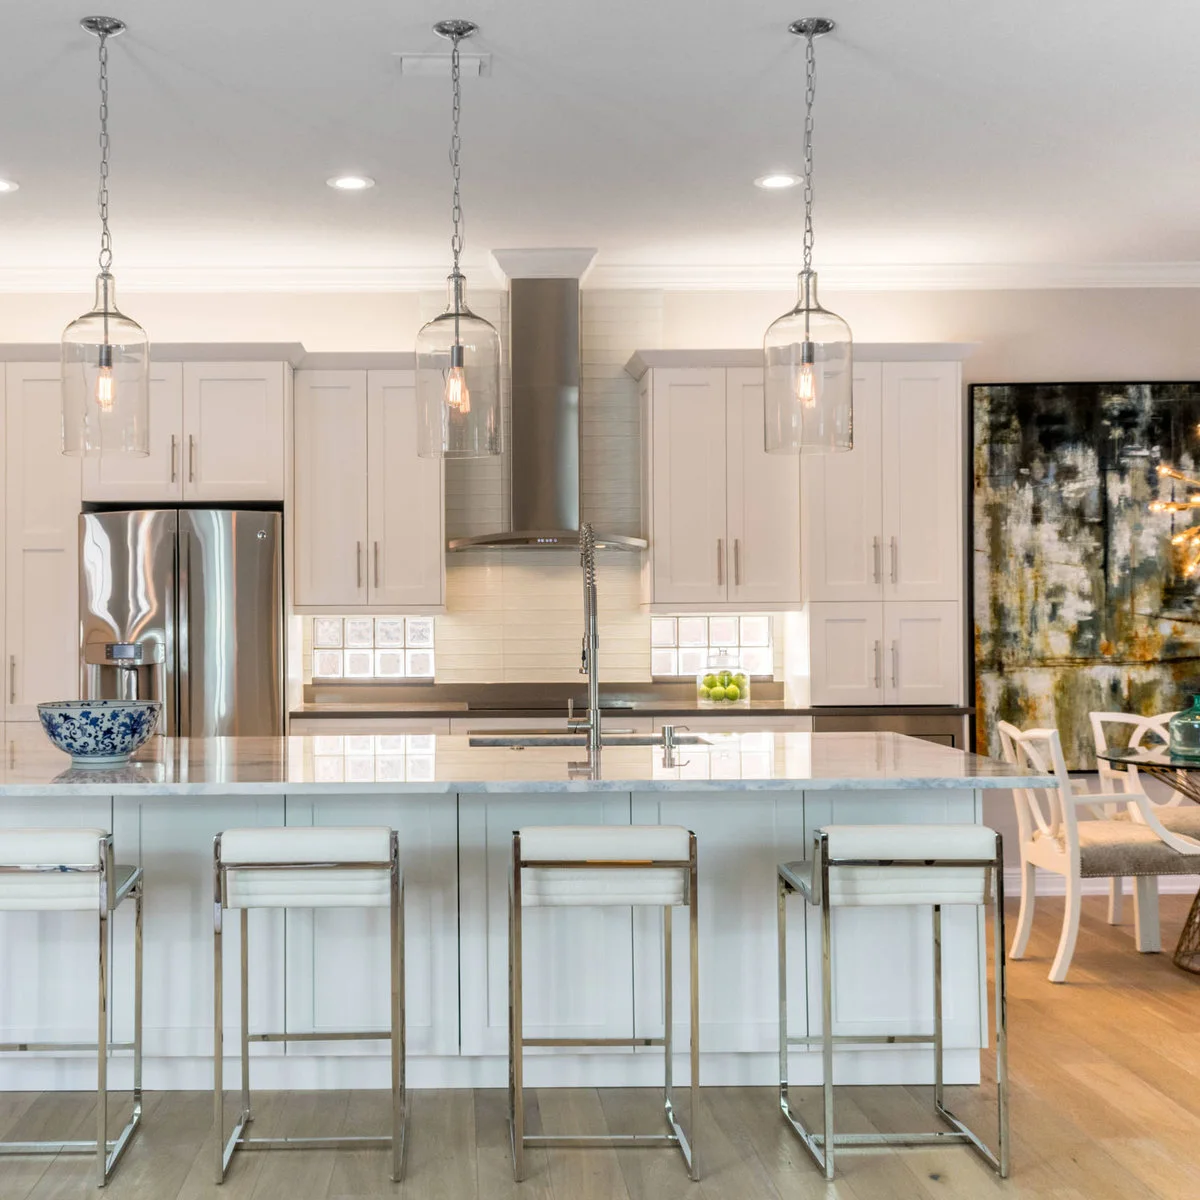
Three narrow glass shades make a repeated line above the island without concealing much of the pale cabinetry behind them. The visible lamps add a warm point inside each clear shade. Silvery chains and stool frames connect the fixtures with the room’s other light-reflecting details.
Compare the exposed lamp from the seating position and check the glass reflections at night, not only in daylight. Keep the row aligned with the actual island rather than a temporary furniture position. Consider how easily the long shades can be removed or cleaned according to their instructions.
IDEA 10 / 20
Use Opaque Lower Globes with Dark Upper Caps
 SaveSupport Non AI Creator
Image credit: Project: Fautt Homes (via Houzz)
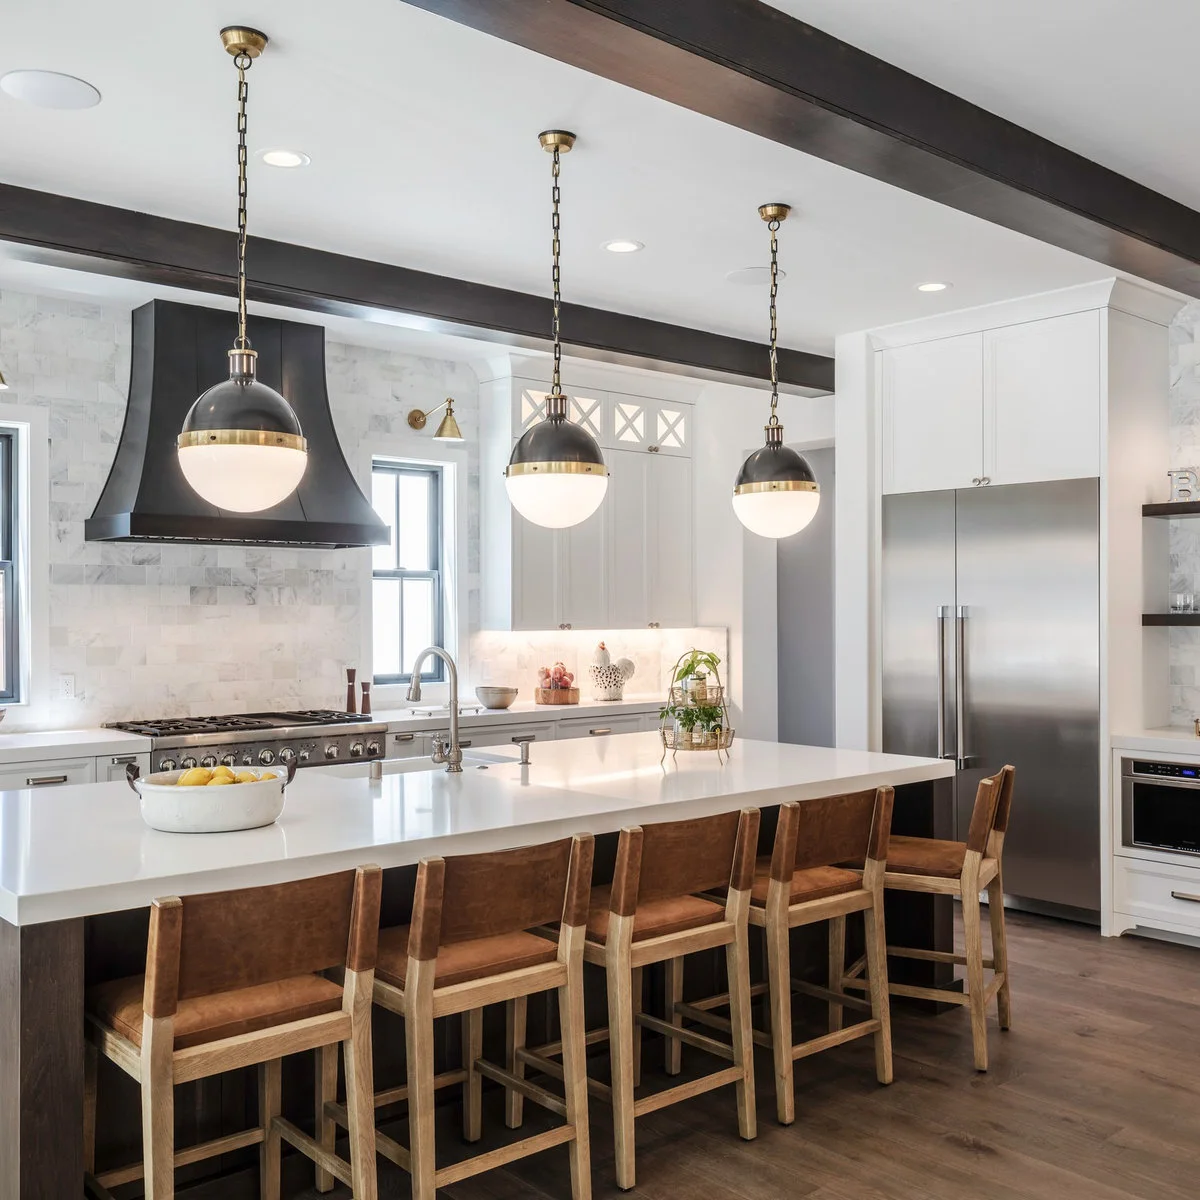
The pale lower halves of these globe pendants contrast with their dark upper caps and narrow warm metal bands. Repeating three fittings gives the long island a clear rhythm. Dark ceiling beams and the hood relate to the caps, while the lighter globes remain distinct against them.
Check the actual fixture’s light distribution and dimming compatibility rather than assuming the opaque globe produces a particular brightness. Compare its full diameter with the island width and the view across the stools. Leave access for cleaning the lower surface, where fingerprints and cooking residue may become noticeable.
PART 03
Work Around Windows, Shelves and Ceilings
IDEA 11 / 20
Use Wall Lights Between Kitchen Windows
 SaveSupport Non AI Creator
Image credit: Ryann Ford / Cuppett Kilpatrick Architecture + Interior Design
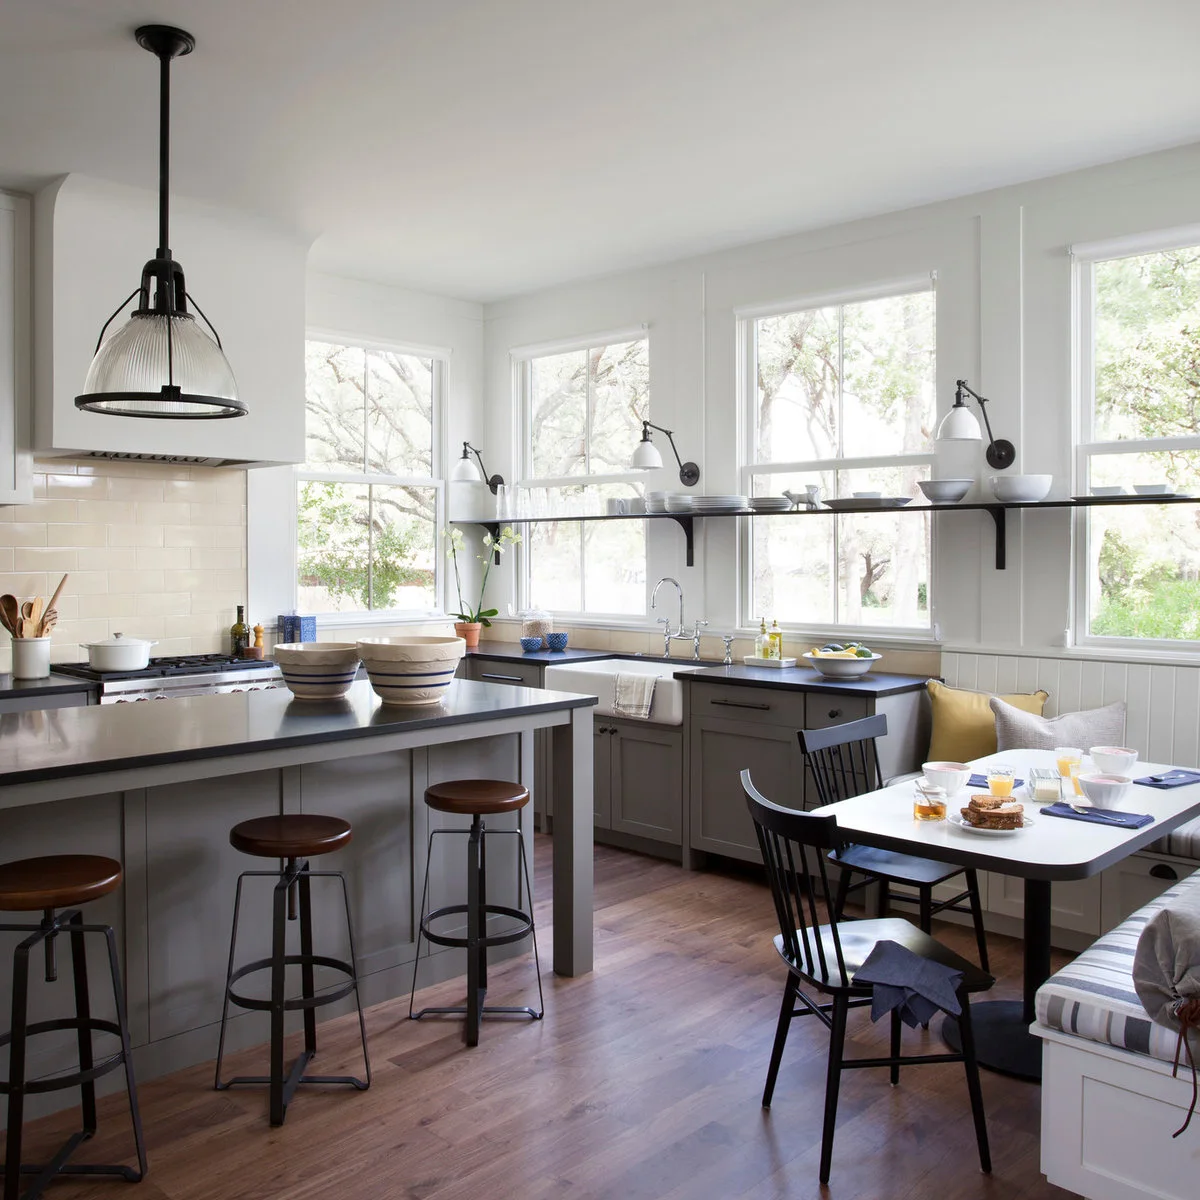
Small shaded wall lights occupy the narrow piers between the tall windows. A long shelf connects the lower part of the window wall, while the nearby pendant marks the island. The fittings make use of wall space where a continuous upper cabinet run would change the view and storage arrangement.
Compare wall sconce ideas around the actual window trim and shelf contents before fixing positions. Check the shade projection against dishes and the room’s approach. Test the light after dark at the sink and the adjacent eating area, since plentiful daylight does not establish how the evening arrangement will work.
IDEA 12 / 20
Coordinate Wall Arms with Broad Island Shades
 SaveSupport Non AI Creator
Image credit: Wiff Harmer / Allard Ward Architects
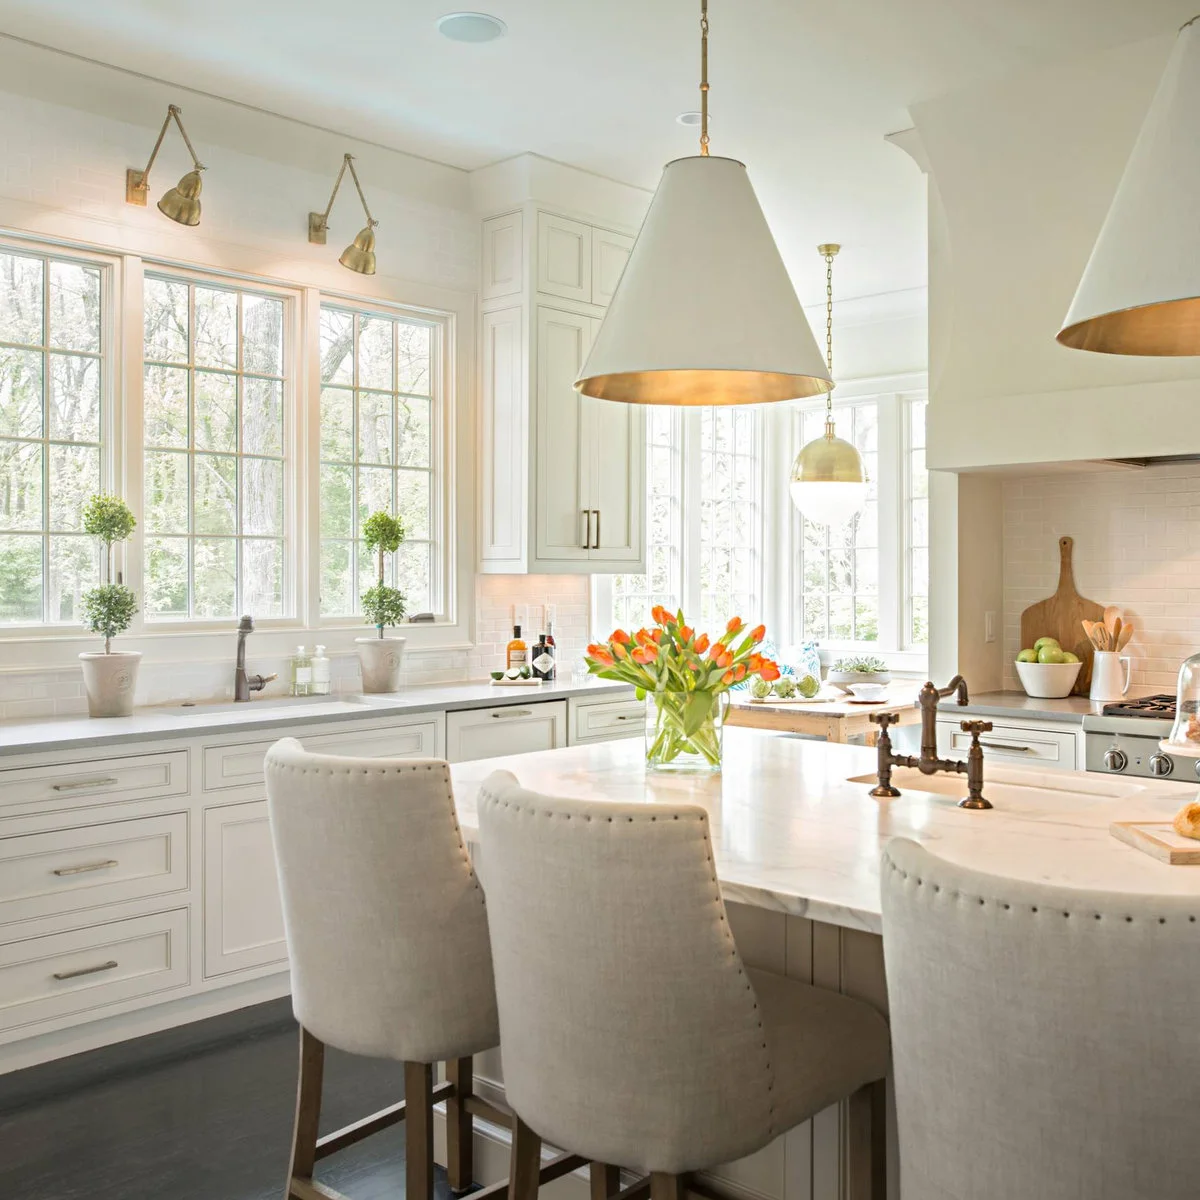
Small warm metal wall arms repeat above the broad window, while larger pale cone shades define the island in front. The two fixture types share warm details without matching in size. Pale cupboards and counters keep the lighting shapes visible against an otherwise restrained background.
Check the actual wall fitting’s movement and mounting requirements before copying the arm positions. Compare both fixture types together from the sink and stools so one does not block the other. Plan separate control needs around washing and sitting rather than treating every decorative light as one inseparable group.
IDEA 13 / 20
Use Small Shades Beside a Sink Window
 SaveSupport Non AI Creator
Image credit: Project: Keystone Millworks Inc (via Houzz)
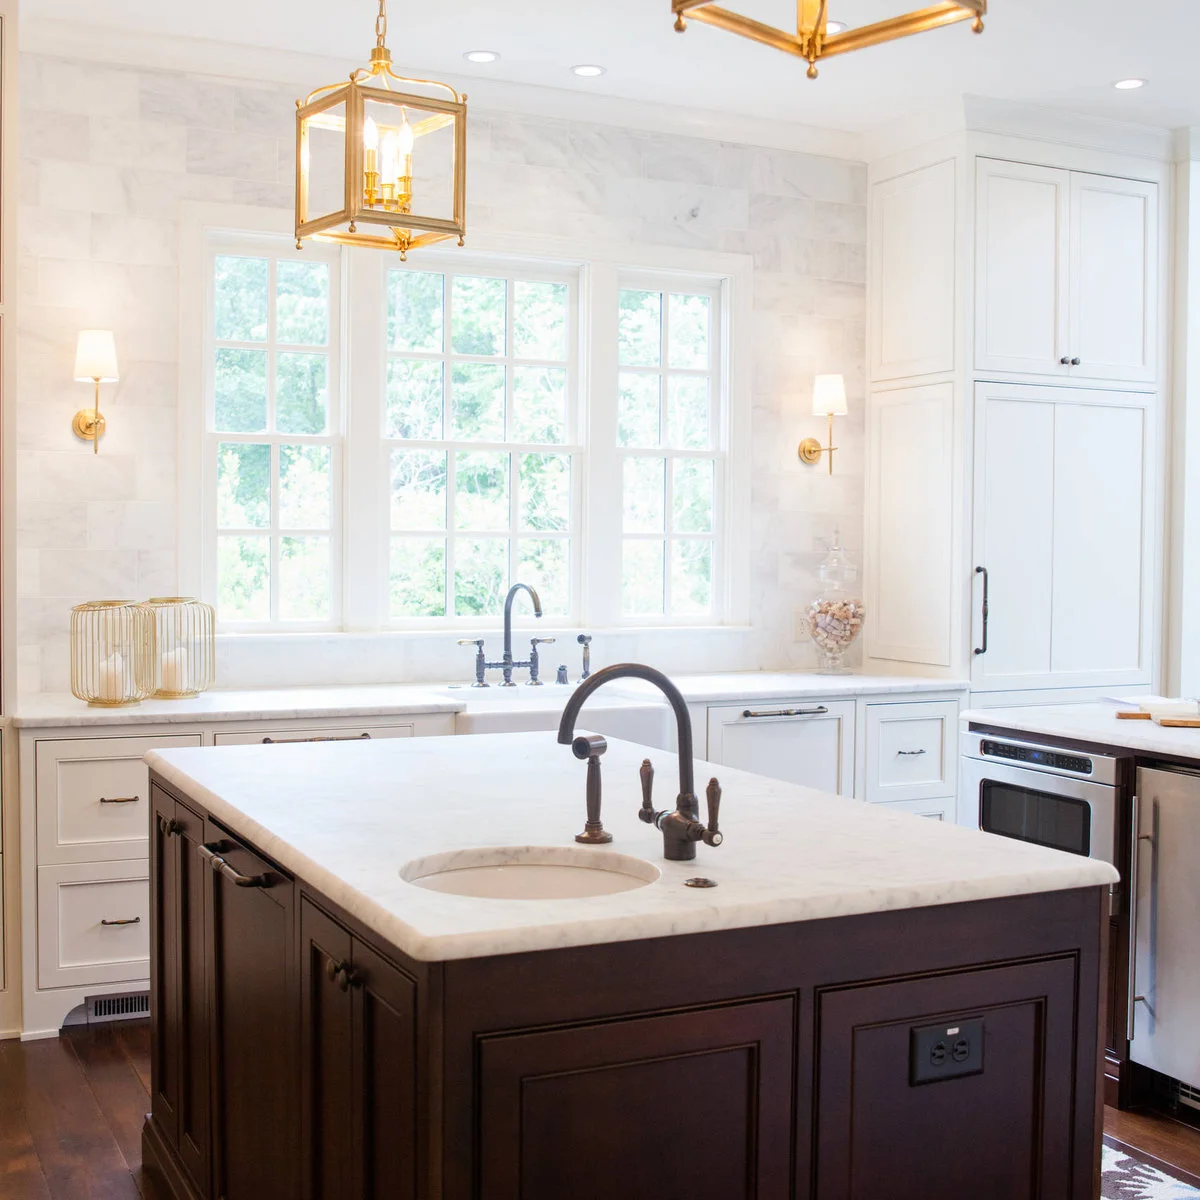
Small pale shades sit on either side of the wide window above the main sink. Their narrow warm metal stems relate to the larger lantern frames in front without dominating the tiled wall. The dark island and pale counters keep the room’s separate working areas clearly visible.
Check the sconces from the washing position and from the island seats before locating them beside the trim. Leave room to clean the window and shade surfaces. Have the electrician confirm suitability and placement for the actual location, including any requirements associated with the nearby sink.
IDEA 14 / 20
Follow a Sloping Wall with a Smaller Light Rhythm
 SaveSupport Non AI Creator
Image credit: Project: Heidi Caillier Design (via Houzz)
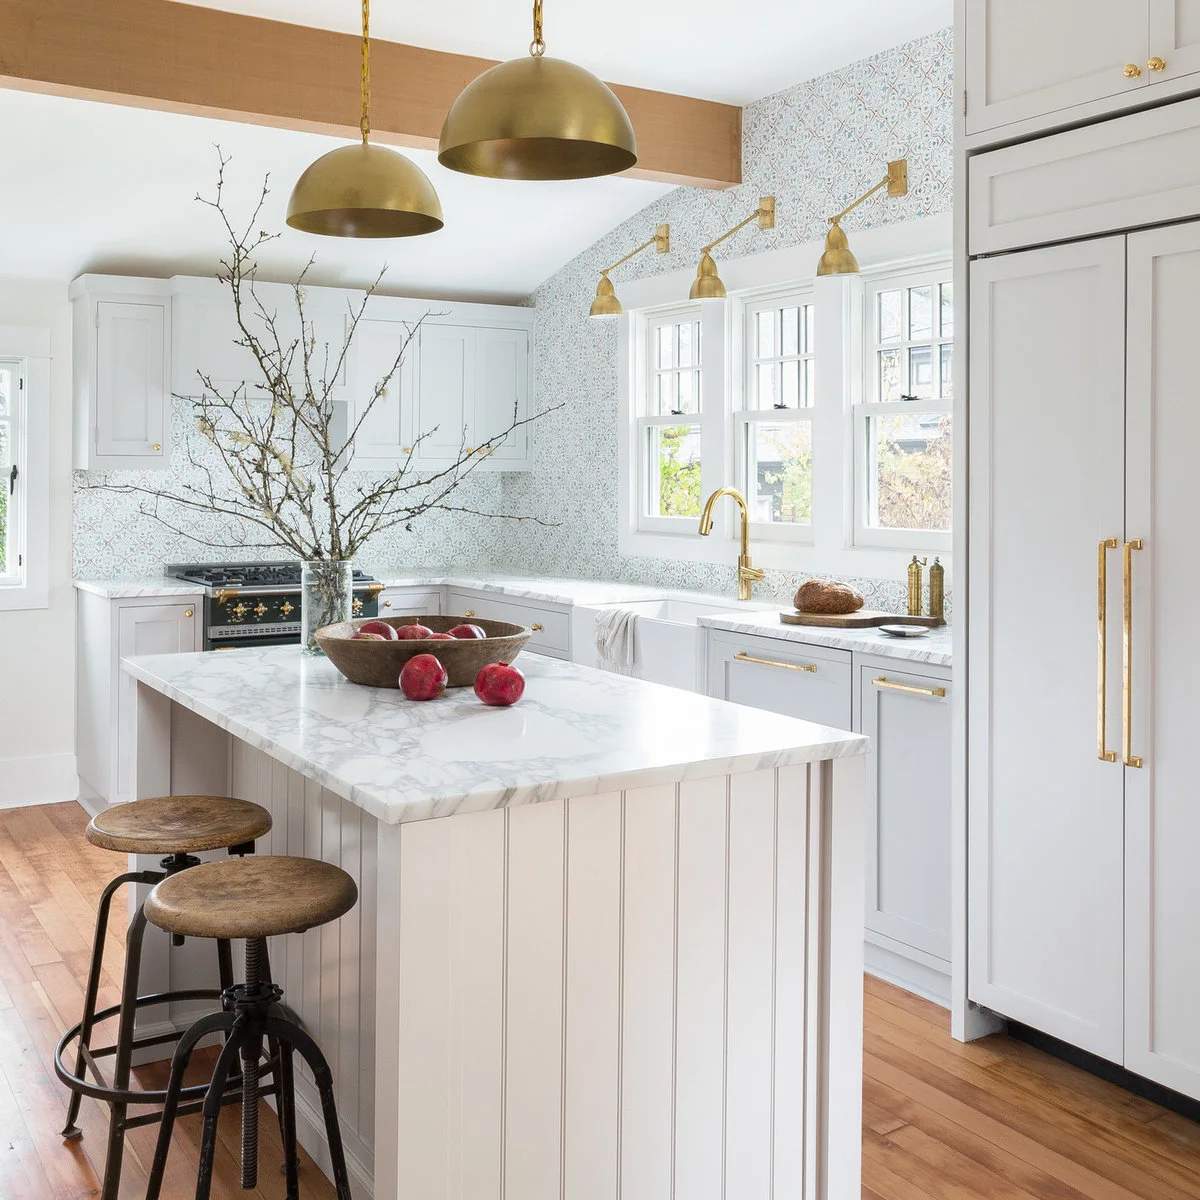
The dome pendants occupy the island area beside the wood beam, while small wall lights repeat above the windows on the sloping wall. Their shared warm finish connects the different scales. The patterned wall makes the smaller fixtures visible as a line without requiring another large hanging shape.
Check the permitted mounting orientation and adjustment of the chosen wall fittings before arranging them along a slope. Compare the pendant drops with the beam and the island’s position. Keep window operation and future cleaning access in the plan instead of using the slope alone to determine each electrical point.
IDEA 15 / 20
Use Short Ceiling Bars Where Hanging Shades Are Unwanted
 SaveSupport Non AI Creator
Source: Houzz
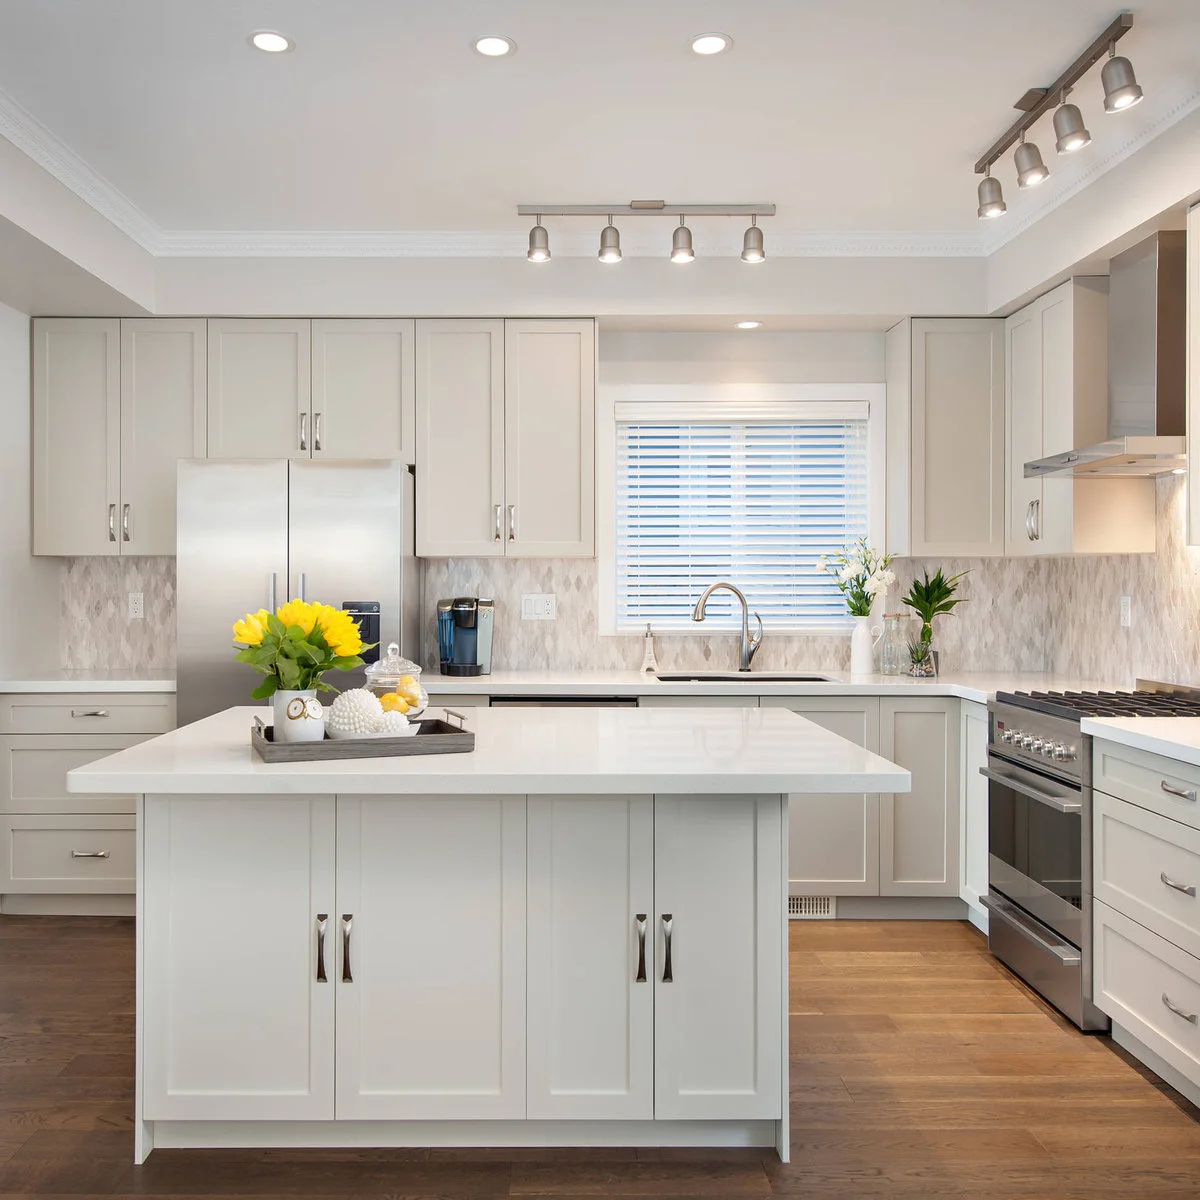
The short ceiling bars hold several small shades close to the ceiling, leaving the view over the island open. Round recessed fittings add another pattern across the central ceiling. Pale cabinets and walls keep the metal bars visible without turning them into large decorative features.
Check whether the selected heads adjust and how their beams cover the actual counters before choosing this arrangement. A compact fixture does not automatically remove glare. Test it from the island seats and ask the electrician to assess the layout around the working positions and any existing ceiling construction.
PART 04
Choose Shades You Can Live With and Maintain
IDEA 16 / 20
Outline the Ceiling with a Slim Track Arrangement
 SaveSupport Non AI Creator
Image credit: Project: Tech Lighting (via Houzz)
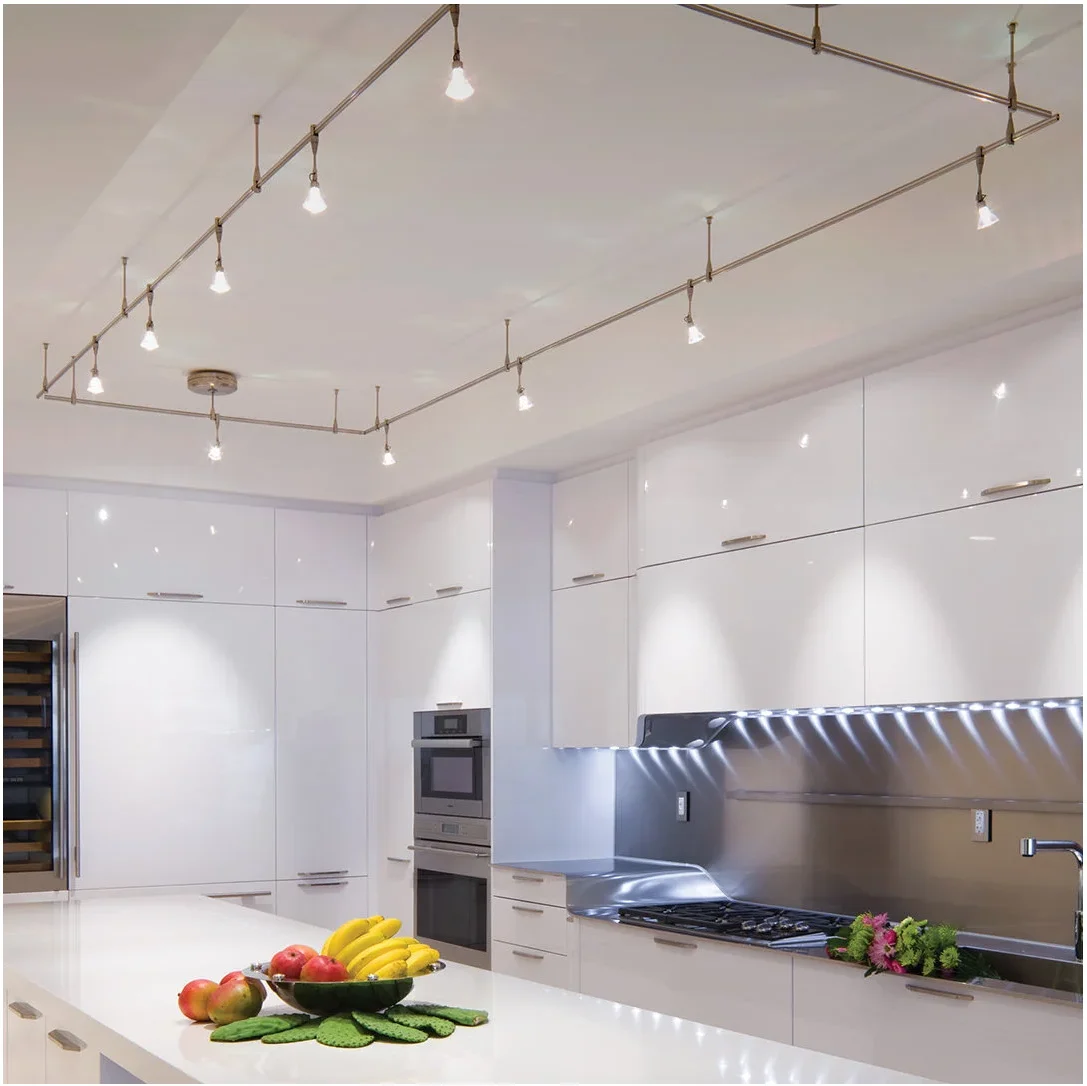
The slim rails form a rectangular arrangement above the glossy white kitchen. Small light heads repeat around the rails rather than hanging as broad shades. A separate line beneath the cabinets creates bright reflections across the metal backsplash, showing how reflective finishes become part of the lighting effect.
Test the reflected light against the actual backsplash and counter before committing to exposed points of light. Check the system’s permitted connections and mounting layout with the installer. If glare is distracting, compare compatible shielding or different fittings instead of assuming more small lamps will improve the working surface.
IDEA 17 / 20
Keep the Central Ceiling Low and Uncluttered
 SaveSupport Non AI Creator
Image credit: Project: J.Holderby - Renovations (via Houzz)
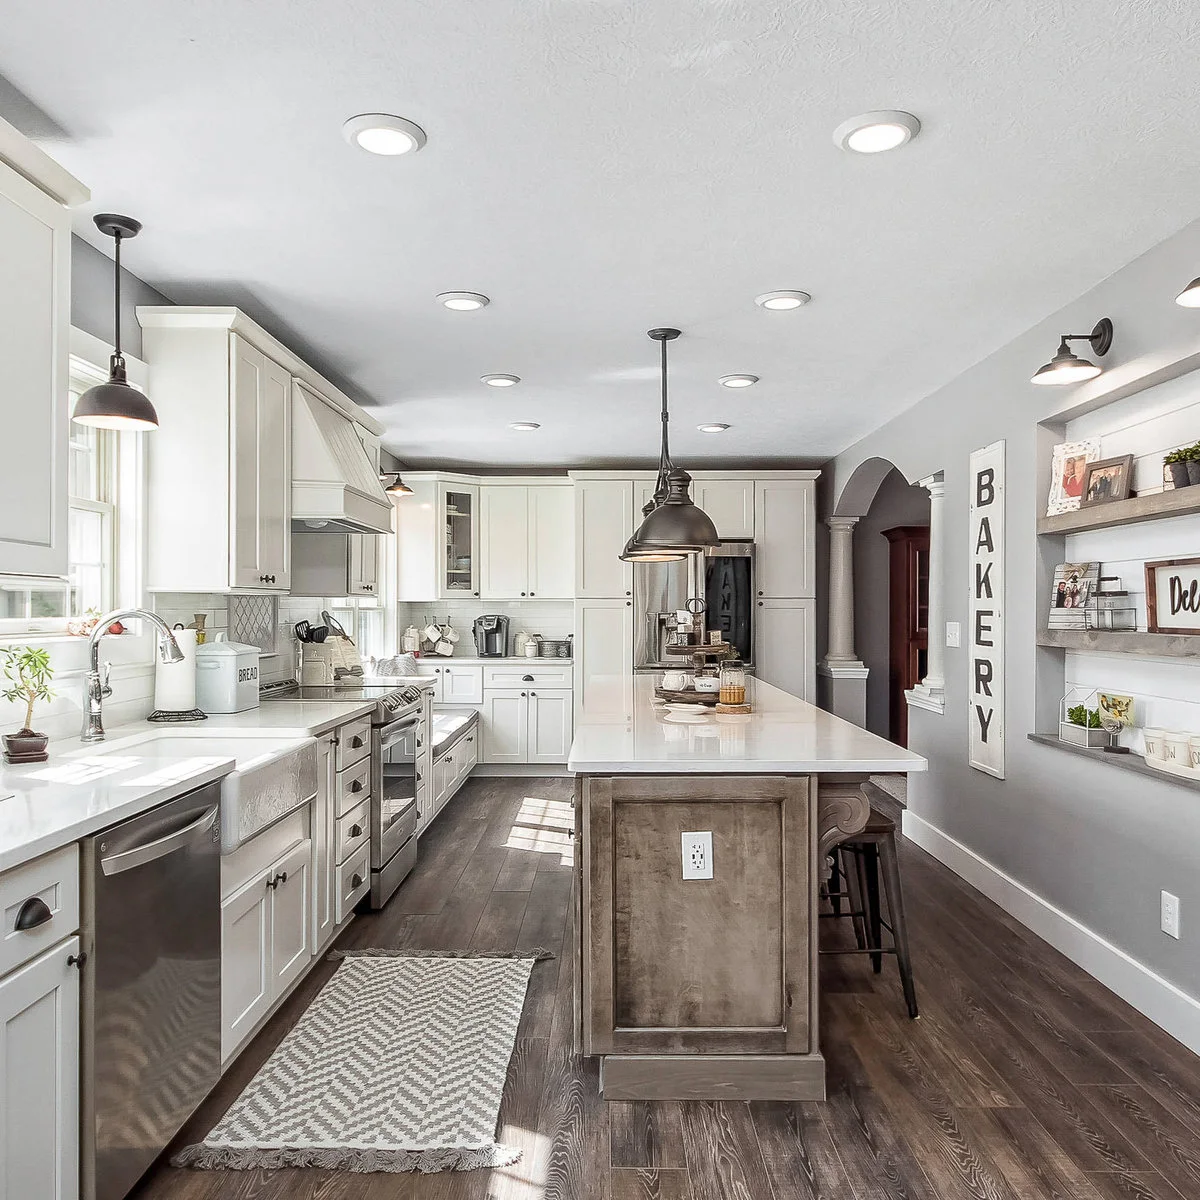
Round low-profile fittings form the main ceiling pattern through the narrow kitchen. Dark pendants add selected lower shapes near the island and window, while the pale ceiling stays relatively uncluttered around them. The repeated dark finish also appears in the hardware and small wall lights.
Assess the counter and walking route separately before placing the round fittings in a regular grid. A visually neat ceiling still needs to work when someone stands at the sink or preparation area. Check the chosen fixture’s installation requirements against the ceiling construction rather than assuming every shallow-looking fitting mounts the same way.
IDEA 18 / 20
Use a Colored Pendant as a Small Accent
 SaveSupport Non AI Creator
Image credit: Project: Brownsmith Restoration (via Houzz)
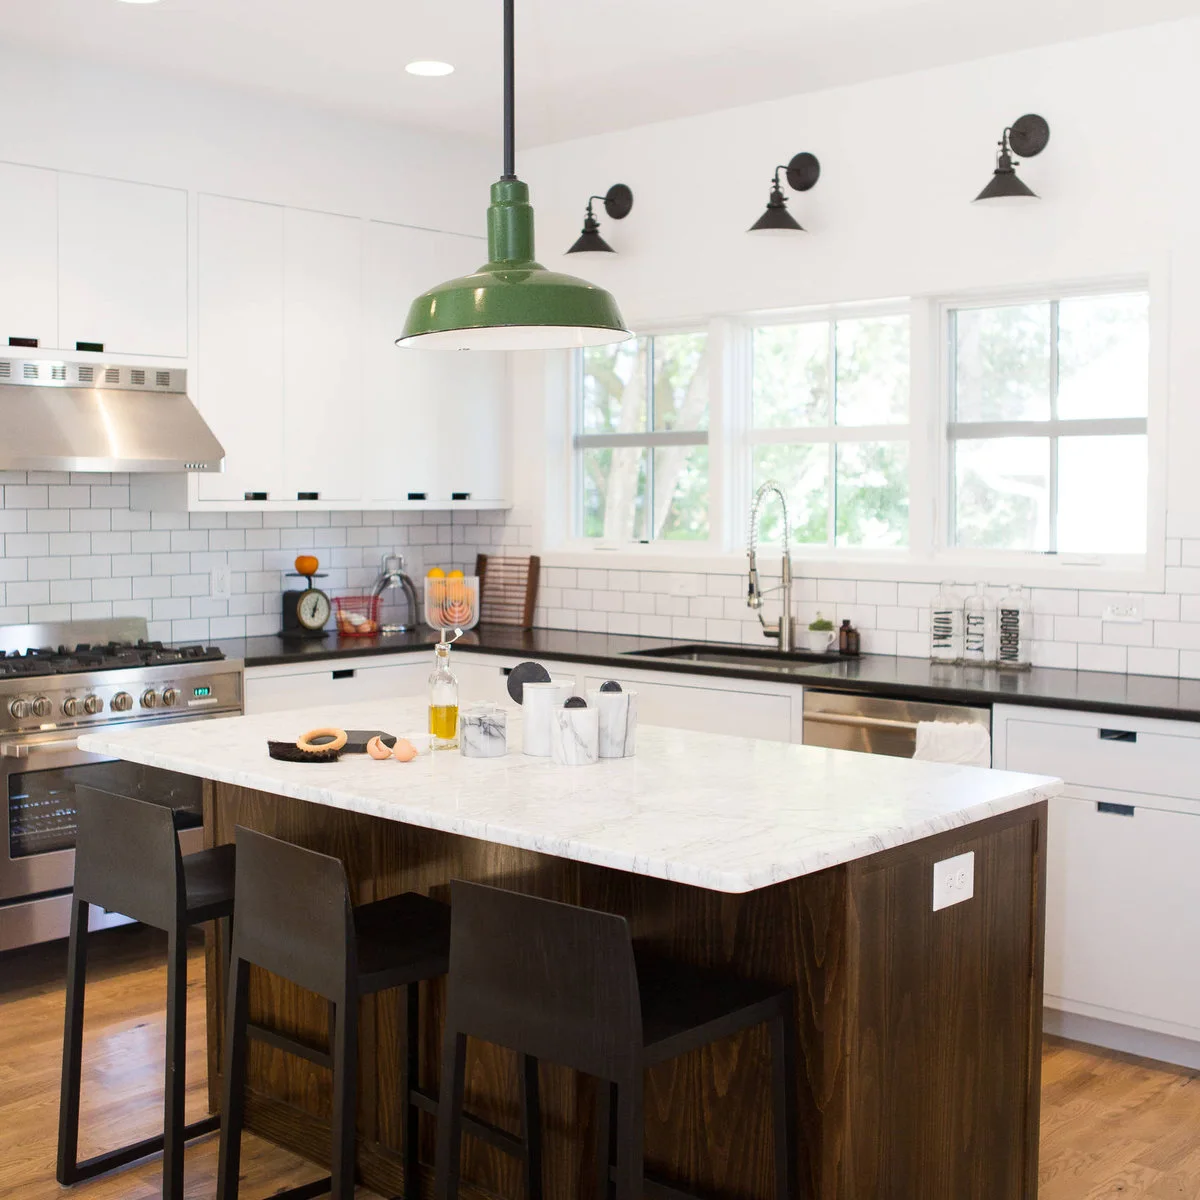
The green pendant supplies a concentrated color accent above the island, while the small dark wall lights remain quieter above the windows. White cabinets and tile let the green shade stand out without repeating it across a full cabinet run. The wood island gives the lower part of the room warmth.
Compare kitchen color combinations with an actual shade sample before using a fixture as the room’s main accent. Check its size and finish from adjoining spaces as well as the kitchen doorway. Keep the working light assessment separate from the color decision so an attractive shade still serves its intended position.
IDEA 19 / 20
Give a Breakfast Table a Different Fixture Shape
 SaveSupport Non AI Creator
Image credit: Emily Followill
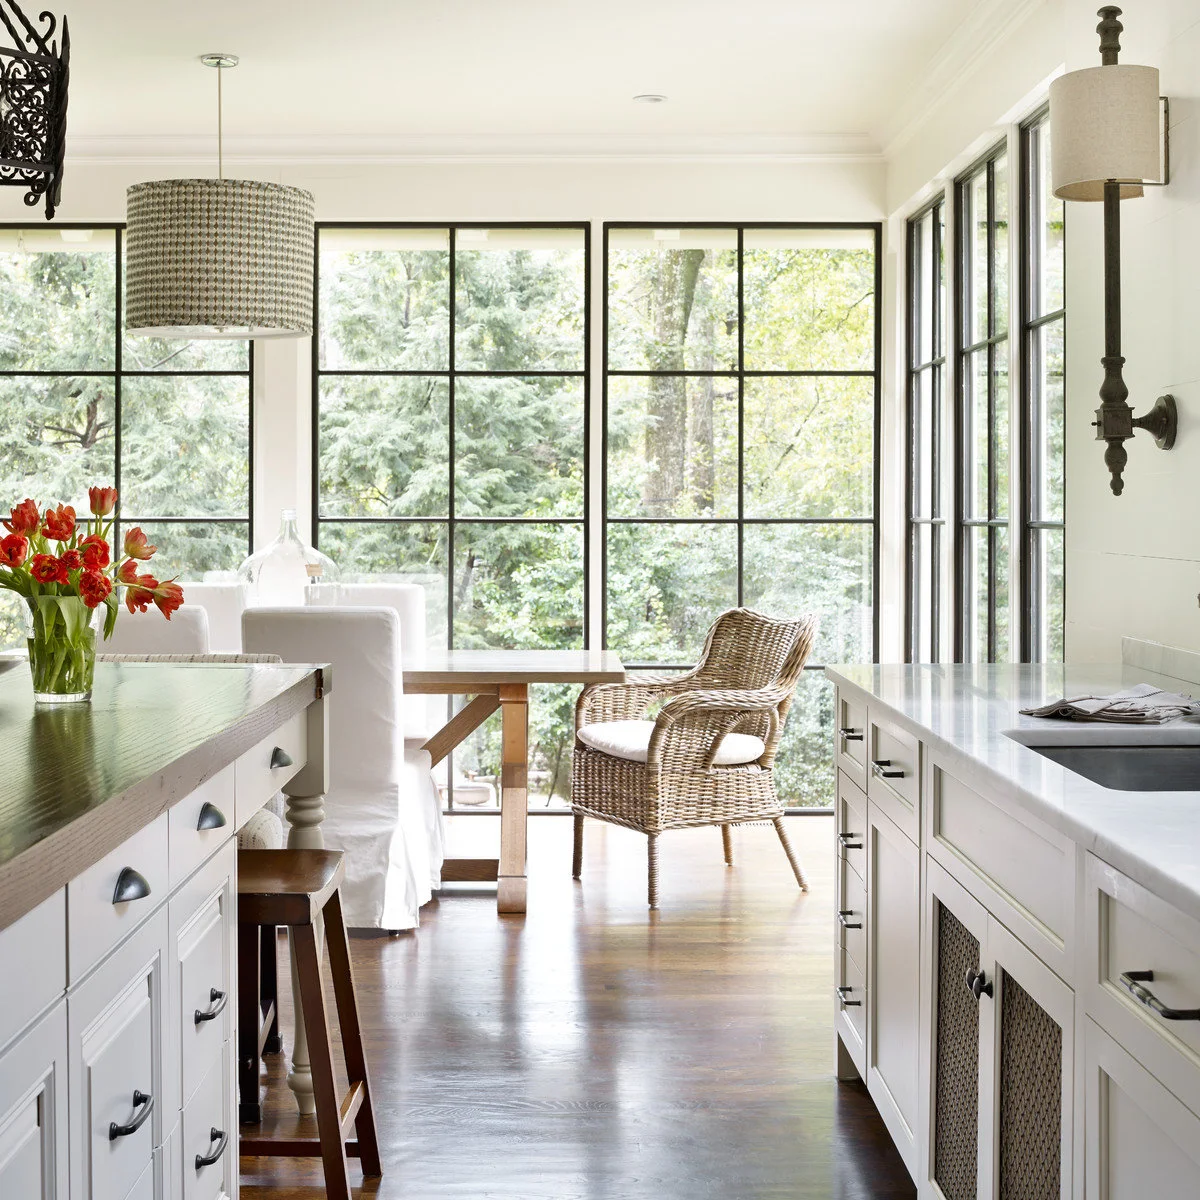
The patterned drum pendant identifies the breakfast table beside the tall windows, while the smaller wall light occupies the nearby kitchen wall. Their pale shades connect the two areas without repeating the same fixture. The table’s pendant adds softer pattern to the dark window frames and white cabinetry.
Locate the table and chairs before fixing the pendant position, especially if the table may move for gatherings. Check the shade from a seated position and compare its care requirements with cooking nearby. Keep enough separation between the two areas’ controls to use the table comfortably without lighting every working surface.
IDEA 20 / 20
Add Texture with Broad Woven Shades
 SaveSupport Non AI Creator
Image credit: Margaret Wright Photography / Houzz
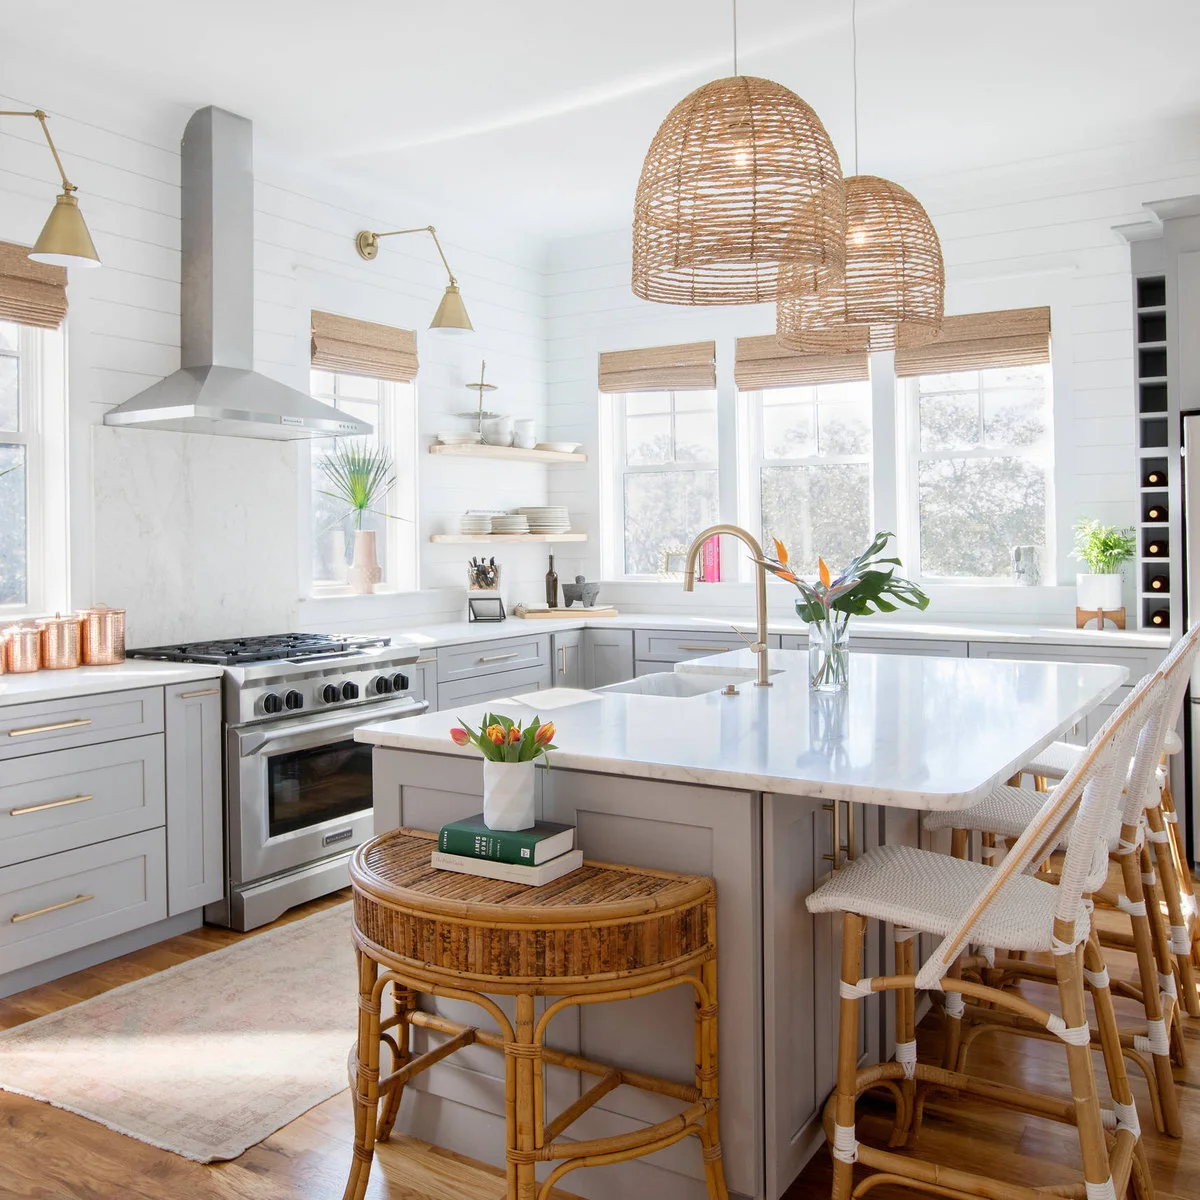
The broad woven shades add texture above the pale island, repeating the warmer tones of the stools and window blinds. Small warm metal wall lights provide a different outline near the windows. White wall boards and cabinetry leave the woven forms easy to see without adding another strong pattern.
Check the selected fixture’s approved lamp and cleaning instructions before choosing a woven shade for a kitchen. Compare its width with the island and the view through the room. Plan a reachable cleaning method, since open textured surfaces can require different care from a smooth metal or glass shade.
BRING IT ALL TOGETHER
Plan the Controls Alongside the Fixtures
List the lights needed for preparation, washing, dining and moving through the room. Discuss useful control groups with the electrician so decorative lighting does not have to do every job. Check that the proposed lamps, drivers and dimmers are compatible before ordering a whole set.
Test glare and reflections from both standing and seated positions. Include the real countertop and backsplash samples where possible, and keep a practical route for cleaning shades and replacing lamps. Final placement should follow the selected products and the actual room, rather than a universal spacing copied from a photograph.