A junk drawer earns its space when you can find scissors, tape or a working pen without emptying it onto the counter. Start with the items your household reaches for in that room. Everything else needs a decision before it needs a prettier container.
These photographs show different drawers and a few useful stages of a real organizing project. Some arrangements use fitted inserts; others reuse boxes or combine trays of different sizes. Choose a layout that lets you remove and return one item with one hand, and keep sharp tools and hazardous small objects inaccessible to children.
PART 01
Give the drawer a clear job
IDEA 01 / 17
Turn a Wide Drawer Into a Household Station
 SaveSupport Non AI Creator
Image credit: Kris Jarrett / Driven by Decor
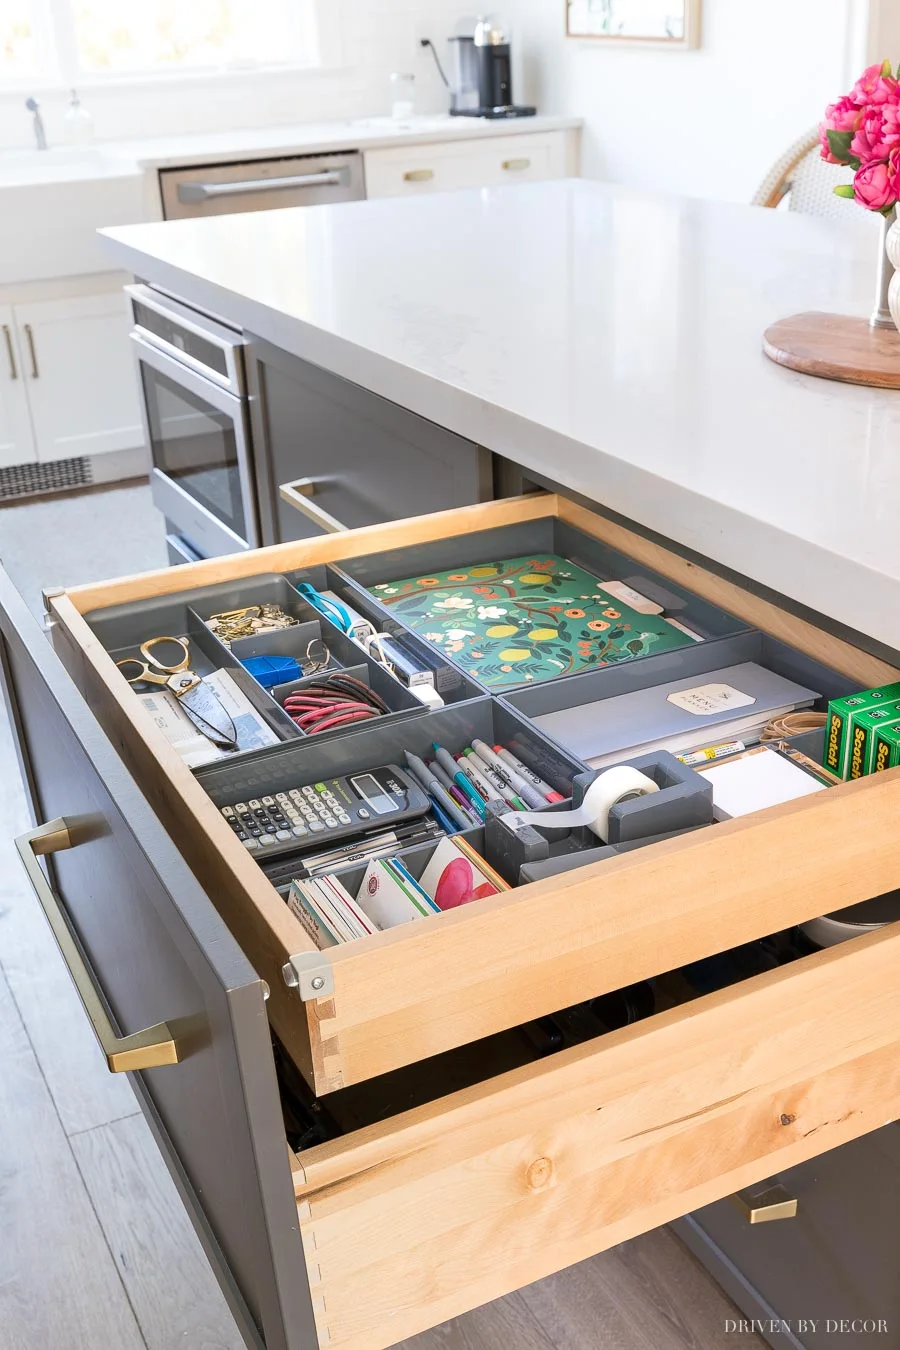
Gray trays divide this wide island drawer into zones for writing supplies, paper and small household accessories. A floral folder lies flat at the back, while scissors and pens remain visible toward the front. The shallow layout keeps the contents from becoming a stack of unrelated objects.
Choose categories before choosing containers, especially in a wide drawer where a single large tray can swallow everything. Keep papers inside one folder rather than underneath tools. Our small apartment storage ideas offer more ways to give everyday supplies a defined home when one kitchen drawer serves several rooms.
IDEA 02 / 17
Fit a Simple Tray Beside Removable Baskets
 SaveSupport Non AI Creator
Image credit: Keep Calm Get Organised
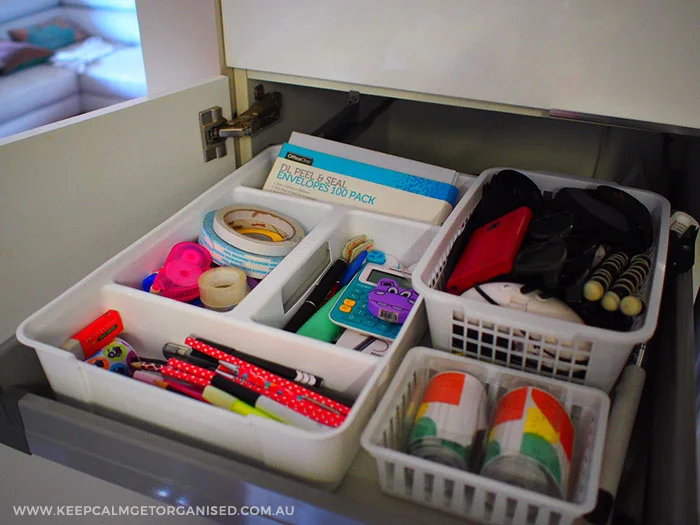
A white divided tray handles the smaller stationery in this drawer, while two separate baskets take the bulkier accessories beside it. The different container sizes suit different shapes rather than imposing identical compartments on every item. Long pens sit across the front where their ends are easy to reach.
Try containers you already own before buying a complete set. Check their height with the drawer nearly closed, and avoid stacking items above the rim. A basket that lifts out easily is useful for a portable category, but it should not have to be removed whenever you need a pen.
IDEA 03 / 17
Use Small Trays to Contain a Mixed Utility Drawer
 SaveSupport Non AI Creator
Source: www.houzz.com
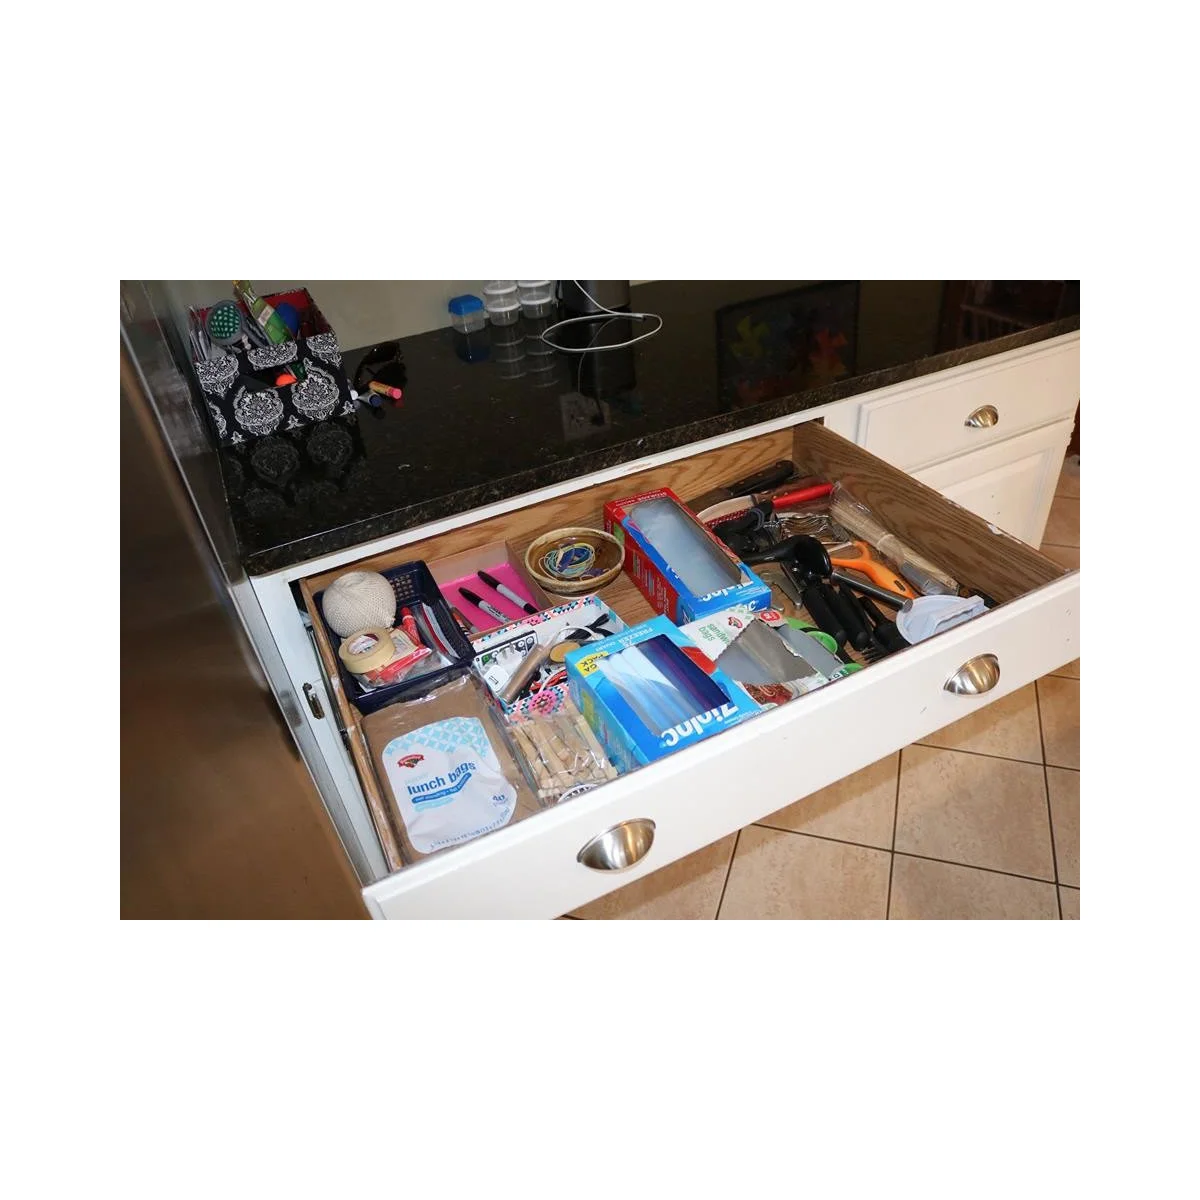
Small trays contain some pens and supplies on the left of this broad drawer, while boxes and household tools occupy the remaining space. The photograph shows a mixed utility drawer rather than a fully divided system. Its useful lesson is that a few containers can start to control smaller items without organizing every object at once.
Begin with the items that roll, tangle or disappear beneath larger handles, then measure the empty space before buying more trays. Keep a larger tool collection elsewhere and remove duplicate packaging. Our small kitchen ideas can help you decide which drawer should serve this purpose without taking storage away from essential cooking equipment.
IDEA 04 / 17
Give Small Repair Supplies Individual Compartments
 SaveSupport Non AI Creator
Image credit: Designers Showcase Inc.
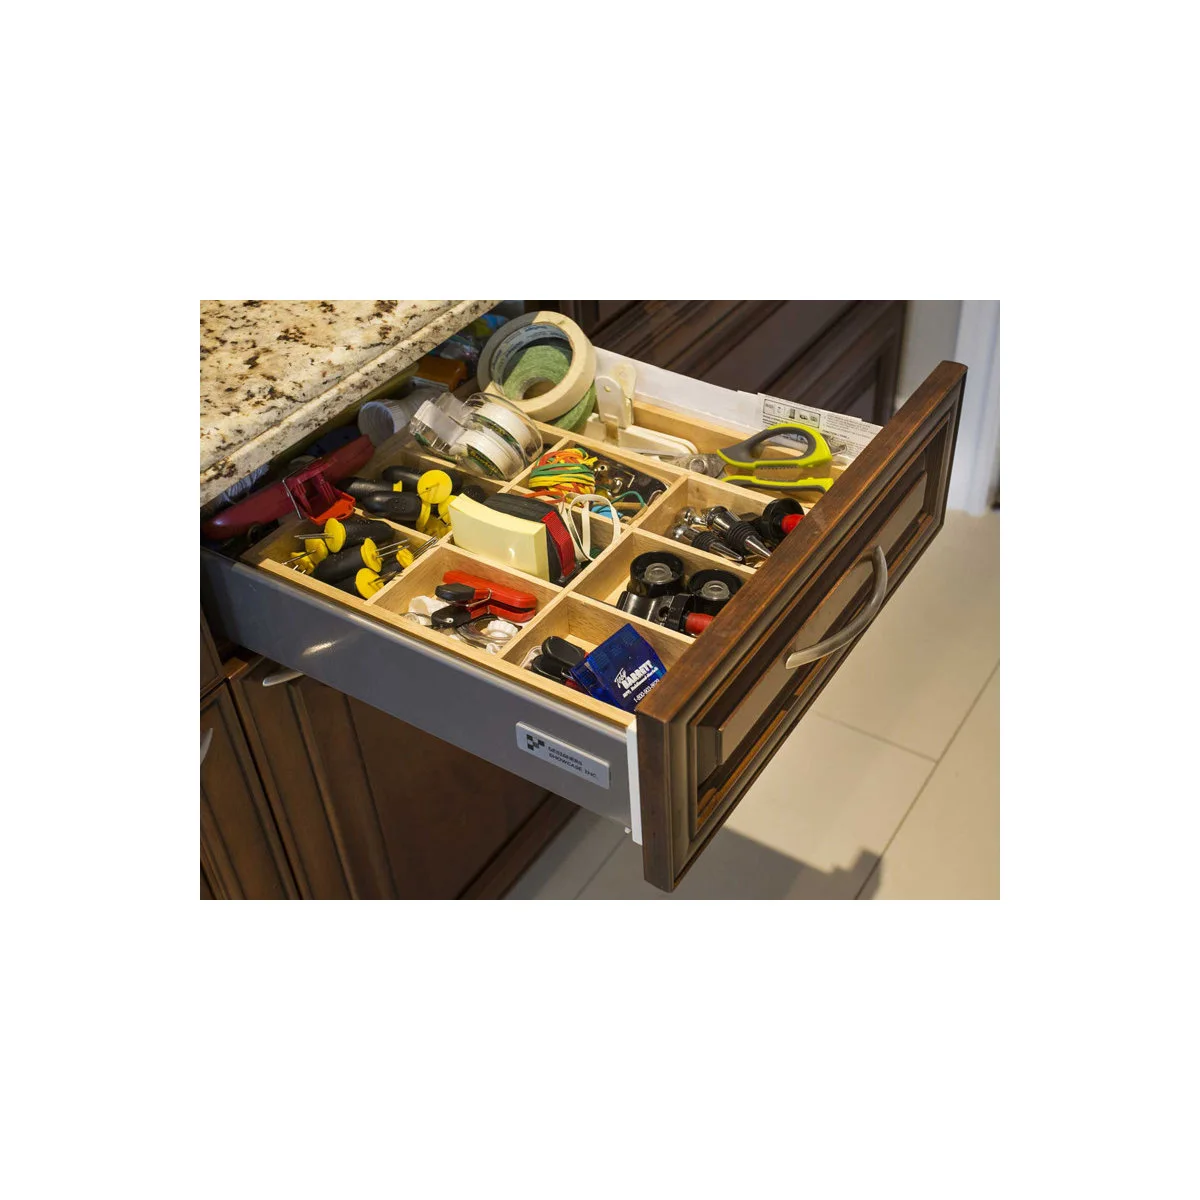
Small wooden compartments divide the tape, scissors and repair accessories in this drawer. The grid makes many differently shaped objects visible at once, with larger pieces occupying the longer sections. It is a useful layout for a household drawer that mostly supports quick repairs rather than paperwork.
Sort loose hardware into suitable small containers before adding it to a compartment. Keep the sharp ends of tools contained, and store anything hazardous securely. Avoid buying an insert with many tiny squares unless your actual supplies fit them; a rigid grid can waste space around longer handles.
IDEA 05 / 17
Reserve One Clear Area for Daily Pocket Items
 SaveSupport Non AI Creator
Image credit: Tracey Stephens Design, LLC
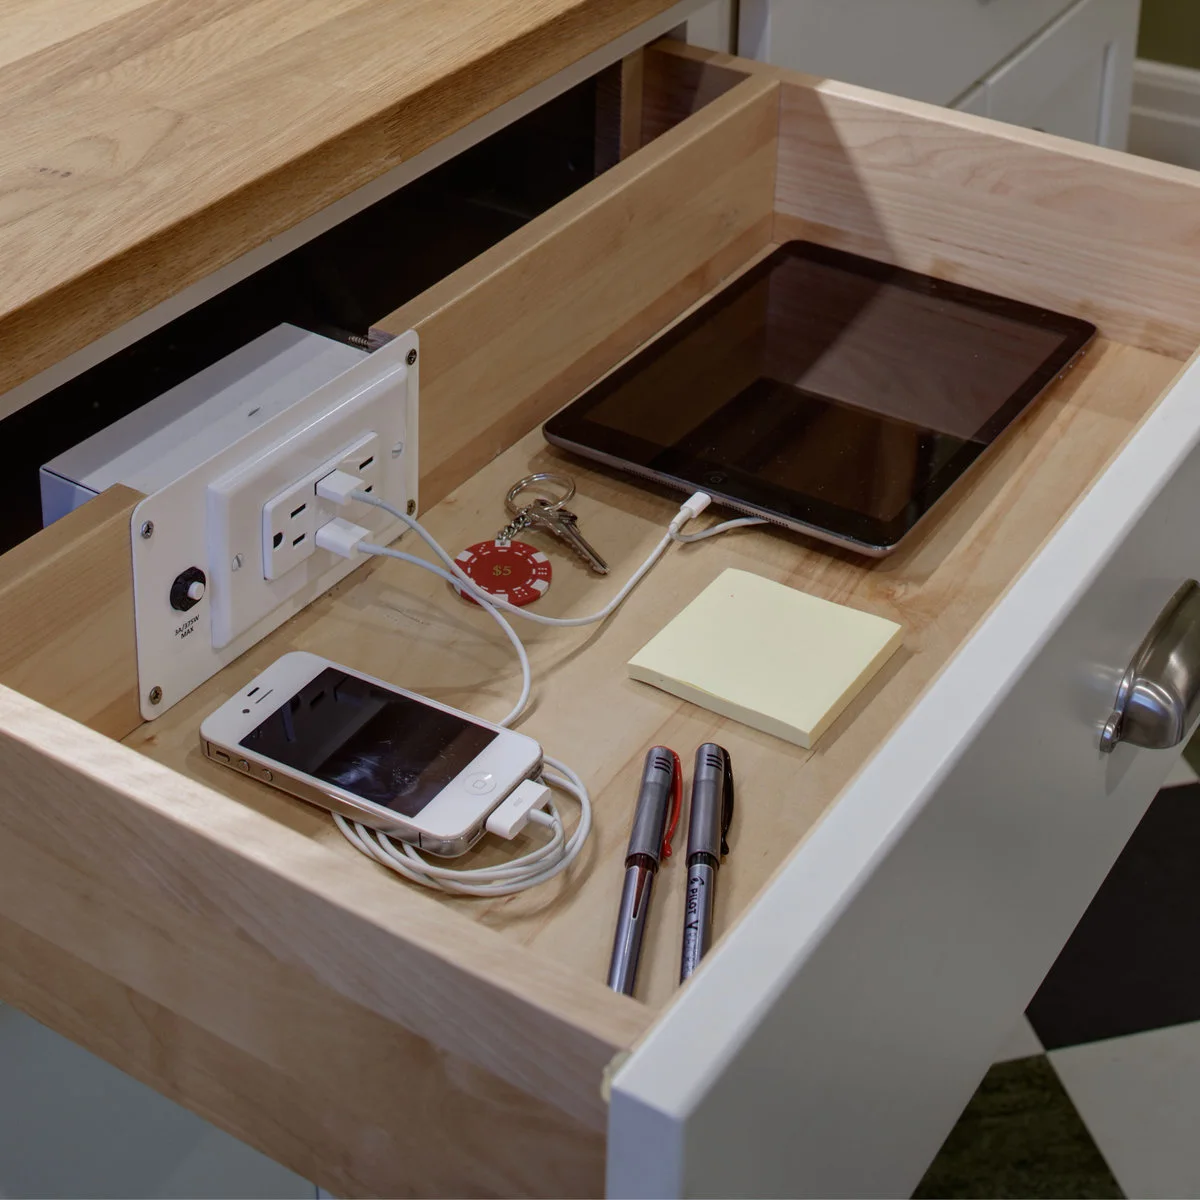
Keys, pens and a notepad share this shallow drawer with two charging devices. The open surface makes each item visible and leaves room around the cables. It illustrates how a deliberate daily drop spot can prevent chargers and pocket items from drifting into a crowded miscellaneous drawer.
Treat the electrical installation as a separate project requiring equipment intended for moving, enclosed cabinetry and a qualified installer where needed. Do not trap an ordinary extension cord in a closing drawer. For the organizing layout, retain enough clear space to lift a device without pulling its neighbor’s cable.
PART 02
Contain the smallest supplies
IDEA 06 / 17
Use Small Dishes for Clips and Fasteners
 SaveSupport Non AI Creator
Image credit: Farm Fresh Therapy
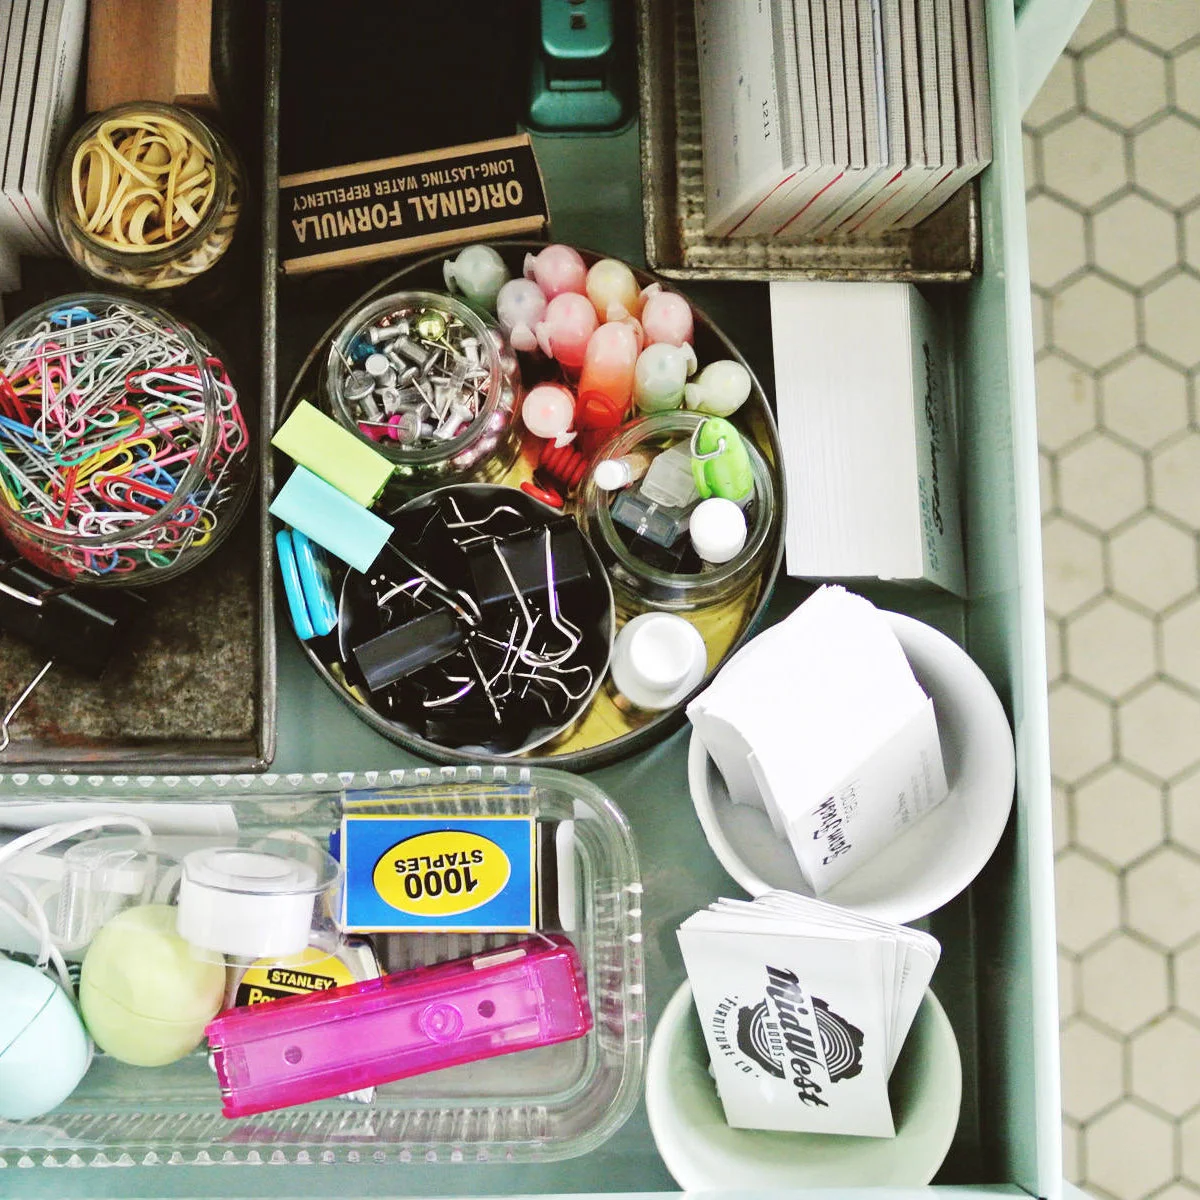
Small cups and shallow tins separate paper clips, binder clips and other stationery in this mixed drawer. Their open tops make small pieces easy to identify without opening several lids. Larger rectangular containers occupy the surrounding space, showing that an organizer does not need matching pieces to work.
Use sturdy, stable containers with smooth edges, and avoid fragile glass where a drawer is opened forcefully. Keep pointed fasteners away from loose paper and small hands. Test whether your fingers can reach the last few pieces comfortably; a tall narrow jar may look tidy but be awkward inside a shallow drawer.
IDEA 07 / 17
Line Reused Boxes for a Coordinated Finish
 SaveSupport Non AI Creator
Image credit: The Homes I Have Made
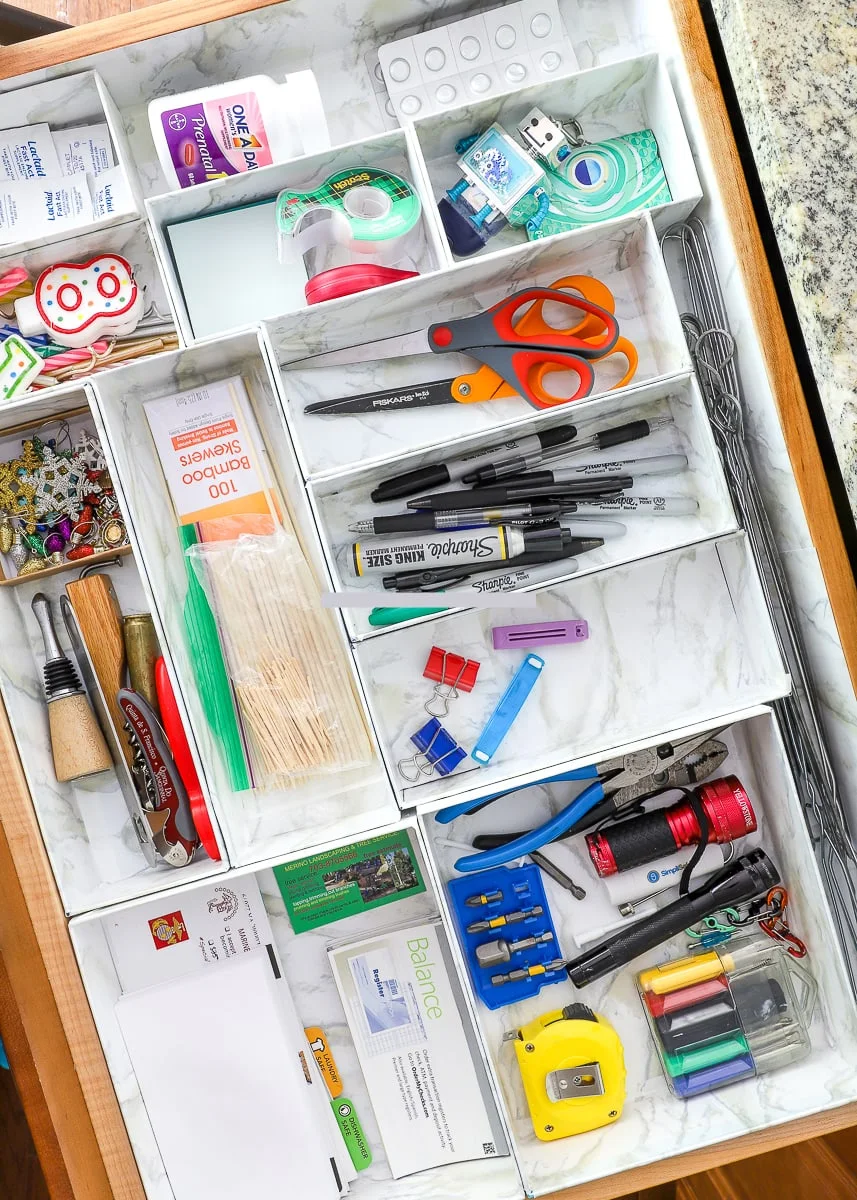
Marble-pattern coverings give reused boxes a consistent appearance, while their different lengths suit scissors, markers and tools. The boxes turn a large drawer into smaller working areas without requiring a custom-built insert. The larger lower compartments hold bulkier supplies and flat papers separately.
Choose clean boxes with firm sides and check their fit before covering them. Fold paper edges securely so they cannot catch on the contents or the drawer frame. Keep liquids and potentially leaking products elsewhere; a decorative covering makes cardboard easier to coordinate, but it does not make it waterproof.
IDEA 08 / 17
Sort Everything Where You Can See It
 SaveSupport Non AI Creator
Image credit: The Homes I Have Made
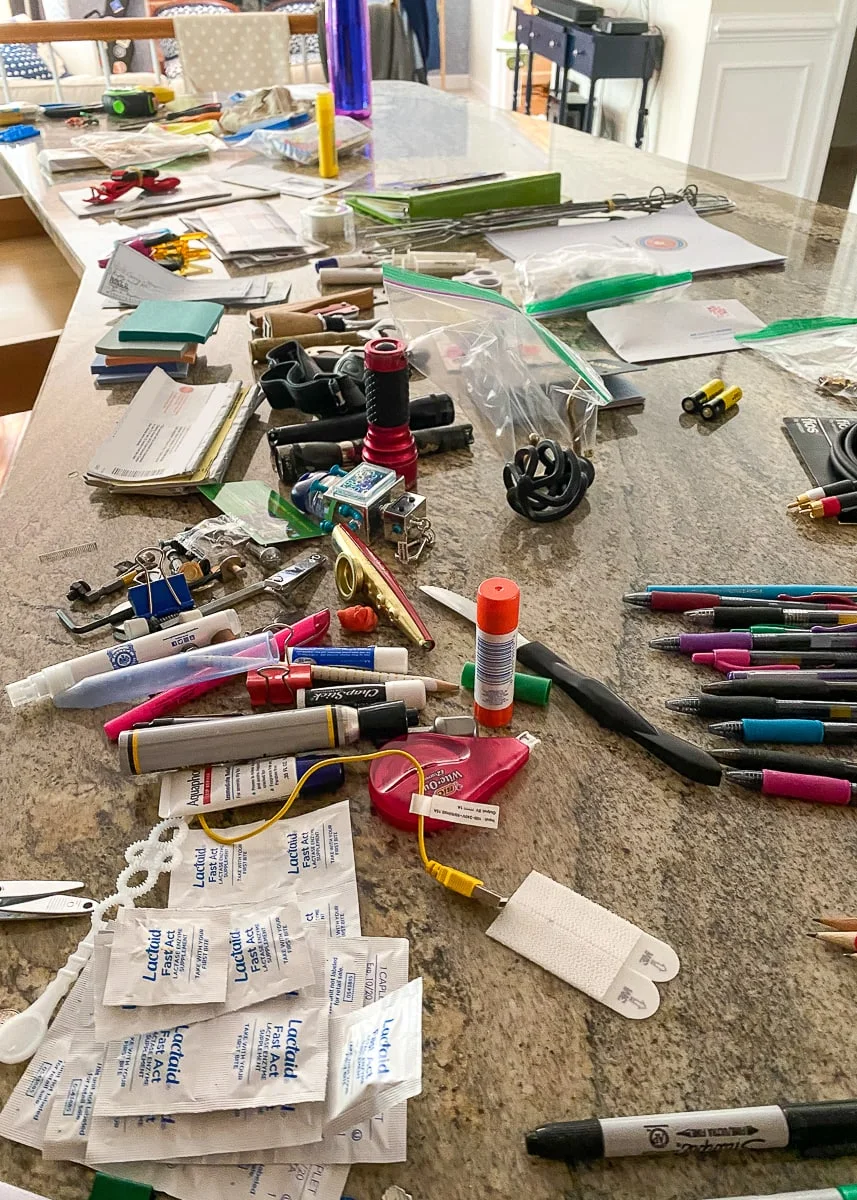
The contents of a drawer are spread across the counter here, revealing repeated pens, tools, paper and small accessories. Seeing the collection outside the drawer makes its volume clearer. This stage is useful before buying organizers because it shows which groups need room and which items belong elsewhere.
Work on a protected surface and return dangerous small items to secure storage promptly. Test pens, identify cables and move paperwork into a single review pile. Once sorting is finished, our small home office ideas can help you separate paperwork from the cooking area instead of letting the drawer’s overflow become a permanent display.
IDEA 09 / 17
Test Box Sizes Before Decorating Them
 SaveSupport Non AI Creator
Image credit: The Homes I Have Made
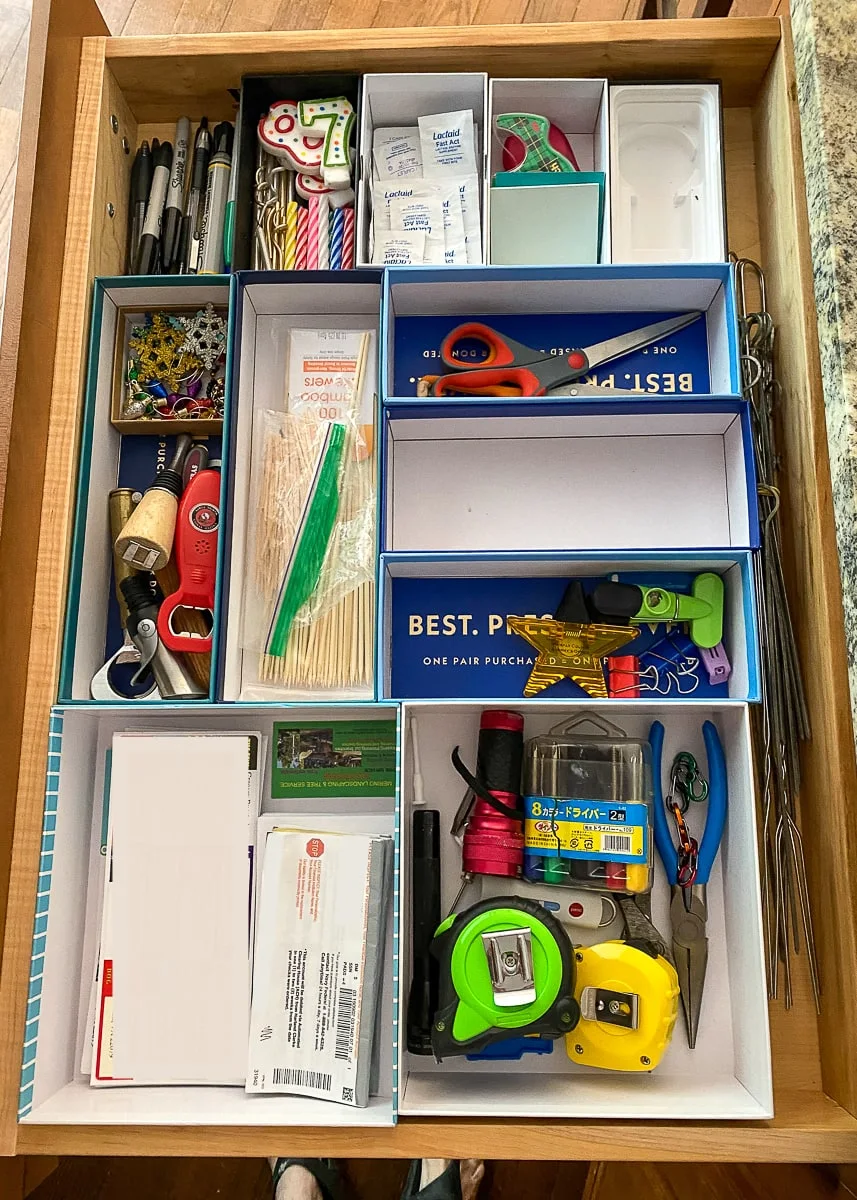
Uncovered packaging boxes form a trial layout in this drawer. Longer boxes hold scissors and clips, with larger compartments for tools and papers. The exposed packaging makes the approach easy to understand: the container sizes are doing the organizing before any decorative finish is added.
Use the drawer for a few days in this trial arrangement before spending time covering the boxes. A compartment that looks generous may become awkward once every item is returned. Keep only a modest working supply in each group and adjust the layout if a box must be lifted to reach another.
PART 03
Adapt boxes and trays
IDEA 10 / 17
Prepare Shallow Boxes With Smooth Edges
 SaveSupport Non AI Creator
Image credit: The Homes I Have Made
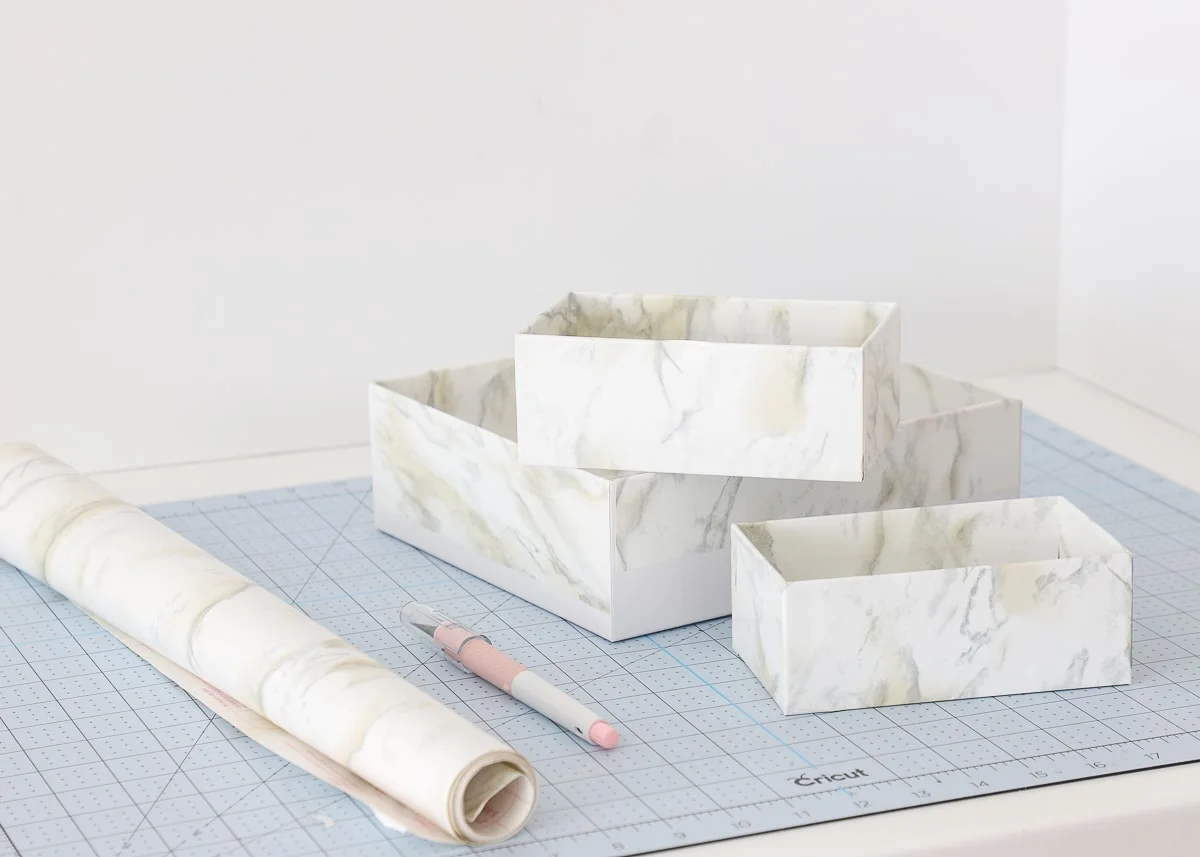
These shallow boxes have been covered in the same marble pattern, with their rims left smooth and their interiors lined. Different widths allow them to contain different supply groups. Preparing the boxes outside the drawer makes it easier to check the finish and remove any loose folds.
Measure the usable drawer height before making the boxes, including clearance under the cabinet frame. Use a covering suited to the box surface and let any adhesive dry before loading supplies. Keep cutting tools on an appropriate work mat, and replace damaged boxes rather than trying to hide weakened corners.
IDEA 11 / 17
Fill a Narrow Gap With Small Clear Trays
 SaveSupport Non AI Creator
Image credit: The Homes I Have Made
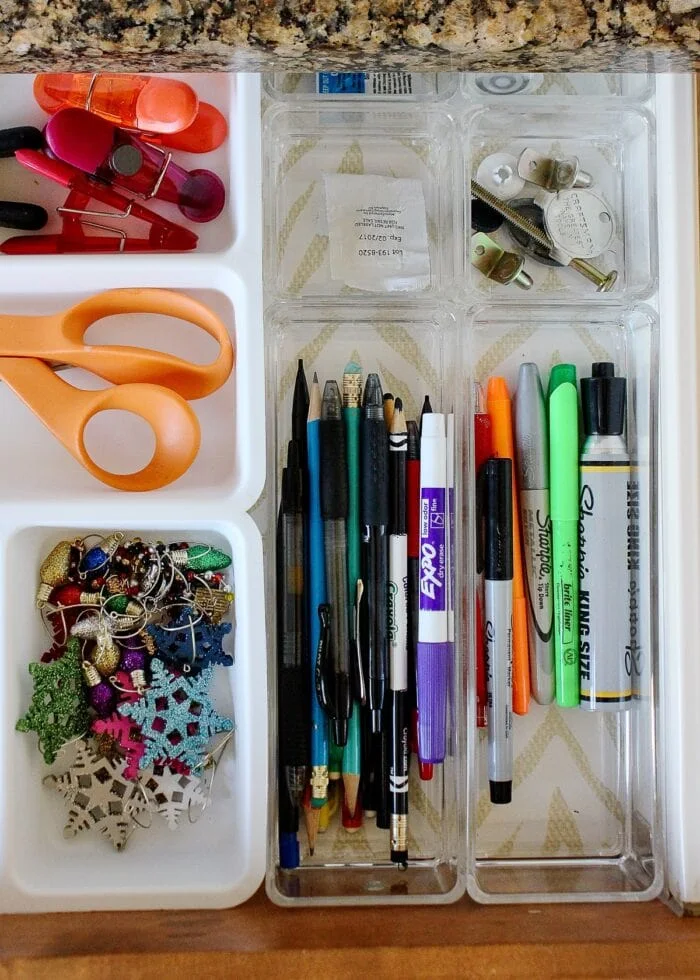
Small clear trays occupy a narrow strip beside the larger white insert, keeping pencils, markers and loose hardware in separate channels. The arrangement uses the leftover width without scattering small objects along the drawer edge. The transparent sides also leave the patterned liner visible underneath.
Measure the remaining gap after placing the main organizer, then test smaller trays in both orientations. Keep long writing tools parallel so their tips do not catch neighboring objects. Avoid wedging containers tightly against the drawer sides; you should still be able to lift them out for cleaning.
IDEA 12 / 17
Make Room for a Small Household Tool Kit
 SaveSupport Non AI Creator
Image credit: Matthew Williams; styling by Alexa Hotz
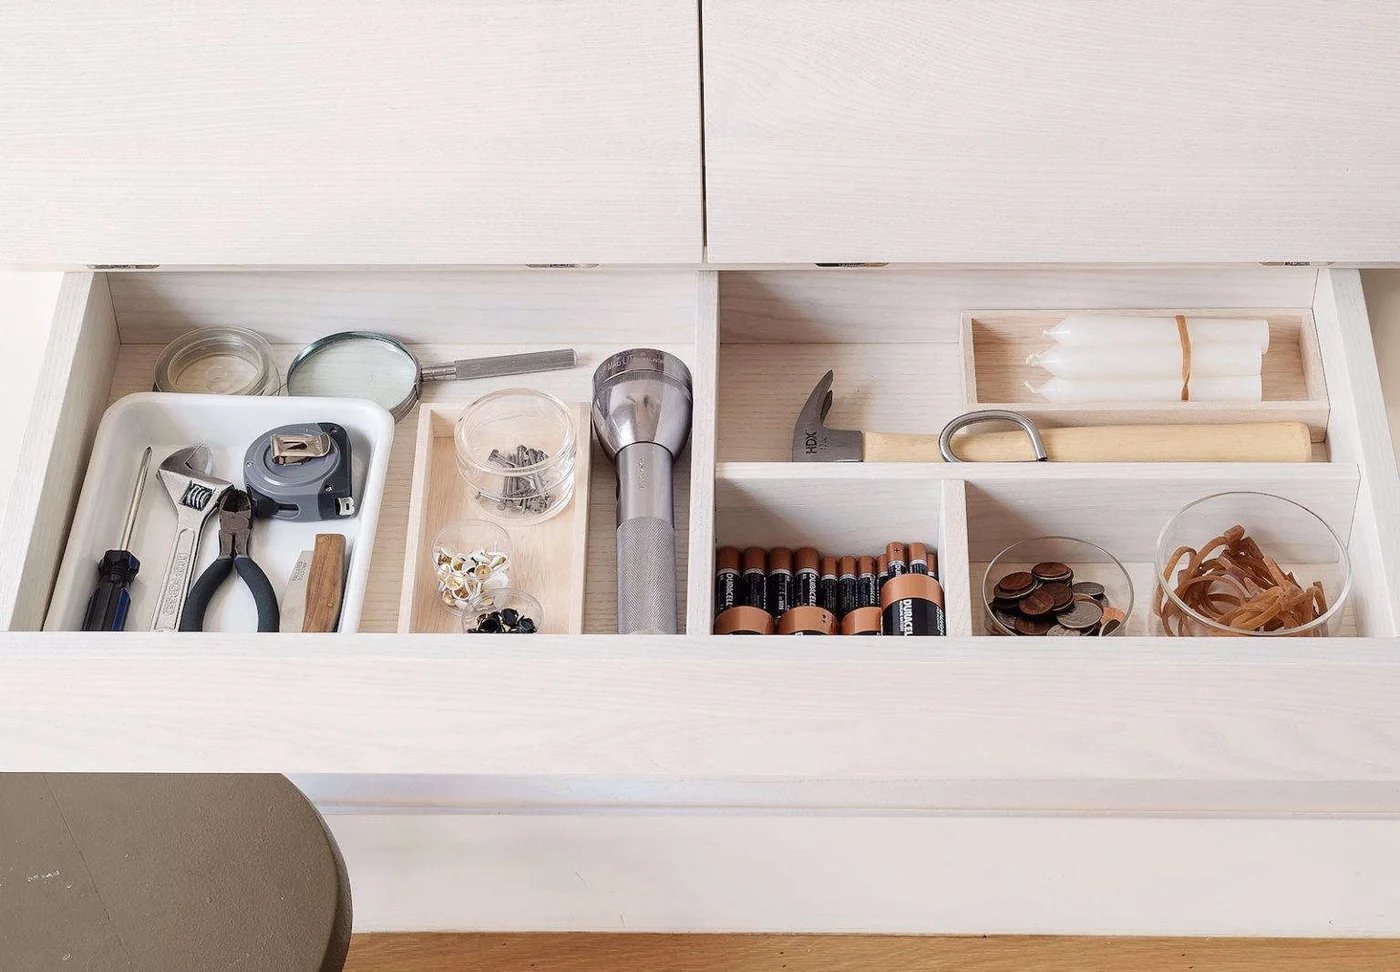
A hammer and flashlight have their own spaces in this pale divided drawer, with smaller tools and containers alongside them. The layout gives basic maintenance supplies a deliberate home. Low partitions keep the handles visible, rather than hiding them underneath a mixed layer of paper and tape.
Choose only the tools used for routine jobs in the house, and keep heavier or specialist equipment elsewhere. Store batteries according to their maker’s guidance, with terminals protected from loose metal. Check that the hammer cannot roll into a neighboring compartment and that the drawer’s load remains within its rating.
IDEA 13 / 17
Plan With Modular Trays Before Filling the Drawer
 SaveSupport Non AI Creator
Image credit: Travis Rainey; styling by Joseph De Leo
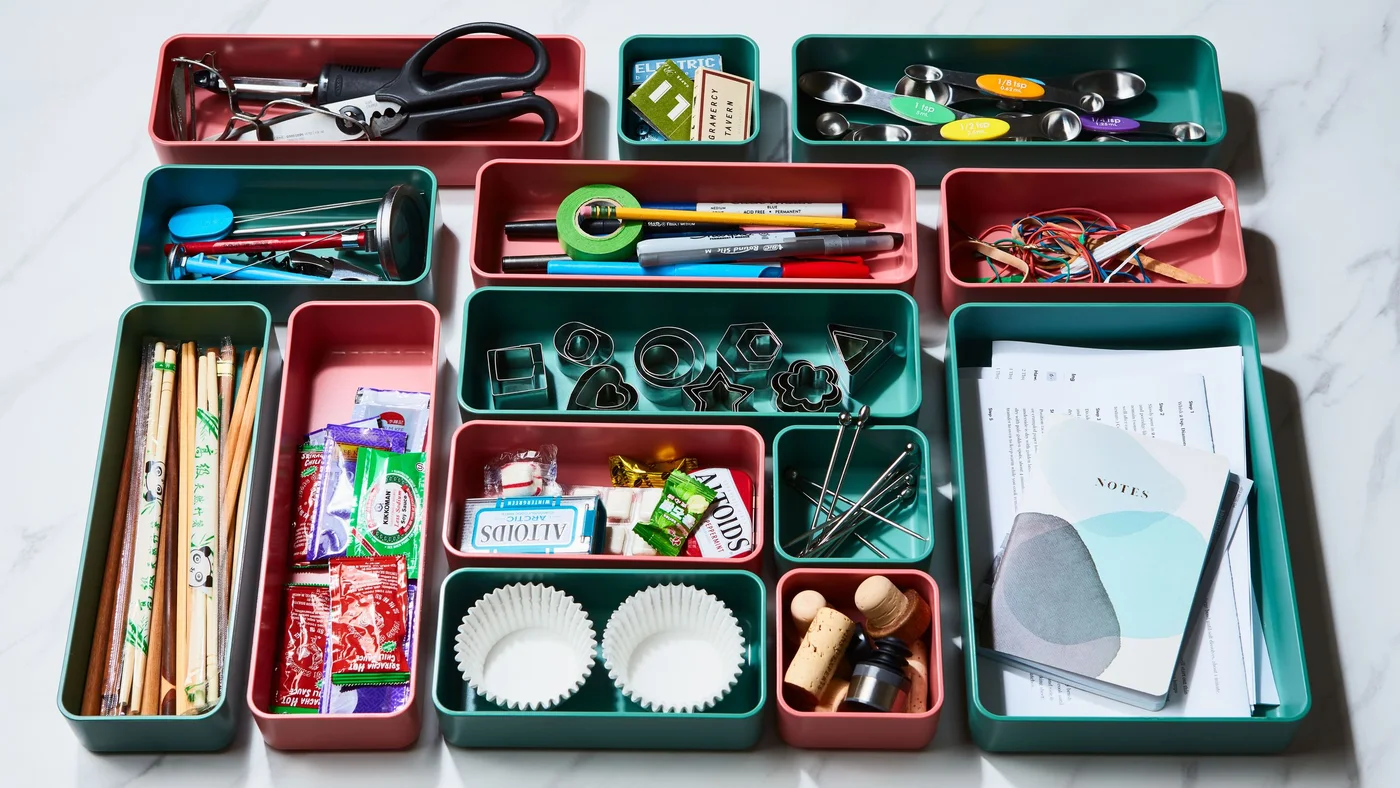
Coral and green trays are laid out with different contents, showing how long narrow containers and small square ones can work together. Pens, rubber bands and notes have distinct areas. A few kitchen accessories appear too, demonstrating the need to choose categories deliberately when several tasks share one drawer.
Lay out the trays on a surface matching the drawer’s internal dimensions, then move them into place together. Use the contents to determine sizes rather than buying every shape in a set. Keep food and household repair materials separate, and remove any category that already has a more convenient home.
PART 04
Make the arrangement easy to maintain
IDEA 14 / 17
Divide Two Drawers by the Jobs They Support
 SaveSupport Non AI Creator
Image credit: Abby Lawson / Abby Organizes
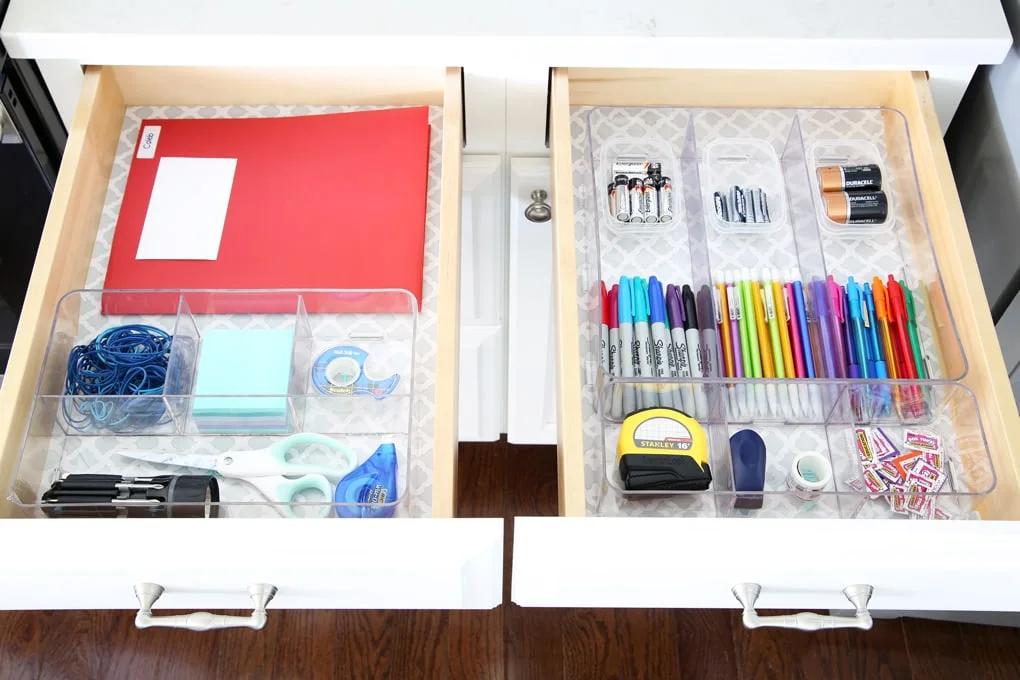
Two adjacent drawers split the household supplies into separate working areas. One holds a folder, elastic bands and scissors; the other has rows of pens and smaller containers at the back. The division reduces crowding while keeping the overall arrangement easy to understand at a glance.
Use a practical boundary such as paperwork in one drawer and writing or measuring tools in the other. Labels help a shared household return things consistently. Avoid copying the quantity of pens simply for appearance; keep a realistic working selection and store any worthwhile replacements separately.
IDEA 15 / 17
Use Adjustable Dividers Around Unequal Categories
 SaveSupport Non AI Creator
Image credit: Kris Jarrett / Driven by Decor
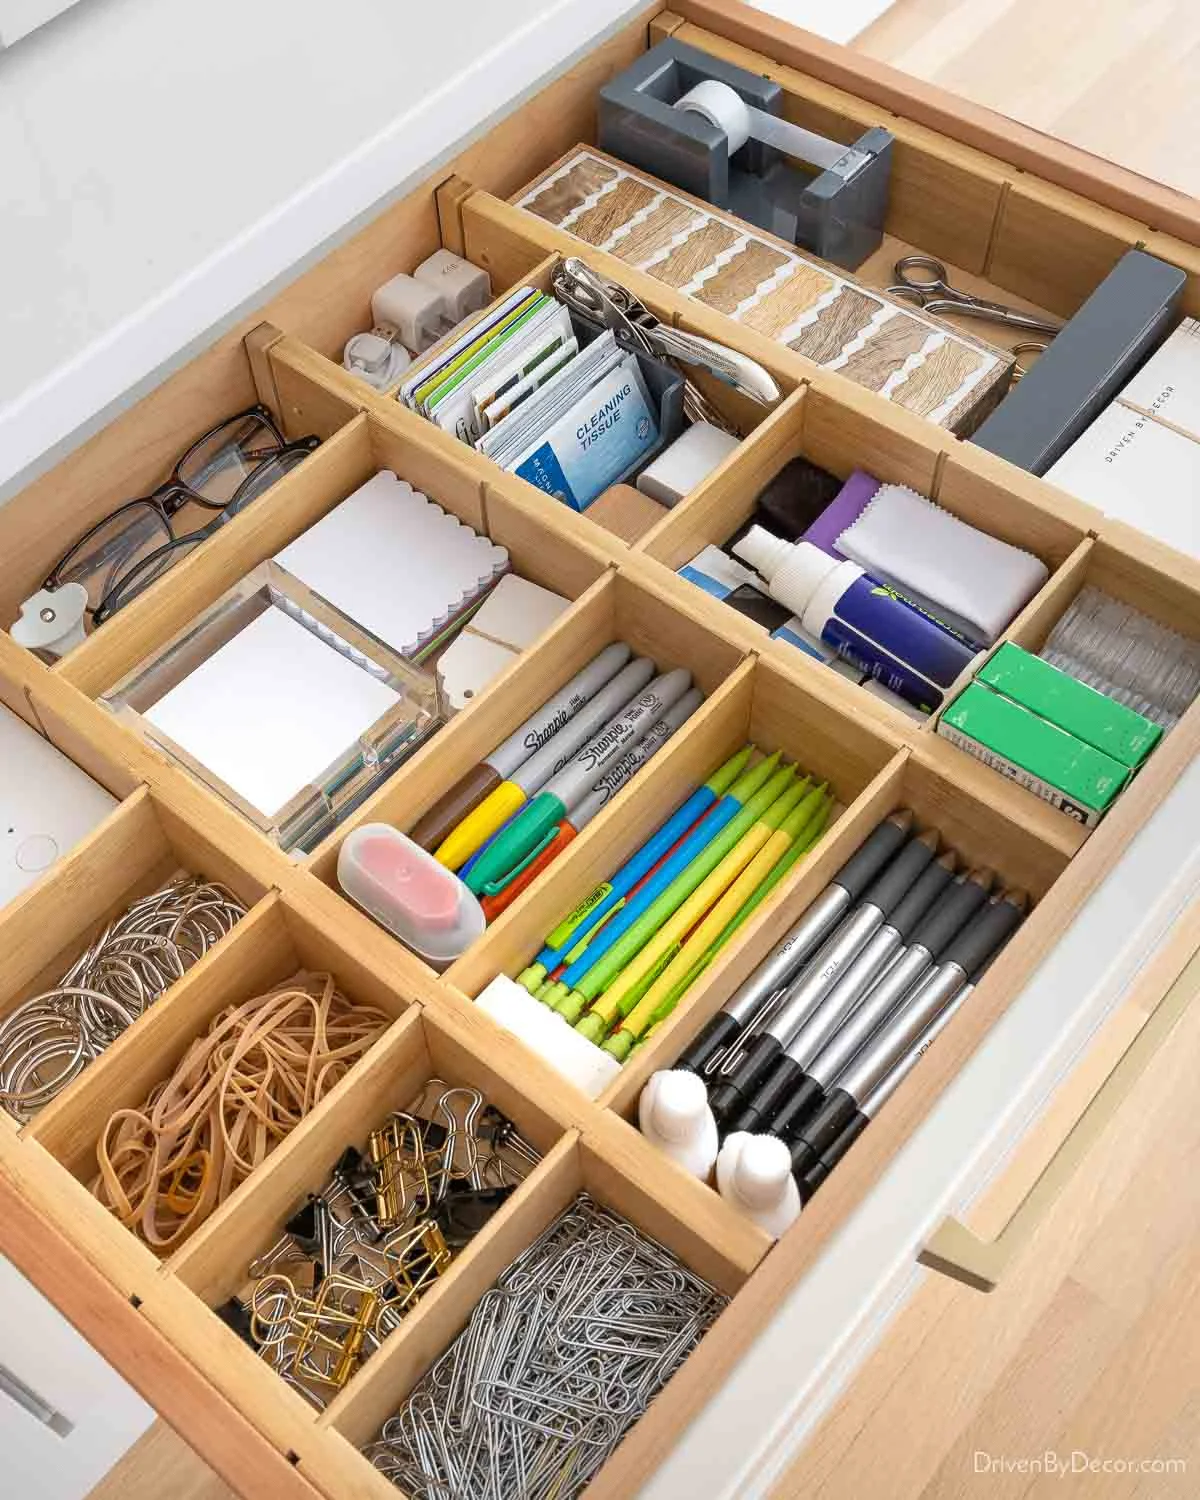
Wooden dividers create compartments of different widths around pens, glasses, cards and small accessories. The layout allows long writing tools to lie flat while short objects occupy smaller spaces. A tape dispenser sits at the back, leaving more frequently handled items toward the accessible front.
Set the dividers around the largest object in each category and leave room for your fingers beside it. Keep glasses protected from hard tools and leaking products. Review the contents after an ordinary week; if several categories have migrated across a partition, change the boundary rather than adding another layer on top.
IDEA 16 / 17
Choose Washable Clear Bins for a Mixed Drawer
 SaveSupport Non AI Creator
Image credit: Kris Jarrett / Driven by Decor
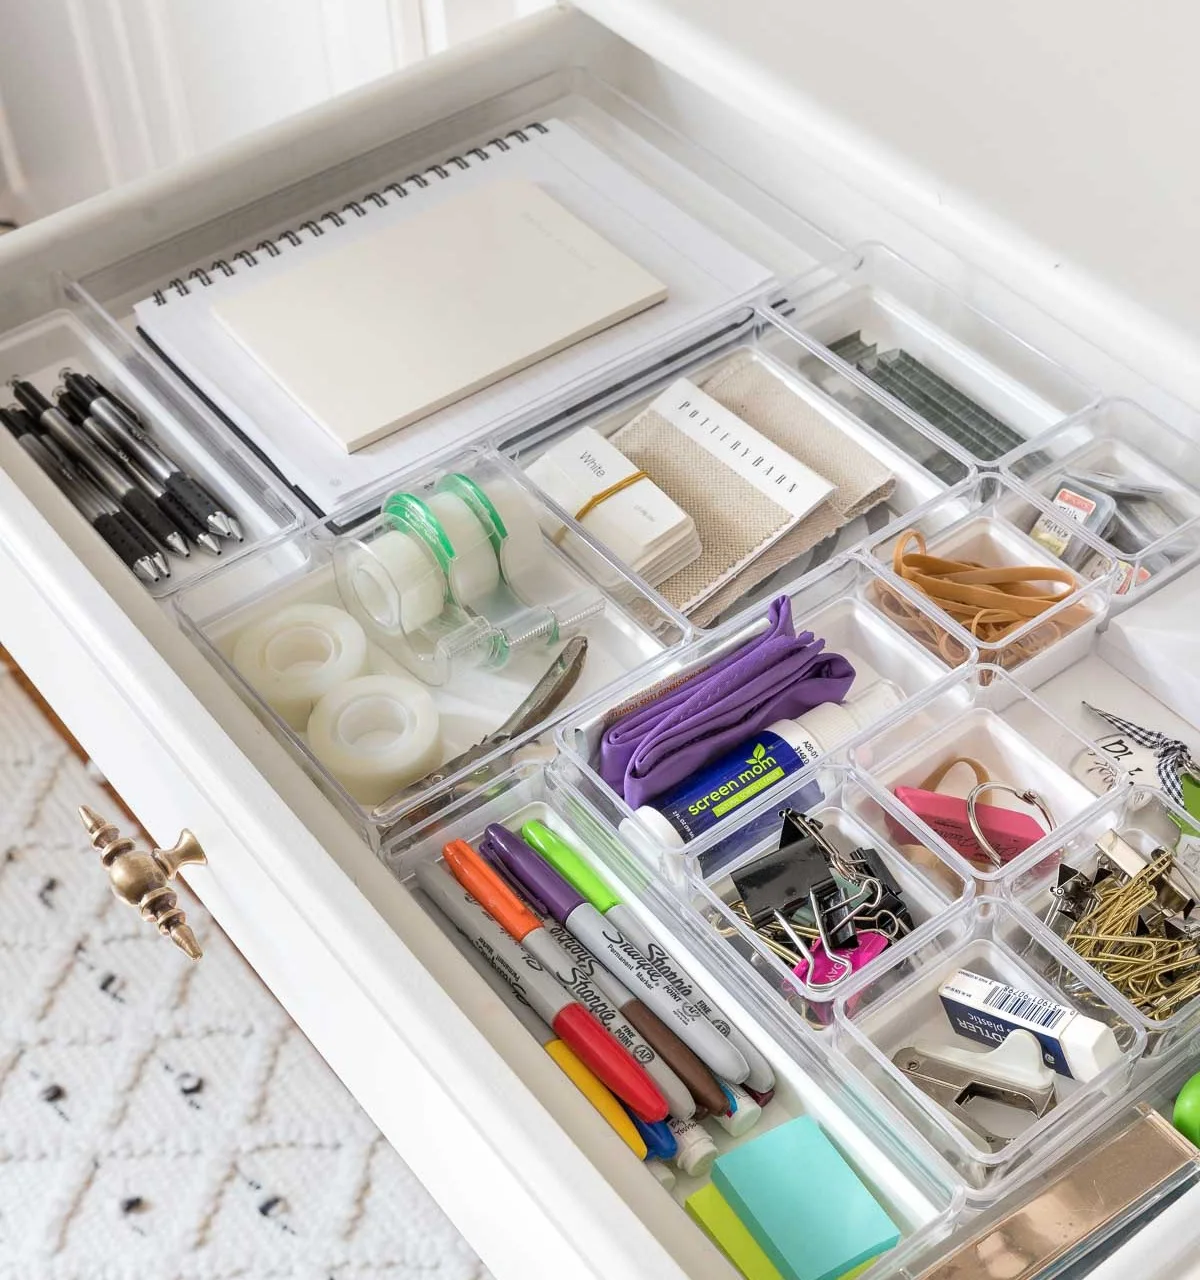
Clear rectangular bins separate tape, elastic bands, clips and writing supplies in this white drawer. A larger shallow section accommodates notebooks and paper without folding them. The removable bins give each group a defined limit while keeping the drawer base visible for quick cleaning.
Choose bins with enough height to contain small pieces but not so much that they collide with the cabinet opening. Lift them out periodically to clear dust and pencil debris. Keep only current papers in the large section so it remains useful for a notepad instead of becoming a hidden archive.
IDEA 17 / 17
Keep Long Tools in Their Own Channels
 SaveSupport Non AI Creator
Image credit: Clean and Scentsible
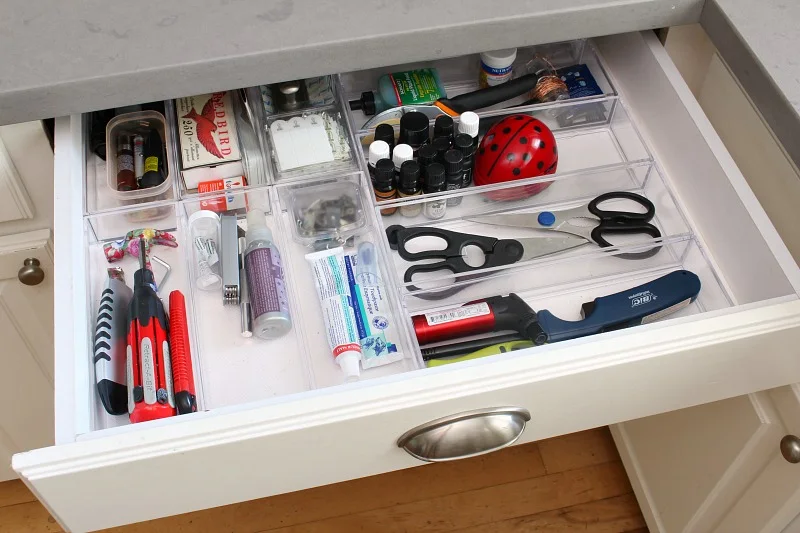
Long scissors and a lighter lie in separate channels on one side of this drawer, with smaller stationery and accessories on the other. The horizontal arrangement keeps handles visible. Clear dividers provide boundaries without using much visual space, so it is easier to notice when something has been returned incorrectly.
Store sharp tools and ignition devices securely where children cannot reach them; the photograph’s accessible drawer position is not a safety recommendation. For a shared adult drawer, keep long objects below the rim and test the closing motion slowly. Any item that catches needs a different compartment or another home.
BRING IT ALL TOGETHER
Test the drawer during an ordinary day
Pick up the five things you use most and put them back. If you have to lift another container or shift a pile, change that part of the arrangement. The best organizer is the one your household can use without remembering a complicated system.
Leave a little working room around the contents. Review unidentified keys, dried pens and outdated papers regularly, and move supplies with an established home back there. Keep only the quantities that fit comfortably; a full drawer should still open smoothly.