Plan a PAX wardrobe around the clothes you own, the room you can spare and the way its doors will open. A beautiful exterior cannot compensate for a drawer blocked by a hinge or shelves too high to use. Measure the finished room, including trim and uneven walls, before choosing frames.
These photographs show documented PAX installations and different storage details within them. Some are custom carpentry projects rather than standard combinations. Follow the current instructions for your exact frame and fittings, including wall attachment, assembly clearance and compatibility; a photograph of an older installation does not establish what will fit a new one.
PART 01
Make the outside suit the room
IDEA 01 / 16
Match Wardrobe Trim to an Older Room
 SaveSupport Non AI Creator
Image credit: Readmore House / IKEA Hackers
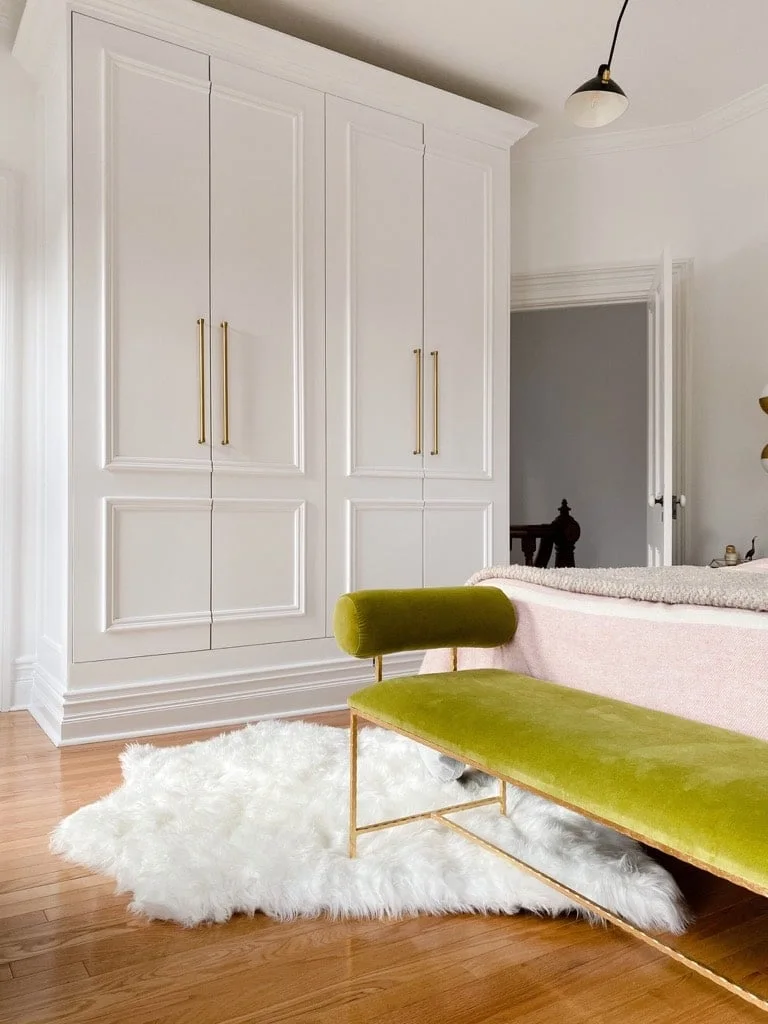
Applied panel details, a deep lower trim and a shaped top edge make this white wardrobe sit comfortably beside the room’s traditional doorway. Long handles emphasize the height without adding another pattern. The pale finish keeps a substantial run of storage from dominating the bed and bench beside it.
Plan the trim profile before installing the frames so it can meet the room’s existing details cleanly. Keep door gaps and access to hinges intact. Our small bedroom decor ideas can help balance a large wardrobe with the rest of the furniture, particularly when the bed leaves little space for open doors.
IDEA 02 / 16
Use a Restrained Door Pattern in an Alcove
 SaveSupport Non AI Creator
Image credit: Home Reborn
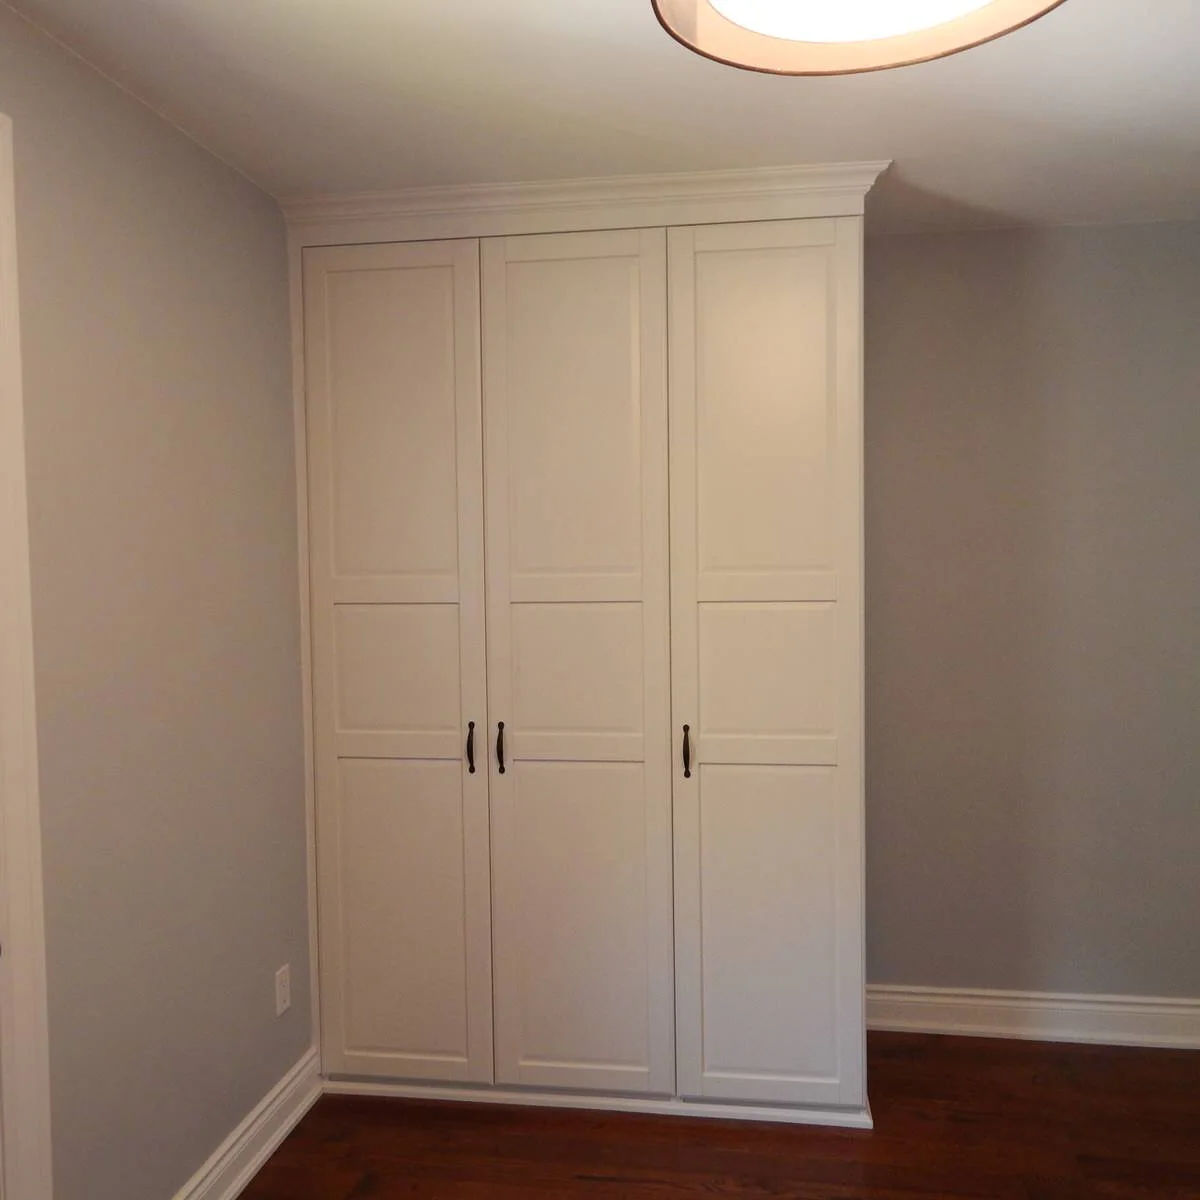
Three white doors fill this alcove, with a simple rectangular pattern repeated across their fronts. Dark handles give the pale surface a clear point of use. The wardrobe reads as one quiet block of storage, rather than several separate pieces competing with the adjacent wall.
Check an alcove at several heights and depths before choosing the frame widths. Side fillers may be needed where walls are uneven or handles need clearance. Keep the installation requirements separate from the decorative finish; a close-looking fit in a photograph does not show the wall fixing or usable space behind the doors.
IDEA 03 / 16
Use Mirrored Doors Where the Reflection Helps
 SaveSupport Non AI Creator
Image credit: Matthew Jenkins / IKEA Hackers
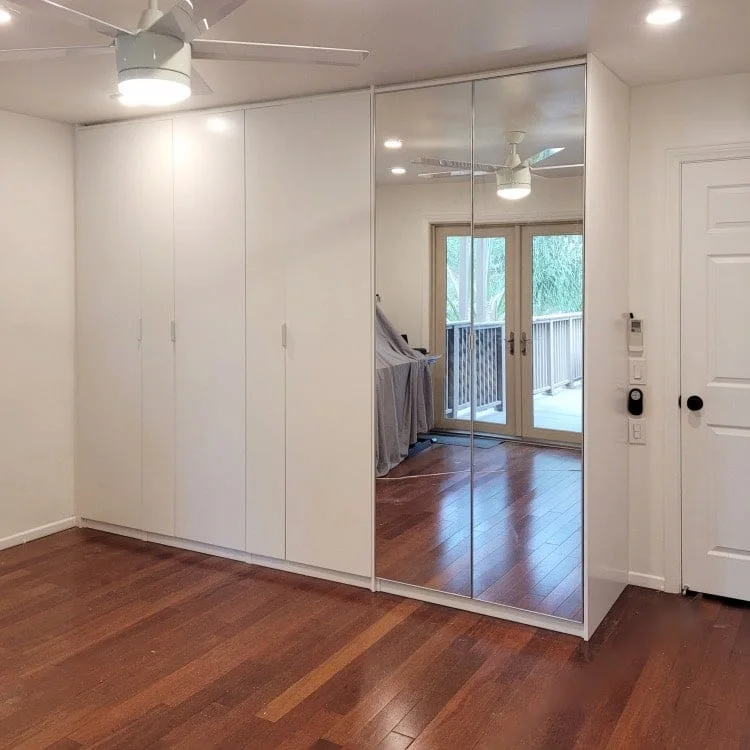
Two mirrored panels interrupt the white doors in this wardrobe wall, reflecting the brighter side of the room. The reflection adds visual depth while the other doors keep the surface simple. It is a useful combination when a full mirror wall would feel too busy or expose unwanted views.
Stand where the mirror will be seen from the bed and doorway before choosing its position. Check what it reflects at different times of day, including lamps at night. Allow for the weight and fitting requirements of the specified door system, and use cleaning products suitable for both the glass and surrounding finish.
IDEA 04 / 16
Choose Sliding Doors for a Clear Front Edge
 SaveSupport Non AI Creator
Image credit: Precision Furniture Assembly
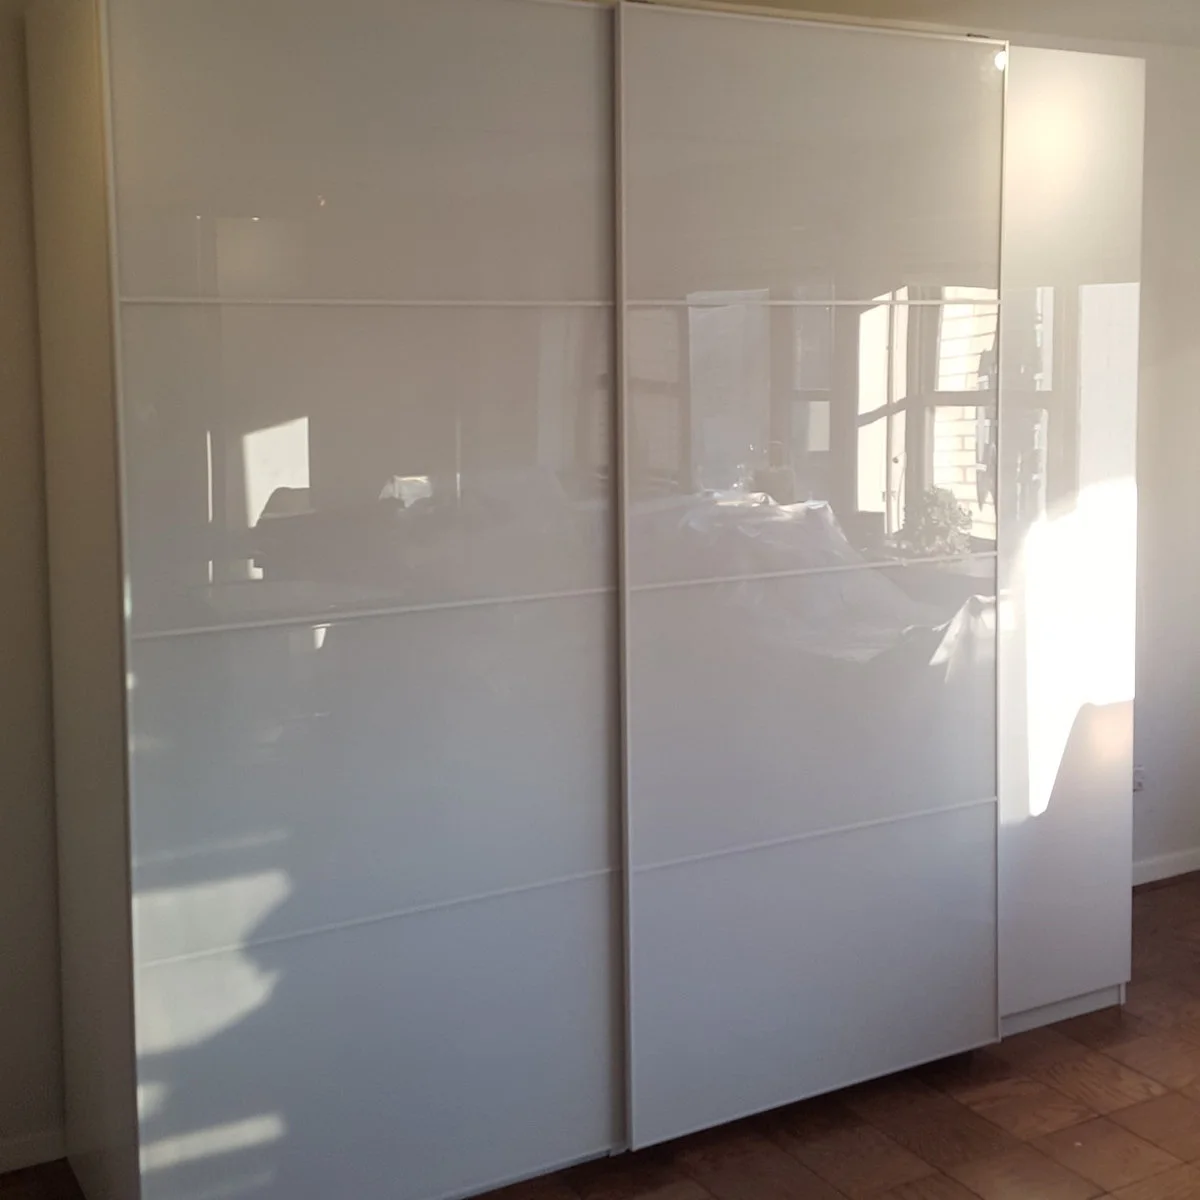
Broad glossy panels close across this wardrobe without hinged doors projecting into the room. Horizontal divisions give the tall surface a gentler rhythm, while the pale finish reflects nearby daylight. The closed view is calm, with no separate handles breaking up the central panels.
Check the opening available behind each sliding panel before placing drawers or pullout fittings. A sliding door saves swing space but does not expose the whole wardrobe at once. Keep tracks clear and follow the current combination’s height and installation requirements rather than estimating them from the apparent gap at the ceiling.
PART 02
Coordinate color and fitted details
IDEA 05 / 16
Blend a Recessed Wardrobe With the Wall Color
 SaveSupport Non AI Creator
Source: IKEA Hackers
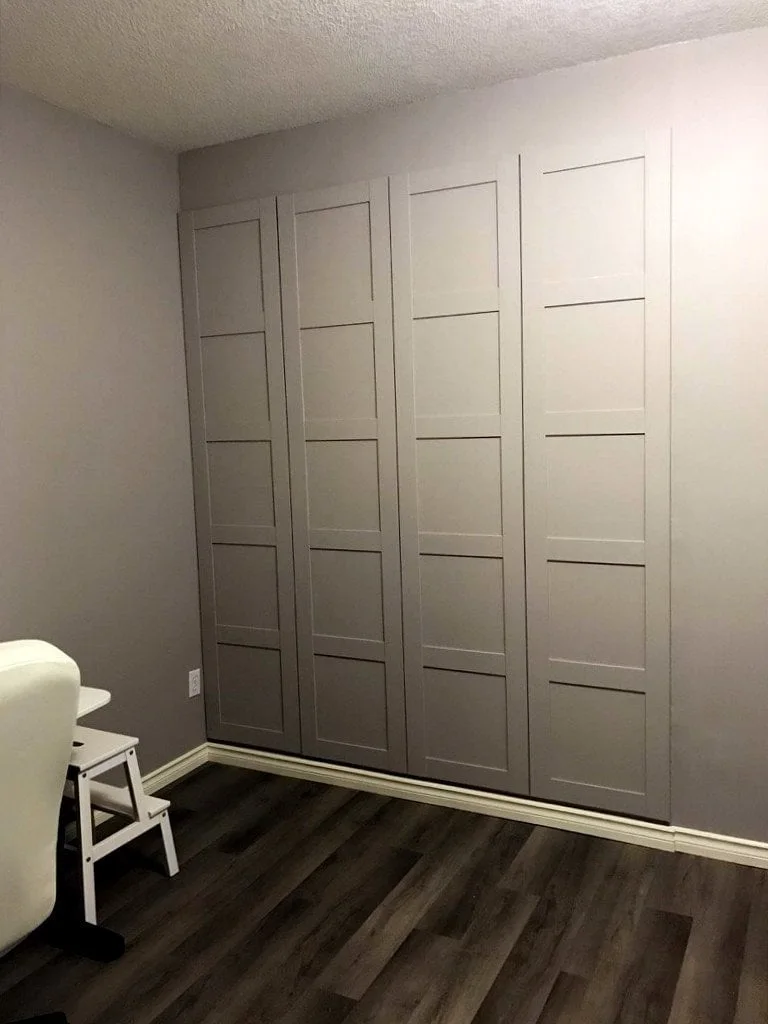
Gray doors and surrounding walls share a similar tone, helping this recessed wardrobe feel continuous with the room. Repeated horizontal panels add definition without a contrasting color. The finished front gives an awkward recess a purposeful use while keeping the adjacent floor area visually open.
Establish what is inside an existing wall or recess before considering alterations. Structural, electrical and plumbing conditions need assessment before carpentry begins. For the finish, sample the door color alongside the wall in daylight and evening light; the same paint can look different on separate surfaces and at different angles.
IDEA 06 / 16
Give Plain Doors Color and Longer Handles
 SaveSupport Non AI Creator
Image credit: @diydoctorsoph
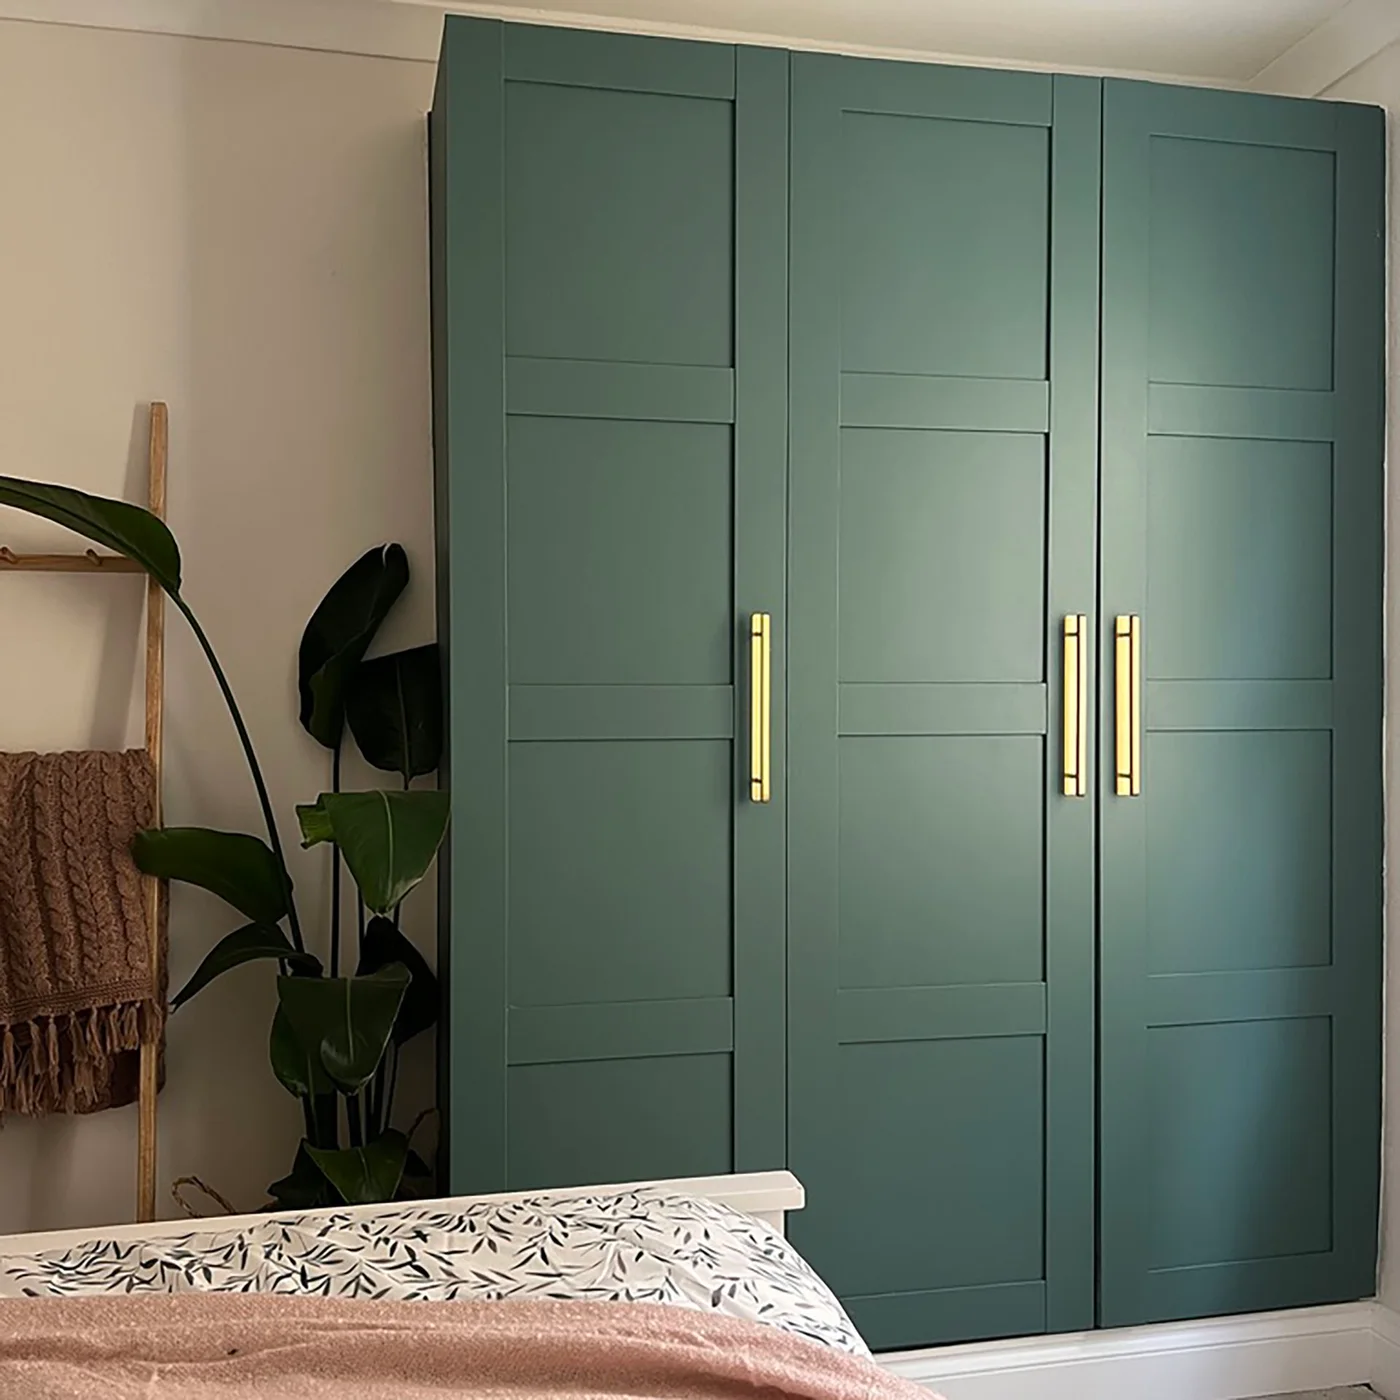
Blue-green doors create a substantial color feature at the end of this bedroom, with long gold-colored handles providing a warm contrast. The repeated panels keep the front orderly. Nearby bedding and pale walls give the stronger wardrobe color room to stand out without covering every surface.
Test a furniture finish on an inconspicuous area and follow the coating maker’s preparation and curing instructions for the actual surface. Remove hardware before painting and protect moving parts. Check handle placement with the doors open so a decorative change does not make neighboring drawers or the bedside area harder to use.
IDEA 07 / 16
Coordinate Wardrobes With the Bed Wall
 SaveSupport Non AI Creator
Image credit: Future PLC/Dominic Blackmore
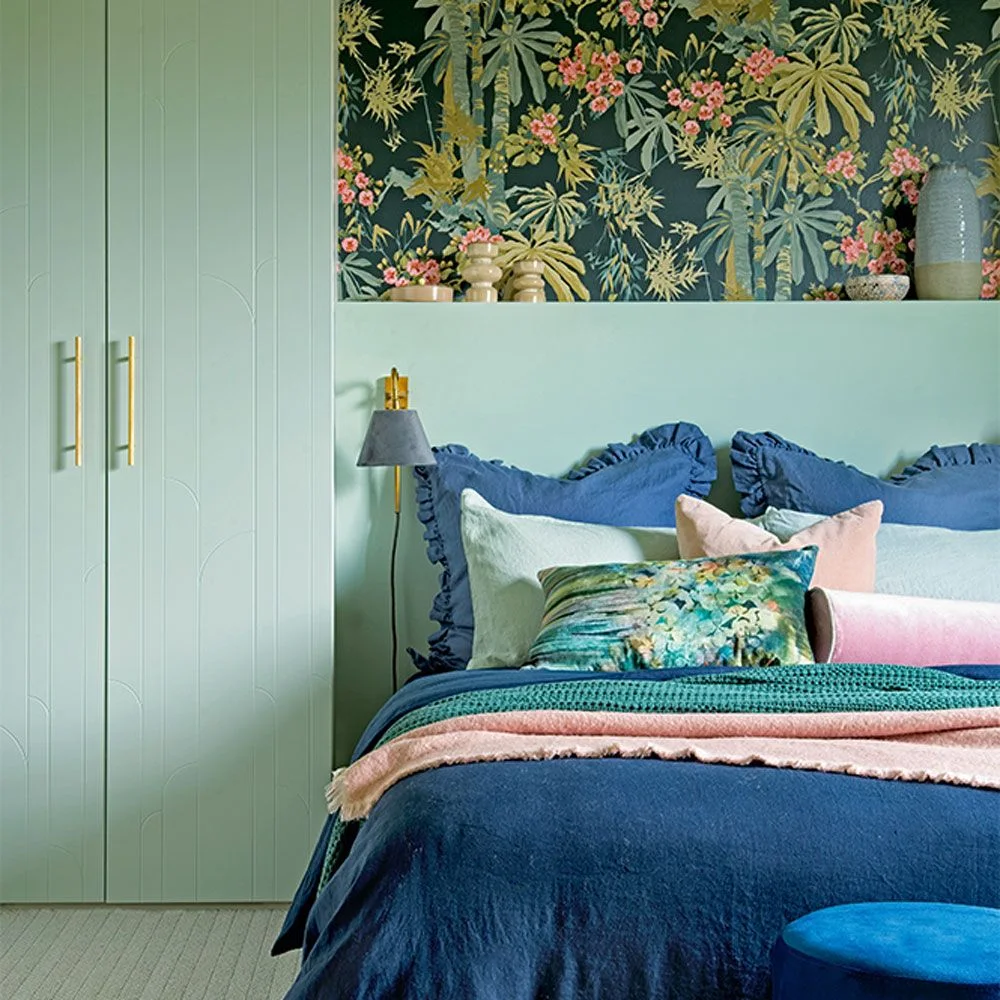
A pale green wardrobe and headboard create a continuous edge around this bed, with botanical wallcovering above adding a separate layer of pattern. Gold-colored handles repeat the warm accents. The furniture color stays consistent, allowing the bedding and wall print to carry the room’s more varied details.
Confirm the exact replacement doors and fittings are compatible with your frames before ordering a coordinated finish. Leave room for hinges, bedside lighting and access to the storage. If a headboard connects several pieces visually, plan service access and cleaning gaps rather than assuming the whole arrangement should be permanently joined.
IDEA 08 / 16
Use a Shallow Tray for Small Accessories
 SaveSupport Non AI Creator
Image credit: Precision Furniture Assembly
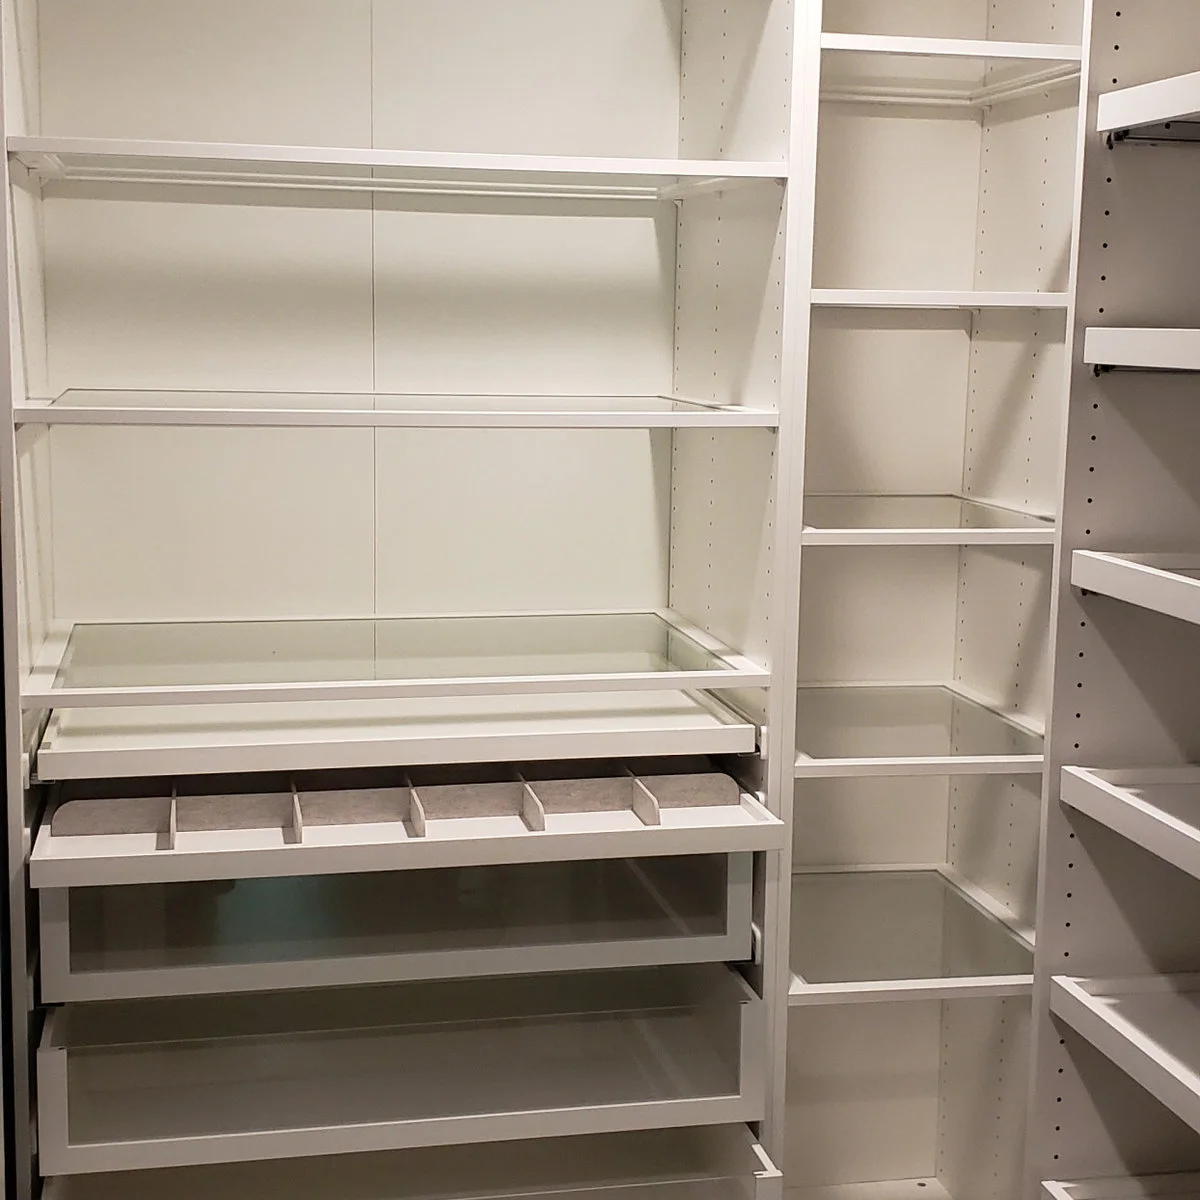
A shallow divided tray sits above the larger drawers in this white wardrobe. Its low compartments keep small accessories separated, while shelves provide space for folded items above and alongside it. The open view makes the difference between display-sized storage and deeper clothing storage easy to understand.
Choose tray compartments around the accessories you actually own and check their usable depth. Small items should be removable without lifting another tray or reaching under a hanging garment. Confirm the tray’s compatibility and hinge clearance in your exact combination, and leave enough room above it to see the contents comfortably.
PART 03
Choose interiors around your belongings
IDEA 09 / 16
Balance Hanging Space With Drawer Stacks
 SaveSupport Non AI Creator
Image credit: Precision Furniture Assembly
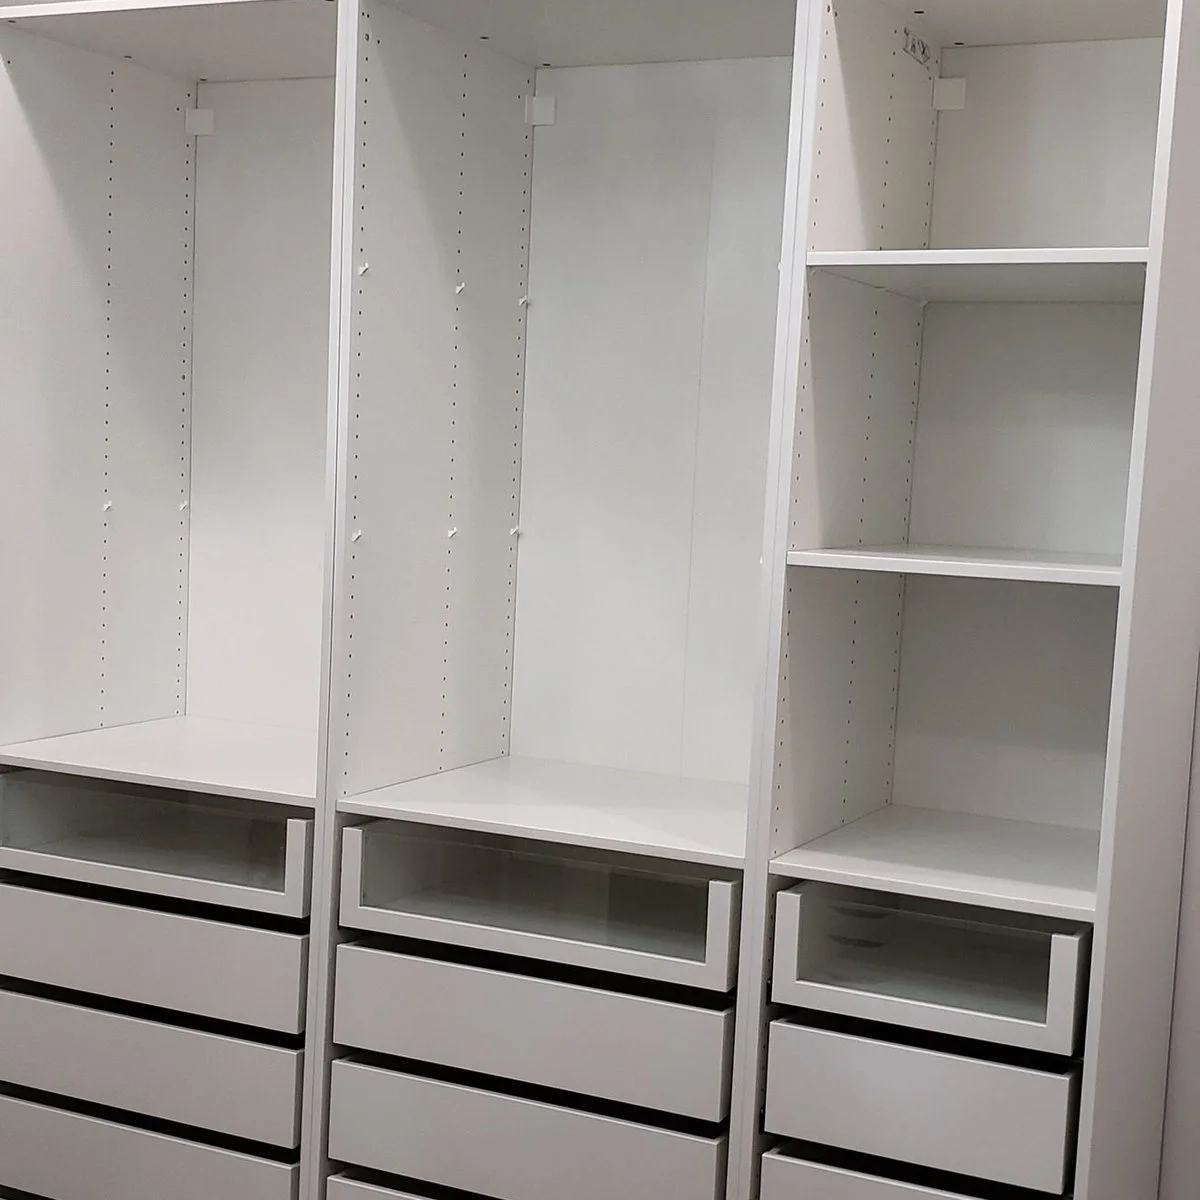
Tall upper openings sit over stacks of drawers in this wardrobe interior. The combination provides different kinds of storage within the same vertical bay, rather than filling every section with shelves. Clear upper drawer fronts give a view of the contents while the lower fronts conceal them.
Measure your longest garments on their usual hangers before deciding where the first drawer should sit. A hanging rail that fits the frame can still leave clothing dragging on the drawer below. Divide folded clothes into manageable groups and avoid adding drawers simply to make every bay look identical.
IDEA 10 / 16
Keep Small Valuables on a Divided Pullout
 SaveSupport Non AI Creator
Image credit: Precision Furniture Assembly
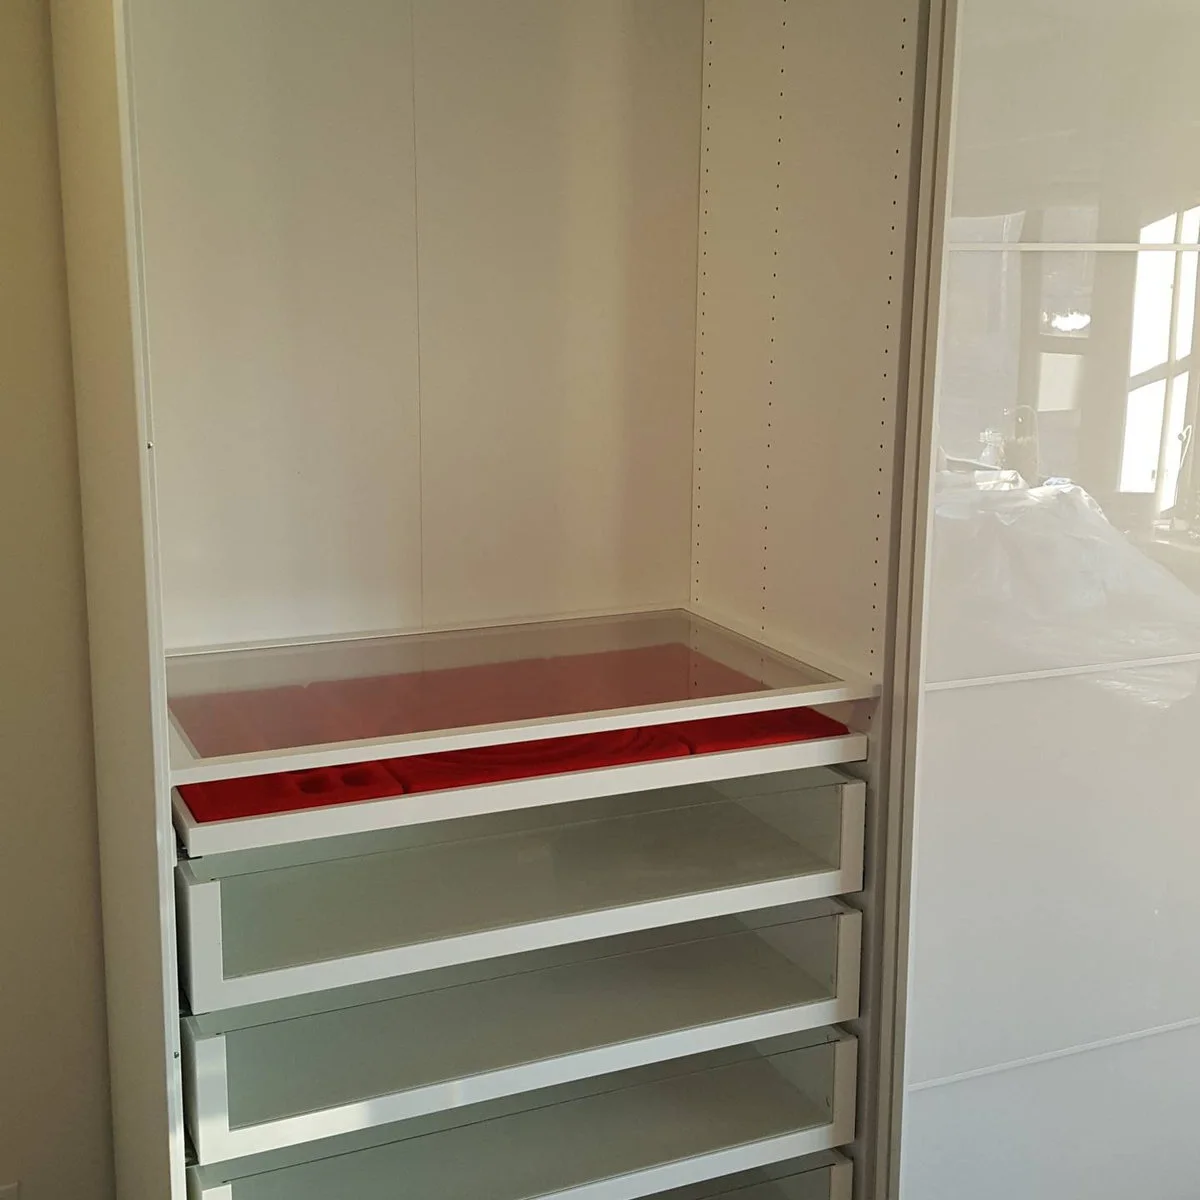
A red-lined tray creates a distinct area for small accessories above the deeper drawers in this cabinet. The contrast makes the compartment shapes easy to see. A clear horizontal surface above it separates the tray from the taller opening, giving delicate pieces their own lower layer.
Choose a lining suited to the objects you store and keep the compartments lightly filled. Check the opening with the actual door in place, especially where sliding panels limit access. Store valuable or sensitive items appropriately for your household; an accessory tray provides organization but does not provide secure storage.
IDEA 11 / 16
Give Shoes Their Own Pullout Levels
 SaveSupport Non AI Creator
Image credit: Precision Furniture Assembly
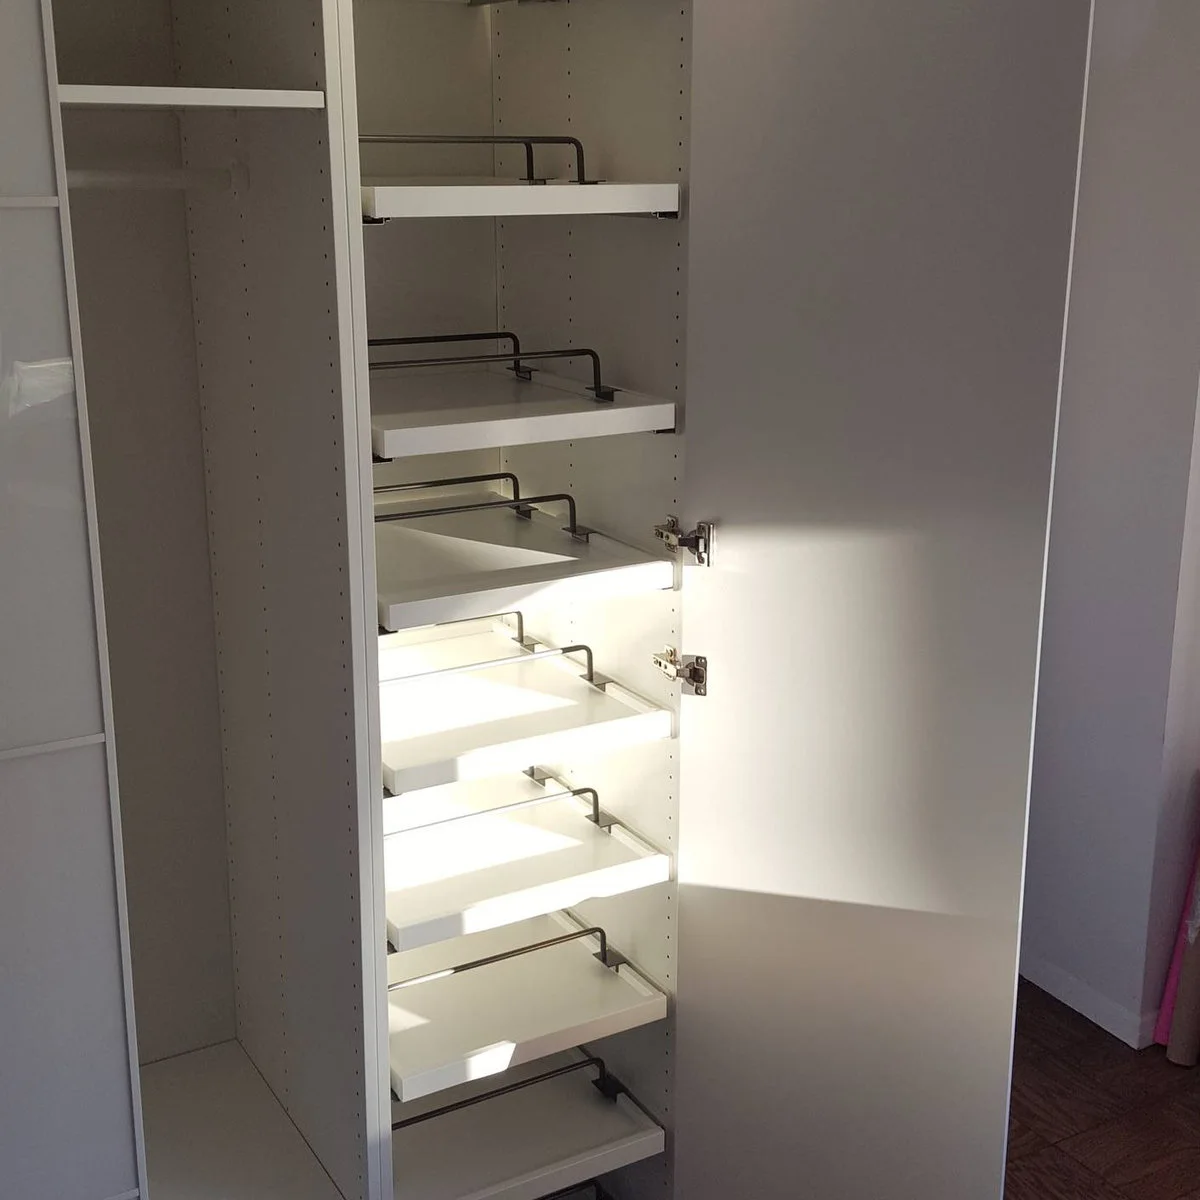
Several shallow pullout levels occupy this narrow wardrobe section, with raised retaining rails spanning the width of each level. The separated surfaces allow shoes to sit in a visible row rather than being buried in a deep basket. The open door also shows why access space matters as much as the number of shelves.
Compare the shelf spacing with your tallest everyday shoes before fixing the layout. Let damp footwear dry elsewhere and clean grit from the trays regularly. Confirm that the door opens far enough for full extension, and keep the front edges clear so shoes cannot catch when a tray slides back.
IDEA 12 / 16
Use One Finish Throughout a Narrow Walk-In
 SaveSupport Non AI Creator
Image credit: Erin Kestenbaum / IKEA Hackers
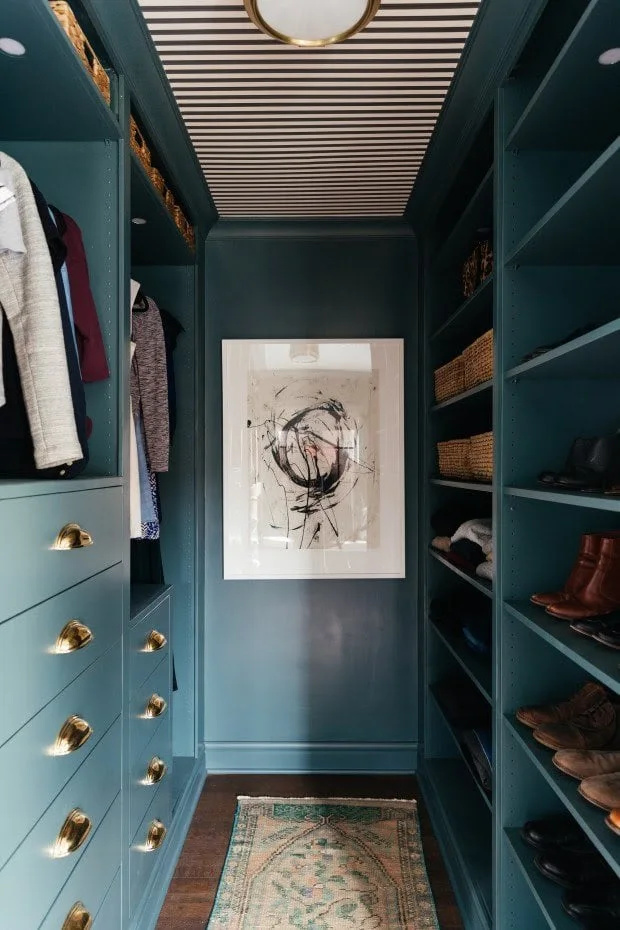
Blue-green cabinetry wraps both sides of this narrow walk-in, with drawers on one side and shoe shelves on the other. Woven baskets use the upper openings while a framed picture closes the view at the end. The single cabinet color ties the varied storage together without hiding its practical divisions.
Plan the passage with drawers fully extended before adding an opposite storage run. Our walk-in closet ideas offer more examples of balancing hanging rails, shelves and circulation. Keep the upper baskets light enough to lower safely, and choose lighting that lets you distinguish clothing colors inside the darker cabinetry.
PART 04
Plan for clothes, shoes and shared storage
IDEA 13 / 16
Keep Everyday Shirts Above Convenient Drawers
 SaveSupport Non AI Creator
Image credit: Erin Kestenbaum / IKEA Hackers
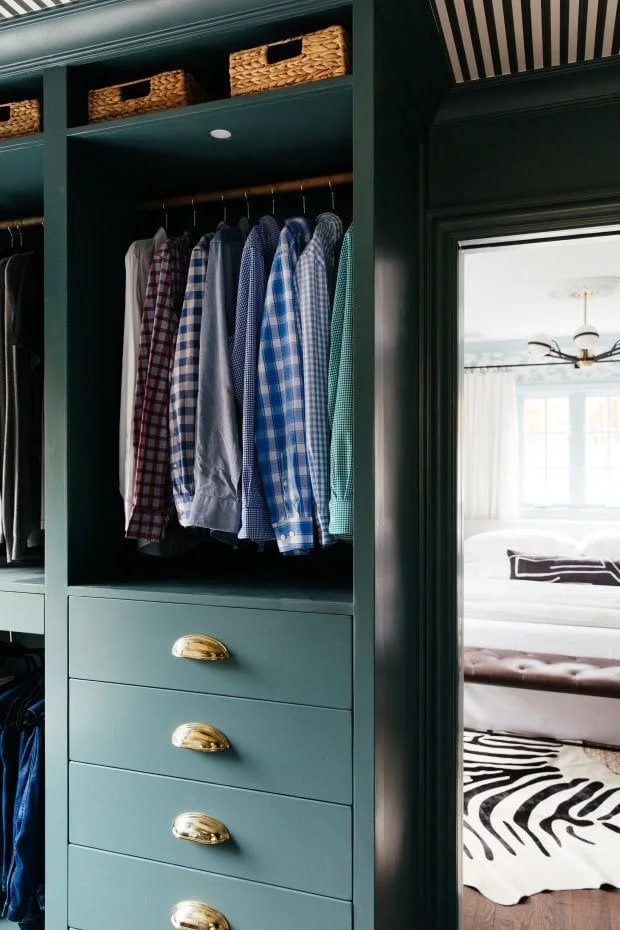
Shirts hang directly above a drawer stack in this blue-green wardrobe bay, with a basket stored in the upper opening. The layout groups daily clothing within one vertical section. Matching drawer fronts and shaped pulls give the storage a finished appearance while the shirts remain easy to scan.
Set the rail height using your actual shirts and hangers so hems clear the surface below. Leave some space between garments to remove one without pulling its neighbors. If drawer fronts are customized, preserve the original movement and fitting clearances, and test each drawer after the finish has fully cured.
IDEA 14 / 16
Dedicate a Central Cabinet to Footwear
 SaveSupport Non AI Creator
Image credit: Tatjana / IKEA Hackers
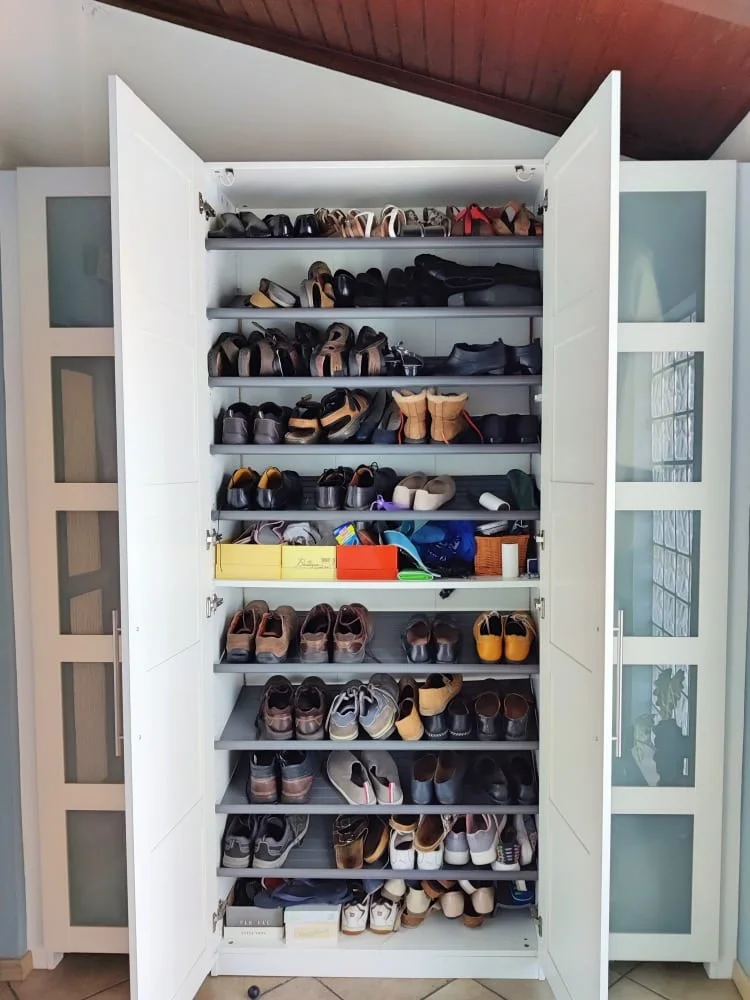
Closely spaced shelves hold rows of shoes in this central cabinet, with a few taller openings accommodating boots and boxes. Keeping the footwear together makes the quantity visible and gives pairs a consistent return spot. The white interior helps distinguish dark shoes against the back of the cupboard.
Arrange shelf heights by the shoes you wear rather than making every gap equal. Leave enough room to lift a pair without scraping the shelf above. Dry and brush shoes before storing them, and keep occasional footwear higher so the most frequently used pairs stay within a comfortable reach.
IDEA 15 / 16
Separate Coats From the Central Storage Bay
 SaveSupport Non AI Creator
Image credit: Tatjana / IKEA Hackers
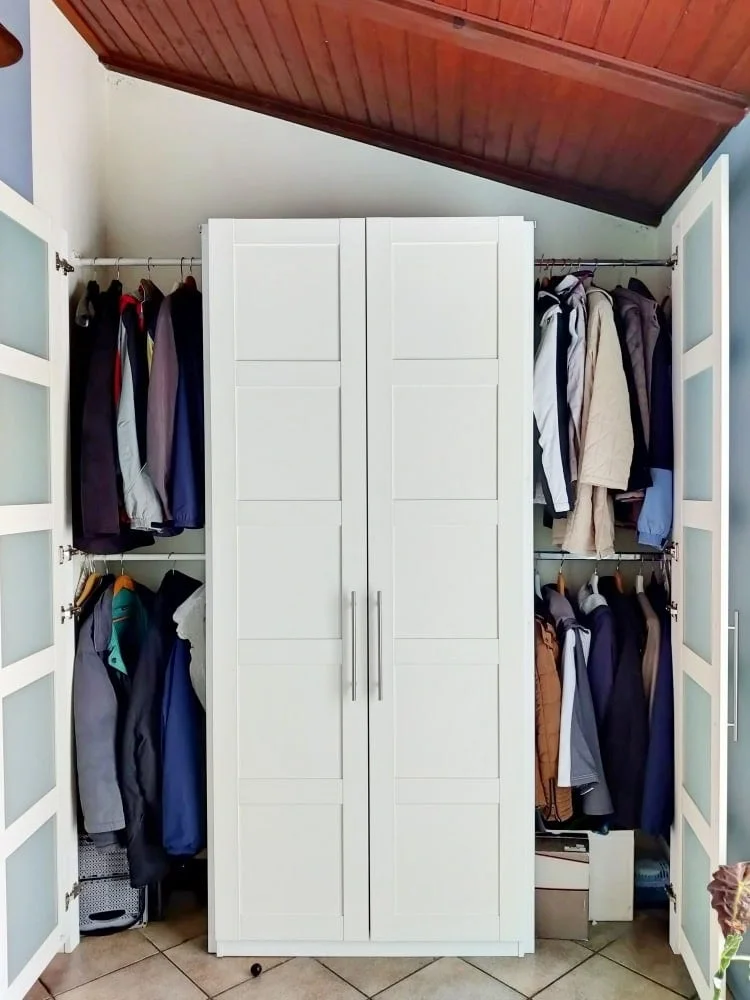
Coats hang in side sections around a central cabinet in this hallway arrangement. Two rails divide shorter garments into separate levels, while the middle doors close over the footwear storage shown in the same project. The whole wall handles several daily routines without putting every item in one bay.
Check garment length before adding a second rail, and avoid pressing damp coats into a tightly enclosed space. Our IKEA mudroom ideas offer other ways to divide shoes, bags and outerwear. Custom side sections need proper support and should not compromise the frame’s required wall attachment or the room’s circulation.
IDEA 16 / 16
Mix Solid and Glazed Door Panels
 SaveSupport Non AI Creator
Source: IKEA Hackers
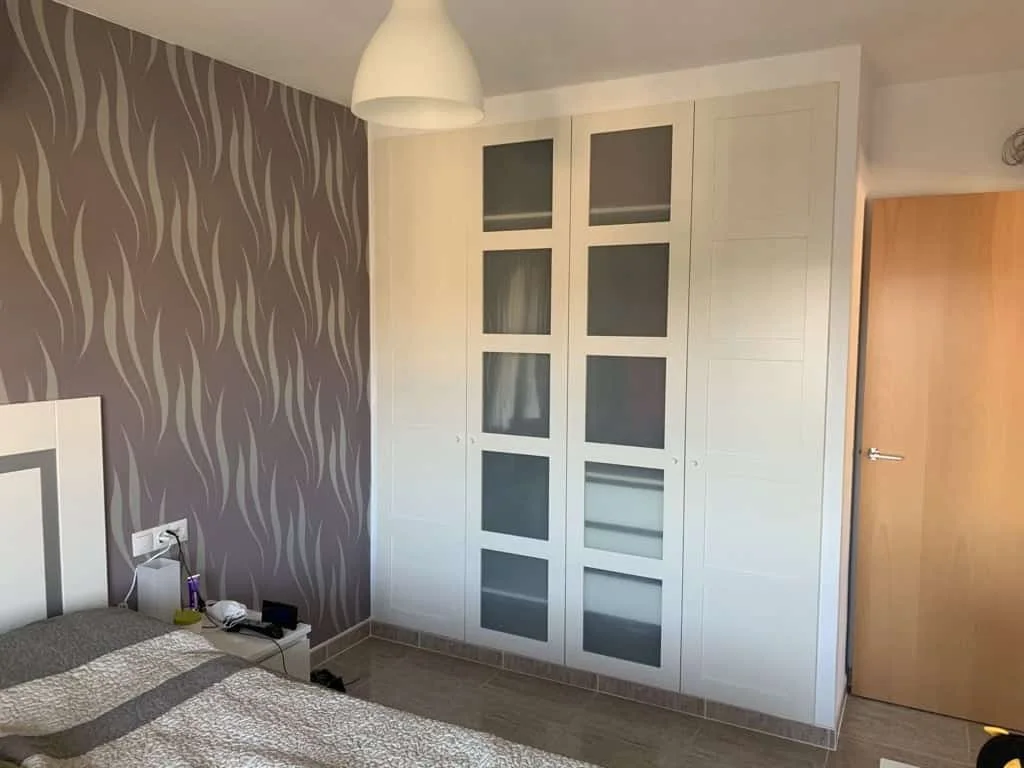
Glazed central doors and solid outer doors create two levels of visibility in this fitted wardrobe. The white finish keeps the front cohesive, while the adjacent patterned wall adds contrast. The combination suits a room where some stored pieces can remain visible and other categories benefit from concealment.
Decide what will sit behind the glazed panels before committing to them, since busy clothing colors remain part of the room. Confirm that all doors belong to a compatible system for your frame. Keep handles, hinges and drawer positions coordinated so the more decorative exterior still opens into usable storage.
BRING IT ALL TOGETHER
Check the opening as carefully as the storage
Draw the wardrobe with doors open and drawers extended before committing to it. Check the room door, bed, radiator, switches and walking route at the same time. Choose internal fittings by the quantities and lengths of your belongings rather than fitting every optional accessory.
Use current instructions for the actual frame, door and interior fittings. Custom trim, paint and replacement fronts can affect clearances and future adjustments. Secure furniture as instructed, and have any structural alterations assessed before treating an alcove or wall as spare storage space.