An IKEA hack can be a small change to a frame or a larger project that gives ordinary storage a new role. Start with the piece you already have and the problem you want it to solve. Paint and trim are useful only when the furniture still works well afterward.
These documented projects focus on furniture and accessories outside the wardrobe. Some involve straightforward decoration; others need confident carpentry and properly designed support. Check the actual product, surface and assembly instructions before adapting it, and preserve required wall attachments, load limits and safe access to moving parts.
PART 01
Shape furniture around the living space
IDEA 01 / 20
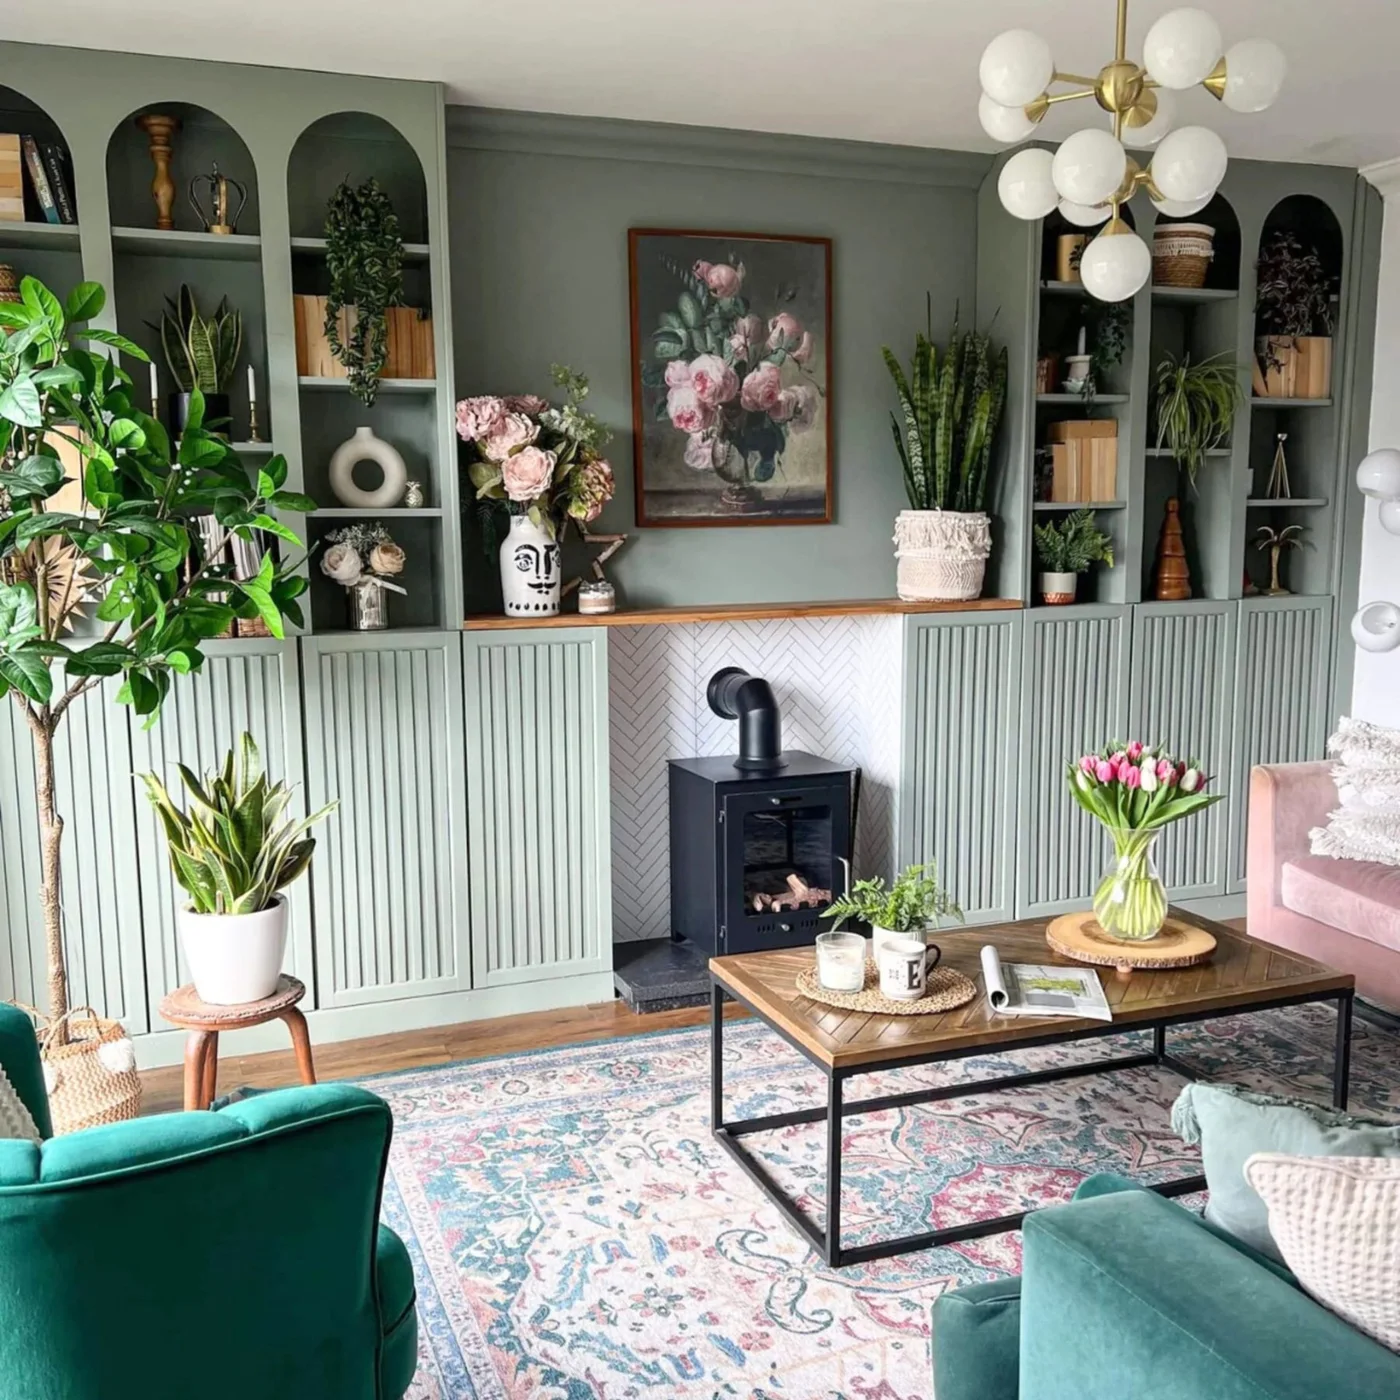
Frame a Fireplace With Arched BILLY Shelves
 SaveSupport Non AI Creator
Image credit: Melanie Boyden/Melanie Jade Design
Sage green bookcases frame this fireplace, with arched upper openings and fluted lower doors giving the repeated units a more finished appearance. Open shelves hold books and plants, while the lower cupboards conceal everyday storage. A continuous top edge ties the individual sections together across the wall.
Plan the whole wall before adding arches or trim, including access to sockets and the clearances required around the fireplace. Anchor bookcases according to their instructions and respect shelf loads. Keep watering trays away from the finish, and leave the lower doors enough space to open without scraping a rug.
IDEA 02 / 20
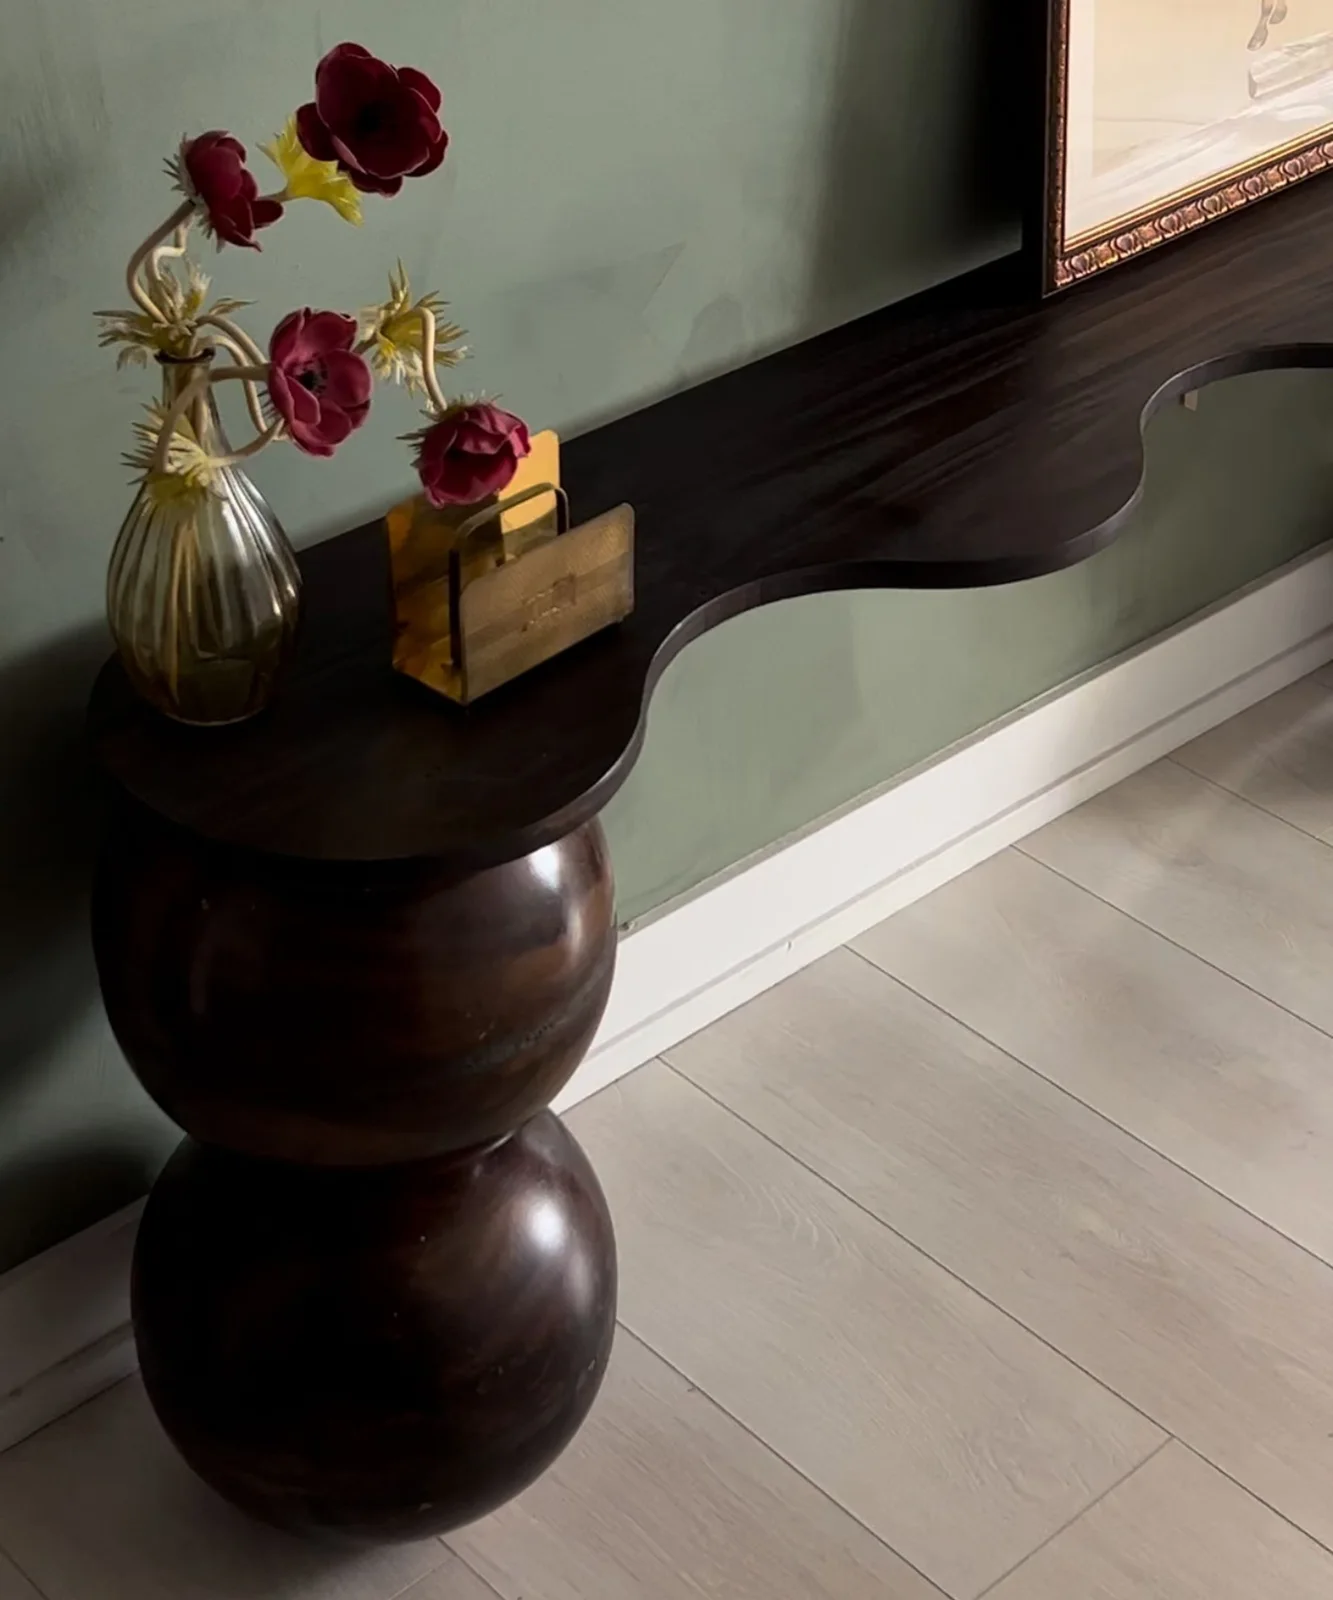
Make a Sculptural Console From Stacked Bowls
 SaveSupport Non AI Creator
Image credit: Cassandra Noel @cassandranoelhome
A wavy dark top and rounded stacked legs make this narrow console the focus of the hallway. The documented project uses IKEA serving bowls as part of the base, turning a familiar household object into a sculptural element. A small vase and letter holder leave much of the top visible.
Treat the base as custom furniture rather than assuming a bowl has a rated load capacity. The joints and resistance to tipping need careful assessment before anything heavy is placed above. Keep the finished piece out of a tight route where bags or passing elbows could catch the projecting edge.
IDEA 03 / 20
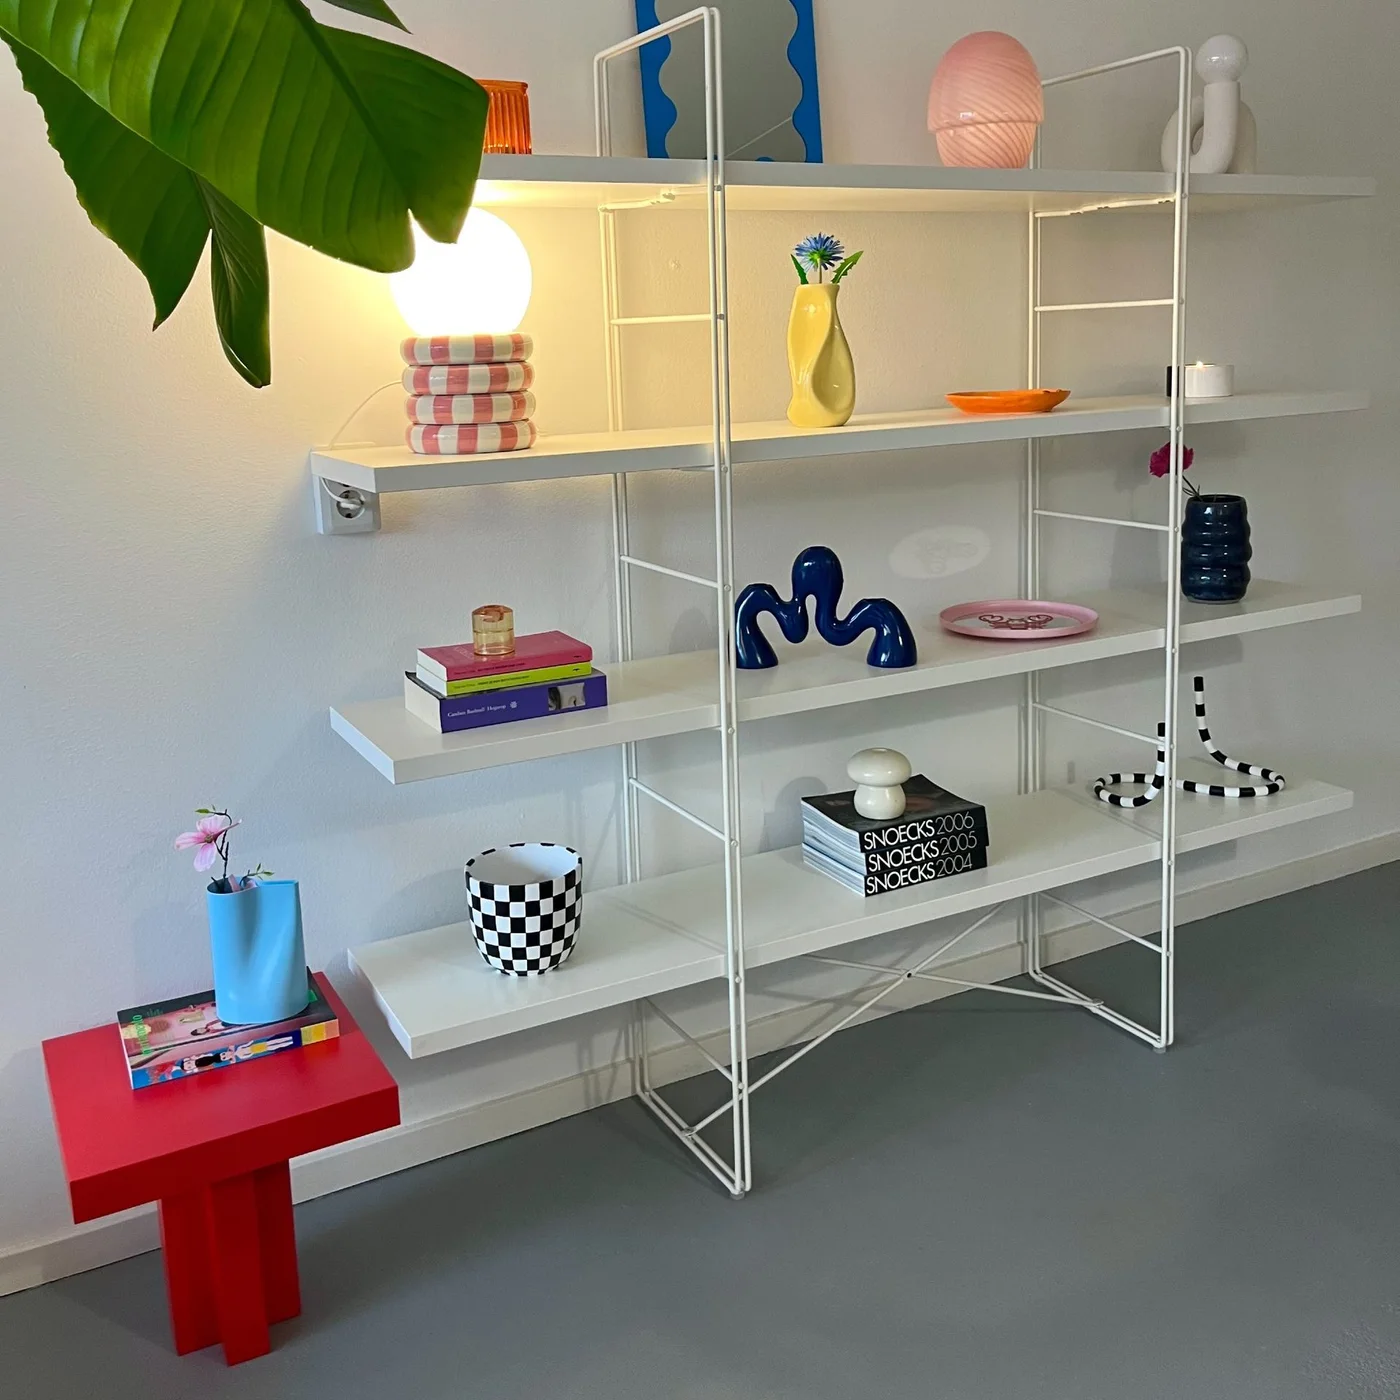
Give a LACK Side Table a Stronger Silhouette
 SaveSupport Non AI Creator
Image credit: Angela Janssen, Angie On The Wall
A bright red finish and rearranged-looking geometric base give this small side table a distinct silhouette beside the pale shelving. The compact top holds a few books and a blue vase. Its limited size lets the color act as an accent without requiring a large matching furniture piece.
Check the original table’s construction before altering its supports, and make sure any new arrangement remains stable. Test the finish on the actual surface and allow it to cure before placing books on top. A bold color works best here when nearby furniture stays relatively quiet and the table has enough clearance to use.
IDEA 04 / 20
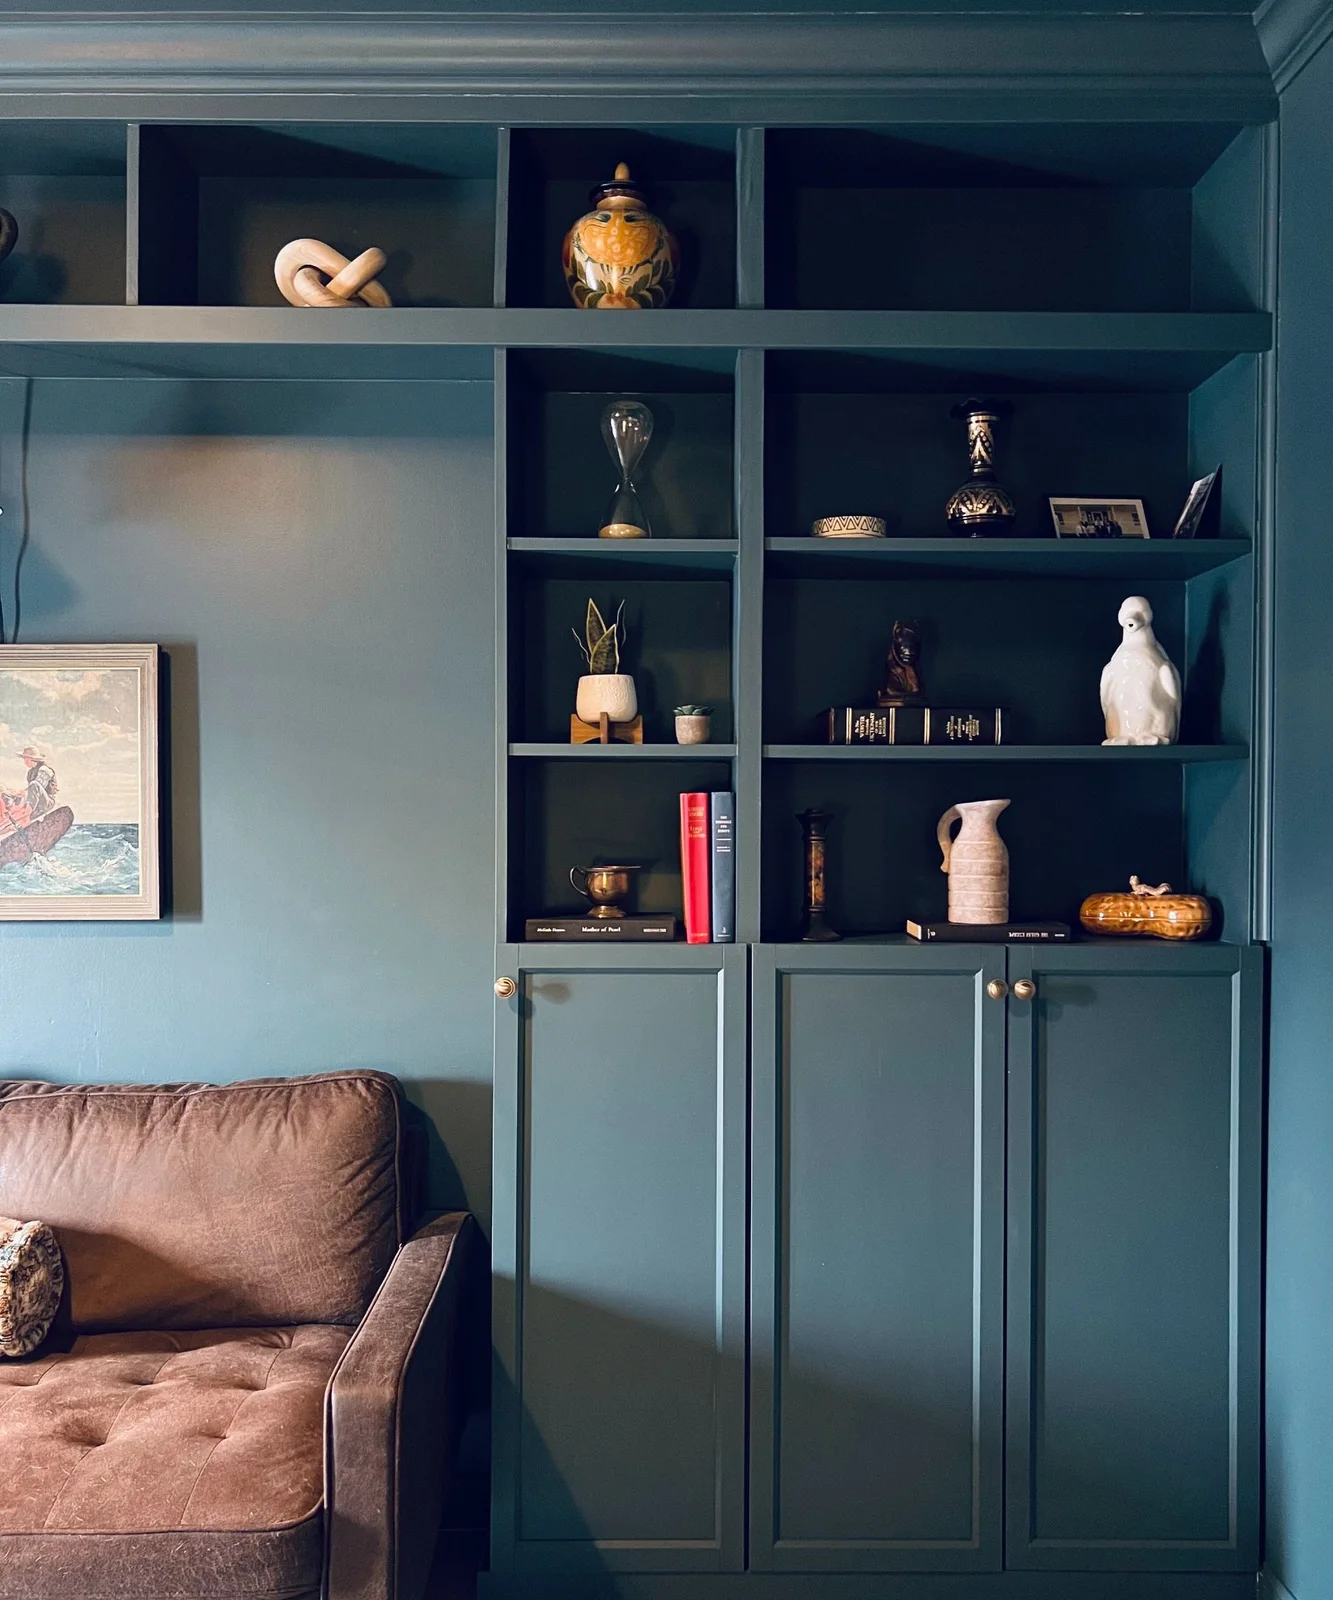
Fit BILLY Storage Beside a Sofa
 SaveSupport Non AI Creator
Image credit: Charlotte and Oliver Jiang, One More Project
Blue-green shelving stands beside the edge of a brown sofa, with closed cupboards below and display objects on the open shelves above. The painted wall behind the seat matches the cabinetry, connecting the two areas without filling the whole wall with storage. Small sections hold books, pottery and framed pictures.
Measure the bookcase depth beside the sofa before adding doors or trim, and anchor the finished unit as directed. Leave enough space to reach the seat comfortably and keep regularly used items in the lower cupboards. Our small home office ideas offer other ways to balance closed storage with a lightly filled display area.
IDEA 05 / 20
Use Rounded Supports on a Low Coffee Table
 SaveSupport Non AI Creator
Image credit: Nicky Behshad @homebynicky
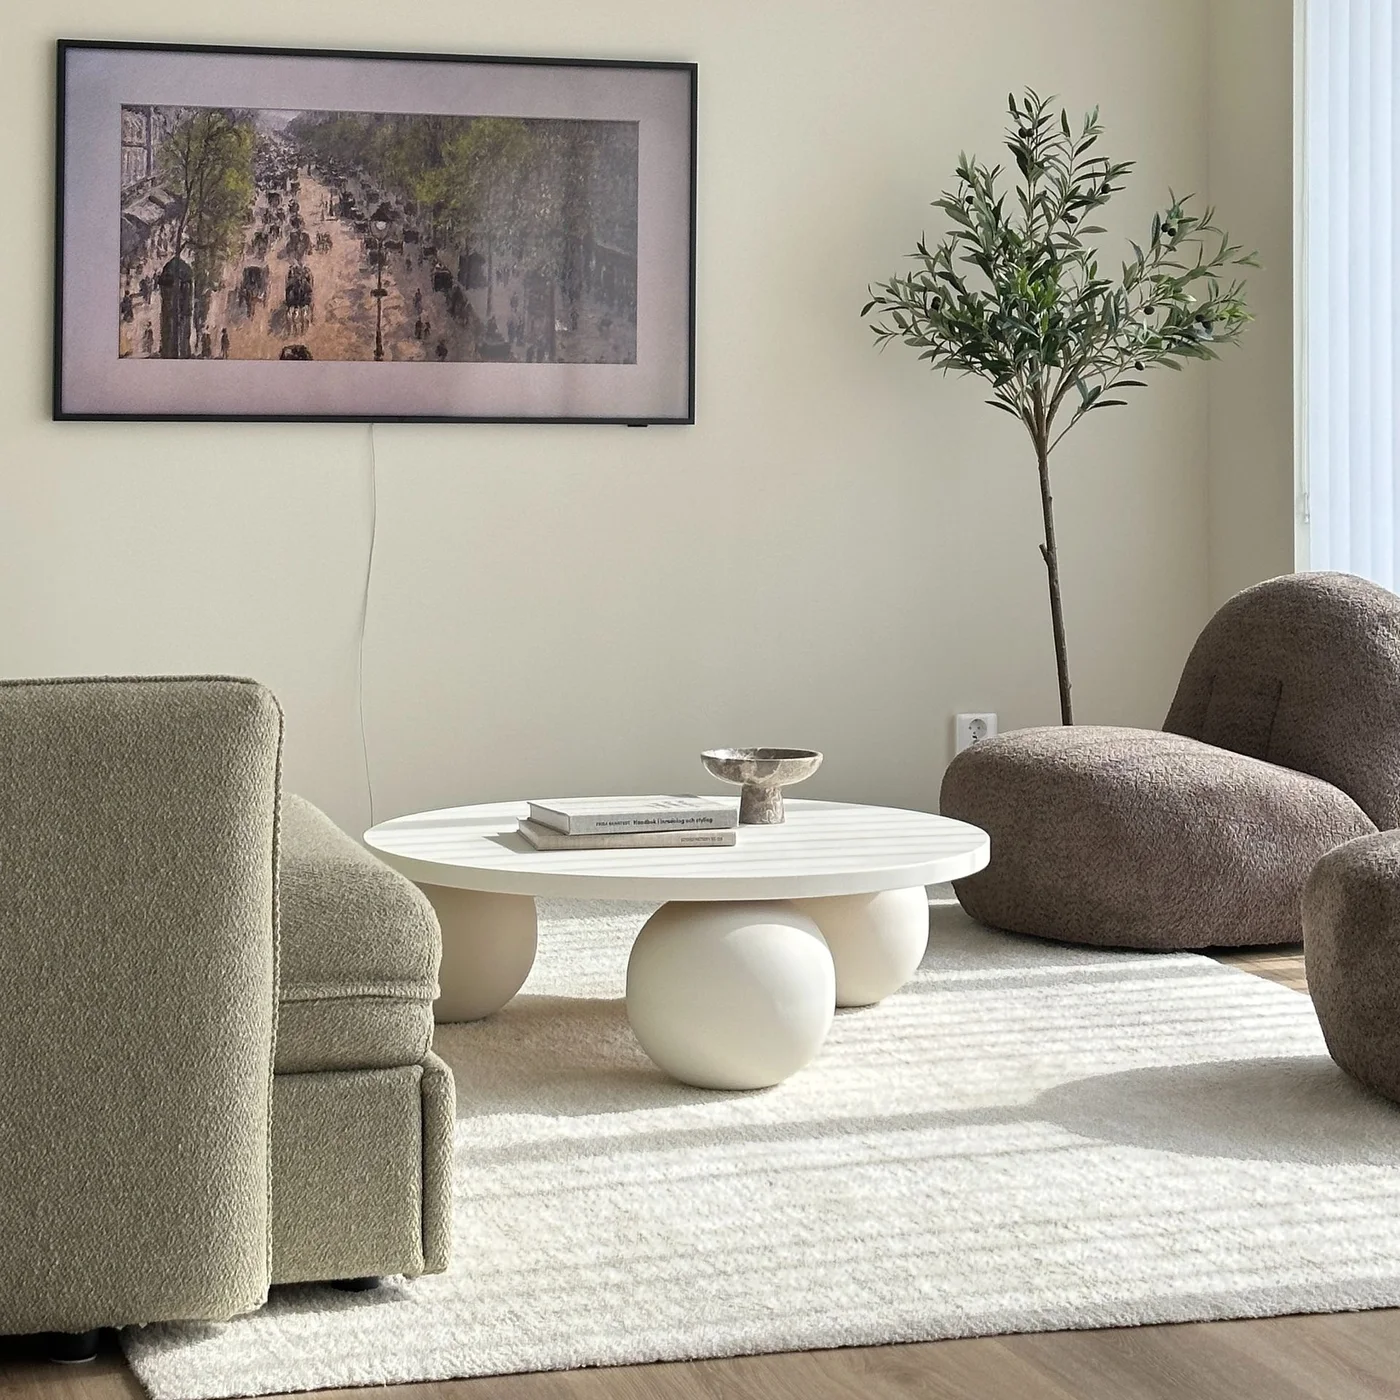
Large rounded supports give this low white coffee table a playful form among the room’s neutral upholstery. The circular top removes sharp corners from the main seating area. A small stack of books and one bowl keep the sculptural base, rather than a crowded display, as the main feature.
The source project uses serving bowls in a custom base, so assess the joints, stability and top support before attempting a similar construction. Check the table height against your seats and leave a comfortable route around it. Keep heavy objects away until the finished piece’s safe use has been established.
PART 02
Change the smaller details
IDEA 06 / 20
Paint a Plain Frame With Broad Stripes
 SaveSupport Non AI Creator
Image credit: Bradley Dreha @bradleydreha
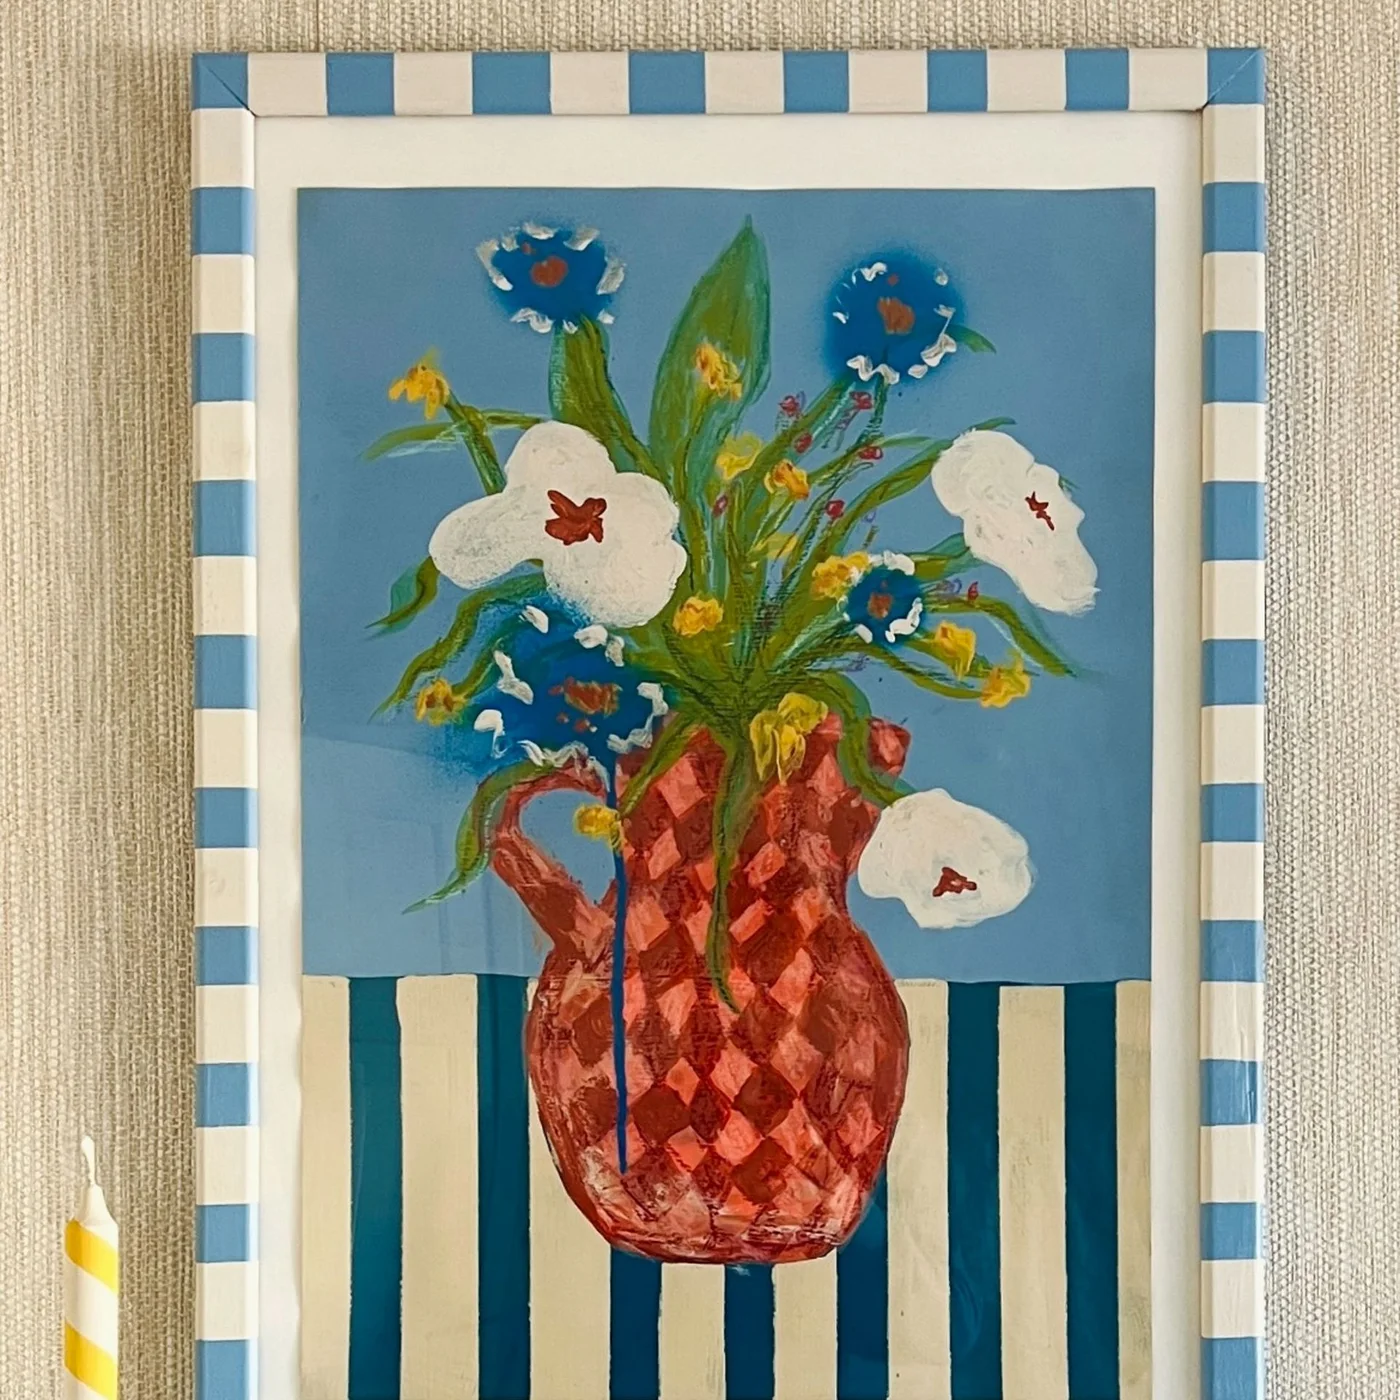
Broad blue and cream stripes turn this simple frame into part of the artwork’s color scheme. Their scale is large enough to read clearly against the textured wall. The plain inner border gives the flowers a little breathing room, keeping the patterned edge from competing with every brushstroke.
Remove the artwork and glazing before working on a frame, and test the coating on its actual finish. Mark the stripe spacing before painting so corners meet deliberately. Let the finish dry fully before reassembling, and choose secure hanging hardware appropriate to the frame’s weight and the wall.
IDEA 07 / 20
Add Curved Cane Panels to BESTA Doors
 SaveSupport Non AI Creator
Image credit: @crack_the_shutters
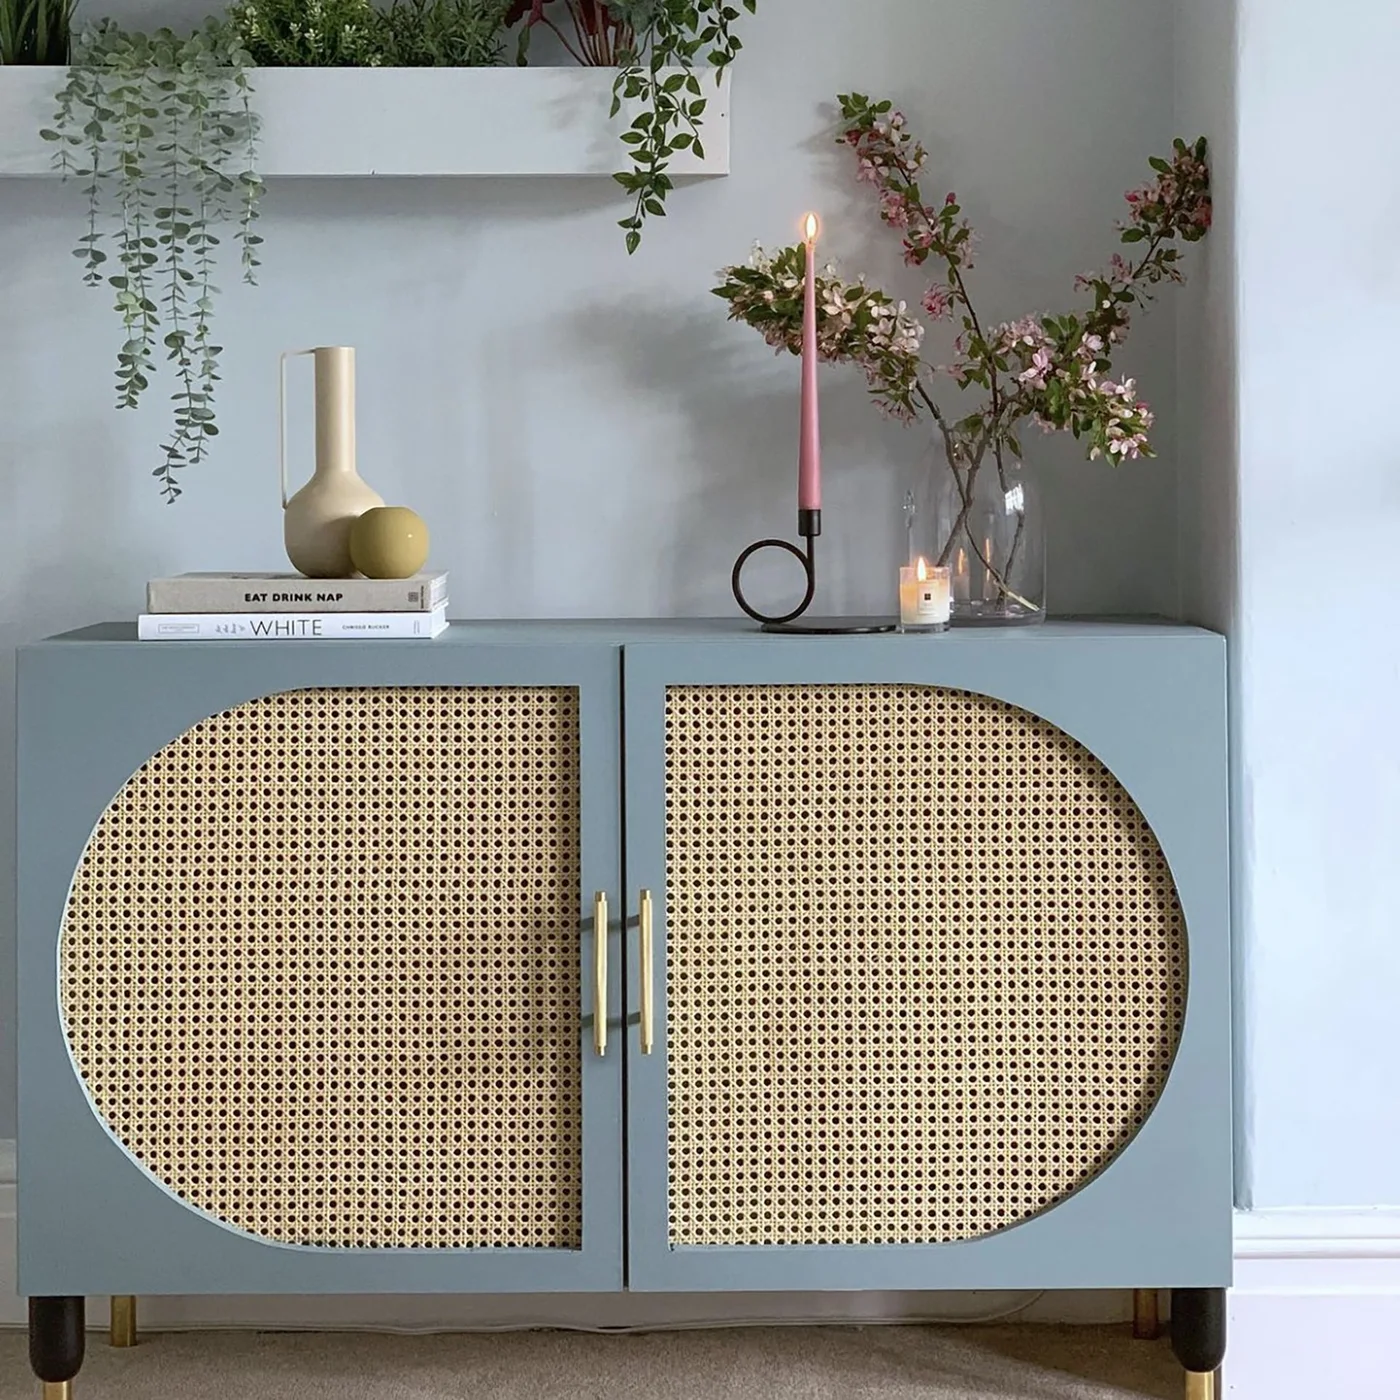
Curved cane panels soften the front of this blue-gray cabinet, while long gold-colored handles mark the center opening. The pale woven pattern adds texture without introducing another strong color. Books, a vase and a candle occupy only part of the top, allowing the cabinet fronts to remain prominent.
Any change to a door panel needs to preserve its strength, hinge fixing and movement. Confirm the construction before cutting, and use suitable backing or professional help where needed. Keep the cane away from repeated splashes, dust it gently and allow doors to close without catching the edges of the insert.
IDEA 08 / 20
Turn Several BILLY Units Into a Dining-Room Library
 SaveSupport Non AI Creator
Image credit: Caroline McQuistin @carolinemcquistin
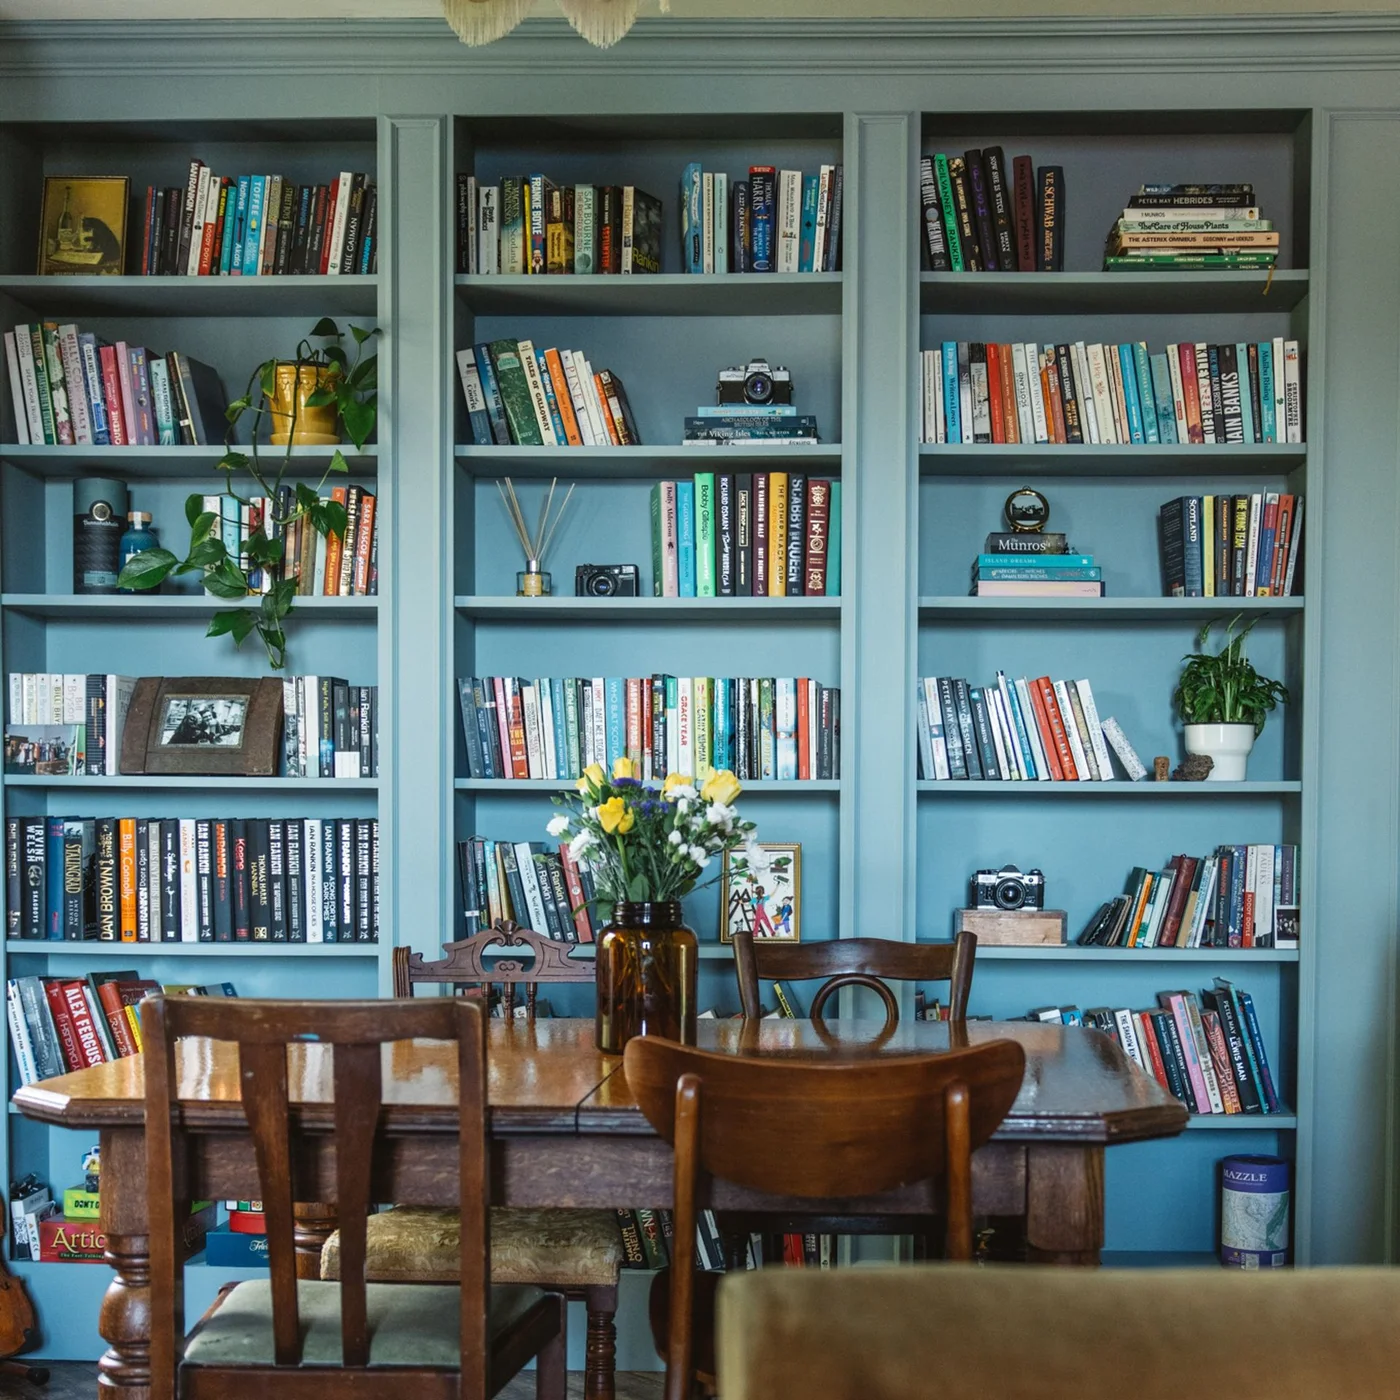
A continuous blue finish joins the bookcases behind this dining table into a broad library wall. Books occupy most of the shelves, with small objects and pictures breaking up the rows. The darker wooden table and chairs remain distinct against the blue background rather than blending into the storage.
Measure the table’s working area before adding a full wall of shelving, including space to pull chairs back. Anchor each unit and keep within its shelf load rating. If you add trim across several frames, leave access for future adjustments and avoid covering fixings that need inspection or tightening.
IDEA 09 / 20
Bring Color and Pattern to a Group of Frames
 SaveSupport Non AI Creator
Image credit: Future PLC/Jemma Watts
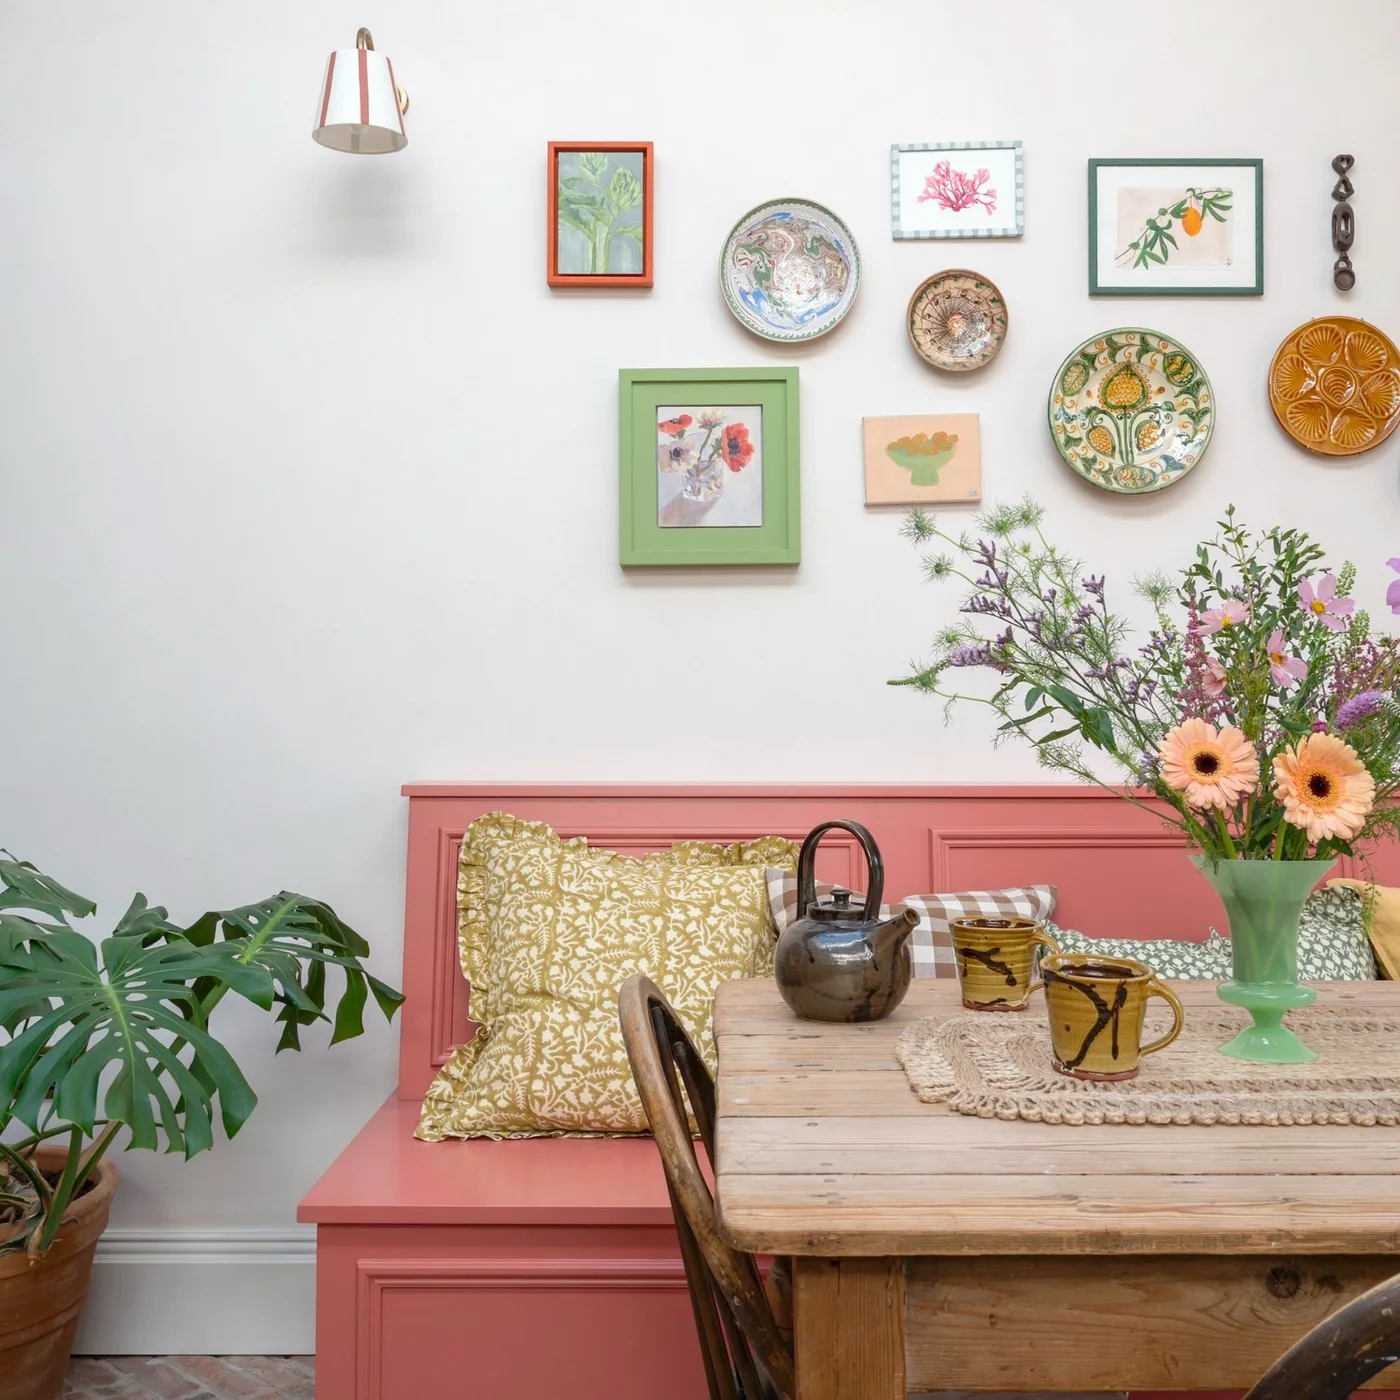
Small frames in different colors form a loose group above this pink bench, with decorative plates mixed among the pictures. Their modest scale lets several finishes sit together without making the wall feel heavy. A patterned frame edge can add texture even when the surrounding wall stays plain.
Use a small frame as a trial for a new paint color or a small checked border before committing to a larger furniture makeover. Remove the art while working and keep the hanging points accessible. Lay out the whole group on paper first, checking that pieces above seating are securely fixed and comfortably clear of heads.
IDEA 10 / 20
Arrange Small Mirrors as One Large Grid
 SaveSupport Non AI Creator
Image credit: Anna Hoban @our_home_style_
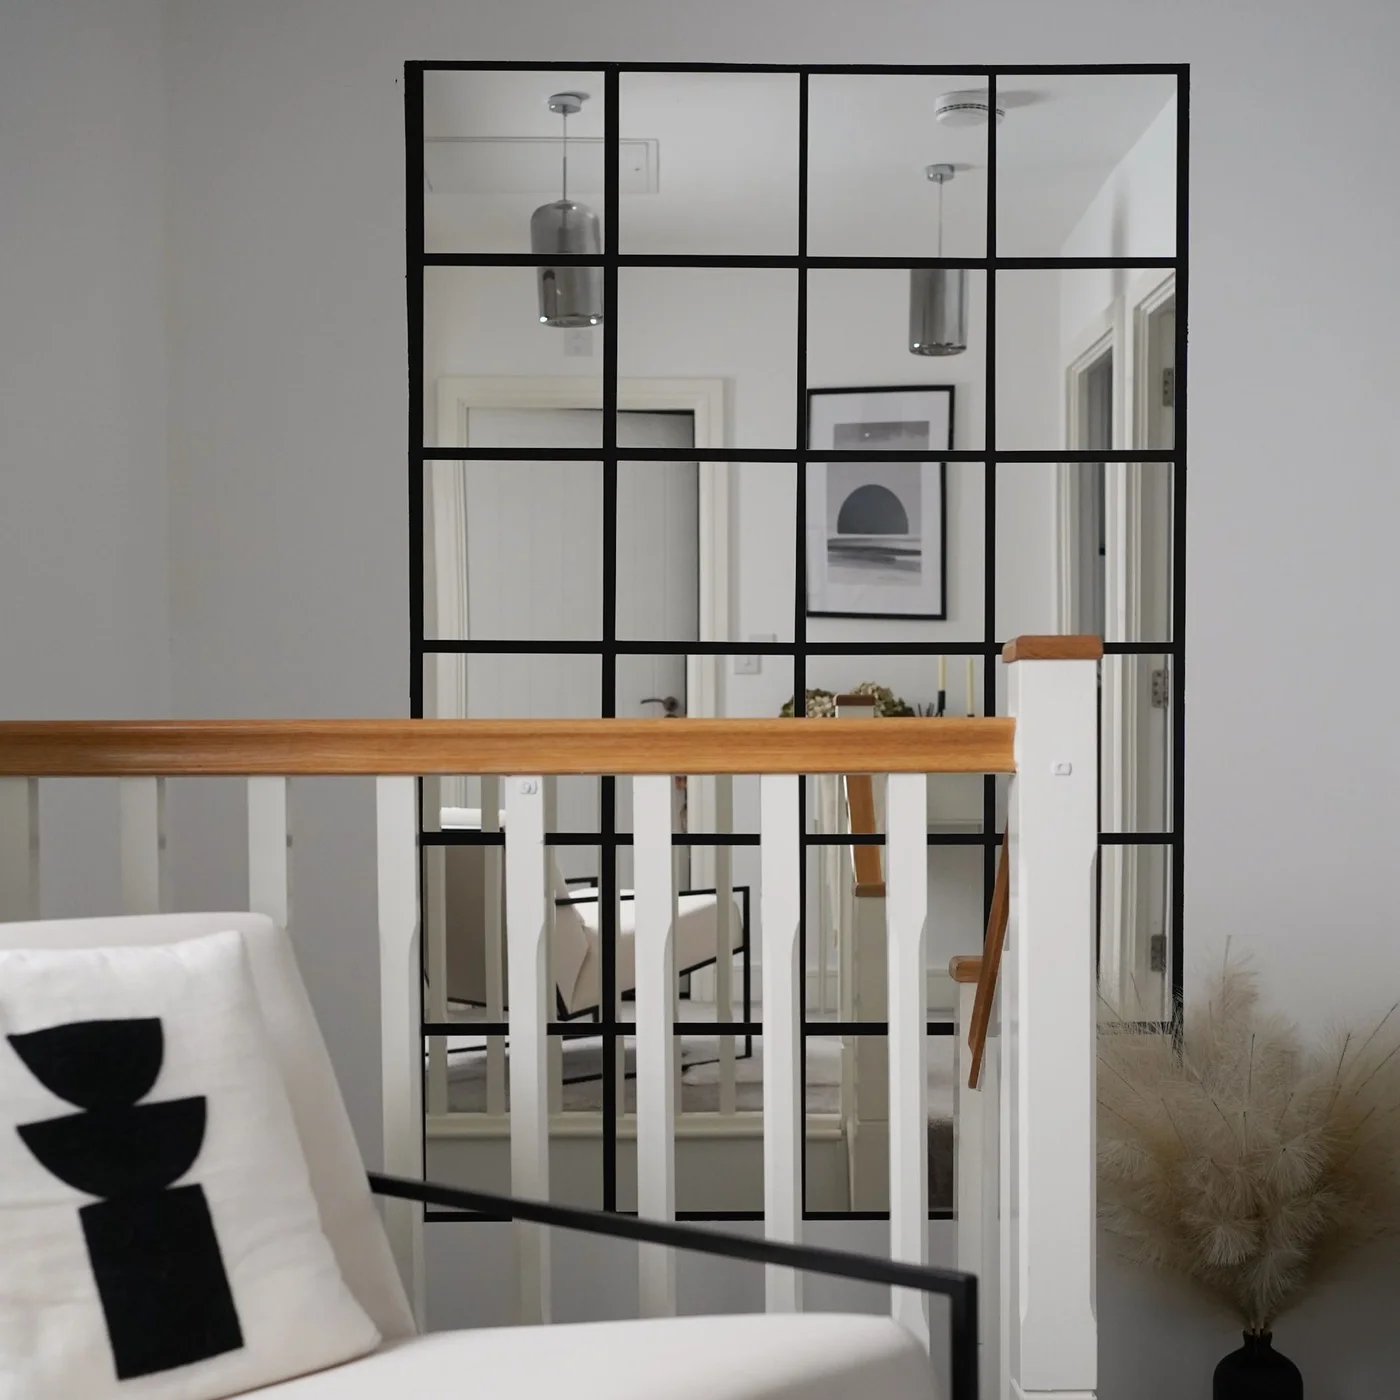
Small square mirrors form a single tall grid on this landing, with the black spaces between them reading like a shared frame. The reflection opens the view beyond the railing without adding bulky furniture. Repeated spacing gives the group a deliberate structure despite the use of individual pieces.
Measure the grid from a level reference and check the chosen fixing method against both the mirrors and wall surface. Work safely on a landing; do not balance over a stair opening to reach the upper row. Consider the reflected view from downstairs as well as from the room beside it.
PART 03
Give storage a more personal finish
IDEA 11 / 20
Repeat Fluting Across a BESTA Cabinet
 SaveSupport Non AI Creator
Image credit: @melanielissackinteriors
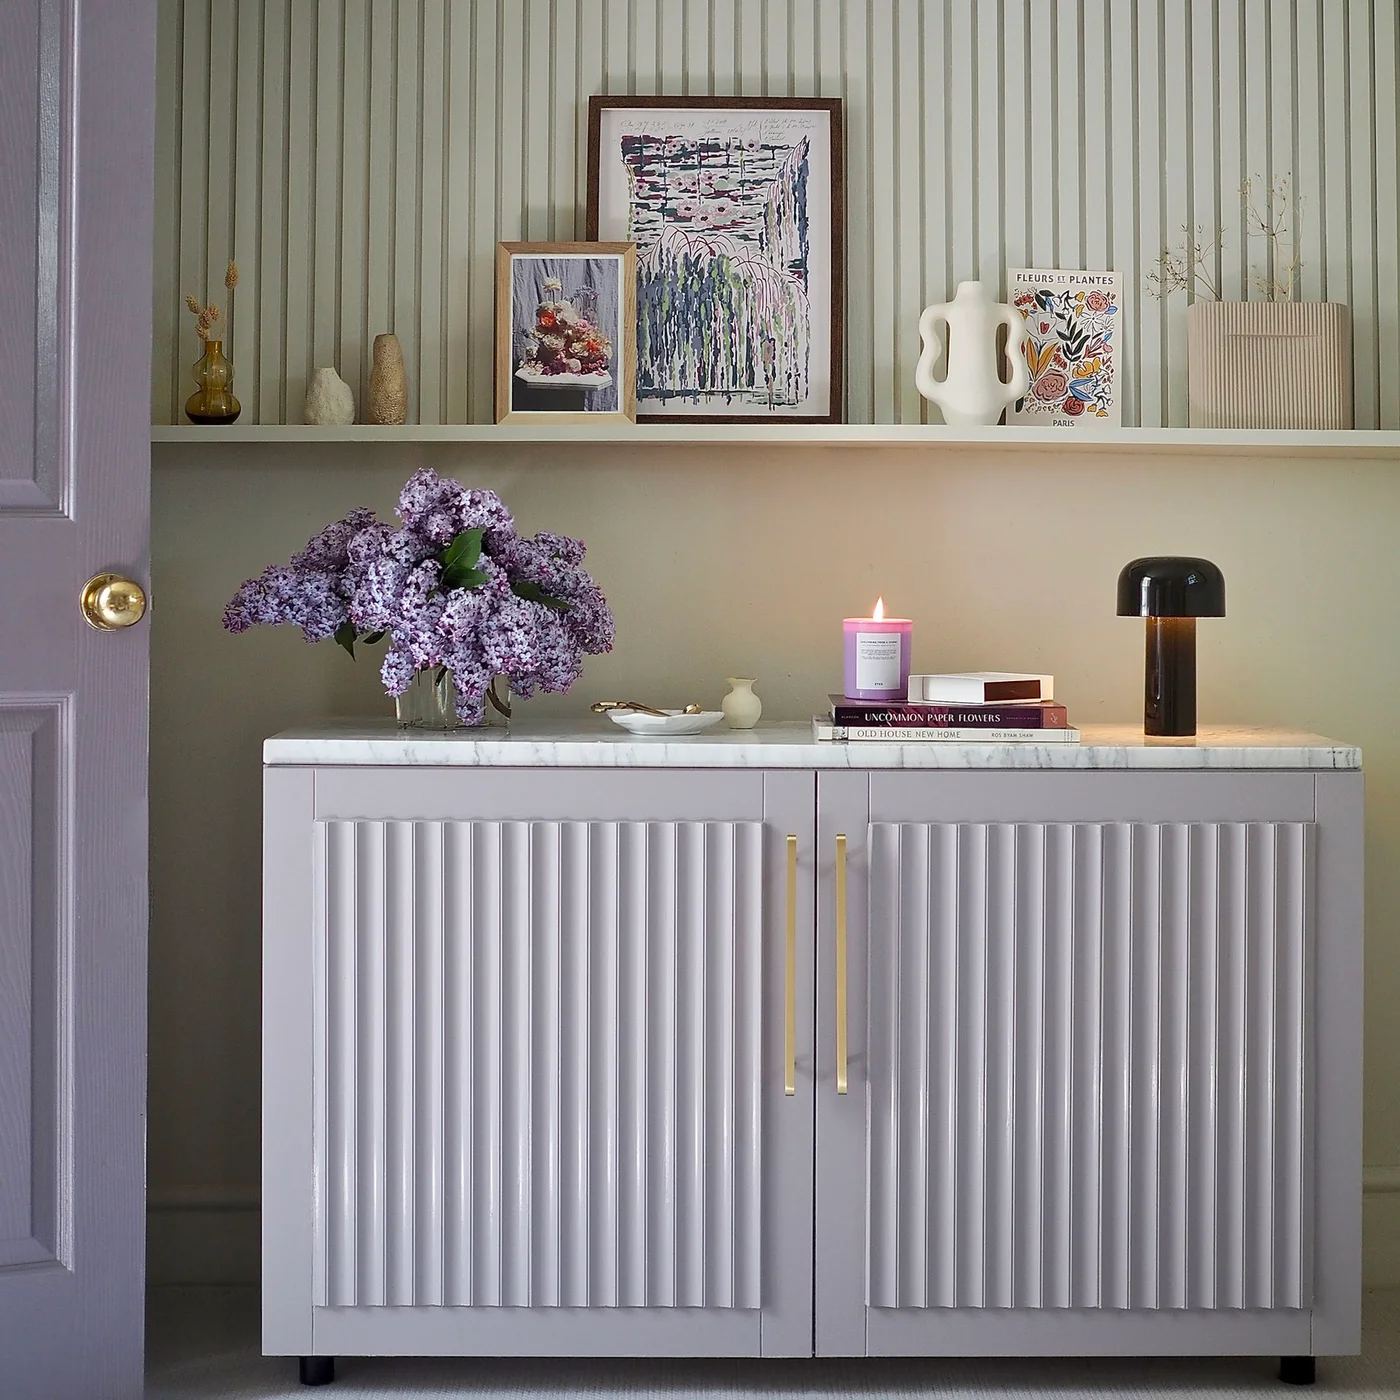
Vertical fluting gives these lilac cabinet doors a more detailed surface, echoing the narrow lines on the wall behind. Long handles repeat the upward direction, while the pale top provides a quieter surface for books and flowers. The color keeps the added texture from feeling too heavy.
Check the added thickness against the hinge movement and the gaps between doors. Decorative strips should not prevent a door from opening fully or add unsupported weight. Test the finish on both the cabinet and applied trim, since different surfaces may absorb paint differently and show an uneven sheen.
IDEA 12 / 20
Use Tall Shelves to Define a Shared Desk
 SaveSupport Non AI Creator
Image credit: @fromcatterytohome
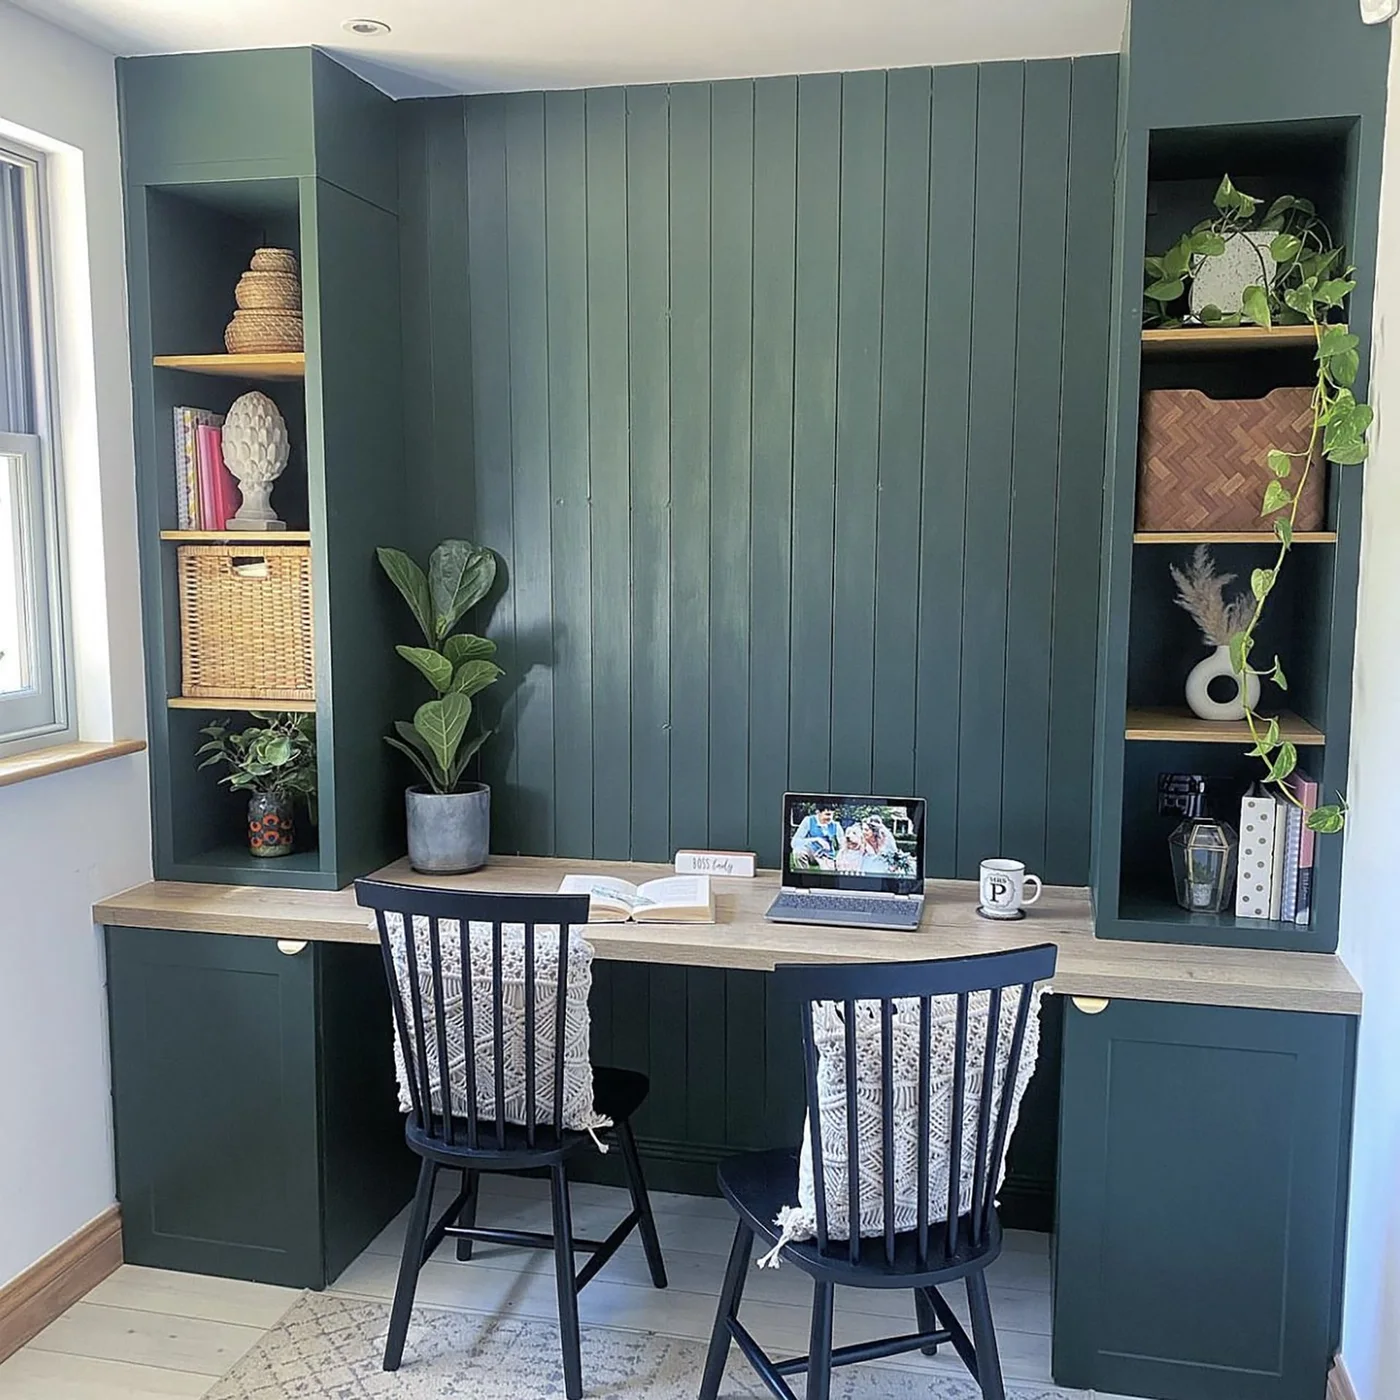
Tall green shelves frame both ends of this shared desk, with a continuous pale worktop connecting the two seats. Lower cupboards provide concealed storage, while the central wall stays clear enough for everyday work. The matching finish gives the adapted bookcases a place within the room’s wider arrangement.
Measure legroom and chair movement for both users before positioning the supports. A long worktop needs suitable support independent of decorative trim. Our small apartment storage ideas offer other ways to combine open shelves and closed cupboards when one room handles several tasks, without turning every surface into a display.
IDEA 13 / 20
Give Drawer Fronts a Repeated Graphic Pattern
 SaveSupport Non AI Creator
Image credit: Future PLC/Tim Young
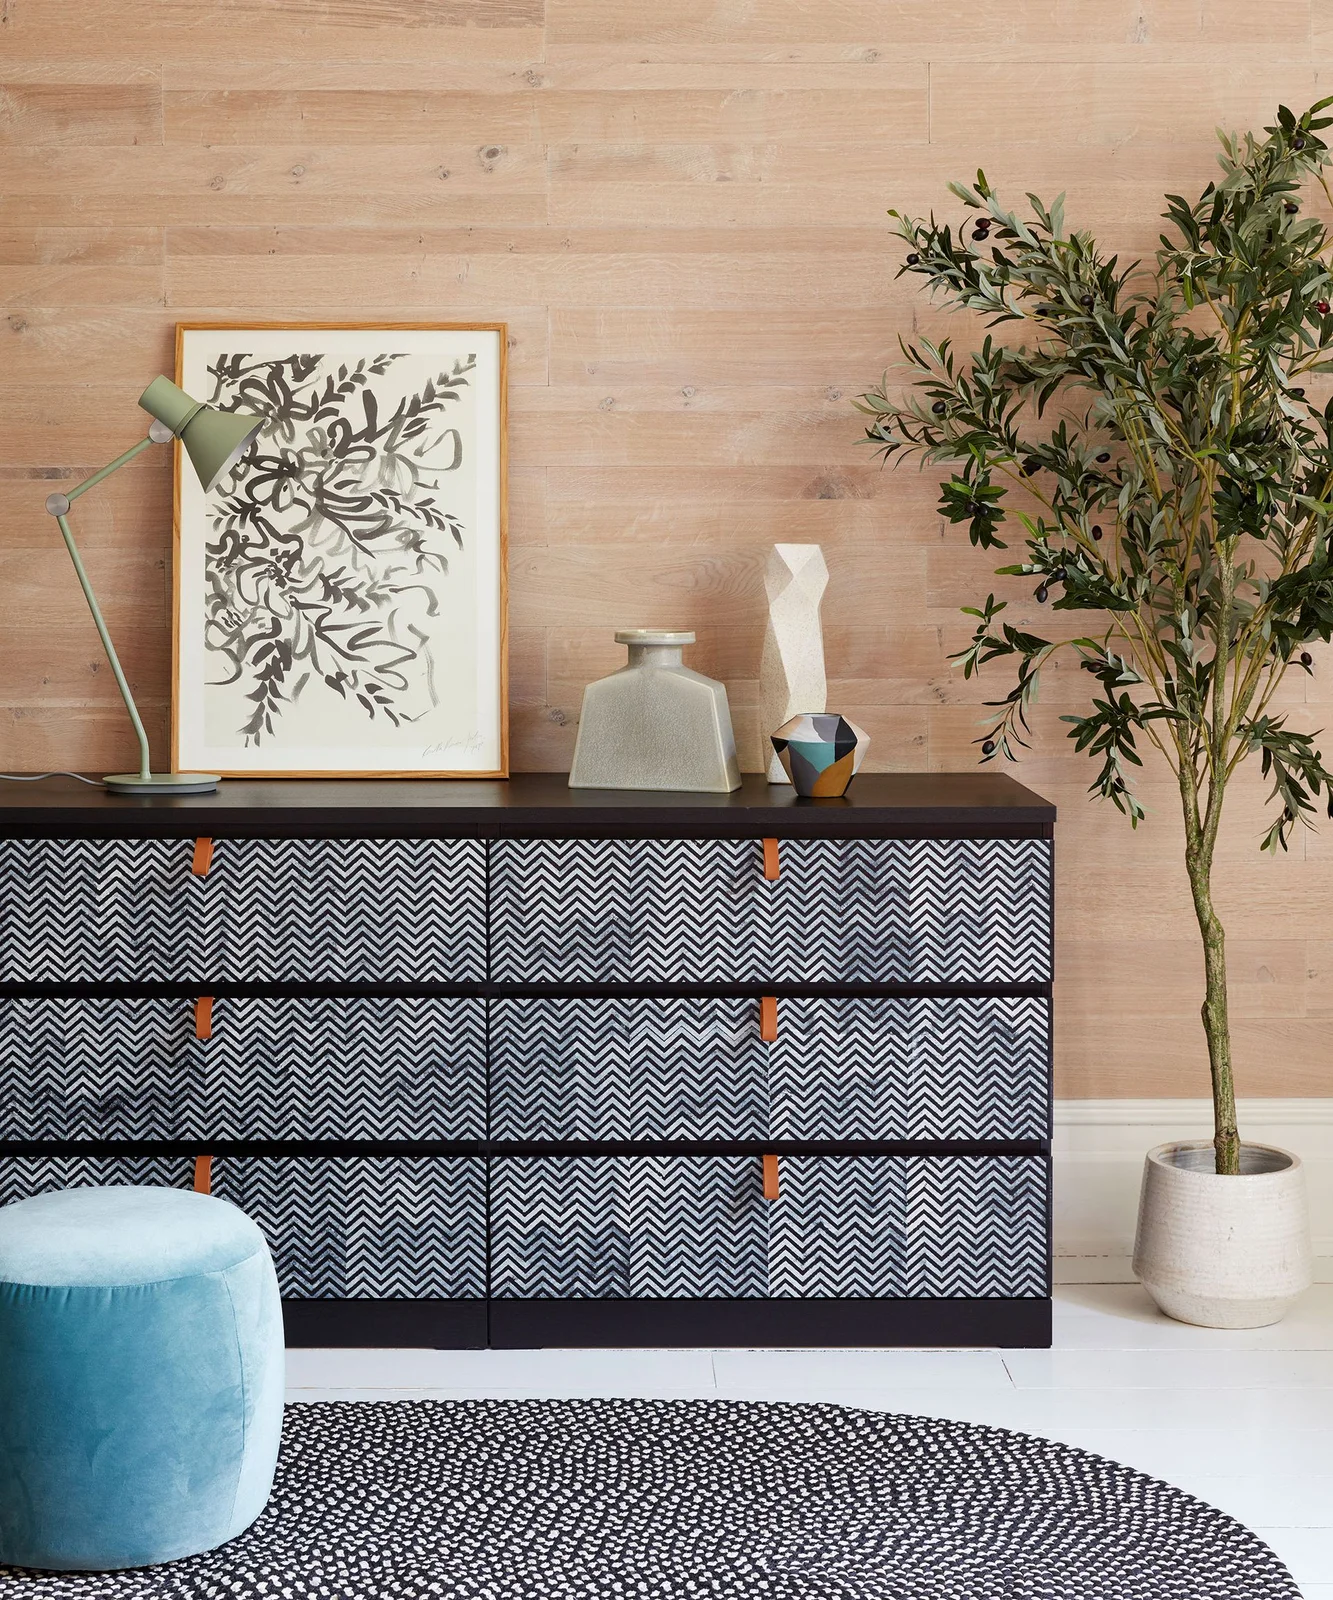
A repeated chevron pattern changes the character of this wide chest while the dark frame remains visible around each drawer. Tan tab handles add a softer detail and keep the pattern uninterrupted. Plain accessories on top prevent the busy fronts from competing with an equally crowded surface.
Work on removable drawer fronts where the furniture allows, and check that any coating or covering leaves the gaps clear. Test handle placement with the drawers open and closed. Keep the pattern aligned across neighboring fronts, but inspect each drawer’s movement individually rather than tightening every part simply to make the lines match.
IDEA 14 / 20
Combine Small Drawers With a Bedside Base
 SaveSupport Non AI Creator
Image credit: Future PLC/Tim Young
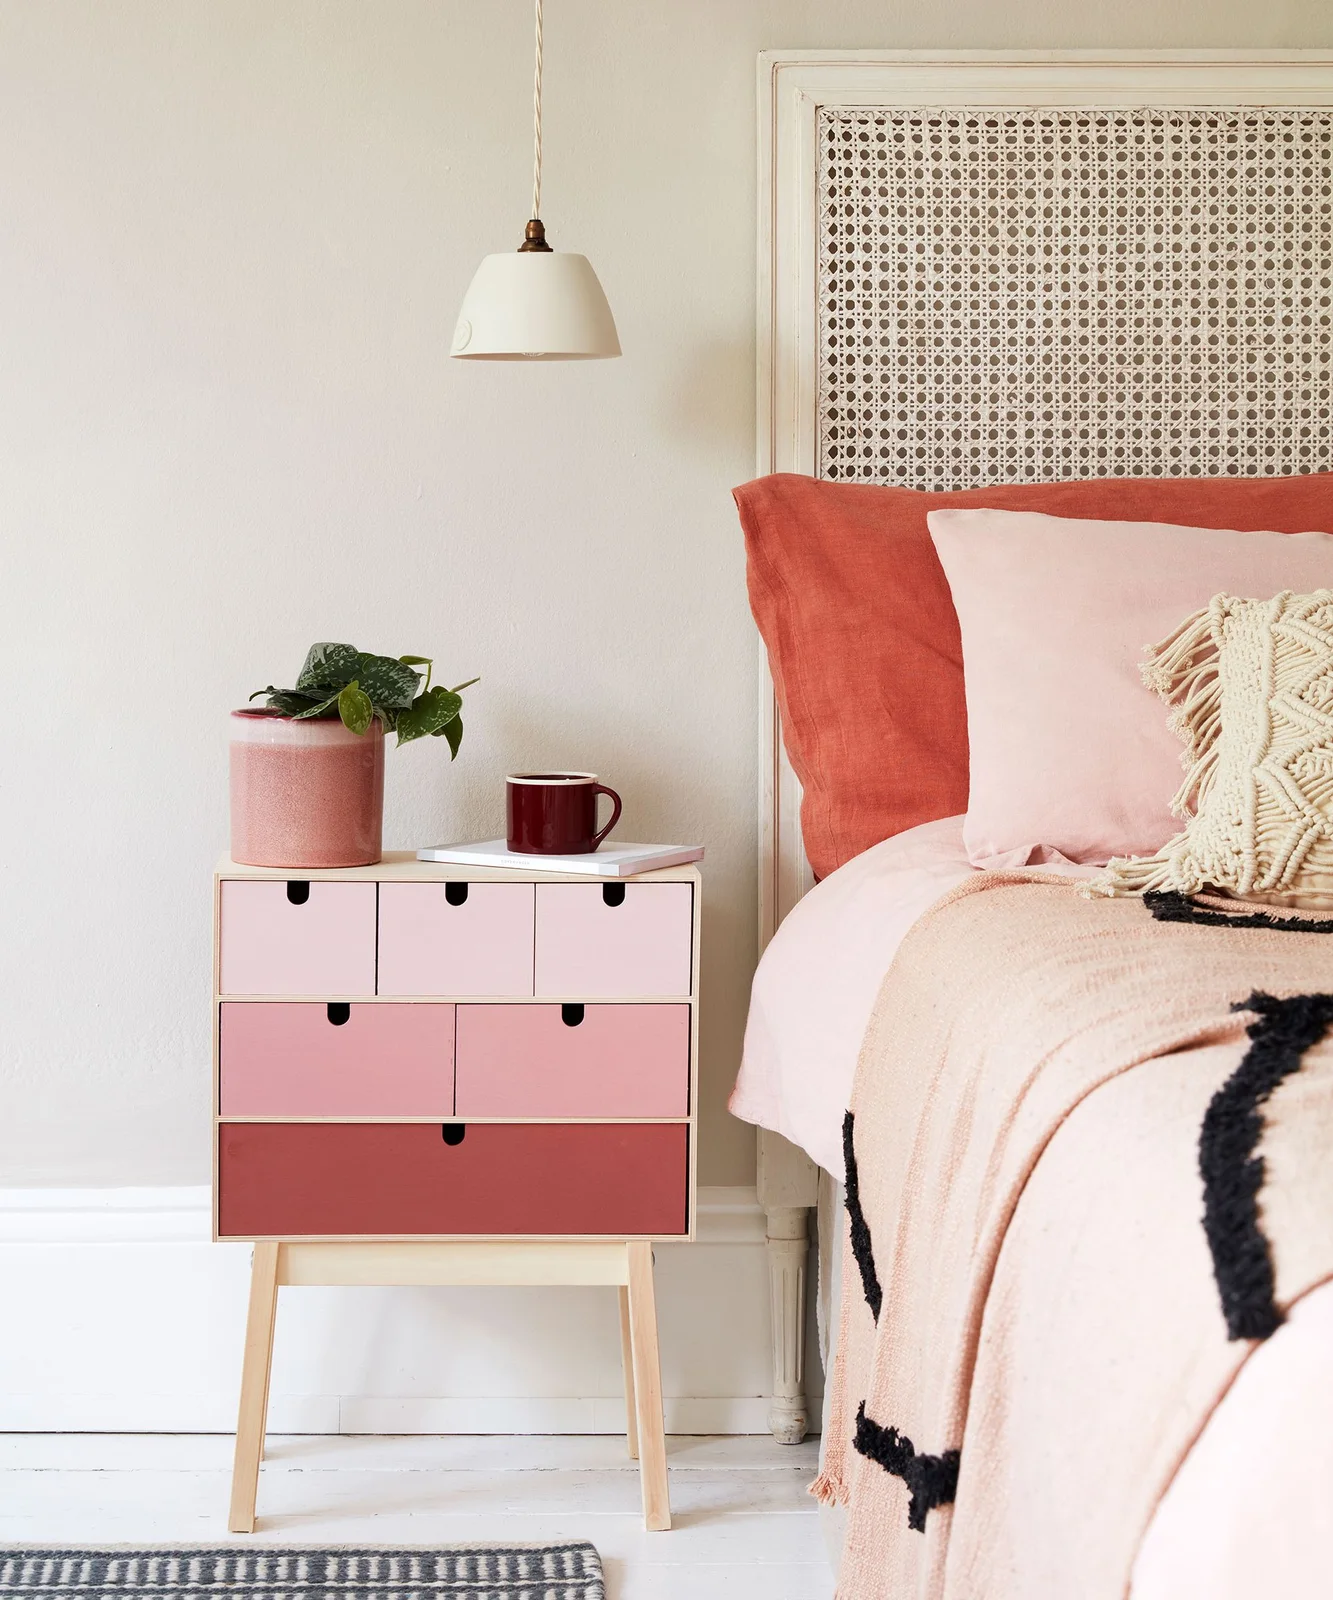
Small drawers in graduated pink shades turn this compact bedside piece into a useful color detail. The light wooden base lifts the storage clear of the floor, while the top holds a plant and cup. Several narrow drawers suit little accessories better than one deep undivided compartment.
The documented project combines a small drawer unit and stool base, so check how the components are joined and whether the finished piece resists tipping. Keep water in a protective tray and avoid loading only the open upper drawers. Compare the top height with your mattress before choosing a base.
IDEA 15 / 20
Soften Display Storage With Fluted Glass Film
 SaveSupport Non AI Creator
Image credit: Future PLC/Tim Young
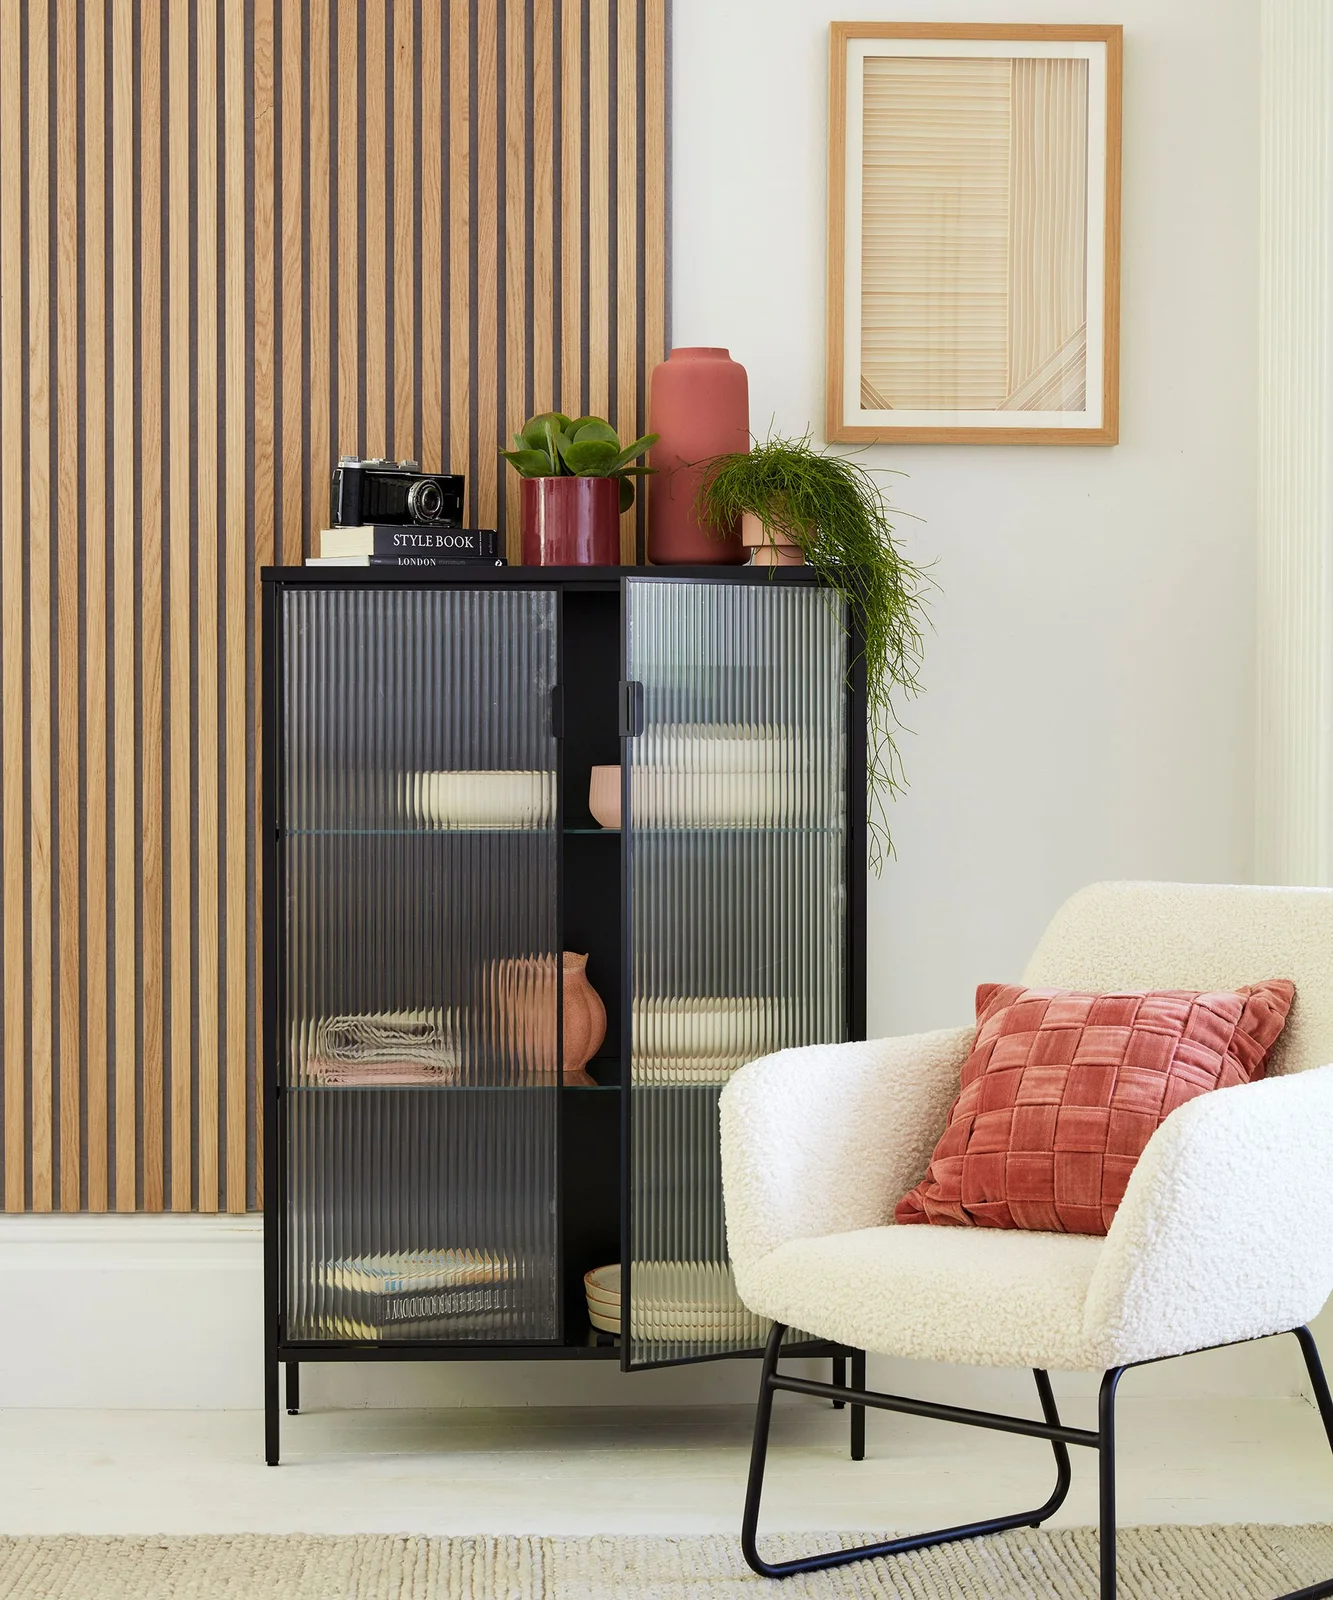
Vertical texture on the glazed doors softens the view into this black display cabinet. Bowls and books remain partly visible, while the darker frame gives the piece a clear outline beside the pale chair. The effect changes how the contents read without replacing the whole cabinet.
Choose a film suitable for the actual glazing and follow its application and removal guidance. Clean the glass carefully before applying it, then check the finished edges for lifting. Keep the shelves reasonably ordered, because translucent texture softens shapes but will not conceal densely packed contents or strong mismatched colors.
PART 04
Make compact pieces work harder
IDEA 16 / 20
Join Drawer Chests With a Continuous Top
 SaveSupport Non AI Creator
Image credit: Future PLC/Tim Young
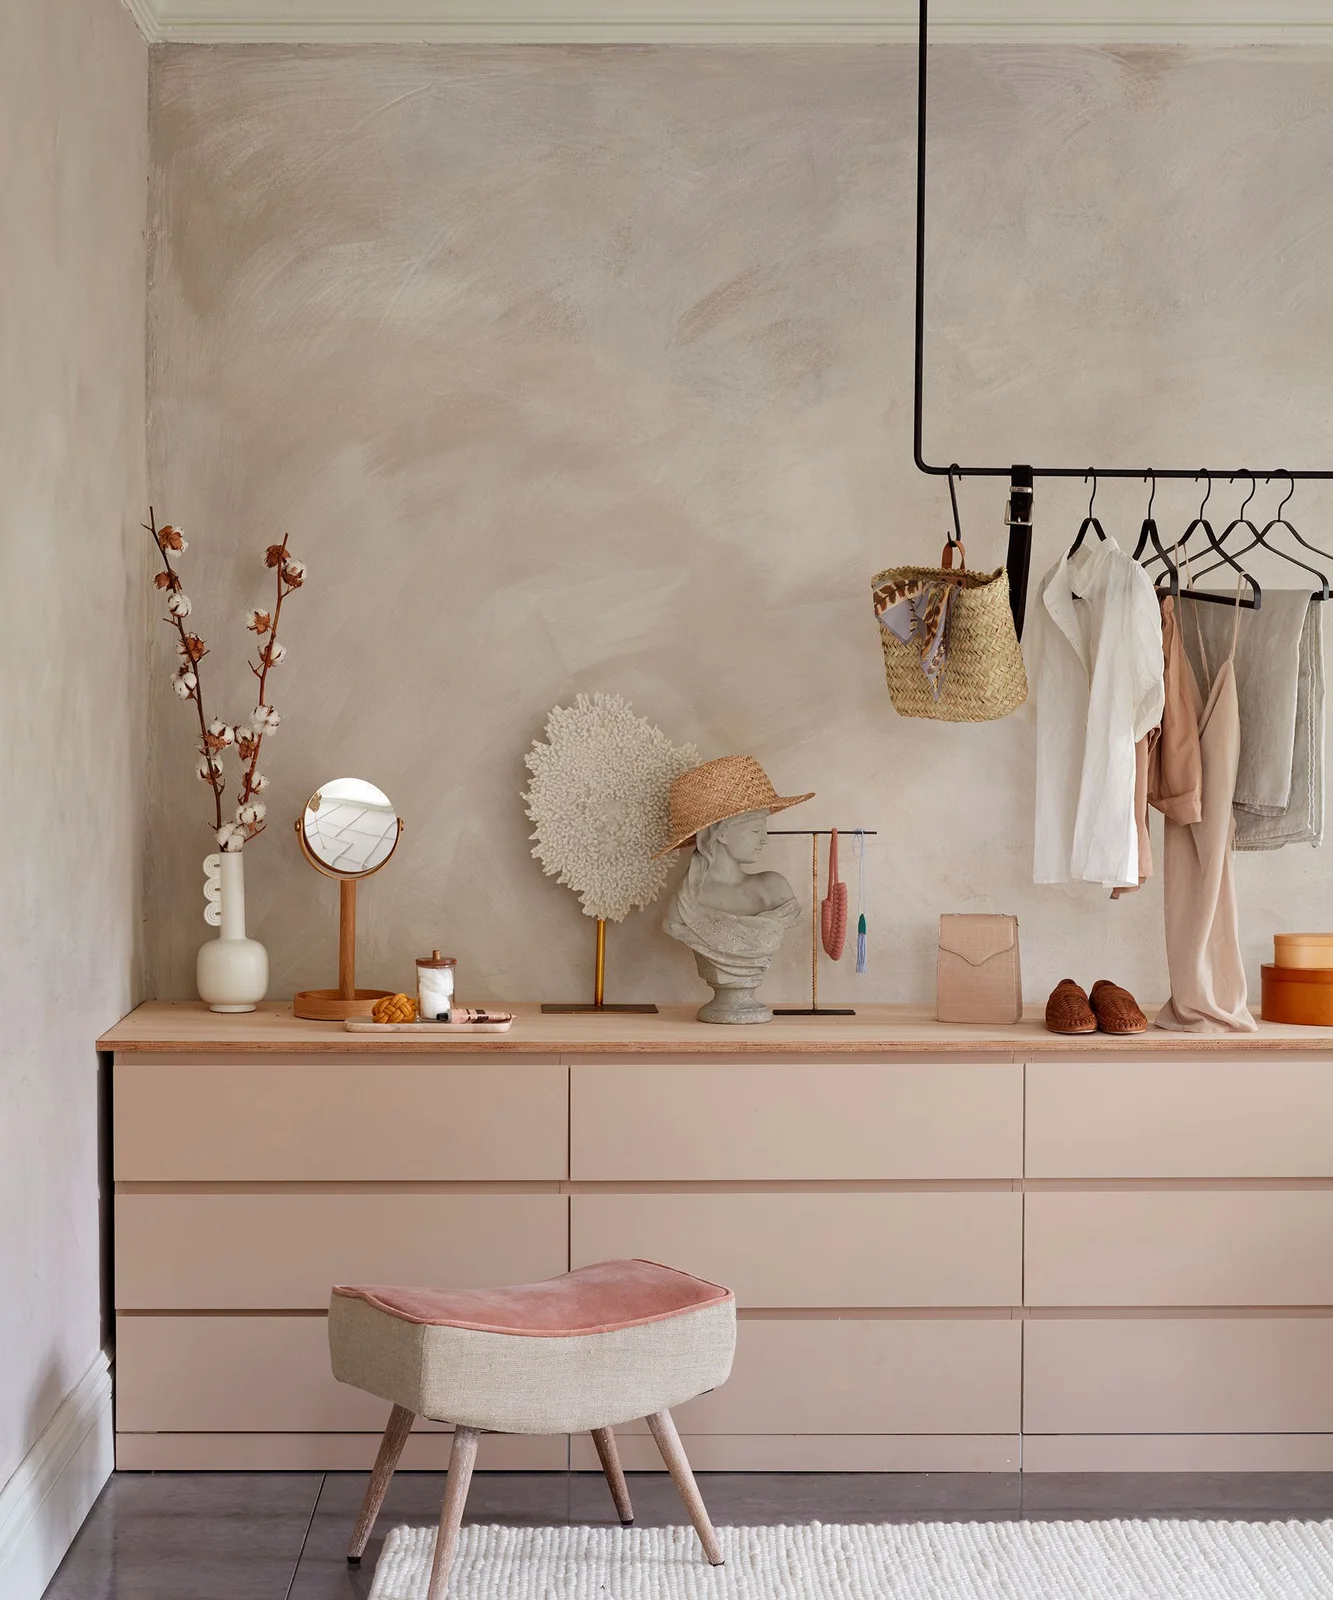
A continuous wooden top connects the drawer chests in this dressing area, giving the separate units the appearance of a long fitted surface. Their pale pink finish coordinates with the stool and accessories. The suspended clothing rail uses the space above while leaving the drawer fronts unobstructed.
Check the support and movement of each chest before adding a shared top, and preserve required wall attachments. A long surface can encourage overloading, so keep the arrangement within the furniture’s rating. Hanging rails require appropriate structural support of their own and should not rely on decorative wall finishes.
IDEA 17 / 20
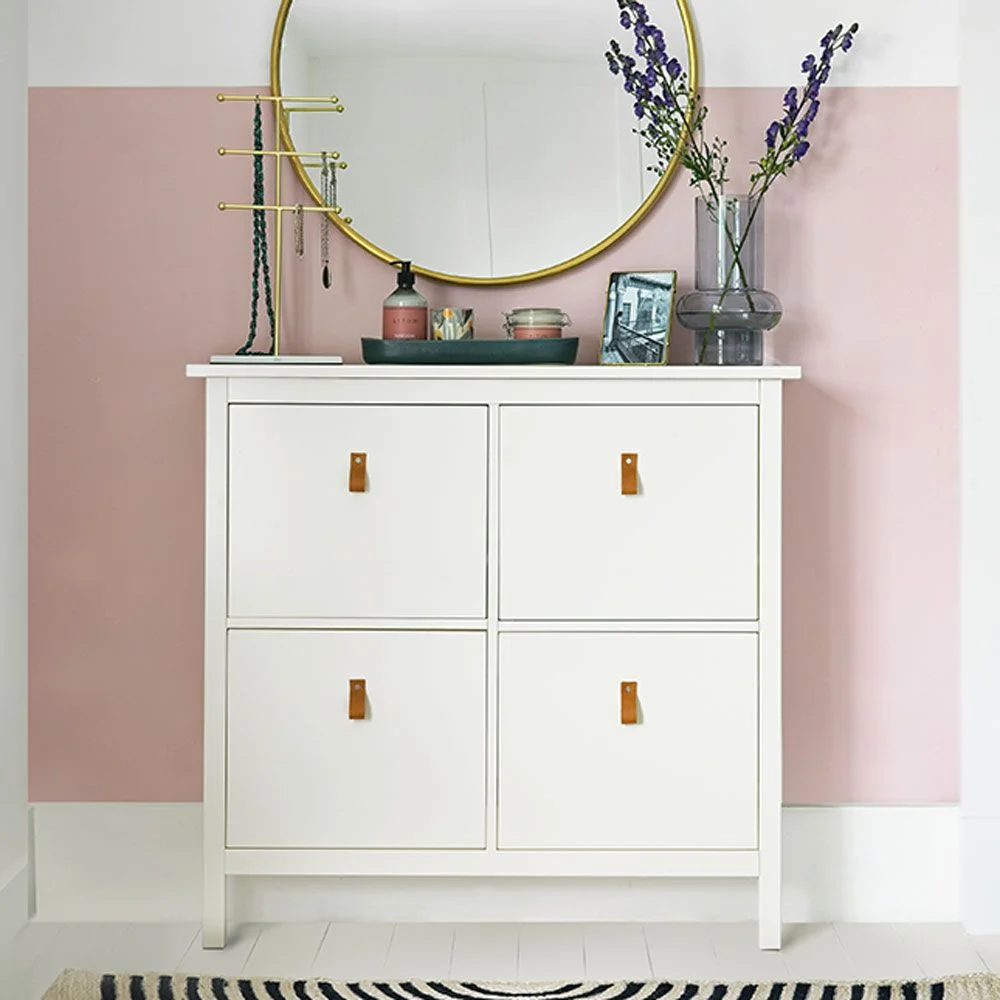
Turn a Slim Shoe Cabinet Into a Dressing Spot
 SaveSupport Non AI Creator
Image credit: Future PLC/Dominic Blackmore
A round mirror and small accessories give this shallow shoe cabinet a second role as a dressing spot. Tan tab handles add a warmer detail to the plain white fronts. The slim profile leaves more floor space in front than a conventional deep chest would occupy.
Check the cabinet’s internal movement before storing anything other than footwear, since tilt-out compartments can tip loose objects. Our IKEA mudroom ideas show more arrangements for narrow storage near a doorway. Follow the cabinet’s wall-fixing instructions, and keep heavy objects or fragile bottles away from the front edge.
IDEA 18 / 20
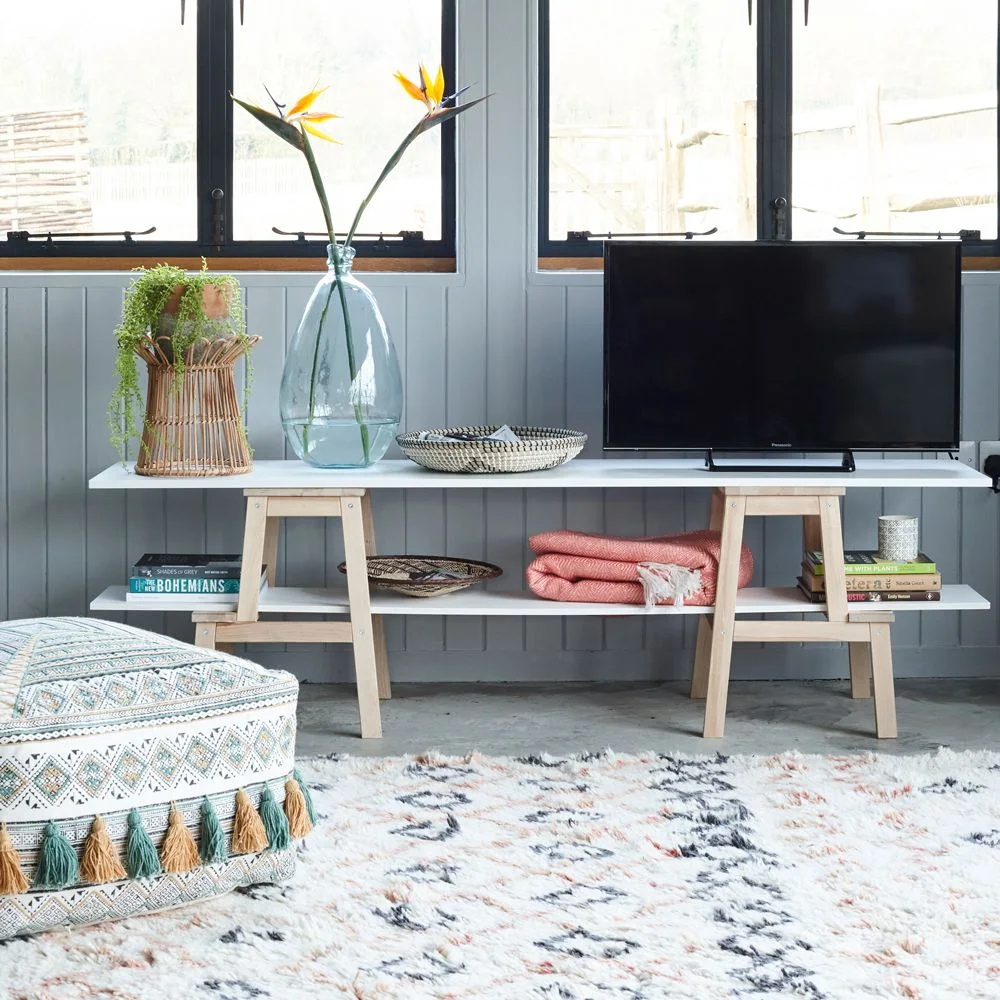
Create a Low Media Shelf With Two Stools
 SaveSupport Non AI Creator
Image credit: Future PLC/Jo Henderson
Two light wooden stools form the visible supports of this low media stand, with white shelves joining the arrangement horizontally. Open space beneath and between the supports keeps the piece visually light. A television sits to one side, leaving the rest of the top for a few accessories.
Assess the complete structure and shelf span before placing a television on an adapted support. Fix components securely and follow the television maker’s guidance on stability and tip prevention. Keep cables organized behind the stand without trapping them, and leave the ventilation space required by any equipment stored below.
IDEA 19 / 20
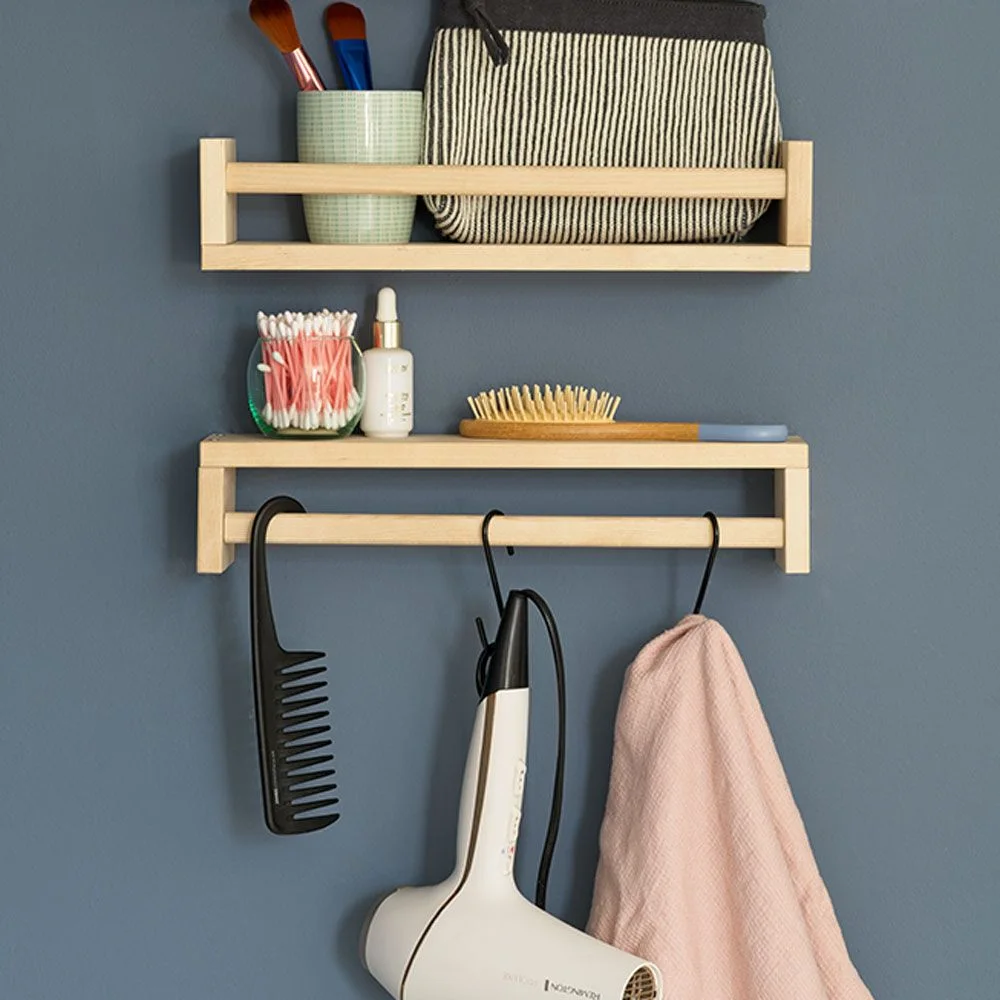
Use Spice Racks for Compact Grooming Storage
 SaveSupport Non AI Creator
Image credit: Future PLC/Dominic Blackmore
Two small wooden racks bring grooming supplies onto this wall, with the lower rail used for hanging accessories. Brushes and a bag occupy the upper shelf, while the compact arrangement leaves the nearby surface clear. The pale wood stands out gently against the blue wall.
Use appropriate wall fixings and keep the load modest, particularly when hooks add weight below the original rack. Store electrical grooming tools unplugged and fully cool, following their storage instructions. Position the racks away from splashes and choose a height where handles can be removed without knocking bottles from the shelf above.
IDEA 20 / 20
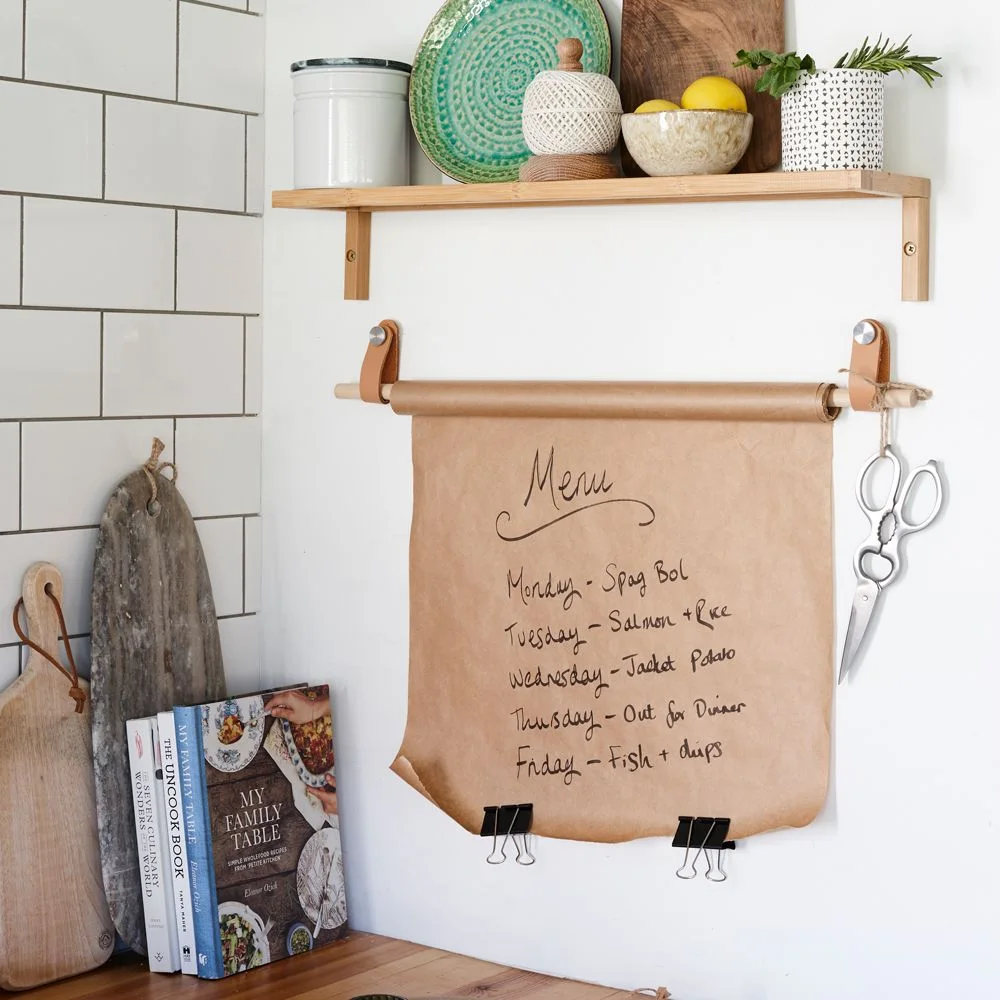
Make a Simple Paper-Roll Station
 SaveSupport Non AI Creator
Image credit: Future PLC/Joanna Henderson
Tan loops hold a wooden dowel and brown paper roll beneath this kitchen shelf. The hanging paper provides a clear place for a short menu or shopping list without occupying the counter. Small clips at the bottom help the visible section stay flat rather than curling back toward the roll.
Check the dowel length, roll weight and wall fixings before loading the holder, and leave space to change the roll without removing the whole installation. Keep paper clear of heat, water and food preparation. A lighter decorative load is more suitable than assuming cabinet handles can support any size of paper roll.
BRING IT ALL TOGETHER
Choose the smallest useful change first
A new handle or carefully tested paint finish may solve the problem without rebuilding a piece of furniture. Measure the space, inspect the existing condition and decide how you will use the finished piece before buying extra materials. Keep storage accessible and avoid decoration that makes cleaning or repairs difficult.
For larger adaptations, plan loads, wall fixings, stable support and the movement of doors and drawers. A published makeover is inspiration, not a replacement for the product instructions or a structural assessment. Finish a test section before applying a new coating to the whole piece.