A flower bed edge can be a physical strip of stone or metal, a regularly cut lawn boundary, or a line of low plants beside a path. Choose the job first: containing loose material, defining a curve and retaining a change in soil level are different requirements.
These photographed gardens show both constructed and planted boundaries. Compare the width of the adjoining route, how the plants meet it and where maintenance will happen. Treat raised beds and retaining walls as construction projects whose foundations, drainage and local requirements need checking; their appearance cannot reveal what is below ground.
PART 01
Give the bed a physical boundary
IDEA 01 / 18
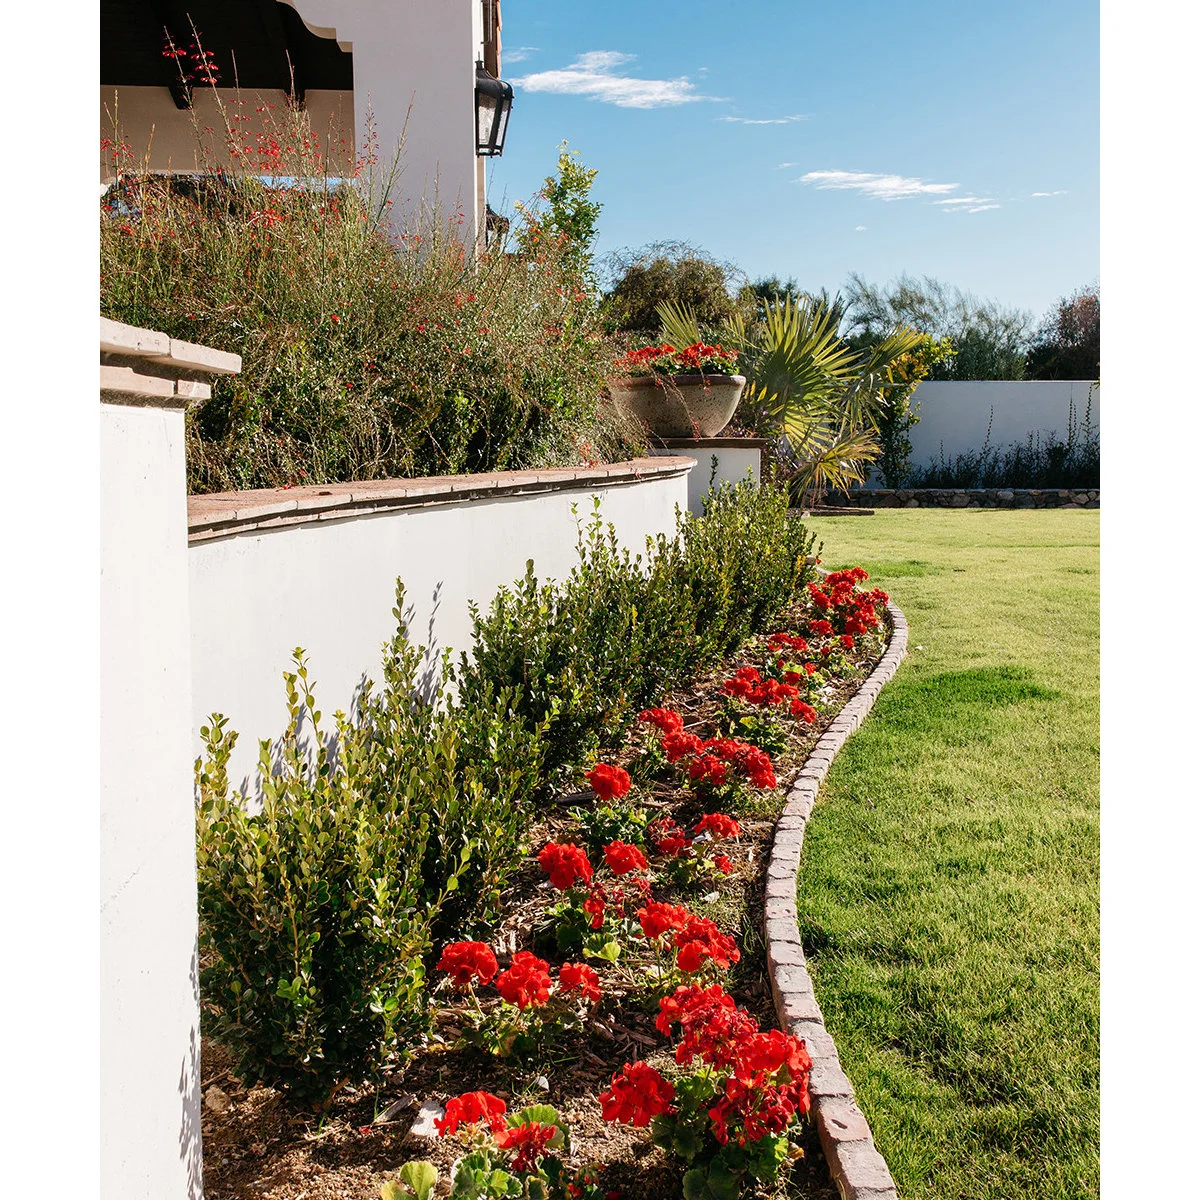
Follow a Curve with a Narrow Brick Line
 SaveSupport Non AI Creator
Image credit: Project: Greey Pickett (via Houzz)
A narrow brick line follows the lawn beside the red flowers, giving the planting a clear outer limit. Its warm color relates to the coping on the wall behind. The line is restrained enough to leave the flowers prominent while making the change from grass to bed easy to read.
Set out the curve before buying the units and check how the joints will behave around it. Avoid forcing a tight bend that leaves awkward gaps. Confirm the bed preparation and fixing method for your conditions, and leave room to trim the grass without striking the flower stems.
IDEA 02 / 18
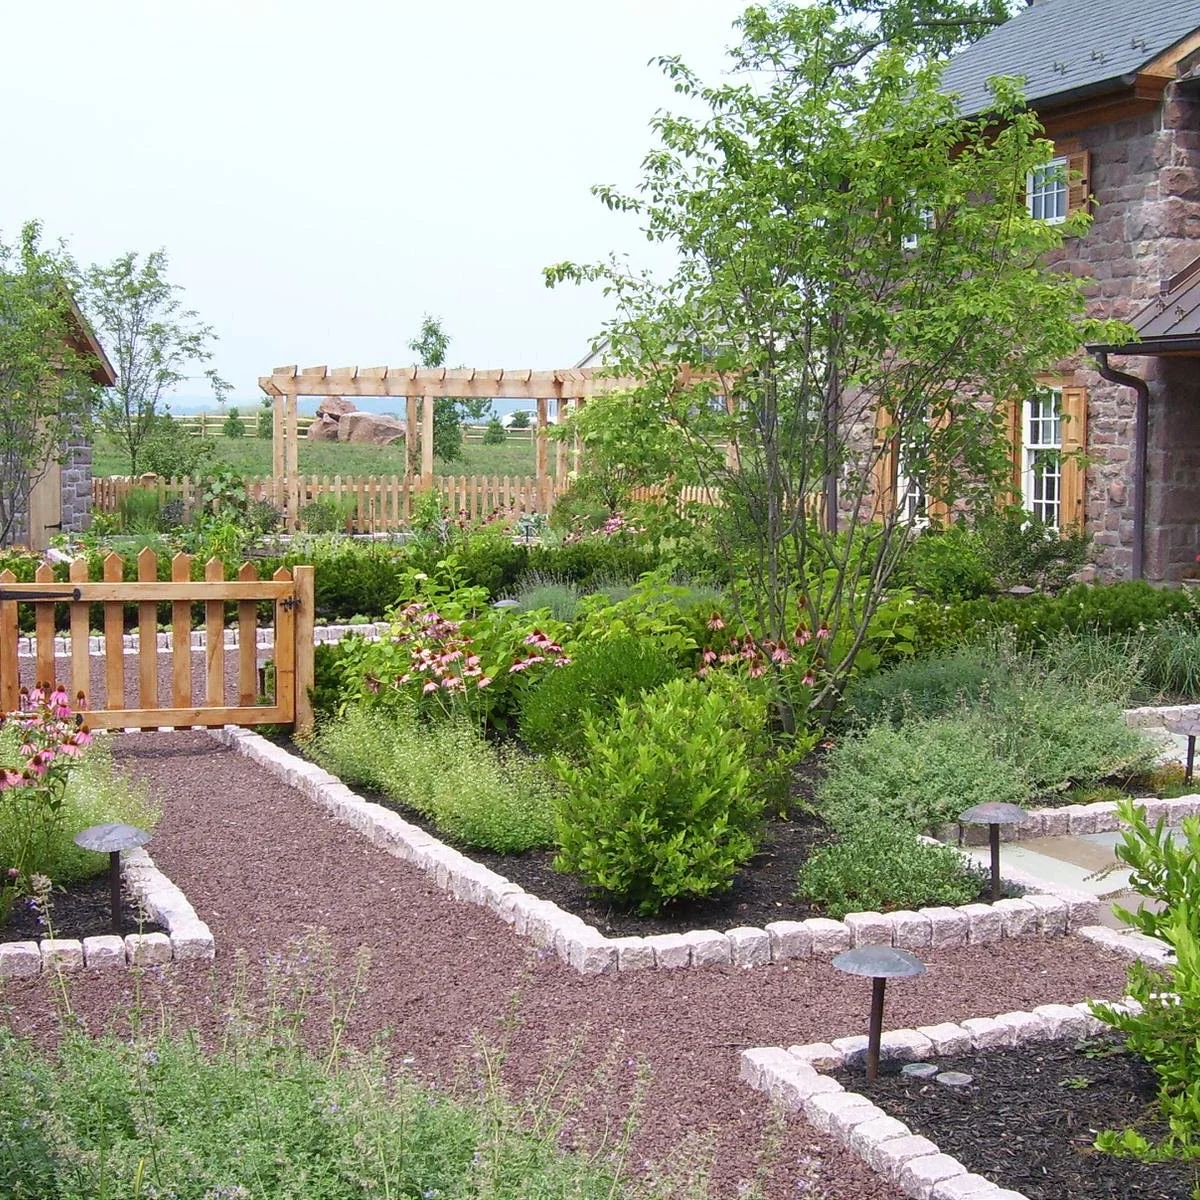
Outline Gravel Paths with Rough Pale Setts
 SaveSupport Non AI Creator
Image credit: Project: River Valley Landscapes (via Houzz)
Pale rough-faced units separate dark planting soil from the reddish gravel paths. Their short lengths handle the turns around the beds and continue toward the wood gate. Repeating the same edge at each intersection makes the garden's walking routes distinct from its more irregular planting.
Check the finished path width at intersections and around lights before fixing the line. The edge should contain loose material without creating an unexpected obstacle where people turn. Allow room to reach the planting for weeding, and inspect individual units periodically for movement or a raised corner.
IDEA 03 / 18
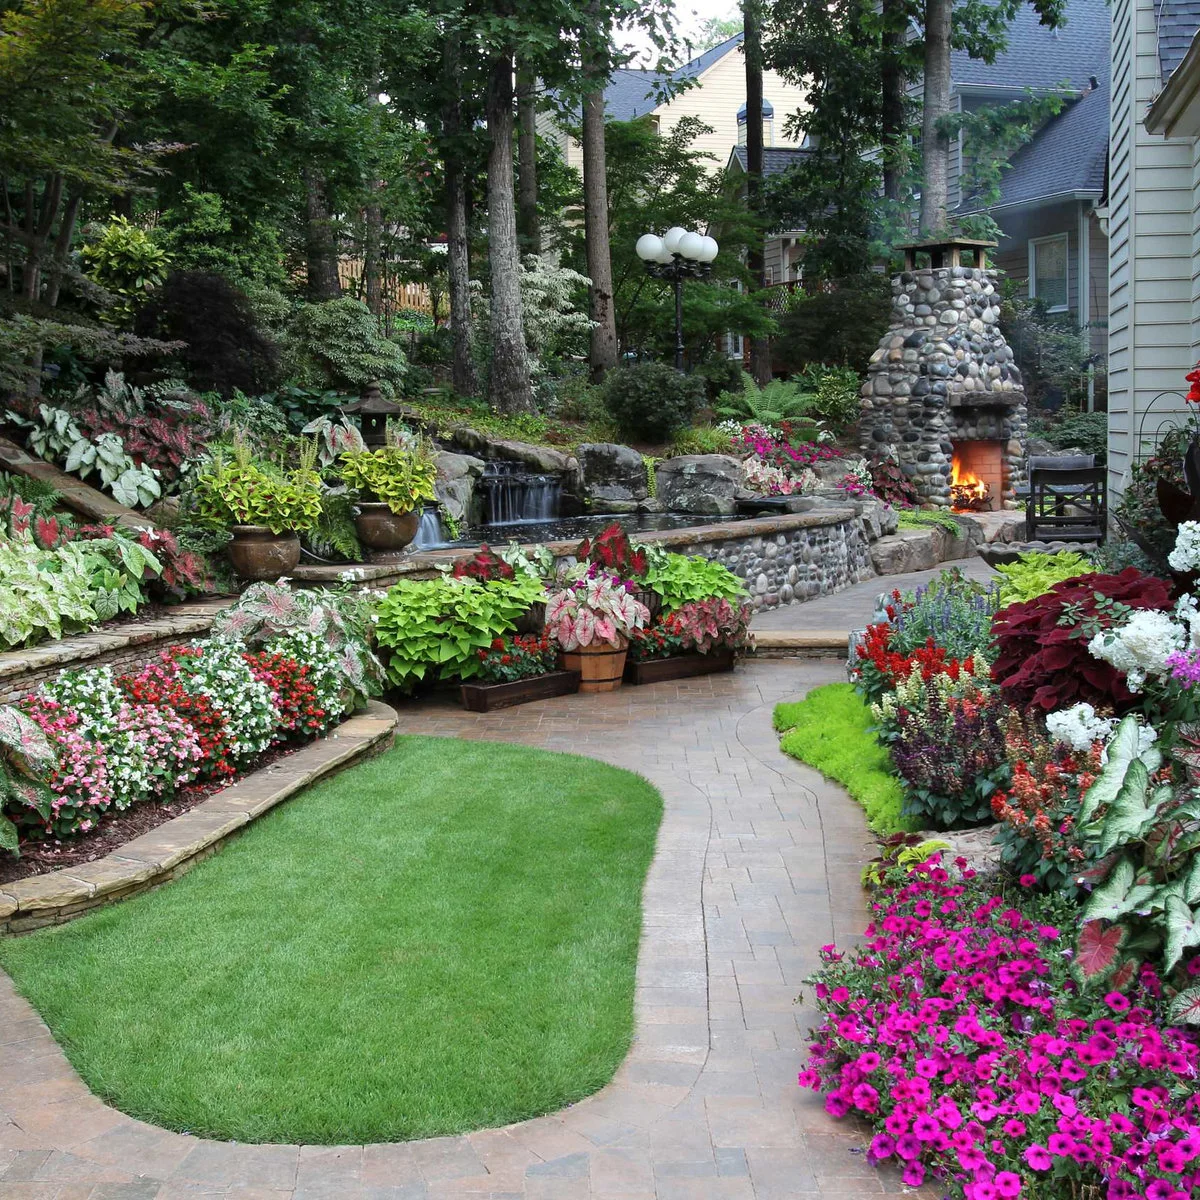
Cap a Low Raised Border with Flat Stone
 SaveSupport Non AI Creator
Image credit: Project: Artistic Landscapes (via Houzz)
Flat coping follows the low raised flower bed on the left, separating its dense planting from the lawn. The adjoining paving takes a broader route around the grass. The cap gives the wall a continuous top even though its face has a more varied stone texture.
A raised border requires more planning than a surface divider. Our retaining wall ideas show other appearances, but the required support and drainage depend on your site and height change. Keep the cap stable and preserve access to the planting instead of assuming the wall top is a safe seat.
IDEA 04 / 18
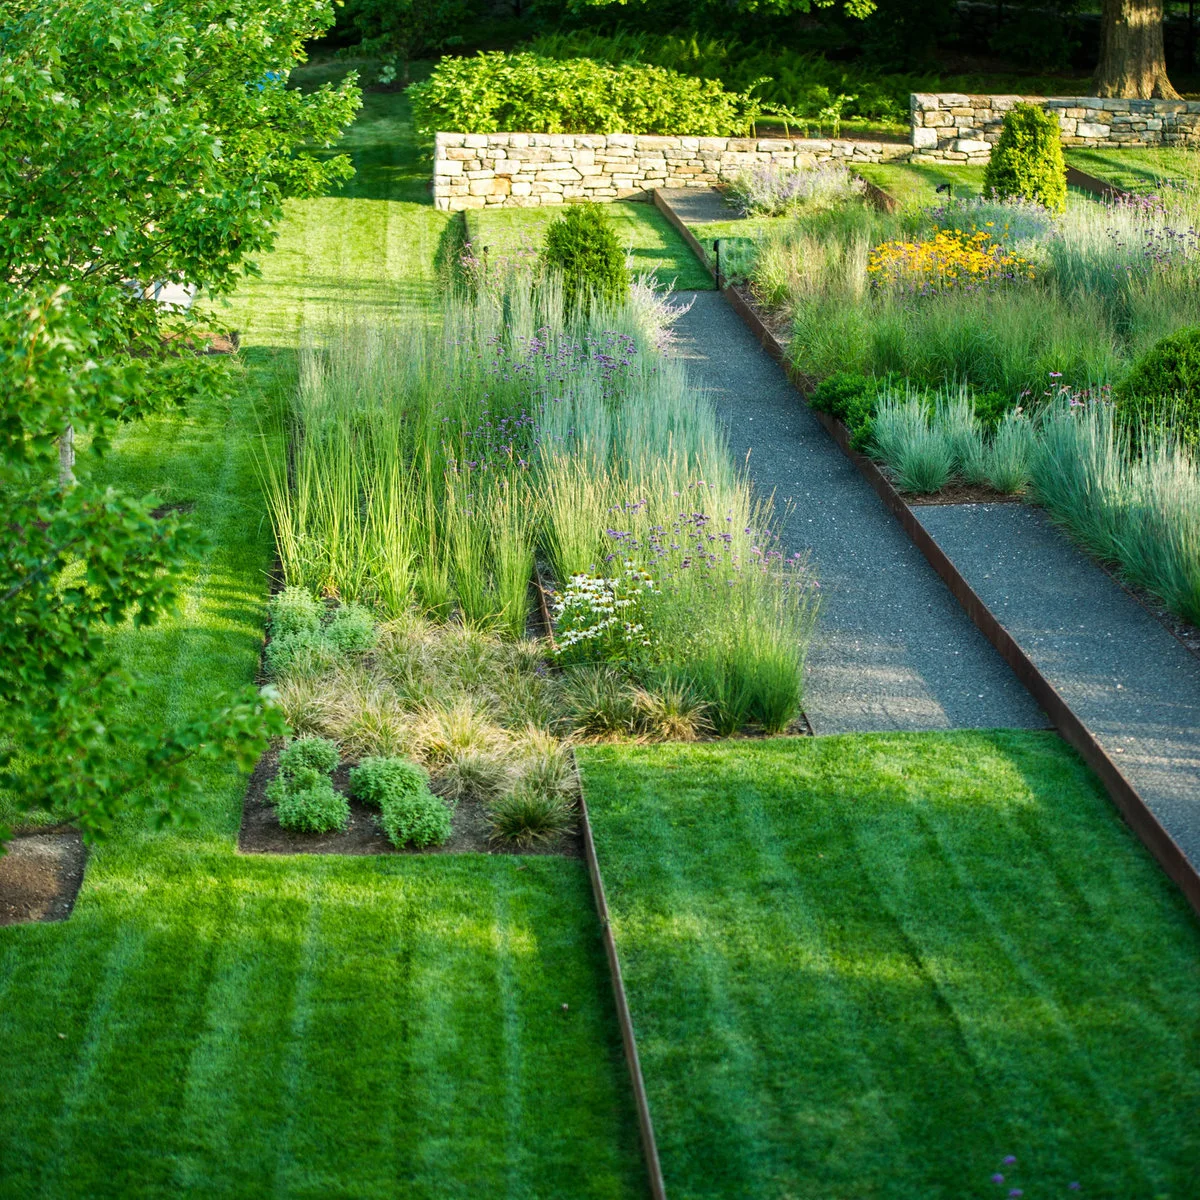
Use Thin Metal Lines for Geometric Beds
 SaveSupport Non AI Creator
Image credit: Project: LaurelRock (via Houzz)
Narrow brown metal lines give this garden sharply defined rectangles without a bulky curb. Grasses and small flowers soften the planting side, while gray gravel and lawn remain visibly separate. Short connections between the paths show how the edge can organize several small planting areas.
Choose a system intended for the material and height it will contain. Check the edge finish, anchors and exposed ends before installation, especially beside a narrow route. Leave maintenance access to the planting and do not assume a thin decorative strip can support raised soil or regular foot loading.
IDEA 05 / 18
Separate Pebble Mulch with Low Block Edging
 SaveSupport Non AI Creator
Image credit: Project: LawnExpert Lawn and Landscape (via Houzz)
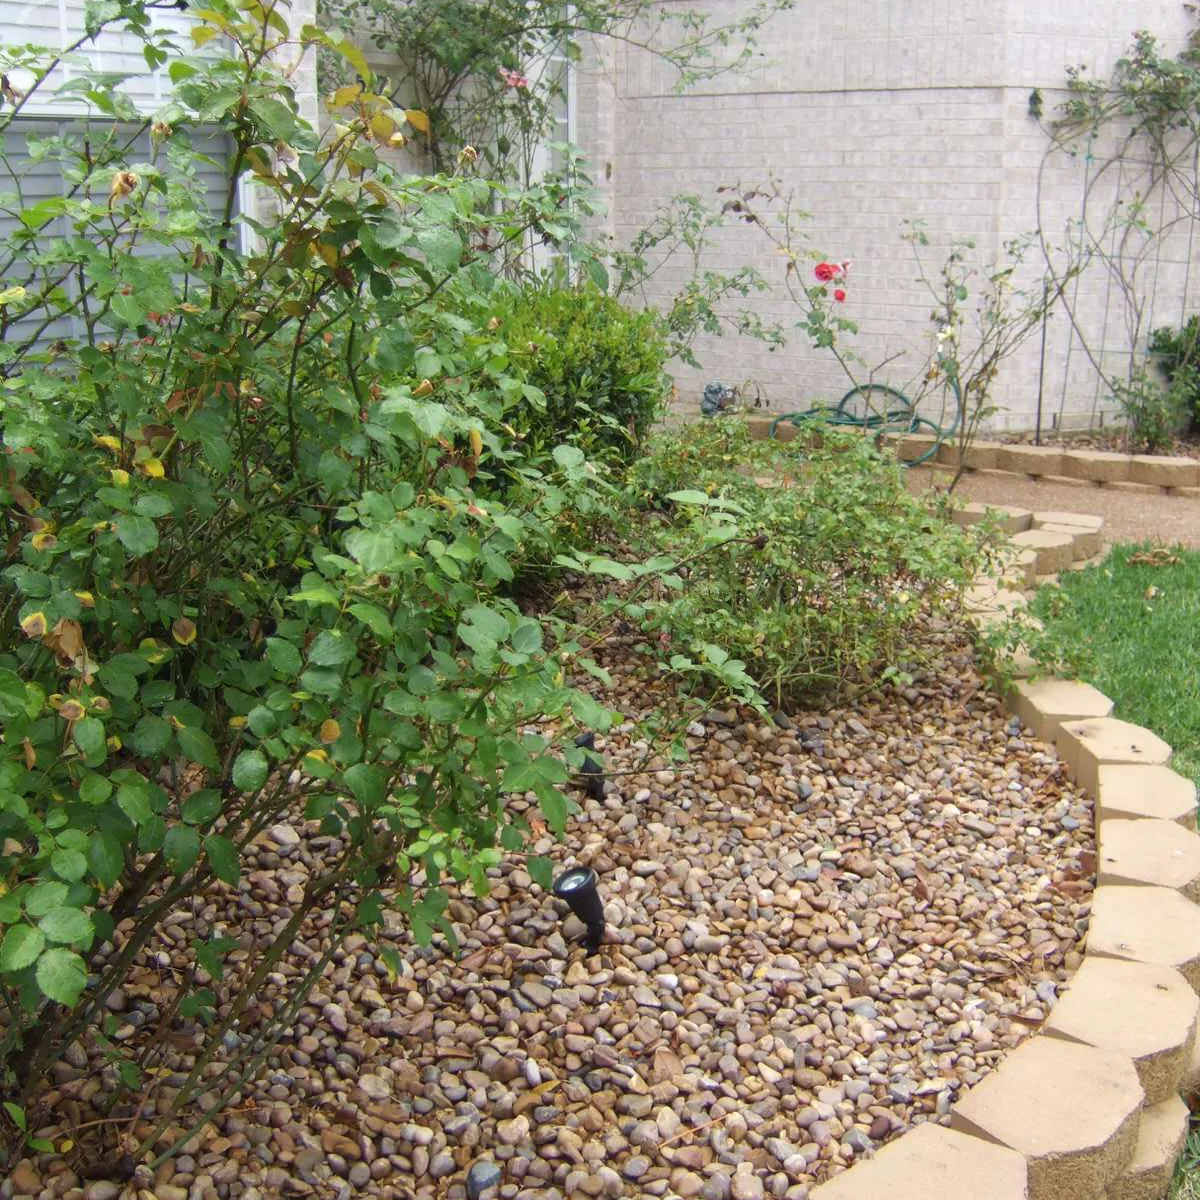
Tan blocks form a low curve between the grass and the rounded stones around the rose shrubs. The color relates to the pale brick behind without copying its small joints. The block tops make the boundary legible even where the plants leave open patches in the bed.
Consider the work of removing fallen leaves and weeds from loose stone before choosing it around flowers. Keep stones from spilling onto the mowing route and check that the blocks sit firmly. Plan access for pruning so the edge does not become something you repeatedly step on or dislodge.
PART 02
Choose how flowers meet the lawn
IDEA 06 / 18
Keep a Clean Lawn Line Below the Flowers
 SaveSupport Non AI Creator
Image credit: Project: gardenUP® (via Houzz)
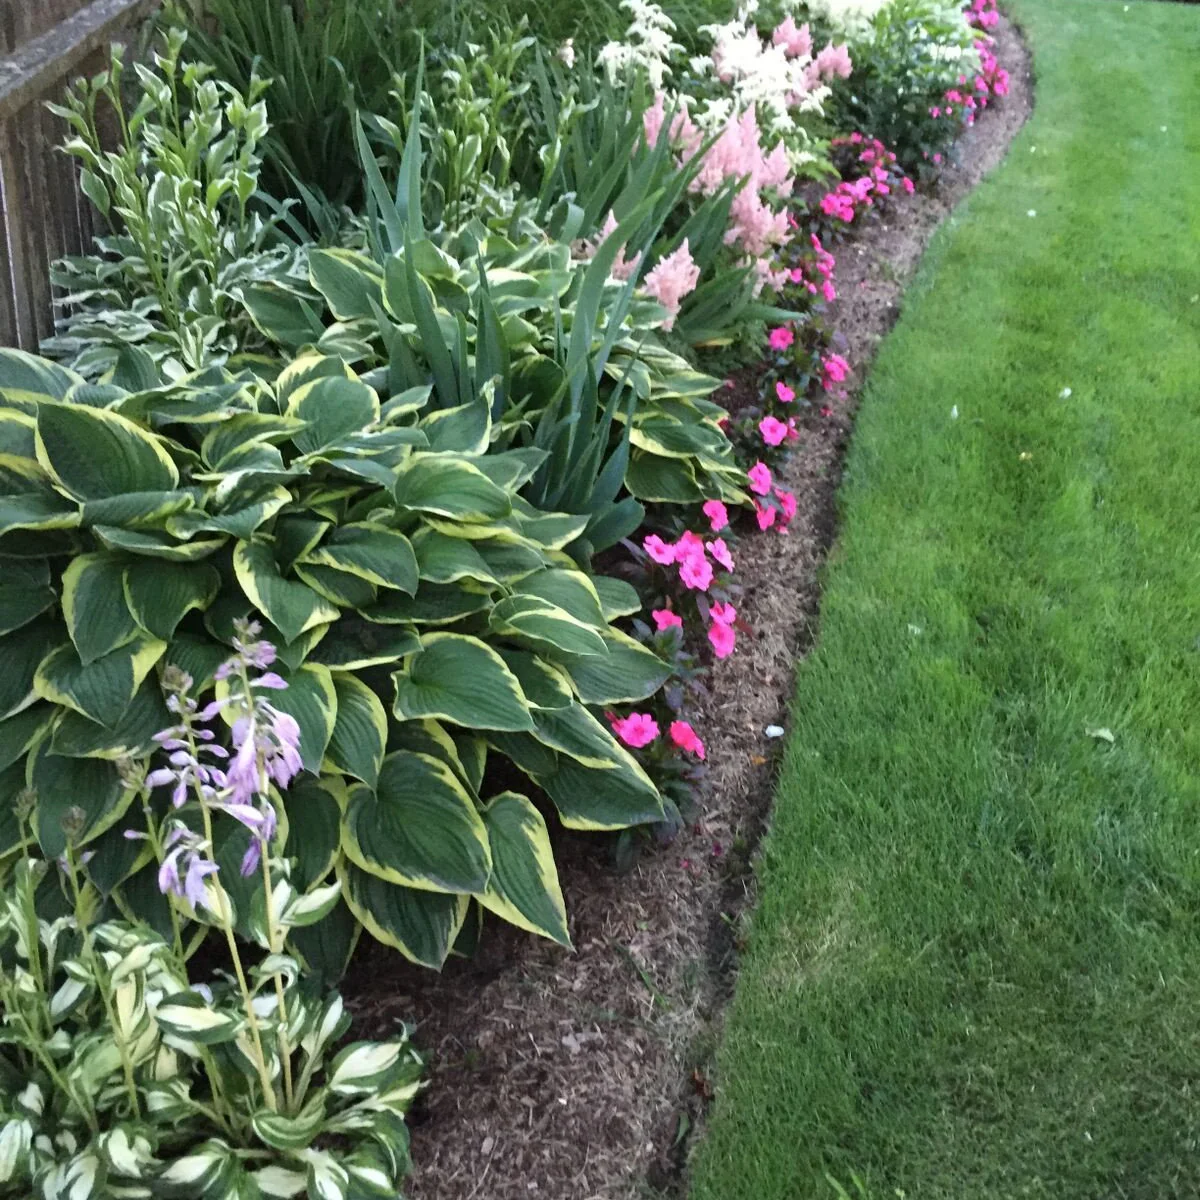
The grass meets a narrow visible strip of mulch below the pink flowers and broad variegated leaves. There is no prominent raised curb competing with the planting. The gentle curve gives the flower bed definition while preserving the soft appearance of the foliage above it.
This type of boundary relies on maintenance rather than a purchased strip. Redefine the established line when needed and trim grass before it spreads over the edge. Keep plant growth back enough to see what you are cutting, and avoid making the curve tighter than your equipment can comfortably follow.
IDEA 07 / 18
Use a Broad Curve for a Deep Mixed Border
 SaveSupport Non AI Creator
Image credit: Project: gardenUP® (via Houzz)
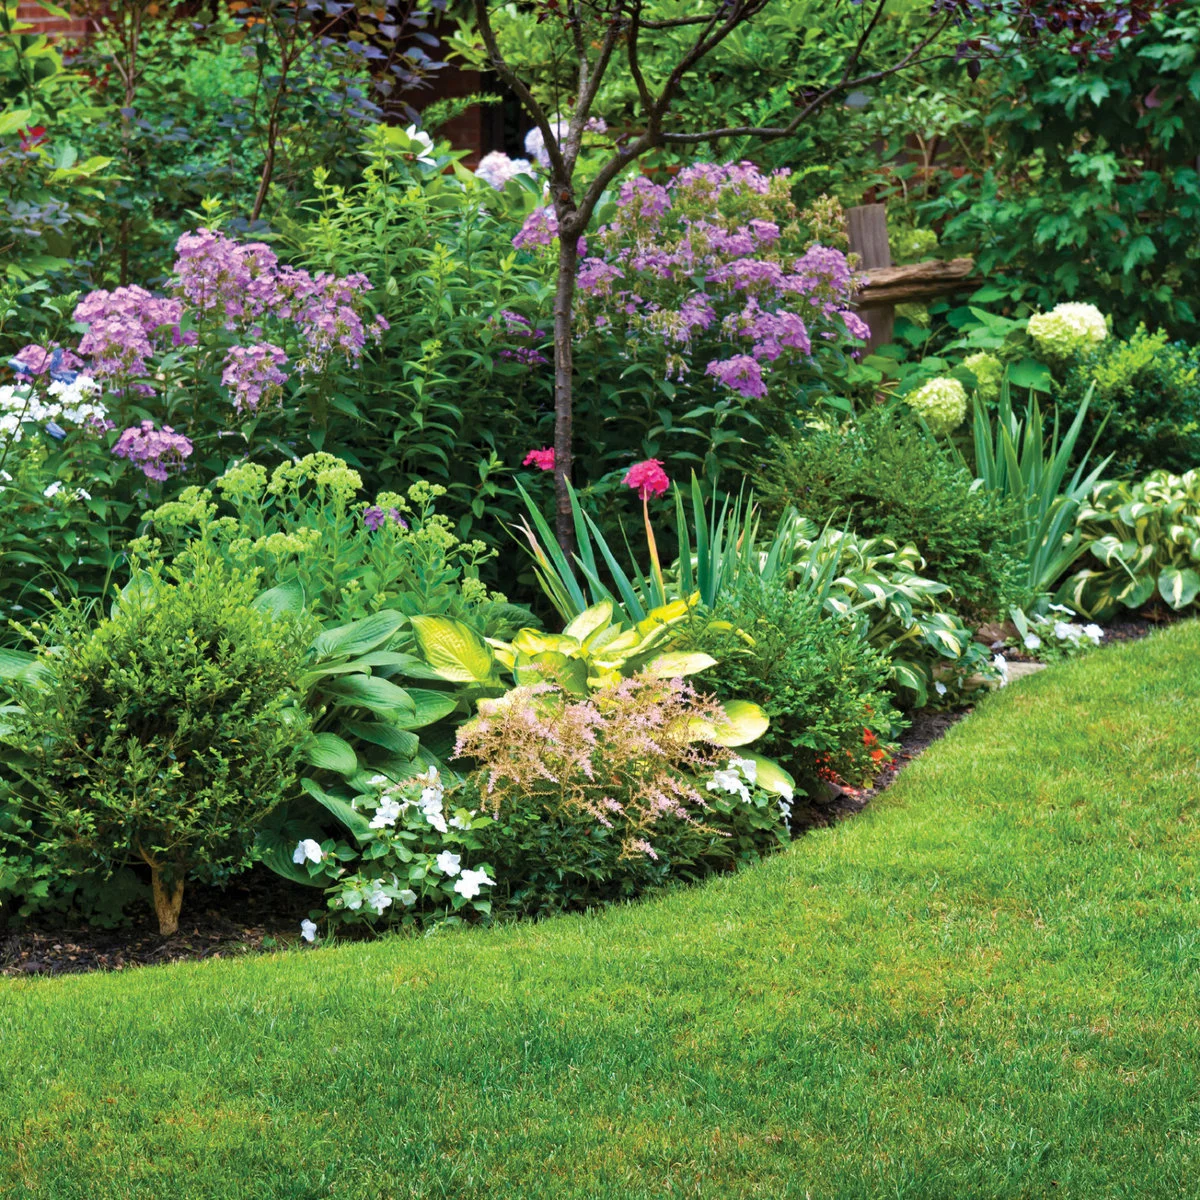
A broad sweep of grass follows this deep mixed border, with a small dark gap visible beneath the front plants. Flower colors and leaf shapes vary along the curve, but the lawn line stays continuous. That simple outer shape allows the planting above it to remain more informal.
Draw the boundary from the viewpoints where you will see it most often, then test the mowing route. Give the front plants enough space for their mature spread without burying the edge. Keep existing tree roots in mind when changing ground levels or digging along an established bed.
IDEA 08 / 18
Soften the Lawn Boundary with Low Flowers
 SaveSupport Non AI Creator
Image credit: Project: Platinum Landscape & Pools (via Houzz)
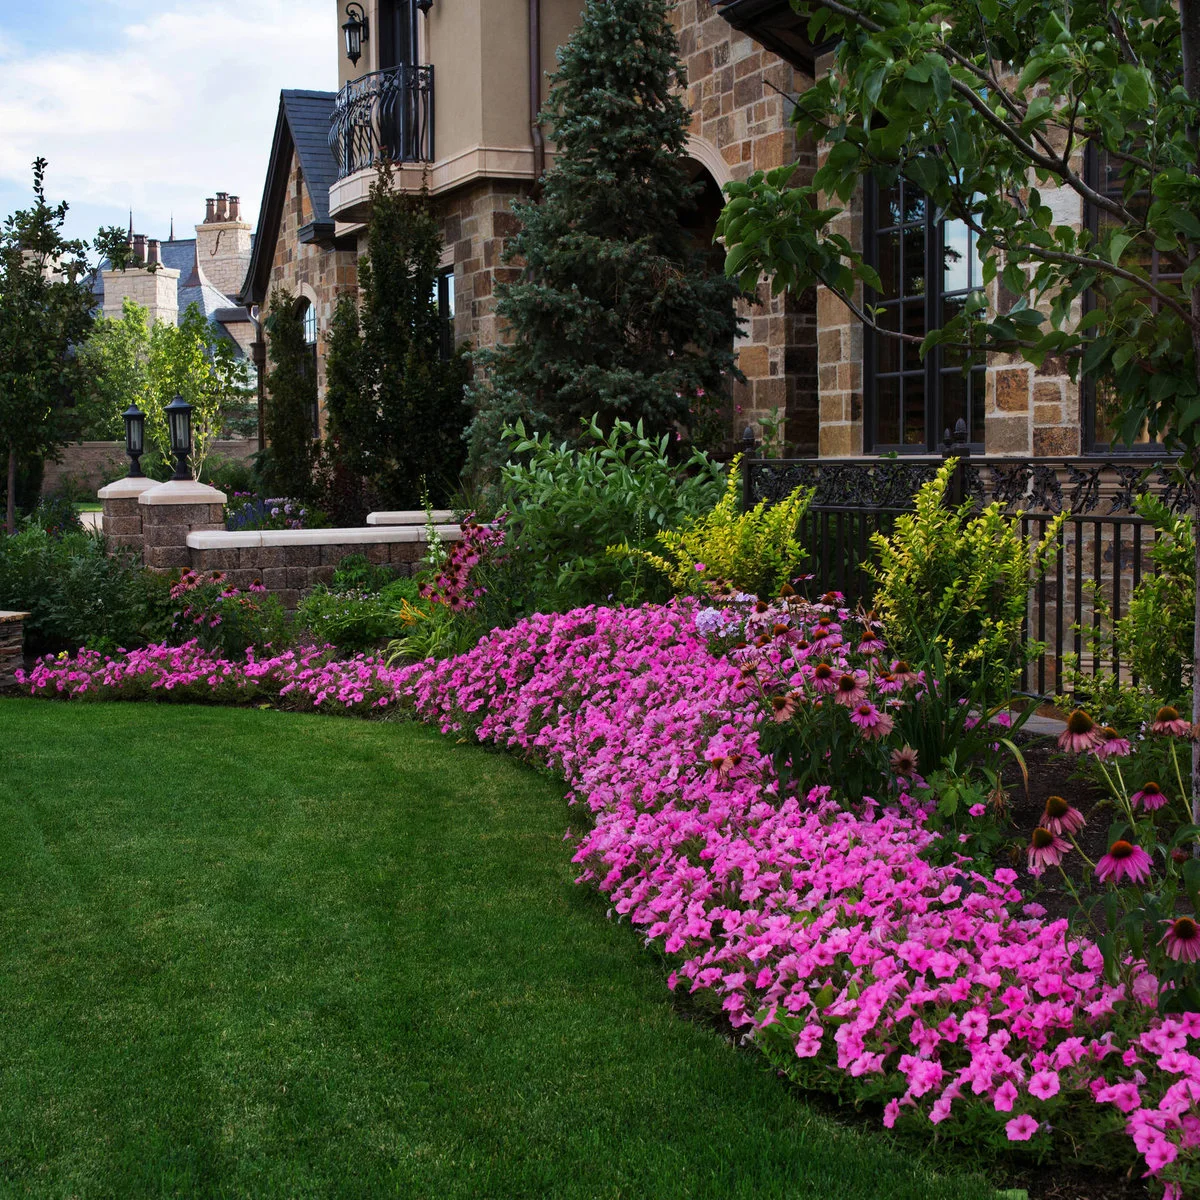
A band of low pink flowers sits at the front of the bed, with taller stems and shrubs behind. The planting softens the lawn boundary instead of emphasizing a heavy edging material. The continuous color also links several different plant shapes along the fence.
Choose front-row plants for the actual light and soil, then allow for their mature width. Keep enough separation to maintain the grass without repeatedly cutting flower stems. If plants start lying across the lawn, adjust the planting position or border line rather than trimming every bloom to fit an unsuitable space.
IDEA 09 / 18
Leave Mulch Visible Between Flower Groups
 SaveSupport Non AI Creator
Image credit: Project: Linden L.A.N.D. Group (via Houzz)
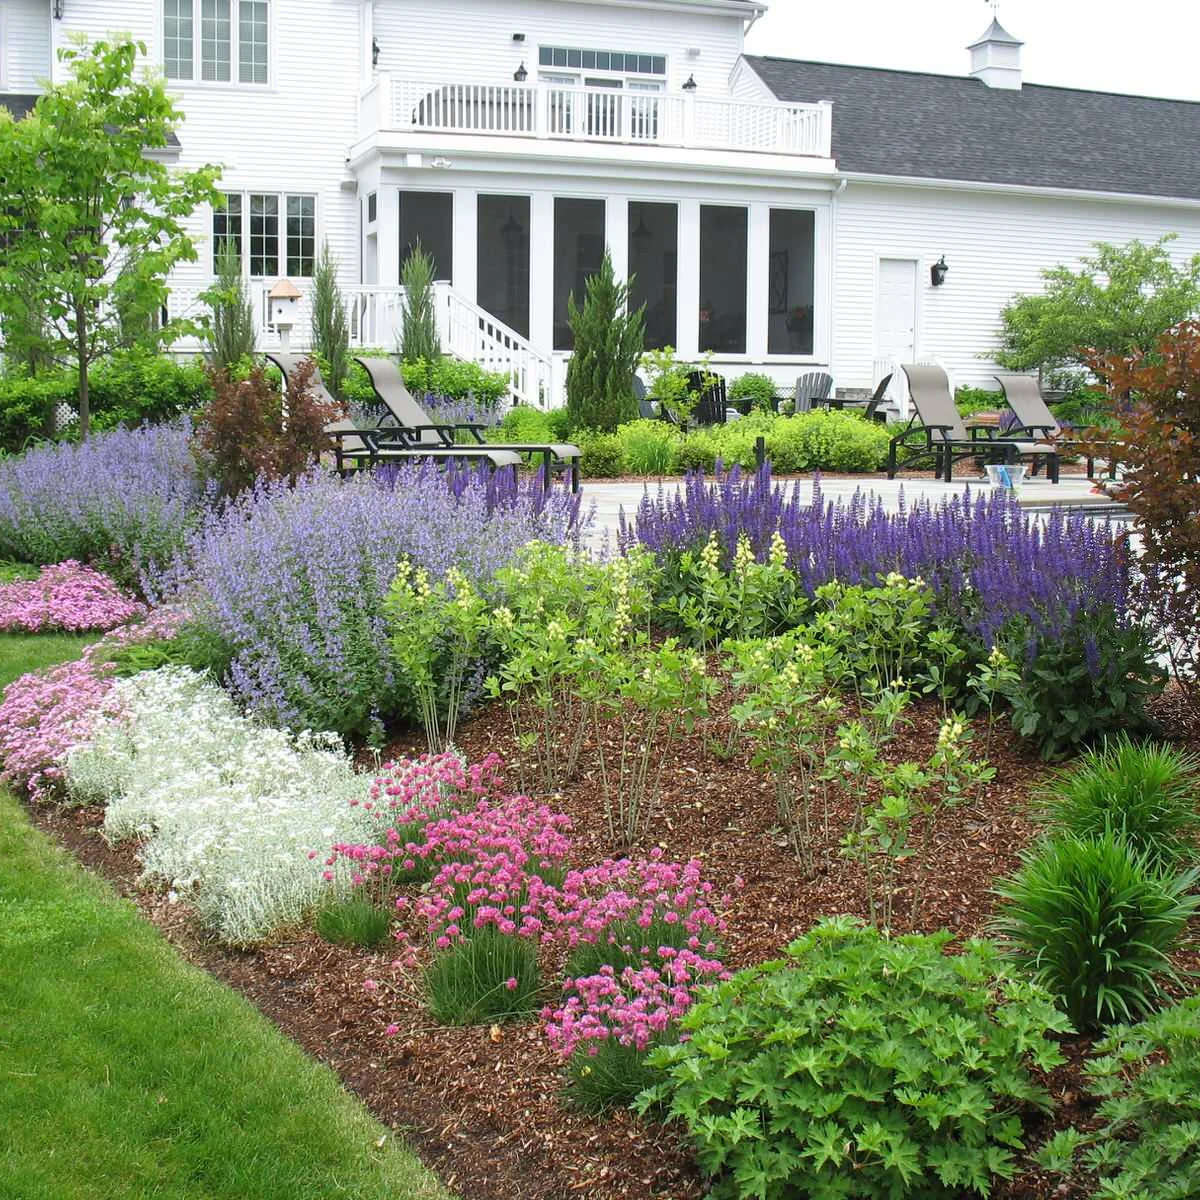
Groups of low flowers mark the front of this bed, with visible mulch between them and taller purple flowers behind. The outer line follows the lawn without a dominant raised curb. The gaps let the different plant shapes remain distinct instead of forming one continuous dense mat.
Spacing can make access easier, but base it on mature plant size rather than the nursery pot. Keep mulch clear of stems and maintain the lawn boundary as growth fills in. Avoid adding more plants simply to hide every patch of soil before the original planting has developed.
PART 03
Add structure with planted edges
IDEA 10 / 18
Pair a Physical Curb with a Low Hedge
 SaveSupport Non AI Creator
Image credit: Project: Arrow. Land + Structures (via Houzz)
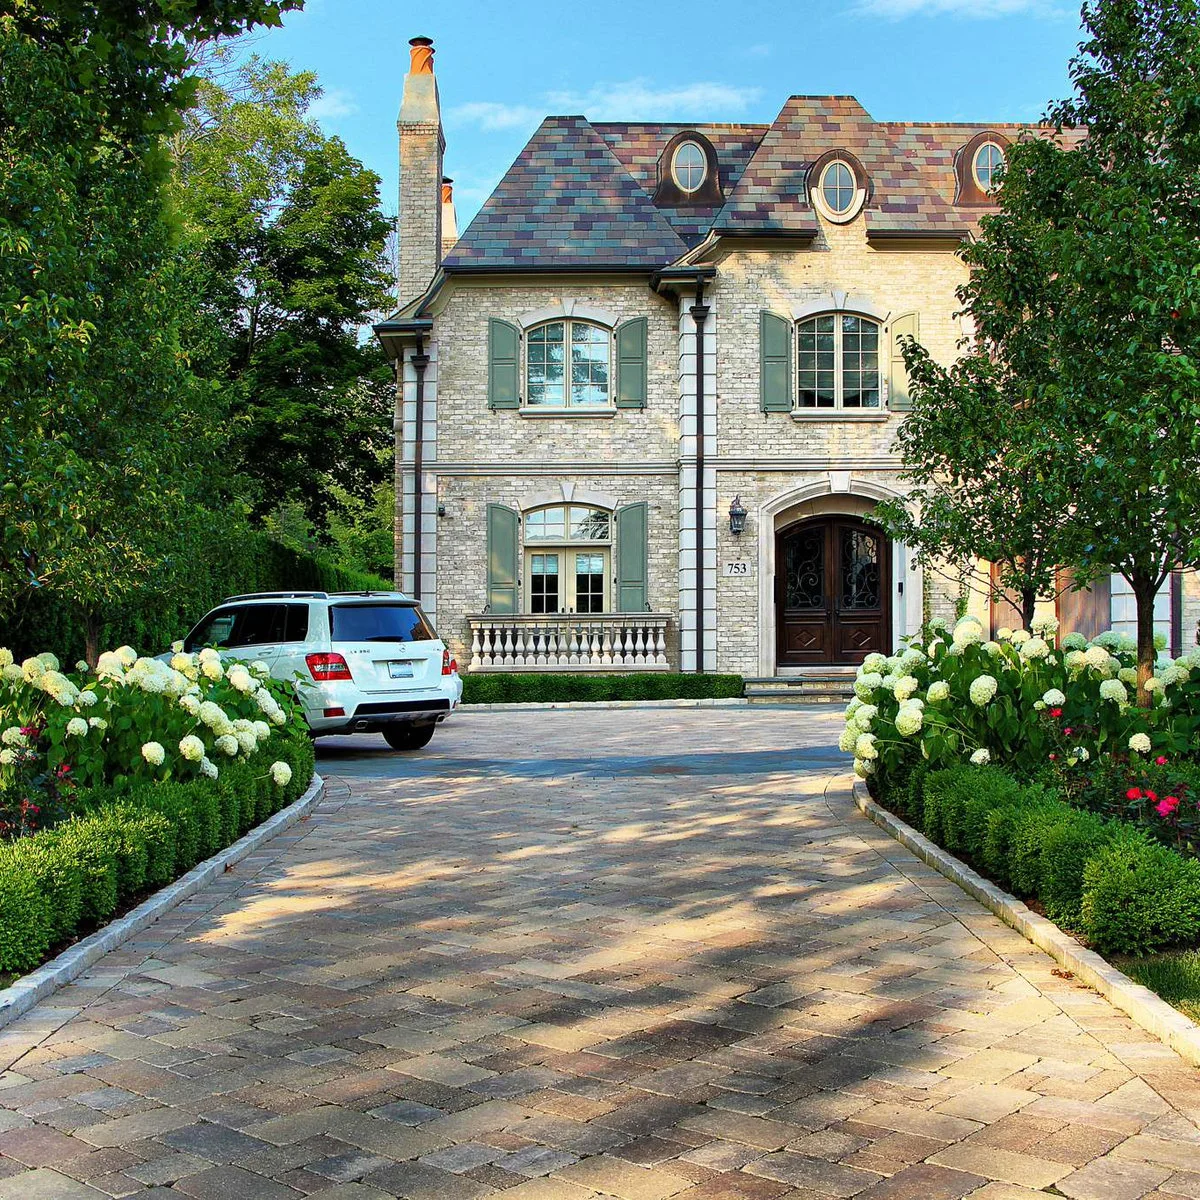
A low clipped hedge sits behind pale curb stones on each side of the driveway. White flower heads rise above that green frame, while the solid edging keeps the paved approach clearly separate. The repeated arrangement gives both sides a consistent height and outline near the entrance.
Use driveway landscaping ideas to consider the whole approach, including vehicle movement and views near the road. Leave enough growing space behind the curb for the hedge rather than planting against it. Check the mature spread of flowering shrubs so branches do not narrow the usable drive.
IDEA 11 / 18
Place a Living Hedge Behind a Flower Strip
 SaveSupport Non AI Creator
Image credit: Project: Chelsea Gardens, Inc. (via Houzz)
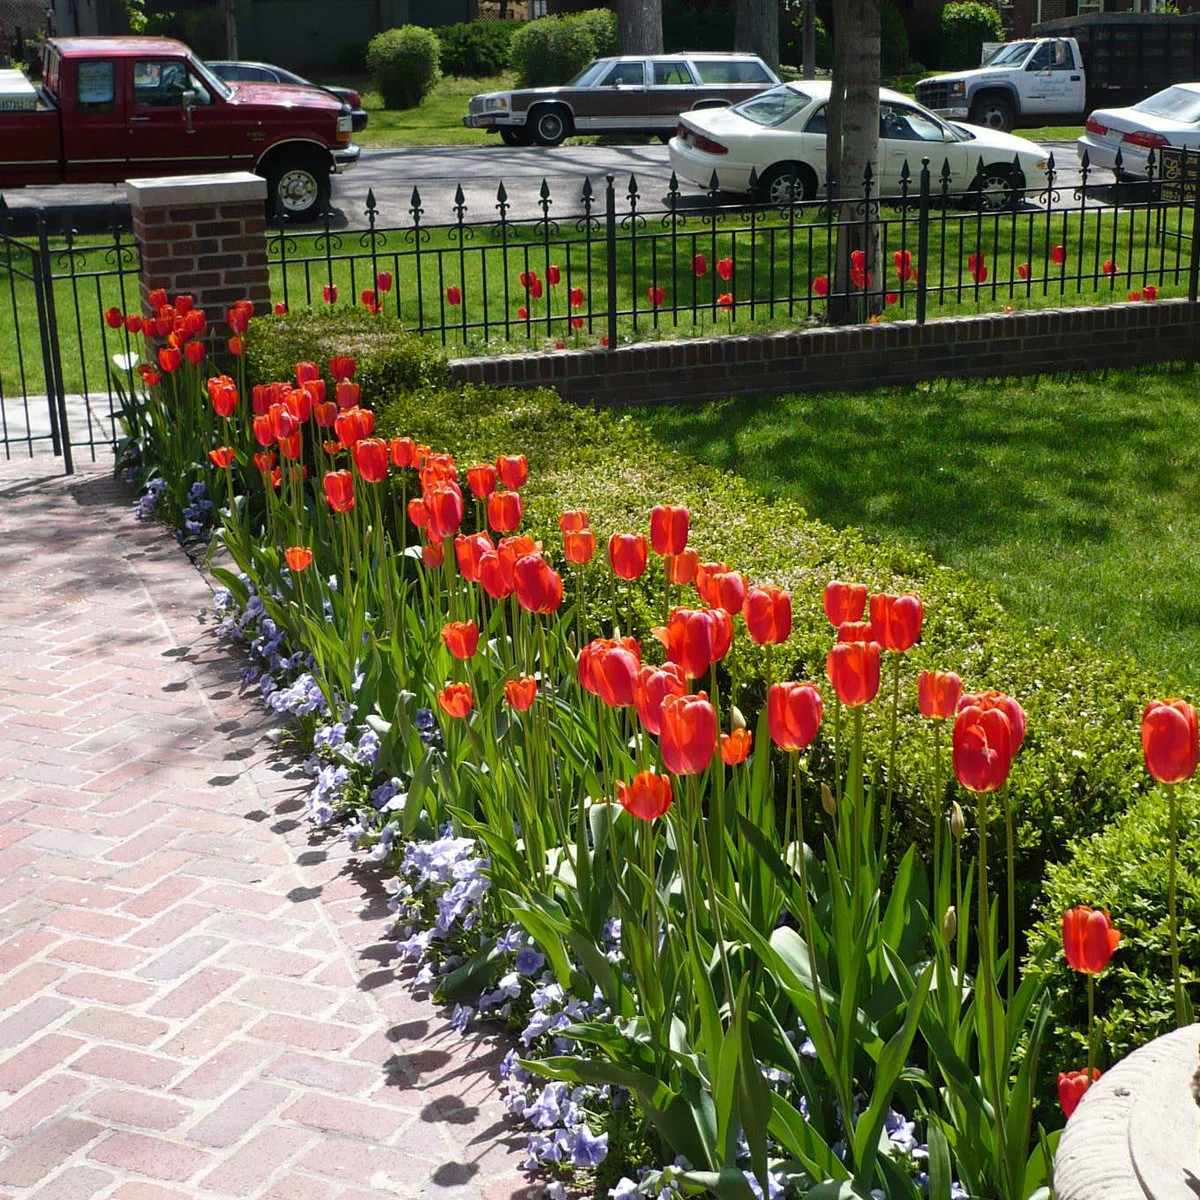
The clipped hedge forms the rear boundary of this narrow flower strip, with red tulips and lower purple flowers beside the brick path. That arrangement keeps the lawn visually separate while allowing the flower stems to sit close to the paving. Different heights make the layers easy to distinguish.
A planted edge needs access on the sides where it will be clipped. Check that maintenance will not require standing on delicate flowers. Plan for the bed's appearance after individual flowers finish, using suitable permanent structure rather than assuming one photographed display will last throughout the year.
IDEA 12 / 18
Layer a Low Curb and Clipped Green Shapes
 SaveSupport Non AI Creator
Image credit: Project: Executive Landscape (via Houzz)
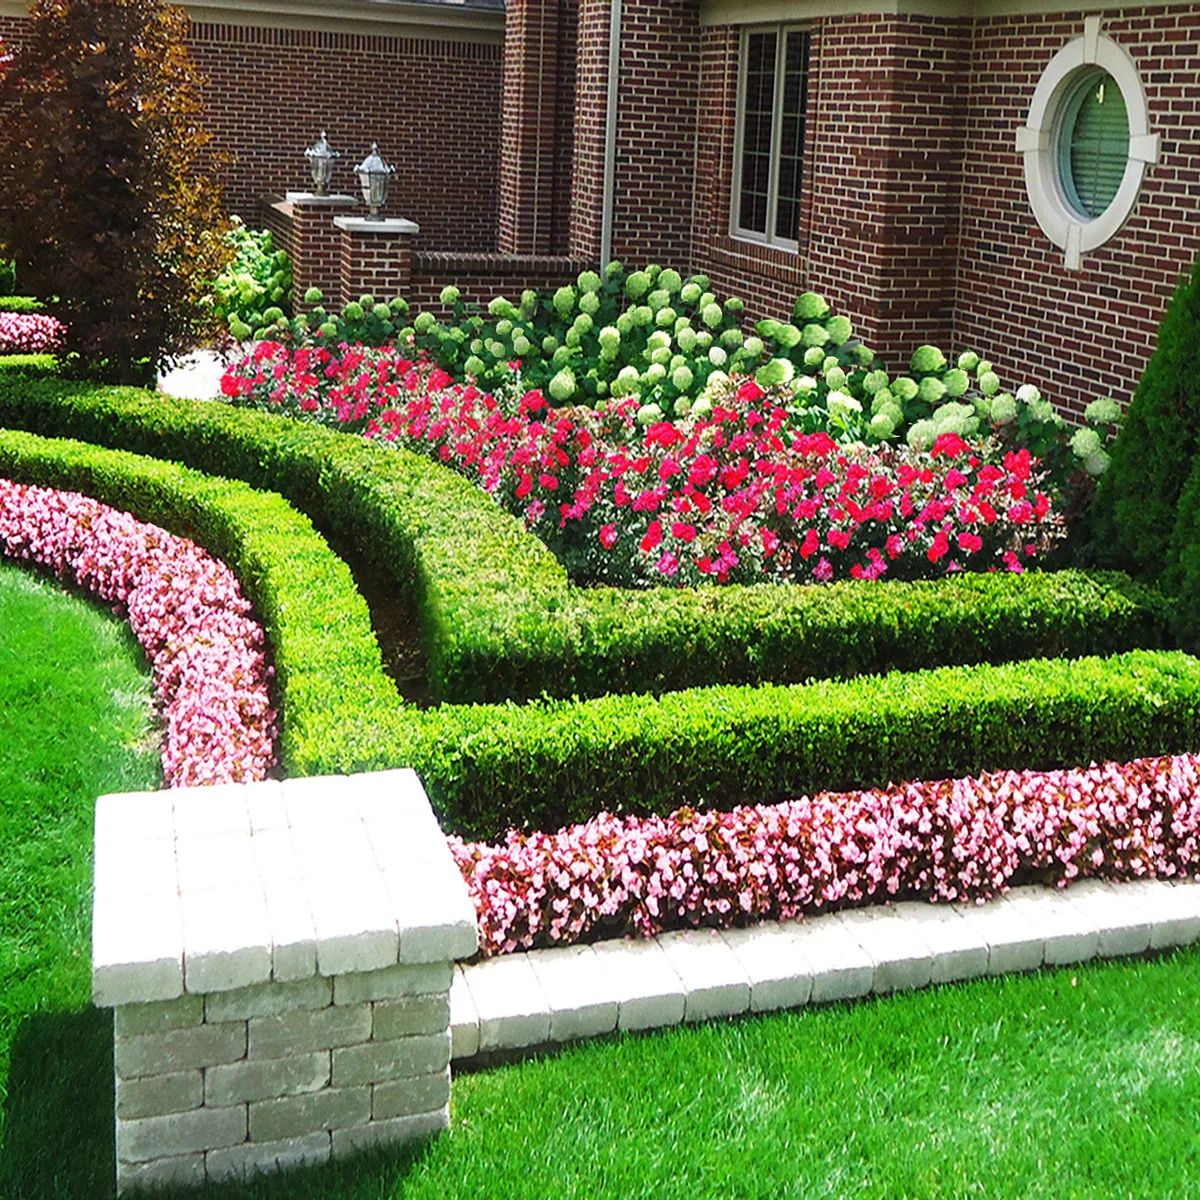
Pale blocks outline the front of this bed, while low pink flowers and clipped green shapes create separate layers behind them. Taller red and pale green flower heads fill the rear. The solid front line and curved hedges provide structure at different depths instead of acting as interchangeable edges.
This layered arrangement needs enough bed depth for every row to grow and remain accessible. Consider whether you want the ongoing clipping it involves before copying the shapes. Keep the front edging visible and choose plants for your conditions rather than relying on the photograph to identify suitable varieties.
IDEA 13 / 18
Add a Low Green Ribbon Beside Stone Paving
 SaveSupport Non AI Creator
Source: houzz.com
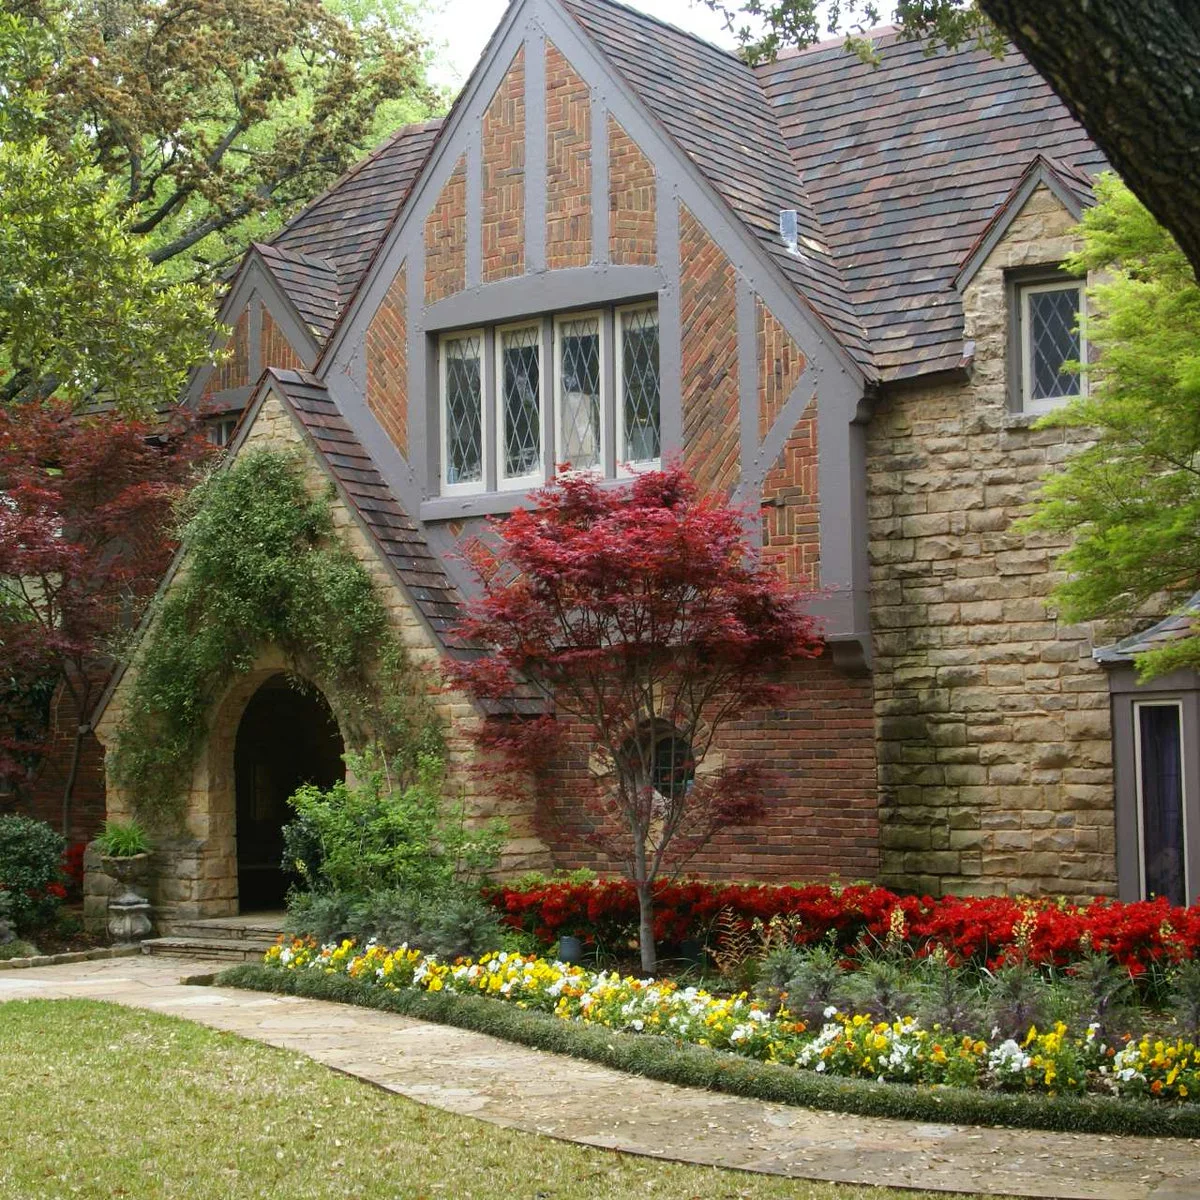
A narrow ribbon of low green planting runs along the stone path, with yellow and white flowers behind it. The greenery gives the flower bed a continuous front even where individual blooms vary. Its restrained height keeps the path and the house entrance visible across the planting.
Select a plant whose eventual height and spread suit the route. Check whether it tolerates the site's light and routine trimming, and leave room to maintain it without stepping into the flower row. Keep foliage off the paving where it would reduce footing or conceal an uneven edge.
PART 04
Connect the border to paths and terraces
IDEA 14 / 18
Frame the Entrance with Low Curved Masonry
 SaveSupport Non AI Creator
Image credit: Project: Peter Marino (via Houzz)
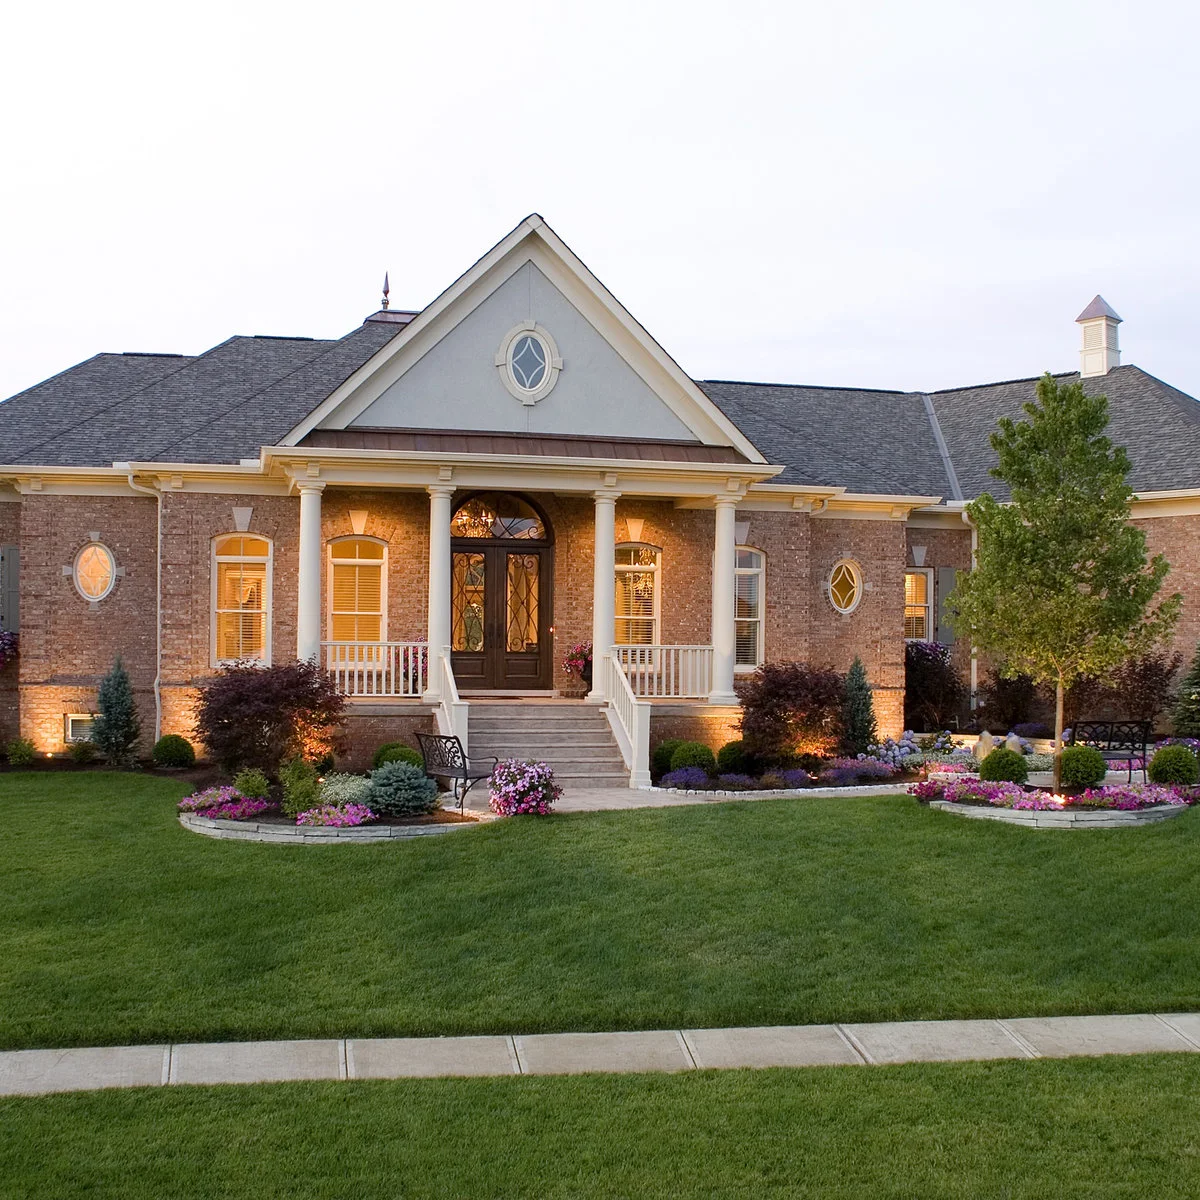
Low pale edges turn outward from the entrance, enclosing pink flowers and compact shrubs on both sides. The repeated curves make the front path easy to follow across the lawn. The edging remains low enough that the planting and porch steps are visible together from the approach.
Start with the route and step access before deciding how far each curve should project. Check mower movement around the outer ends and allow space for shrubs to mature. Where soil is raised, confirm the construction needed to retain it rather than treating appearance as a guide to installation.
IDEA 15 / 18
Use the Path Surface as a Crisp Bed Boundary
 SaveSupport Non AI Creator
Image credit: Project: NLH Landscape Architects (via Houzz)
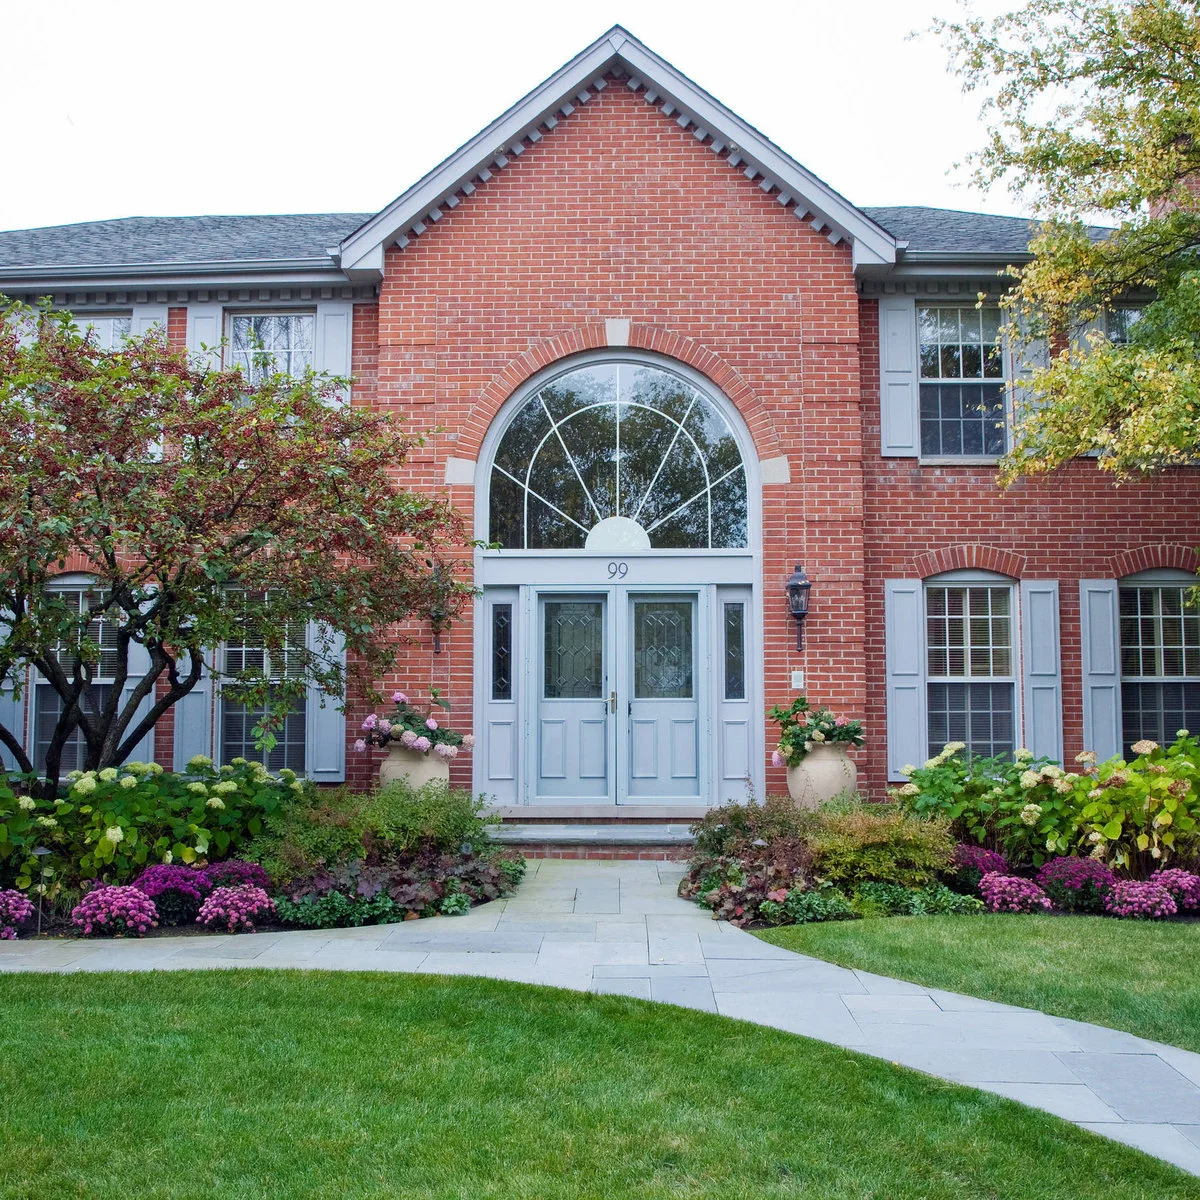
The pale path creates a crisp limit for the beds without adding a separate prominent strip beside it. Pink flowers and low greenery sit close to the paving, while taller shrubs stay nearer the house. The entrance remains visible between the two planted sides.
A path can define a flower bed only while its usable width stays clear. Set plants back according to their eventual spread and keep loose soil or mulch off the surface. Inspect the junction after heavy rain to understand whether runoff or soil movement requires a better edge detail.
IDEA 16 / 18
Meet a Brick Terrace with a Soft Flower Band
 SaveSupport Non AI Creator
Image credit: Project: Sudbury Design Group (via Houzz)
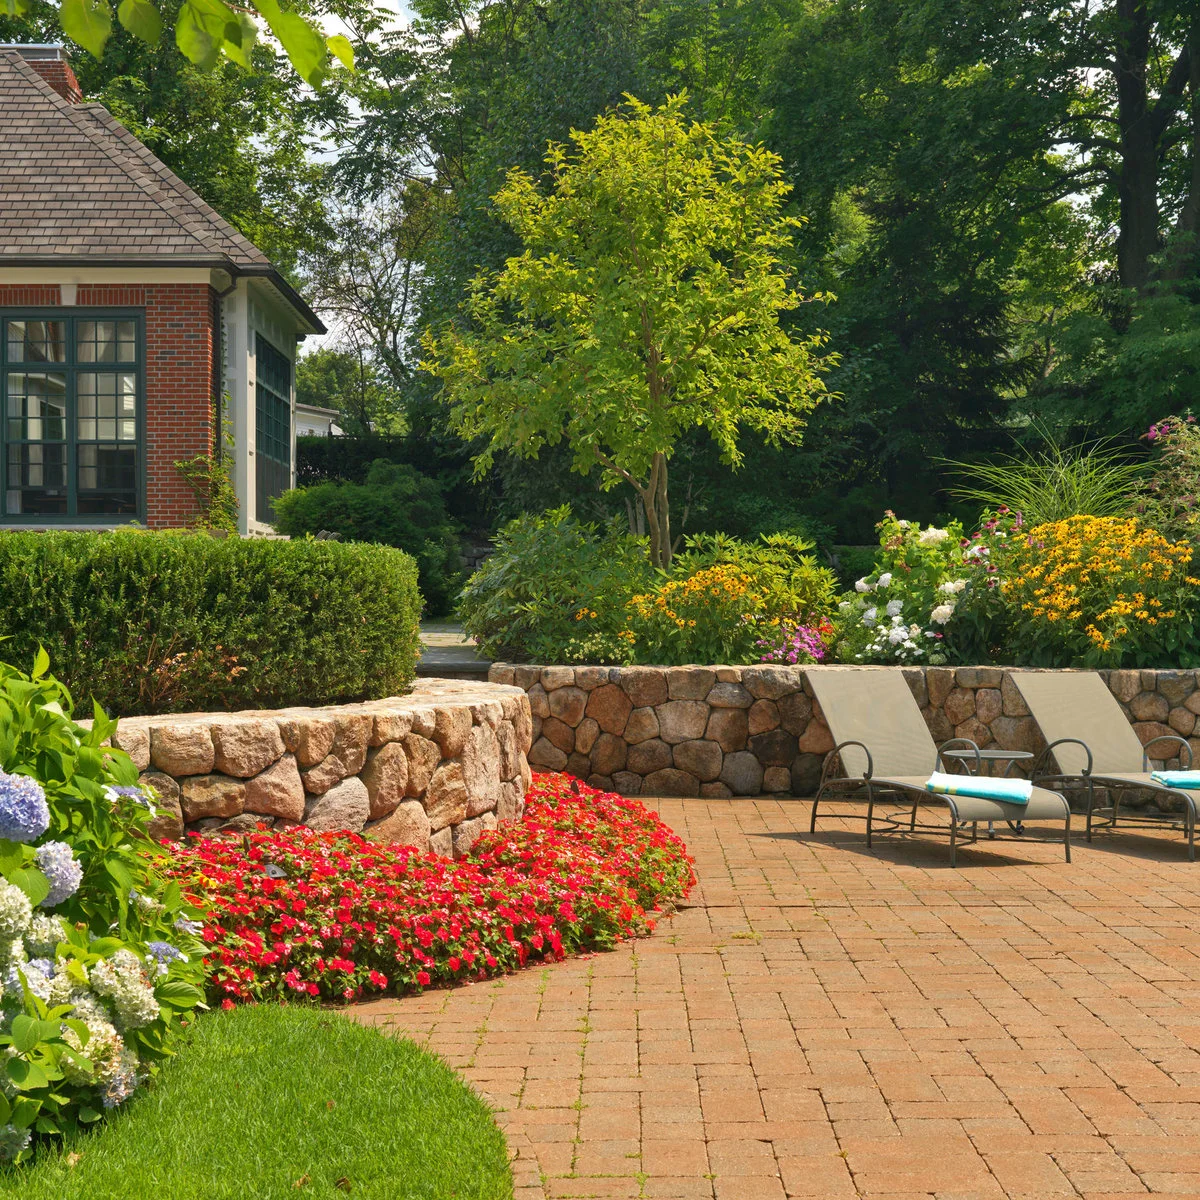
Low red flowers sit between the brick terrace and the taller rough-stone bed behind. The planting softens the meeting point without hiding the main curve of the wall. Taller flowers occupy the raised level, giving the smaller front border a different role beside the seating area.
Preserve enough terrace width for chairs in use before adding a planted strip. Check where feet and chair legs will move, and choose front plants that will not repeatedly spill into that space. Any raised wall needs suitable construction and drainage independent of the flowers that conceal its base.
IDEA 17 / 18
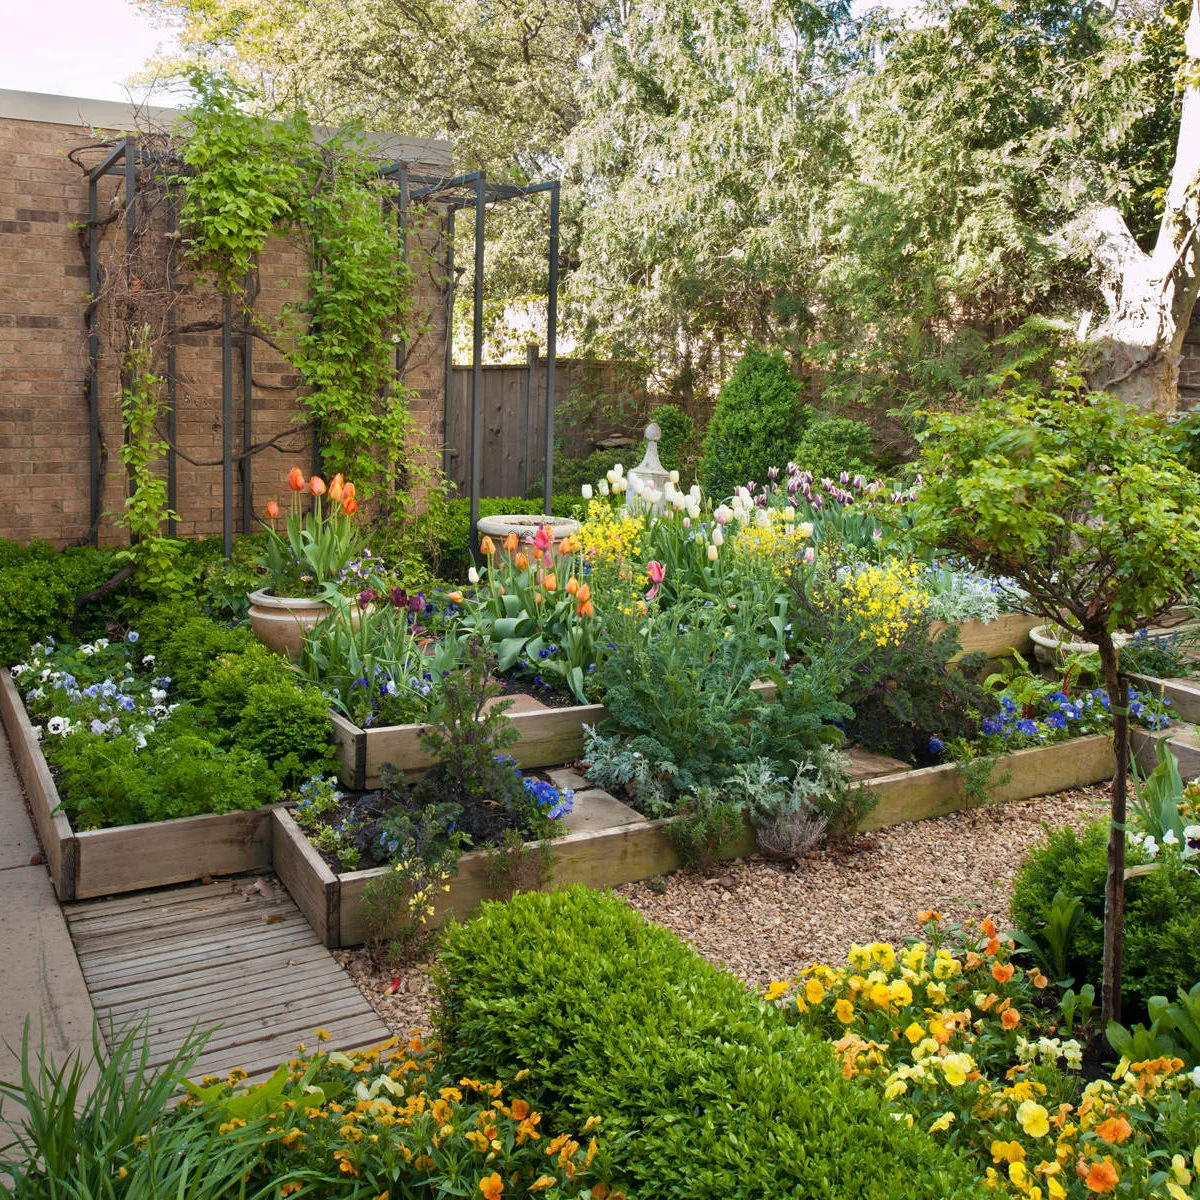
Step Timber Borders Around a Small Garden
 SaveSupport Non AI Creator
Source: houzz.com
Rectangular timber edges divide this compact flower garden into several levels. Gravel and wood routes remain between the planted sections, while flowers soften the straight boards. The stepped arrangement makes separate pockets visible, rather than forcing the whole garden into one broad level bed.
Our small cottage garden ideas offer more ways to combine abundant planting with usable routes. Here, check access to every pocket and the durability of materials in ground contact. Raised timber beds need suitable support; do not copy their height or joints without checking the loads and site conditions.
IDEA 18 / 18
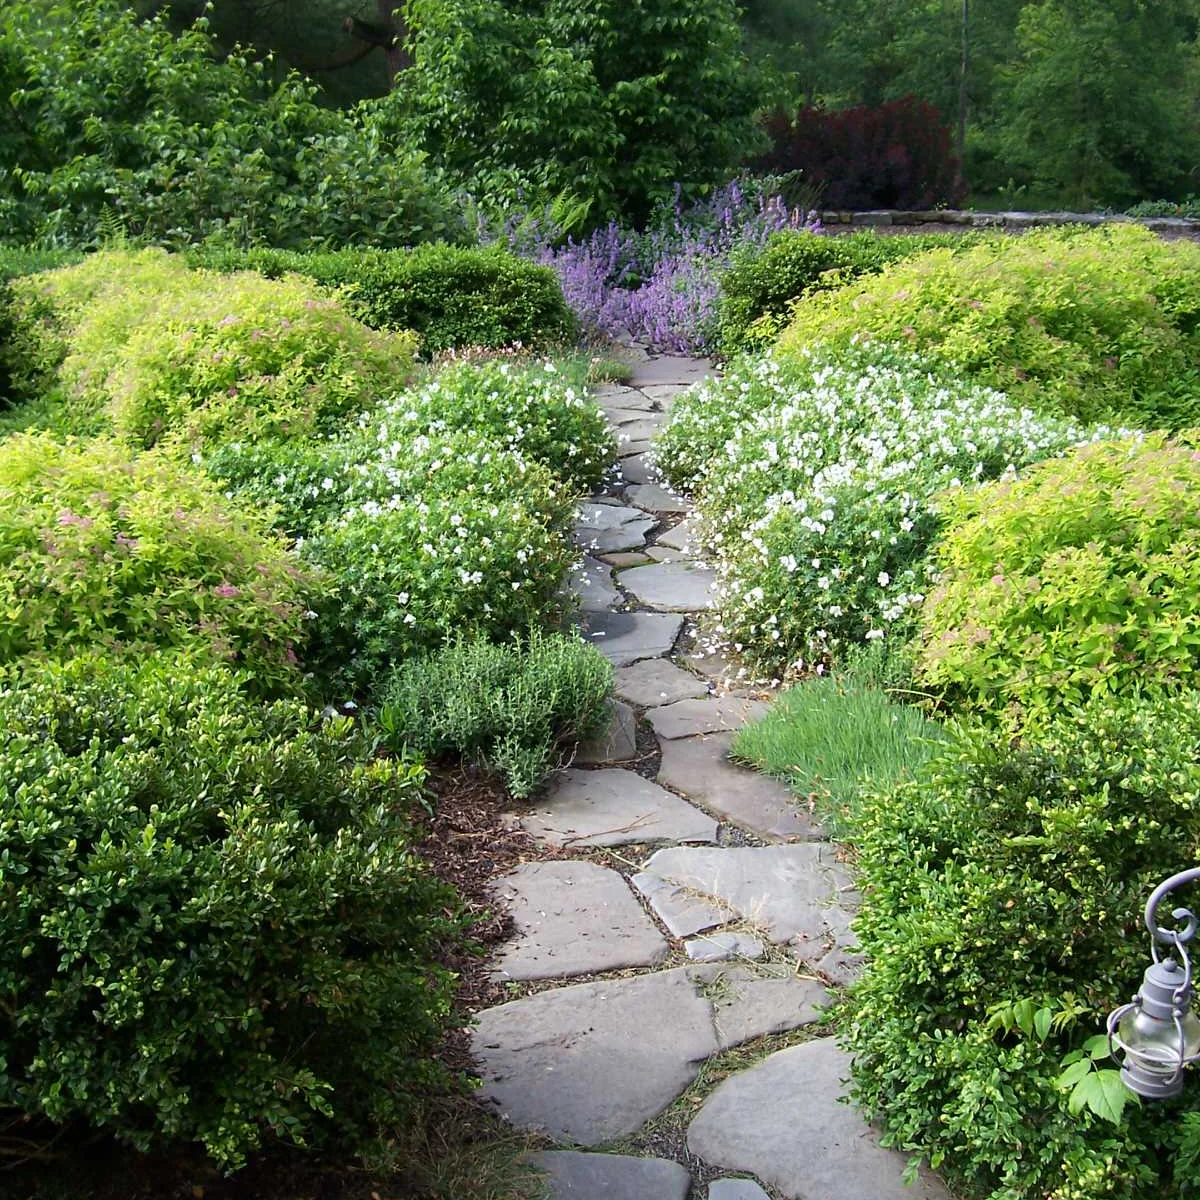
Let Low Planting Soften an Irregular Stone Path
 SaveSupport Non AI Creator
Image credit: Project: Dear Garden Associates, Inc. (via Houzz)
Low rounded plants form the edge of this irregular stone path, with white flowers and taller purple stems farther along it. The planting follows the route without a separate high curb. Its small leaves and low profile make the transition between stone and flower bed feel gradual.
Keep the intended walking width clear as plants mature, especially where uneven stones already need careful footing. Choose edge plants that suit the light and can be maintained from the path. Remove encroaching growth before it hides the route rather than relying on people to push through it.
BRING IT ALL TOGETHER
Test the edge before fixing it in place
Lay out the proposed line with a hose or string, then walk past it and try the maintenance route. Check that the bed is deep enough for the plants at maturity and that the edge will not create an obstacle beside a step or gate.
Choose a construction method for your soil, climate and height change. Keep access for weeding and repairs, and plan where water will go. Low edges still need checking for movement; planted edges still need trimming and space to grow.