A classic white kitchen depends on more than the color of its doors. The proportions of a cooker surround, the shape of an island, the window treatment and the smaller metal details all affect how the room feels. White can provide a quiet background for those choices without requiring every surface to match.
These rooms range from crisp white to softer off-white and pale neutral finishes. Look at each arrangement as a whole, then adapt the useful parts to your space, cooking habits and cleaning routine. The photographs offer combinations to consider rather than a reason to replace sound fittings that already work.
PART 01
Shape the Room Around Its Main Features
IDEA 01 / 20
Give a White Kitchen a Wood Island
 SaveSupport Non AI Creator
Image credit: Blair Burton Interiors / Julie Soefer Photography
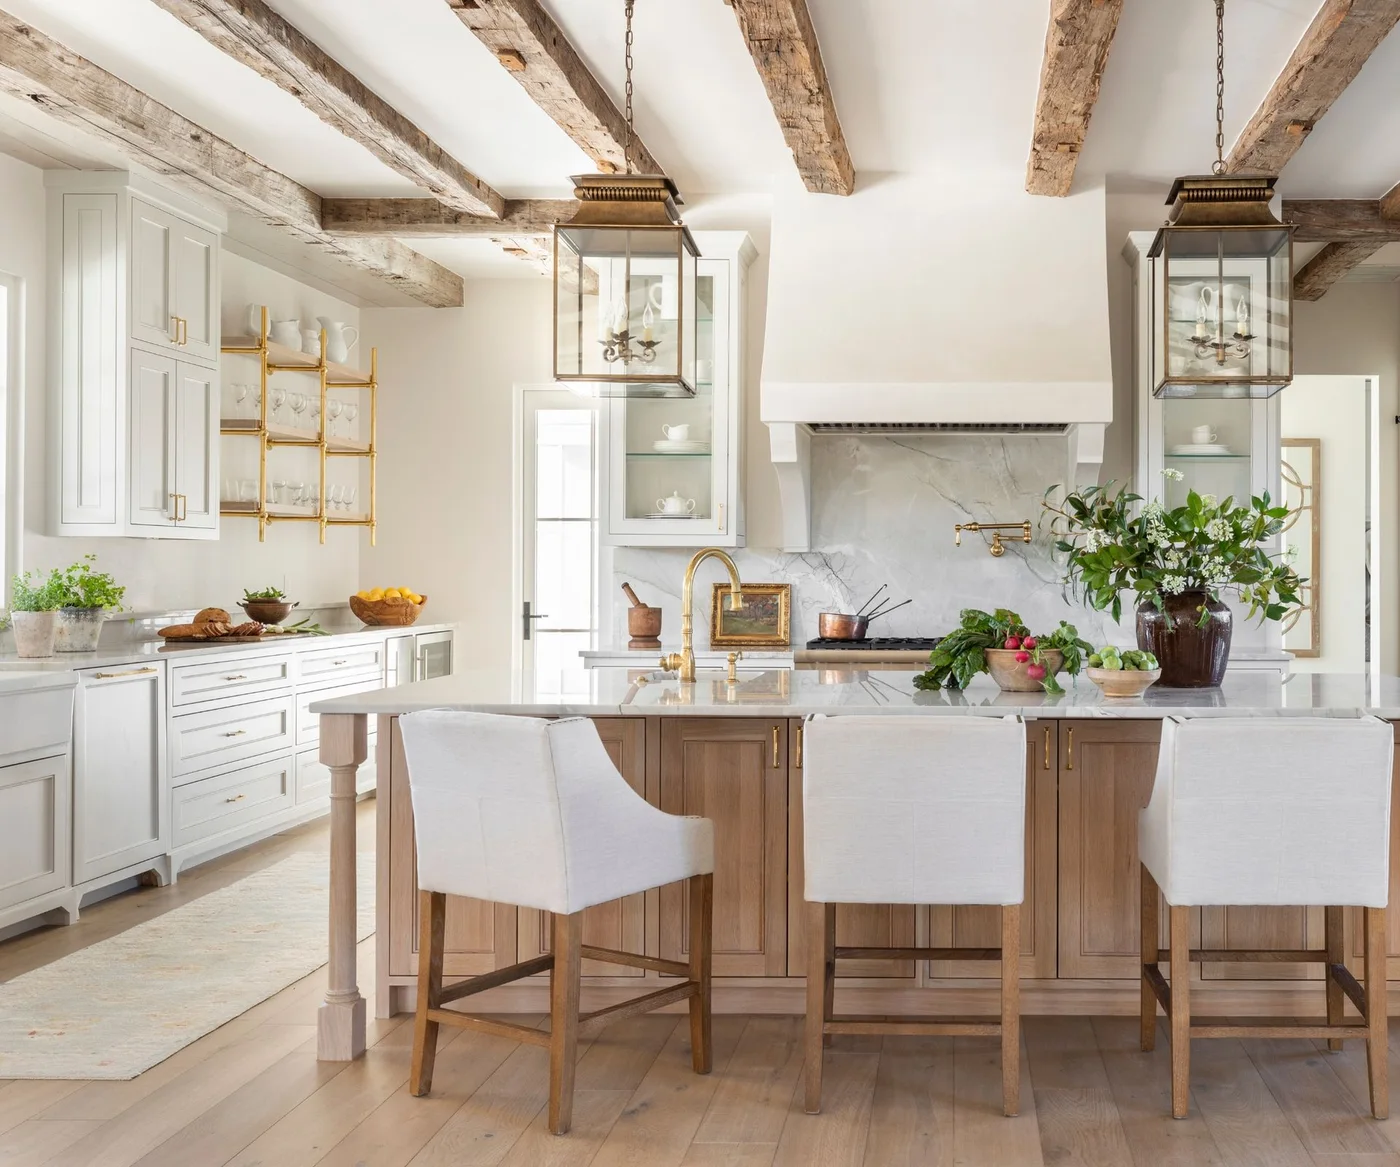
The wood island gives this largely white room a warmer center, relating to the exposed timbers above. Glass lanterns and glazed wall cupboards keep the upper half comparatively open. The broad hood provides a clear focal point behind the island rather than competing with several different wall finishes.
Choose the island after measuring circulation with the stools occupied and cabinet doors open. Upholstered seats are comfortable but need fabric suited to kitchen spills. Our white oak kitchen cabinet ideas explore more wood-and-white combinations; confirm the actual wood and finish before choosing cleaning products or ordering a matching piece.
IDEA 02 / 20
Frame the Range With a Simple Mantel Shape
 SaveSupport Non AI Creator
Image credit: Future PLC/Fraser Marr
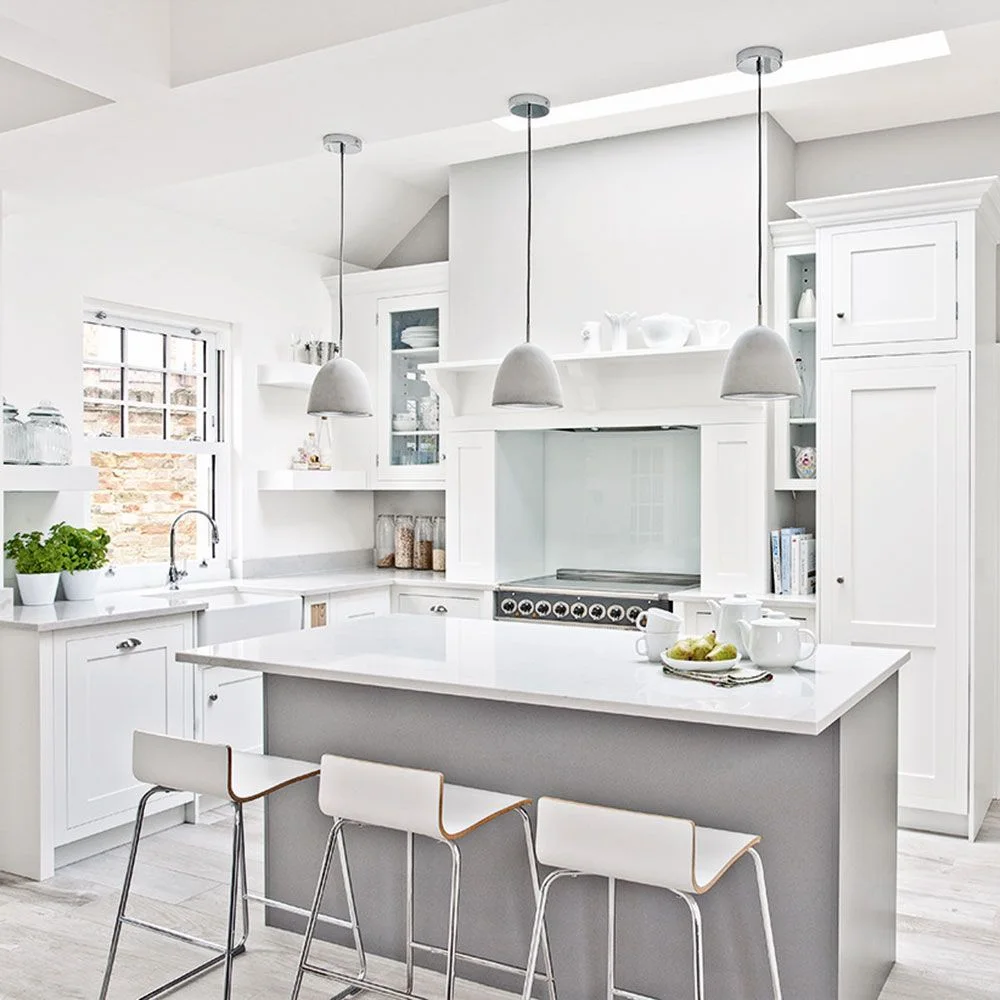
The surround turns the cooking area into an architectural feature, while its plain white finish connects it with the cabinets on either side. Narrow display shelves add detail without a full wall of glass doors. A gray island introduces a gentle change in tone beneath the line of small pendants.
Plan the hood and surround together around the appliance specifications, ventilation route and required clearances. A decorative mantel must not obstruct extraction. Keep display objects outside the cooking splash area, and choose shelves you can clean easily rather than placing fragile pieces where everyday cooking will coat them in grease.
IDEA 03 / 20
Keep Traditional Detail Light in a Narrow Room
 SaveSupport Non AI Creator
Image credit: Future PLC/David Giles
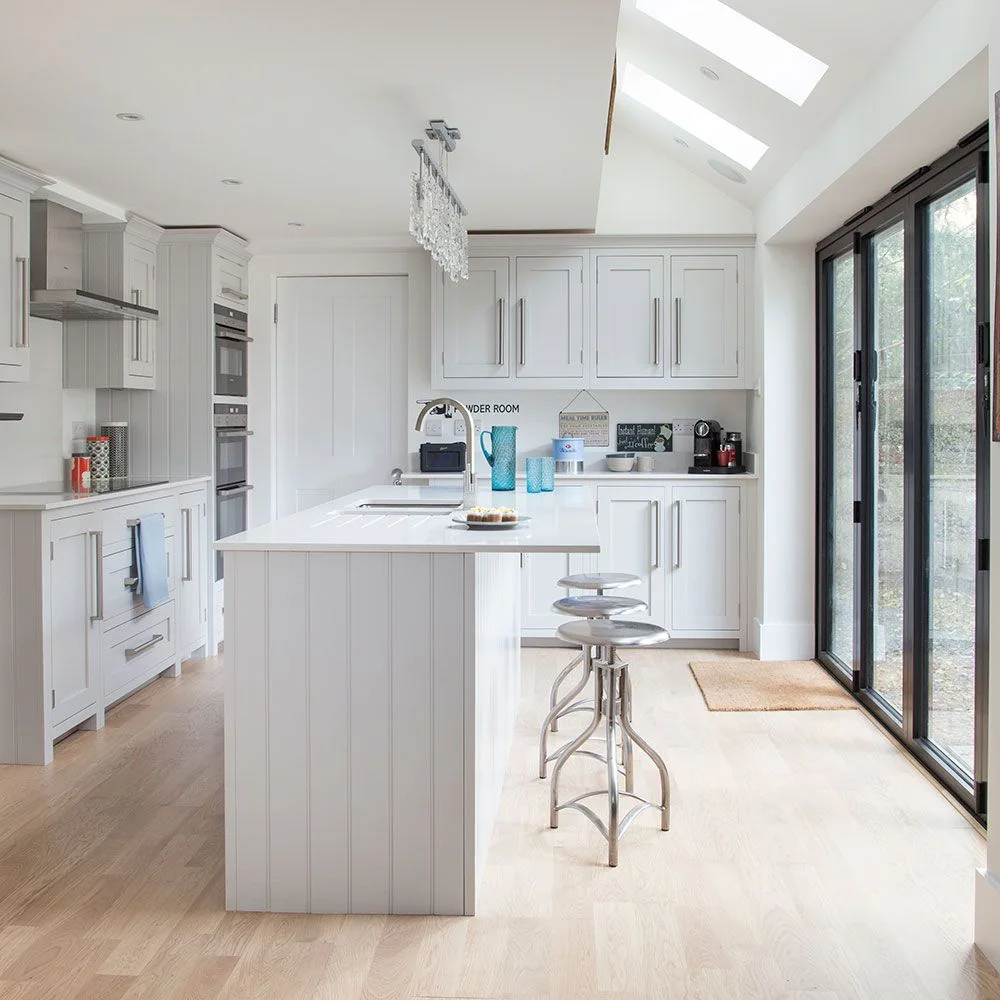
Framed doors and the paneled island supply the traditional detail, while slim stools and a restrained palette keep the narrow room from feeling heavy. Tall storage occupies the back wall rather than the glazed side. The garden doors remain a strong edge to the space instead of disappearing behind furniture.
Check the passage beside the island with stools pulled out, especially if it is also the route outdoors. Avoid choosing a wide island simply to fit more seating. Compare slim stools for stability and comfort, and use a floor finish that can cope with the actual amount of garden traffic.
IDEA 04 / 20
Let Window Frames Warm the White Scheme
 SaveSupport Non AI Creator
Image credit: Shane & Pierce / Michael P.H. Clifford Photography
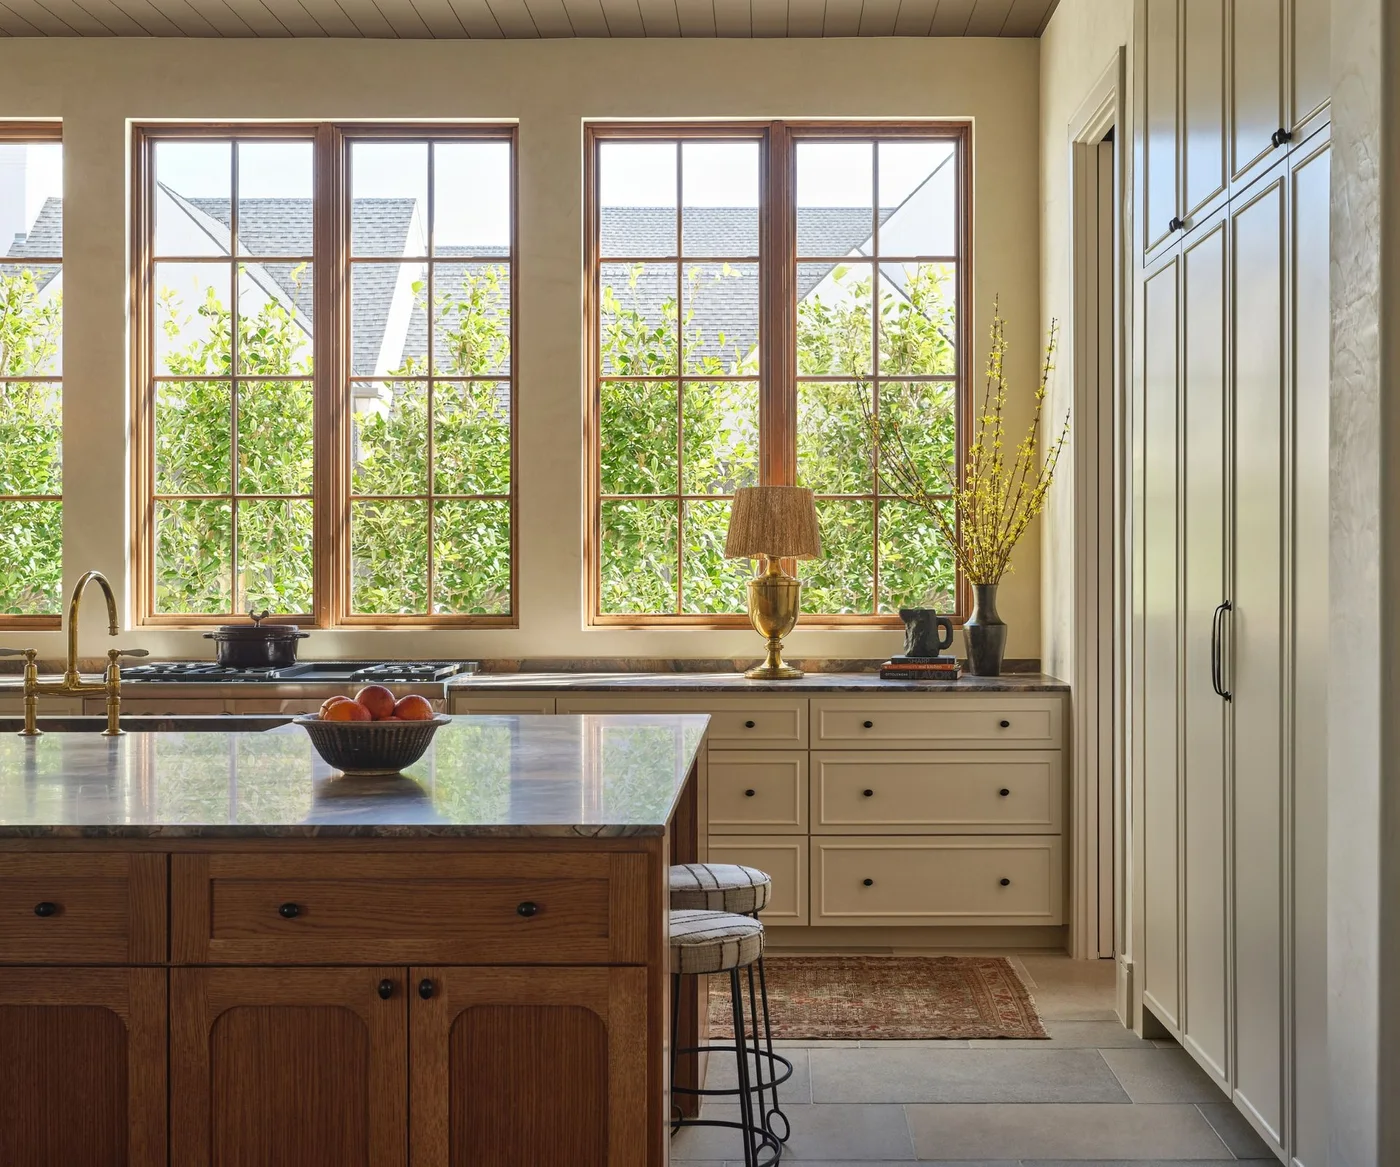
Wood appears in the window frames, ceiling and island, surrounding the pale painted cabinetry with a warmer outline. The dark counters connect the working surfaces without adding another cabinet color. Long low drawer runs allow the windows to remain the strongest feature across the back wall.
Compare a proposed cabinet white beside the existing wood in both daylight and evening light. Keep access to window catches and cleaning positions practical when planning the sink or cooktop. Choose a worktop for its real maintenance needs, and do not assume that a dark surface will hide every water mark.
IDEA 05 / 20
Repeat a Veined Surface Behind Plain Cabinets
 SaveSupport Non AI Creator
Image credit: Riviera Development
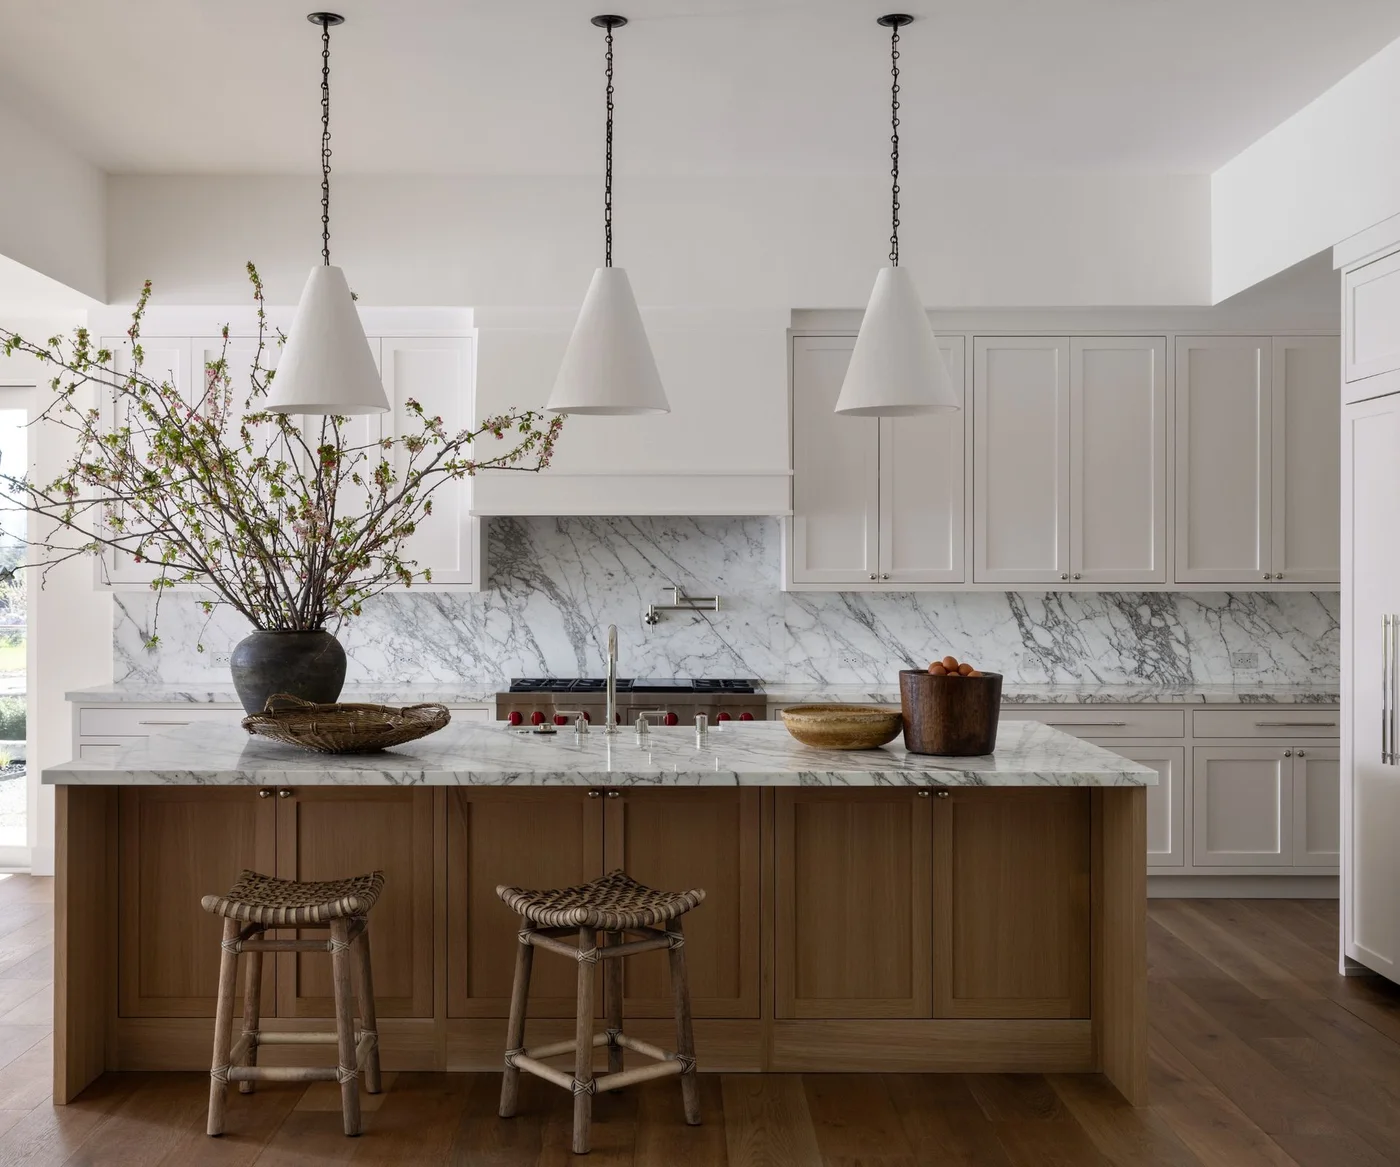
The veining supplies movement across the backsplash and island top, while the cabinet doors stay simple. Repeating that surface makes the two working areas feel connected. White cone shades leave the wood island visible as the main warm element rather than introducing another large decorative finish above it.
View a large sample or the actual slab before committing to a strongly patterned surface. Plan joints, sockets and cutouts with the fabricator so key sections are not lost. The cleaning and sealing routine depends on the material selected; a similar-looking engineered product and natural stone may need very different treatment.
PART 02
Add Warmth, Color and Softer Shapes
IDEA 06 / 20
Soften a White Kitchen With Window Fabrics
 SaveSupport Non AI Creator
Image credit: Ariel Okin / Photography Read McKendree
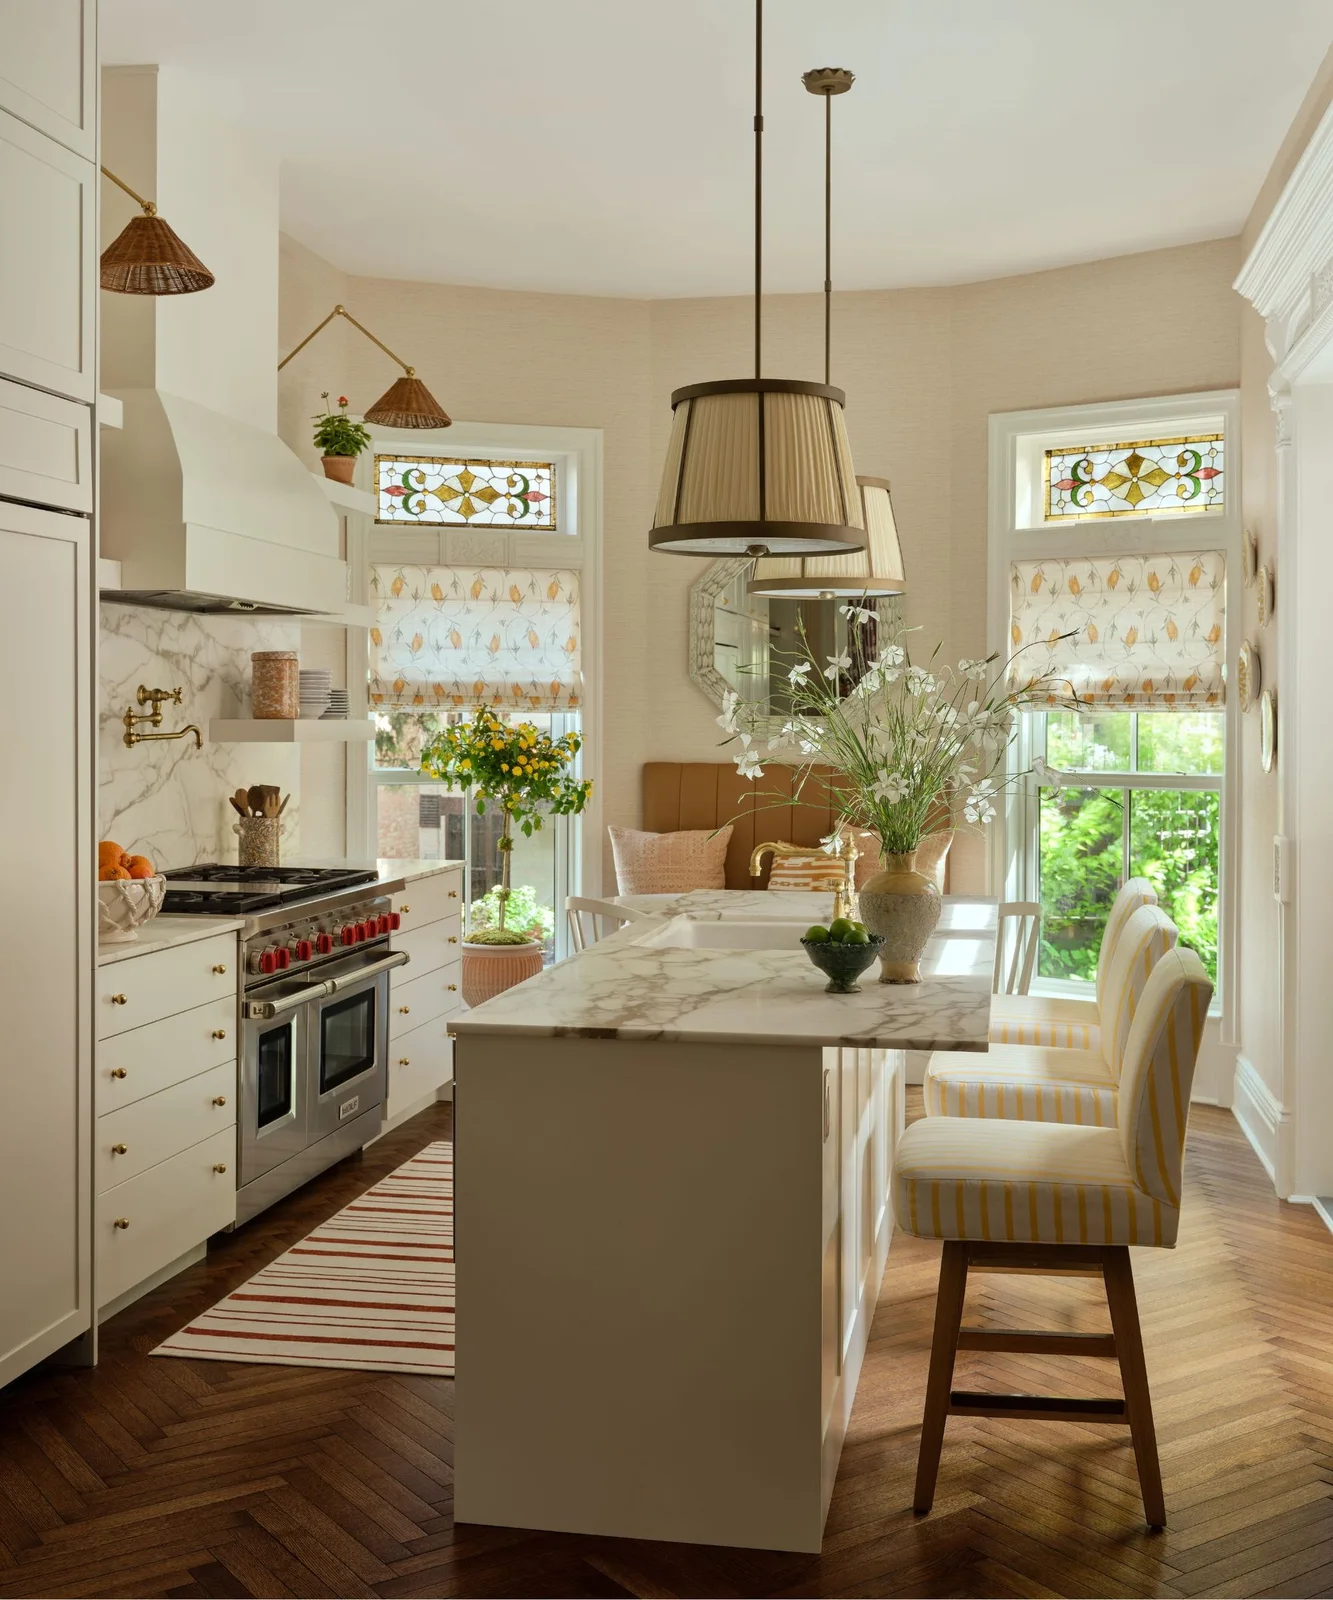
Patterned blinds and striped stools bring softness into the white cabinetry without covering much of the room. The smaller woven wall shades relate to the larger pleated pendants. Leaving the stained-glass window tops visible allows the room’s existing decorative detail to remain part of the arrangement.
Choose fabrics for their distance from cooking, steam and splashes, checking the cleaning instructions before ordering. Compare stools at the actual counter height and leave room to pull them out. Keep blinds and cords away from heat sources, and avoid placing a bulky flower arrangement where it restricts the useful preparation area.
IDEA 07 / 20
Use One Colored Island as the Accent
 SaveSupport Non AI Creator
Image credit: Studio Strachan / Boz Gagovski Photography
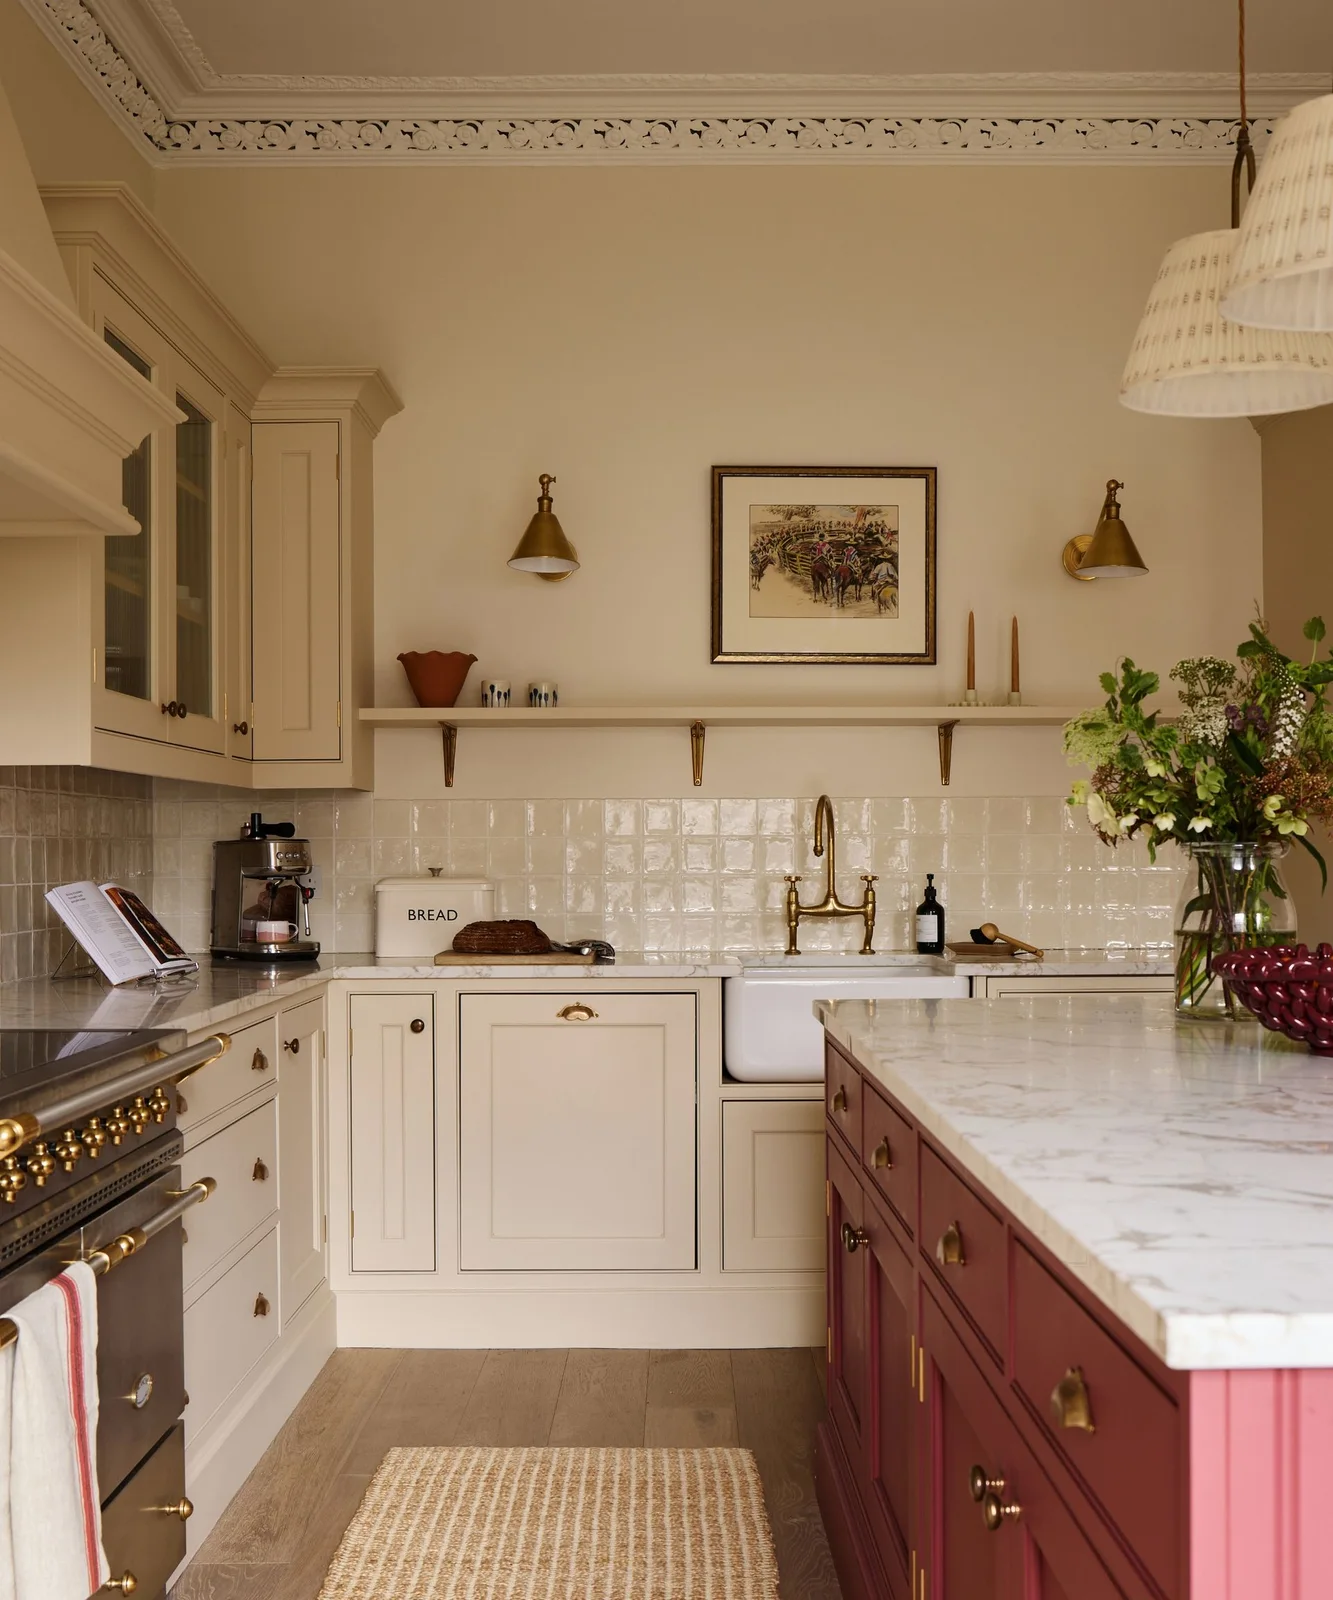
The red island gives the room a distinct center while the perimeter stays in a warm white. Glossy tiles and small metal details add variation without another strong paint color. A long shelf runs above the sink, keeping the wall lighter than a continuous row of tall cabinets would.
Test the island color beside both the cabinet sample and the floor rather than choosing it from a screen. Keep the shelf display sparse enough to dust comfortably. Our painted kitchen cabinets offer other color combinations; check that the selected coating and preparation suit the actual doors before repainting an existing kitchen.
IDEA 08 / 20
Add Color Through Pendants and Blinds
 SaveSupport Non AI Creator
Image credit: Kirsten Francis. Design: Jennifer Hunter Design. Styling: Martin Bourne
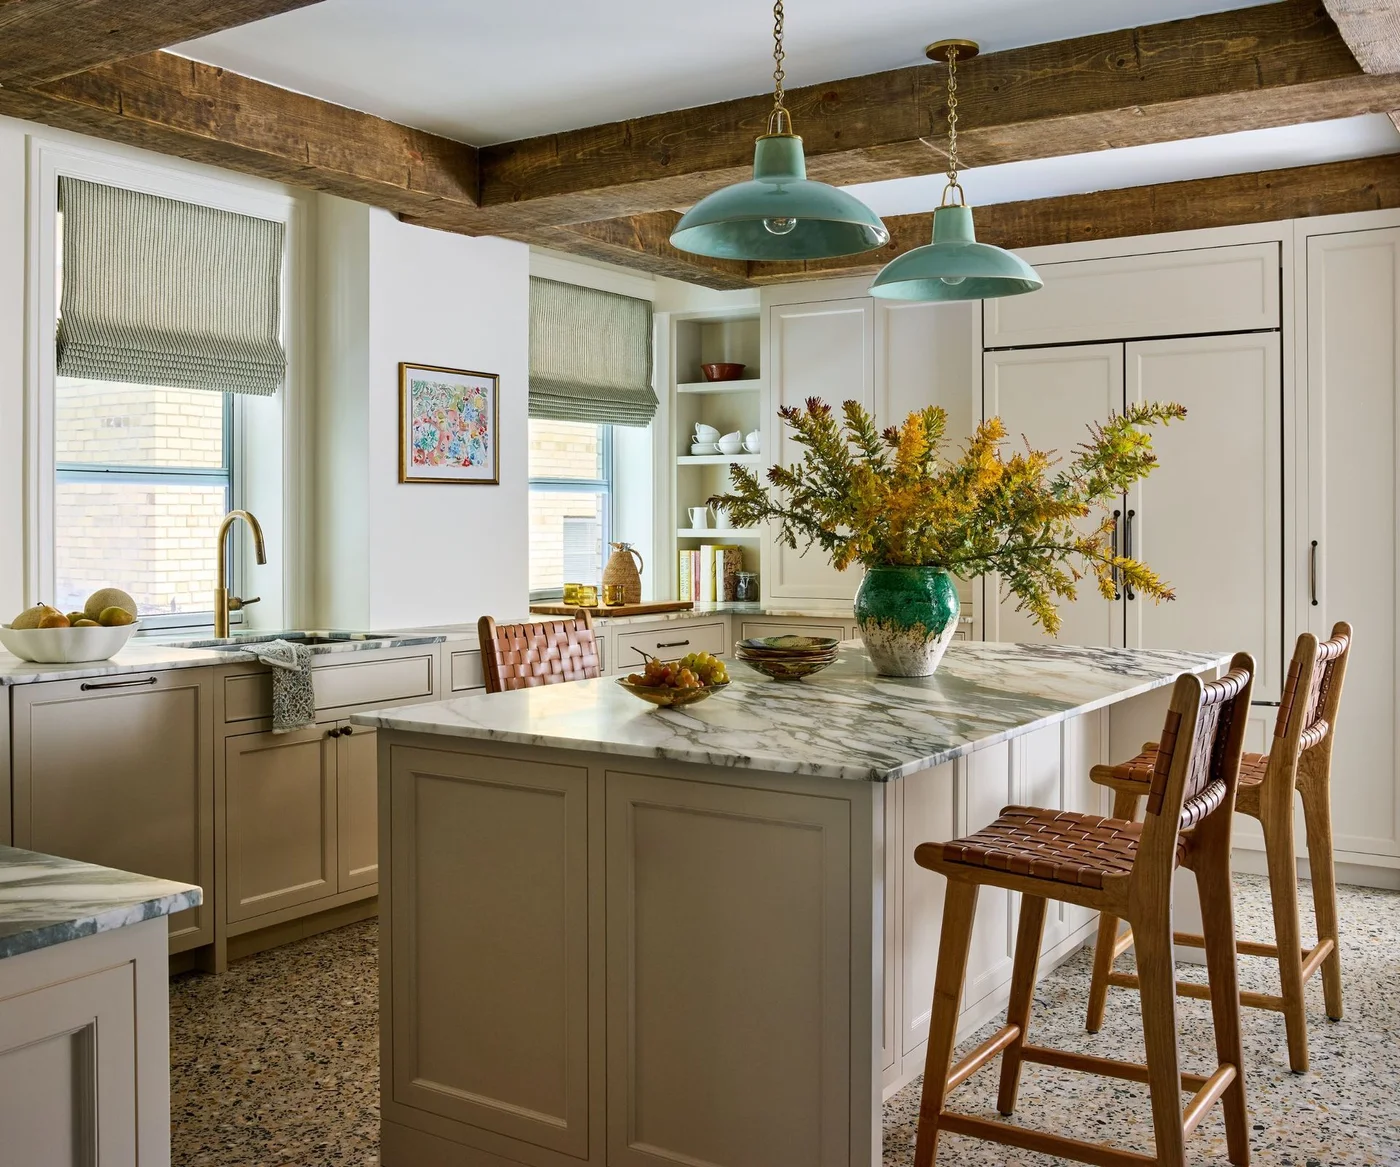
Green pendants and fine-striped blinds add color above the pale cabinetry, so the room does not depend on a brightly painted island. Brown woven seating relates to the ceiling timbers. The island repeats the perimeter’s framed detailing, allowing the accessories to provide most of the change in character.
Compare pendant size with the island and the view across the room, checking glare from seated positions. Choose blinds that remain clear of taps and splashes when lowered. Large branches make a striking photograph, but a shorter arrangement is more practical if people need to talk or pass dishes across the island.
IDEA 09 / 20
Break Up White Cabinetry With a Dresser
 SaveSupport Non AI Creator
Image credit: Edition 82 / Carina Skrobecki Photography
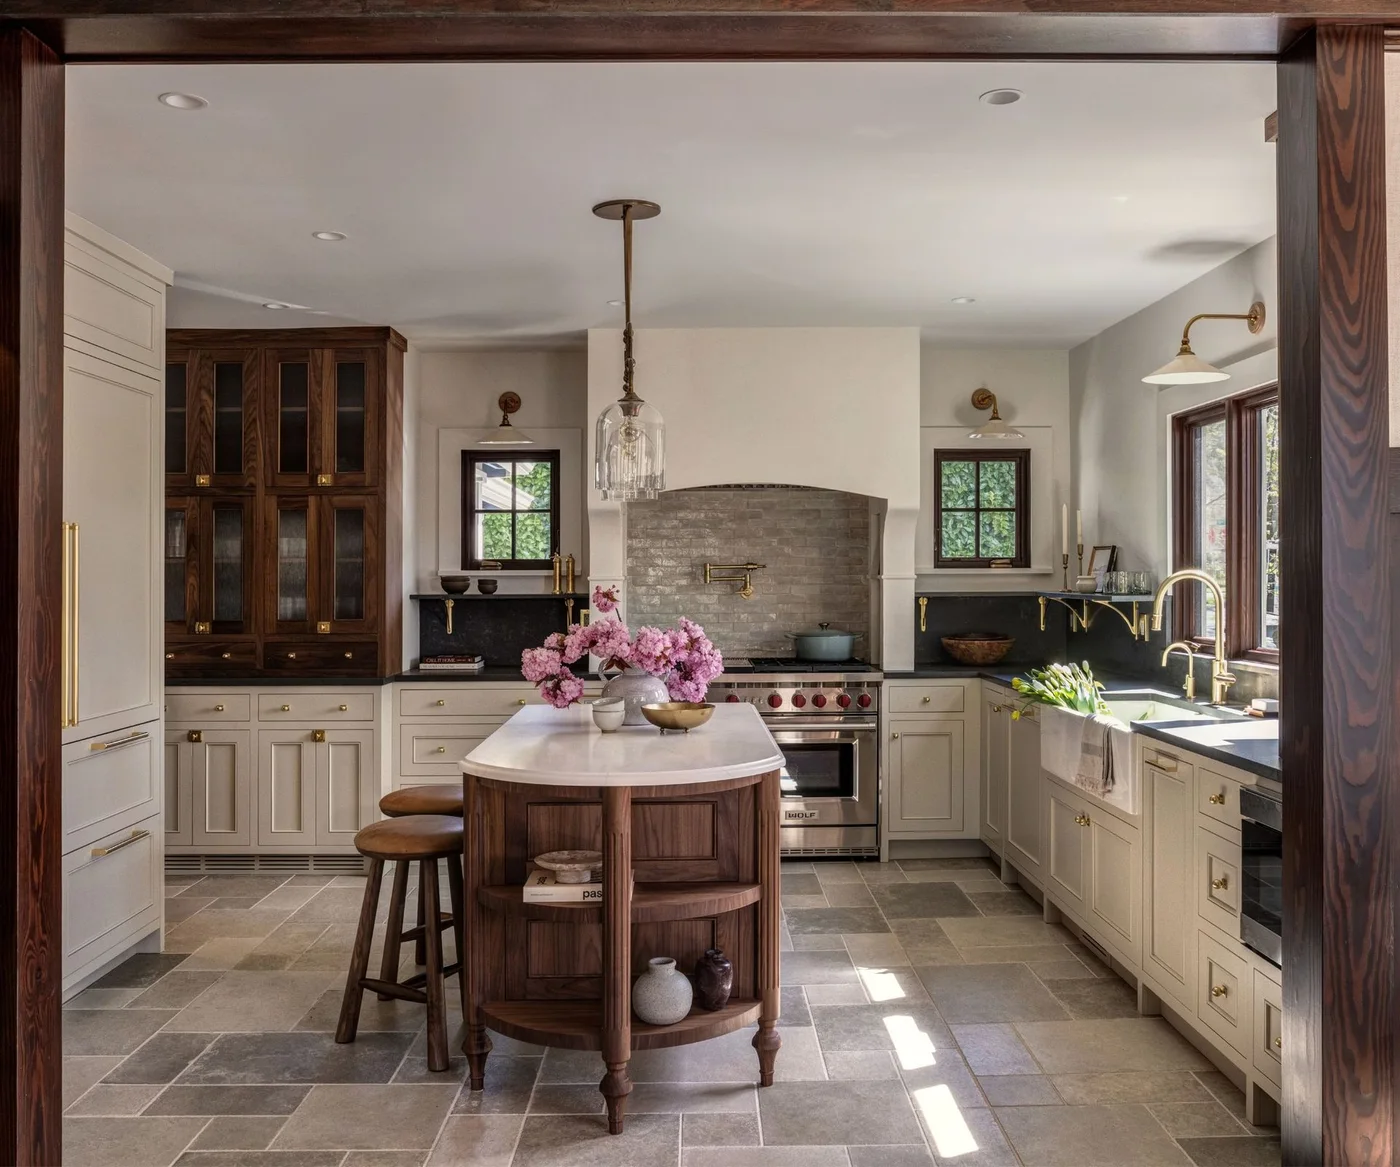
The darker dresser looks like a separate furniture piece within the pale cabinet run. A curved island repeats the wood tone with a softer shape at the center. The cooker recess and small windows organize the back wall, leaving the glazed dresser as the strongest storage feature.
Decide what will be displayed behind glass before choosing the number and width of glazed doors. Check shelf depth against your dishes, and allow room to open the doors without obstructing the working aisle. A rounded island end can ease a corner visually, but the actual clearance still needs to work with occupied stools.
IDEA 10 / 20
Echo Curves in Glazed Cupboards and Lighting
 SaveSupport Non AI Creator
Image credit: Curated Nest/Jacob Snavely Photography
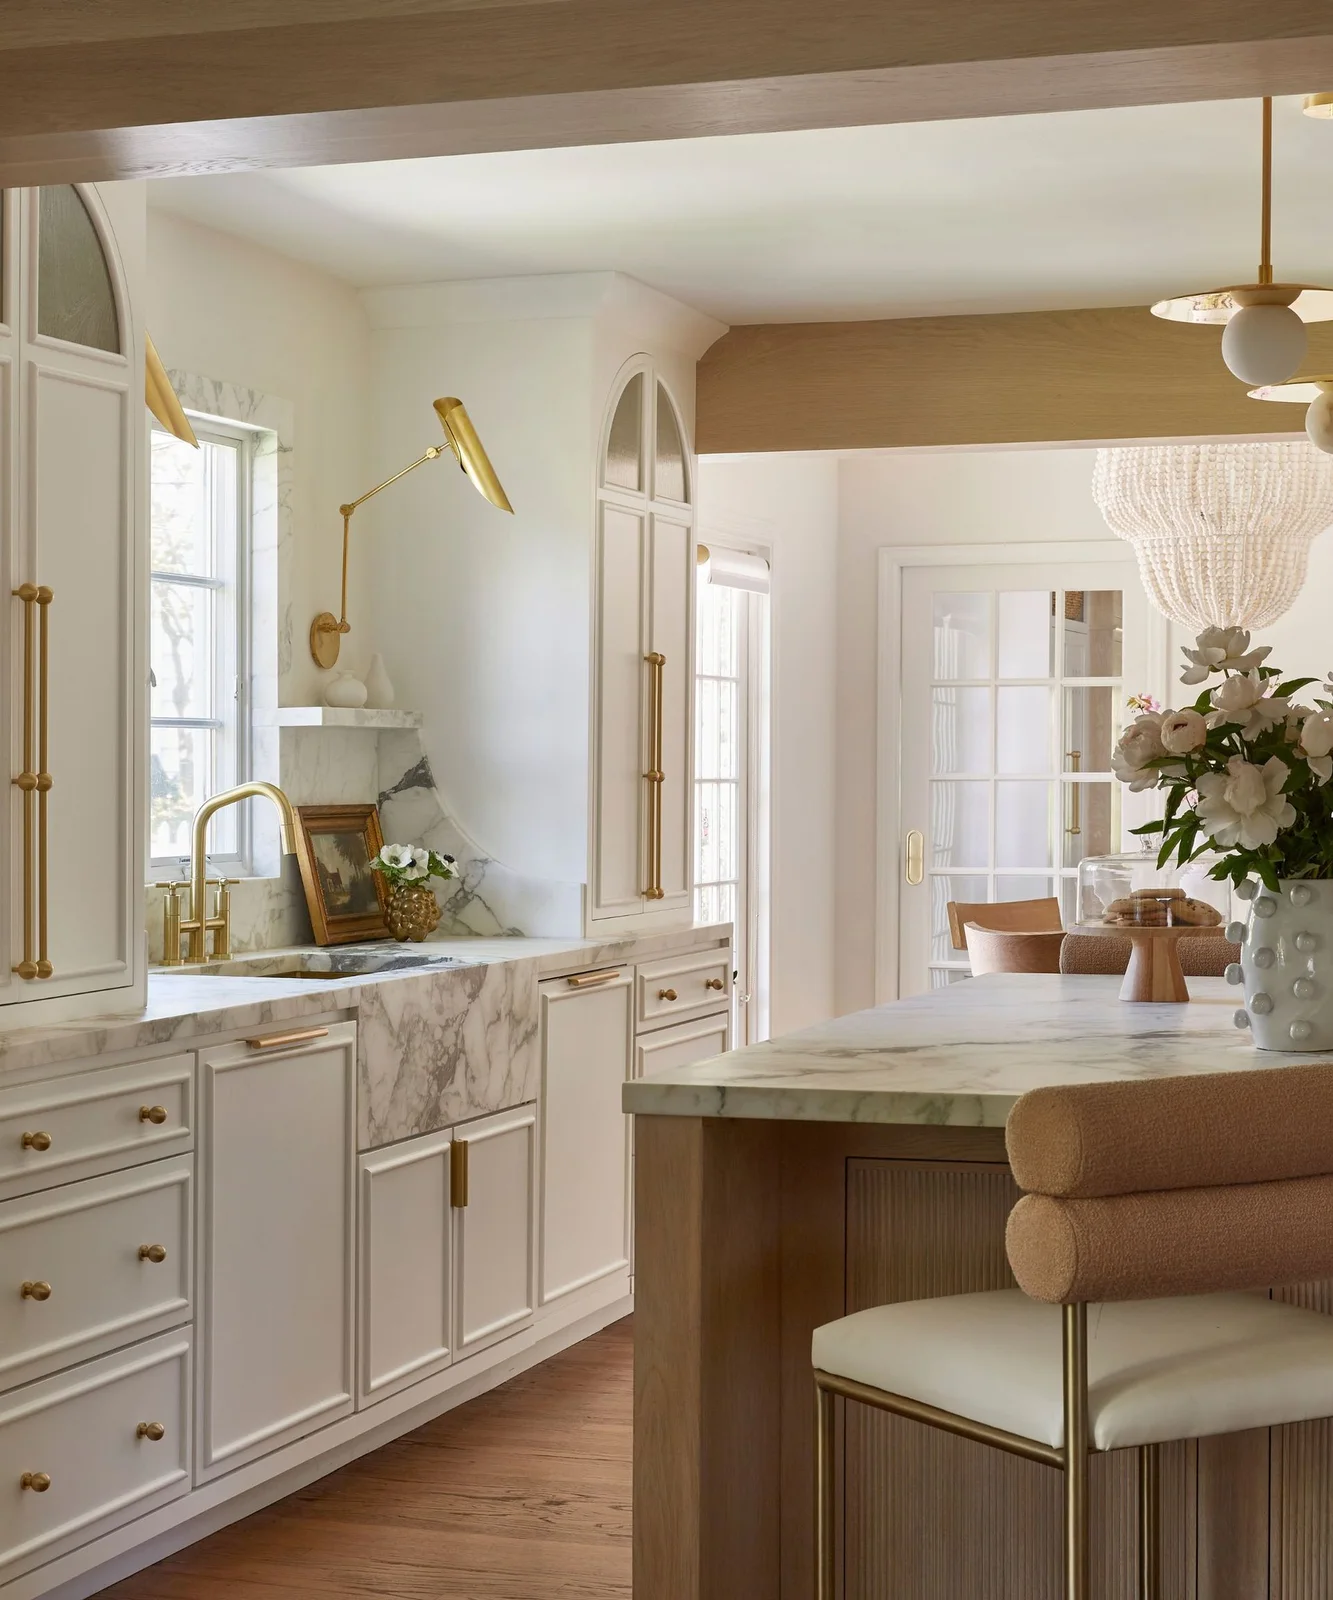
Arched cupboard tops and rounded seating soften the straight drawer runs in this kitchen. Warm metal hardware repeats through the tap, wall lights and handles, making the smaller details feel connected. The pale surfaces carry the room, while the island’s wood base supplies a quieter contrast below the counter.
Allow for the extra cleaning involved in detailed frames and glazed doors, especially near a sink. Check that a wall light can be adjusted without touching the cupboard or window. If choosing a stone sink, ask about its specific care, support and repair needs rather than treating it like a standard ceramic basin.
PART 03
Choose Useful Surfaces and Storage Details
IDEA 11 / 20
Give the Range Wall an Unbroken Backsplash
 SaveSupport Non AI Creator
Image credit: Neptune
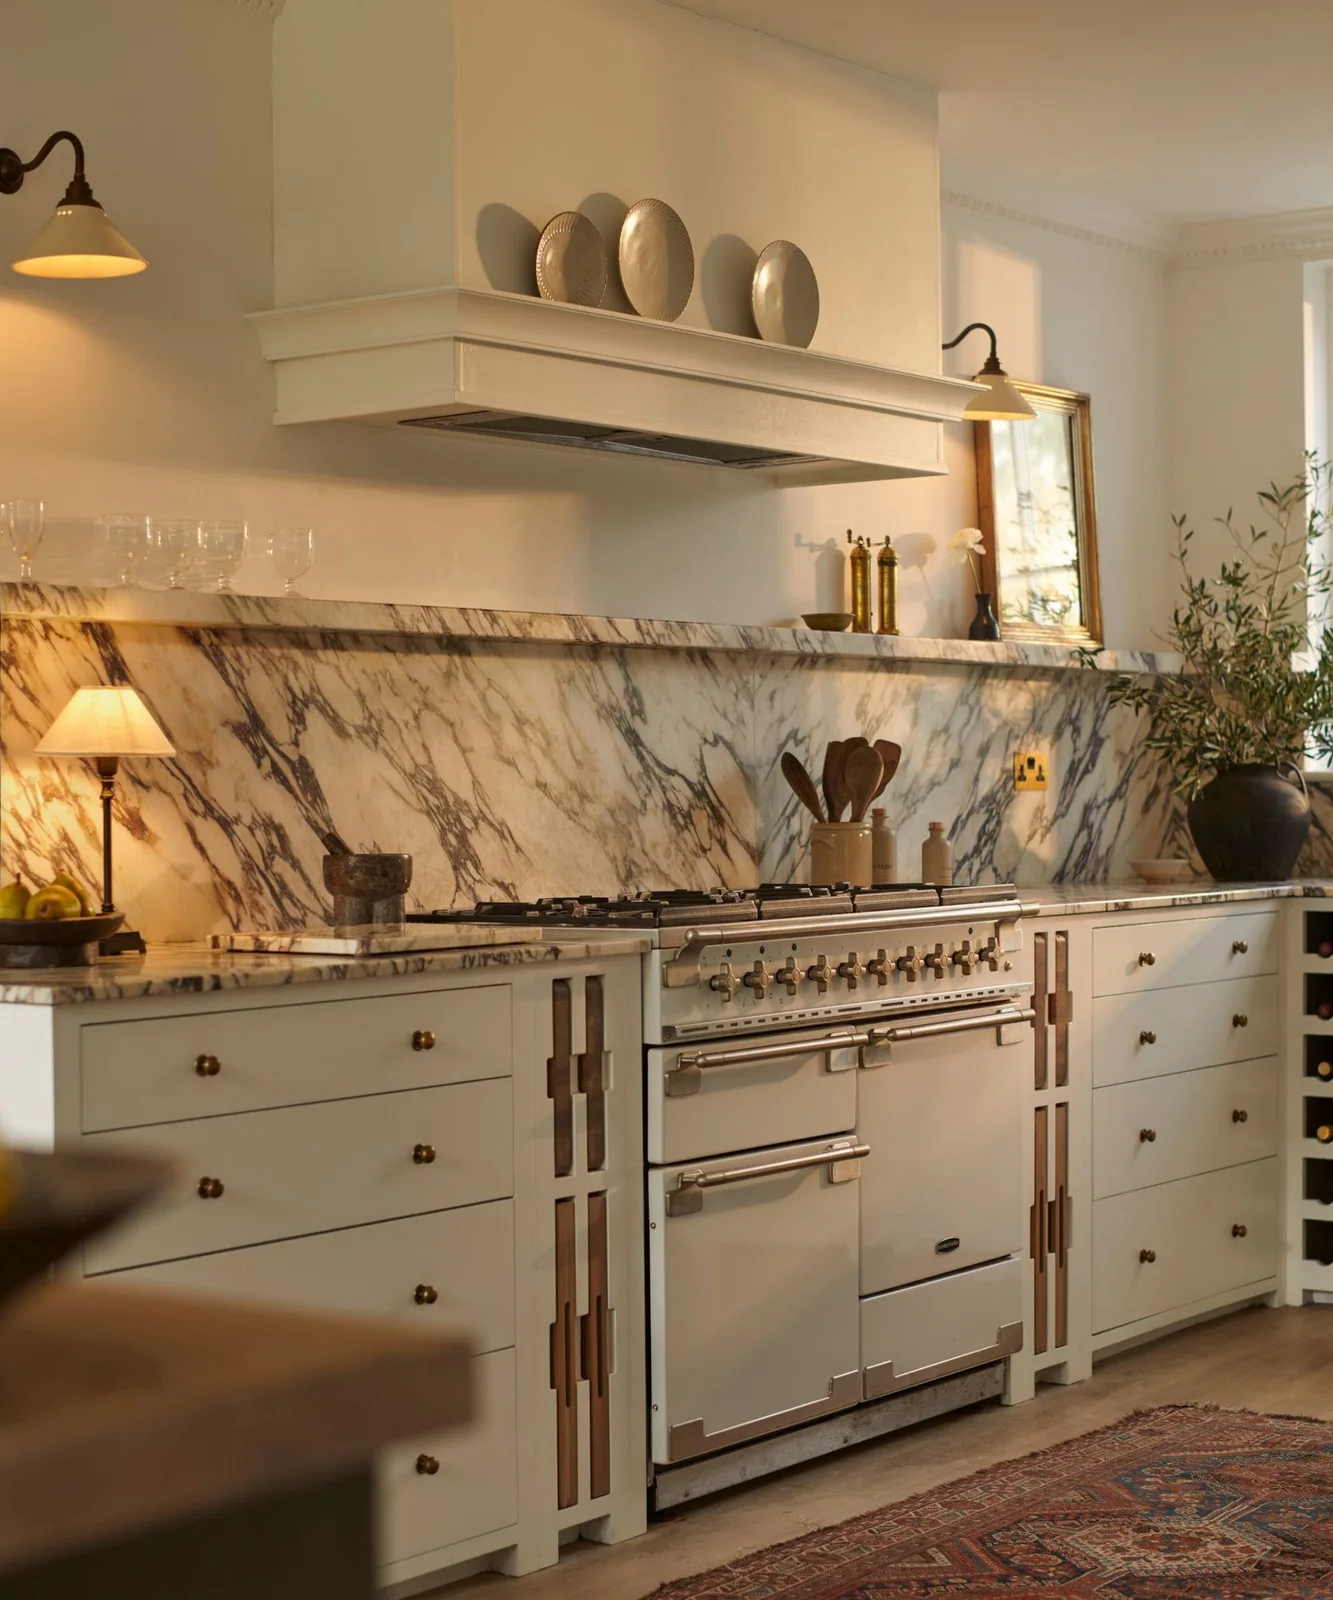
The long backsplash creates one clear band behind the range and drawers, giving the white furniture a stronger outline. The hood remains plain enough to balance the busy veining. Small lamps and cabinet hardware add warmth at a much smaller scale, keeping the cooking wall from feeling visually crowded.
Plan where the protective surface starts and stops before placing sockets or wall lights. Select a backsplash rated for the intended location and follow the appliance clearances. Keep freestanding lamps and their cords outside splash and heat zones; practical task lighting may be better supplied by appropriately installed fixed fittings.
IDEA 12 / 20
Use a Peg Rail Above the Sink
 SaveSupport Non AI Creator
Image credit: Benchmarx
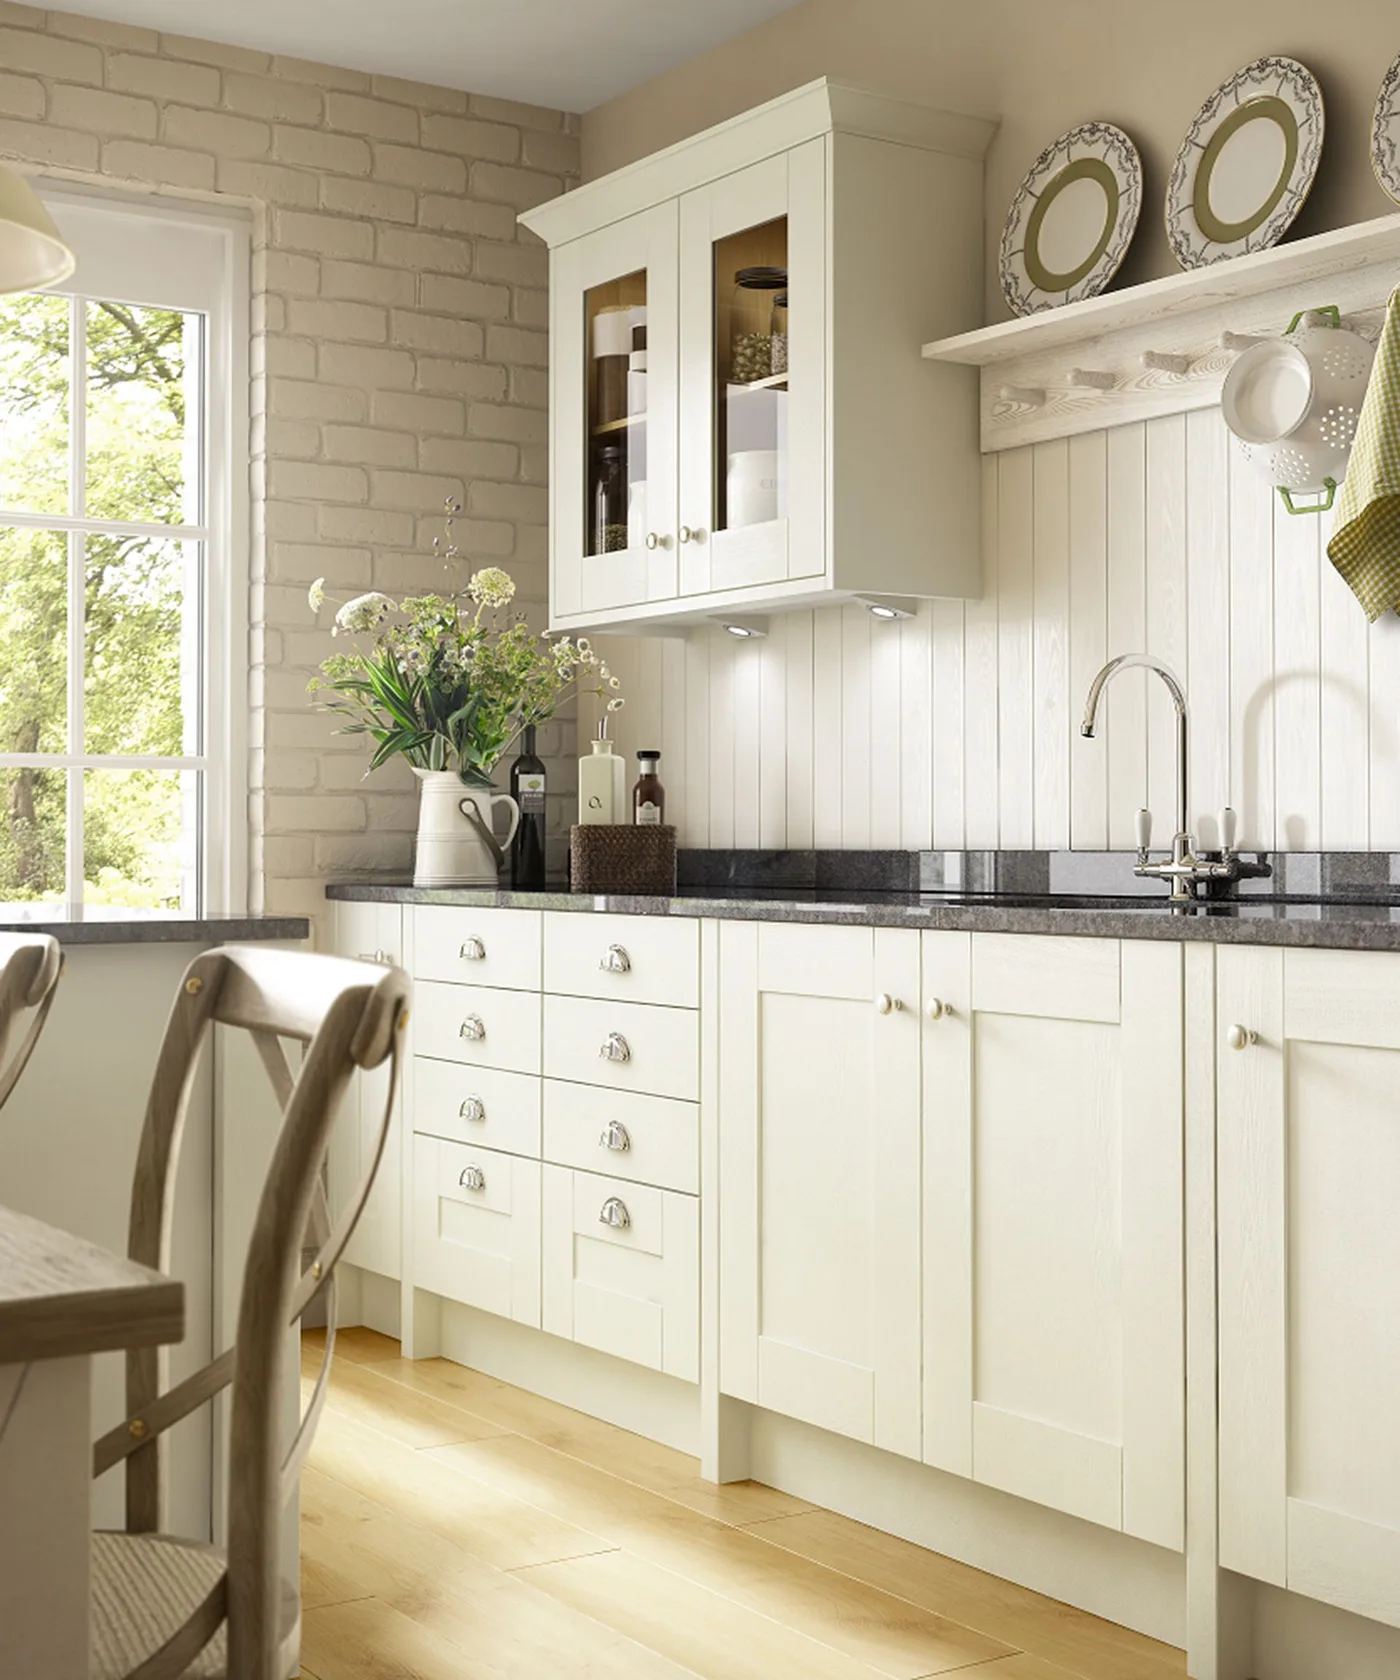
The peg rail combines a narrow display ledge with hooks, giving the wall a useful function between the cupboard and sink. Vertical boards add a finer texture beneath it. The dark worktop separates the pale cabinet fronts from the pale wall so the room still has a readable working edge.
Keep hooks for lightweight items that will not obstruct the tap or swing into the sink. A paneled splash area needs a finish and installation suited to moisture, including vulnerable joints. Wipe splashes promptly, and keep everyday dishes low enough to reach without standing on a chair or leaning across a wet counter.
IDEA 13 / 20
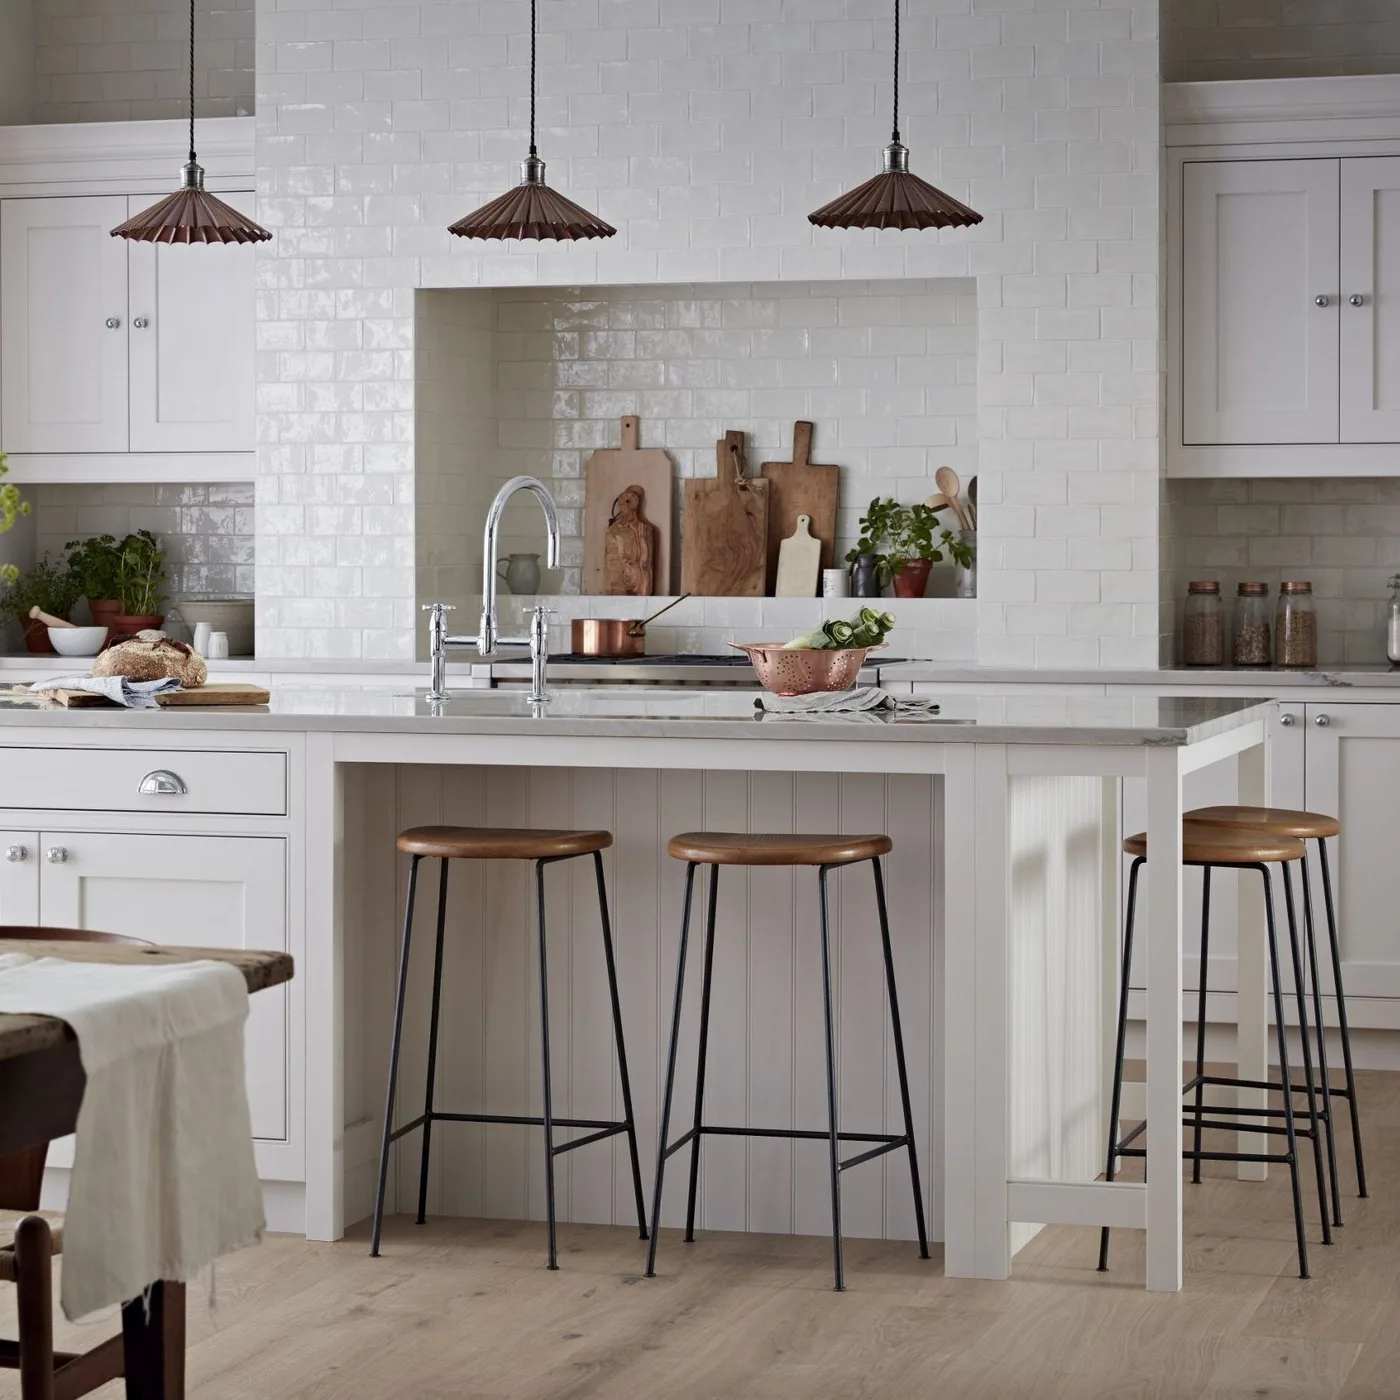
Carry White Tile Around the Cooker Recess
 SaveSupport Non AI Creator
Image credit: Future PLC/Jon Day
White tile continues around the recess, making the cooking wall read as one substantial feature rather than a small patch behind the range. The island repeats the pale palette with finer vertical boards. Brown fluted shades and wood-topped stools bring texture without introducing another large block of color.
Choose grout color and joint width from a sample panel, since they change how strongly the tile pattern reads. Check cleaning access at the recess corners. Our classic kitchen backsplash ideas show other restrained patterns; make the heat resistance and appliance guidance part of the choice before considering the decorative finish.
IDEA 14 / 20
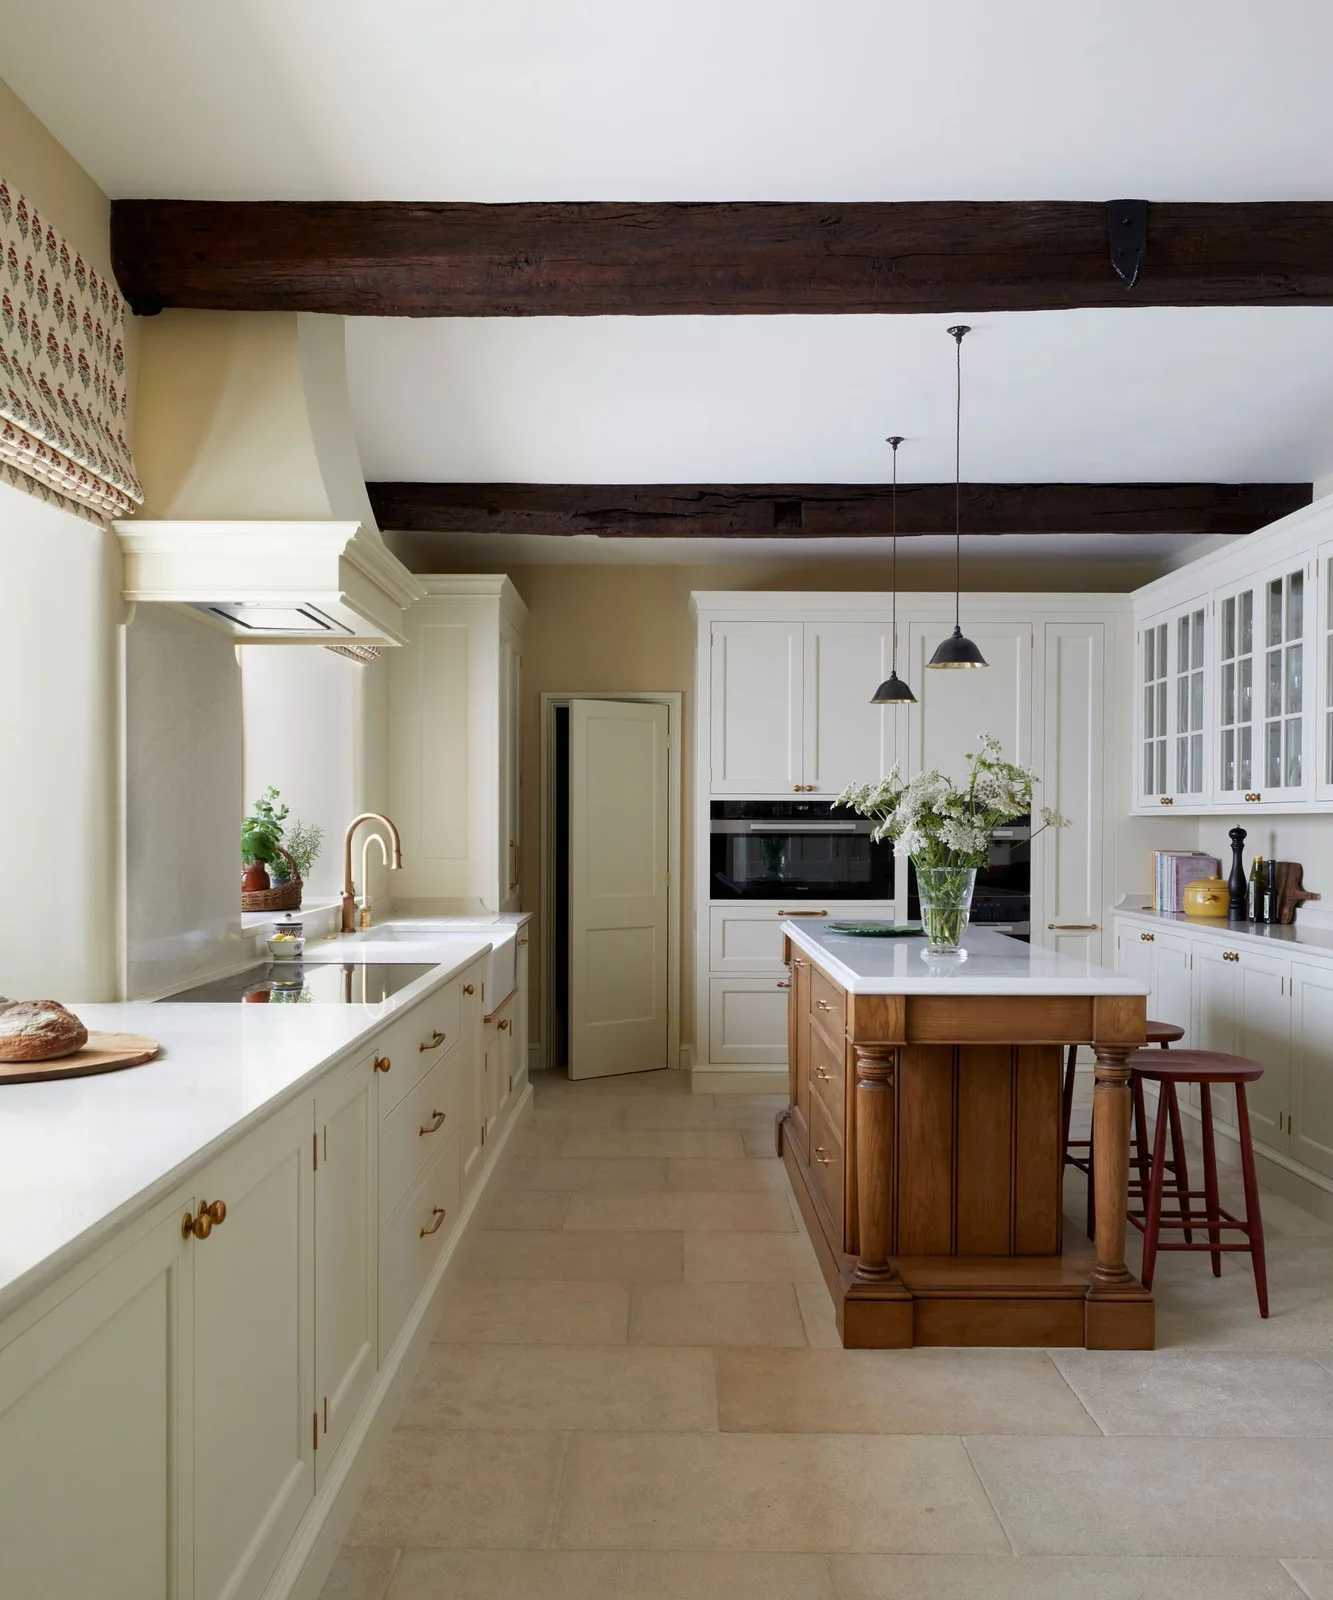
Treat a Narrow Island Like a Furniture Piece
 SaveSupport Non AI Creator
Image credit: VSP Interiors/Paul Massey Photography
The narrow wood island looks closer to a piece of furniture than a solid block of cabinetry. Its turned posts introduce traditional detail at a small scale. White cabinets run along the surrounding walls, while dark beams and a pair of small pendants give the ceiling a clear rhythm.
Map the island position on the floor before ordering, including the space needed for drawers and oven doors. Make sure a furniture-style base still provides the support required for its worktop. Keep stool legs out of the main passage, and choose a floor-cleaning routine suited to the actual tile and grout.
IDEA 15 / 20
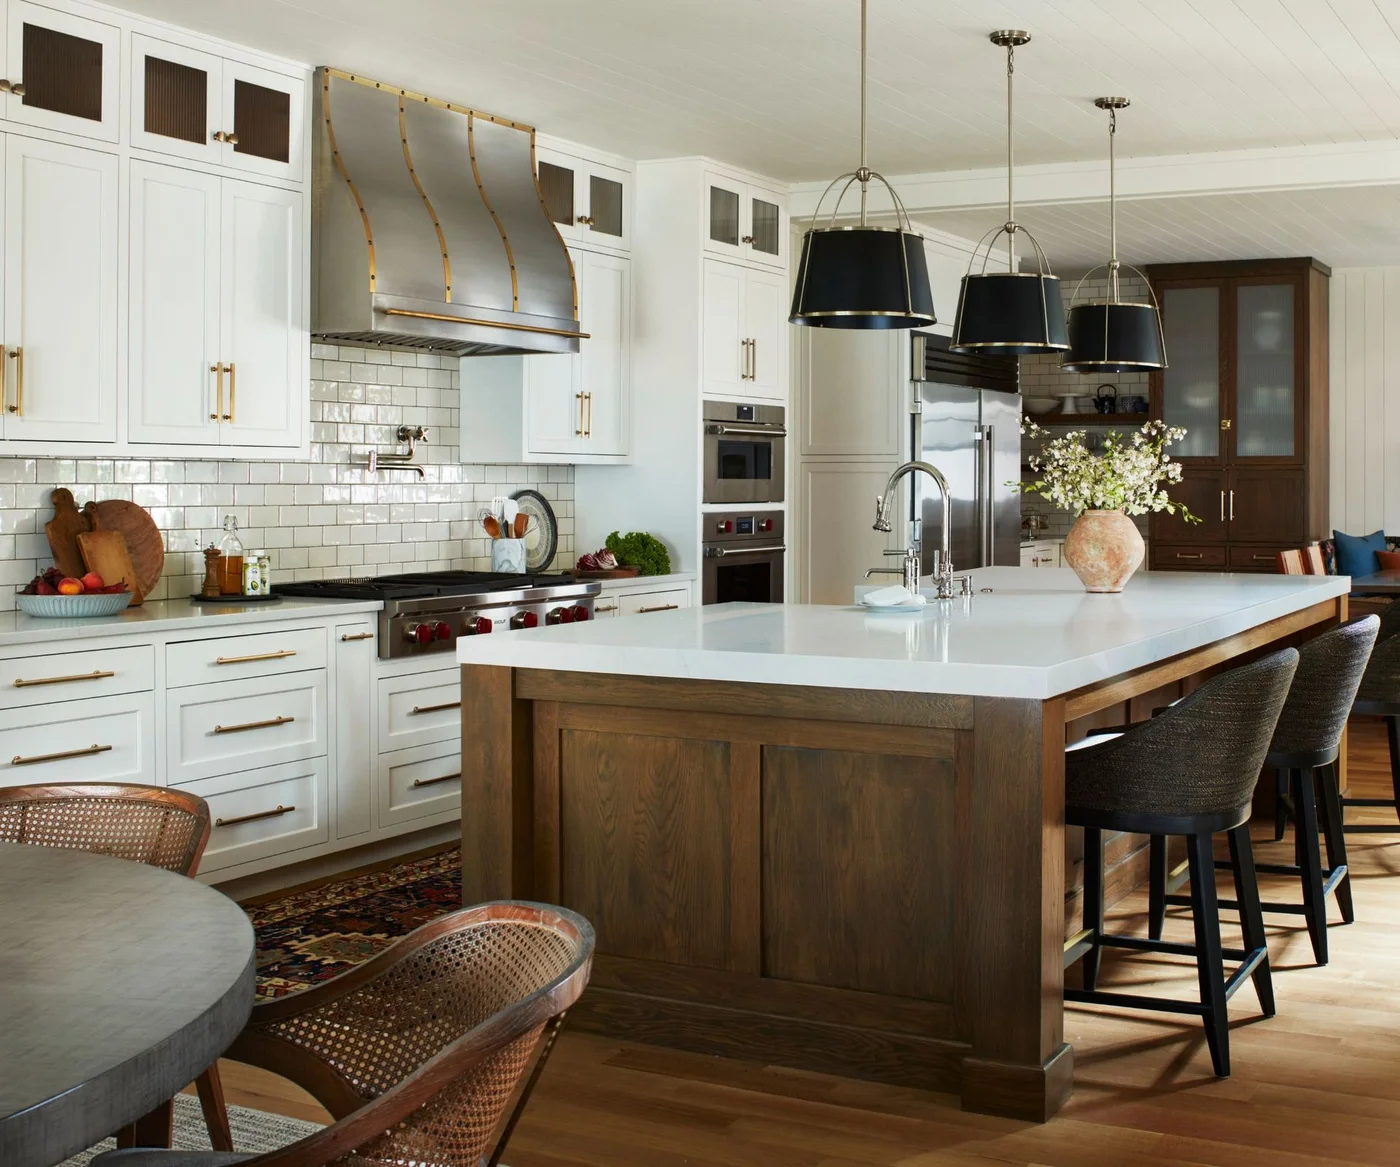
Balance a Large Hood With Dark Pendants
 SaveSupport Non AI Creator
Image credit: Camden Grace / Photography Jared Kuzia / Styling Matthew Gleason
The broad metal hood has enough presence to anchor the cooking wall, while the dark shades repeat its outline above the island. Pale cabinet fronts connect the tall storage around it. A wood island and darker glazed cupboard stop the room from relying on white for every major surface.
Set the hood size and installation height from the cooking appliance and extraction requirements. Plan pendant positions separately so they do not obstruct sightlines or useful overhead space. Dark shades can concentrate light downward, so check the actual light spread and provide task lighting where food preparation happens.
PART 04
Finish the Lighting, Seating and Everyday Details
IDEA 16 / 20
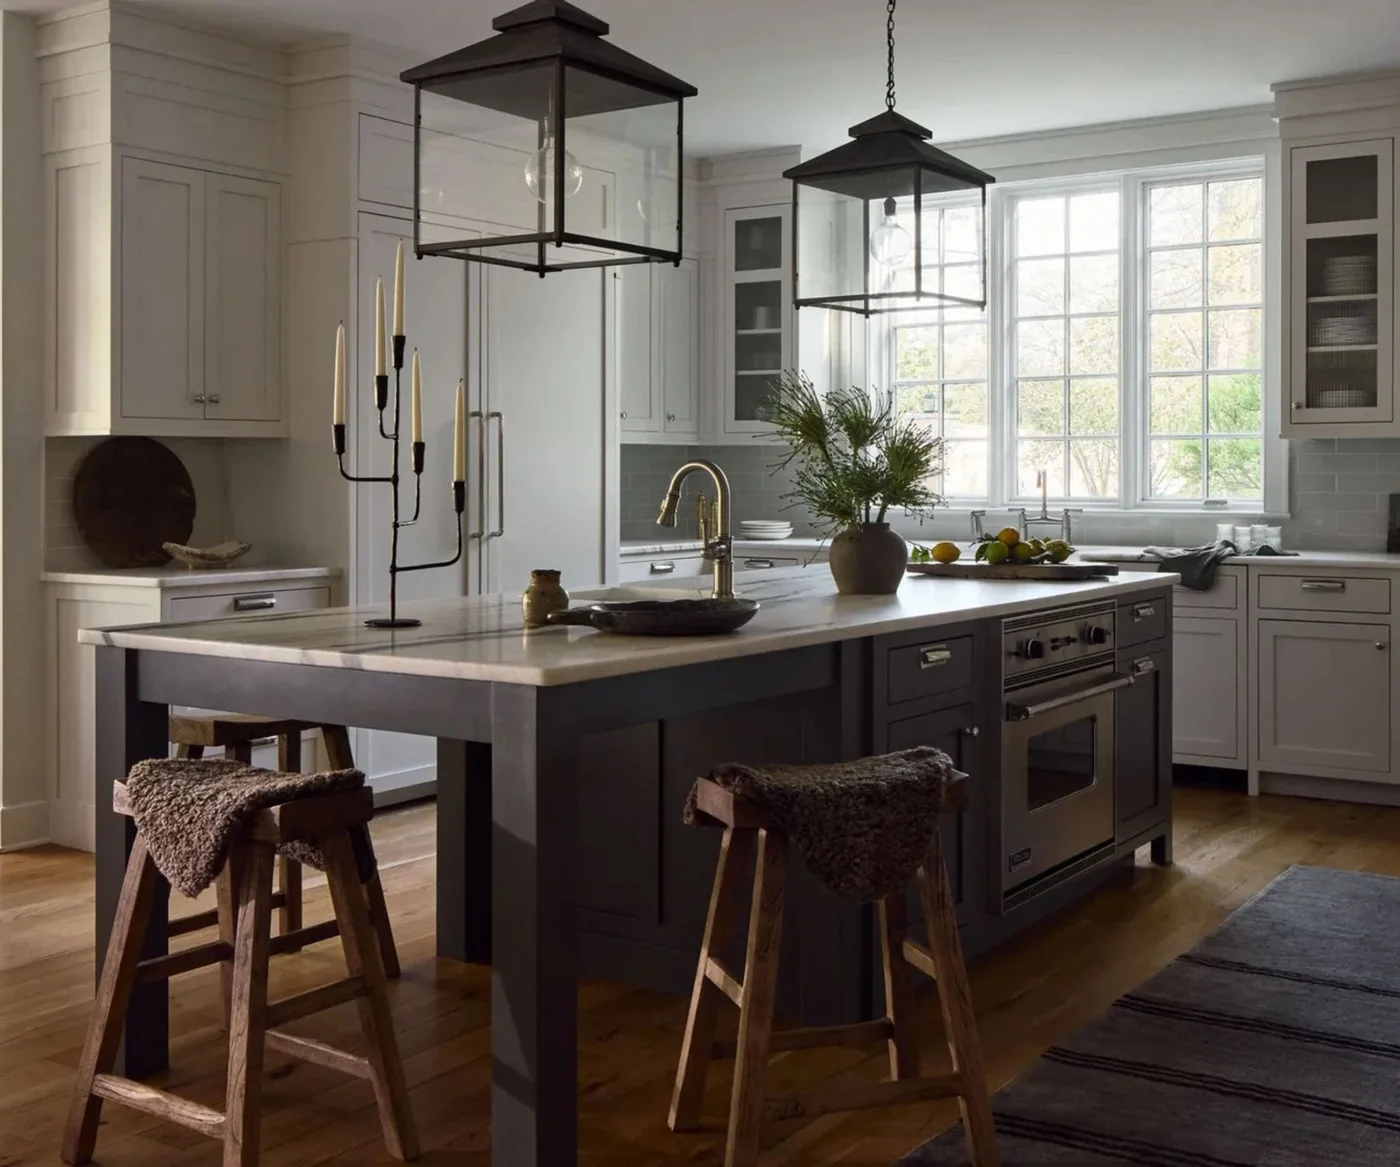
Give a Dark Island a Pale Perimeter
 SaveSupport Non AI Creator
Image credit: Studio Seva/Gieves Anderson
White cupboards and the broad window keep the perimeter light, while the dark island makes the central working area easy to distinguish. Large lantern frames repeat the island’s darker outline without covering the view entirely. The combination brings stronger contrast to a room whose cabinet detailing stays traditional.
Check the oven door and stool positions together before placing seating on an appliance island. Leave the required ventilation and safe working clearances around the equipment. Choose lanterns that can be cleaned easily, and compare their scale from the doorway as well as directly underneath them before committing to a pair.
IDEA 17 / 20
Connect the Hood Trim With the Upper Cabinets
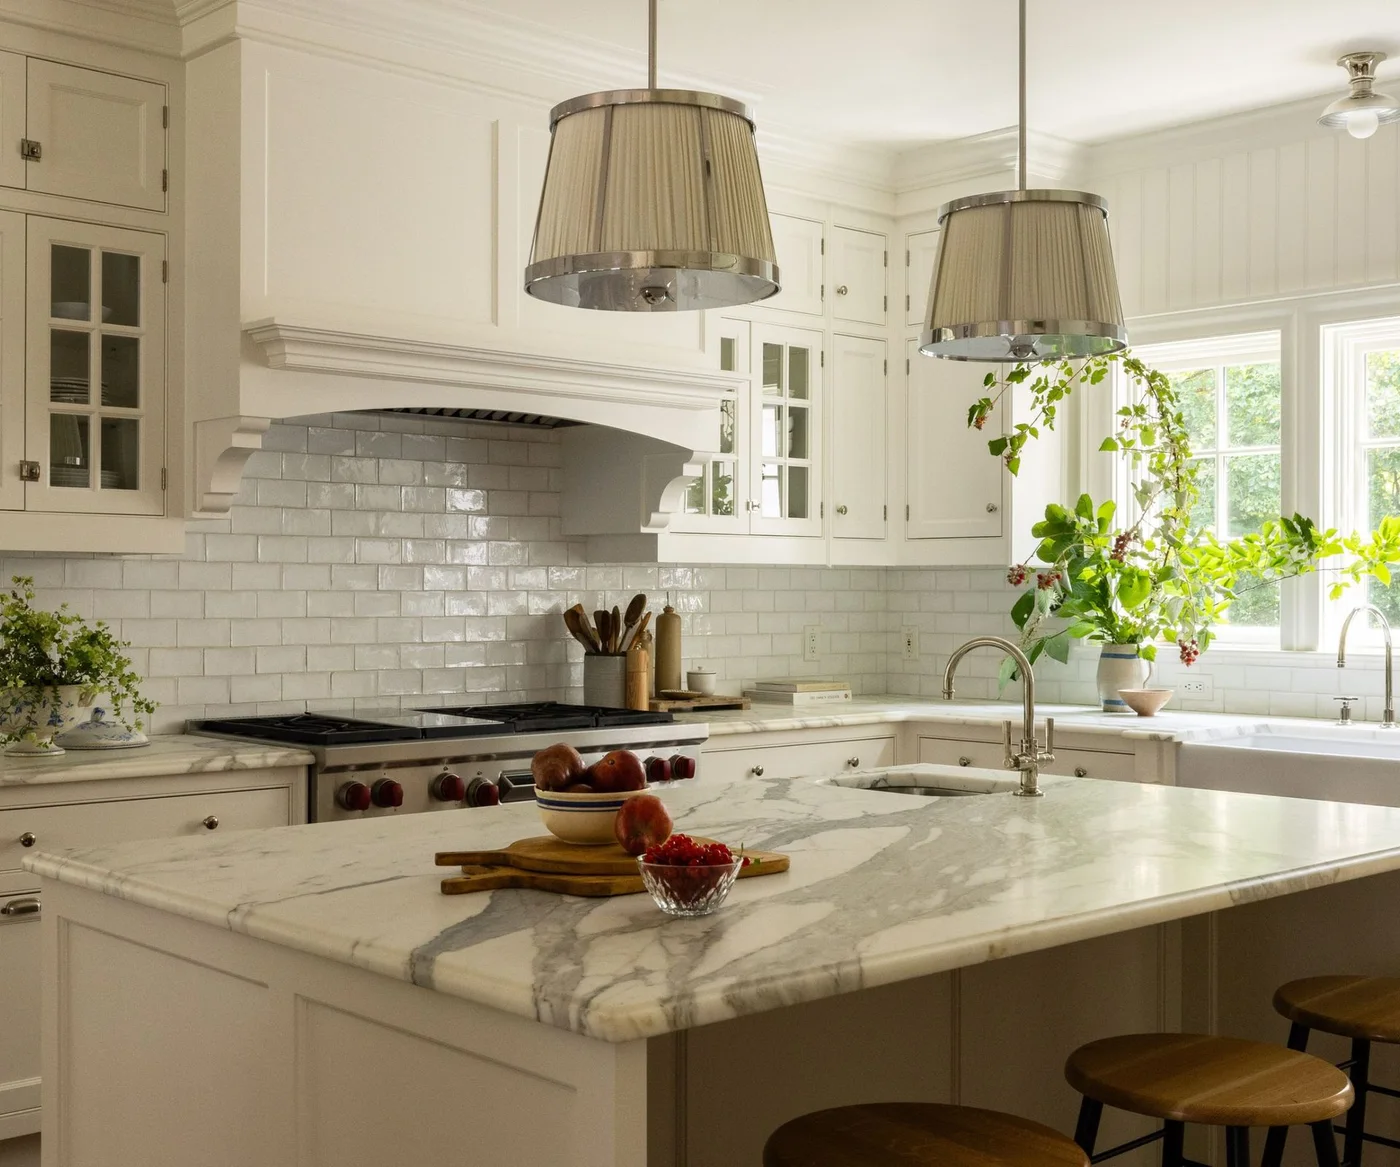 SaveSupport Non AI Creator
Image credit: Thomas Richter
The hood trim echoes the surrounding cabinet moldings, giving the cooking wall a continuous architectural outline. Glazed doors interrupt the solid fronts at either side. The island’s broad veined surface adds pattern below, while the pale pendant shades keep the upper portion of the room relatively quiet.
Detailed trim creates more ledges to clean, so choose profiles you are comfortable maintaining near a range. Compare a small island sink against the preparation space it removes and plan the plumbing before ordering cabinetry. Keep fresh branches clear of light fittings and working areas rather than copying a large photographic arrangement literally.
IDEA 18 / 20
Use a Small Pattern Behind Plain White Doors
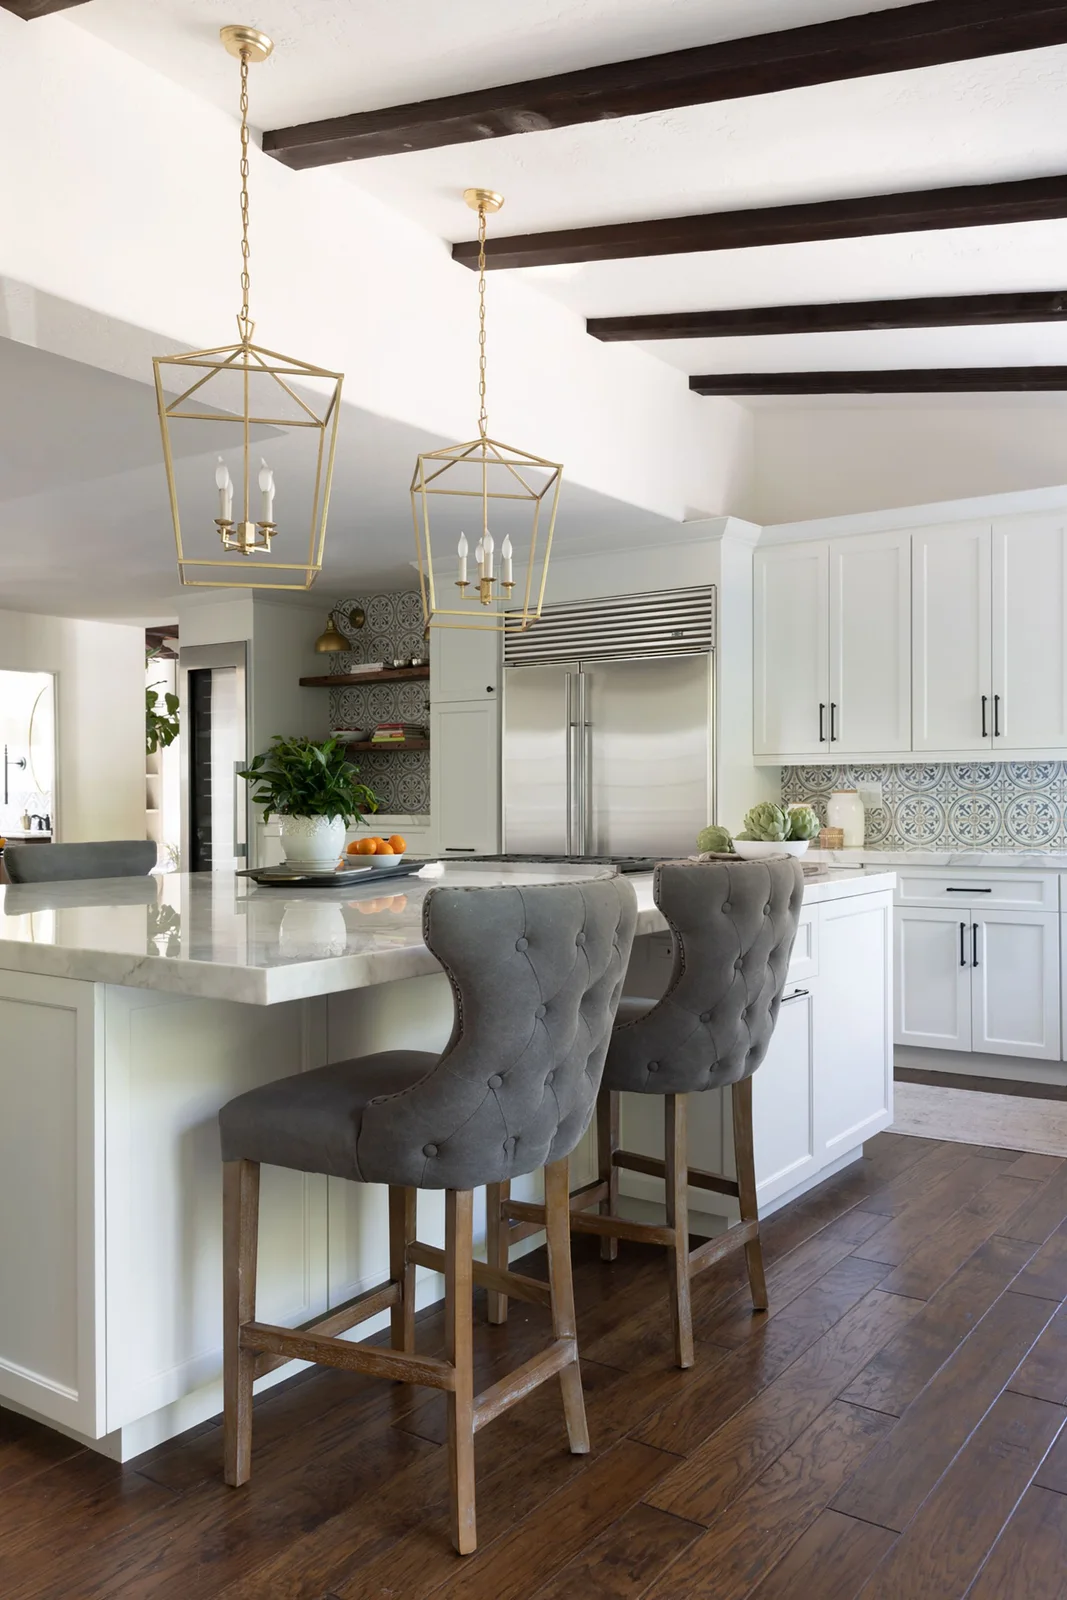 SaveSupport Non AI Creator
Image credit: Molly Rose Photography
The patterned backsplash supplies a repeated motif between the white worktop and plain upper doors. Dark beams give the ceiling structure a separate, broader pattern. Gray seats pick up the cooler tile tones, while the lanterns add warmth without requiring another colored cabinet run.
Choose the tile using a group of pieces rather than judging one square in isolation. Check how the pattern ends at corners, shelves and sockets. Upholstered stools need enough clearance for cleaning around the island base, and removable or easily maintained coverings are useful where meals will be eaten every day.
IDEA 19 / 20
Repeat Dark Details at Several Heights
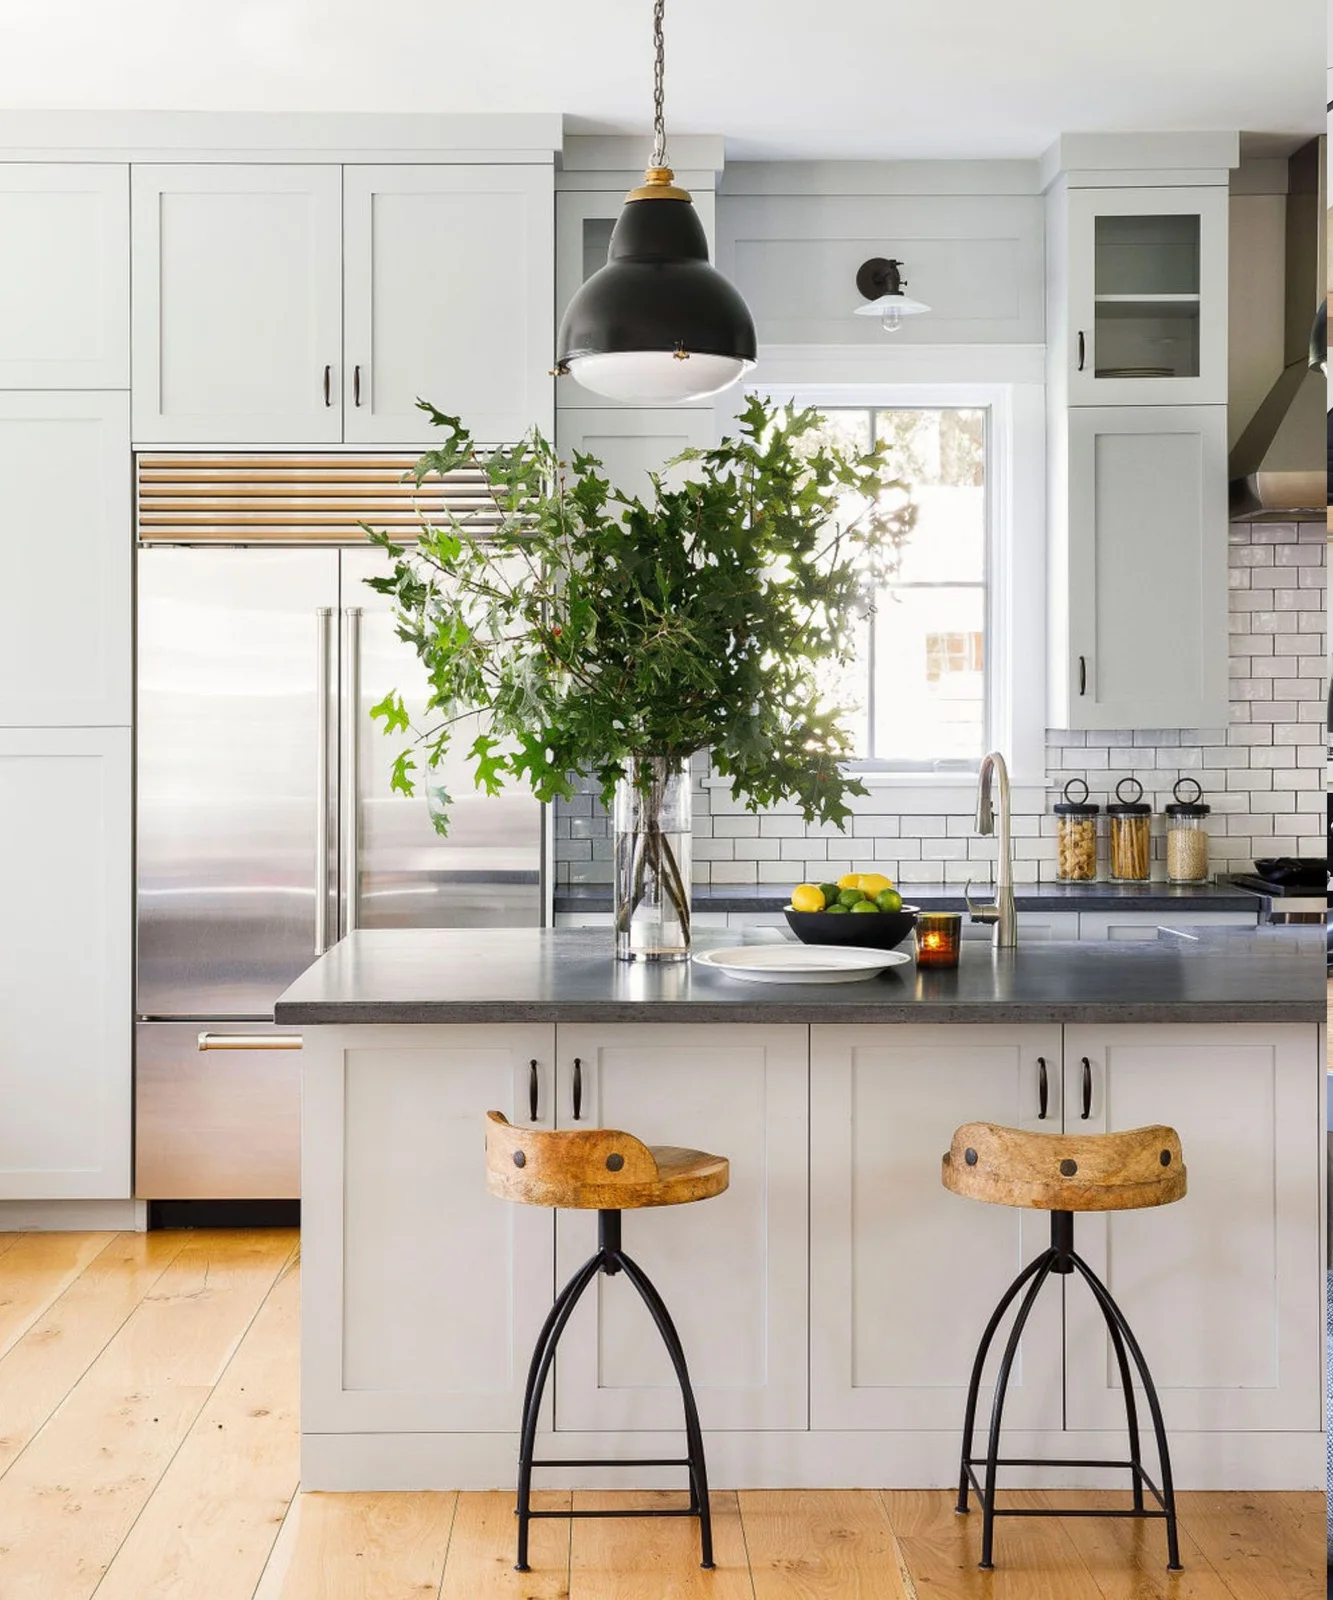 SaveSupport Non AI Creator
Image credit: Interior Allison Babcock, photograph
Dark details appear on the island top, handles, stools and pendant, connecting the room from floor level upward. The broad white cabinet fronts keep those accents from becoming overwhelming. Wood seats and flooring introduce warmth, so the contrast feels less stark than a room finished entirely in black and white.
Compare handle shapes for grip as well as appearance, especially on a heavy refrigerator or pantry door. Leave room for the stool bases without catching passing feet. A tall vase can be moved for entertaining, but keep the everyday island arrangement low enough to preserve a useful view across the working surface.
IDEA 20 / 20
Keep Traditional Accessories Within Easy Reach
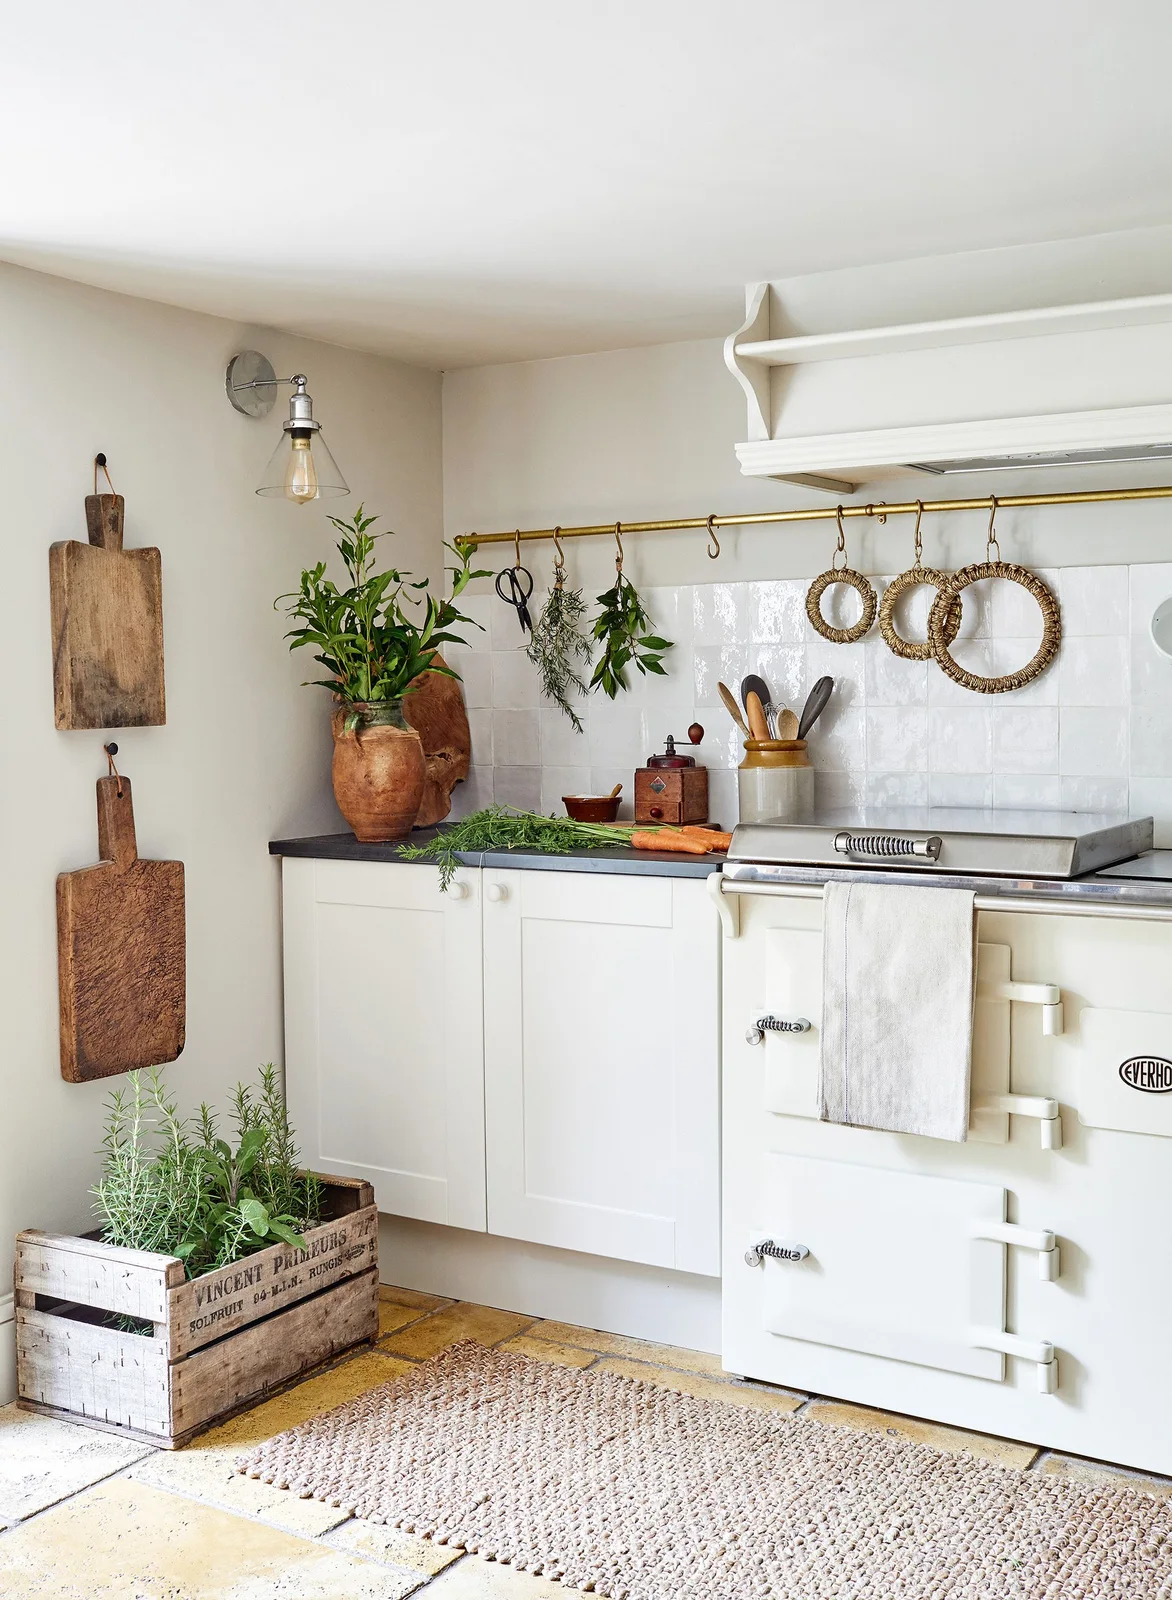 SaveSupport Non AI Creator
Image credit: Brent Darby
A short rail and a few wood boards give this small white corner a collected feel without adding more cabinetry. The dark counter separates the pale cooker from the white wall tile. Most accessories stay at the edge, leaving a recognizable working section beside the appliance.
Keep hanging objects, dried stems and textiles outside the appliance’s required heat clearances. Use only the hooks that can be reached comfortably and secure heavier boards with appropriate fixings. Choose a few useful pieces rather than filling every hook, allowing the counter and nearby floor to remain easy to clean.
BRING IT ALL TOGETHER
Choose the Combination Before the Final White
Bring the cabinet sample, counter, flooring and hardware together in the room’s actual light. A white that looks clean beside one surface may look colder or creamier beside another. Keep the overall combination in view before choosing smaller decorative details.
Resolve circulation, appliance clearances, task lighting and storage access before adding display shelves or extra seating. Traditional character is easier to enjoy when doors open freely, worktops stay useful and the surfaces suit the maintenance you can realistically give them.