A staircase connects rooms, but its rail, wall and landing also shape the feeling of the entrance. You may only need a better runner or more considered artwork to improve an existing flight. A larger change starts with how the stairs work within the surrounding rooms, not just the appearance of the steps.
These photographs offer ideas for finishes and arrangements rather than construction instructions. Have structural changes, guarding, handrails and lighting checked for your home’s requirements by appropriate professionals. Keep steps and landings clear, and choose decorative details that remain easy to maintain along a route used every day.
PART 01
Choose the Staircase’s Main Outline
IDEA 01 / 20
Give Simple Balusters One Repeated Detail
 SaveSupport Non AI Creator
Image credit: Project: Thos. Moser (via Houzz)
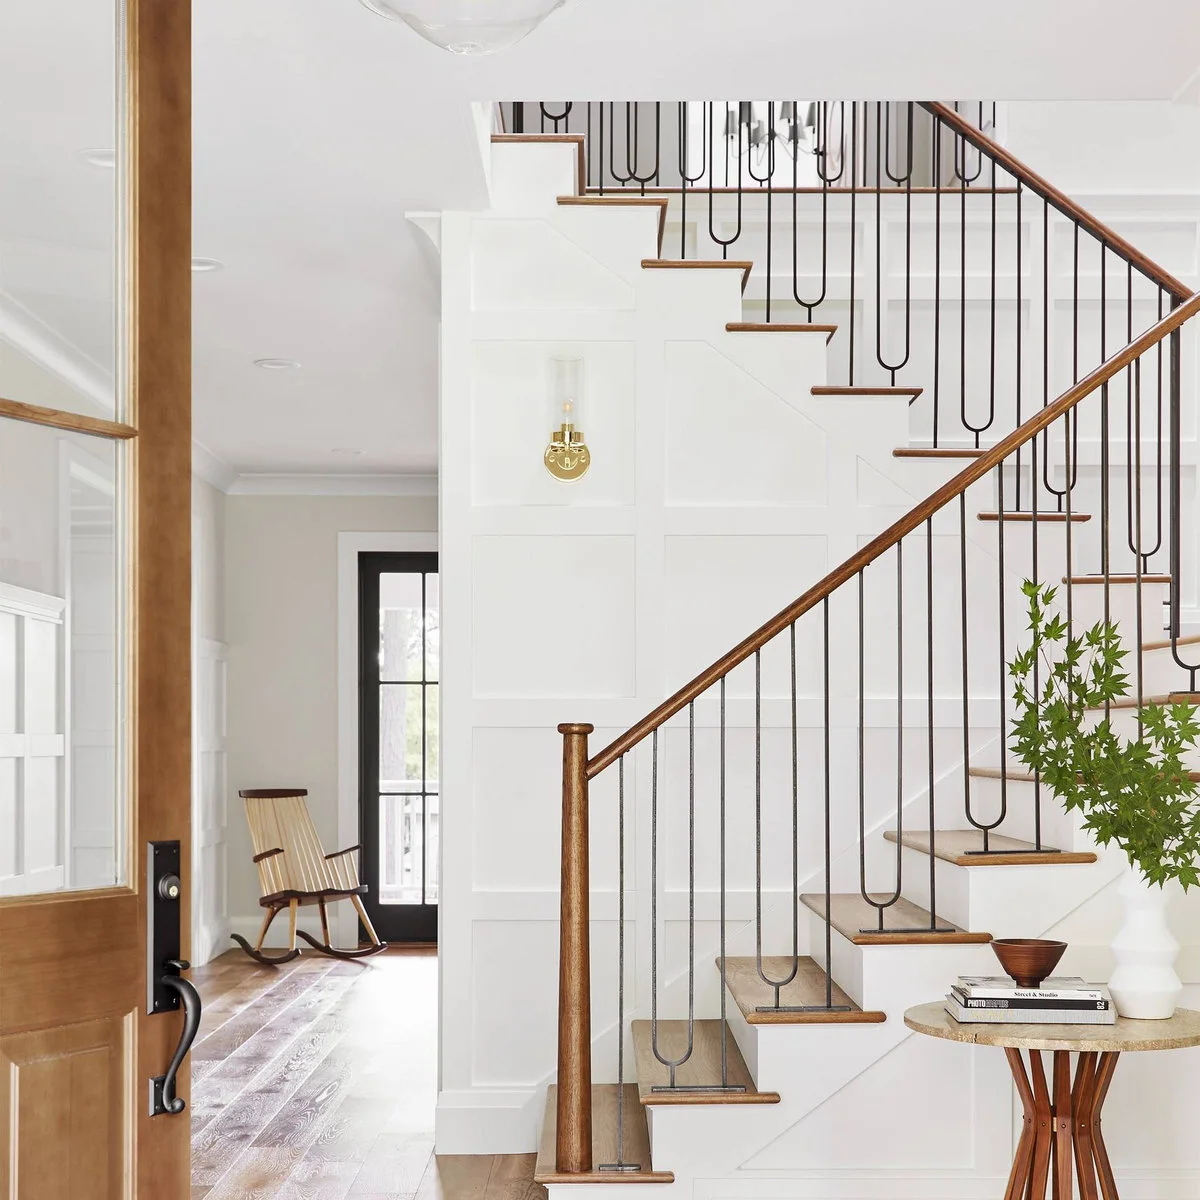
Slim dark balusters include a repeated elongated loop along this white staircase. Wood treads and a matching handrail add warmth, while pale wall paneling gives the flight a structured background. The small repeated detail makes the railing distinctive without filling the entire space with ornament.
Choose the railing as a complete system, with its openings, grip and fixings checked for the home. Keep nearby furniture outside the approach to the first step. When a baluster pattern is already distinctive, simpler artwork or a single wall light can be enough to finish the surrounding space.
IDEA 02 / 20
Pair White Newel Posts with Dark Vertical Lines
 SaveSupport Non AI Creator
Image credit: Project: Coast Salish Woodcrafters (via Houzz)
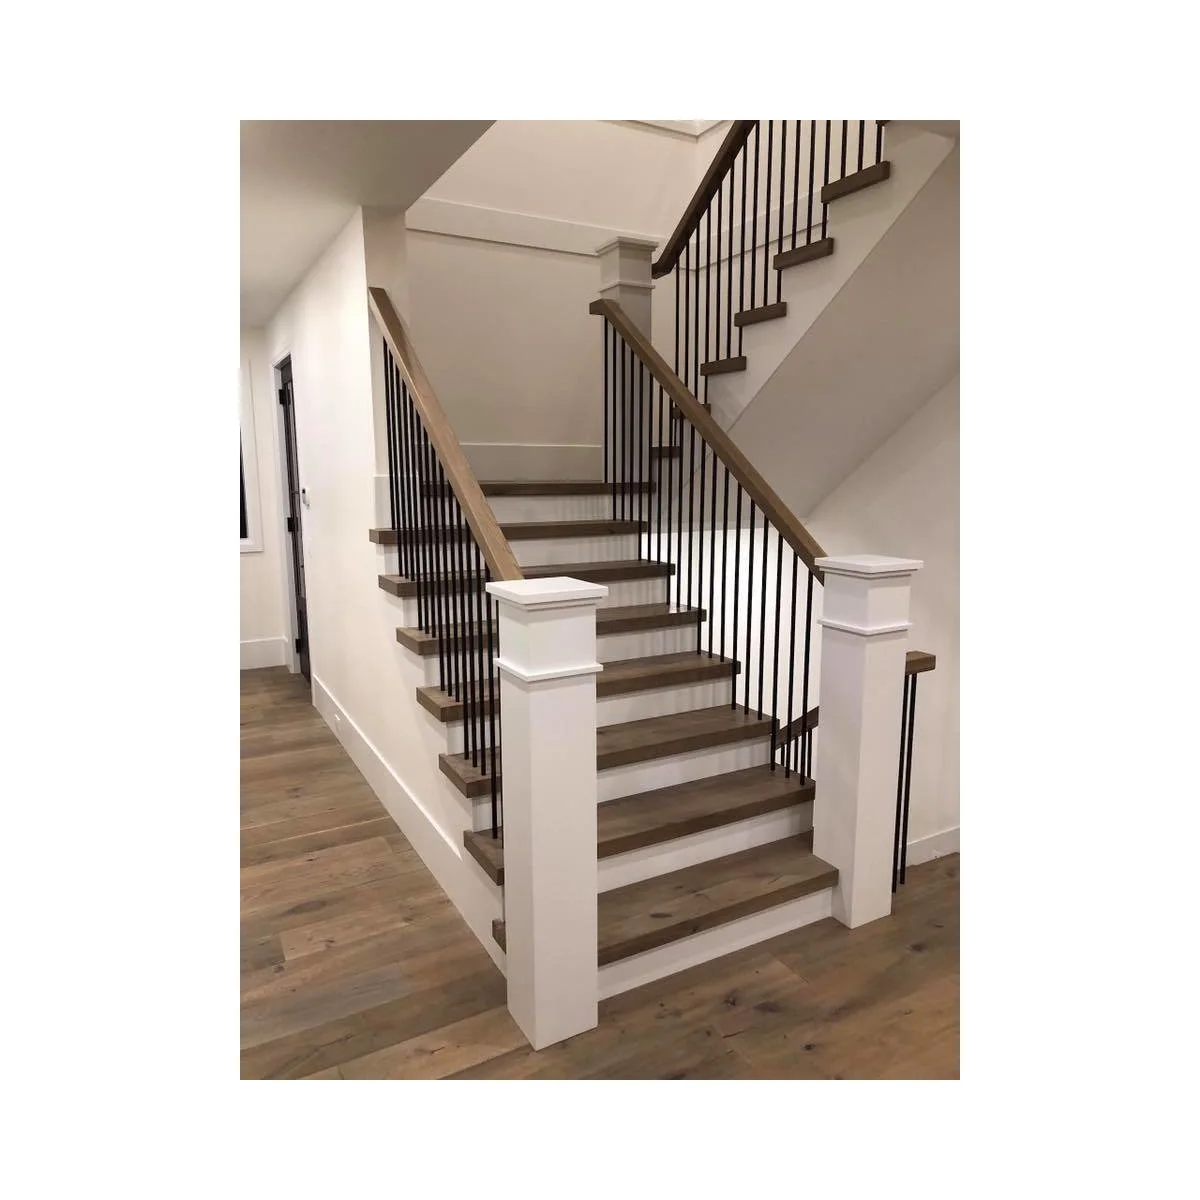
White square newel posts give this turning staircase a substantial outline. Slim black balusters contrast with the lighter posts and risers, while the wood treads relate to the floor below. Repeating the same small group of finishes makes the separate flights feel connected.
Compare the wood stain on a real sample beside the existing floor before refinishing. A close relationship can work without an exact match. Have any replacement rail or post work assessed as part of the whole staircase, and choose a finish that suits repeated handling rather than prioritizing color alone.
IDEA 03 / 20
Keep White Spindles against Warm Wood
 SaveSupport Non AI Creator
Image credit: Project: Providence Design (via Houzz)
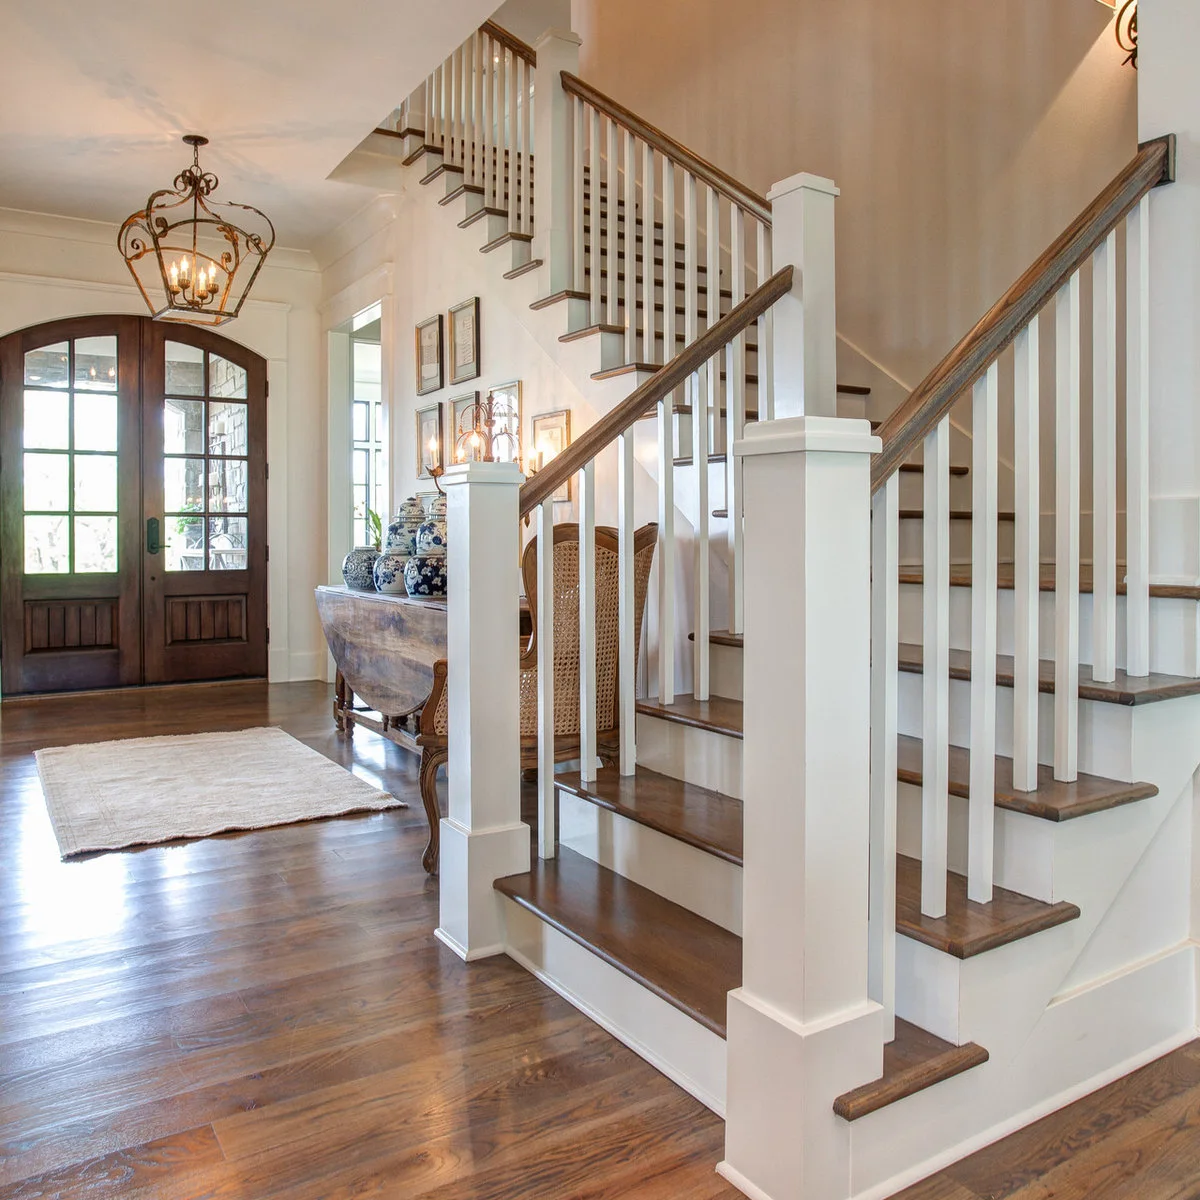
White spindles and risers keep this staircase light against warm wood treads and a matching rail. The pale finish connects to the entry trim, while the wood relates to the front doors and floor. The result feels coordinated without requiring every surface to be the same color.
Test white paint beside the wall and existing trim before choosing its shade. Consider the cleaning and touch-up work along spindles and risers, where scuffs are easy to see. Keep entry tables and chairs far enough from the stair approach that carrying bags or using the handrail remains comfortable.
IDEA 04 / 20
Let Glass Preserve a Window View
 SaveSupport Non AI Creator
Image credit: Project: LMK INTERIOR DESIGN (via Houzz)
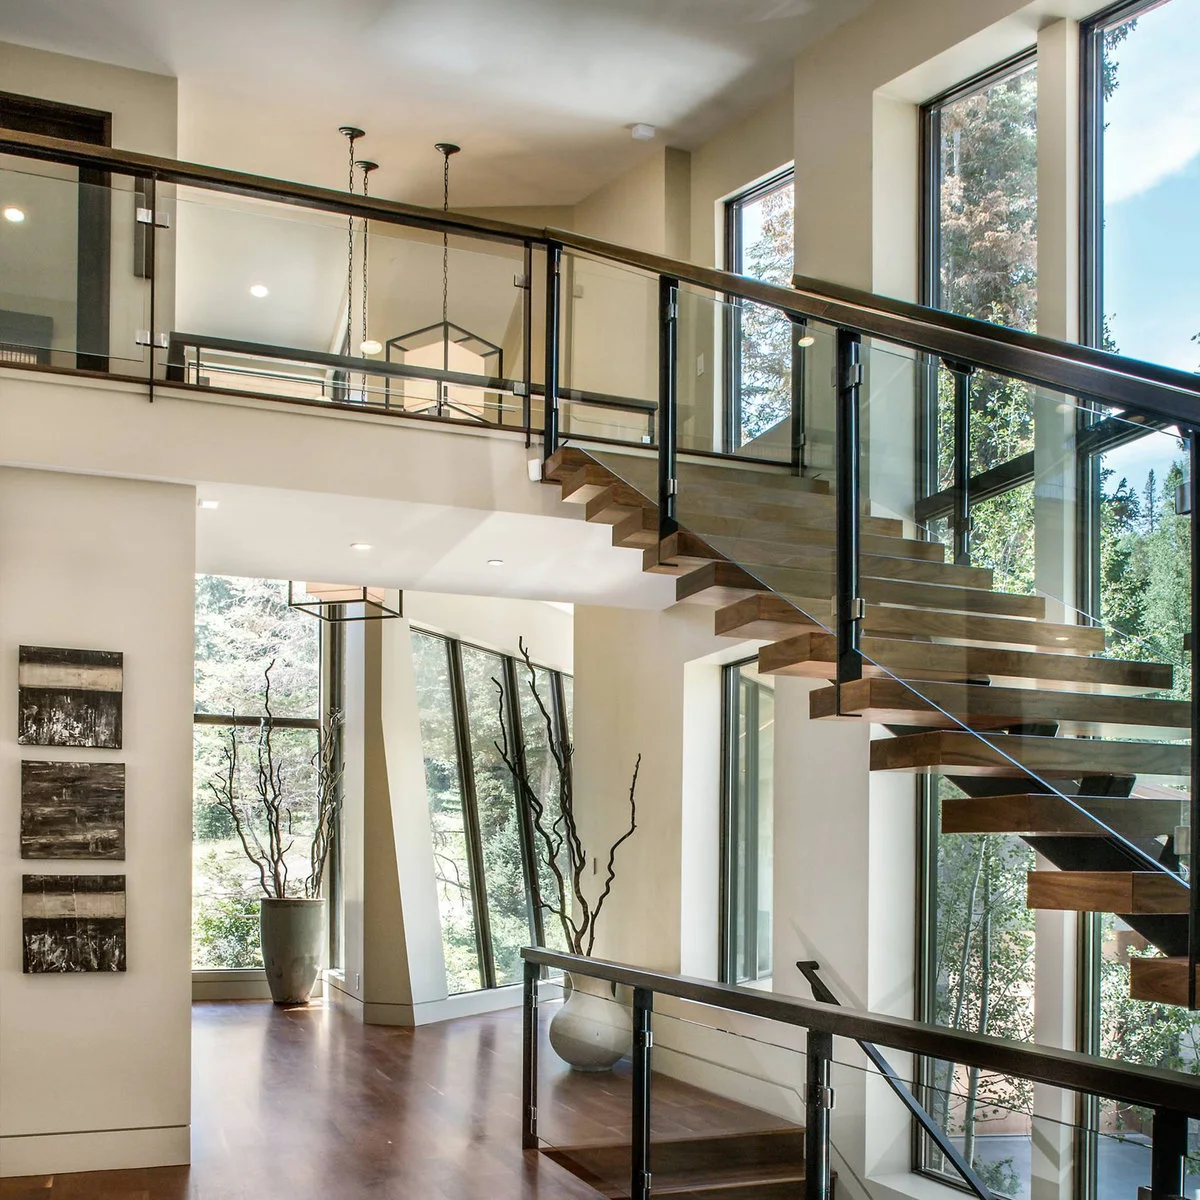
Glass guards leave the tall windows visible beside this open staircase. Dark framing connects the rail to the window outlines, while thick wood treads provide a warmer horizontal element. The transparent sides make the surrounding light and view part of the staircase’s appearance.
Glass needs appropriate specification and professional detailing, including its edges, fixings and handrail arrangement. Consider access for cleaning both sides before choosing it for a tall stairwell. An open-riser appearance is a separate practical decision; assess the complete stair for your household rather than borrowing the visual lightness alone.
IDEA 05 / 20
Use a Continuous Rail to Follow a Turn
 SaveSupport Non AI Creator
Image credit: Project: DKOR Interiors Inc.- Interior Designers Miami, FL (via Houzz)
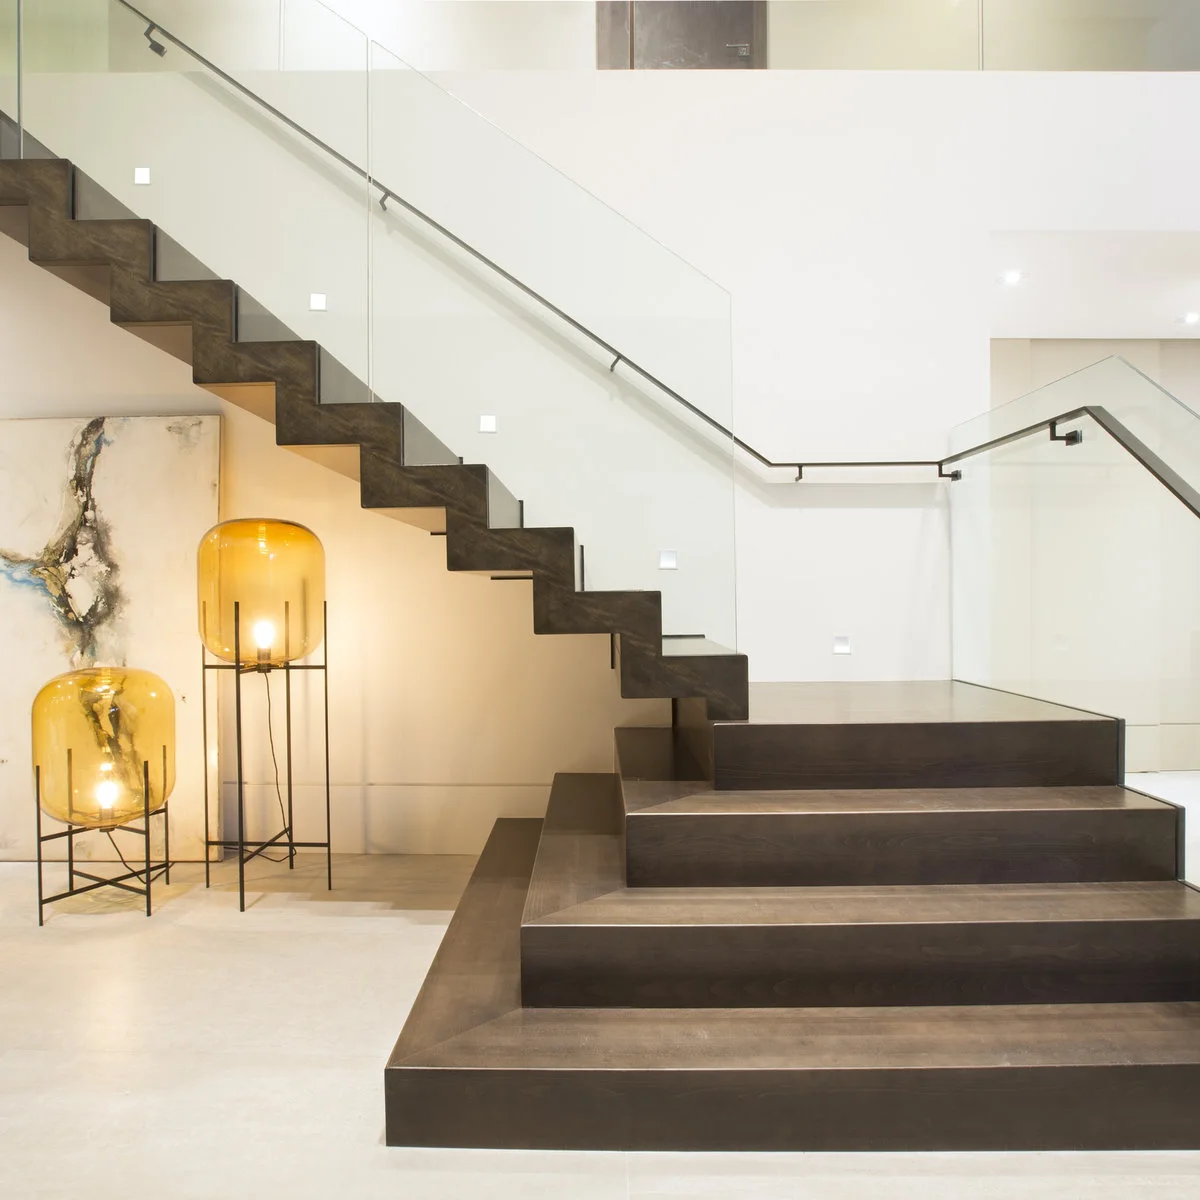
A dark handrail follows the turn of this modern staircase, with glass guards keeping the pale wall visible. Small square wall lights mark the route while the broad lower steps give the flight a clear base. The rail’s line connects the separate parts of the stair visually.
Plan the handrail through changes of direction before choosing isolated pieces of hardware. Its shape, continuity and fixings should be resolved for the actual stair. Keep decorative floor lamps away from the step approach, and ensure the working stair lighting makes edges readable rather than relying entirely on a dramatic illuminated feature nearby.
PART 02
Give Steps and Walls Character
IDEA 06 / 20
Let a Curved Staircase Carry the Ornament
 SaveSupport Non AI Creator
Image credit: Project: Gary Keith Jackson Design Inc. (via Houzz)
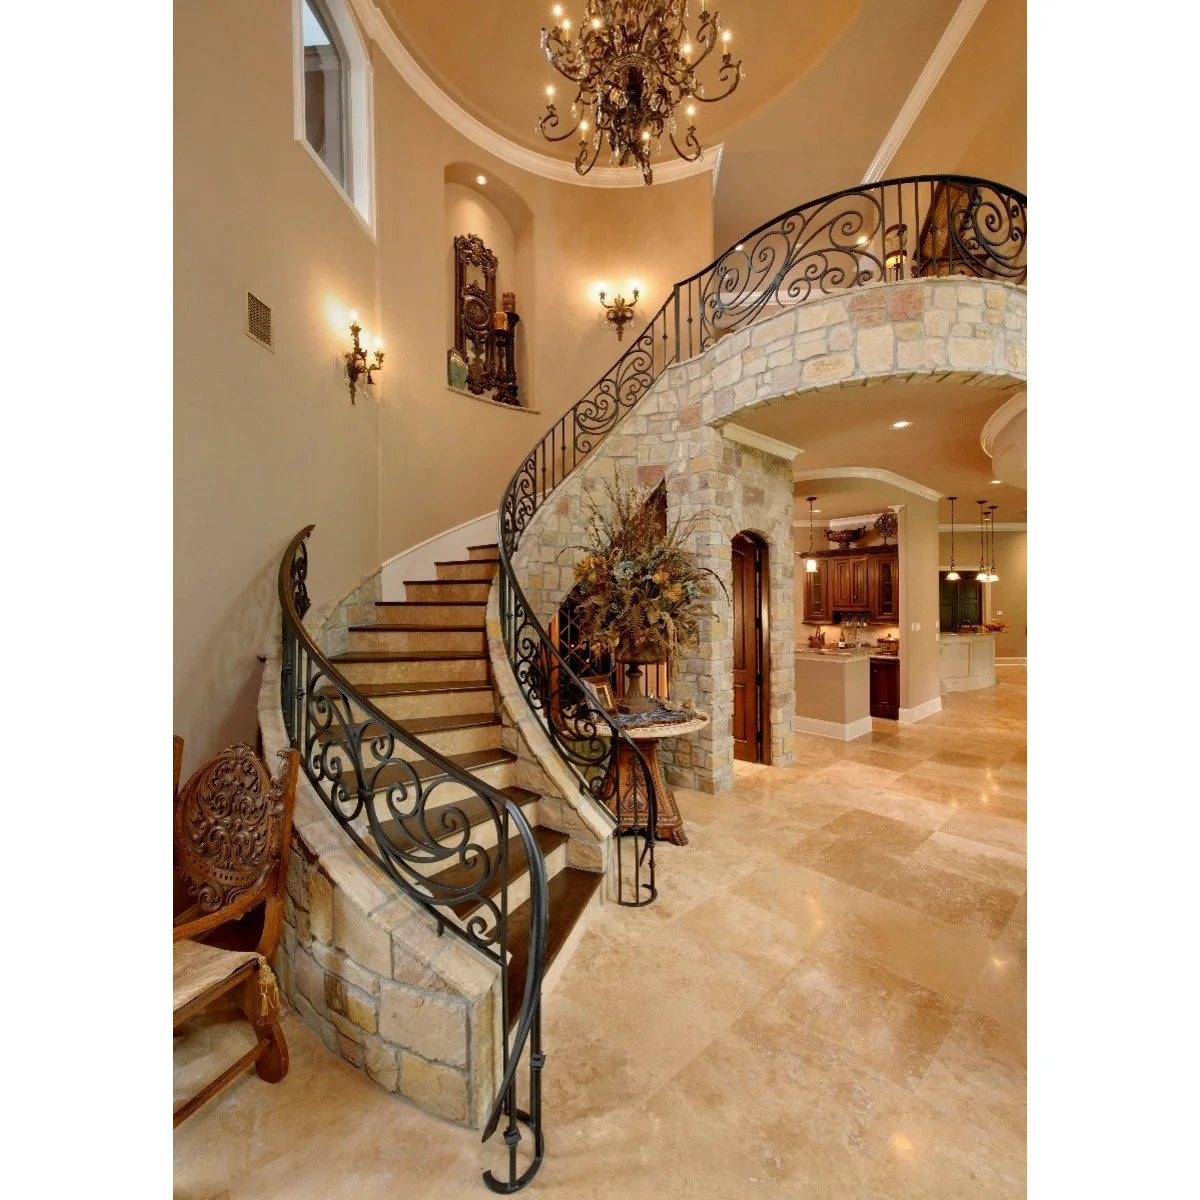
A dark scroll-pattern railing follows the curve of this staircase, while a stone-faced wall gives the lower part visual weight. Warm wall colors and decorative lighting continue the traditional character. The stair’s sweeping outline remains the main feature despite the layered finishes around it.
Choose fewer surrounding objects when the railing and wall already provide substantial detail. Keep the inside and outside of the curve accessible for cleaning. A curved flight is a specialist arrangement, so treat the photograph as inspiration for its finishes rather than a plan for changing tread shapes or railing openings.
IDEA 07 / 20
Put Pattern on the Risers
 SaveSupport Non AI Creator
Image credit: Project: Brown Design Group (via Houzz)
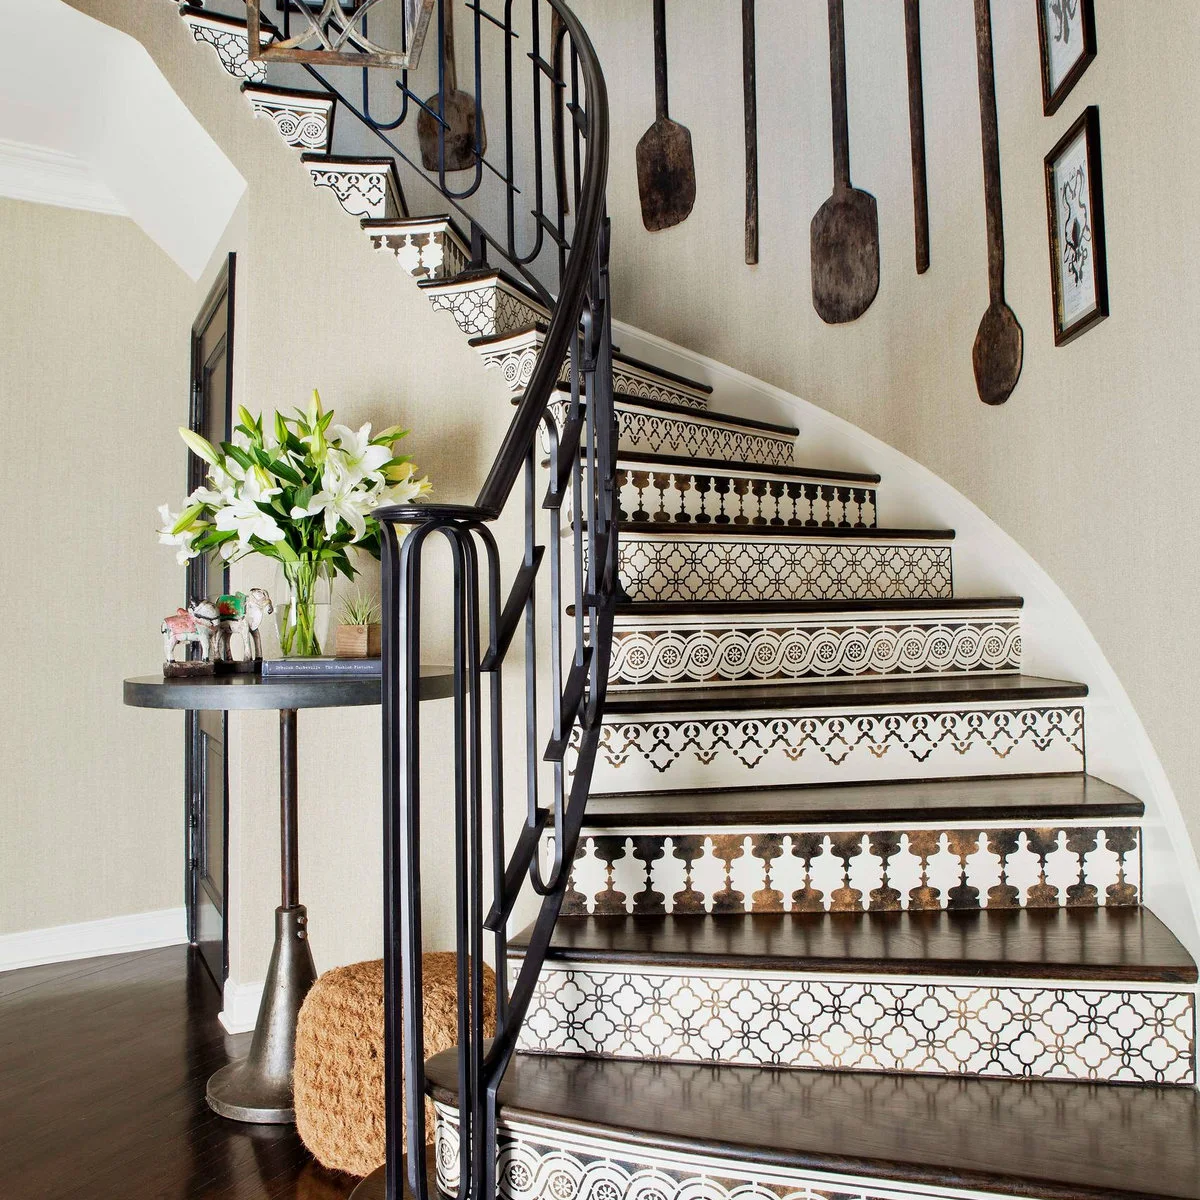
Different black-and-white motifs decorate the risers of this curved staircase, while the dark treads remain plain. The limited palette links the changing patterns and relates to the dark rail. Decoration is concentrated on the vertical faces rather than adding loose objects to the steps.
Compare the whole sequence of motifs before applying a finish to individual risers. Confirm that the chosen product suits the existing surface and will not affect tread edges or dimensions. Keep the tread finish practical for walking, and avoid introducing a second strong pattern on the neighboring wall unless the two work clearly together.
IDEA 08 / 20
Combine Tiled Risers with Small Wall Lights
 SaveSupport Non AI Creator
Image credit: Project: Hochuli Design & Remodeling Team (via Houzz)
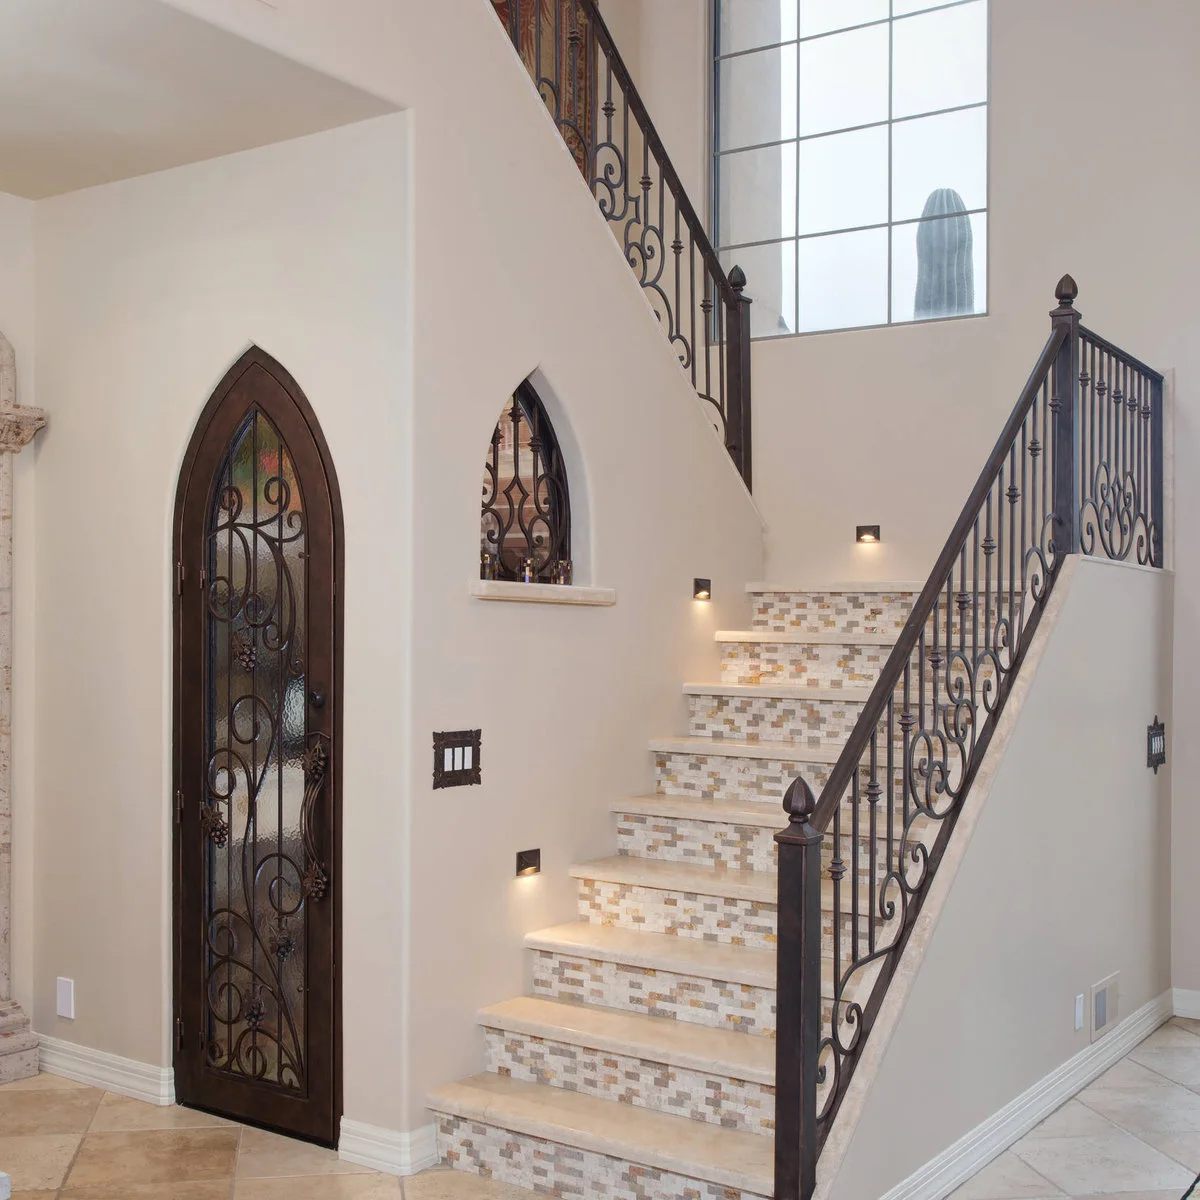
Small warm-toned mosaic pieces cover these risers, with pale treads keeping the walking surfaces distinct. Recessed wall lights follow the lower flight, and the dark decorative rail connects to the nearby door. The tile provides texture without requiring a bold color on every wall.
Plan tile thickness, edges and transitions with a professional before changing a stair finish. The finished steps need to remain consistent and suitable for use. Check how the mosaic joints will be cleaned, and have lighting positioned to show the route without producing distracting glare at eye level.
IDEA 09 / 20
Use the Stair Wall for a Personal Print Collection
 SaveSupport Non AI Creator
Image credit: Project: Dado Interior Design (via Houzz)
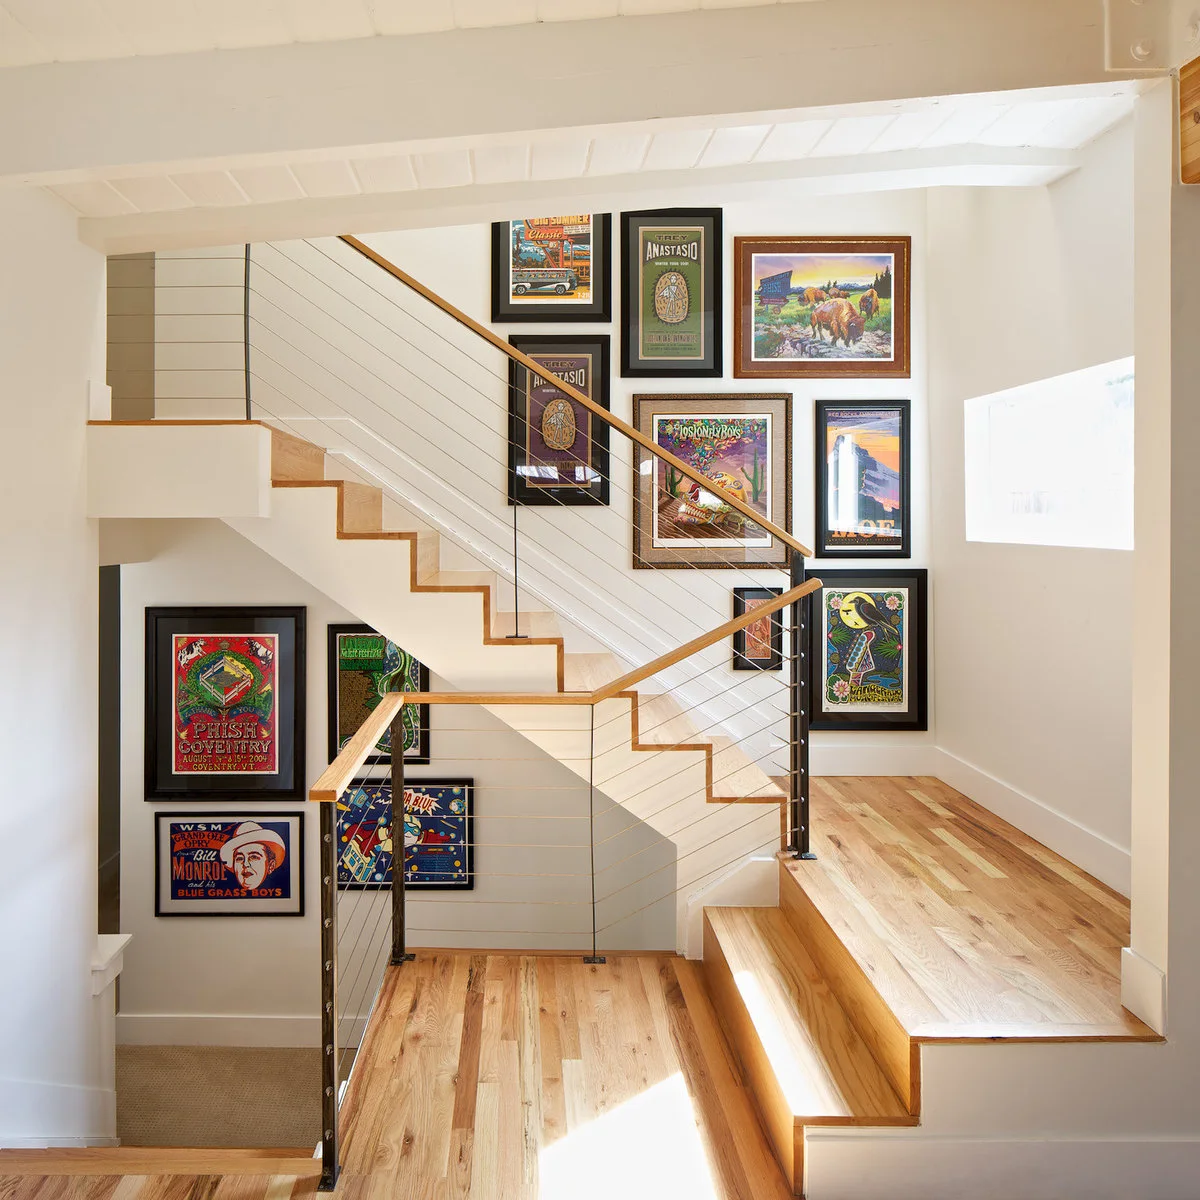
Colorful prints fill the wall beside this pale turning staircase, with wood treads and a slim rail keeping the flight itself comparatively quiet. The frames use related dark outlines despite their different sizes. A personal collection gives the tall wall a purpose beyond simply filling an empty space.
Arrange the frames on paper or removable templates before fixing them, checking the grouping from both the lower hall and landing. Secure each piece and keep it clear of hands moving along the rail. Use the collection you actually enjoy rather than buying enough unrelated prints to cover every gap.
IDEA 10 / 20
Try a Controlled Group of Decorative Frames
 SaveSupport Non AI Creator
Image credit: Project: Frankel Design Build (via Houzz)
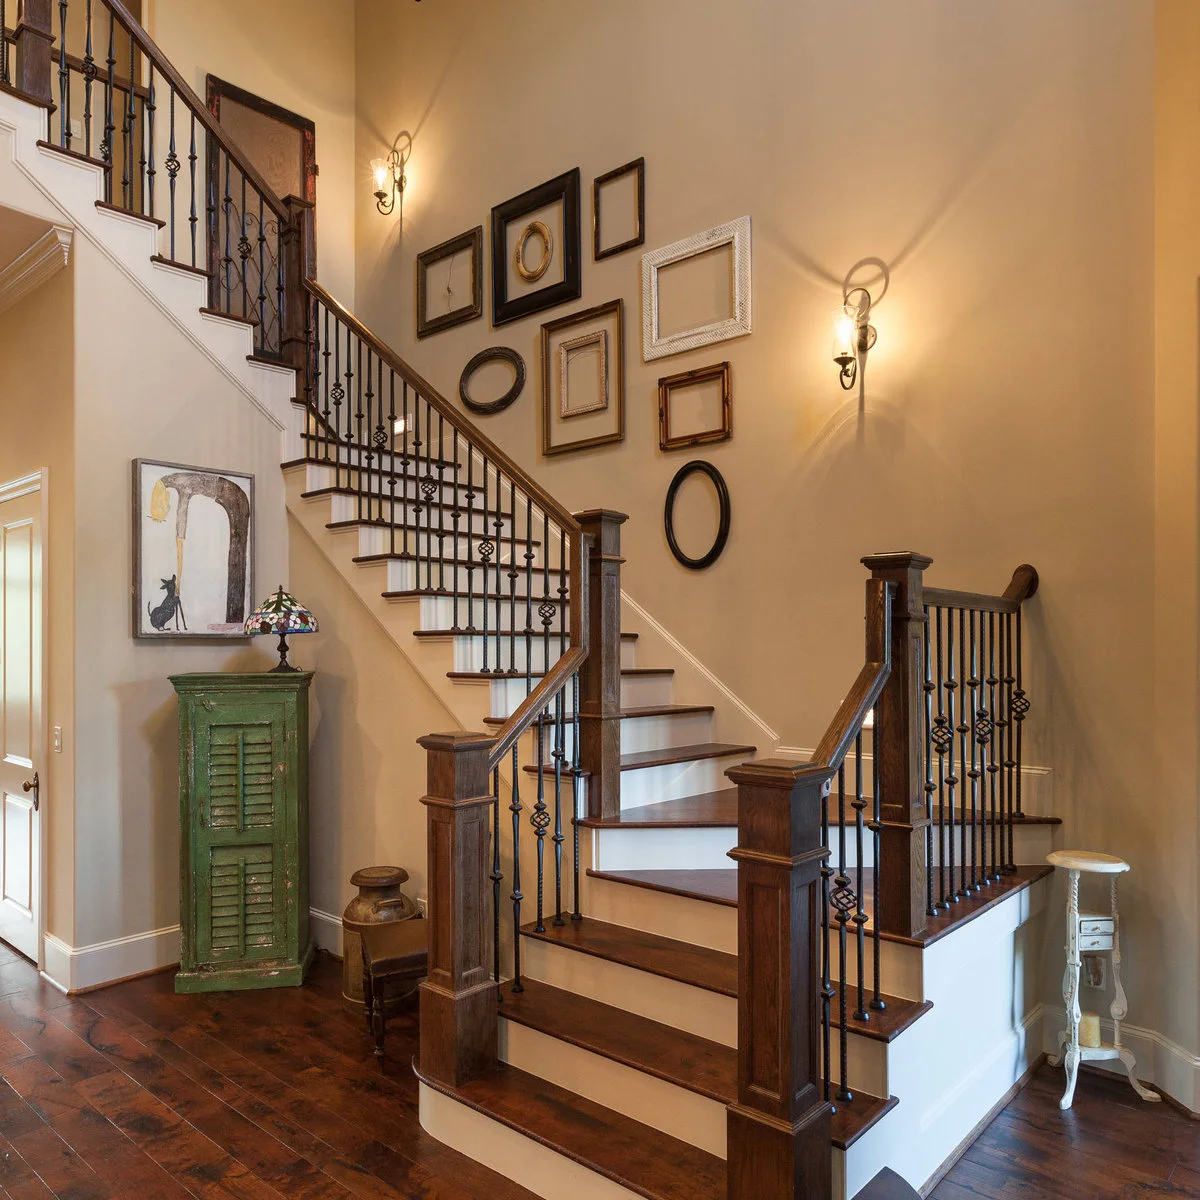
Empty decorative frames form a loose group above this staircase, with dark and pale finishes mixed against the warm wall. Their different outlines supply the decoration without adding a busy collection of pictures. Dark stair rails connect the frames to the flight below.
Choose a few related frame colors so the group feels deliberate. Check the composition from the entrance and from halfway up the stairs before mounting anything. Keep all pieces secure and outside the handrail’s usable space; a decorative arrangement should not make the wall more awkward to clean or the flight harder to use.
PART 03
Connect the Flight to Its Surroundings
IDEA 11 / 20
Continue Horizontal Wall Lines through the Hall
 SaveSupport Non AI Creator
Image credit: Project: Charlie & Co. Design, Ltd (via Houzz)
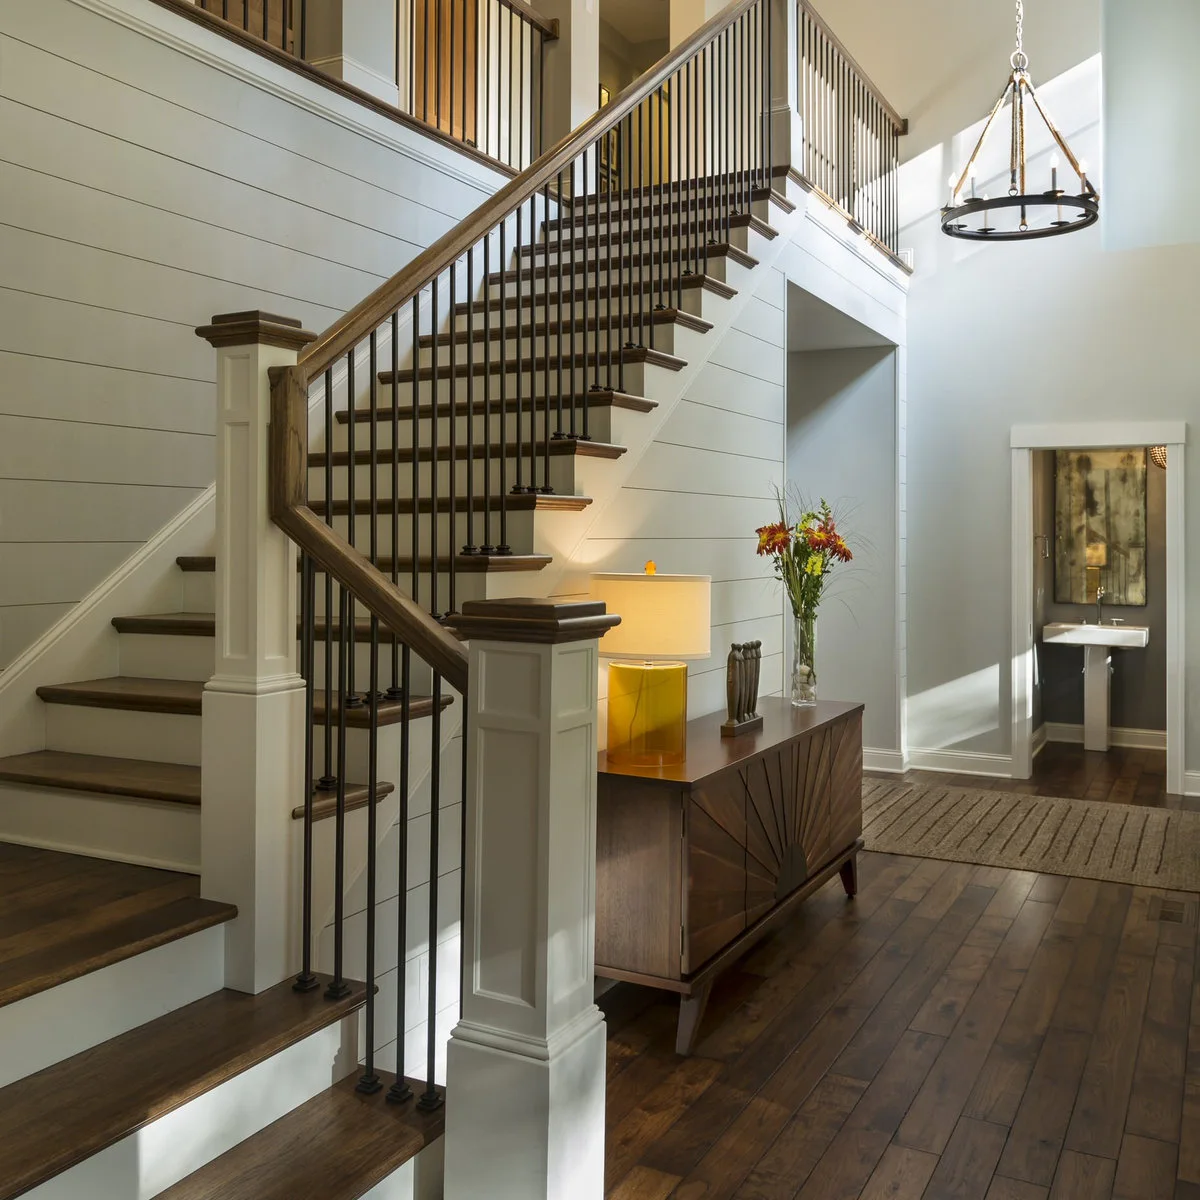
Horizontal wall boards continue behind this white staircase and around the landing above. Dark vertical balusters give the flight a different rhythm, with wood treads and an entry cabinet adding warmth below. The repeated pale wall finish connects the stair to the surrounding hall.
Plan board joints and trim around corners, doors and the stair outline rather than treating each wall separately. Keep the entry cabinet outside the clear approach to the steps. Compare the board spacing with the scale of the hall; narrow lines and many accessories can feel busier than one broader wall treatment.
IDEA 12 / 20
Keep an Under-Stair Door Visually Quiet
 SaveSupport Non AI Creator
Image credit: Project: Markalunas Architecture and Design, LLC (via Houzz)
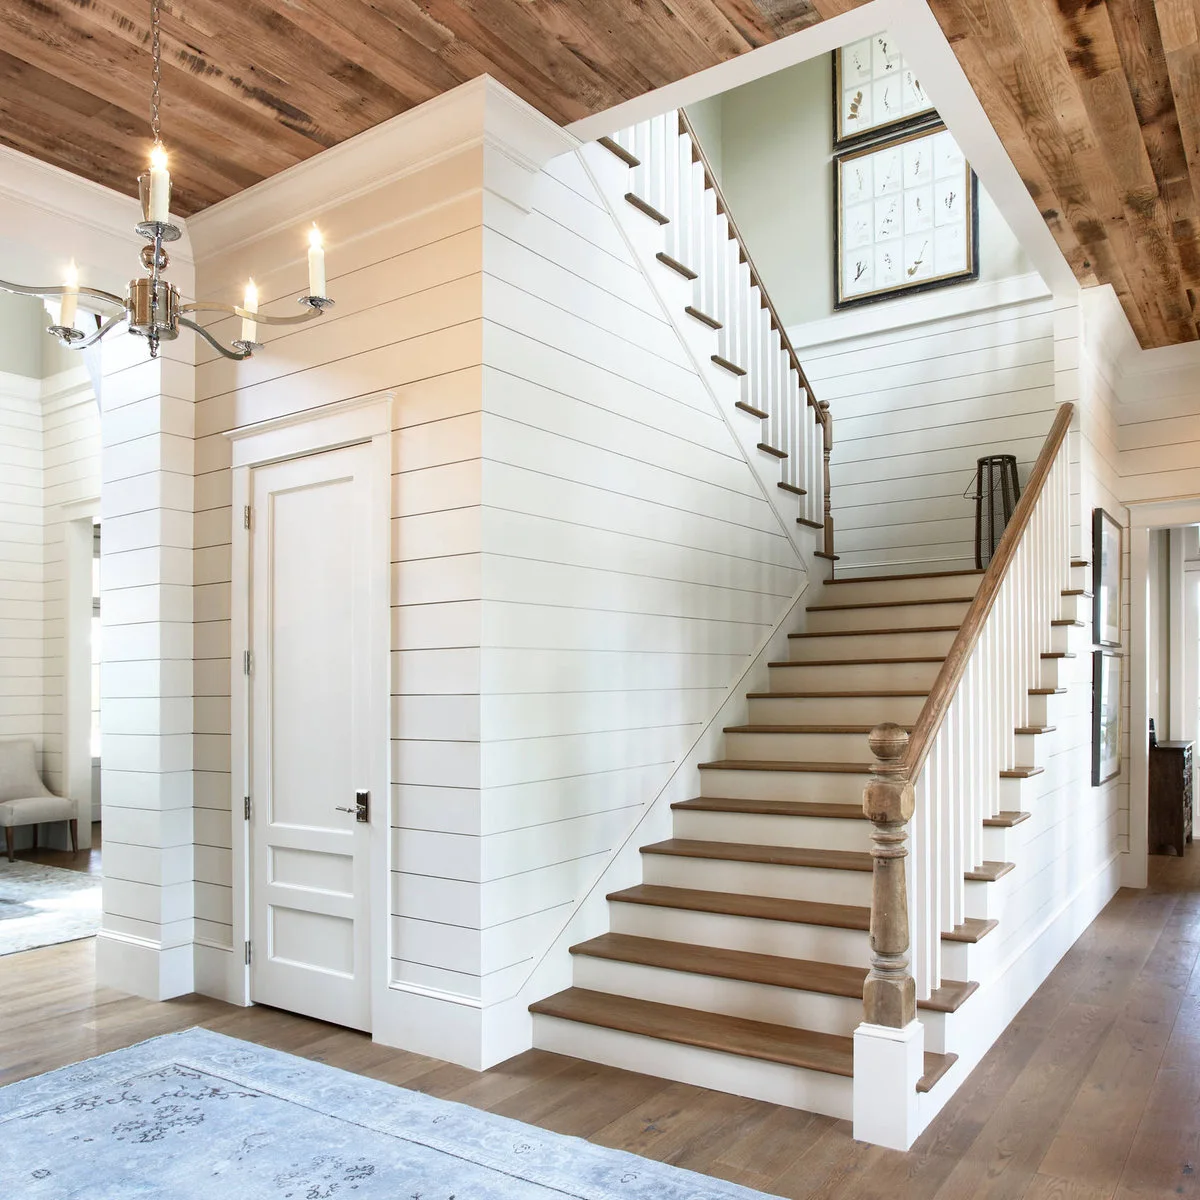
A plain white door sits beneath this staircase, surrounded by the same pale horizontal wall treatment used around the flight. Warm wood treads and ceiling boards add contrast. The under-stair opening stays part of the wall rather than becoming another strongly colored feature beside the steps.
Check what the under-stair space can appropriately hold before planning storage or changing its enclosure. Preserve required access and have any building changes assessed for the home. Match the visible door and trim to the surrounding wall if a quieter appearance is the goal, then keep the approach free of loose household items.
IDEA 13 / 20
Use a Textured Wall behind a Simple Flight
 SaveSupport Non AI Creator
Image credit: Project: Shelby Wood Design (via Houzz)
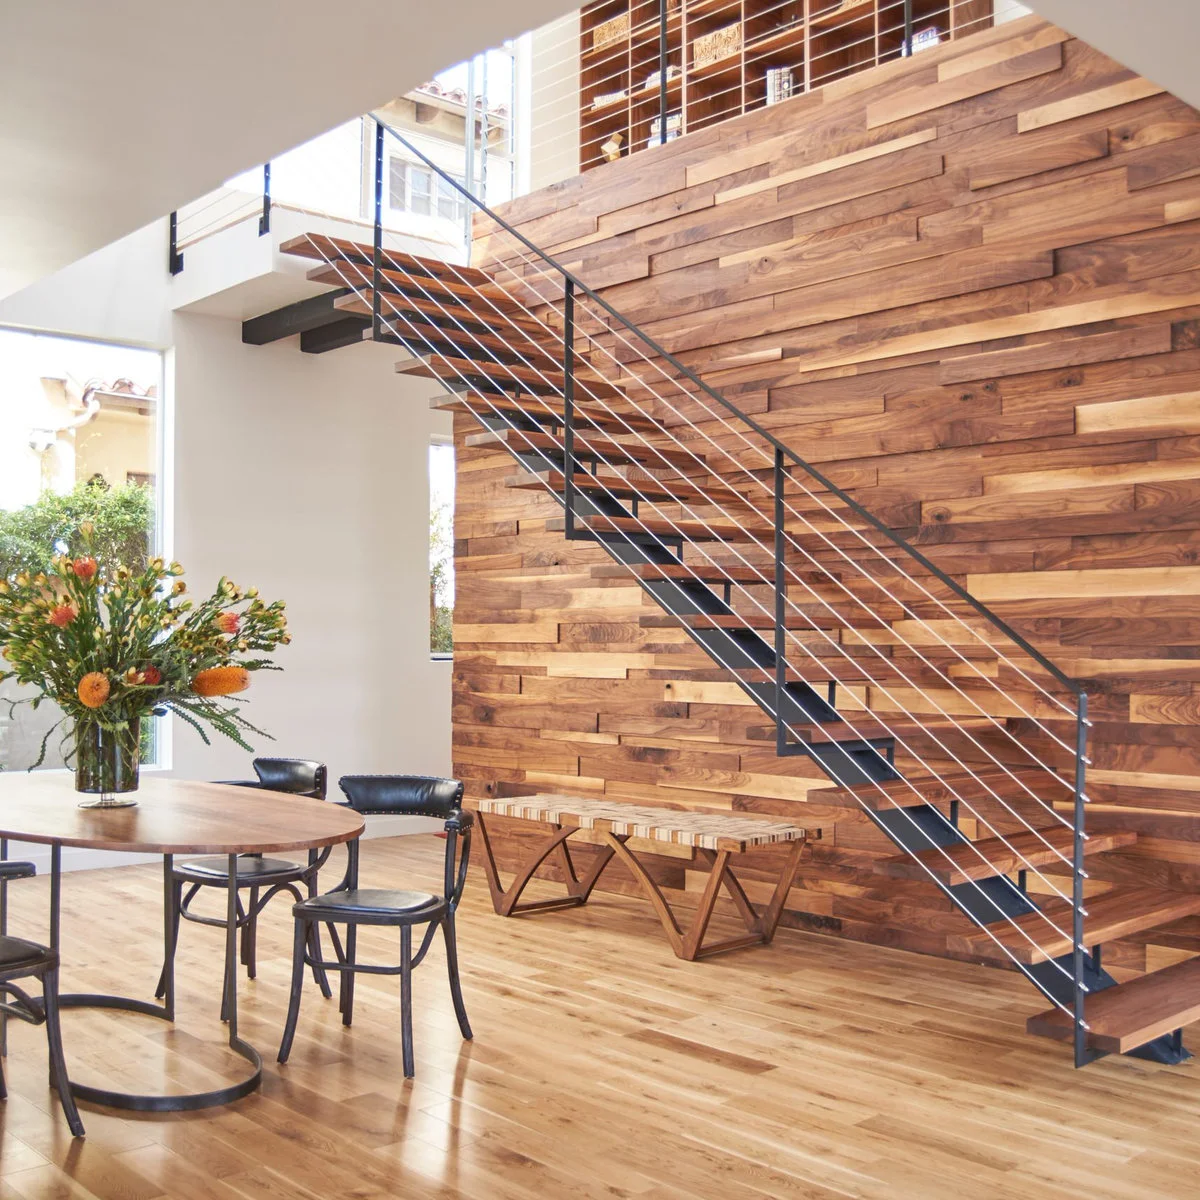
Varied wood boards create a textured wall behind this straight staircase. The dark frame and slim horizontal lines keep the flight’s outline distinct against the changing grain. A bench uses part of the floor below without extending across the full width of the room.
Compare the wood wall and treads together so their variation feels intentional. Keep furniture out of the stair’s working approach and maintain cleaning access below. Any open-riser or horizontal-guard arrangement needs assessment for the home and its users; the wall finish can be borrowed without copying the stair system.
IDEA 14 / 20
Give a Landing a Useful Storage Wall
 SaveSupport Non AI Creator
Image credit: Project: AGK Design Studio (via Houzz)
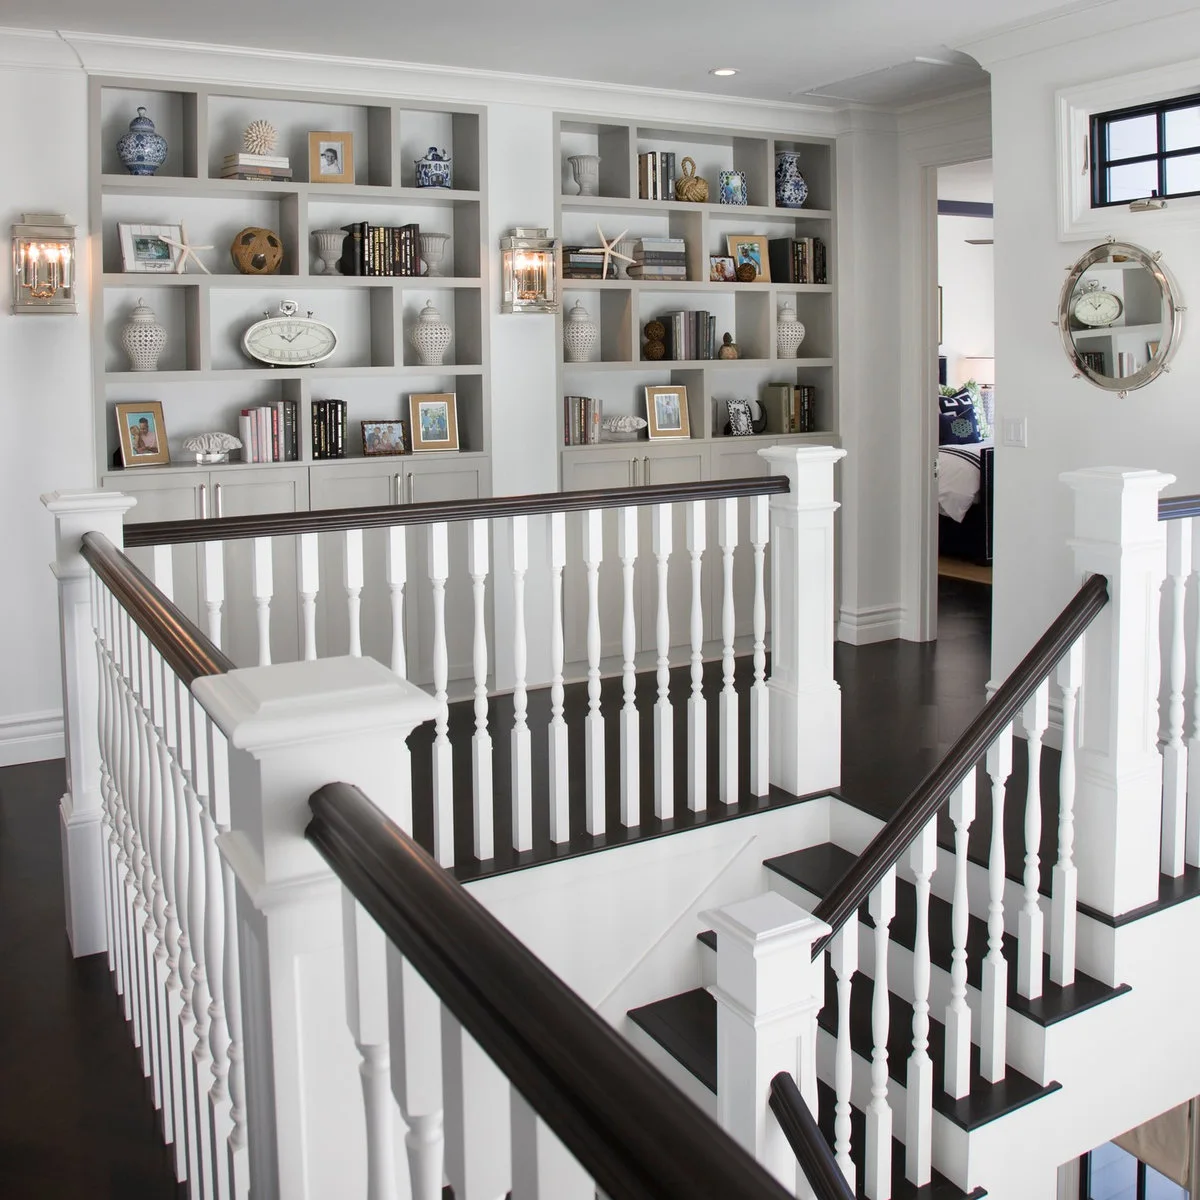
Built-in shelves and closed lower cupboards use the wall opposite this stair landing. Pale cabinetry connects to the white spindles, while the dark rail and floor give the circulation area a clear outline. Books and selected objects turn the landing into a useful part of the house.
Check the remaining passage with cupboard doors open before fitting storage beside a stair. Keep heavier items lower and secure shelving appropriately. Leave display shelves partly open so the landing does not feel like overflow storage, and make sure everyday access to books does not require leaning across the guard.
IDEA 15 / 20
Use Small Wall Lights for a Repeated Rhythm
 SaveSupport Non AI Creator
Image credit: Project: Dror Baldinger, AIA | Architectural Photography (via Houzz)
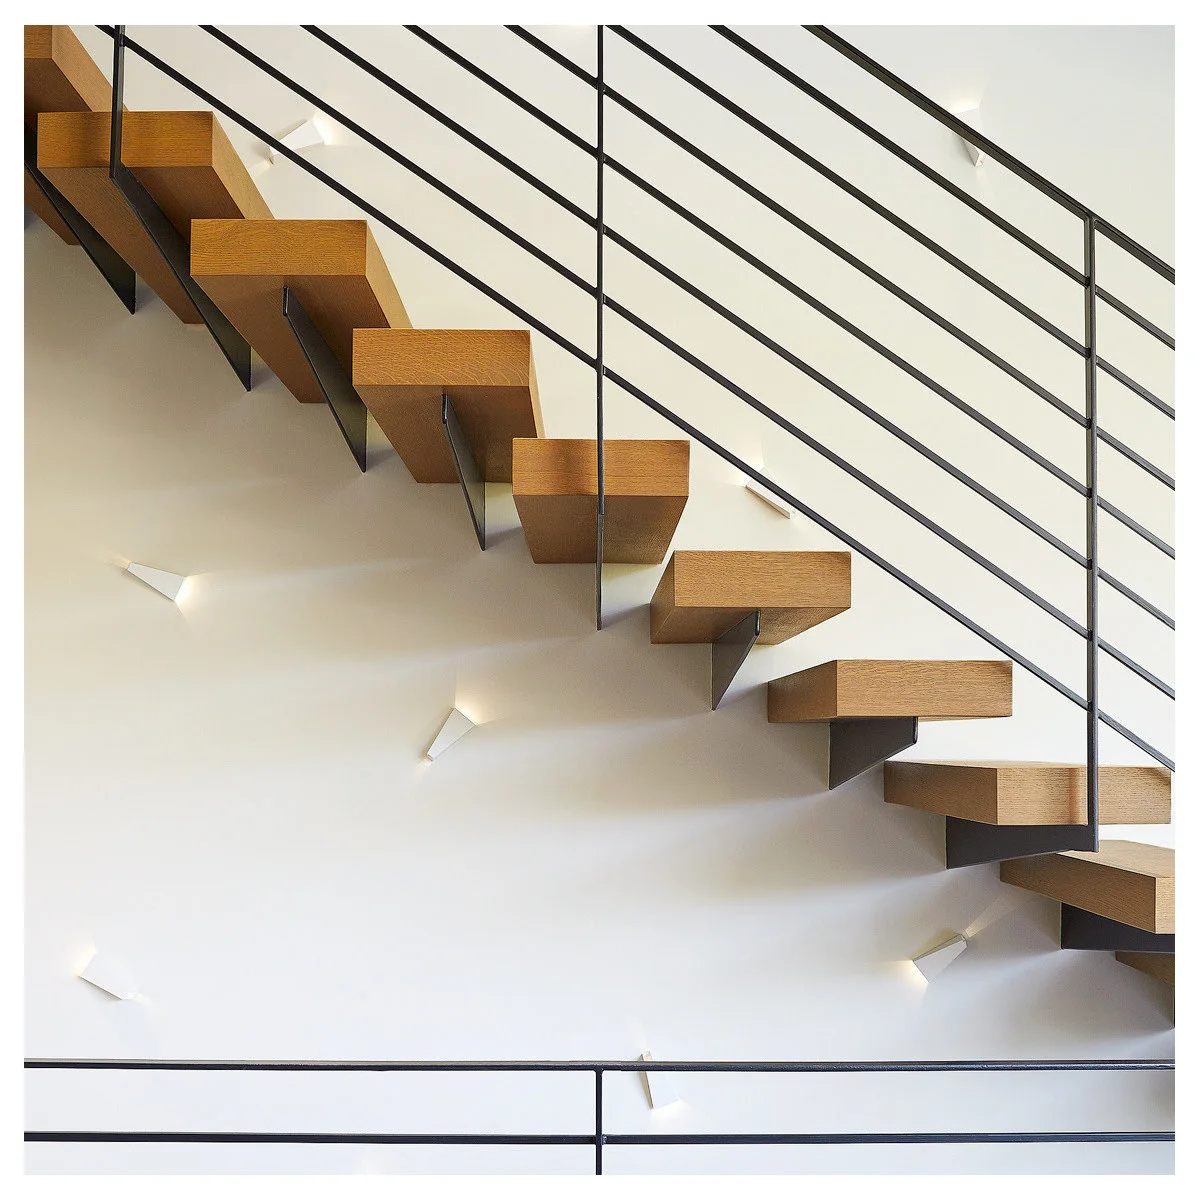
Small angular lights repeat along the wall beneath this open wood staircase. Their pools of light emphasize the flight’s diagonal line, while the dark rail and supports provide a strong outline. The lighting becomes a decorative rhythm even when the rest of the wall remains plain.
Plan decorative and working light together, with appropriate fittings and installation for the stairwell. Check the view from above as well as below so exposed light sources do not cause glare. Keep access for maintenance in mind, and do not assume that lighting beneath the stair adequately illuminates the walking surface.
PART 04
Choose Runners and Useful Landing Details
IDEA 16 / 20
Use Stripes to Emphasize a Straight Flight
 SaveSupport Non AI Creator
Source: www.houzz.com
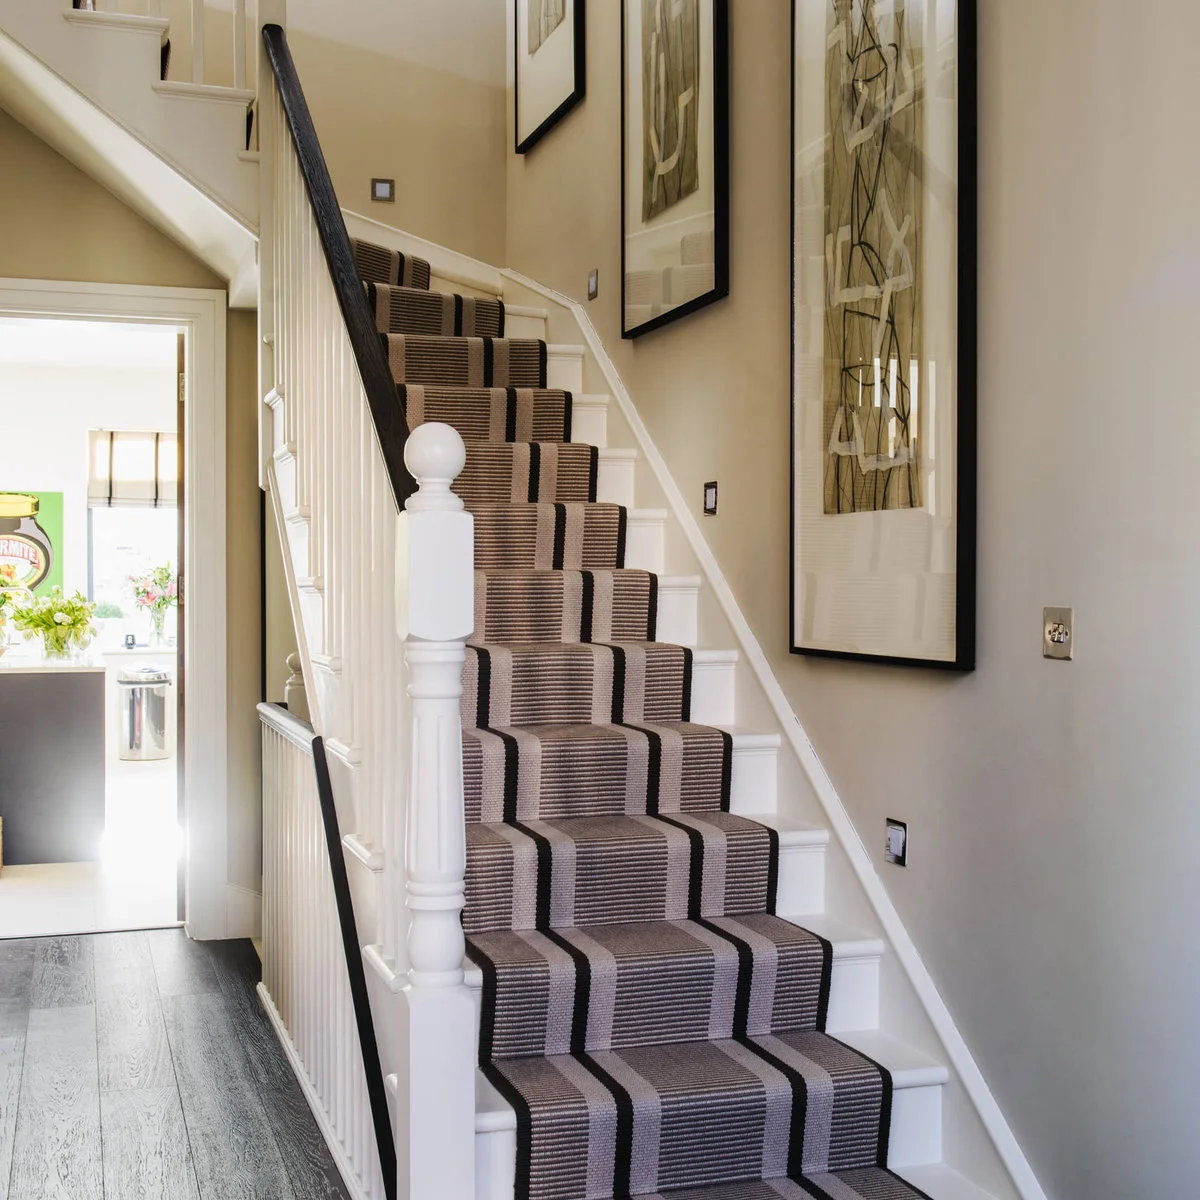
Lengthwise stripes carry the eye up this narrow white staircase. The dark handrail relates to the runner’s strongest lines, while framed artwork stays on the neighboring wall. Pattern gives the flight definition without changing the existing spindles or adding color to every riser.
Choose a runner intended for stairs and have its fit and fixing properly resolved. View the pattern on both a tread and riser before deciding, since stripes change appearance over an edge. Keep side margins deliberate and inspect the runner periodically for movement, loose edges or wear along the main walking line.
IDEA 17 / 20
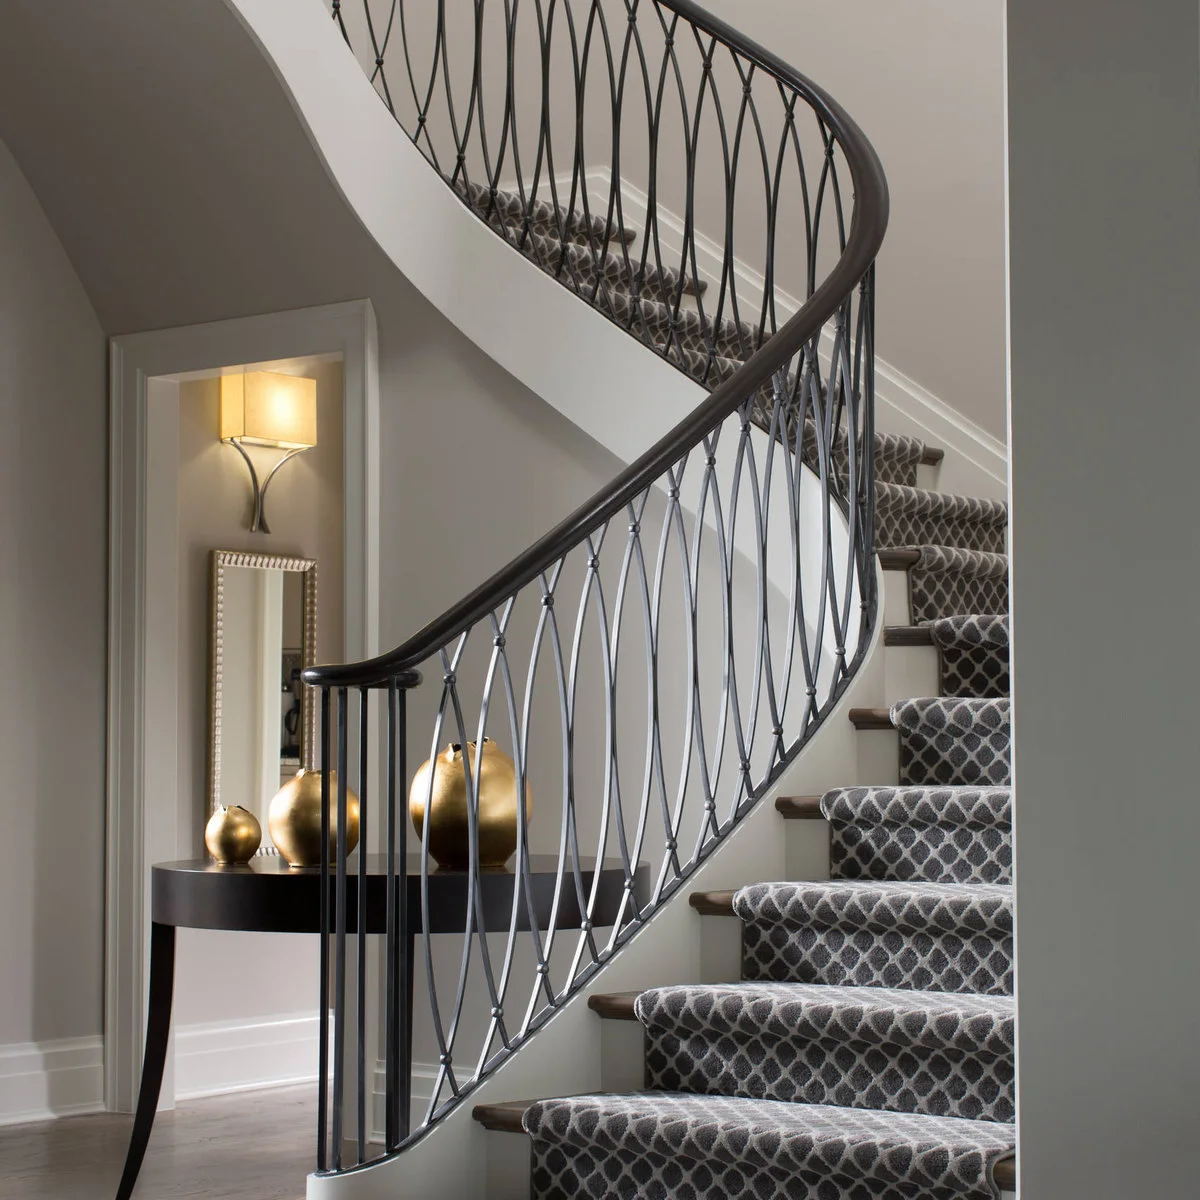
Echo a Curved Rail with a Soft Repeated Pattern
 SaveSupport Non AI Creator
Image credit: Project: ABS Architects (via Houzz)
A grey linked-pattern runner follows this curved staircase, with dark diamond details repeating along the railing. The similar rhythms connect carpet and guard without matching them exactly. Pale risers and walls keep the separate patterns from blending into one uninterrupted dark surface.
A curved flight requires careful runner planning so joins, edges and pattern changes remain controlled. Ask to see how the chosen material handles the actual curve rather than judging a flat sample alone. Keep the surrounding furniture simple and outside the stair approach if both railing and runner already provide substantial visual detail.
IDEA 18 / 20
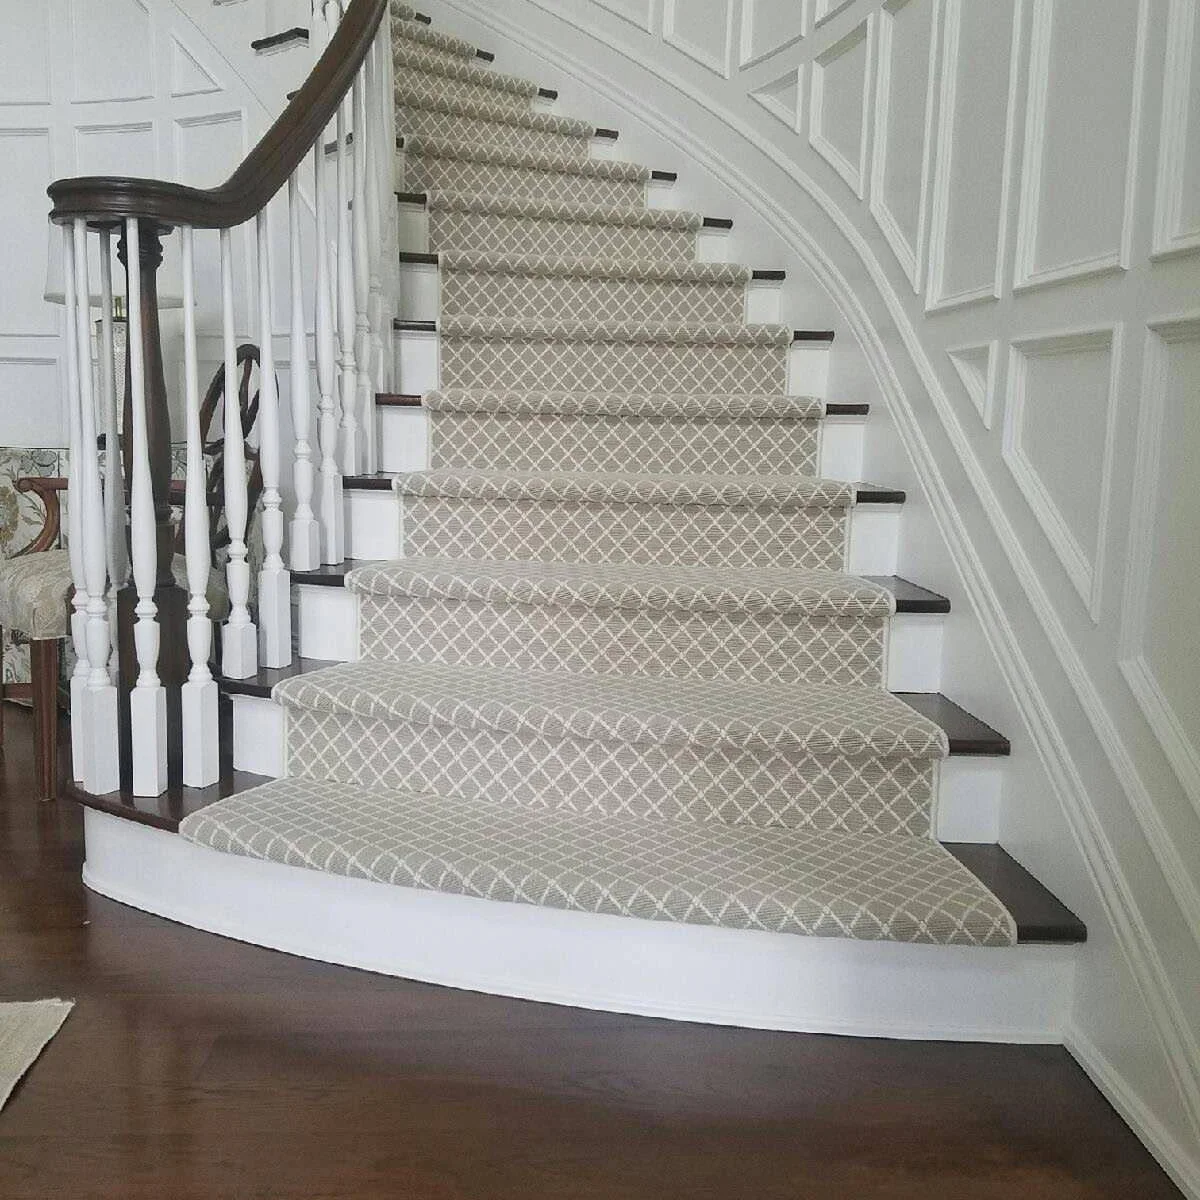
Pair a Pale Geometric Runner with White Paneling
 SaveSupport Non AI Creator
Image credit: Project: J&S by STARK (via Houzz)
A pale diamond-pattern runner climbs this curved white staircase, framed by dark tread edges. Rectangular wall paneling supplies a second, larger geometry beside it. The related light tones keep the combination quiet even though both the runner and the wall have repeated patterns.
Compare the runner with the painted wall in daylight and evening light before choosing a pale shade. Consider how readily its surface can be maintained along a busy route. Have the runner fitted for the shape of the stair, and keep its edges secure rather than relying on a close visual match to the paneling.
IDEA 19 / 20
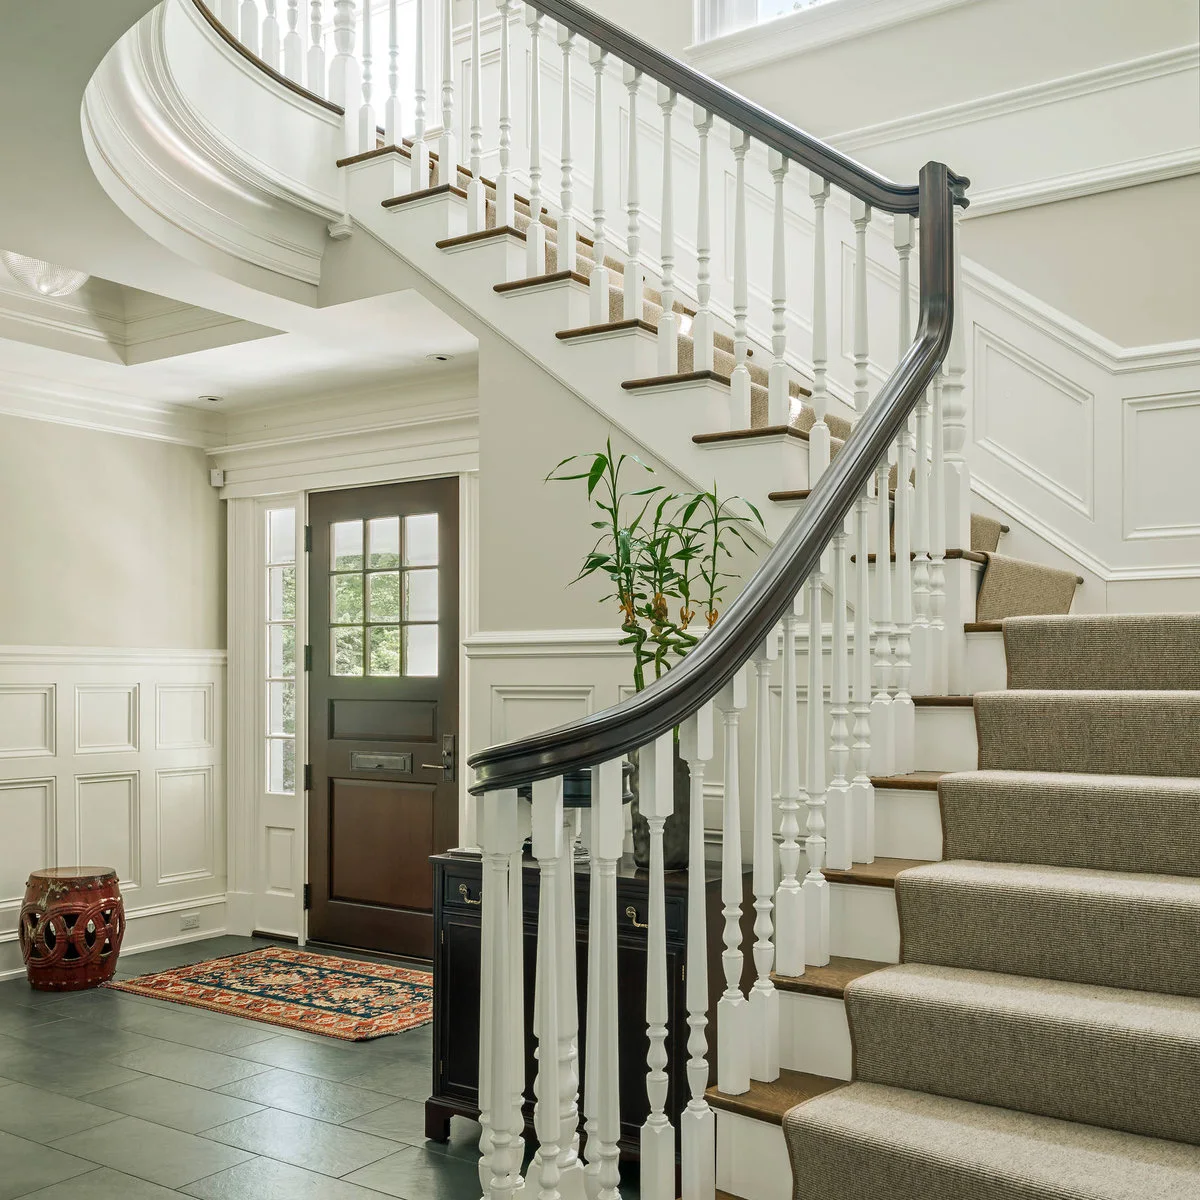
Let a Plain Runner Leave Room for Traditional Detail
 SaveSupport Non AI Creator
Image credit: Project: Jan Gleysteen Architects, Inc (via Houzz)
A plain beige runner softens this traditional white staircase without competing with the turned spindles or paneled walls. The dark curved rail gives the flight a clear continuous line. A quieter textile lets the existing joinery remain the most detailed part of the arrangement.
Test the runner’s texture and maintenance requirements as well as its color. A plain surface can show marks differently from a pattern, so choose for the household’s actual use. Keep the entrance mat and nearby furniture clear of the first step, and have the runner’s edges and fixing checked during fitting.
IDEA 20 / 20
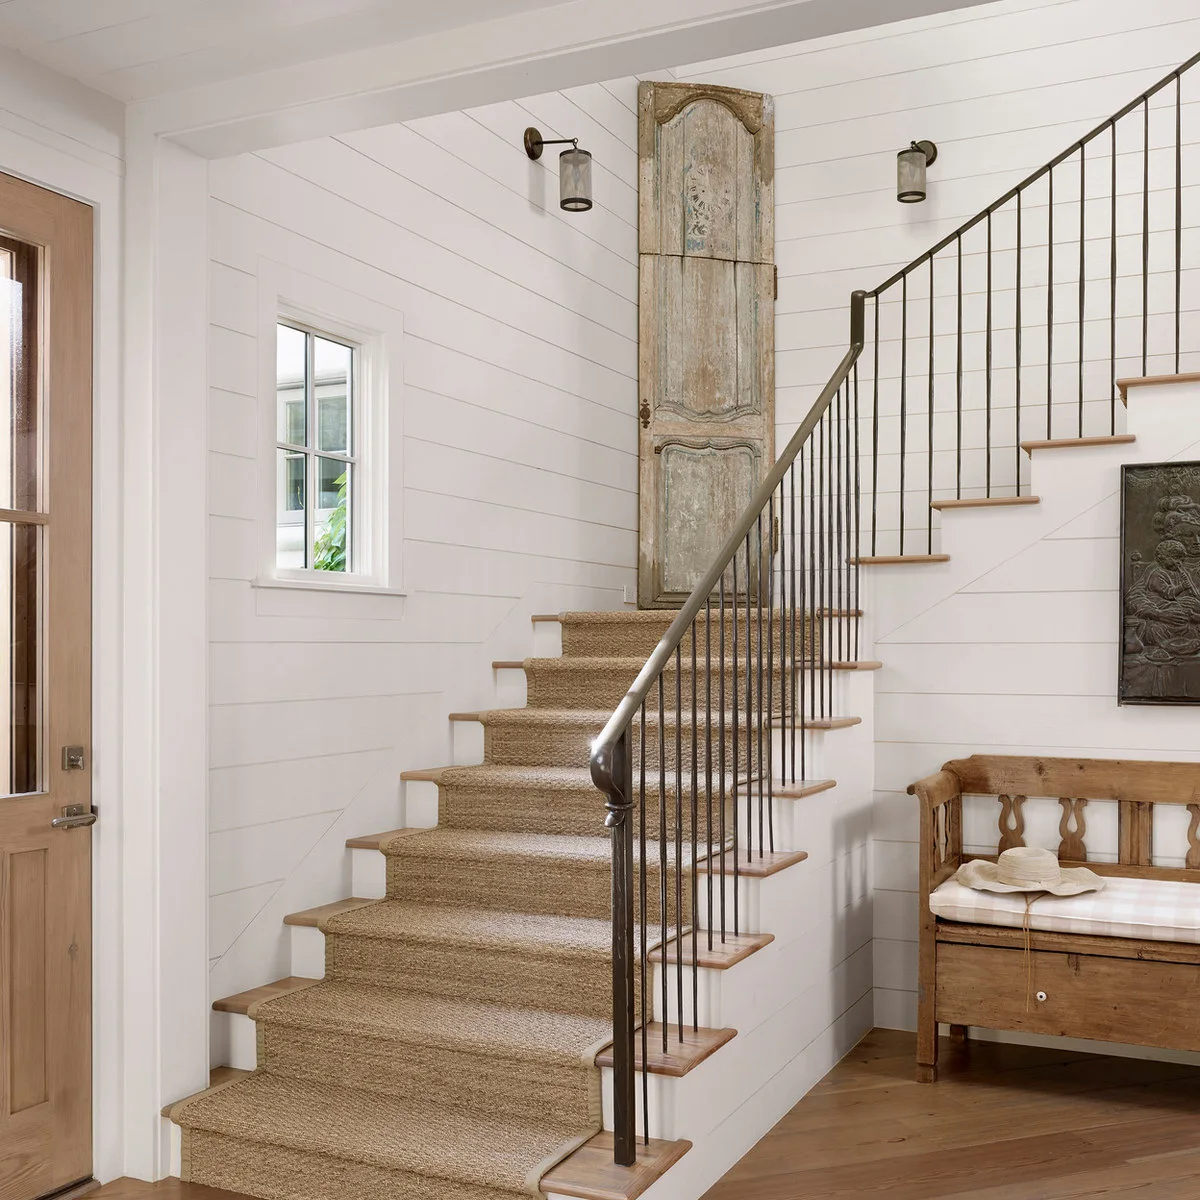
Place a Bench beside the Stair rather than on Its Route
 SaveSupport Non AI Creator
Image credit: Project: Ryan Street Architects (via Houzz)
A wood storage bench sits beside this staircase, with a textured runner and pale boarded walls connecting the flight to the entry. Slim dark balusters leave the wall treatment visible. The bench gives the hall a useful sitting place without occupying a tread or the stair’s first landing.
Measure the route with someone sitting on the bench and with its storage open, if applicable. Keep shoes and bags within the bench area rather than allowing them to spread toward the steps. Choose a runner and entry seating finish that can handle daily use, then keep decorative wall pieces securely fixed.
BRING IT ALL TOGETHER
Improve the Route as Well as the View
Start with the staircase you have and decide whether the biggest need is a better finish, more useful lighting or a clearer entrance around it. A runner, restrained gallery or related wall treatment can make a strong change without replacing the whole stair. Keep the first step, landings and handrail easy to use.
Treat rails, steps, lighting and surrounding furniture as parts of the same route. Have changes assessed and installed appropriately, then choose details you can maintain. The most successful decoration gives the stair character while leaving enough clear space to move through the house comfortably.