Wall paneling changes the rhythm of a room before you add a single picture. Wide frames, narrow boards and simple lower panels each create a different backdrop, so begin with the wall’s proportions and the furniture that will sit against it.
These rooms compare panel shapes, heights and finishes across several settings. Use the visible details to choose an arrangement, then check the actual wall, product and fixing requirements before installing. Paint color alone cannot establish a panel’s material or suitability near water.
PART 01
Choose the Rhythm of the Wall
IDEA 01 / 20
Start with a Broad Rectangular Grid
 SaveSupport Non AI Creator
Image credit: Project: New South Home (via Houzz)
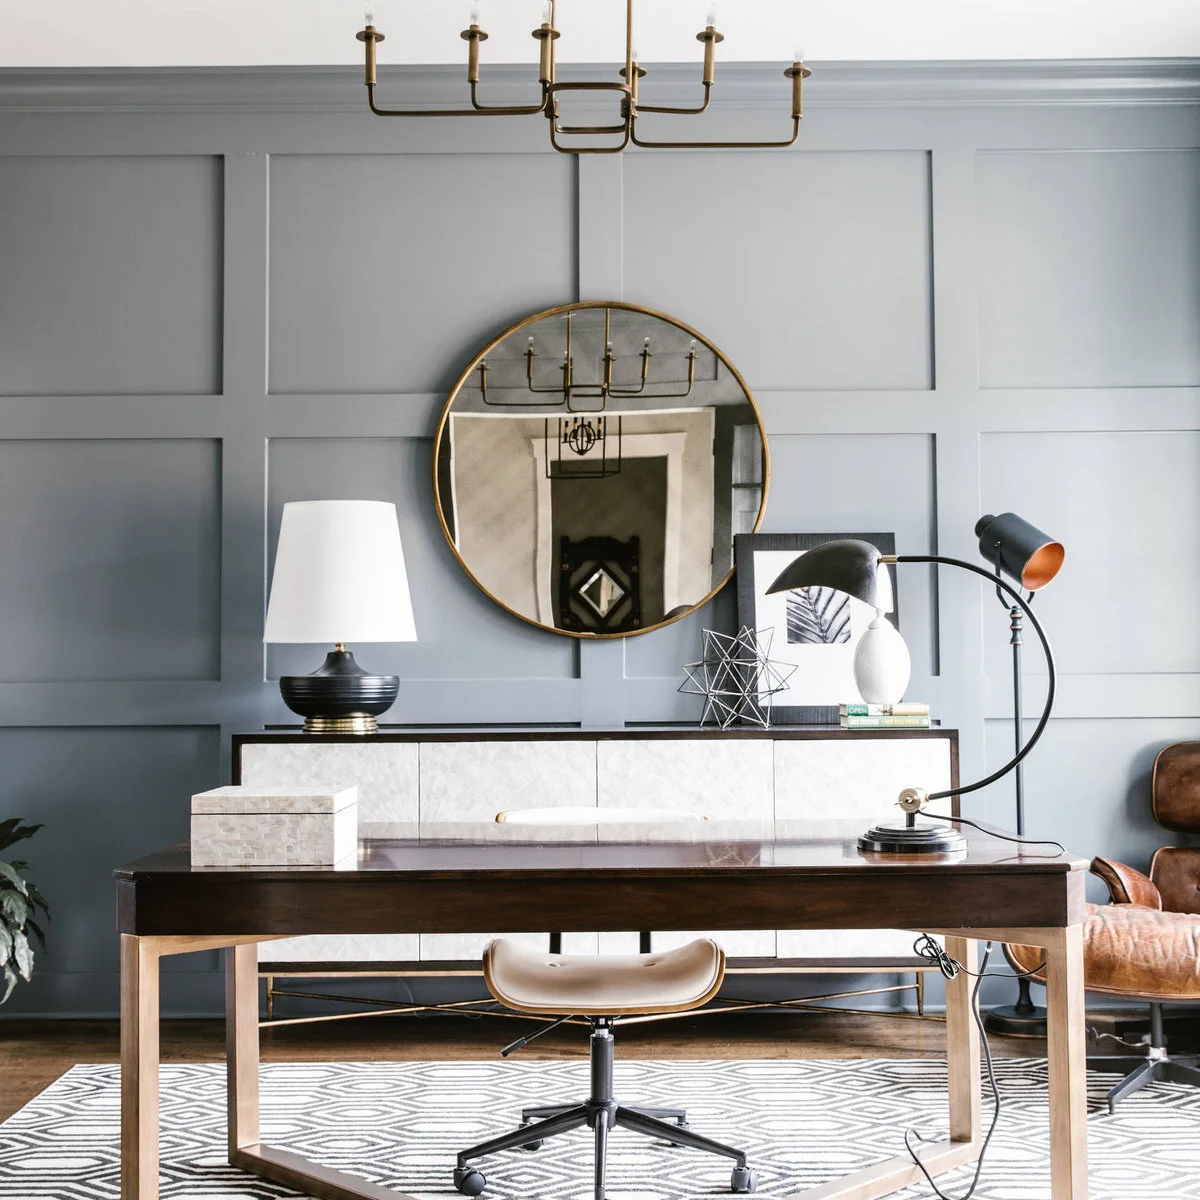
Broad rectangular panels give this blue-gray office wall a steady rhythm behind the desk. A round mirror breaks up the straight lines, while the sideboard supplies a clear horizontal base. Painting the trim and background together keeps the depth subtle rather than outlining every division.
Mark the proposed grid around the furniture before deciding how many panels fit. Wider rectangles can feel calmer than many narrow frames on the same wall. Check outlets and light positions early, leaving useful access instead of hiding an awkwardly placed fitting behind decorative trim.
IDEA 02 / 20
Let a Tall Grid Follow the Stair Hall
 SaveSupport Non AI Creator
Image credit: Project: Purple Cherry Architecture & Interiors (via Houzz)
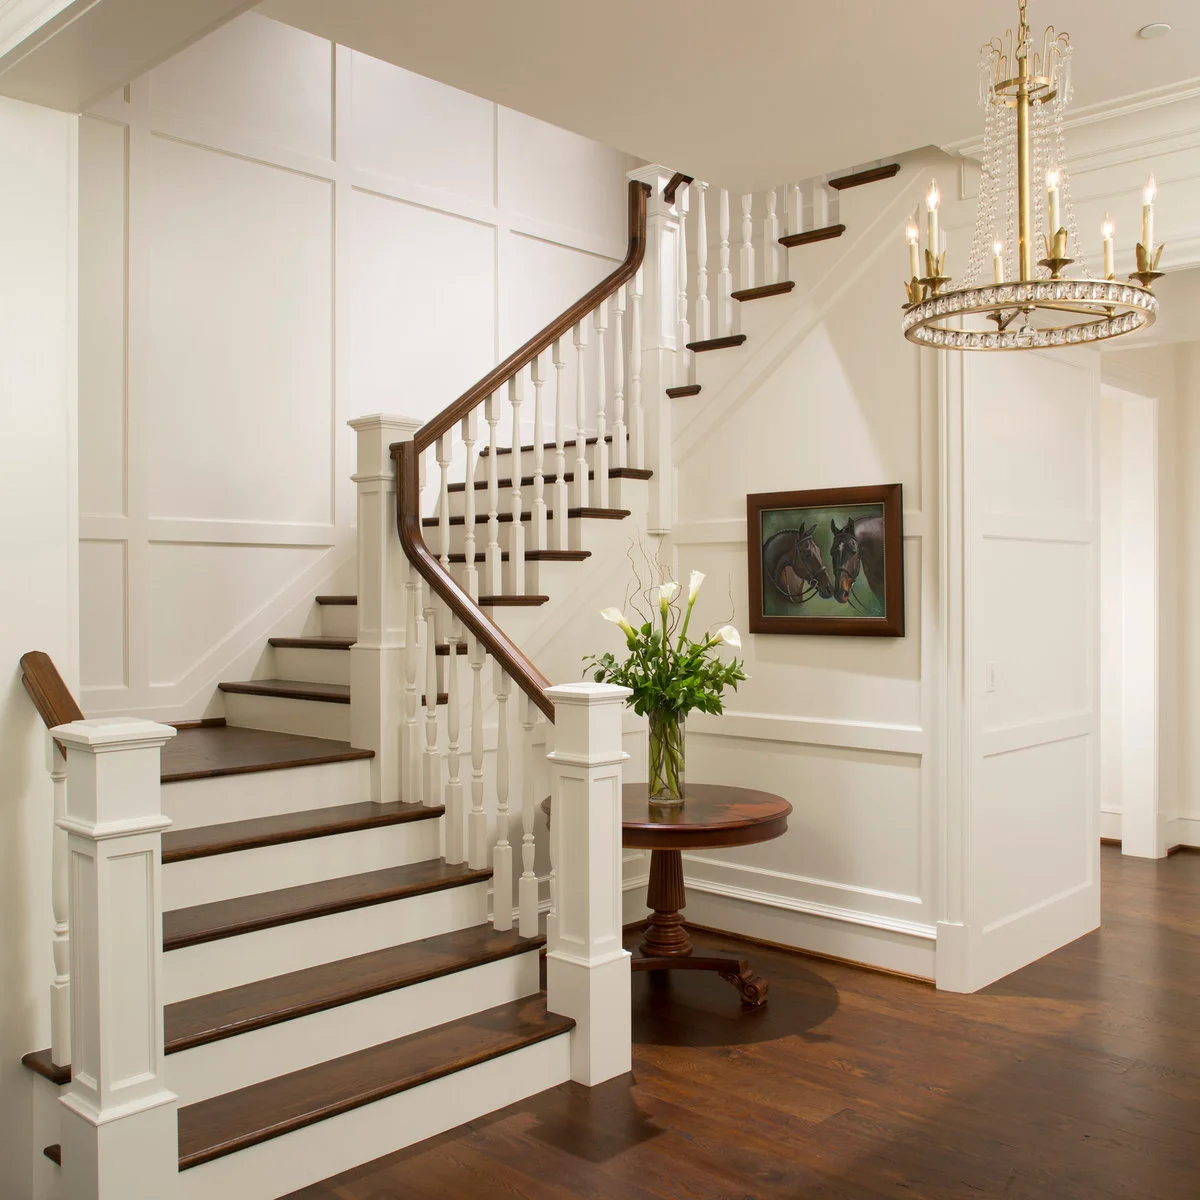
Tall white panels continue around the walls of this turning stair hall. Dark treads and a dark handrail provide contrast, while the light trim joins the wall sections into one arrangement. The rectangular pattern remains clear even where the staircase crosses in front of it.
Plan the panel layout across landings and corners rather than measuring each wall independently. Keep the handrail and its fixings fully functional. Work on a tall stair wall may need specialist access equipment, so include that practical cost before choosing a pattern that reaches the full height.
IDEA 03 / 20
Keep a Grid Quiet Behind Colorful Art
 SaveSupport Non AI Creator
Image credit: Project: Ike Kligerman Barkley (via Houzz)
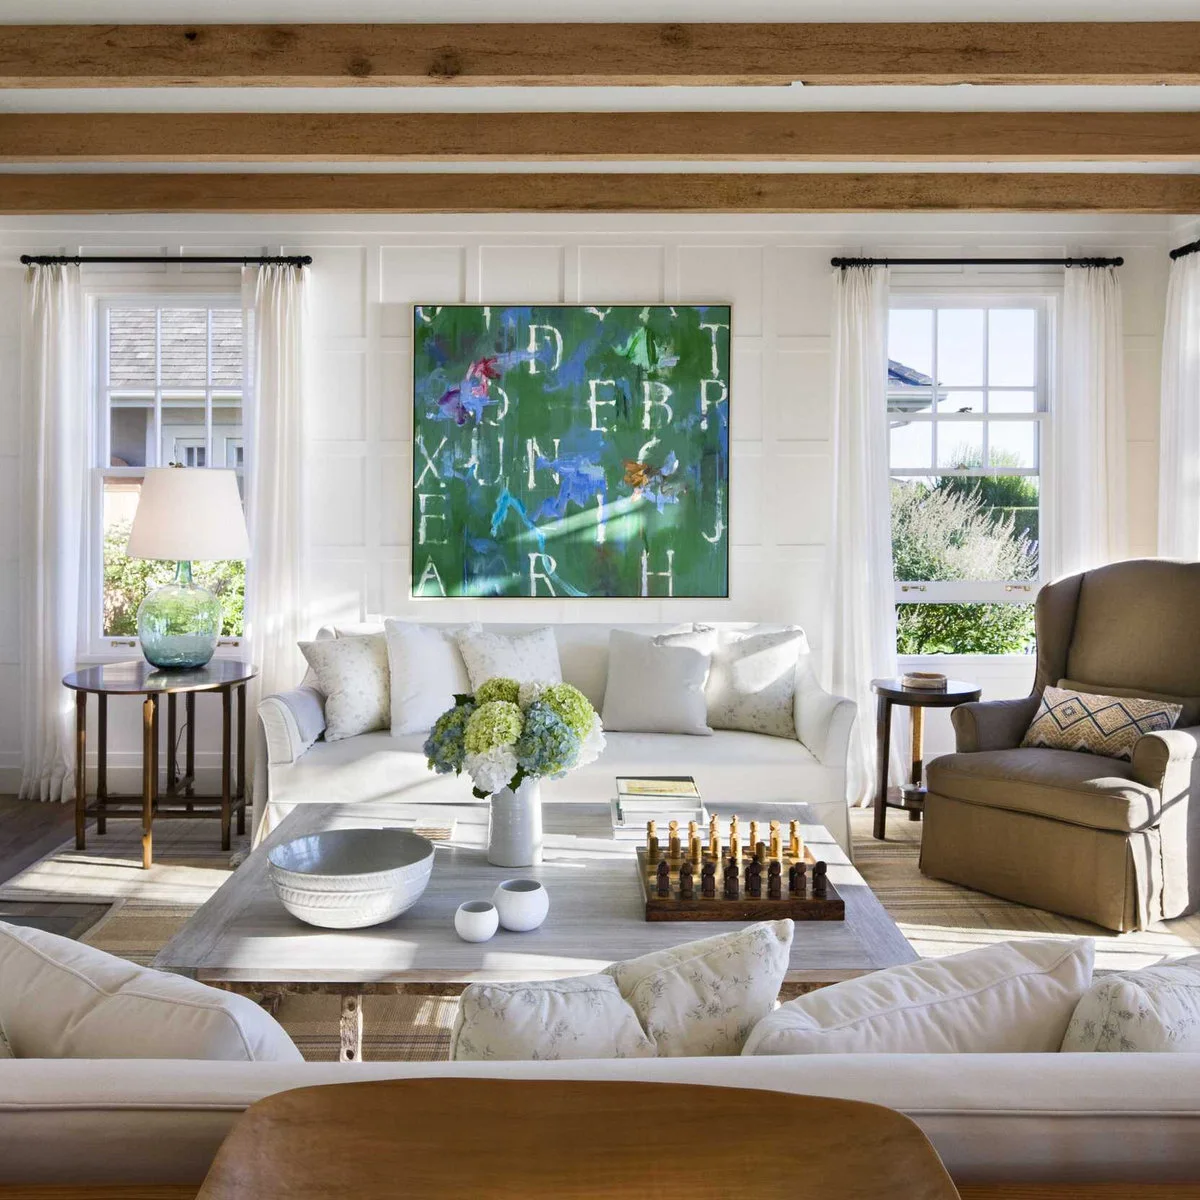
White rectangular paneling adds a quiet background behind the large green artwork in this living room. The frames remain visible around the picture without competing with its color. Warm ceiling beams and a wood floor give the pale wall a separate source of contrast.
Choose the artwork and its approximate position before finalizing the panel spacing. A large picture can cross panel lines if the overall arrangement feels deliberate. Keep the remaining accessories restrained, and check that curtain brackets and nearby lamps do not interrupt the wall pattern unnecessarily.
IDEA 04 / 20
Use Horizontal Boards on a Short Wall Section
 SaveSupport Non AI Creator
Image credit: Project: Hugh Jefferson Randolph Architects (via Houzz)
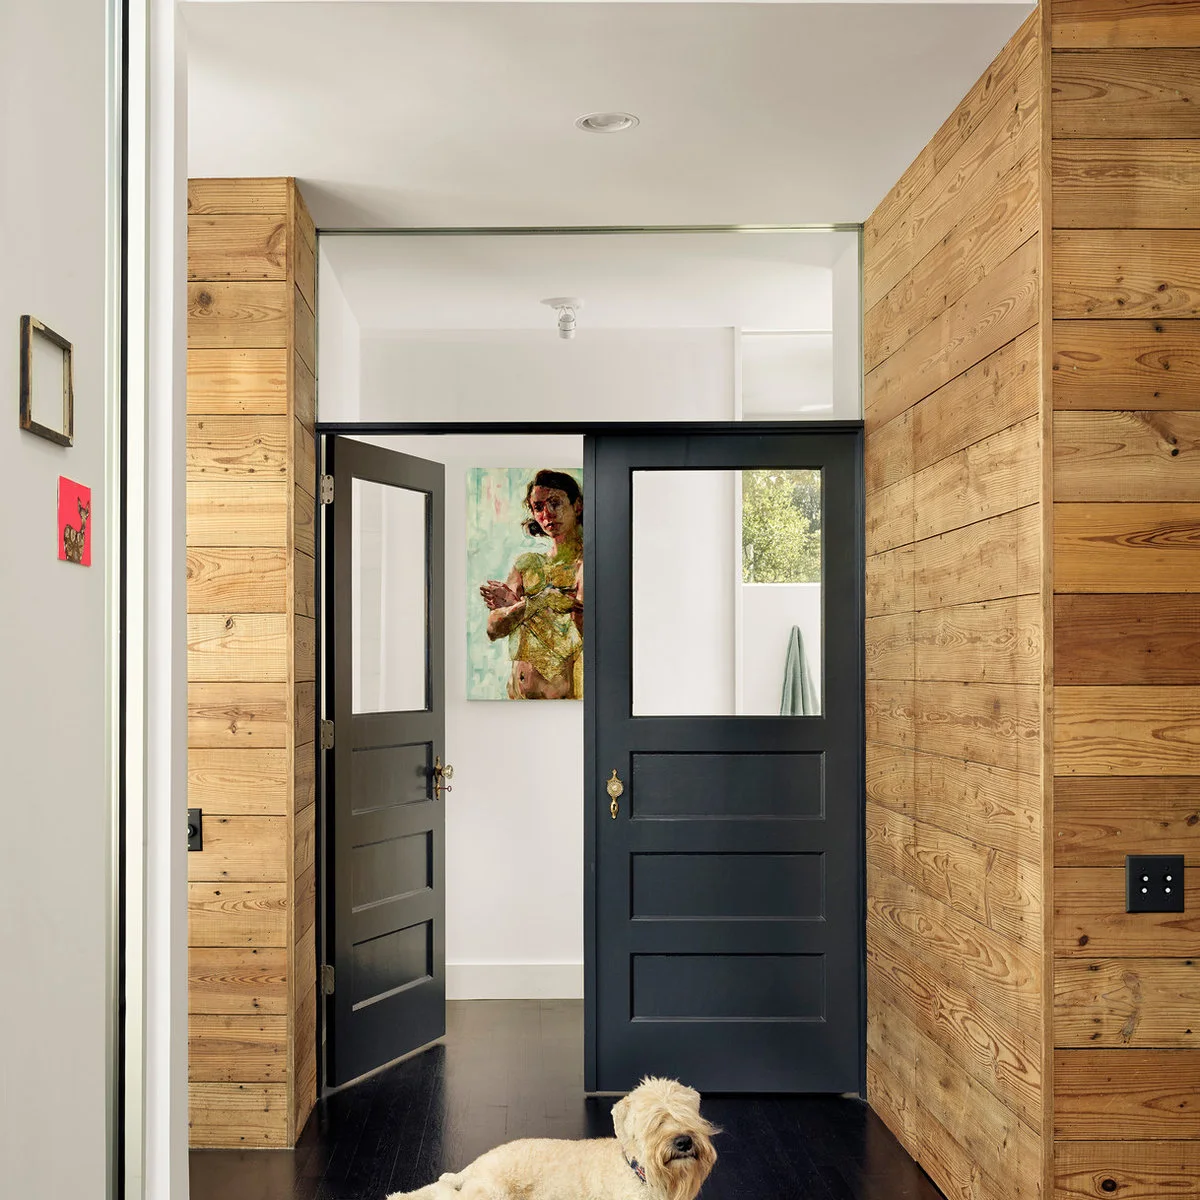
Horizontal wood boards flank the dark glazed doors in this passage. Their visible knots and grain contrast with the white walls beyond, making the paneled sections feel like a defined threshold. Limiting the finish to these surfaces keeps the passage from becoming uniformly dark.
Use an existing corner or doorway as a clear stopping point for a stronger wood finish. Compare board lengths before ordering to avoid awkward short joins. Check how outlets and switches will sit after the wall gains thickness, with any electrical adjustment handled appropriately.
IDEA 05 / 20
Carry Narrow Boards Around a Curved Junction
 SaveSupport Non AI Creator
Image credit: Project: Dennis Moffitt Painting (via Houzz)
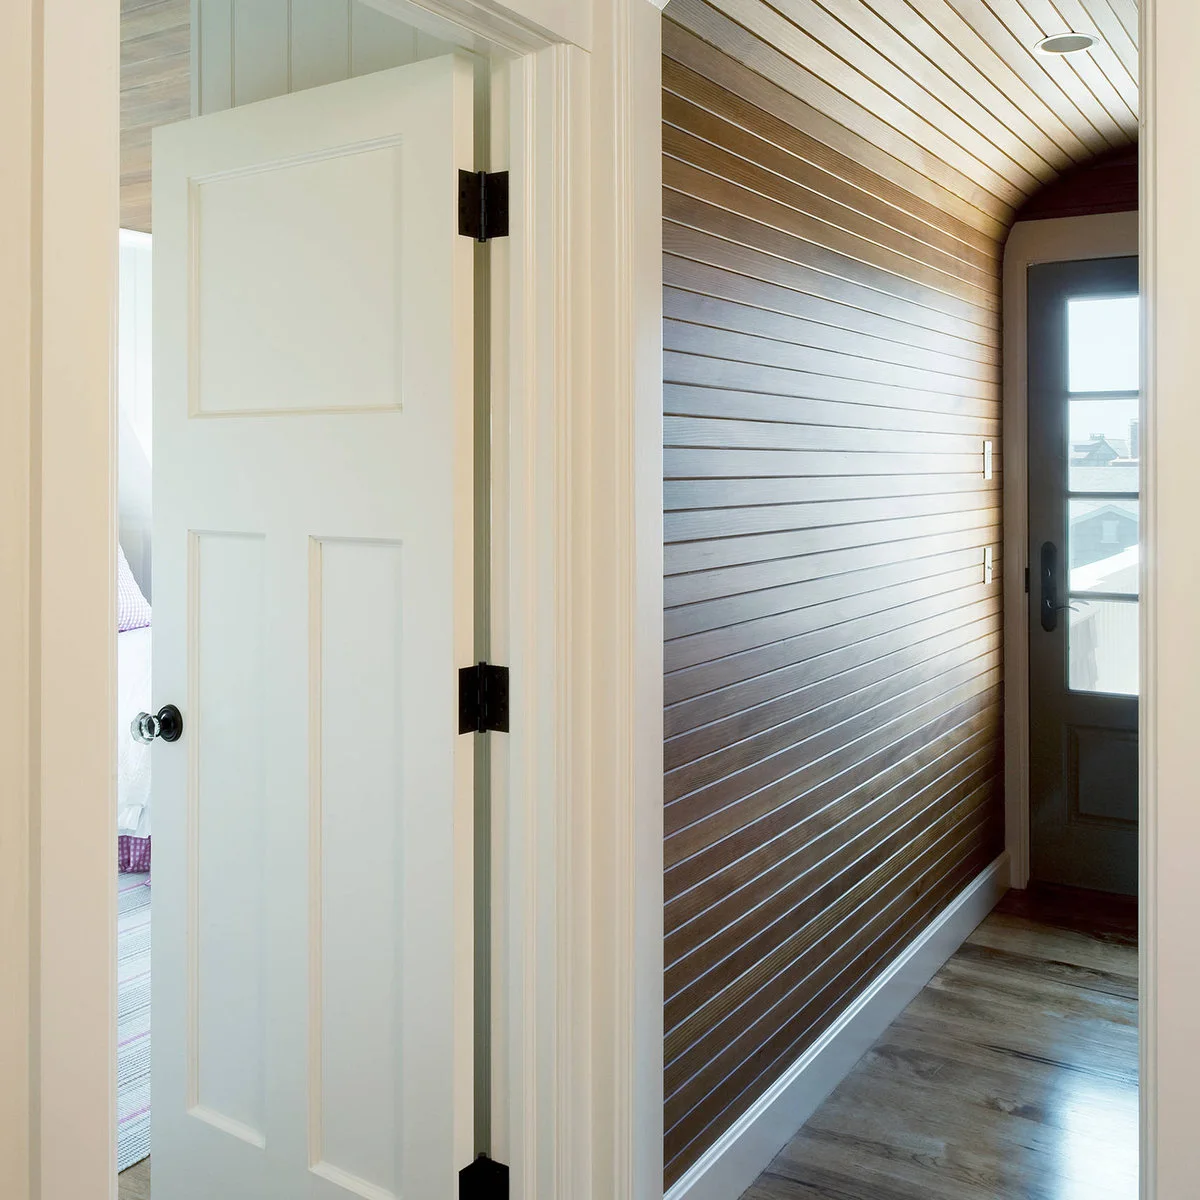
Narrow brown boards continue from the wall around a curved upper junction in this small passage. A white door frame separates the warm surface from the adjoining room. Closely repeated lines make the curve visible without adding a separate decorative molding to every change of plane.
A curved surface needs a product and installation method suited to its shape. Ask for a sample detail before assuming ordinary straight boards will bend neatly. Keep the door opening and trim proportions in the plan, and compare the extra labor with finishing only the flat wall section.
PART 02
Give Lower Paneling a Clear Edge
IDEA 06 / 20
Pair White Lower Panels with a Deep Upper Color
 SaveSupport Non AI Creator
Image credit: Project: Moser Architects PLLC (via Houzz)
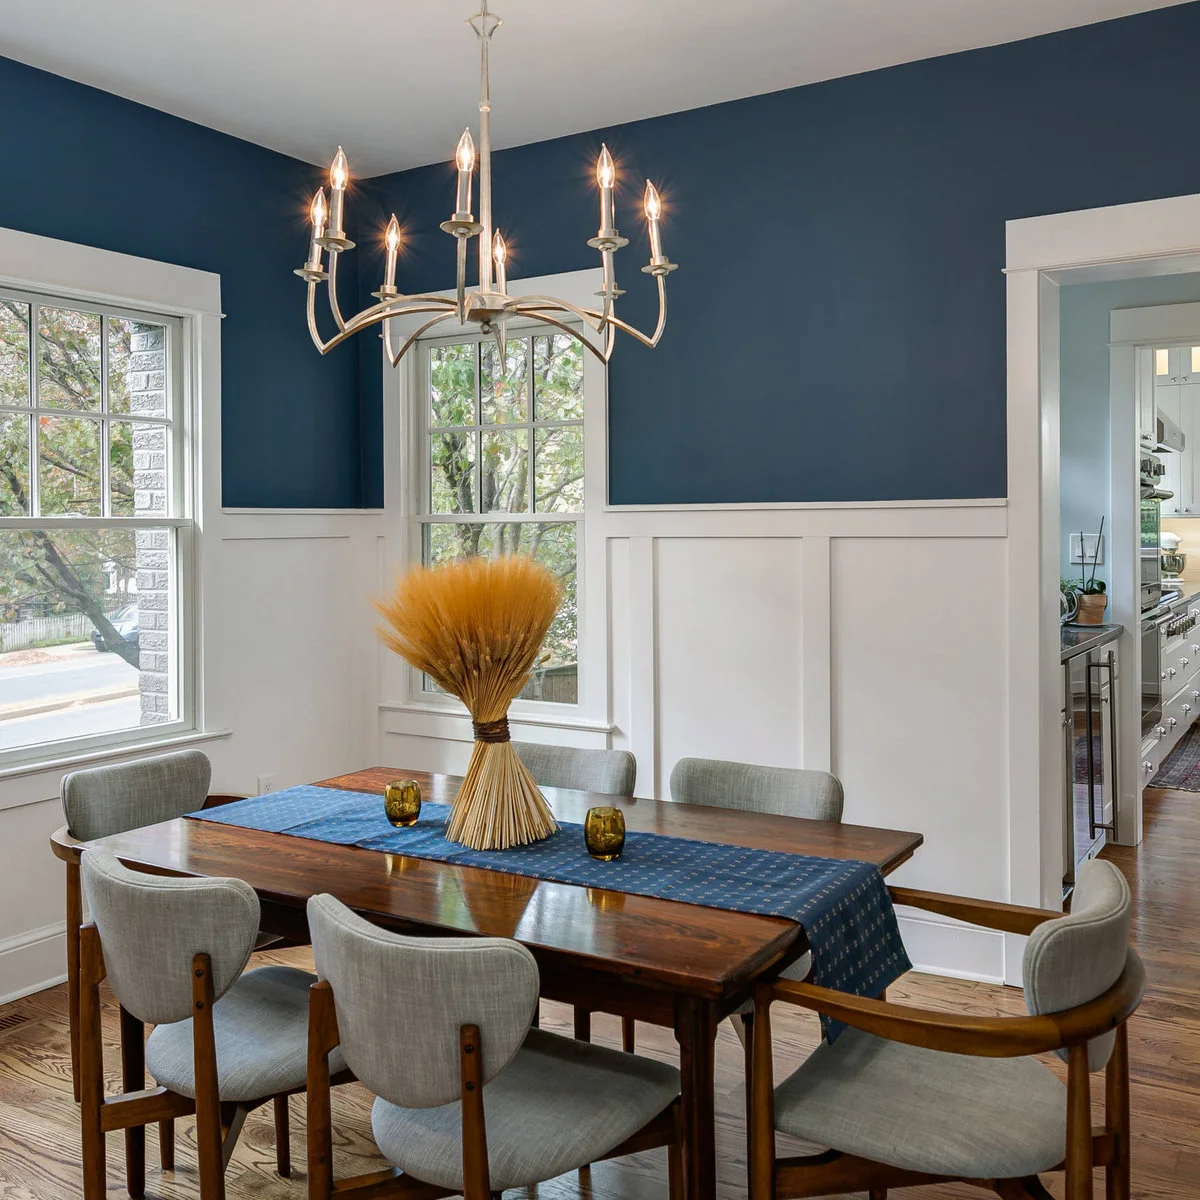
White lower panels create a bright band beneath the dark blue walls in this dining room. Their straight vertical divisions relate to the window trim without matching every furniture line. The darker upper wall gives the pale paneling a clear edge around the room.
Test the rail height against window sills, chair backs and switches before drawing a level line. Carry the height consistently where practical, rather than changing it to dodge every object. For more room-specific combinations, compare dining room paneling with your own furniture already in place.
IDEA 07 / 20
Keep Lower Battens Clear of the Towel Rail
 SaveSupport Non AI Creator
Image credit: Project: Alan Mascord Design Associates Inc (via Houzz)
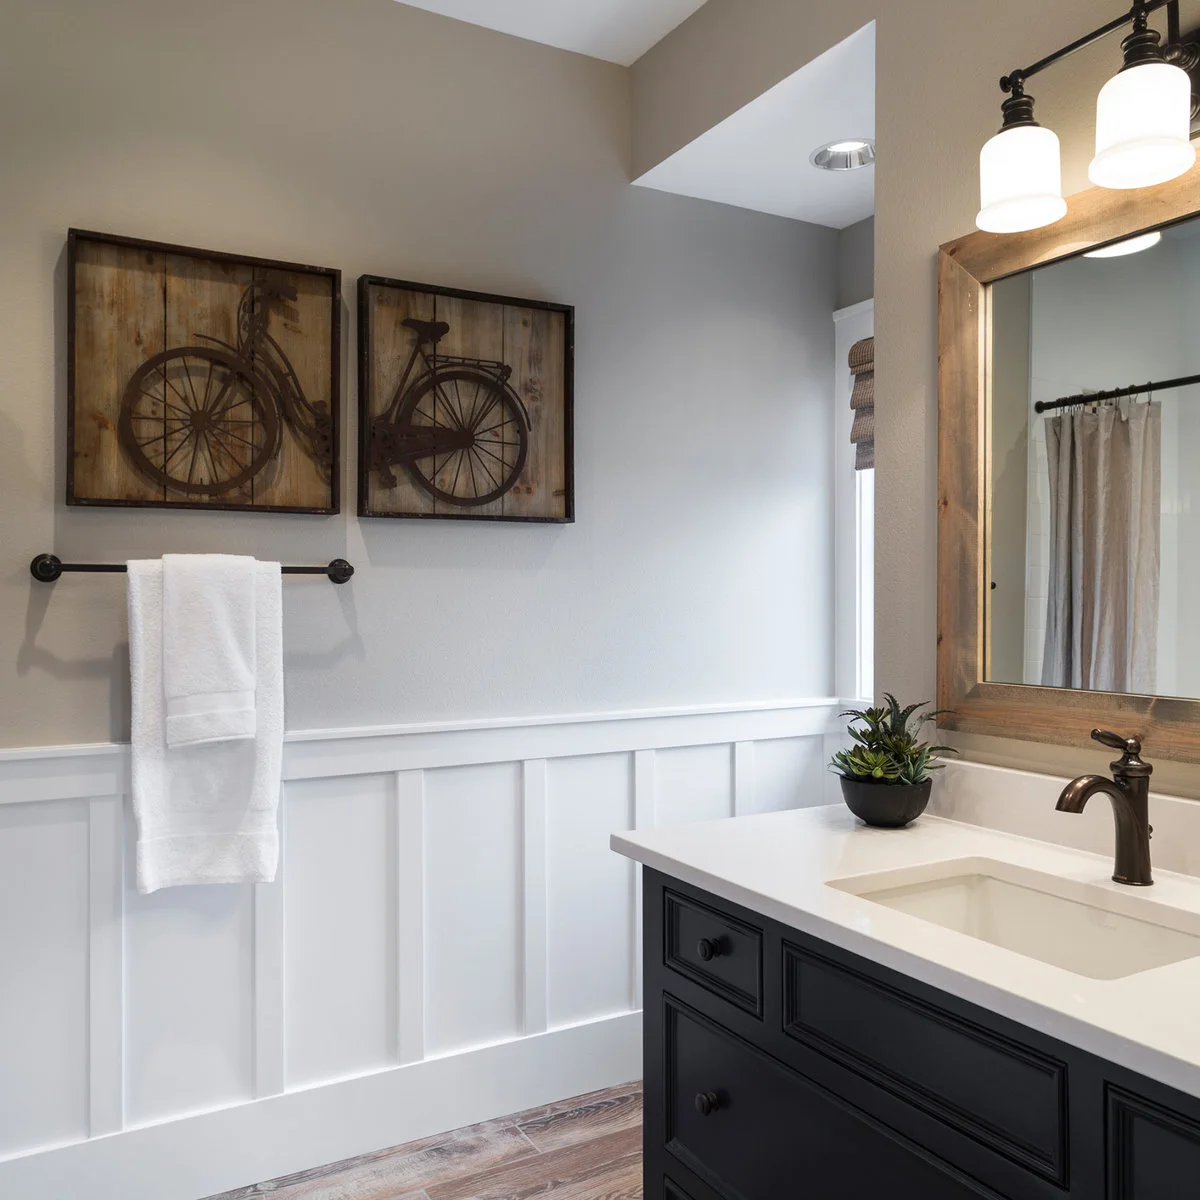
White lower paneling adds vertical lines below the towel rail and paired bicycle prints in this bathroom. The upper wall stays plain, letting the artwork remain readable. A broad top rail gives the transition a firm horizontal edge beside the dark vanity.
Check the rail with towels hanging at their usual length. Choose a panel product and finish appropriate to the bathroom conditions, keeping moisture-sensitive edges away from persistent splashes. Leave enough space to wipe behind the towel rail and around the top ledge without catching cloths on rough joints.
IDEA 08 / 20
Try Fine Vertical Grooves Below a Plain Wall
 SaveSupport Non AI Creator
Image credit: Project: New Old, LLC (via Houzz)
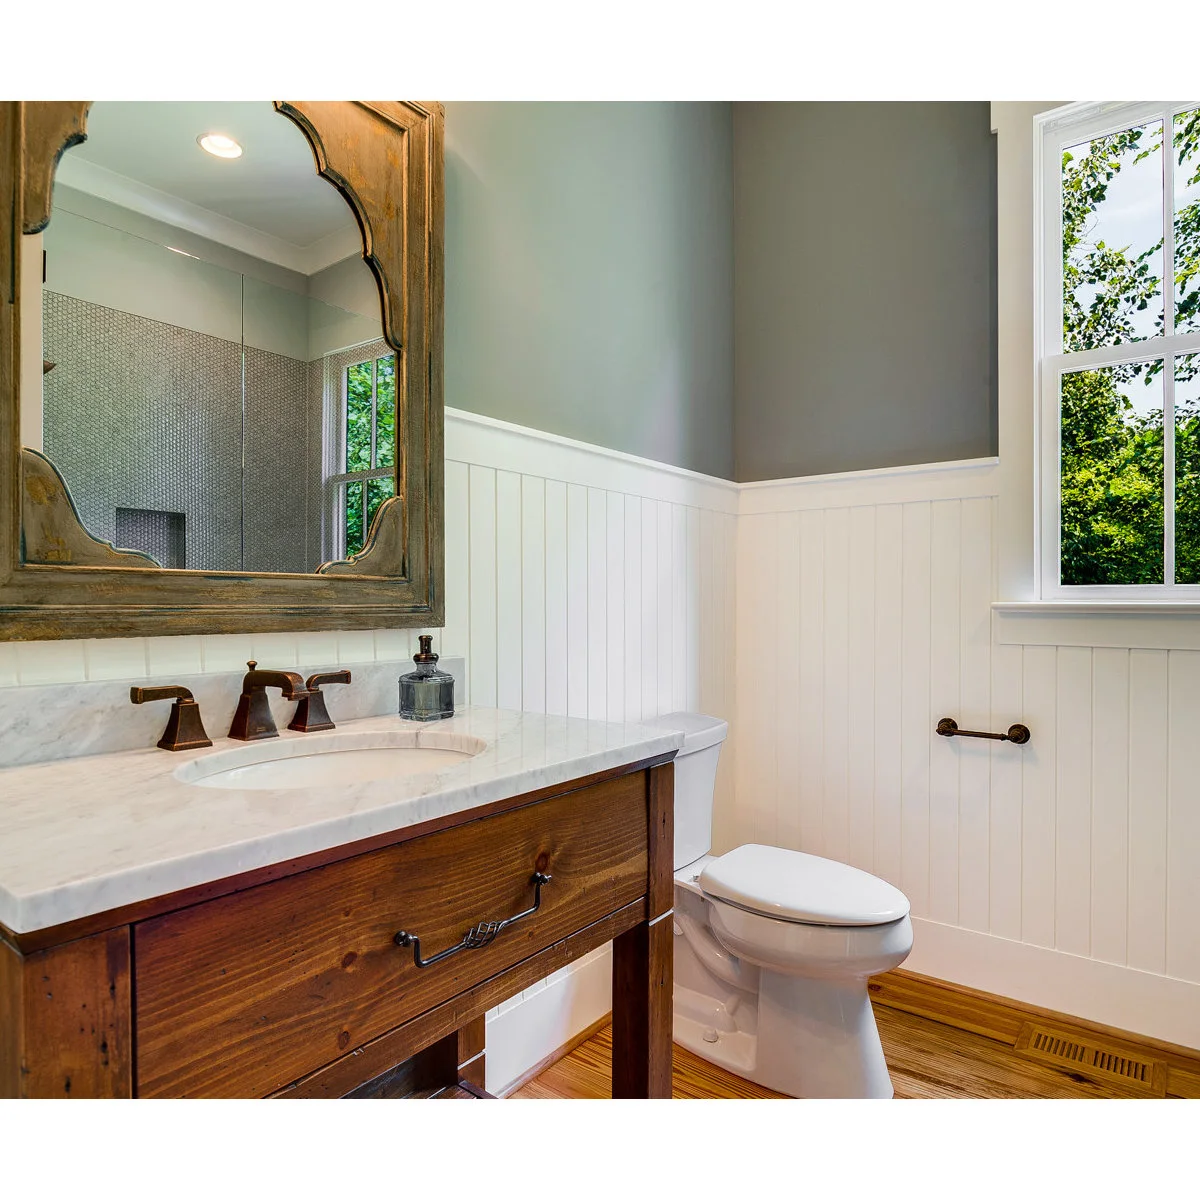
Fine vertical grooves cover the lower part of this bathroom wall beneath pale gray paint. A wood-framed mirror and matching warm vanity introduce texture without requiring a bold panel color. The repeated narrow lines remain distinct from the larger shapes of the mirror and fixtures.
Fine grooves can supply enough detail in a compact room, but consider the cleaning routine along their edges. Check moisture suitability and seal details according to the chosen product. Keep the rail and window trim coordinated so the lower wall does not end in several competing heights.
IDEA 09 / 20
Use Applied Frames on a Textured Wall
 SaveSupport Non AI Creator
Image credit: Project: Angelletta, Inc. (via Houzz)
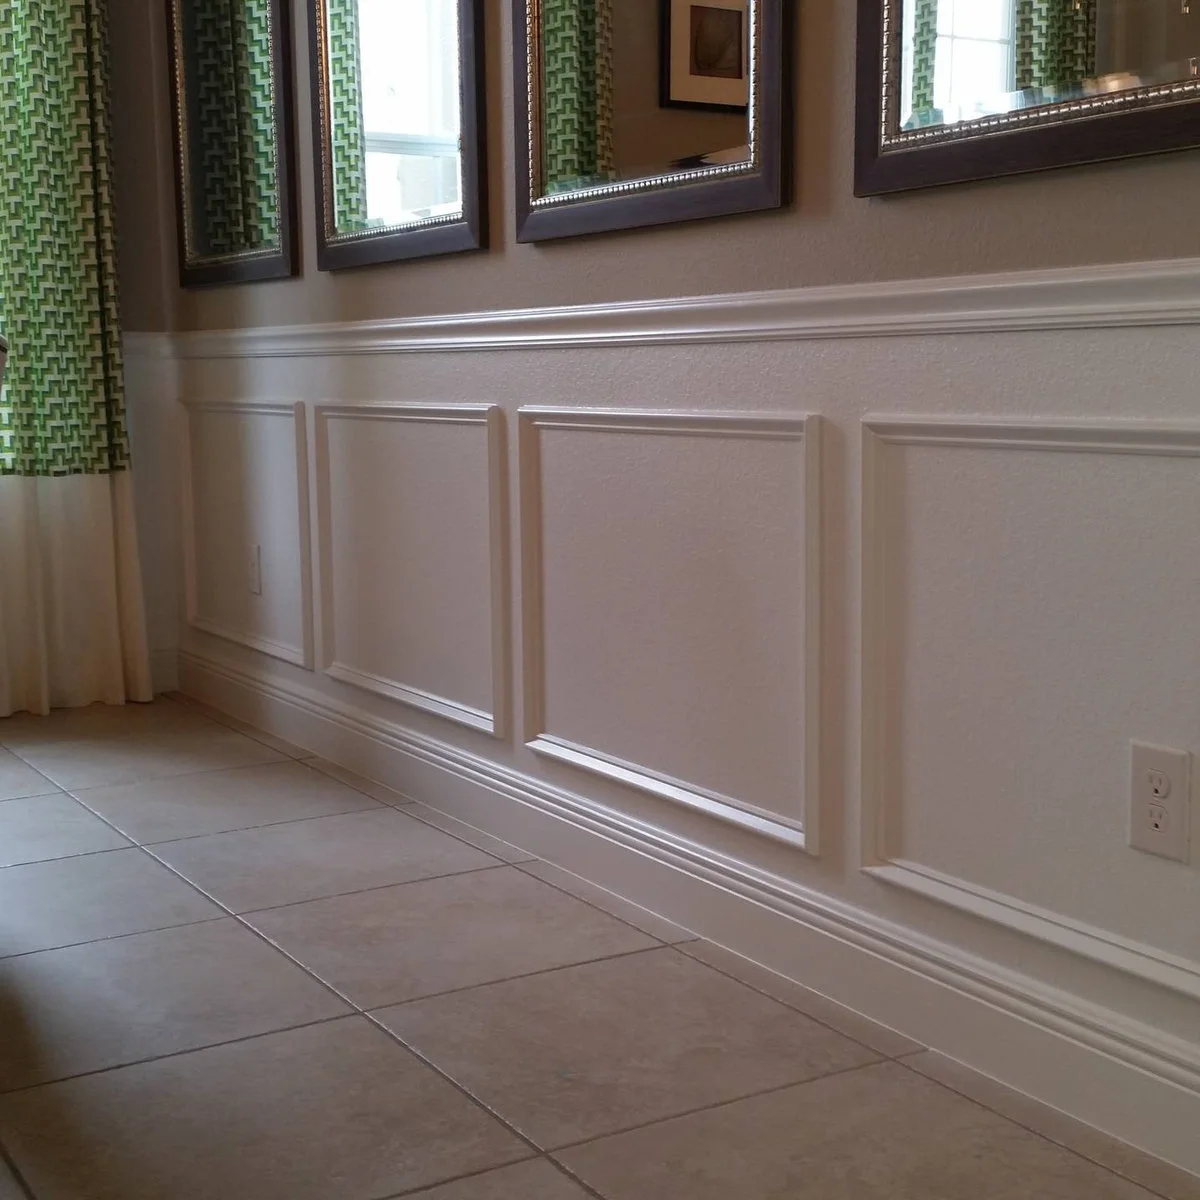
Simple white frames outline rectangles on this lightly textured lower wall. The wall texture stays visible within each shape, while a continuous rail marks the top. Mirrors and patterned curtains add separate detail above, leaving the panel proportions relatively straightforward.
Applied molding can create a framed-panel effect without replacing the whole wall surface. Inspect the substrate and test the fixing method before installation. Keep gaps around outlets deliberate, and plan how the molding meets the skirting so the finished edge looks considered from floor level as well as standing height.
IDEA 10 / 20
Let Wallpaper Sit Above a Plain Lower Band
 SaveSupport Non AI Creator
Image credit: Project: Sean Litchfield Photography (via Houzz)
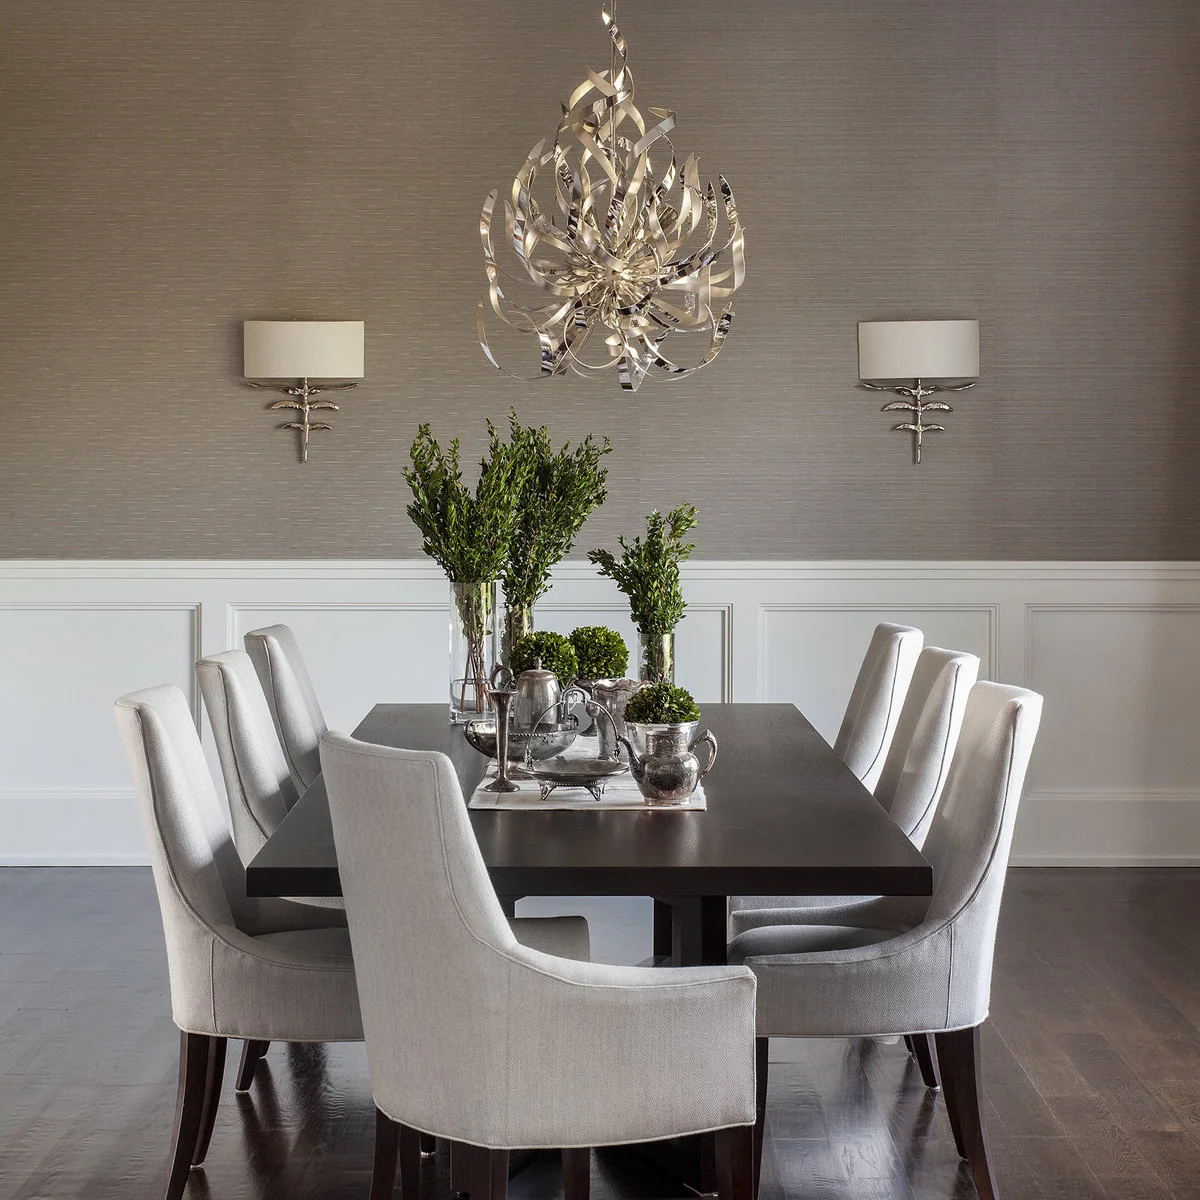
White framed panels form a restrained lower band beneath the textured taupe wall in this dining room. The light trim separates the darker table from the upper wall without adding another strong color. Large upholstered chairs leave the broad panels visible between their backs.
Compare the rail height with the chairs pulled out as well as tucked in. Keep a patterned or textured upper finish quieter if the furniture already has several details. Leave the panel tops easy to dust, and choose a durable finish where chairs or hands may brush the lower wall.
PART 03
Plan Around Fixtures and Furniture
IDEA 11 / 20
Frame Mirrors Within the Panel Layout
 SaveSupport Non AI Creator
Image credit: Project: The Works (via Houzz)
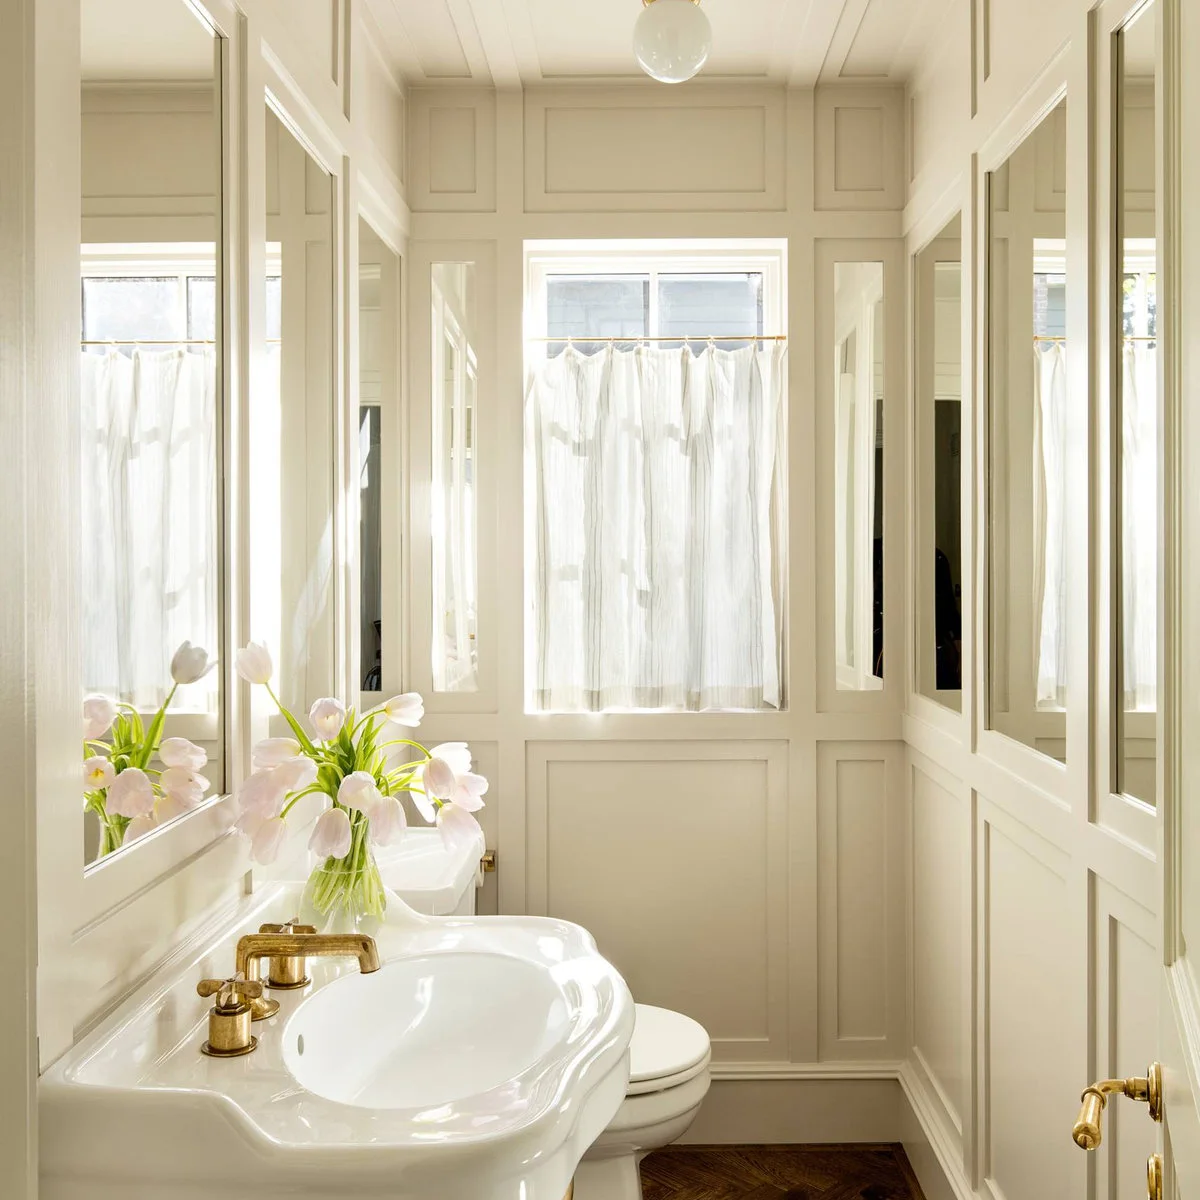
Cream-colored wall frames surround the tall mirrors and small curtained window in this compact bathroom. Repeating vertical rectangles gives the many reflective surfaces a shared outline. The pale finish keeps the trim visible mainly through shadow rather than a sharp change in color.
Measure mirrors, window trim and light positions together before setting out the frames. Keep the reflected view in mind, since a narrow room may repeat the pattern several times. Have heavy mirrors and electrical fittings installed suitably, and choose a finish appropriate to the bathroom’s moisture and cleaning needs.
IDEA 12 / 20
Set the Rail Around a Console Basin
 SaveSupport Non AI Creator
Image credit: Project: indi interiors (via Houzz)
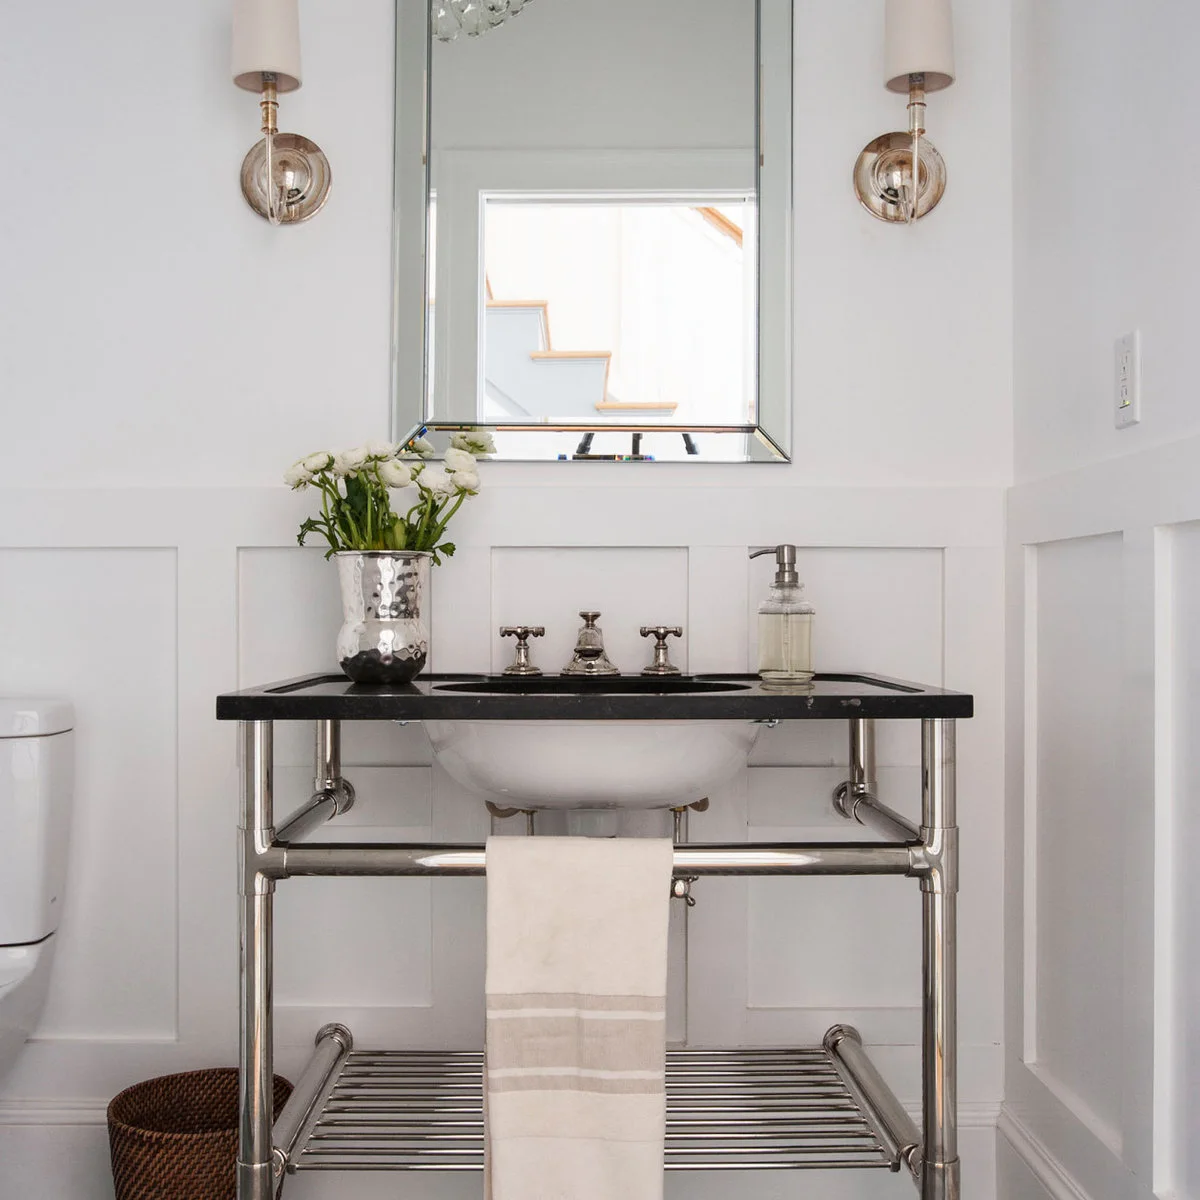
White lower rectangular panels sit behind this open console basin, with the rail running just below the mirror. The dark countertop provides contrast while the open base leaves much of the paneling visible. Simple wall lights avoid adding another large shape beside the mirror.
Coordinate the rail with the sink and plumbing positions before installation. Keep access to valves and fixings rather than concealing them inside decorative work. Use appropriate products around splashes and leave the joints easy to inspect; paneling should never substitute for a required wet-area wall system.
IDEA 13 / 20
Keep Decorative Panels Outside the Shower
 SaveSupport Non AI Creator
Image credit: Project: Rill Architects (via Houzz)
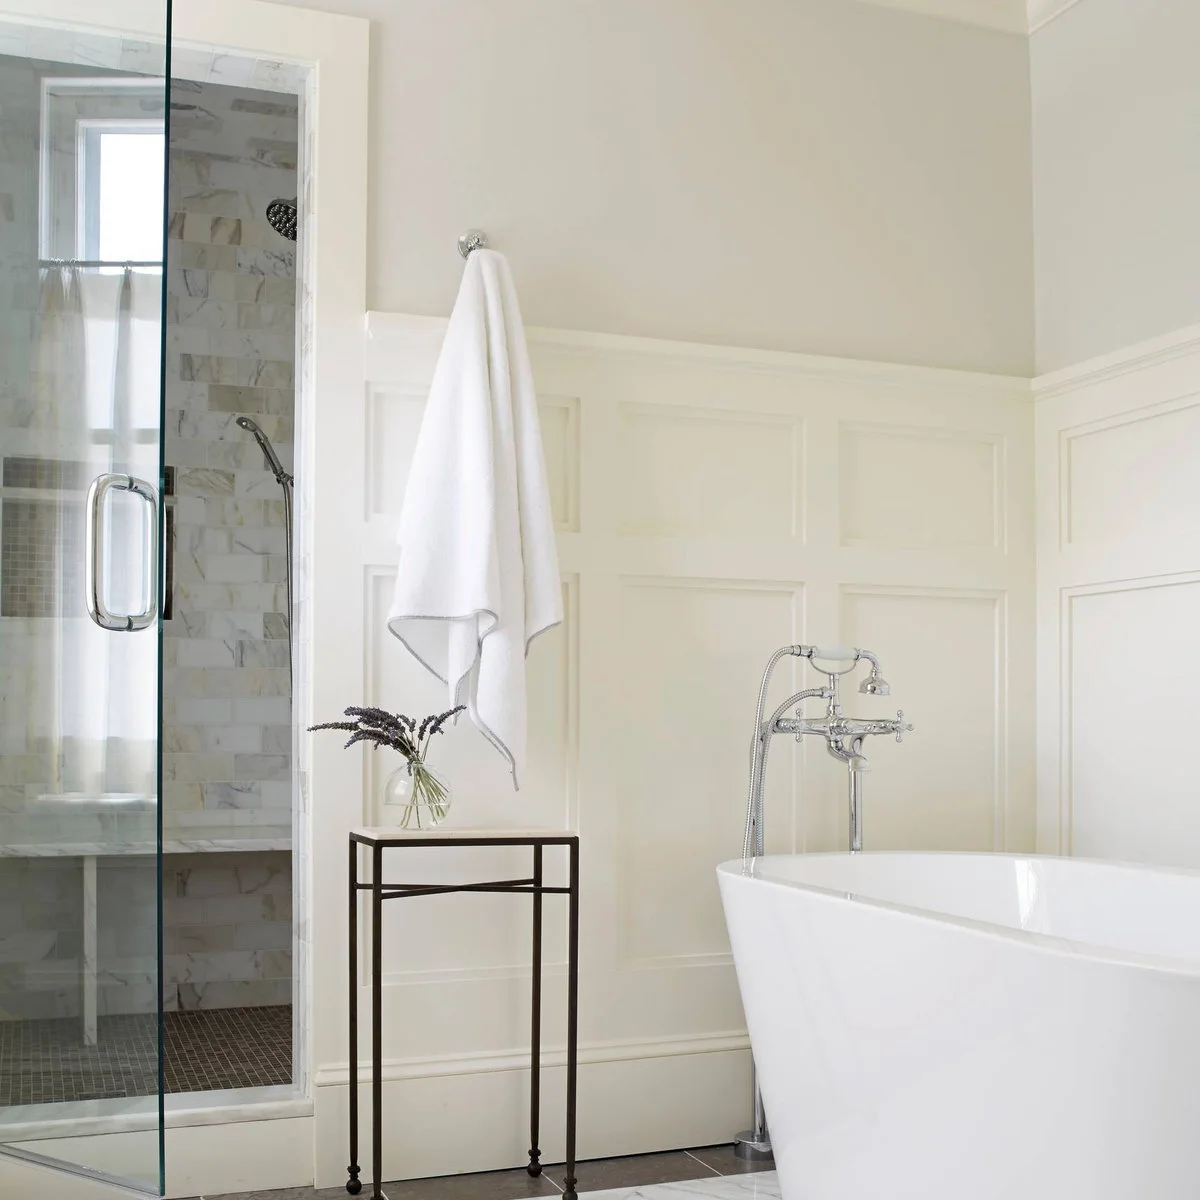
Pale framed panels decorate the wall outside the glass shower beside this freestanding bath. The shower itself uses a different tiled surface, making the two wall treatments easy to distinguish. A towel and small side table add practical details without obscuring the panel pattern.
Keep moisture-sensitive decorative finishes away from direct spray and verify suitability near a bath. Plan any wall hooks with appropriate fixings before adding trim. If the room stays damp, address ventilation and water exposure first instead of relying on extra paint to protect an unsuitable panel product.
IDEA 14 / 20
Align a Shallow Grid with a Strong Bed Shape
 SaveSupport Non AI Creator
Image credit: Project: Diamond Custom Homes, Inc. (via Houzz)
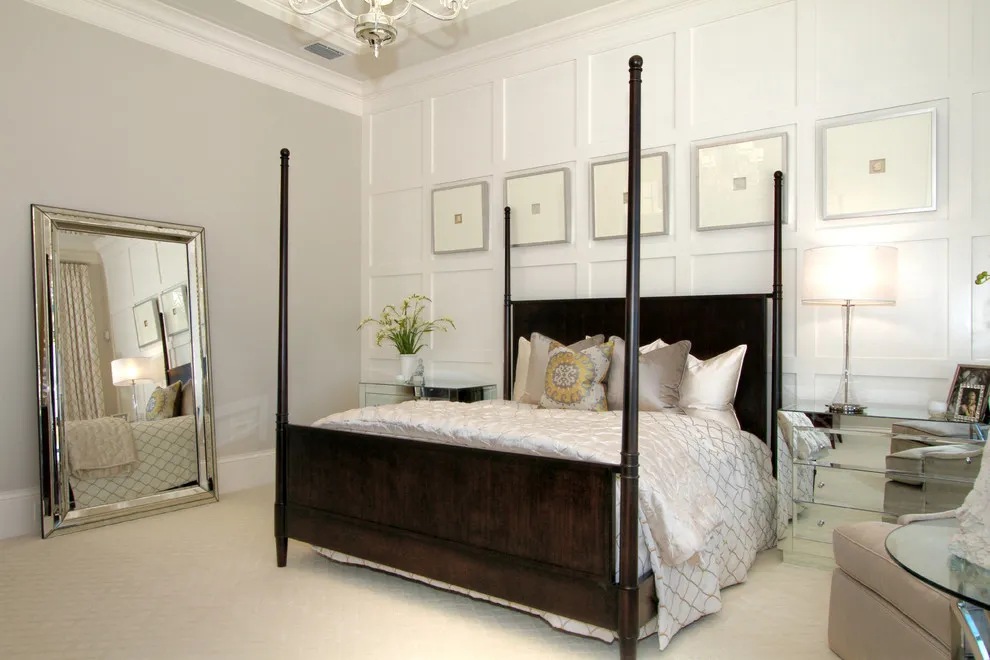
A shallow white grid fills the wall behind this dark four-poster bed. Small framed pictures occupy a horizontal band above the headboard, while the tall posts supply a separate vertical rhythm. Matching the panel color to the wall keeps the backdrop lighter than the bed frame.
Set out the panels with the actual headboard and bedside furniture measured on the wall. Bedroom paneling should still look balanced when pillows cover its lower portion. Avoid placing narrow leftover strips immediately behind the bed posts, where several overlapping lines can make a simple arrangement look fussy.
IDEA 15 / 20
Use One Color for Frames and Background
 SaveSupport Non AI Creator
Image credit: Project: Mimi & Hill interiors (via Houzz)
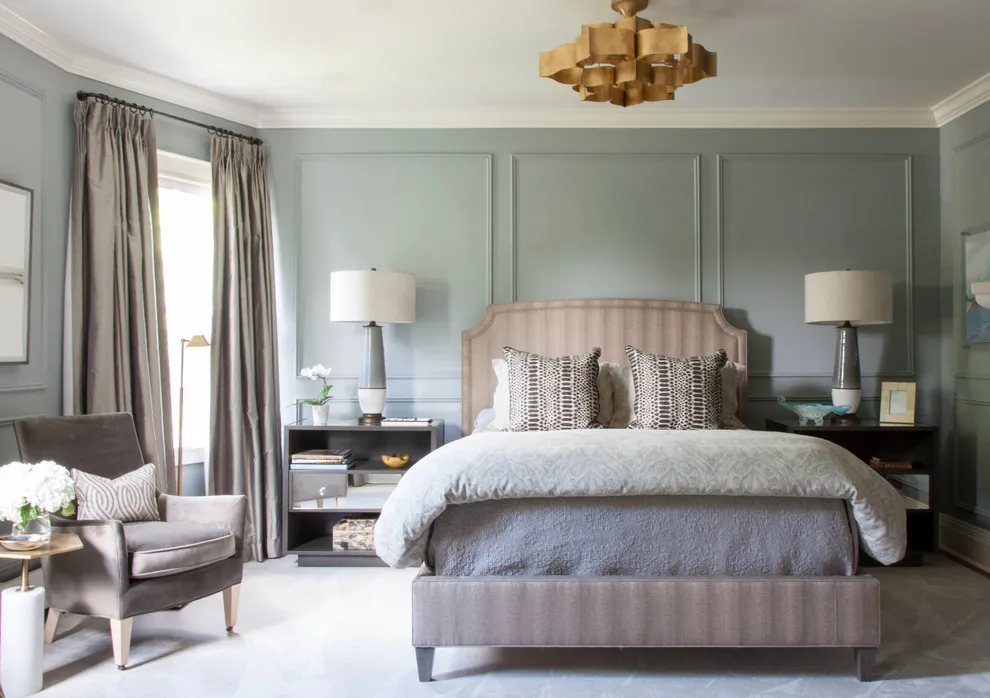
Blue-green moldings and background share one color behind this pale upholstered bed. The shallow frames remain visible through their edges and shadows, giving the wall detail without a strong outlined grid. Dark bedside tables provide a lower contrast against the softer wall and bedding.
Try a large paint sample that includes both flat surface and trim. Light can make the raised edges read differently throughout the day. If the headboard already has a curved shape, leave generous panel proportions around it instead of following every curve with another decorative line.
PART 04
Balance Paneling with the Whole Room
IDEA 16 / 20
Let Large Artwork Cross Panel Divisions
 SaveSupport Non AI Creator
Image credit: Project: Marie Flanigan Interiors (via Houzz)
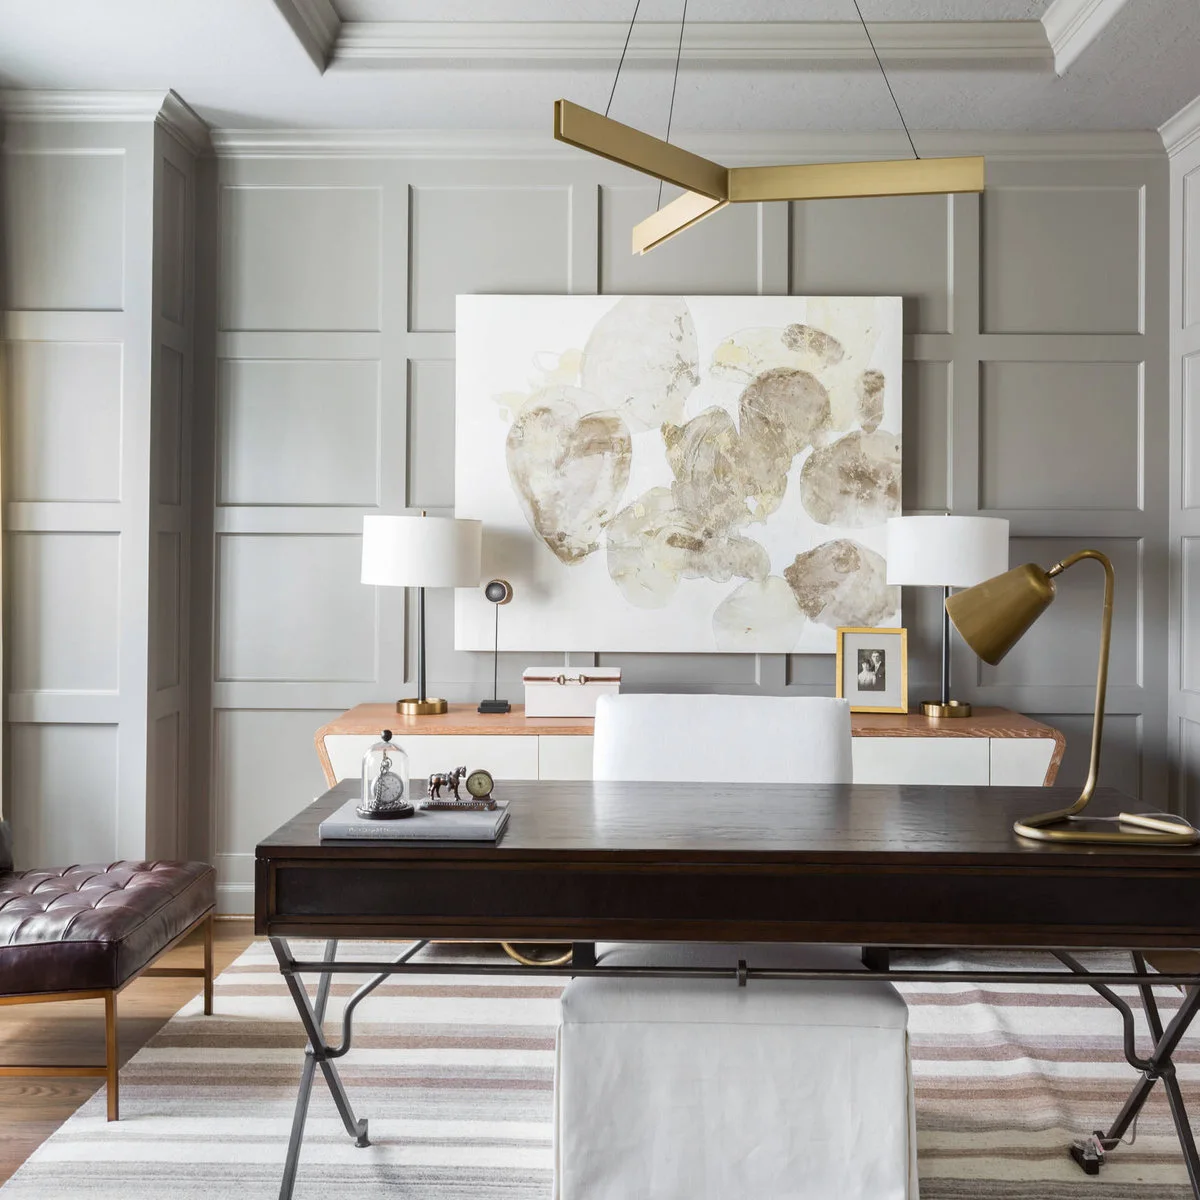
A large pale abstract artwork crosses several divisions of the gray grid behind this desk. The picture becomes the main focal point while the frames add a regular background rhythm. Matching lamps and a light chair keep the layered wall from needing more small objects.
Do not force every picture into one panel if the artwork’s scale works better across several. Check the fixing position and wall support independently of the decorative trim. Keep enough visible grid around the edges to make the arrangement feel deliberate, and test glare from nearby desk lamps before hanging.
IDEA 17 / 20
Use Thin White Frames with Reflective Furniture
 SaveSupport Non AI Creator
Image credit: Project: BuiltIN studio (via Houzz)
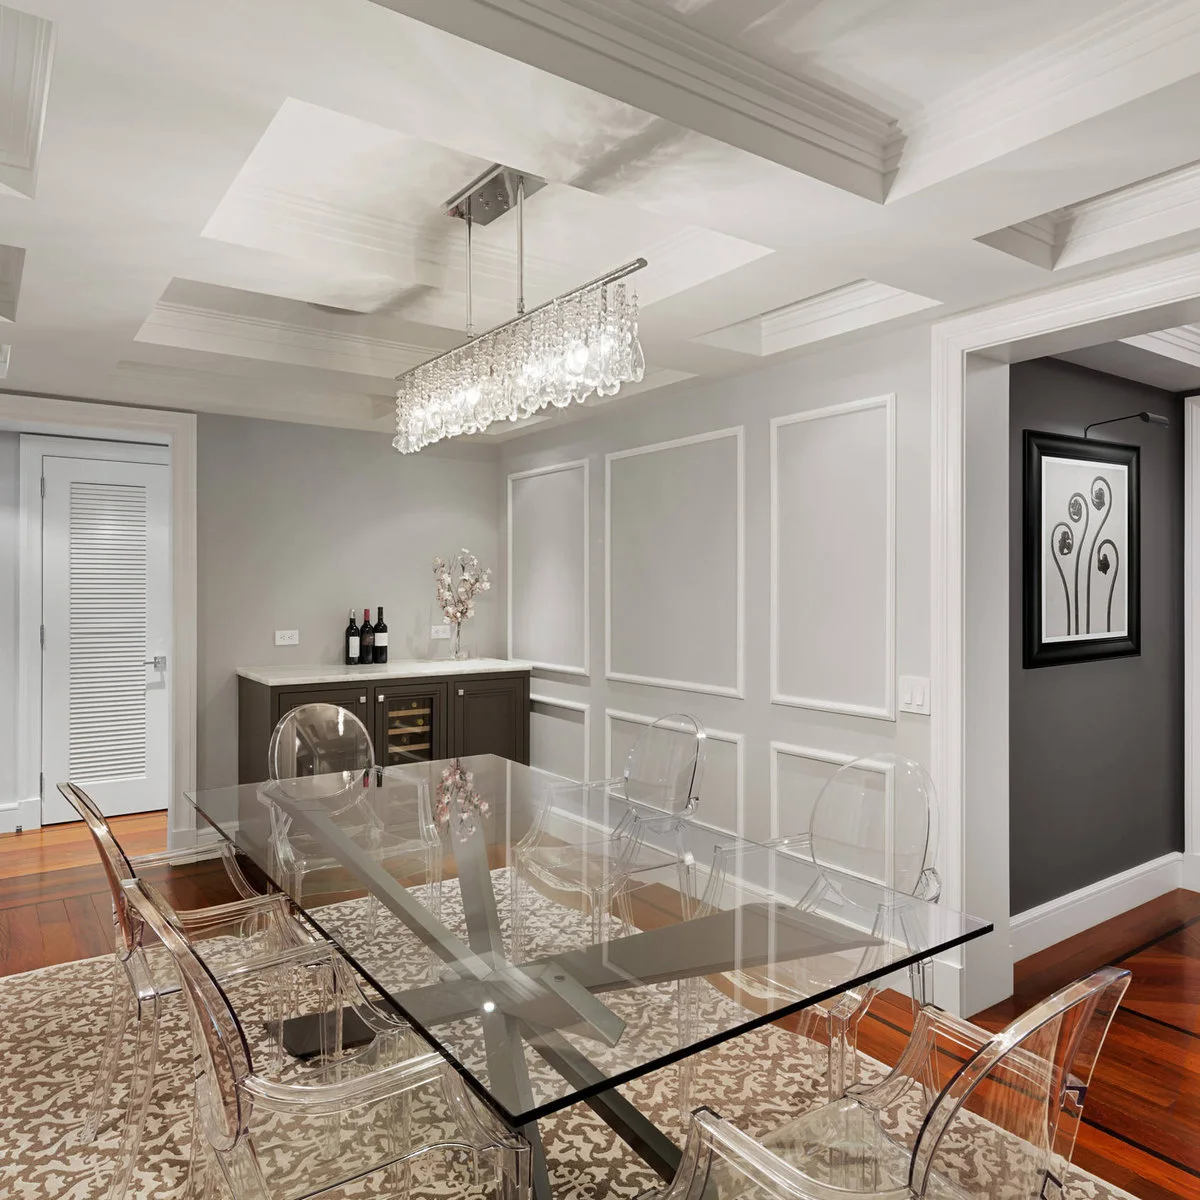
Thin white frames decorate the gray wall behind this glass dining table and clear chairs. Their light outline contrasts with the broad ceiling coffers without copying their depth. The transparent furniture leaves more of the lower wall visible than a heavy cabinet would.
Choose frame widths in relation to existing trim rather than assuming thicker always looks more substantial. A lighter profile can be enough beside reflective furniture. Map out sockets and any sideboard before fixing the lower frames so everyday furniture will not hide every useful part of the pattern.
IDEA 18 / 20
Scale Framed Panels to a High Landing
 SaveSupport Non AI Creator
Image credit: Project: Thompson Custom Homes (via Houzz)
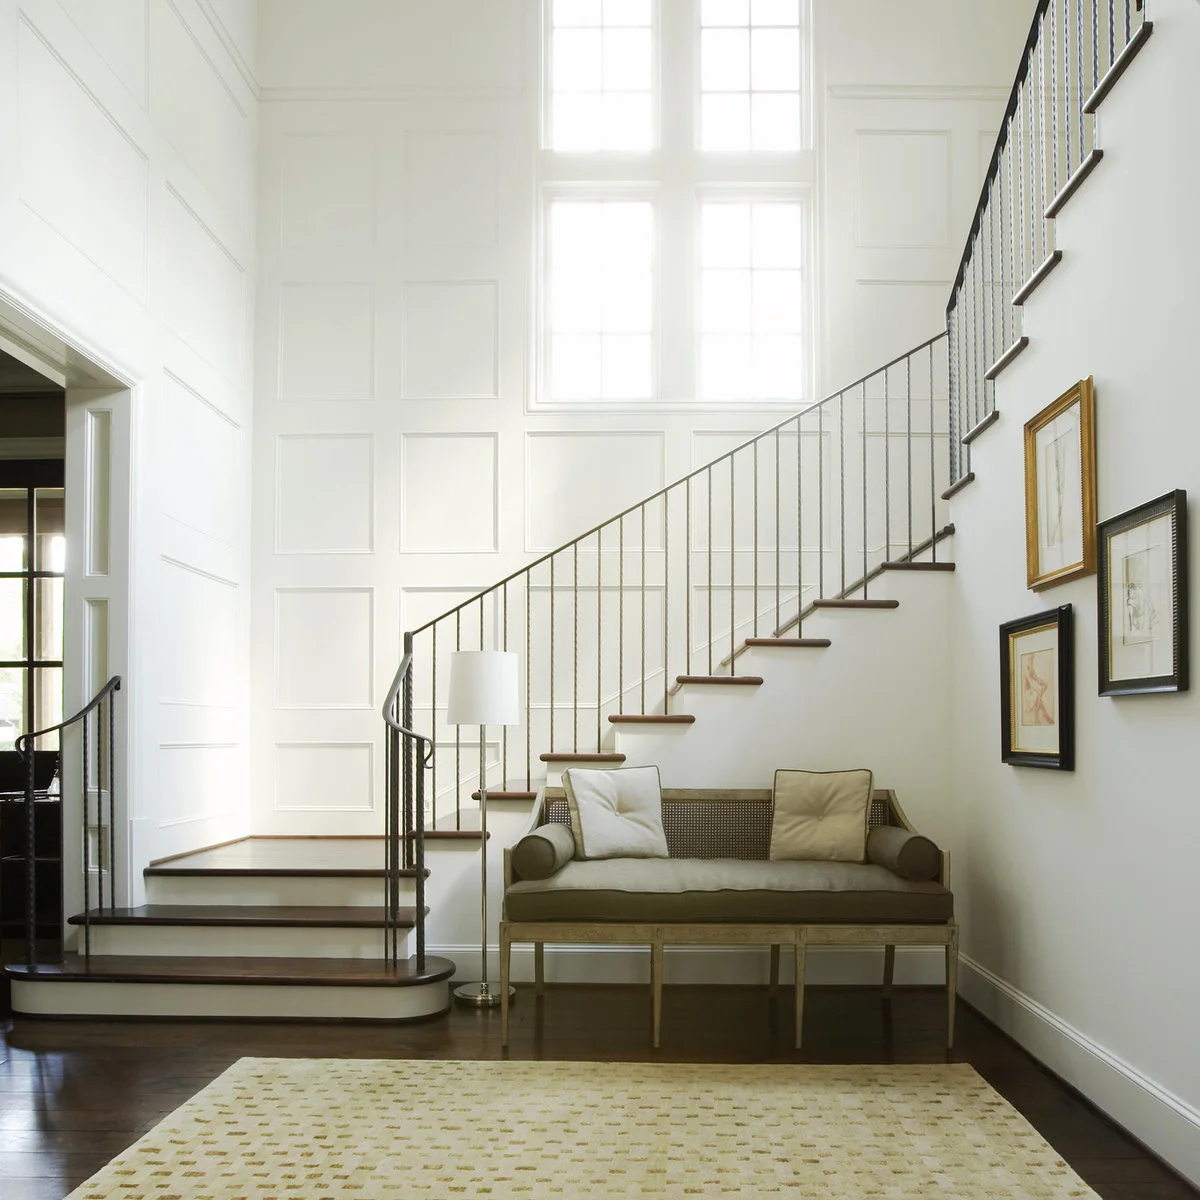
Large white frames divide the high walls around this stair hall’s windows. The broad layout suits the room’s tall proportions without filling every gap with narrow trim. A curved staircase and a small settee supply softer shapes beneath the otherwise regular wall arrangement.
Judge tall paneling from the entrance and upper landing before deciding its spacing. A pattern that looks balanced close up may feel busy across a double-height wall. Plan safe installation and future painting access, and keep the window trim and stair rail visually separate from the applied frames.
IDEA 19 / 20
Use Long Vertical Divisions Between Windows
 SaveSupport Non AI Creator
Image credit: Project: Modern Organic Interiors (via Houzz)
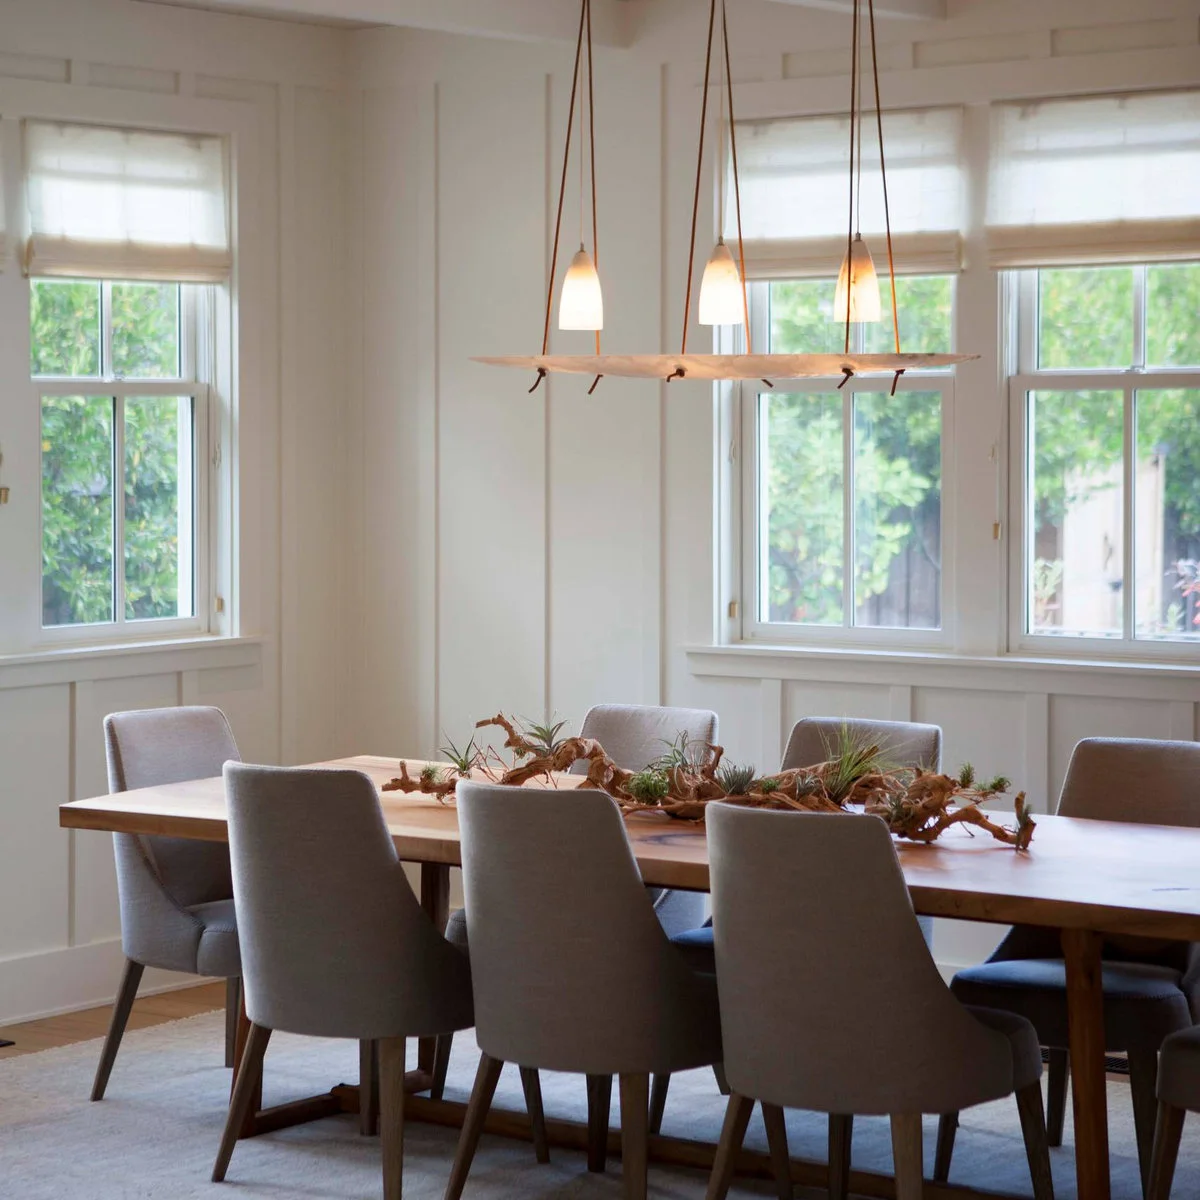
Long vertical divisions extend between the windows in this dining room. Their narrow spacing emphasizes the height of the wall while the pale finish connects with the window trim. Gray chairs and a wood table keep the lower part of the room comparatively simple.
Start the layout around the existing windows instead of forcing equal panels onto unequal wall sections. Keep small slivers out of the corners where possible. If several window frames already create a strong rhythm, use fewer additional divisions so the wall remains a backdrop rather than a dense grid.
IDEA 20 / 20
Give a Geometric Pattern Room to Read
 SaveSupport Non AI Creator
Image credit: Project: Butterfield Custom Homes (via Houzz)
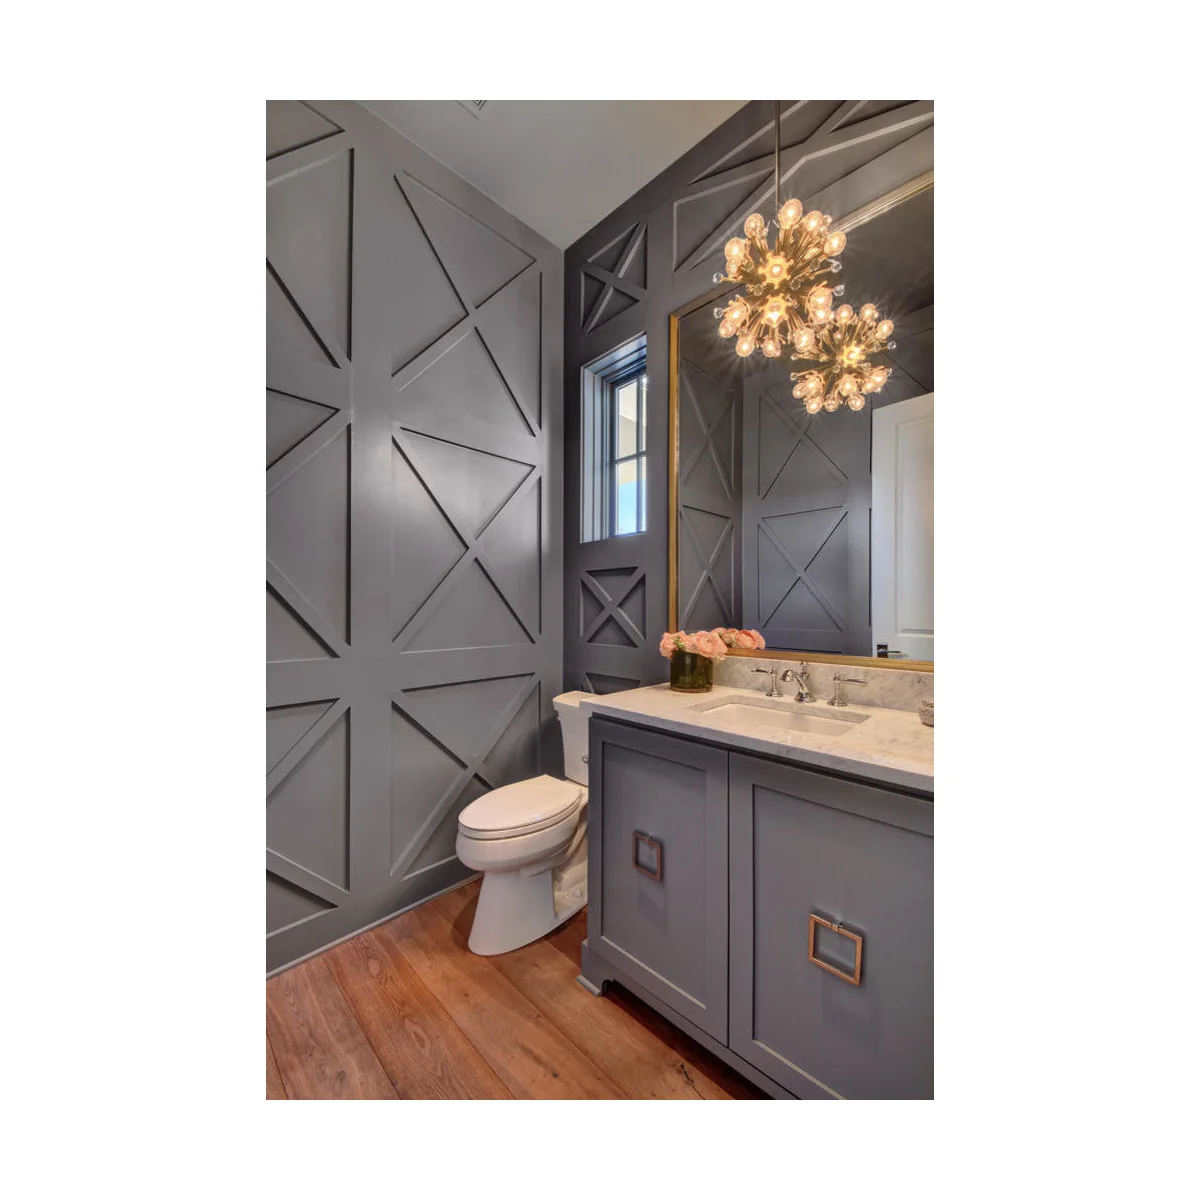
Dark gray diagonal trim creates a repeated X pattern around this compact powder room. The matching vanity keeps the color consistent, while the pale countertop and large mirror provide a visual pause. A single geometric treatment gives the room character without needing several competing wall finishes.
Test a full panel shape with tape before committing to diagonal cuts. Check how the pattern meets the window, corners and base trim, where awkward fragments become noticeable. Use a suitable finish for the room and leave access around fixtures; a bold pattern still needs to be practical to clean.
BRING IT ALL TOGETHER
Draw the Whole Wall Before Adding Trim
Measure doors, windows, outlets and furniture together, then mark out a few full-size panel shapes. Decide where the pattern stops at corners and how the top and bottom edges will meet existing trim before purchasing materials.
Choose a product and finish suited to the room, leaving fixtures accessible and joints easy to clean. A restrained layout with deliberate proportions often works better than squeezing a decorative frame into every available gap.