The space above a kitchen sink has several jobs to balance. It may frame a garden view, hold everyday dishes, provide evening light or simply offer a surface that is easy to wipe. Start with the faucet, splashes and access to any window before adding decoration.
These real kitchen photographs show different ways to organize that area, including open shelves, clear windows, fitted blinds and lighting. Not every solution belongs directly over the bowl: sometimes leaving the center open and placing storage to the side makes the sink much easier to use.
PART 01
Keep shelves useful and reachable
IDEA 01 / 20
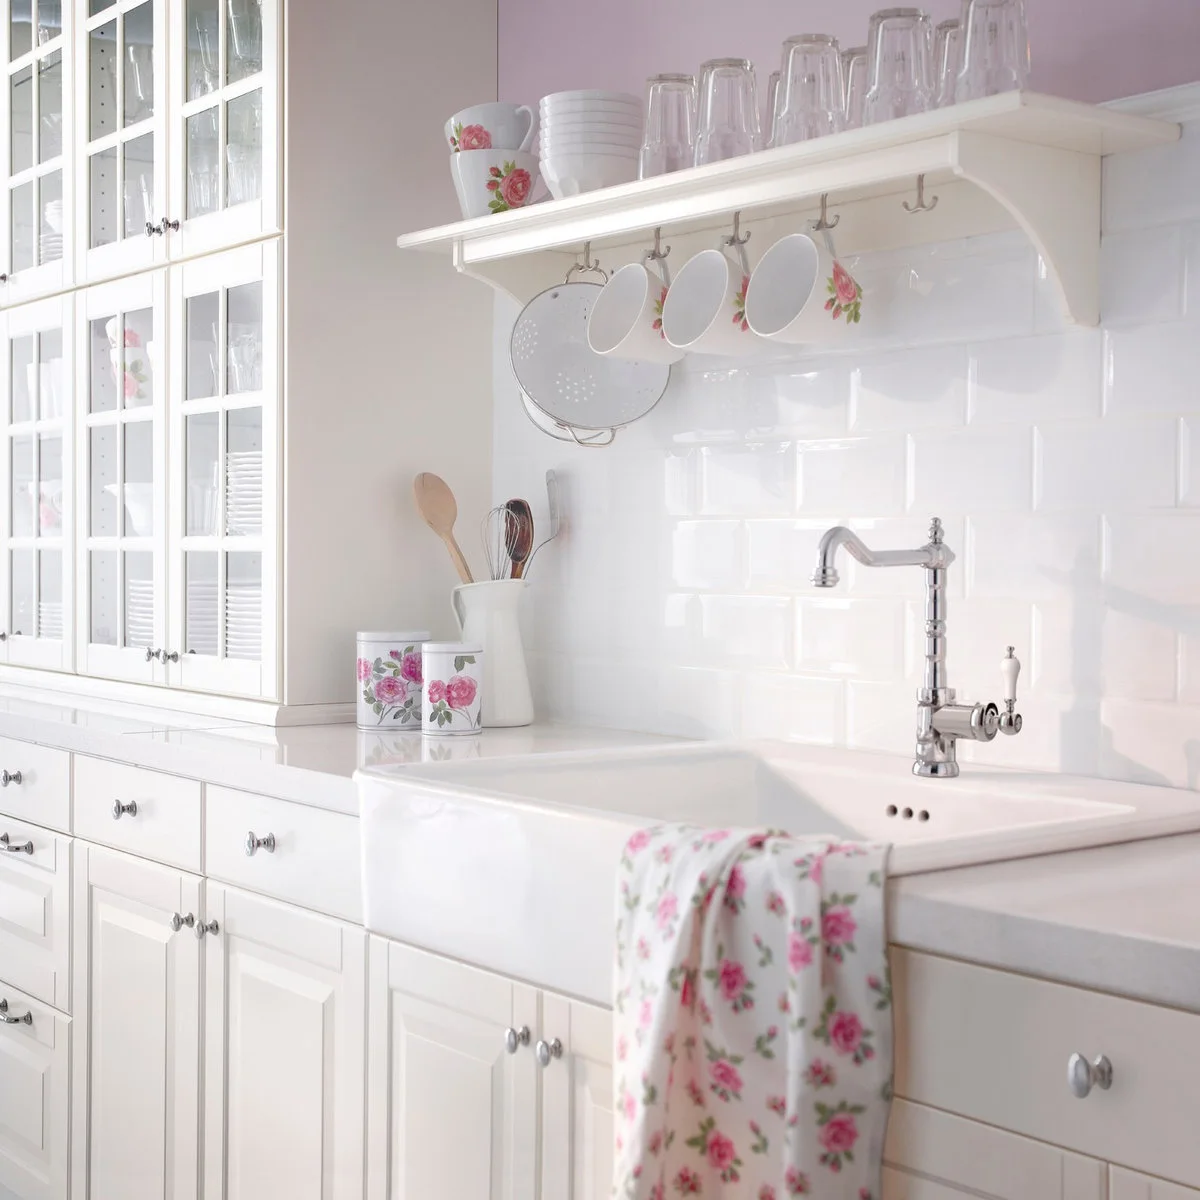
Hang Everyday Cups Beneath a Small Shelf
 SaveSupport Non AI Creator
Image credit: Project: IKEA (via Houzz)
Hooks beneath the small shelf keep cups visible above the sink while glasses and bowls occupy the upper surface. White tile and cabinetry provide a quiet background for the floral pieces. The arrangement adds a useful display without requiring another full-height cupboard beside the glass-fronted cabinets.
Use secure hooks and fixings appropriate for the loaded shelf, and leave enough clearance for washing larger items. Keep frequently used cups within comfortable reach rather than filling every hook. These kitchen wall decor ideas offer other ways to add personality while preserving the surfaces you need for preparation and cleanup. For a different overall direction, these mid-century modern kitchen ideas show how wood cabinetry and simpler wall finishes can shape the cleanup area.
IDEA 02 / 20
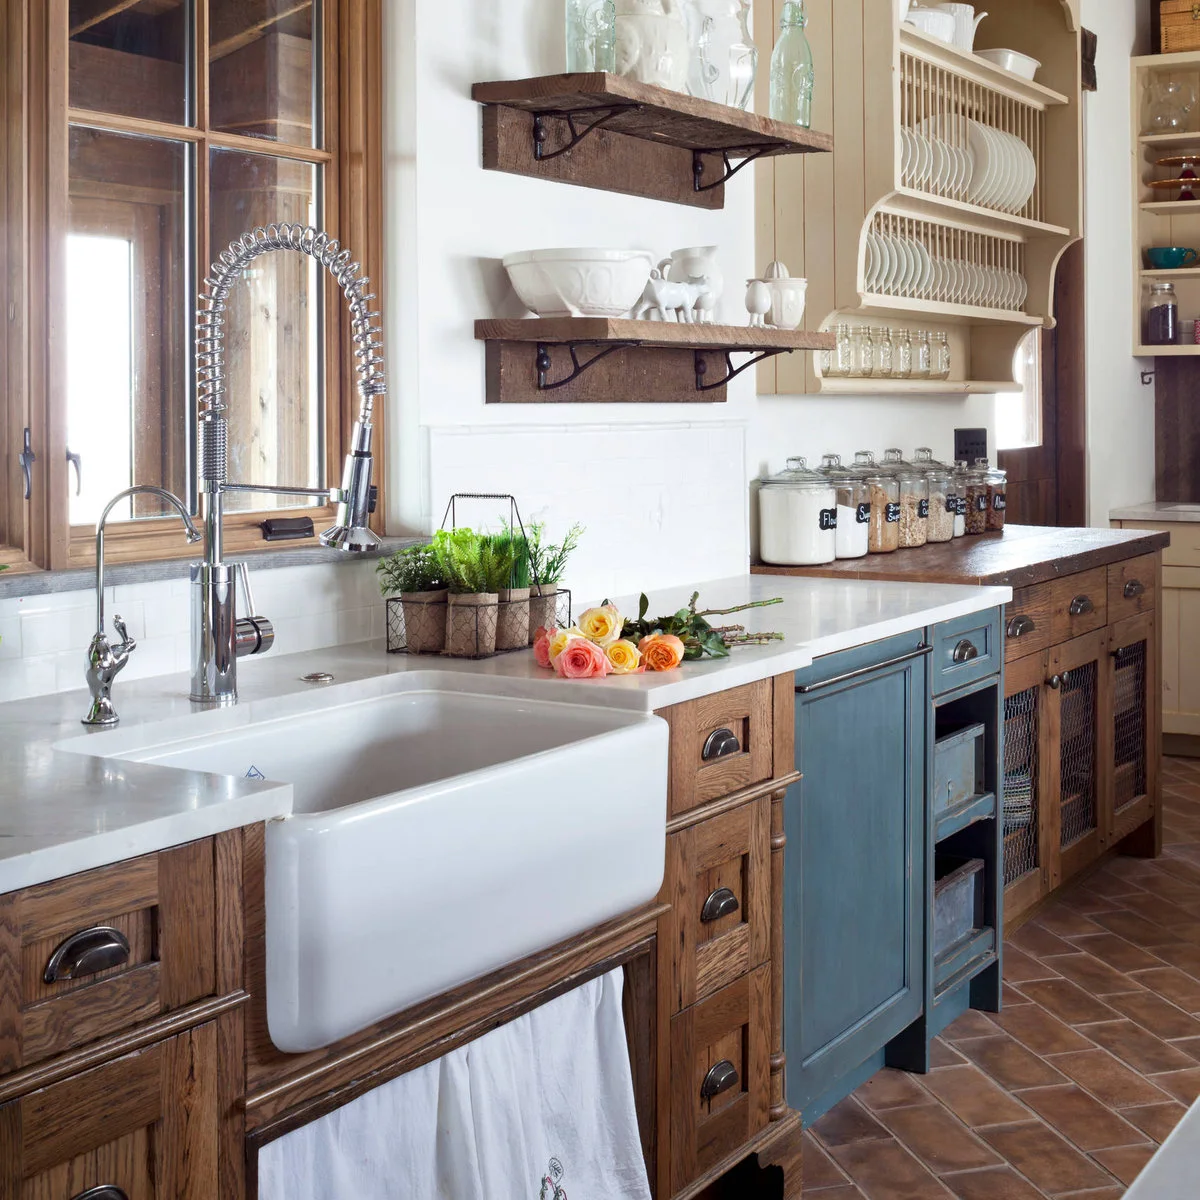
Place Open Storage Beside the Window
 SaveSupport Non AI Creator
Image credit: Project: Angela Otten - Inspire Kitchen Design Studio (via Houzz)
The shelves and plate rack sit beside the window, leaving the center above the sink open. White dishes stand out against the warm wood and cream-painted storage. A few glass vessels occupy the upper shelf, while everyday bowls and plates are kept lower and easier to reach.
Separate frequently used pieces from objects that can remain higher up. Open dish storage needs regular cleaning, particularly near cooking and washing. Keep the shelf clear of window handles, and protect surrounding wood finishes from water rather than assuming a rustic appearance makes them insensitive to splashes.
IDEA 03 / 20
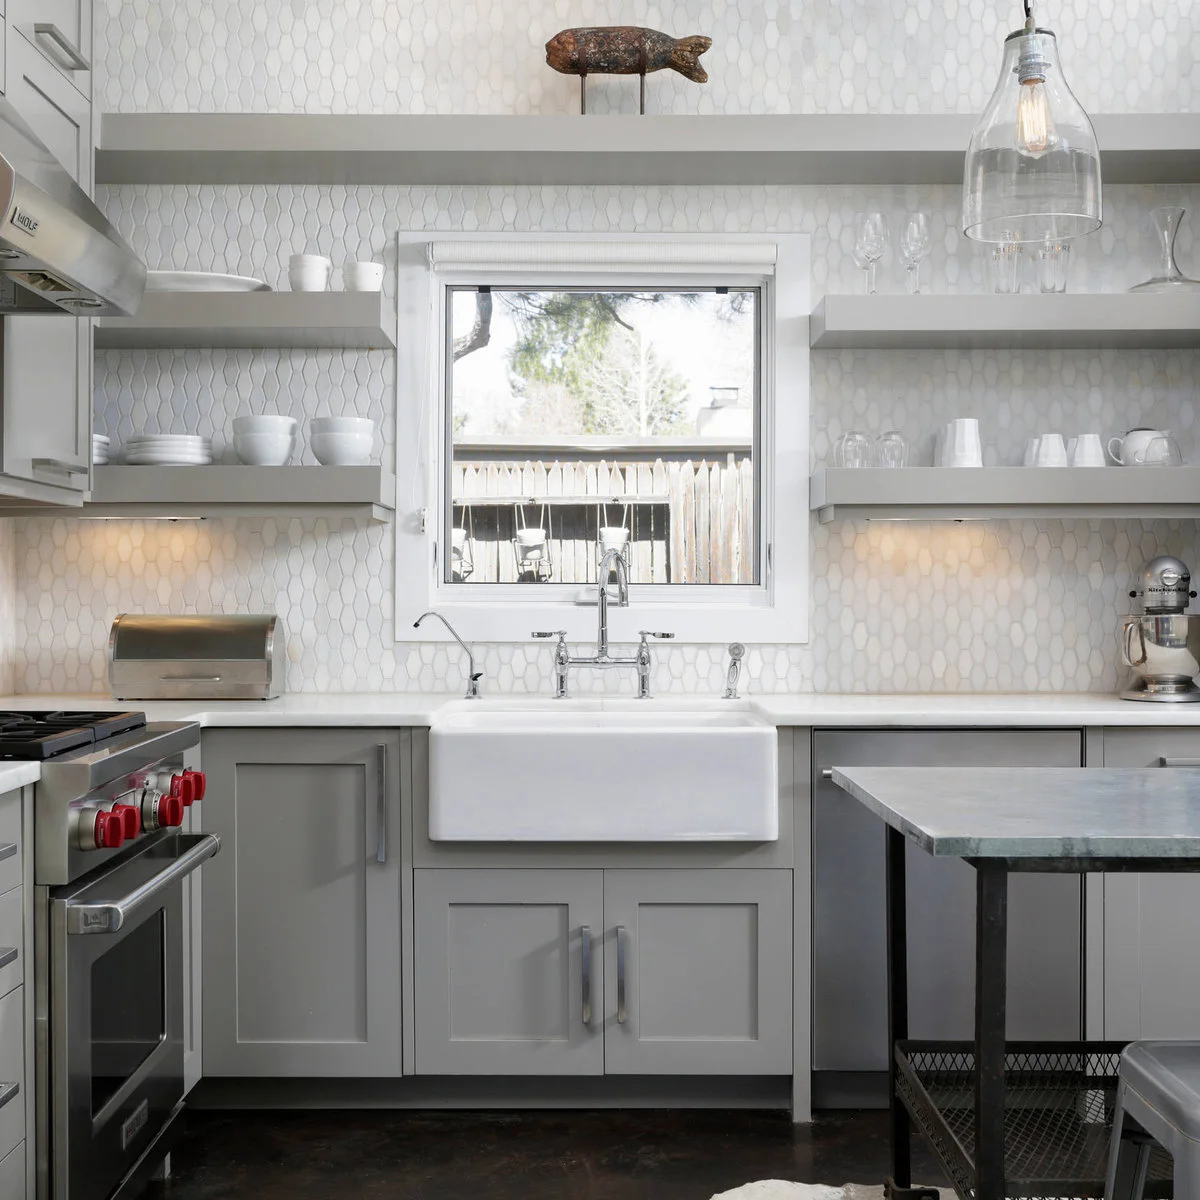
Step Shelves Around a Small Central Window
 SaveSupport Non AI Creator
Image credit: Project: Joseph Deats Photography (via Houzz)
Short shelves fit on both sides of the small window, while a longer upper shelf bridges across the wall. Pale dishes and clear glass keep the display restrained. Lighting beneath the lower shelves adds useful brightness to the counter edges without filling the center above the basin with a cabinet.
Plan shelf heights around reach and the objects you will actually use. Keep heavy pieces low and have the supports specified for the intended load. The highest shelf is better suited to a limited display than daily dish storage, especially if reaching it would require leaning over the sink.
IDEA 04 / 20
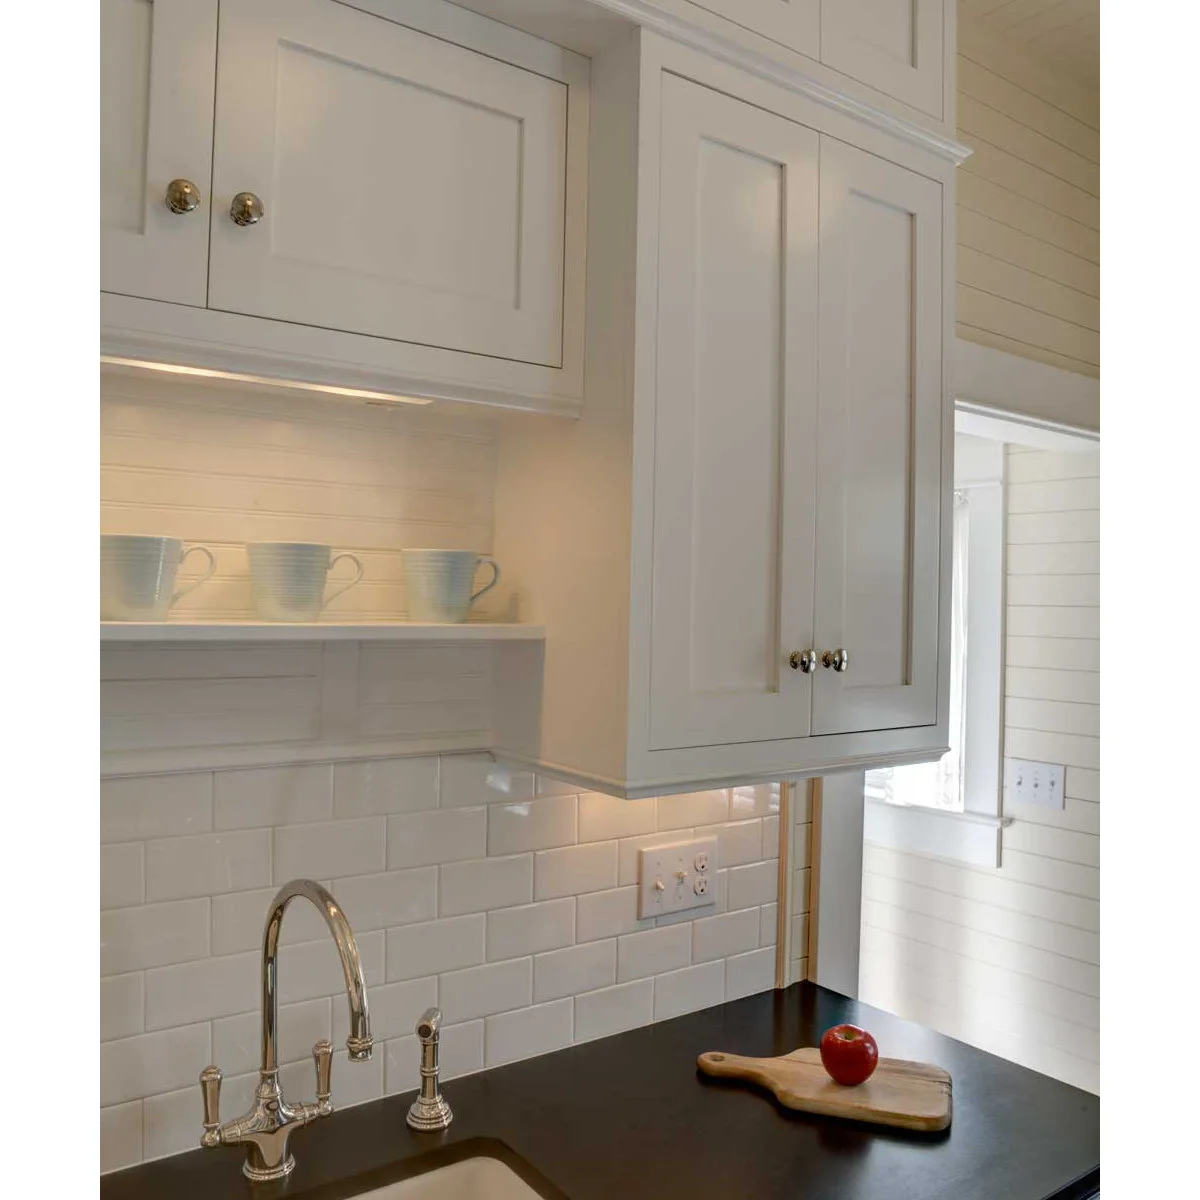
Leave a Clear Gap Between Cabinet Runs
 SaveSupport Non AI Creator
Image credit: Project: Division One Construction (via Houzz)
A slim shelf makes use of the gap between the upper cabinets without enclosing the area above the sink. Three pale cups keep the arrangement simple. Light beneath the cabinets brightens the tile and counter, while the surrounding doors preserve most of the kitchen’s closed storage.
Keep the shelf shallow enough that it does not intrude into normal washing movements. Check the wall fixing and the space needed to lift cups safely. A small display works best when it has a clear limit, rather than becoming a growing collection directly above the wettest part of the counter.
IDEA 05 / 20
Use a Window Shelf Sparingly
 SaveSupport Non AI Creator
Image credit: Project: Cuppett Kilpatrick Architecture + Interior Design (via Houzz)
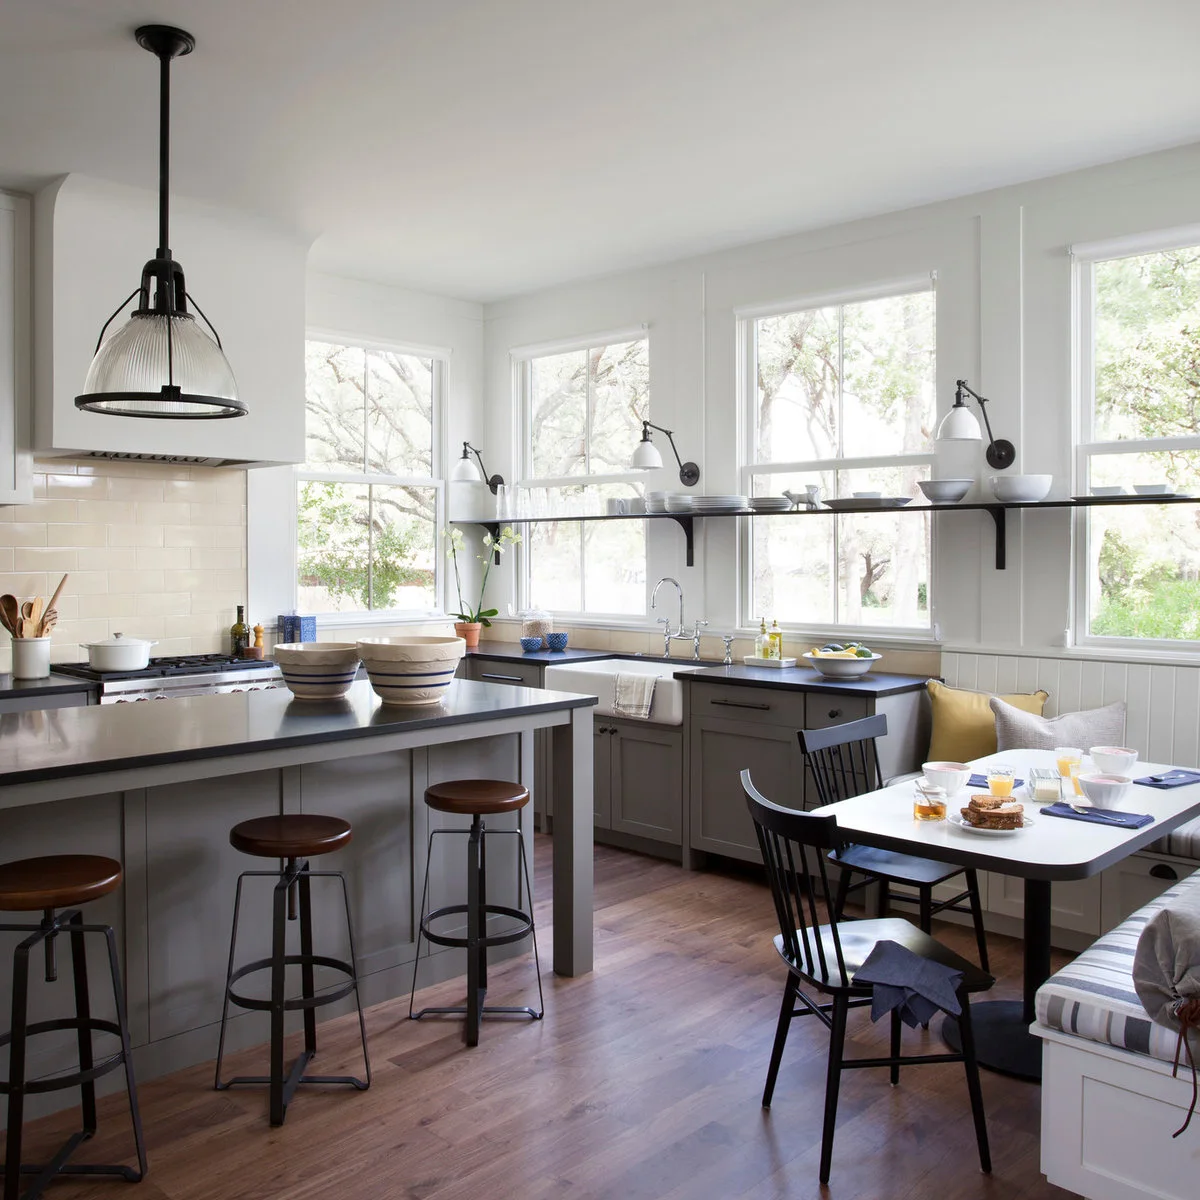
The long dark shelf creates a horizontal display line across the windows, carrying a restrained group of dishes. Small wall lights repeat between the frames. The white window surrounds and dark counter make the shelf feel related to the room, while the view remains visible above and below it.
Consider the tradeoff carefully before adding storage across glazing. It can complicate window operation, cleaning and light, so side storage may suit your kitchen better. Keep any installed shelf secure, avoid overloaded displays, and confirm access to every opening and handle before choosing a fixed position.
PART 02
Let the window do some of the work
IDEA 06 / 20
Frame a Broad Sink Window with Cabinets
 SaveSupport Non AI Creator
Image credit: Project: Metzler Home Builders (via Houzz)
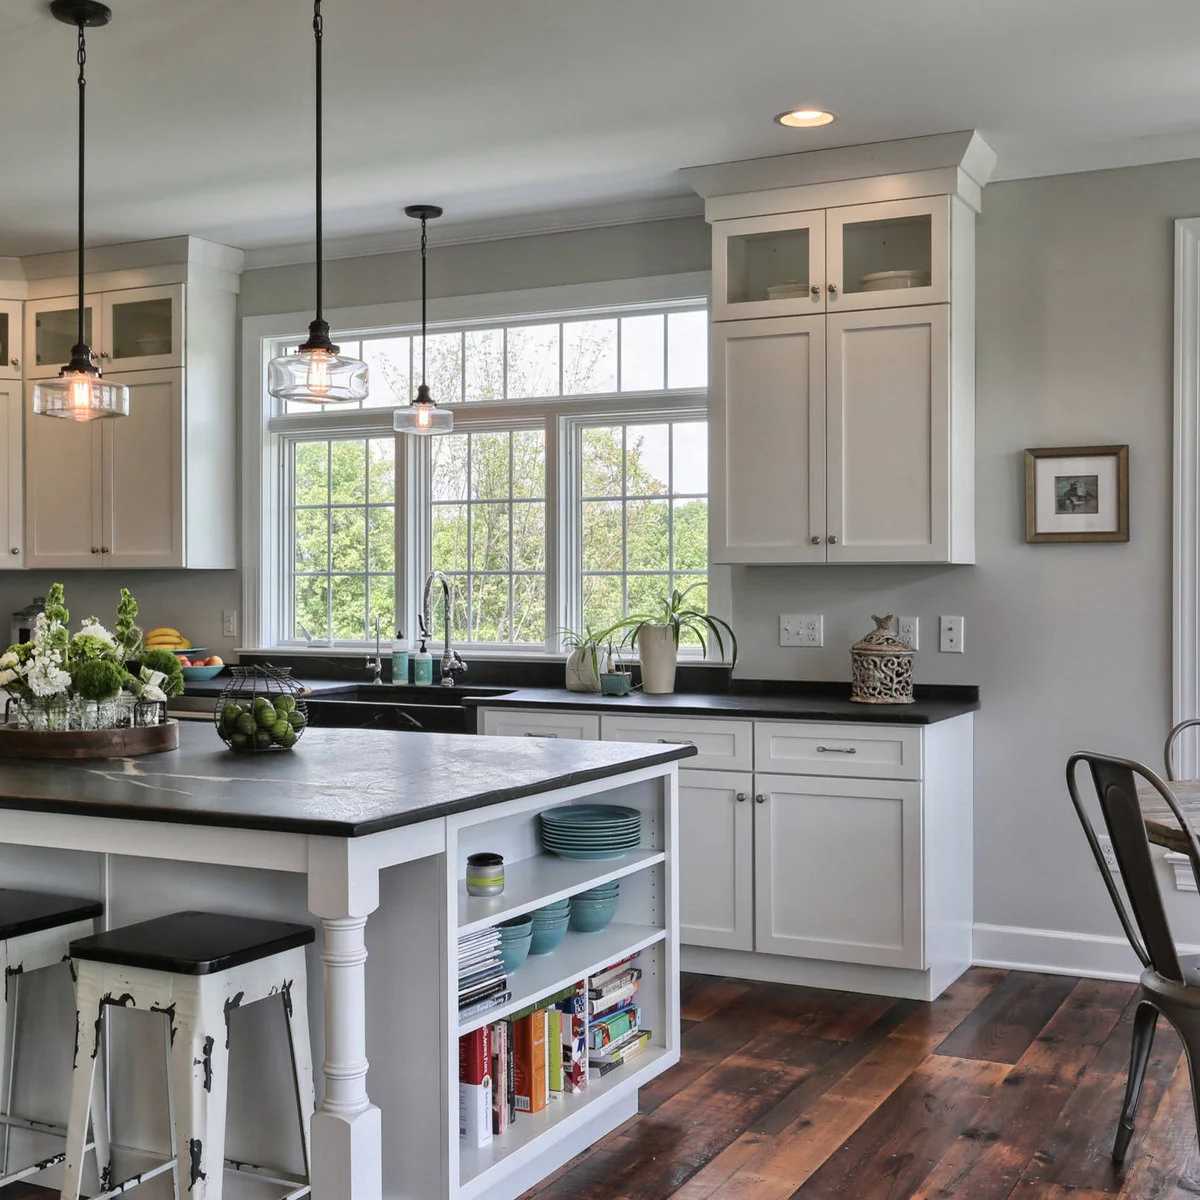
The upper cabinets stop beside the broad window, allowing daylight to reach the sink across several panes. Smaller glass-fronted doors near the ceiling lighten the cabinet ends. A few plants and containers sit to the side, leaving the central faucet and view comparatively clear.
Check the window’s operation with the intended faucet before finalizing their positions. Keep plants and accessories away from handles and the normal splash area. Glazed cabinet doors can soften the wall visually, but their contents remain part of the view, so use them where you can keep the storage orderly.
IDEA 07 / 20
Fit a Woven Blind Above the Main View
 SaveSupport Non AI Creator
Image credit: Project: Butler Armsden Architects (via Houzz)
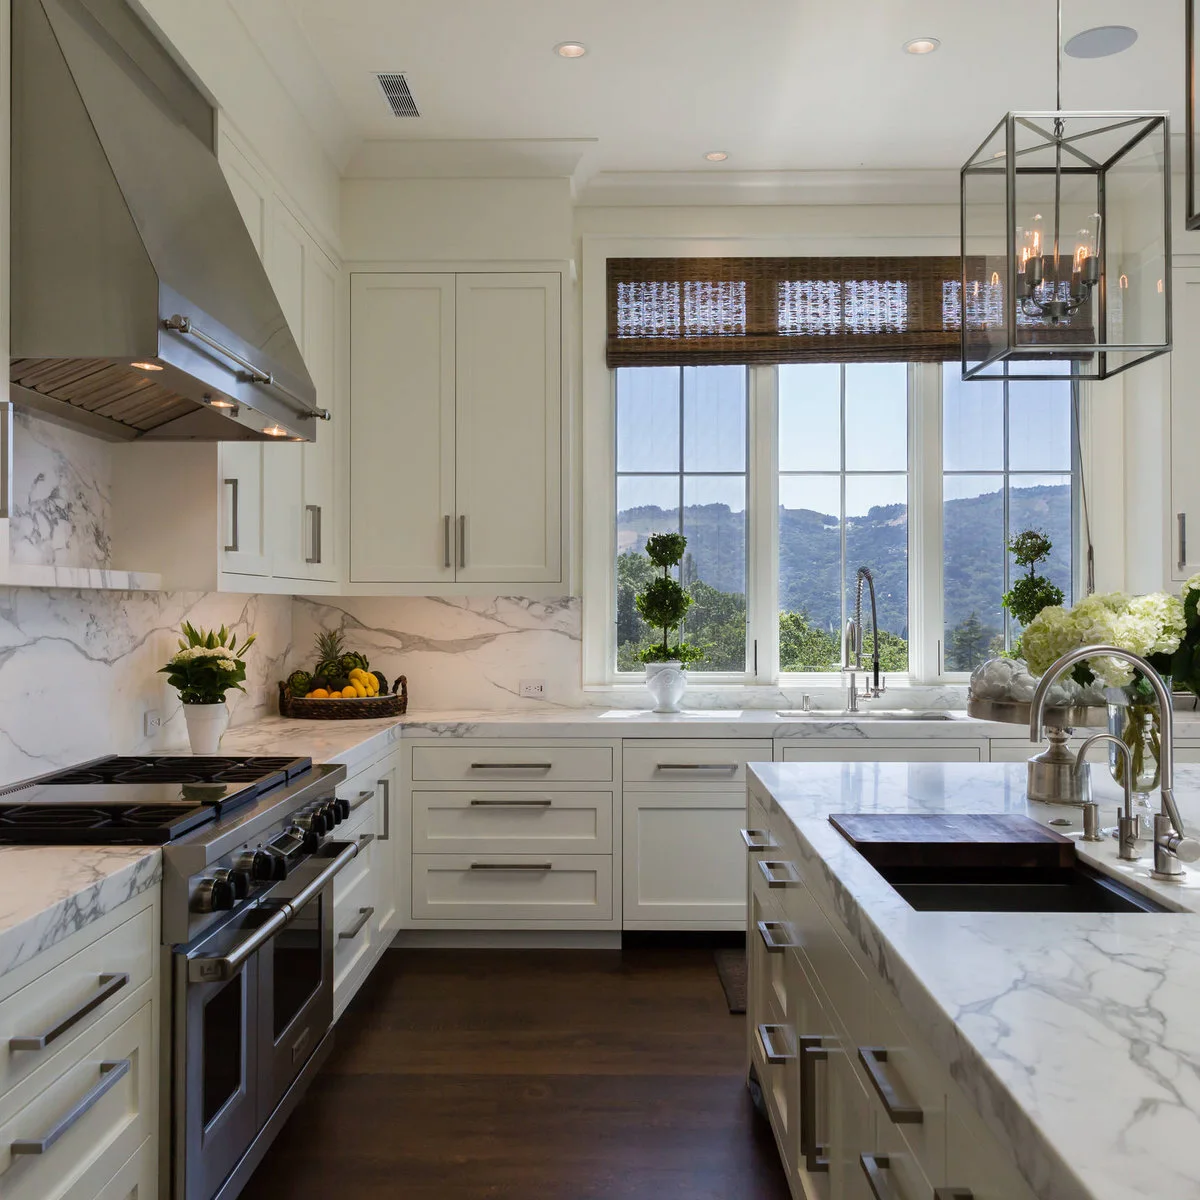
The woven blind gathers above the main panes rather than covering the whole view. Its brown texture adds warmth to the pale cabinets and counters. The wide window stays central to the sink area, with the upper cupboards positioned at the sides instead of bridging across the opening.
Choose a window treatment that can be cleaned and operated comfortably from the sink. Check that the gathered blind will not interfere with the opening or trim. Keep decorative pots small enough to move for cleaning, and test privacy from outside rather than assuming a raised blind provides it.
IDEA 08 / 20
Keep a Picture Window Free of Display
 SaveSupport Non AI Creator
Image credit: Project: Ambrose Construction Inc. (via Houzz)
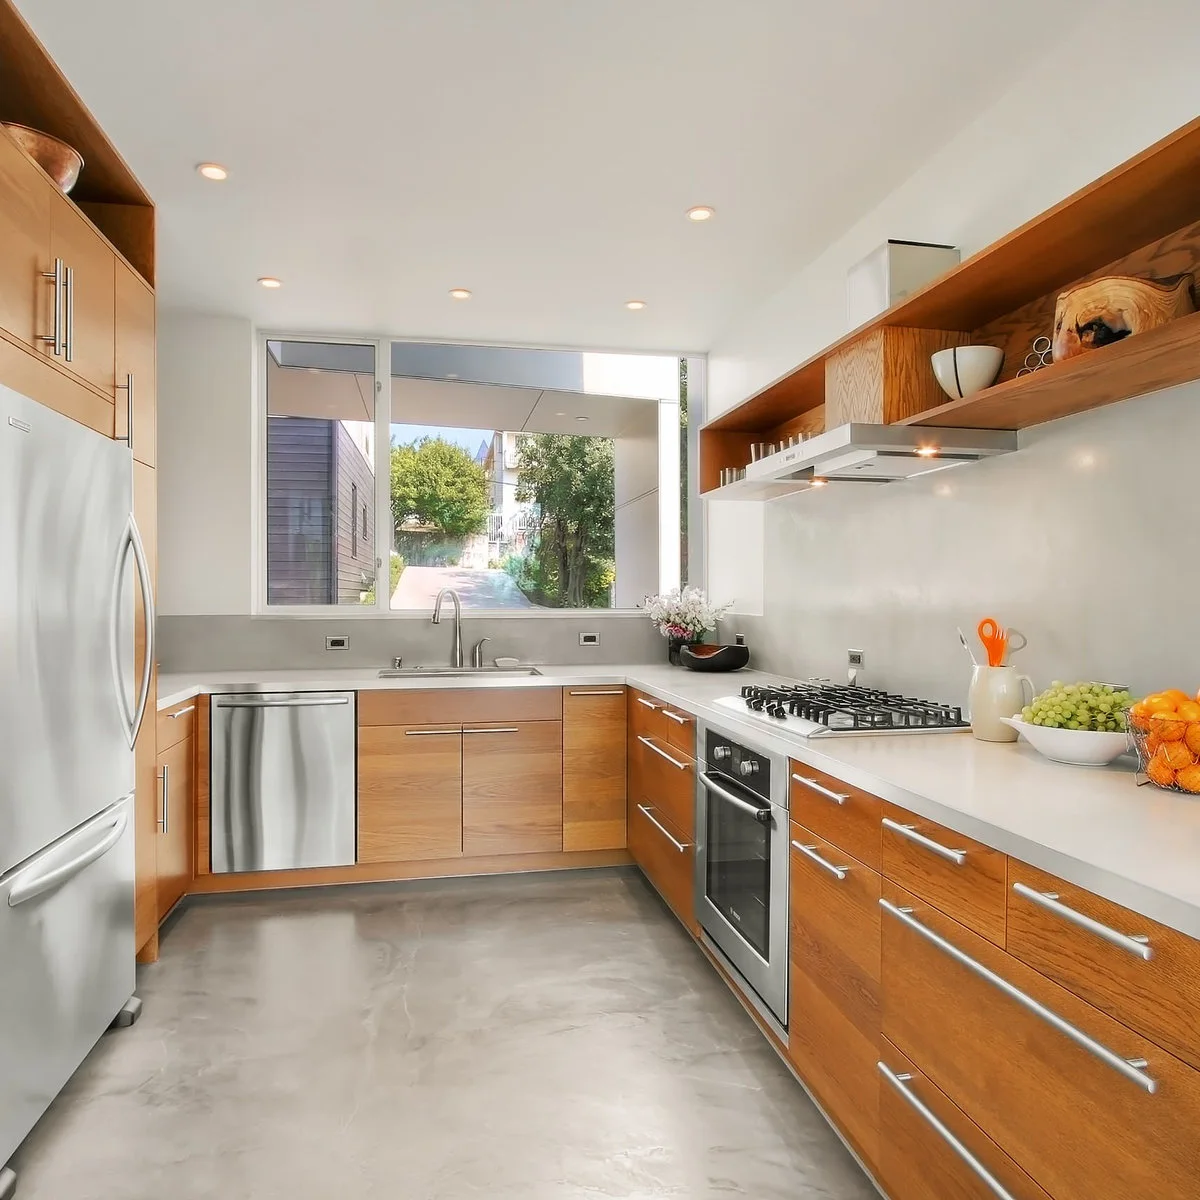
The broad window supplies the main interest above this sink, framing greenery and the neighboring outdoor space. Wood cabinets warm the lower room while the pale backsplash stays simple. Display shelves sit on the side wall, allowing the central glazing to remain largely unobstructed.
Plan storage elsewhere before deciding to keep this wall completely open. The relationship with brown kitchen cabinets can be warm without needing more wood trim around every edge. Check glare, privacy and window-cleaning access as well as the daytime view, especially if the glass is difficult to reach from outside.
IDEA 09 / 20
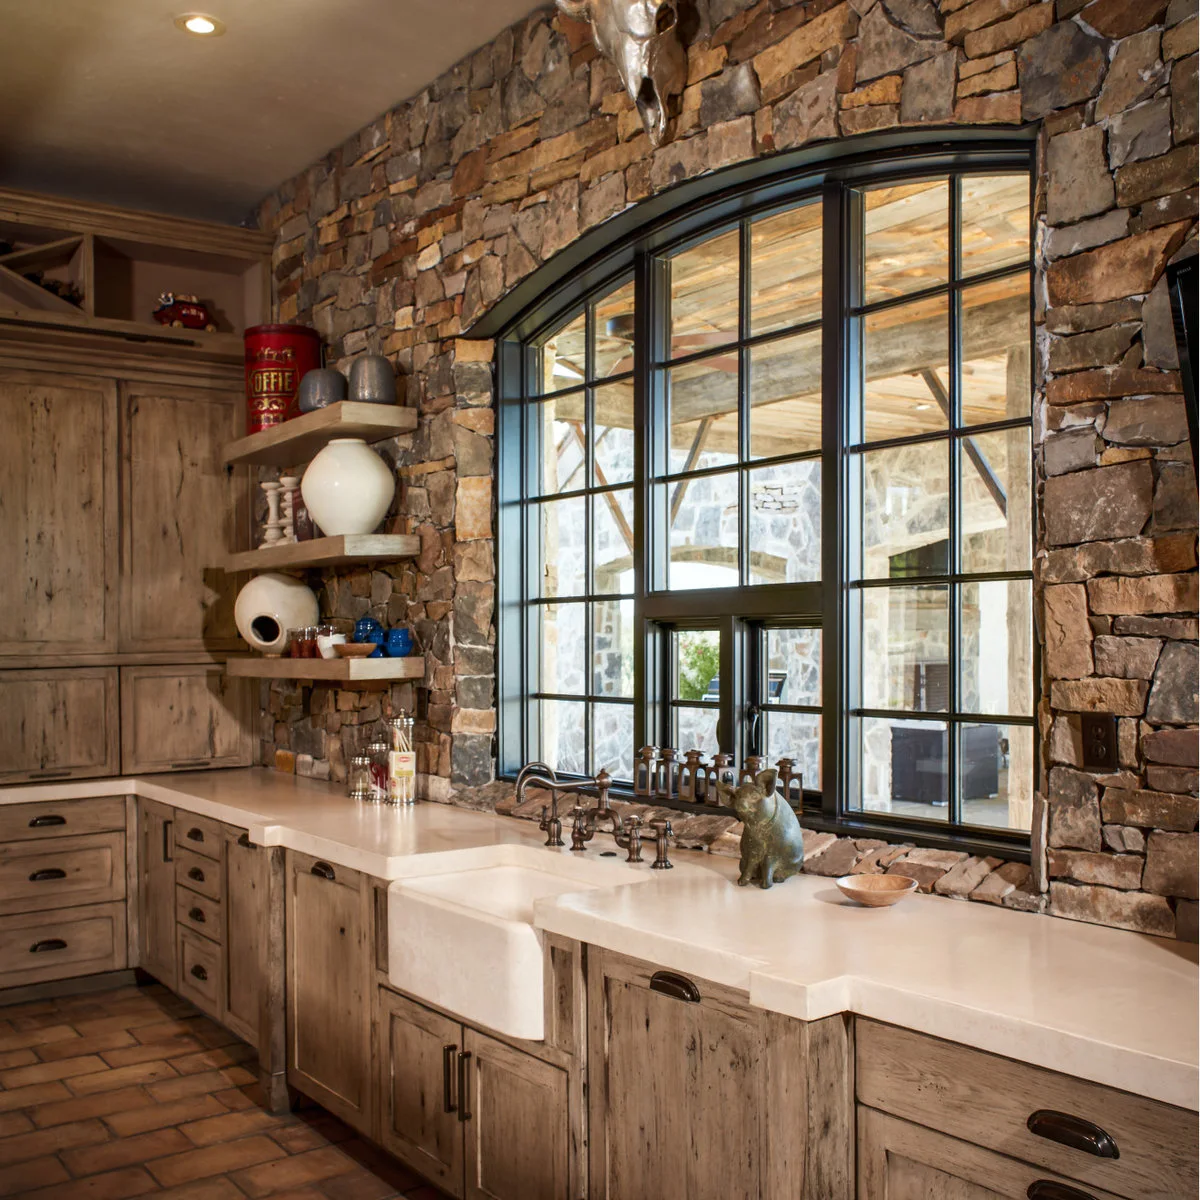
Let an Arched Frame Carry the Character
 SaveSupport Non AI Creator
Image credit: Project: Thompson Custom Homes (via Houzz)
The dark arched frame stands out against the varied stone wall above the sink. Wood shelves and cabinets continue the warm palette at the sides. Because the architecture already supplies strong texture and shape, the window opening itself does not need a hanging sign or another decorative layer.
Keep objects on the sill low enough to preserve access and avoid crowding the faucet. Textured wall surfaces near a sink need cleaning methods suited to their actual material and finish. Structural window alterations require professional planning; the photograph is an idea for proportions rather than a detail to copy directly.
IDEA 10 / 20
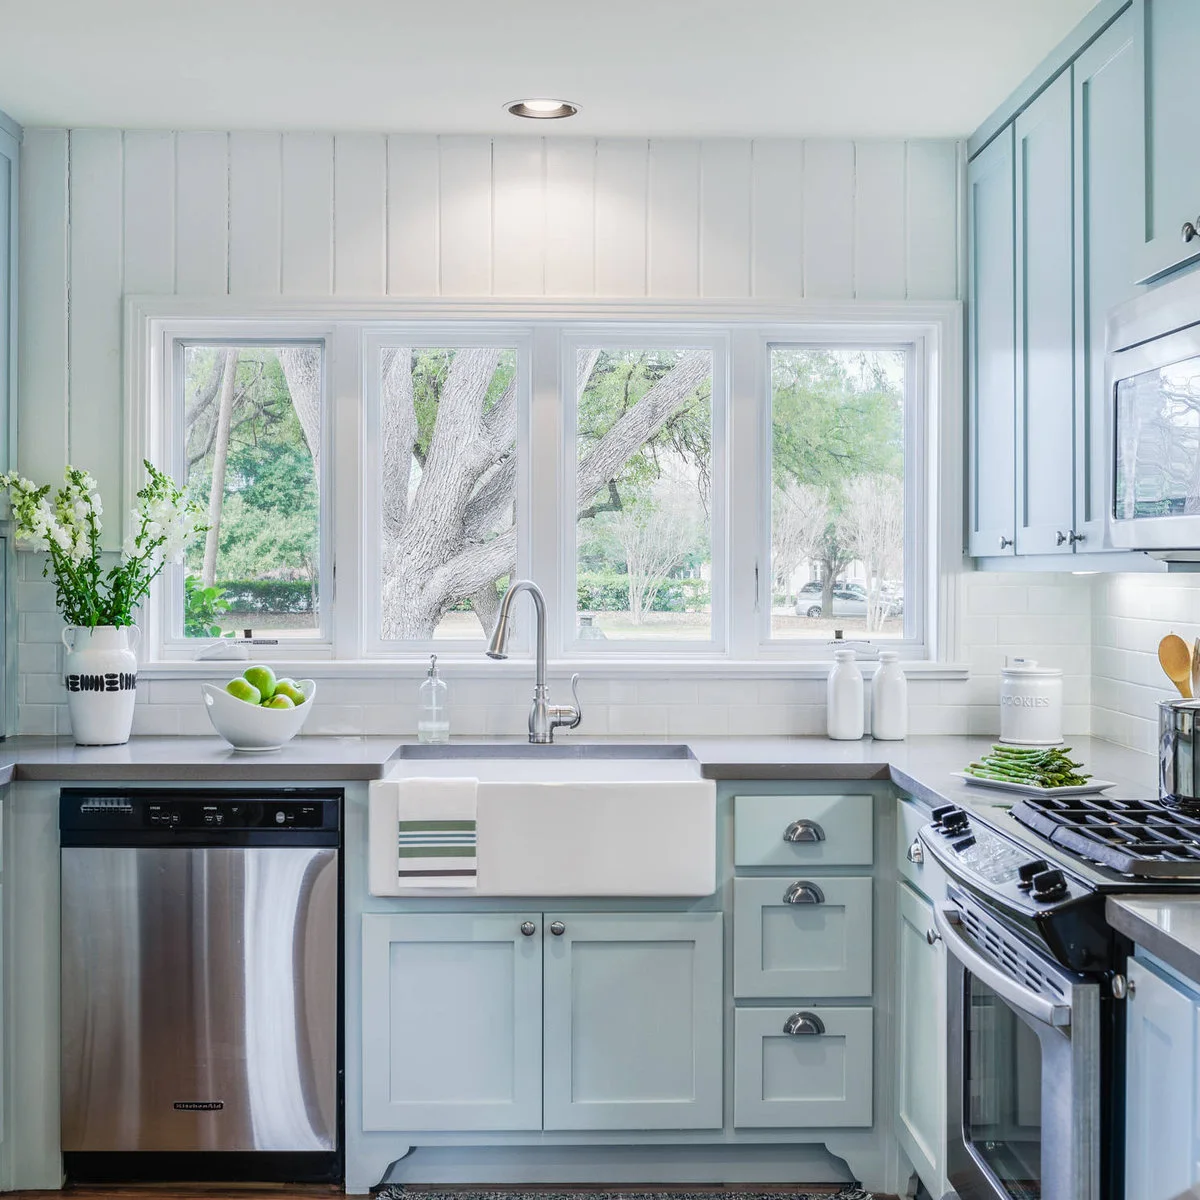
Use Simple Trim Around a Garden View
 SaveSupport Non AI Creator
Image credit: Project: J. Bryant Boyd, Design-Build (via Houzz)
Plain white trim gives the garden view a clear boundary above the pale blue cabinets. The low tiled backsplash runs beneath the sill, keeping the sink edge visually separate from the glazing. A few containers at the sides add detail without placing a shelf across the central panes.
Check how easily you can reach the window catches and clean the lower glass with the chosen faucet in place. Keep decorative containers away from the areas used for soap and washing. A good view can carry the wall on its own, so avoid adding objects simply because the sill has spare space.
PART 03
Plan light around the sink
IDEA 11 / 20
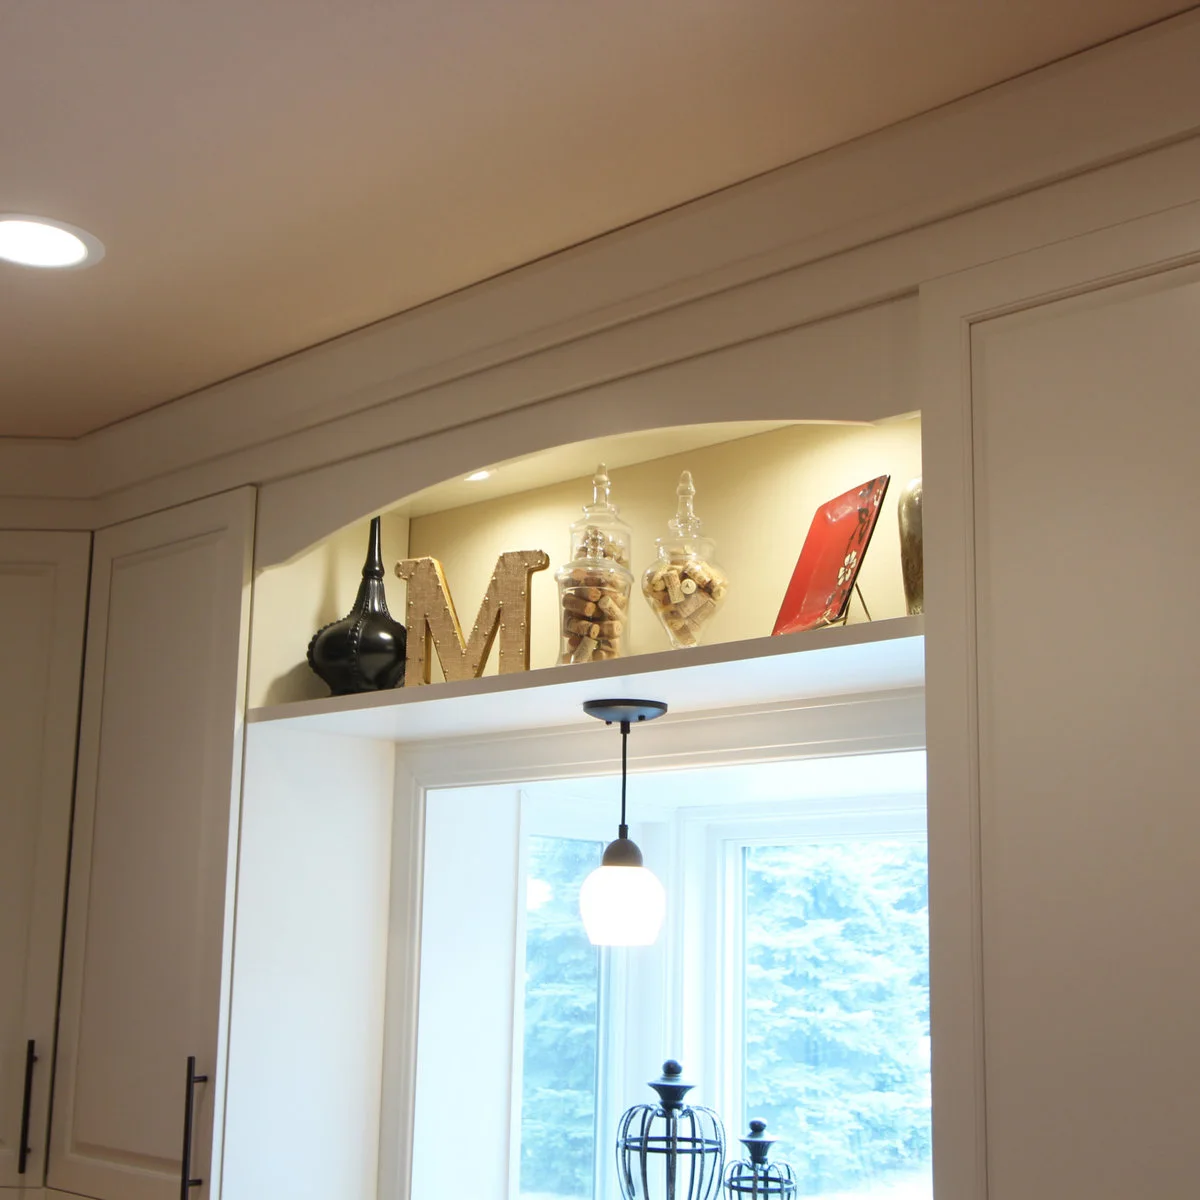
Reserve a High Niche for Occasional Display
 SaveSupport Non AI Creator
Image credit: Project: Denise Quade Design (via Houzz)
The illuminated niche uses space above the window for a small collection of jars and decorative pieces. A pendant sits below it, creating a separate layer of light closer to the work area. The high display keeps most objects away from the sill and the sink’s immediate splash zone.
Use a high niche for occasional display rather than pieces you need several times a day. Check how you will reach it for dusting without standing on the counter. Coordinate the light and its service access with the installer, and keep the pendant clear of the window’s operation and normal movement at the sink.
IDEA 12 / 20
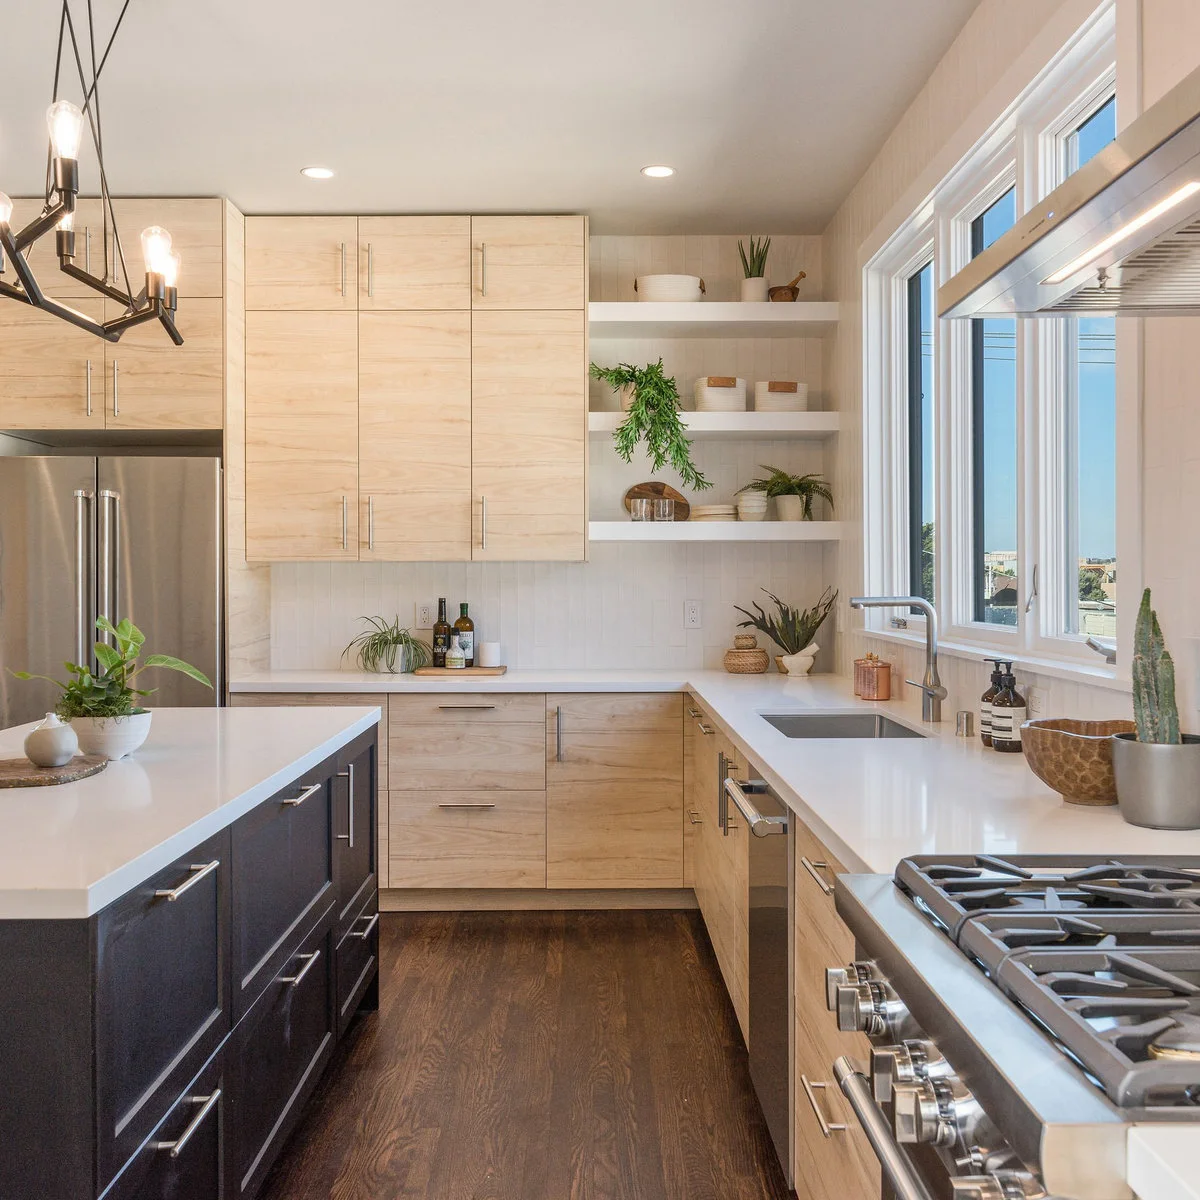
Light the Counter Without Covering the Window
 SaveSupport Non AI Creator
Image credit: Project: Denise Maloney Interior Design (via Houzz)
A slim overhead fixture provides a fine horizontal line above the sink windows. Pale wood cabinetry and white surfaces keep the corner bright, while the open shelves gather plants and bowls to one side. The lighting does not require a broad shade hanging in the center of the view.
Assess the light on the basin and nearby counter rather than judging the fixture only from across the room. Positioning, glare and shadows all matter during evening use. Keep trailing plants away from fittings and working surfaces, and confirm that the selected light and installation suit the actual location.
IDEA 13 / 20
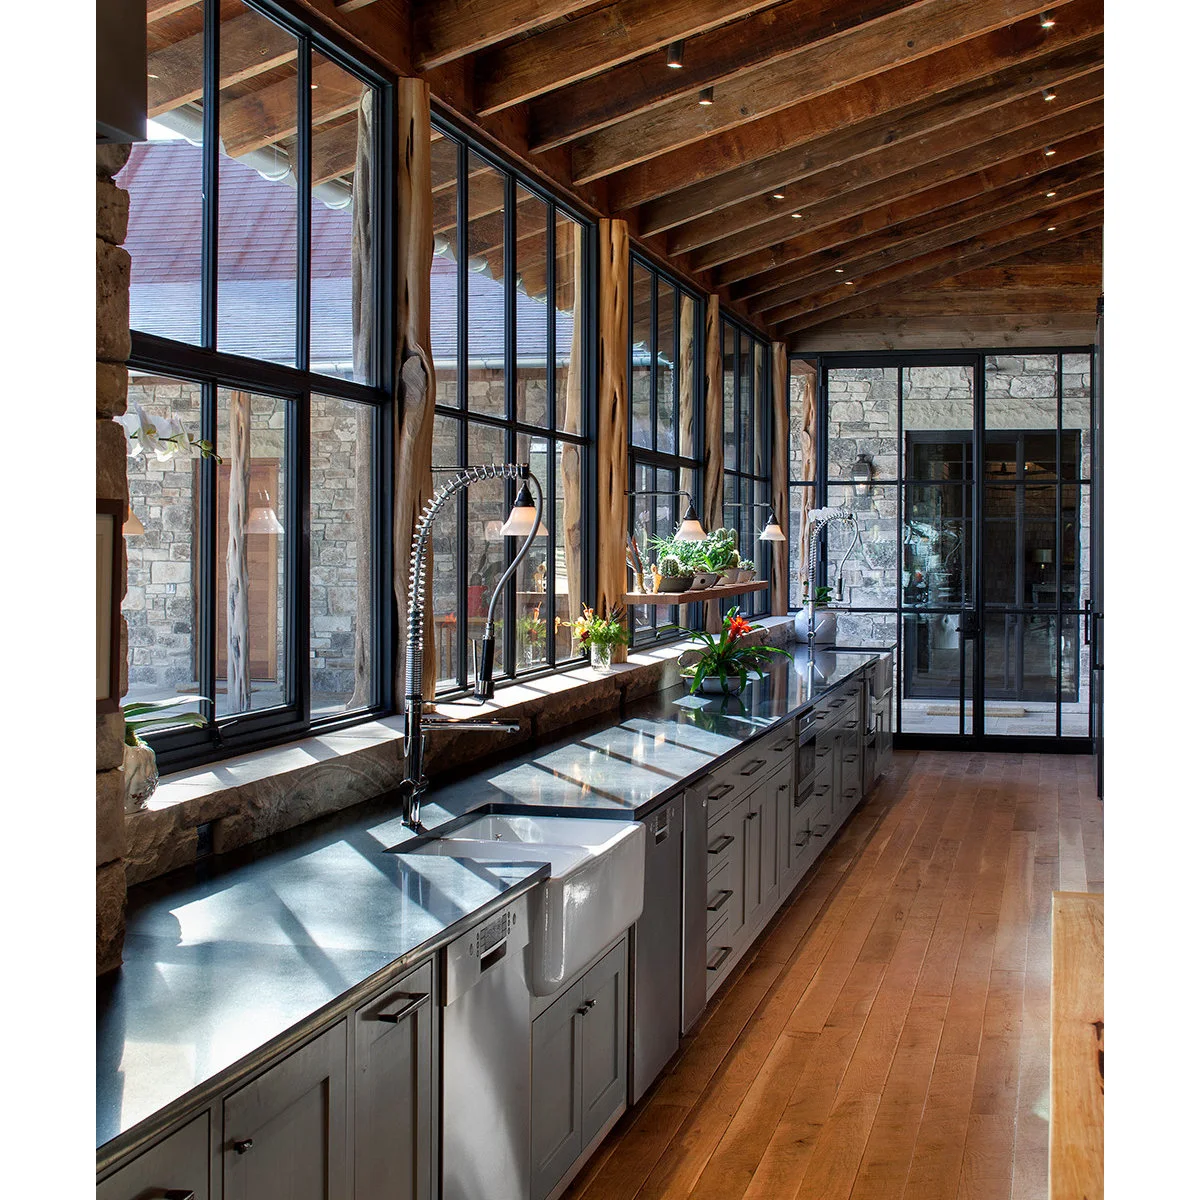
Add Small Lights Along a Tall Glazed Wall
 SaveSupport Non AI Creator
Image credit: Project: Rehme Steel Windows & Doors (via Houzz)
Tall dark window frames give this long sink wall a strong rhythm. Small lights and a narrow wood shelf sit between the glazing, adding detail at a more approachable scale. The wood ceiling and stone surroundings make the bright window wall feel connected to the rest of the room.
Plan each fitting around the working areas instead of repeating lights purely for symmetry. Check reflections on the glazing at night and access for changing or cleaning the fixtures. A small shelf should remain clear of window movement and hold only what its supports are designed to carry.
IDEA 14 / 20
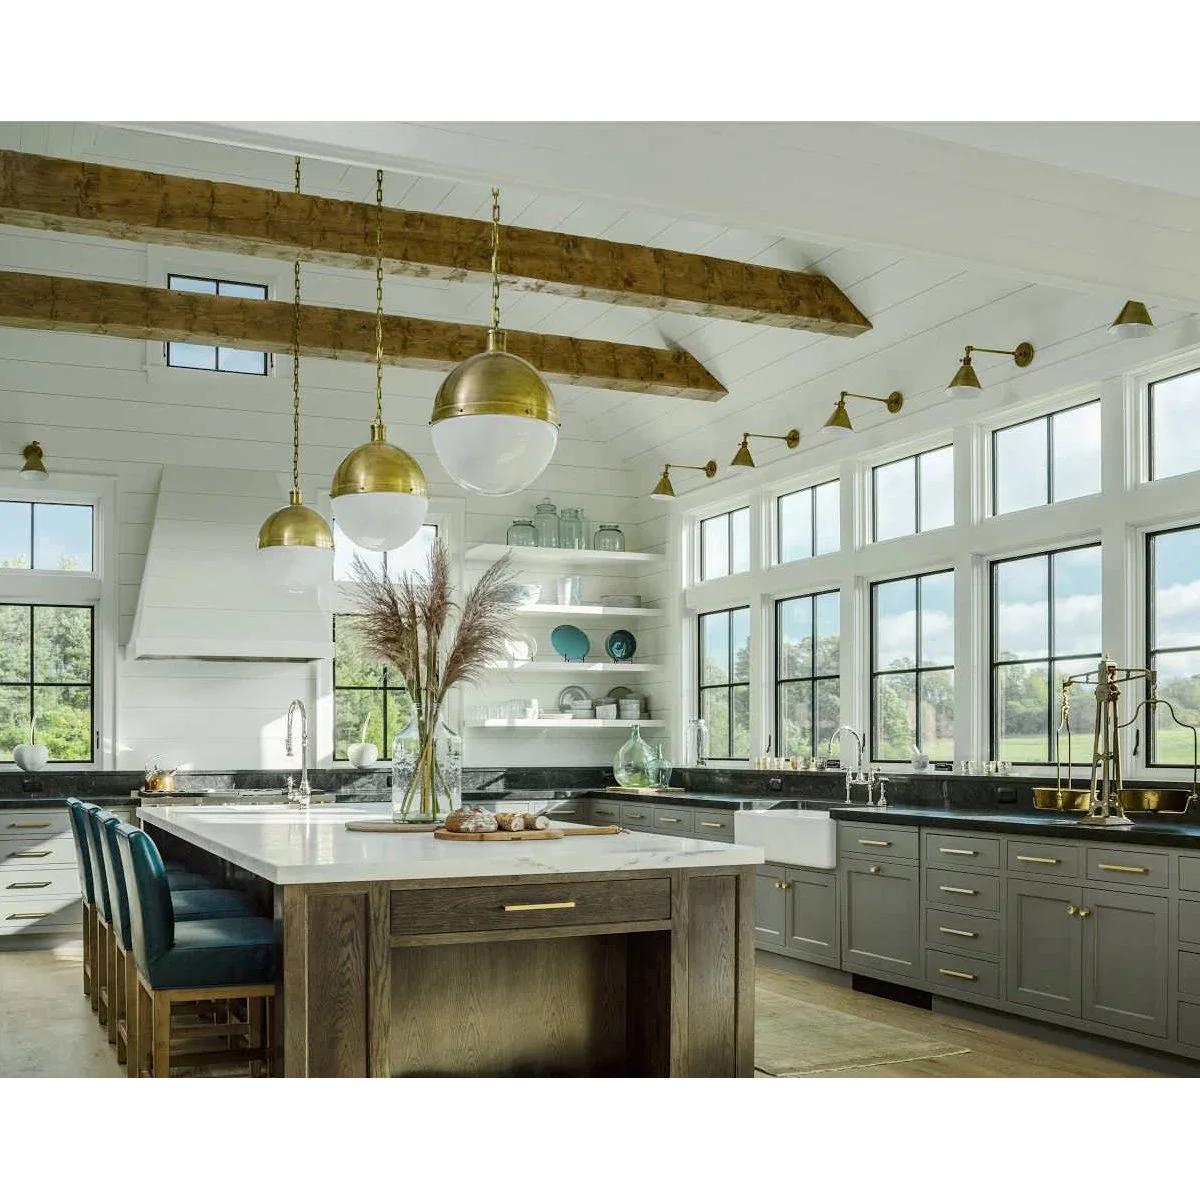
Mount Sconces Above the Window Line
 SaveSupport Non AI Creator
Image credit: Project: TruexCullins Architecture + Interior Design (via Houzz)
Small sconces repeat above the windows, leaving the main glass and transom panes visible. Warm metal details connect the wall lights with the island pendants. The long lower cabinet run stays relatively plain, allowing the high glazing and repeated light shapes to carry the upper wall.
Check where each sconce throws light before choosing a similar arrangement. Decorative repetition does not guarantee a well-lit basin. Discuss installation and access with a qualified electrician, and consider how the windows will look after dark when interior reflections replace much of the daytime view.
IDEA 15 / 20
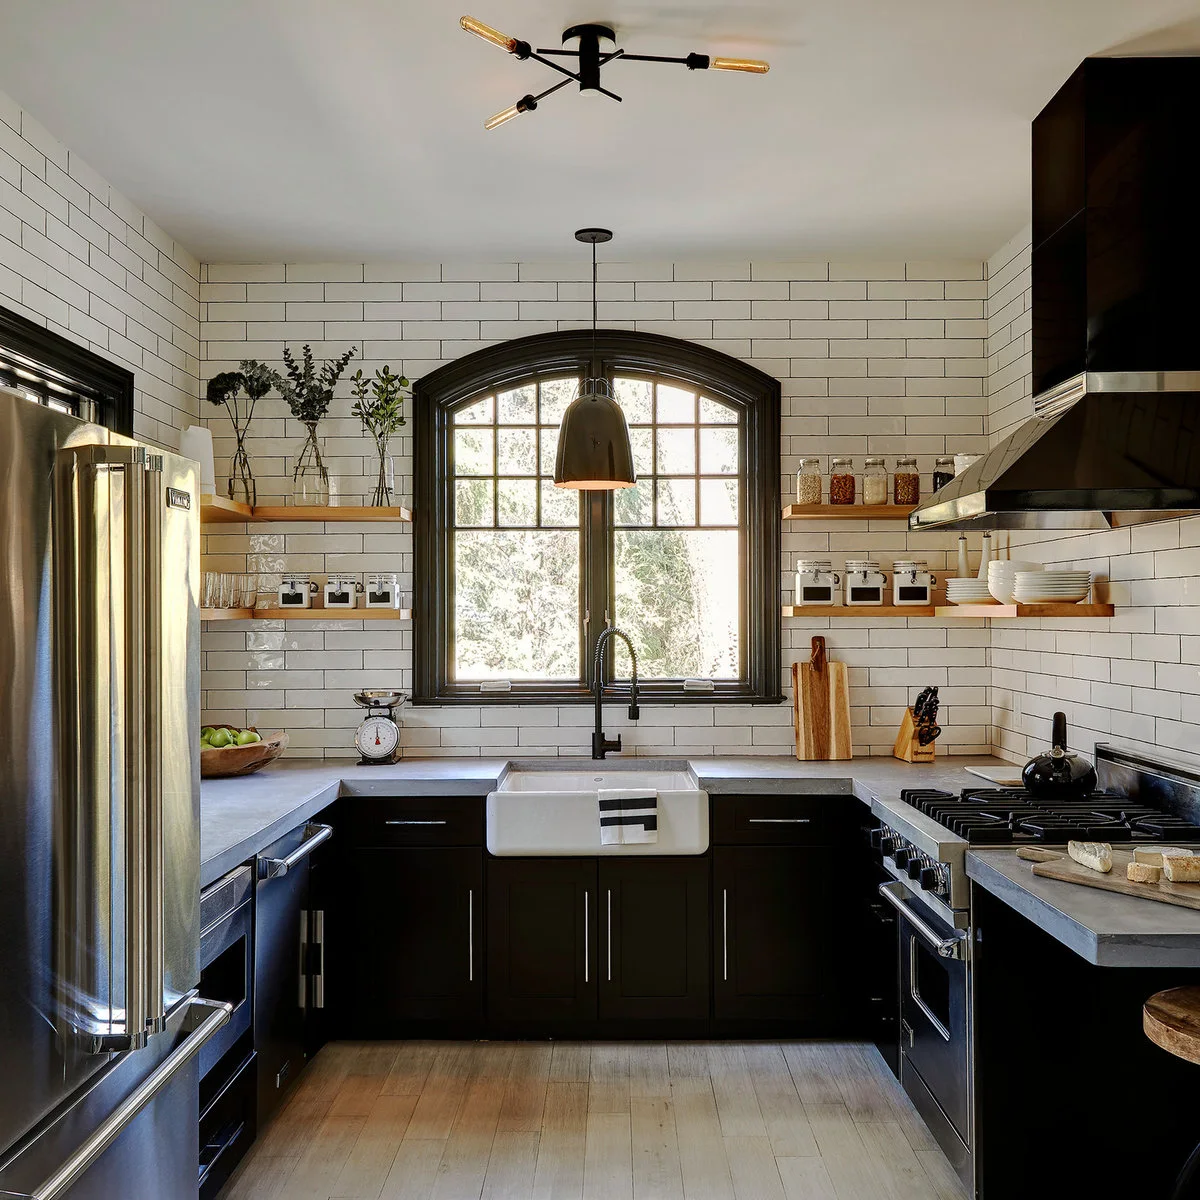
Center One Pendant on a Strong Window Shape
 SaveSupport Non AI Creator
Source: houzz.com
The single pendant aligns with the arched window and the sink, making the center of the compact kitchen easy to read. Wood shelves stop to each side, carrying jars and dishes without bridging across the glass. White tile provides a consistent background behind the dark frame and lower cabinets.
Test the pendant’s apparent size from the working side of the sink as well as from the doorway. A large shade can block the view or create glare at close range. Leave sufficient working clearance and coordinate the fixture’s suitability and position with an installer rather than copying its height from a photograph.
PART 04
Add detail without crowding the work
IDEA 16 / 20
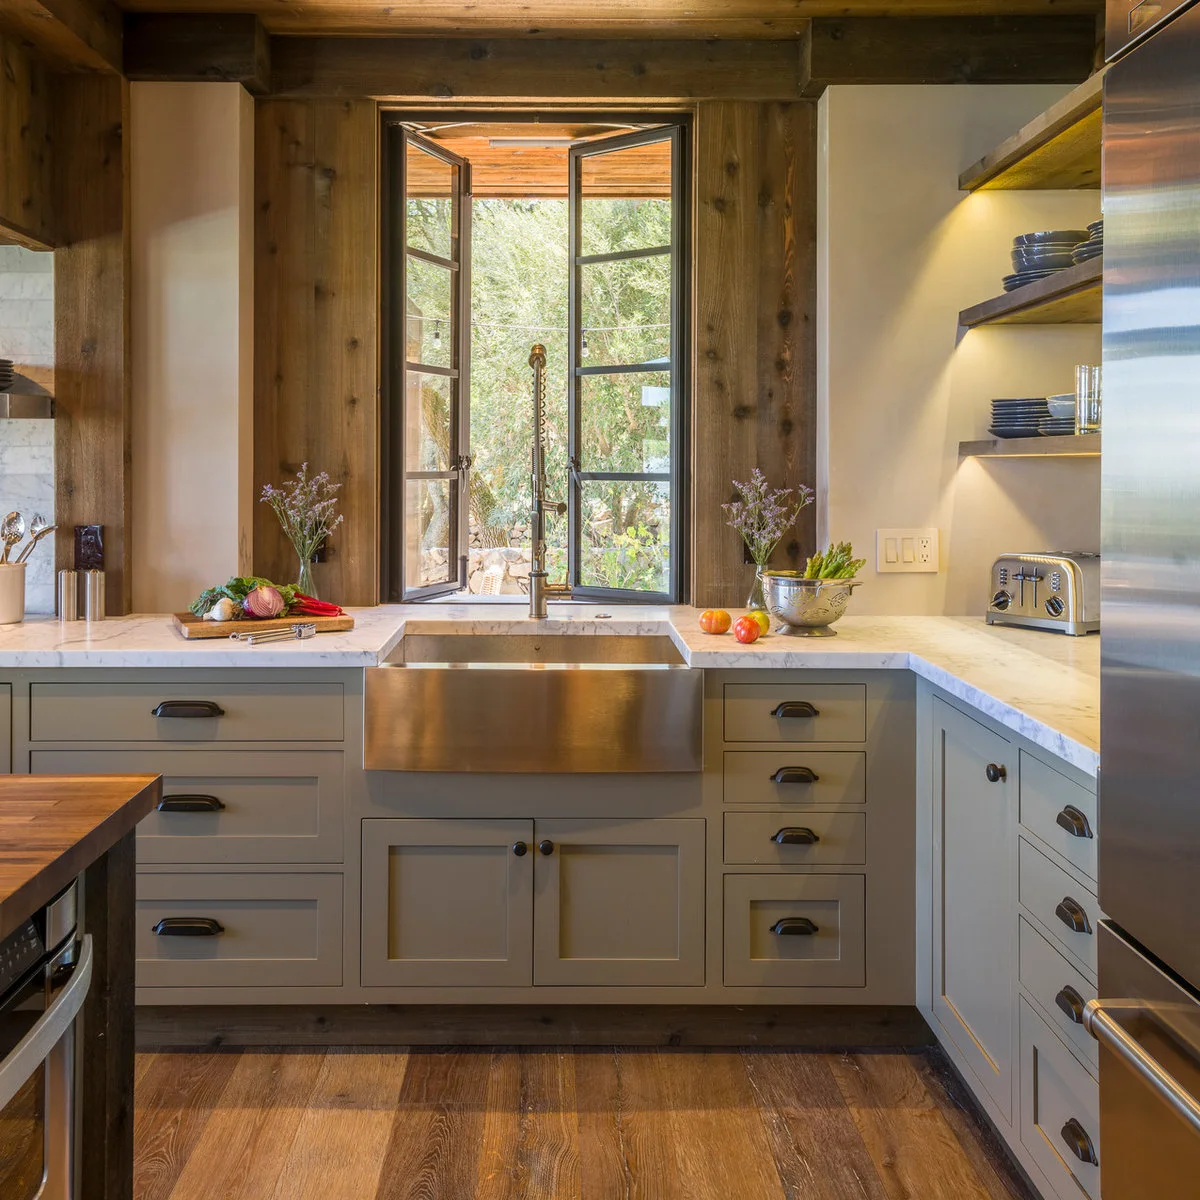
Check Inward-Opening Windows Against the Faucet
 SaveSupport Non AI Creator
Image credit: Project: Barbra Bright Design (via Houzz)
The open window leaves reveal an important relationship between the glazing and the tall faucet. Wood surrounds warm the sink wall, and shelves sit on the adjoining side. Small flower vases and food preparation items remain toward the counter edges rather than filling the center of the opening.
Draw the full movement of the window and faucet before ordering either one. A tall tap can conflict with an inward-opening sash even when their closed positions look balanced. Keep the sill and hinges reachable for cleaning, and leave enough usable counter for washing rather than treating the opening only as decoration.
IDEA 17 / 20
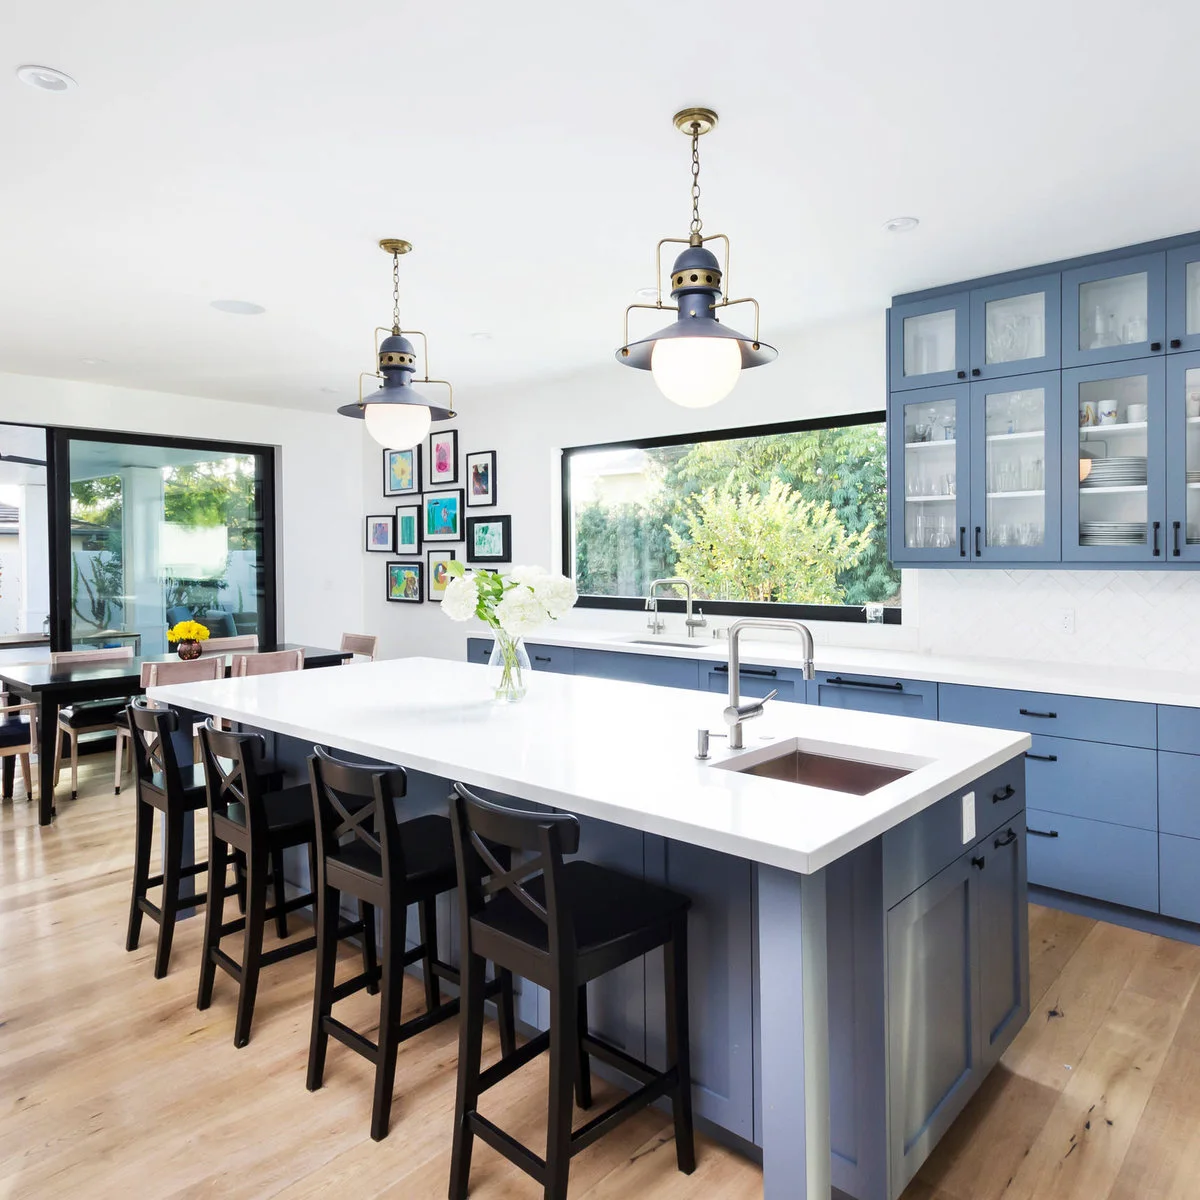
Let Artwork Sit Beside a Clear Window
 SaveSupport Non AI Creator
Image credit: Project: Von Fitz Design (via Houzz)
The long window stays clear above the main sink, while a small group of colorful pictures occupies the wall beside it. Blue cabinets add another steady band of color below. Glass-fronted upper doors sit at the opposite end, keeping display and storage away from the middle of the view.
Choose art placement around splashes and the available wall space rather than covering part of the window. Use framing and fixings suited to the location, and keep the arrangement simple enough to clean around. Check the artwork’s scale from the sink and dining area before adding more frames.
IDEA 18 / 20
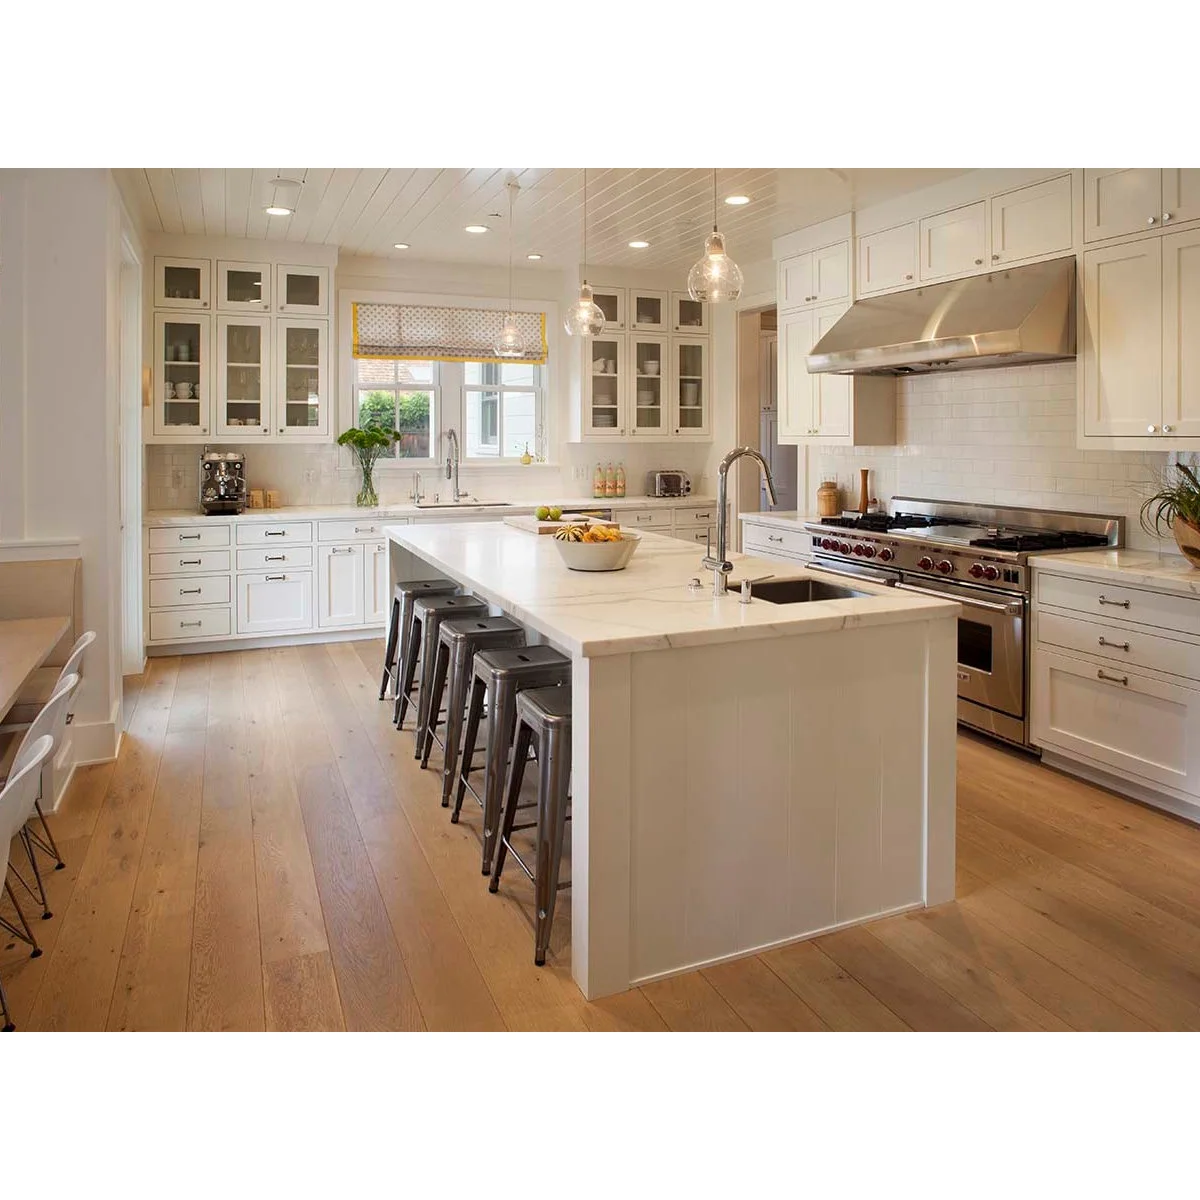
Use a Small Blind as a Color Accent
 SaveSupport Non AI Creator
Image credit: Project: Modern Organic Interiors (via Houzz)
The patterned blind adds a small note of color above the sink without changing the larger white cabinet palette. Glass-fronted cabinets frame the window, and a simple sill leaves room for daylight. The accent remains concentrated in one treatment rather than spread across several competing accessories.
Pick a fabric and mechanism that suit the actual splash exposure and can be cleaned as recommended. Test how much glass remains visible when the blind is raised. Keep the controls safely arranged and comfortably reachable, and avoid a treatment so deep that it prevents the window from opening normally.
IDEA 19 / 20
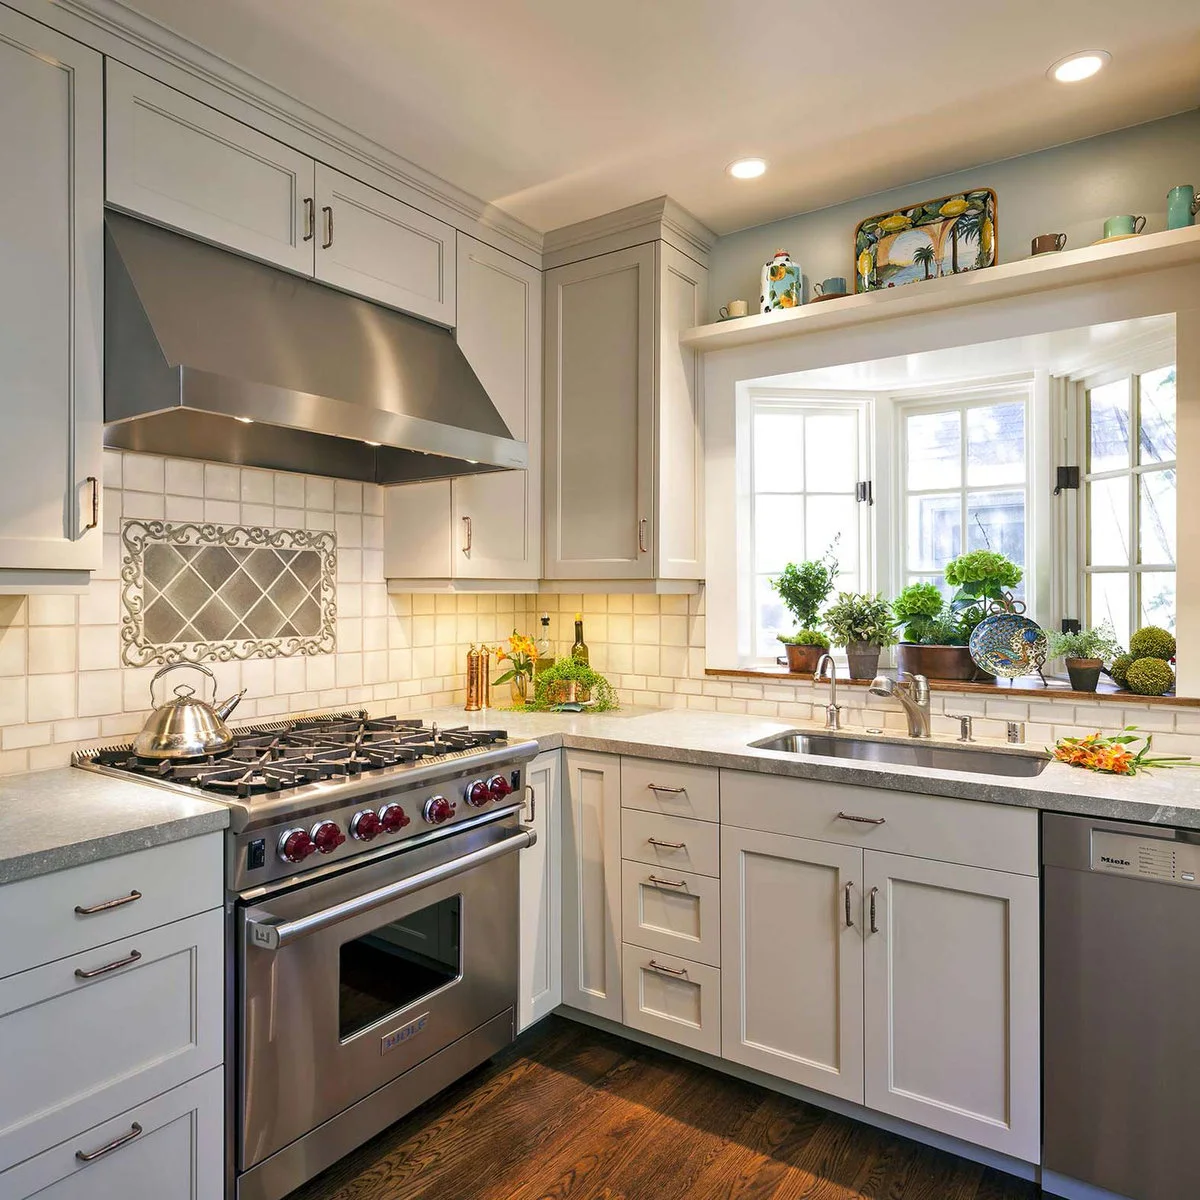
Give Window Plants a Defined Ledge
 SaveSupport Non AI Creator
Image credit: Project: Custom Kitchens by John Wilkins, Inc. (via Houzz)
The shallow bay creates a separate ledge for potted plants above the sink. A higher shelf holds colorful ceramics, keeping the display in two clear bands. Pale cabinets and counters stay quiet around them, so the varied leaves and dishes supply most of the decoration.
Choose plants for the window’s real light and temperature, and use containers that protect the ledge from standing water. Keep enough space to open and clean the windows. A high ceramic display needs secure support and reachable maintenance; do not overload it simply because the ledge below is already full.
IDEA 20 / 20
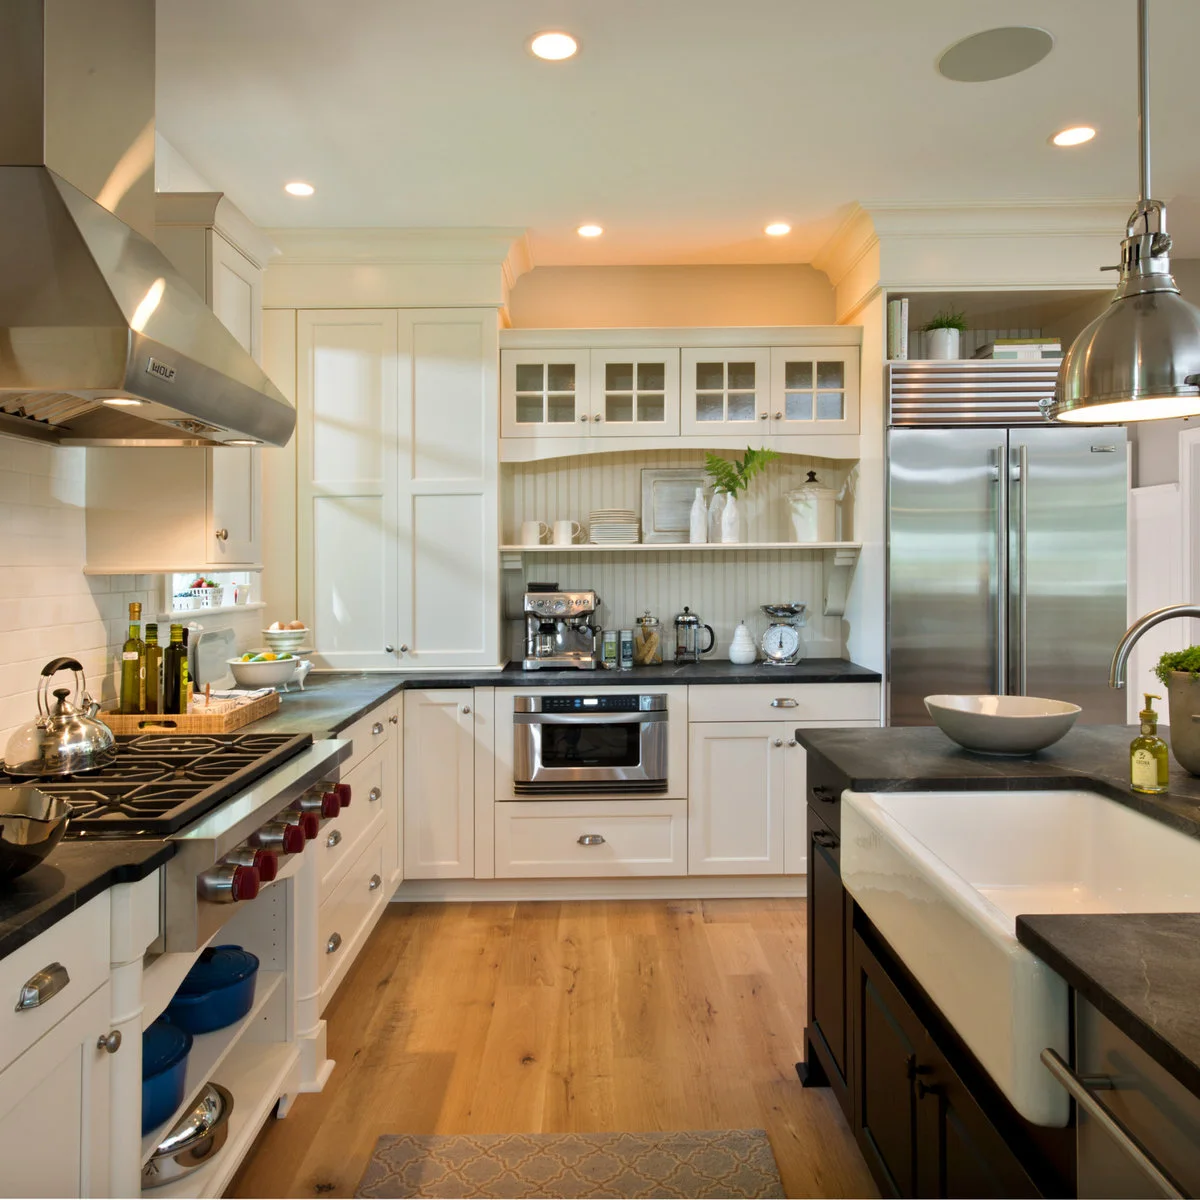
Keep Lighting Simple Above an Island Sink
 SaveSupport Non AI Creator
Image credit: Project: Witt Construction (via Houzz)
This island sink has open space above it rather than a wall or window. A broad metal pendant defines the washing area from above, while the surrounding worktop remains largely clear. The open view connects the sink with the rest of the kitchen instead of enclosing it with an overhead rack.
If the sink sits in an island, consider sightlines and conversation before adding hanging storage or several pendants. Judge the fixture’s light on the bowl, its glare and the space needed for normal movement. Keep decorative objects outside the main splash and preparation areas, and plan practical storage below or nearby.
BRING IT ALL TOGETHER
Test the view from the working side of the sink
Stand where you normally wash dishes and check what you can reach, what blocks the light and how any window opens. A shelf or pendant that looks balanced from across the room may be awkward at arm’s length. Keep the faucet’s movement and the space needed for large pans in mind.
Choose one useful change before adding more objects. It might be a better light, a washable blind or a small shelf for frequently used cups. Keep storage secure and surfaces appropriate for splashes, and have structural or electrical changes assessed by a qualified installer.