Terrazzo brings scattered chips and a broad range of colors to a bathroom. Fine chips can read as quiet texture, while larger fragments become a feature in their own right. Decide how much pattern you want to see before choosing the surrounding paint, wall tiles and cabinet finishes.
These photographs show full bathrooms alongside closer views of benches, niches and bath fronts. A few projects appear from different angles to explain separate details. Use them to compare the appearance, then confirm whether your chosen product is terrazzo or a terrazzo effect, where it can be installed and how it should be maintained.
PART 01
Choose a color and chip scale
IDEA 01 / 17
Make Large Chips the Main Pattern
 SaveSupport Non AI Creator
Image credit: Photo: Brian W. Ferry
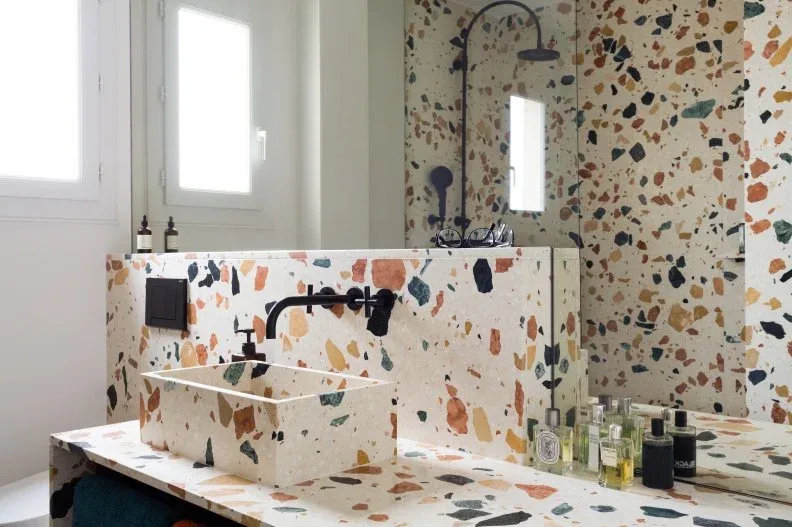
Large irregular chips appear across the basin, counter and shower wall in this bathroom. The pale background ties the surfaces together, while black fittings create a clear outline against the scattered colors. Plain window surrounds provide a quieter area beside the busy pattern, preventing every visible surface from competing for attention.
Choose the chip scale before coordinating the smaller fittings. A sample with only a few fragments may not represent the full distribution, so compare several pieces together. Keep everyday bottles grouped on a removable tray, and confirm the basin and counter care instructions; the decorative pattern does not establish how resistant a particular surface is to stains.
IDEA 02 / 17
Pair Pink Terrazzo with Plain Pink Walls
 SaveSupport Non AI Creator
Image credit: Photo: James Morgan / Design by Biasol
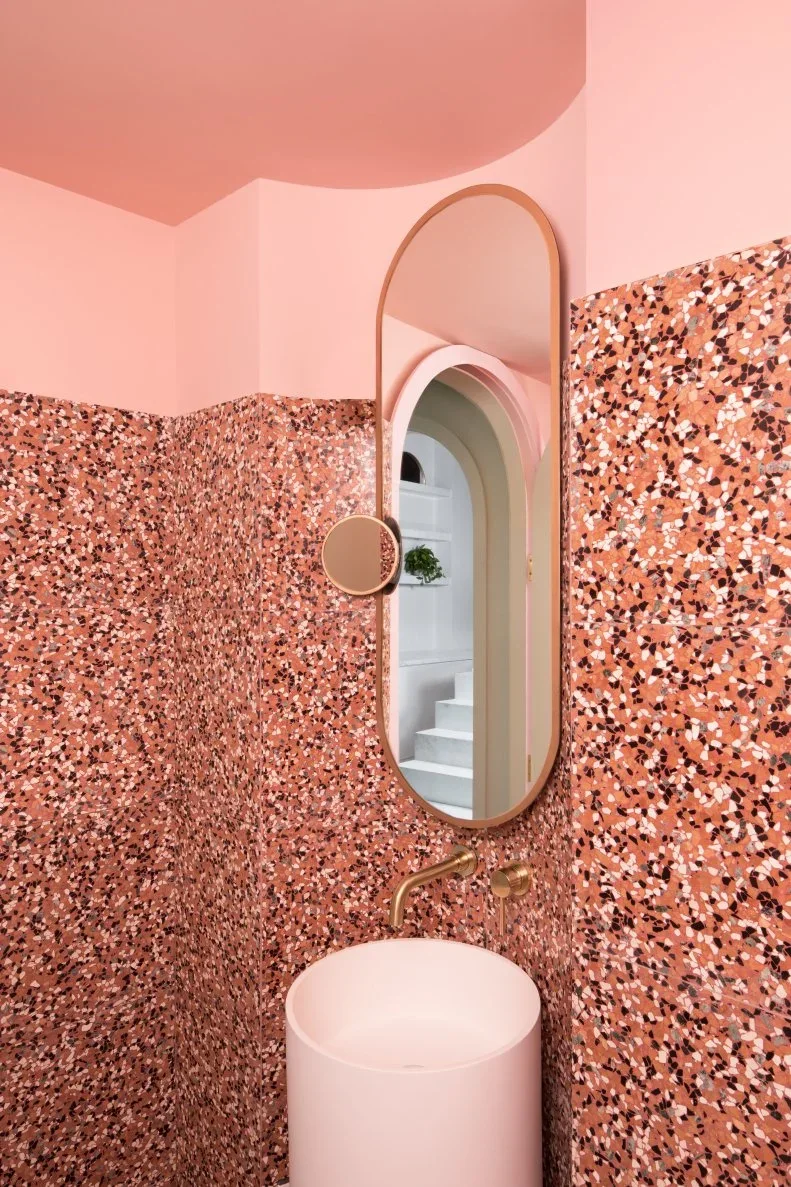
Pink terrazzo forms the lower wall treatment around a pale pedestal basin. Plain pink walls continue above, making the dense pattern feel like part of one color scheme. The tall oval mirror introduces a smooth curve among the many angular chips, while the narrow metal frame and faucet remain easy to distinguish.
Compare the wall paint with the background color and chips under the lighting you plan to use. Matching the general pink family can work better than trying to match every fragment exactly. Set out the height of the patterned band with the mirror and basin so its upper edge has a deliberate relationship to those fittings.
IDEA 03 / 17
Meet Green Wall Tiles at a Clear Boundary
 SaveSupport Non AI Creator
Image credit: Project: Cameron Getter Design
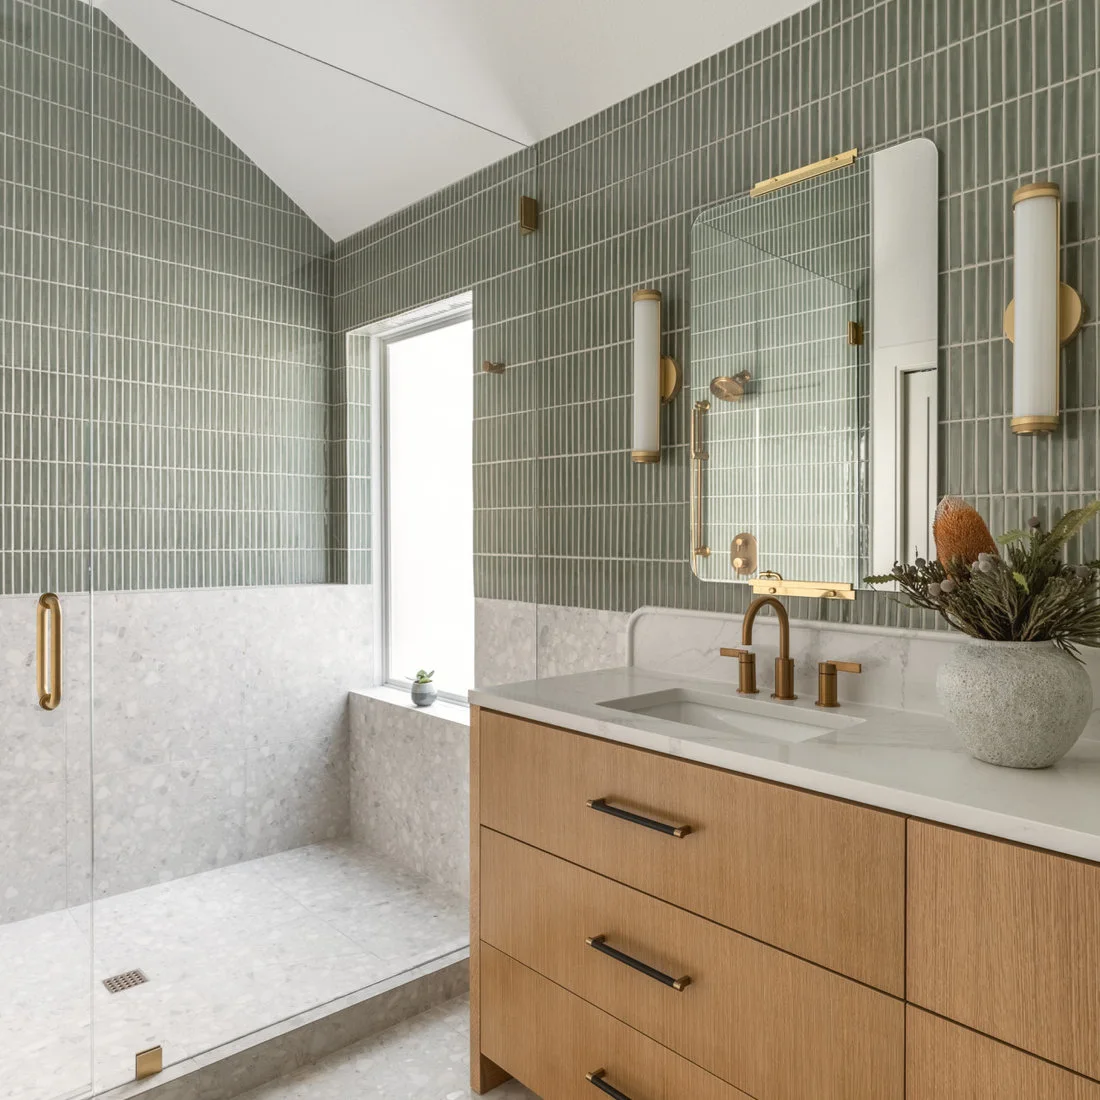
Pale terrazzo covers the shower floor and lower wall, meeting narrow green tiles along a straight horizontal boundary. The timber vanity adds another warm surface without introducing a competing small pattern. A framed mirror and paired lights keep the basin area defined, while clear glass leaves the lower tile treatment visible.
Plan the meeting line between the two tile finishes before placing the vanity and shower fittings. Compare their thicknesses and proposed edge treatments with the installer. For other restrained pairings, our natural bathroom ideas show how warm cabinetry and pale surfaces can work together without requiring the same pattern on every wall.
IDEA 04 / 17
Ground Deep Blue Tiles with a Pale Floor
 SaveSupport Non AI Creator
Image credit: Project: Pollen Architecture & Design
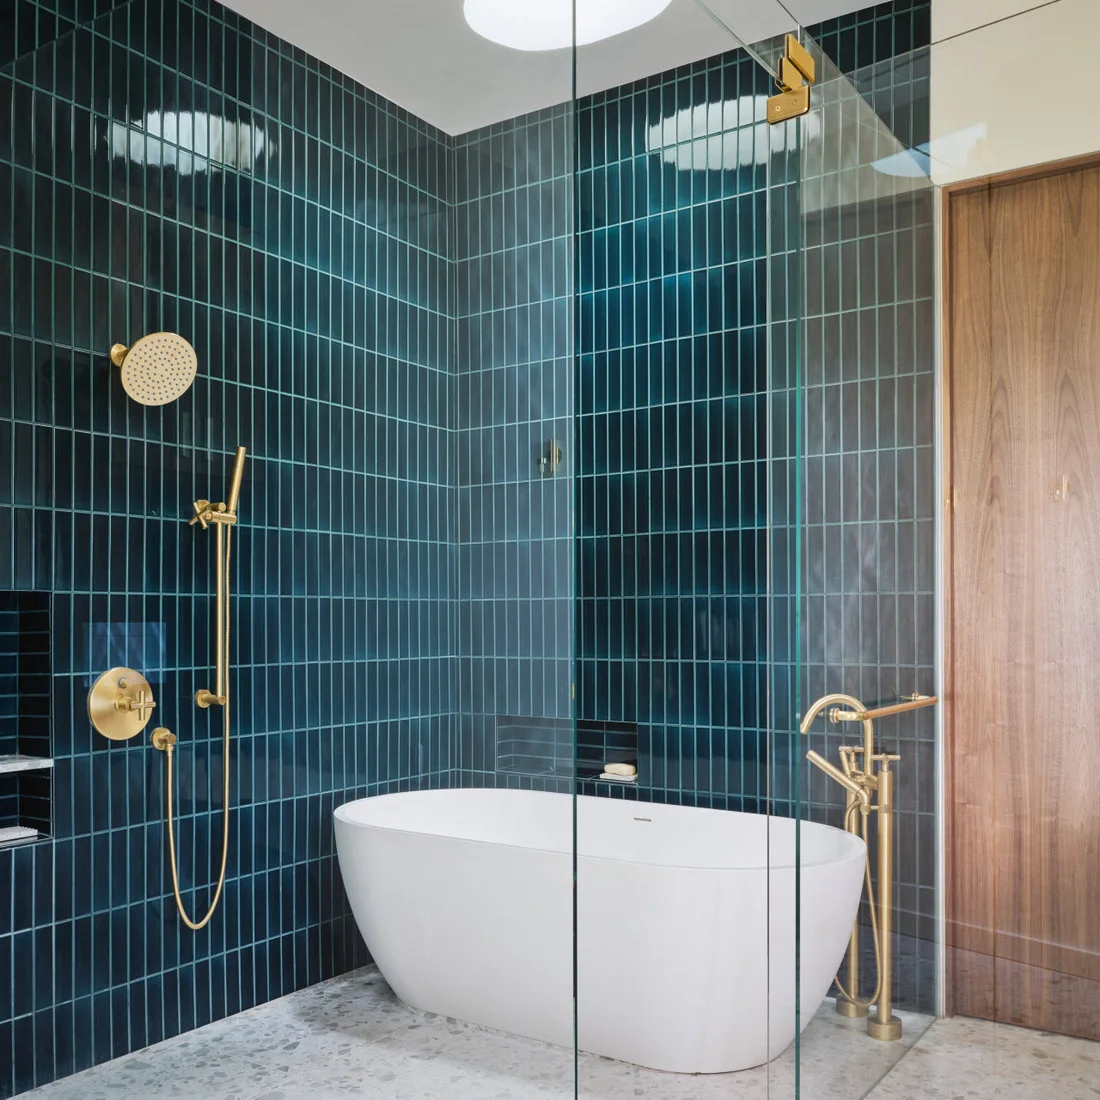
Deep blue tiles surround the white freestanding tub, while a pale terrazzo floor supplies a lighter base. The floor pattern remains visible around the curved tub rather than becoming the strongest color in the room. Brass-colored fittings and a timber door give the cool tiled walls two warmer points of contrast.
Check the floor sample beside the darkest wall tile, especially under evening lighting. A chip color that looks subdued in a showroom may become more noticeable next to deep blue. Plan access around the tub for cleaning and maintenance, and confirm the floor finish and wet-area installation rather than judging suitability from its pale appearance.
PART 02
Balance patterned floors and basin areas
IDEA 05 / 17
Carry a Low Terrazzo Band Behind the Vanity
 SaveSupport Non AI Creator
Image credit: Project: Swiatocha Architecture + Design
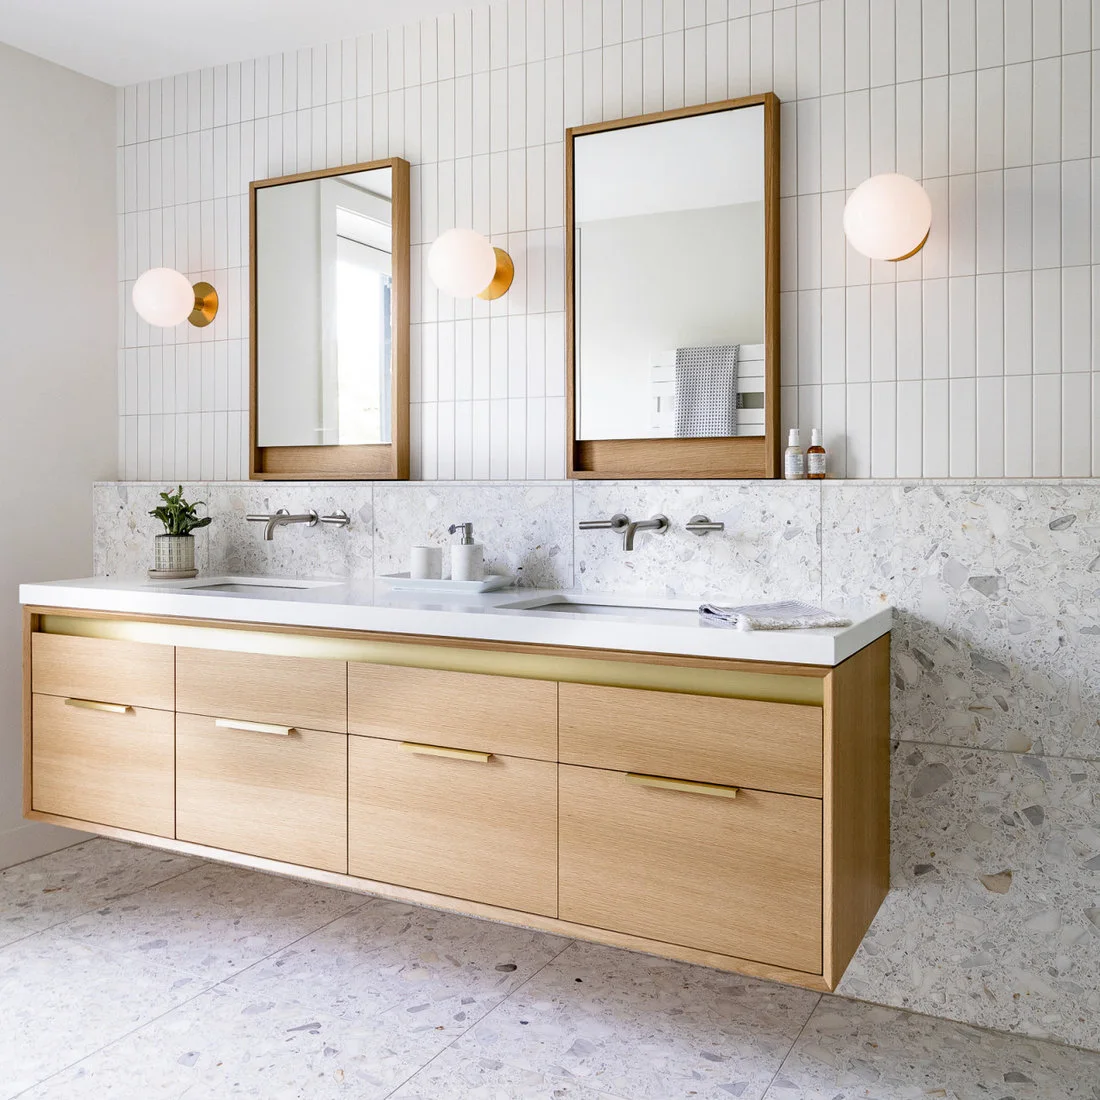
A low band of pale terrazzo runs behind this double vanity and continues visually into the floor. White vertical tiles keep the upper wall simpler, while the cabinet fronts and mirror frames repeat warm timber tones. The floating vanity leaves a broad strip of the floor exposed beneath the drawers.
Set the backsplash height around faucet positions and the counter edge before ordering the tile. A continuous-looking band still needs carefully planned corners and joints. Leave enough clearance beneath a floating cabinet to clean comfortably, and coordinate the wall support with the cabinet maker rather than using appearance alone to decide how it should be mounted.
IDEA 06 / 17
Use Fine Chips Under Broad White Shapes
 SaveSupport Non AI Creator
Image credit: Project: Lion Builder Construction Inc
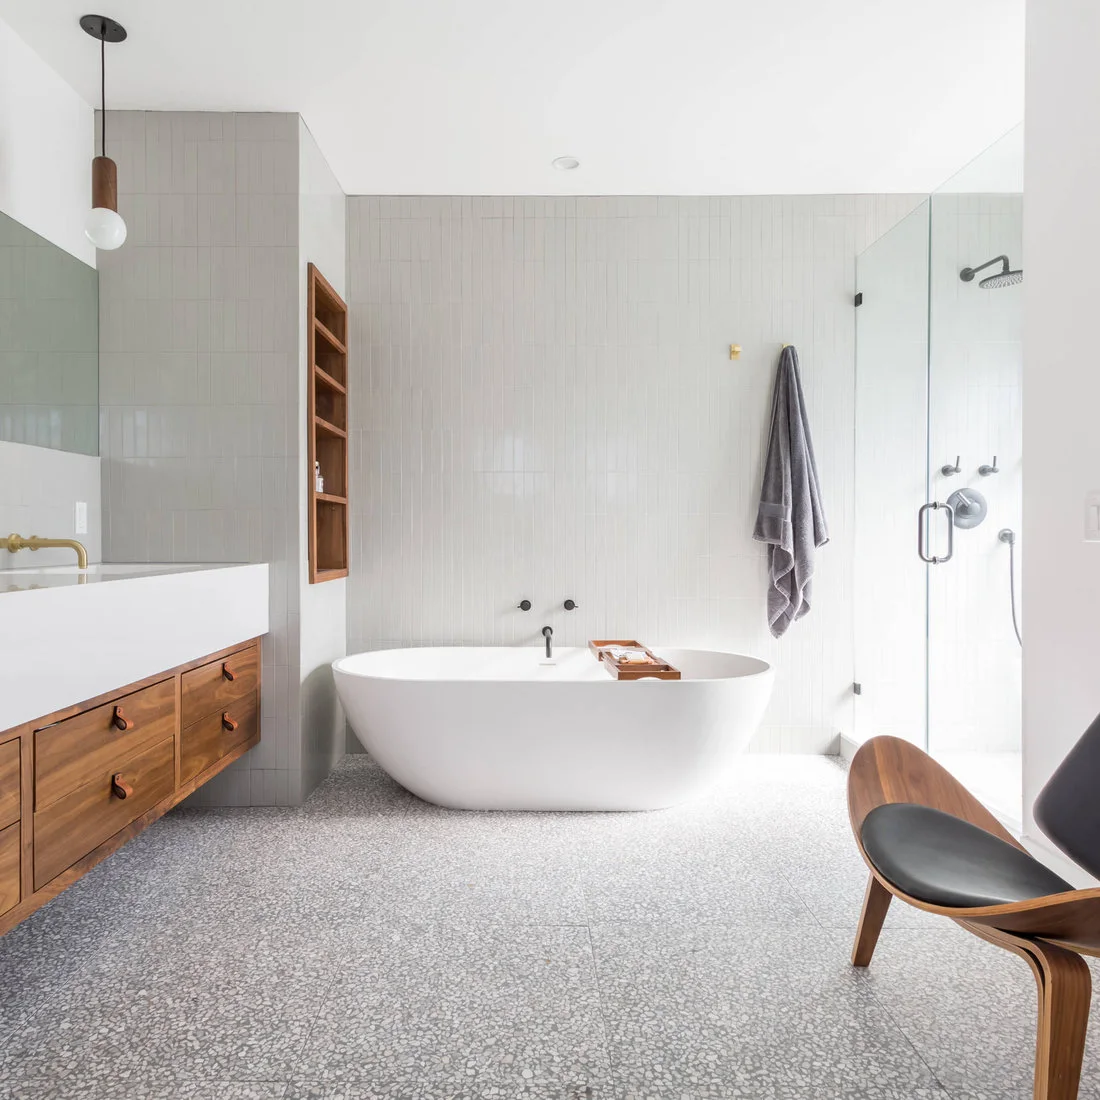
Fine gray chips create a close, even texture across this bathroom floor. The broad white tub and larger wall tiles give the pattern space to recede, while the timber vanity and chair bring warmth at opposite sides of the room. The floor remains visible between the fixtures, connecting the separate bathing and basin areas.
Compare fine and coarse samples from your normal standing distance, not only close up. Fine chips may read as a single textured color from the doorway. Our bathroom floor tile ideas offer other scales to compare; whichever surface you choose, check how the layout meets the tub, shower entrance and vanity without leaving distracting narrow cuts.
IDEA 07 / 17
Balance Peach Basins with a Speckled Shower Floor
 SaveSupport Non AI Creator
Image credit: Project: Noz Design
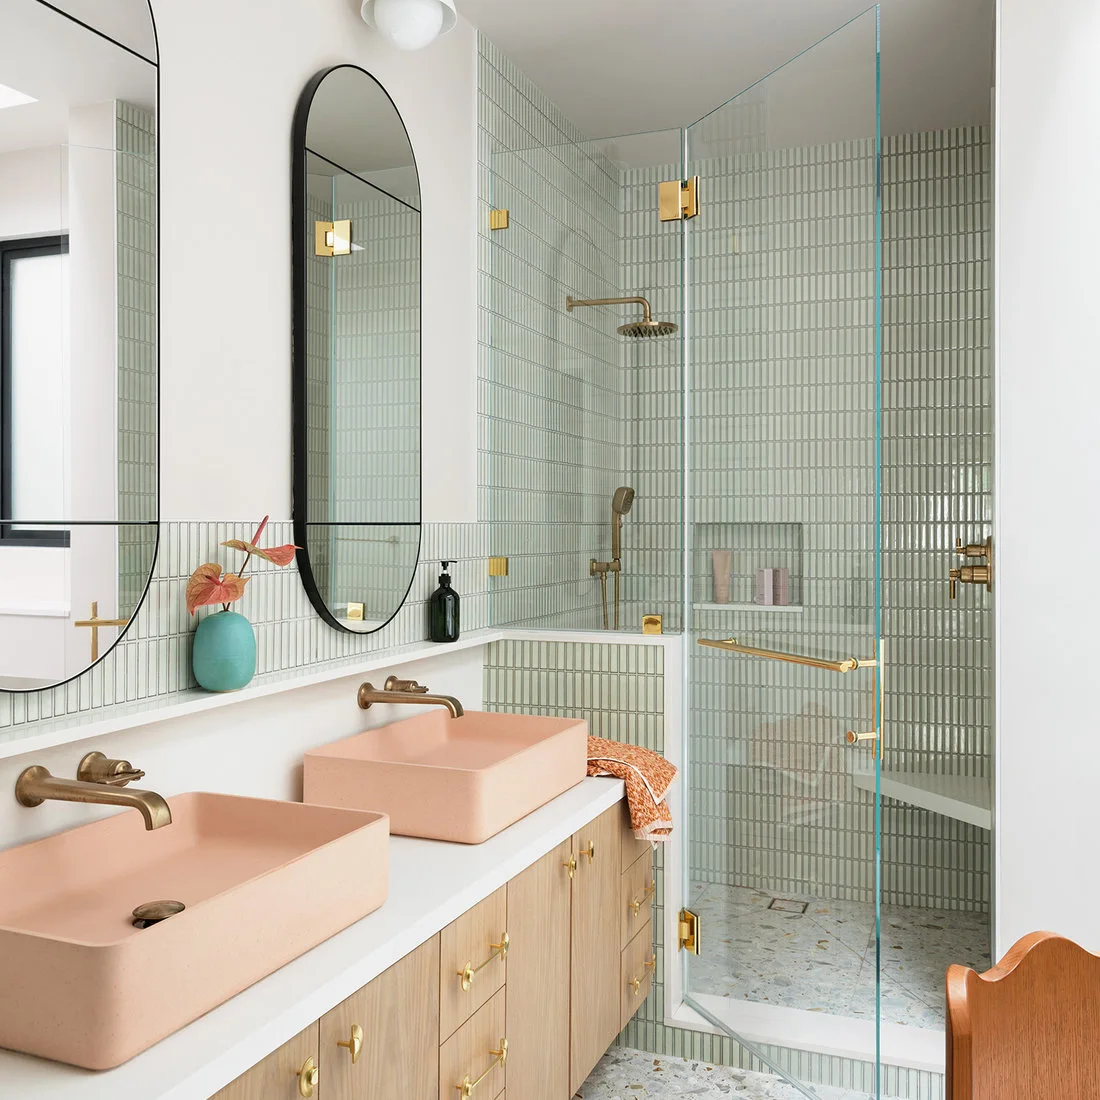
Two peach basins sit above a timber cabinet beside a pale terrazzo shower floor. Narrow green wall tiles introduce a fine linear repeat, contrasting with the scattered chips underfoot. Oval mirrors soften the rectangular basins, while a white counter gives the different colors and patterns a shared, quieter base.
Keep one element dominant when combining colored basins, striped tile joints and terrazzo. Lay all three samples together so the chips support the palette instead of adding an unrelated color. Include the shower threshold and drainage in the floor plan, and check the actual product information before assuming a patterned surface is appropriate for a wet floor.
IDEA 08 / 17
Keep the Counter Quieter Than the Floor
 SaveSupport Non AI Creator
Image credit: Project: Pollen Architecture & Design
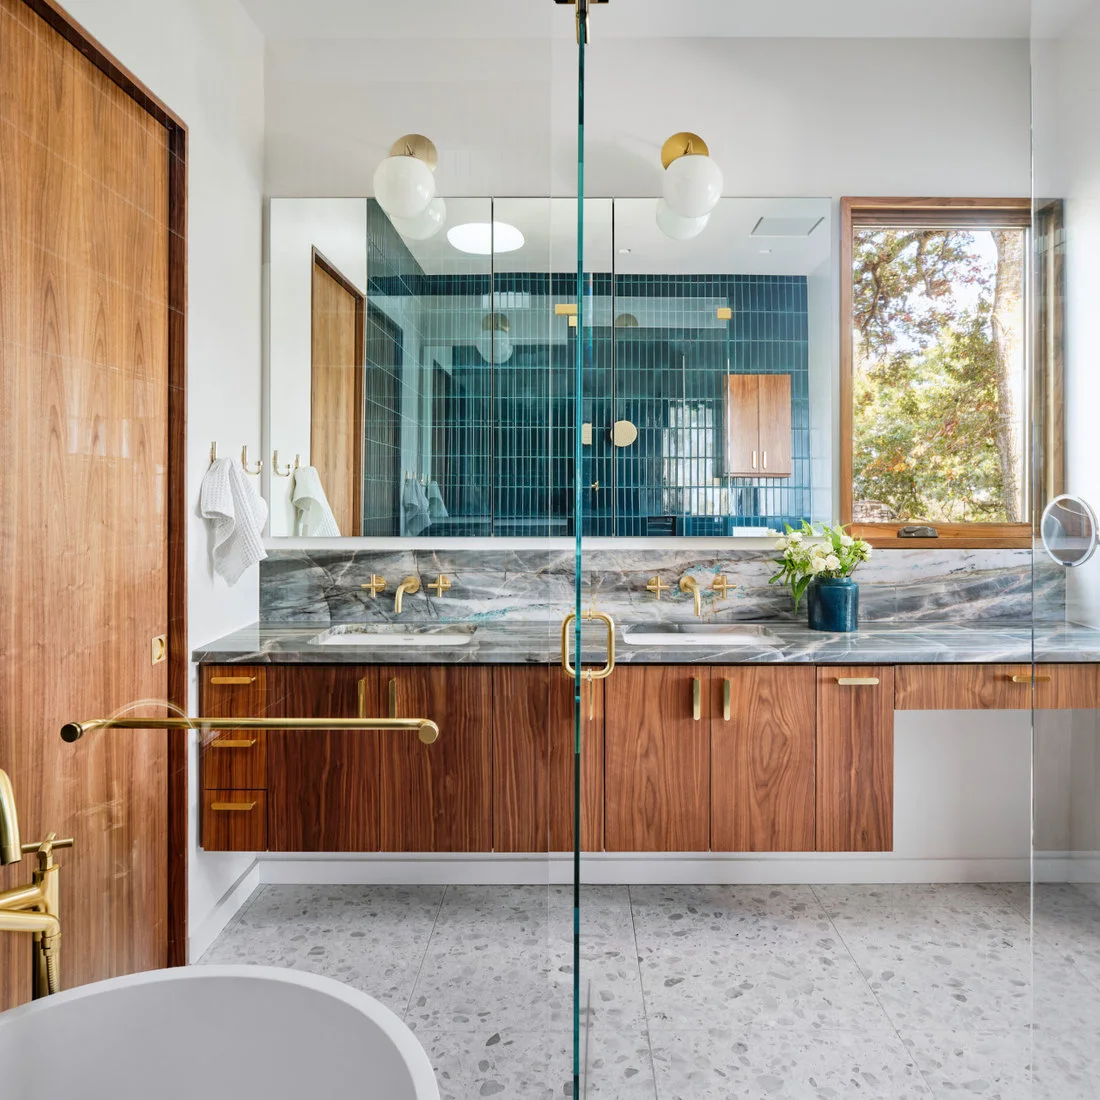
This second view of the blue-tiled bathroom shows pale terrazzo beneath the timber vanity. A veined counter adds a different pattern at basin height, while the large mirror reflects the shower walls. Broad cabinet fronts separate the counter and floor, giving the two patterned surfaces room to remain distinct.
When combining veining and chips, compare their contrast as well as their color. One quieter surface can prevent the vanity area from becoming visually crowded. Keep the counter display compact so the basin remains useful, and leave floor space below the vanity accessible; a successful material combination also needs to be straightforward to clean.
PART 03
Plan benches, niches and partitions
IDEA 09 / 17
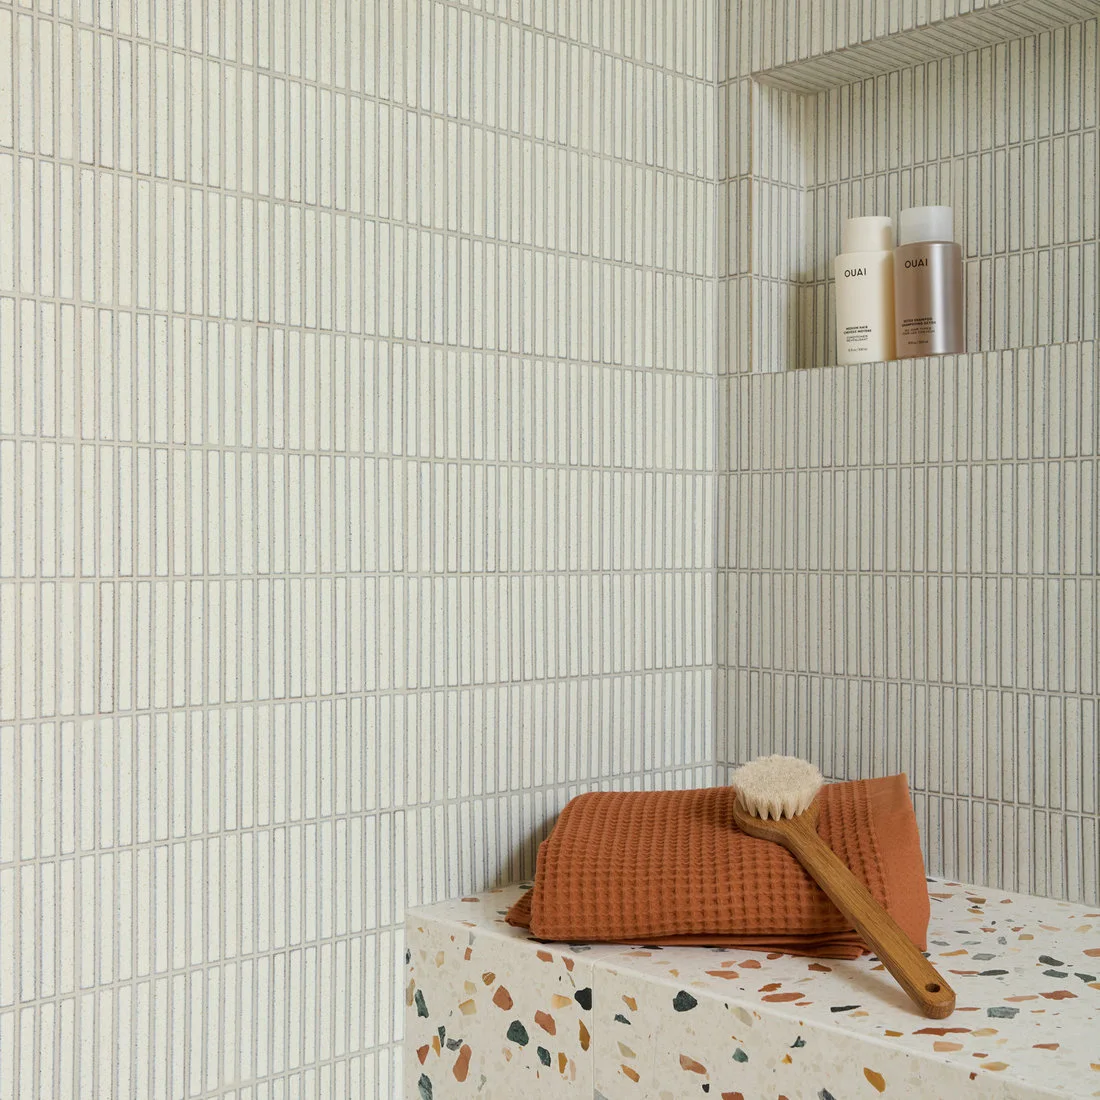
Turn a Shower Bench into a Terrazzo Detail
 SaveSupport Non AI Creator
Image credit: Project: Cathie Hong Interiors
Large warm and dark chips cover this shower bench, giving a small surface a strong identity. Fine vertical wall tiles provide a calmer background, and the recessed niche keeps bottles away from the bench. An orange towel echoes some of the warmer chips without introducing a second elaborate pattern.
A bench can be a practical place to use a bolder chip scale than you want across the whole room. Check the edge treatment, support, waterproofing and drainage with the installer before choosing the finish. Keep accessories removable so the bench can be cleaned fully, and avoid treating an attractive surface as proof of comfortable or safe seating.
IDEA 10 / 17
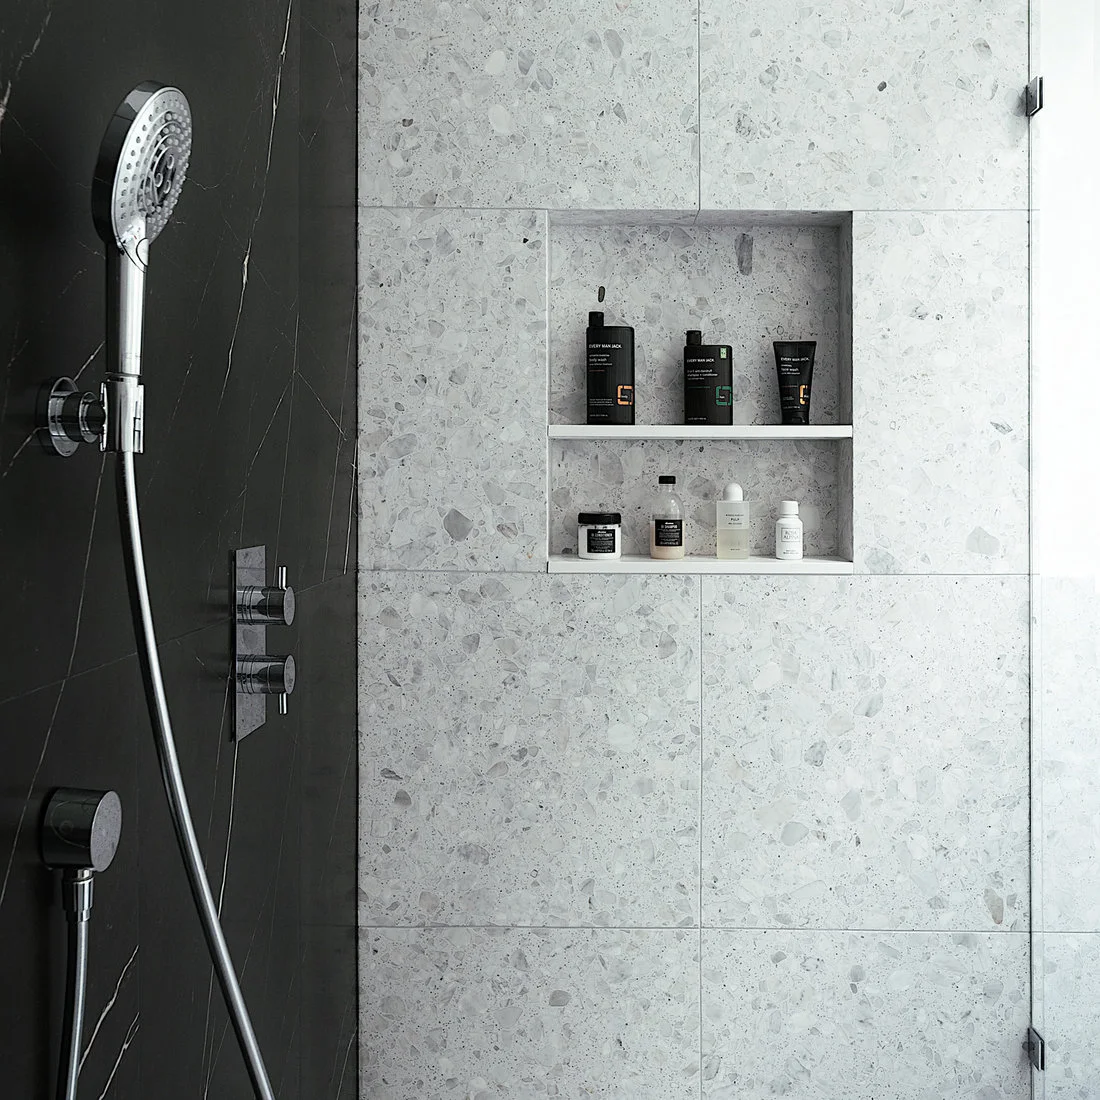
Continue the Pattern Inside a Shower Niche
 SaveSupport Non AI Creator
Image credit: Project: Kimball Modern Design + Interiors
The pale chipped surface continues around and inside a two-level shower niche. Dark bottles stand out against its lighter background, while the neighboring dark wall supplies a stronger contrast than the scattered chips. A slim pale shelf divides the recess, keeping the storage arrangement simple beside the patterned surface.
Set out the niche with the wall tiles so the opening does not interrupt the pattern awkwardly. Include the shelf thickness and the height of the products you actually use. Ask how the recess will be waterproofed, drained and cleaned; continuing a decorative finish into it does not replace those construction details.
IDEA 11 / 17
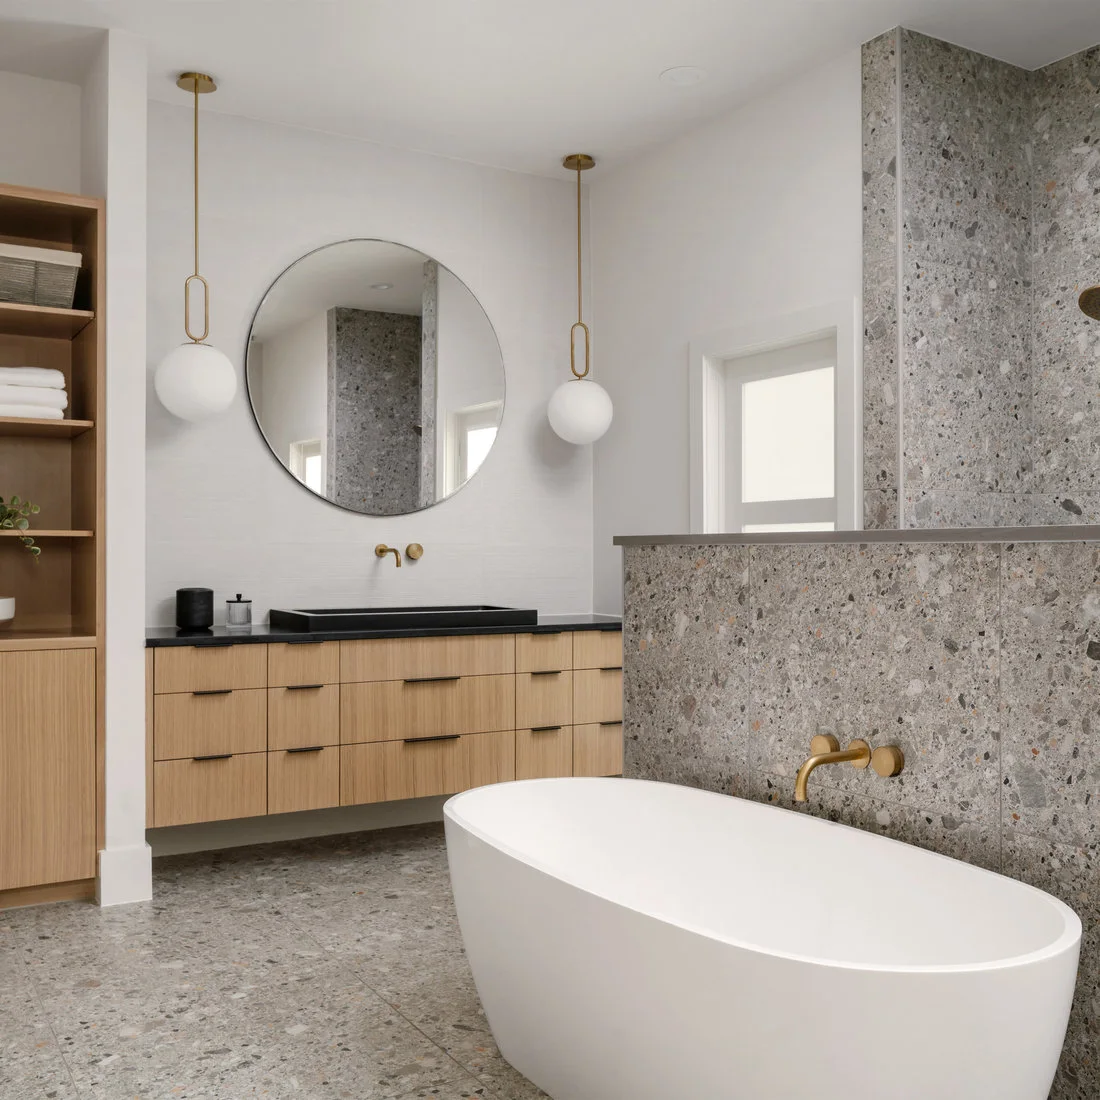
Repeat Gray Terrazzo Across a Bath Partition
 SaveSupport Non AI Creator
Image credit: Project: Messer Design + Construction
Gray terrazzo continues from the floor up the partition behind a white tub. The repeated surface connects the bathing area to the vanity without covering every wall. A black basin and counter create a crisp horizontal line, while the round mirror and hanging globe lights introduce quieter curves above the warm cabinetry.
Consider what the partition needs to screen before deciding its height and width. It should serve the layout as well as carry a decorative finish. Check corner details and the tile setting-out on both sides, and keep the surrounding route comfortable; extending terrazzo vertically should not make access to the tub or basin unnecessarily awkward.
IDEA 12 / 17
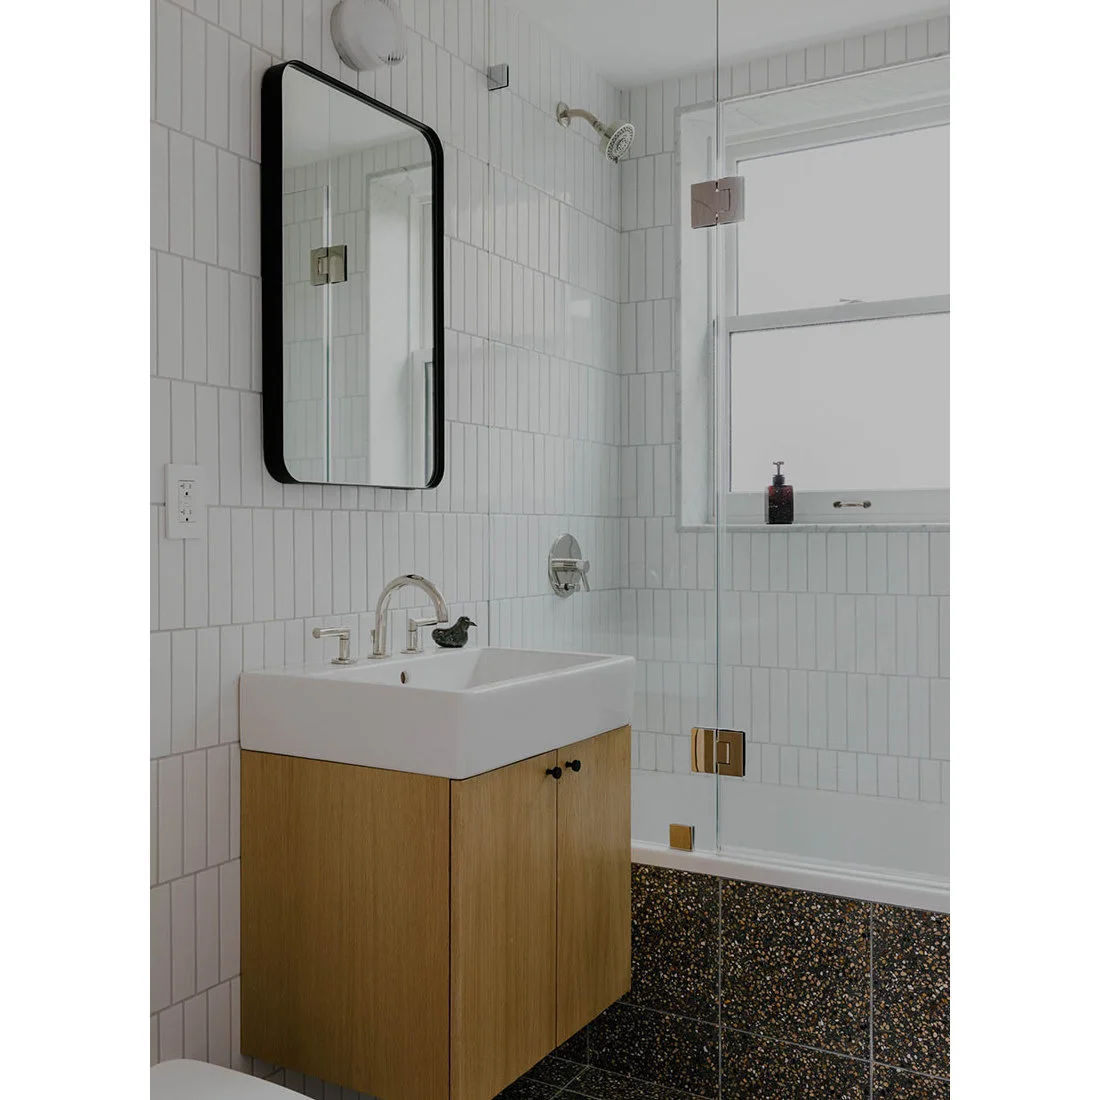
Try a Dark Speckled Bath Front
 SaveSupport Non AI Creator
Image credit: Project: Jane Kim Architect
A dark speckled surface wraps the bath front and continues onto the floor in this compact bathroom. White wall tiles provide a bright contrast, while the simple timber vanity bridges the dark base and pale upper walls. The small black-framed mirror repeats the darker outline without adding another broad dark surface.
Use a dark sample beside your chosen wall tile before committing to this level of contrast. Check how visible lint, dried splashes and cleaning marks are on the actual finish. A patterned bath front also needs appropriate access to the plumbing, so discuss removable access and finished edges before treating it as a continuous decorative panel.
PART 04
Connect terrazzo to the wider room
IDEA 13 / 17
Choose Fine Terrazzo Beside Muted Green
 SaveSupport Non AI Creator
Image credit: Project: Christen Ales Interiors
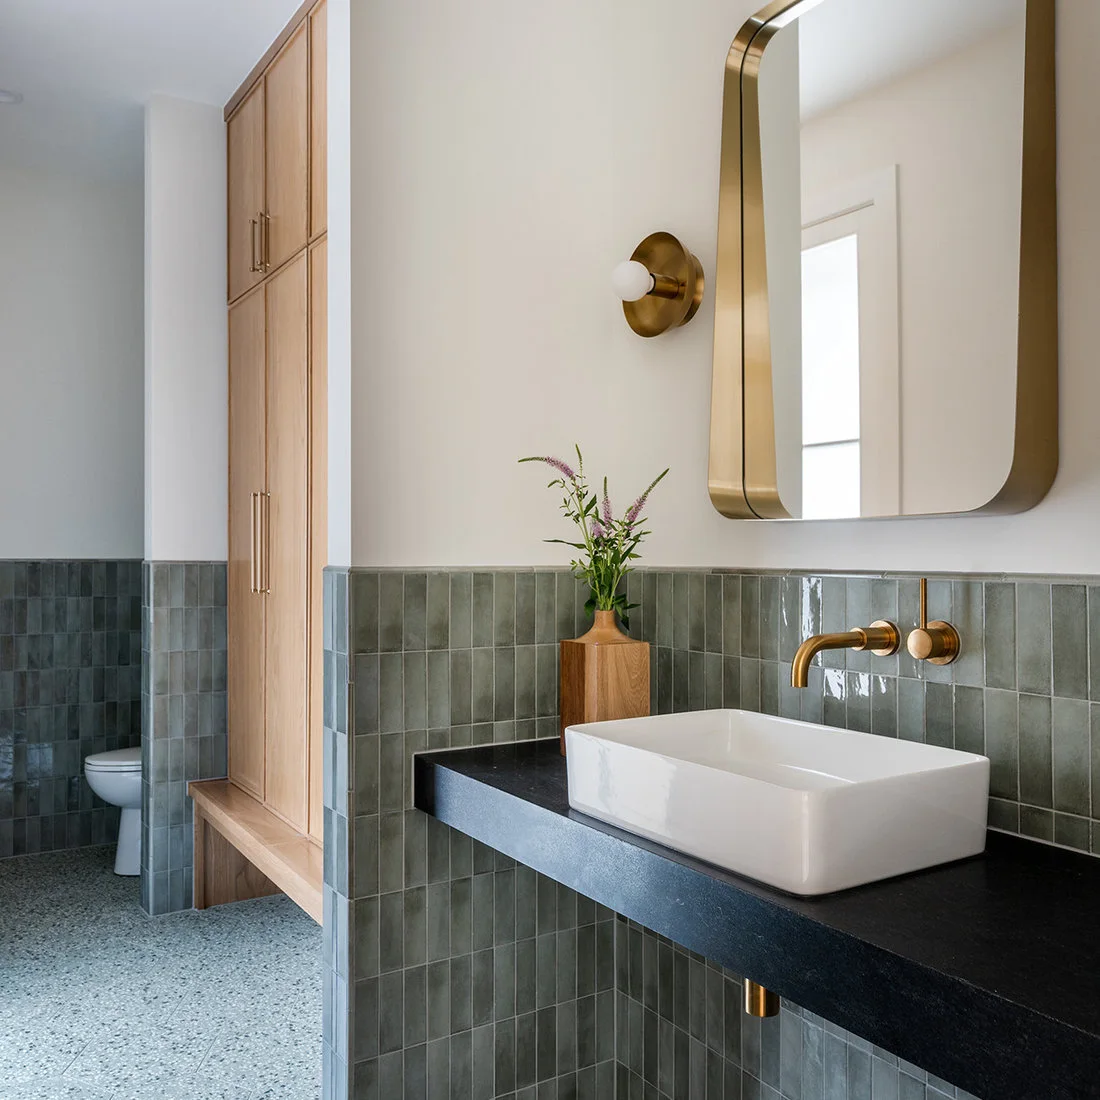
Fine gray terrazzo provides a subdued base beneath muted green wall tiles. A white vessel basin stands clearly against the dark counter, and tall timber storage adds a warm vertical surface nearby. The floor pattern is finer than the wall-tile grid, so the room uses two distinct textures without making either one especially loud.
Compare the floor and wall grout together, since their tones can strengthen or soften this combination. Keep tall storage clear of the route to the basin and toilet, and confirm how it will be secured. A fine chip pattern can suit a restrained palette, but choose it for its appearance and documented use rather than assuming it will conceal all dirt.
IDEA 14 / 17
Let Multicolored Chips Supply the Accent Colors
 SaveSupport Non AI Creator
Image credit: Project: Steph Gaelick Designs
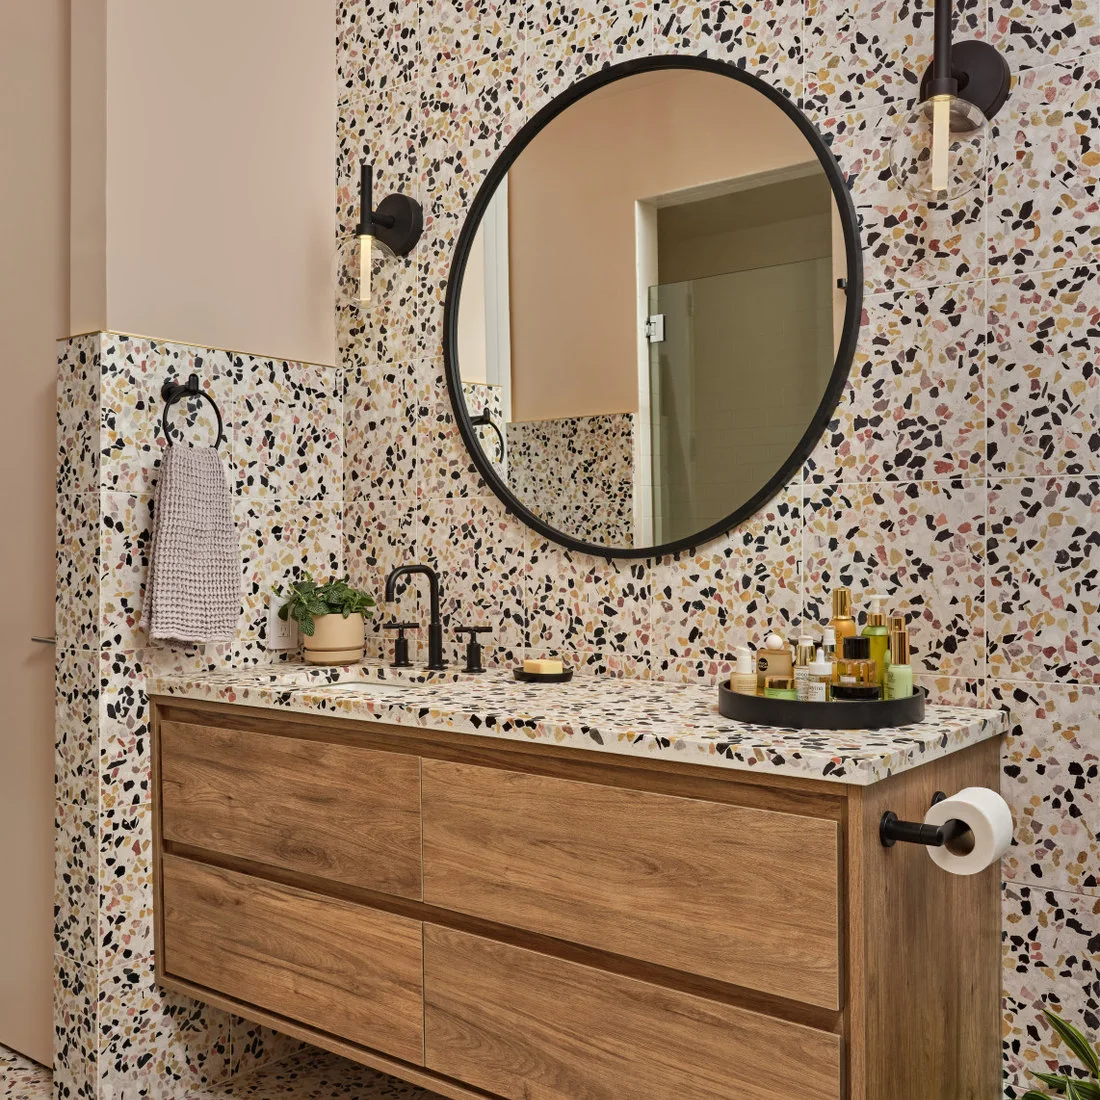
Multicolored chips spread across the counter and lower wall around a timber vanity. Pale pink paint repeats one softer color above the pattern, while a round black mirror and black fittings pick up its darkest fragments. The cabinet fronts provide a broad uninterrupted area between the detailed counter and the floor.
Select one or two chip colors for the surrounding paint and accessories rather than repeating the whole palette. Check a larger sample before choosing the pink, because its relationship to the background matters as much as individual fragments. Use a removable tray for small bottles so the patterned counter remains manageable during daily cleaning.
IDEA 15 / 17
Connect a Small Bathroom with Green Terrazzo
 SaveSupport Non AI Creator
Image credit: Simply Bathrooms & Interiors (Surrey) Ltd.
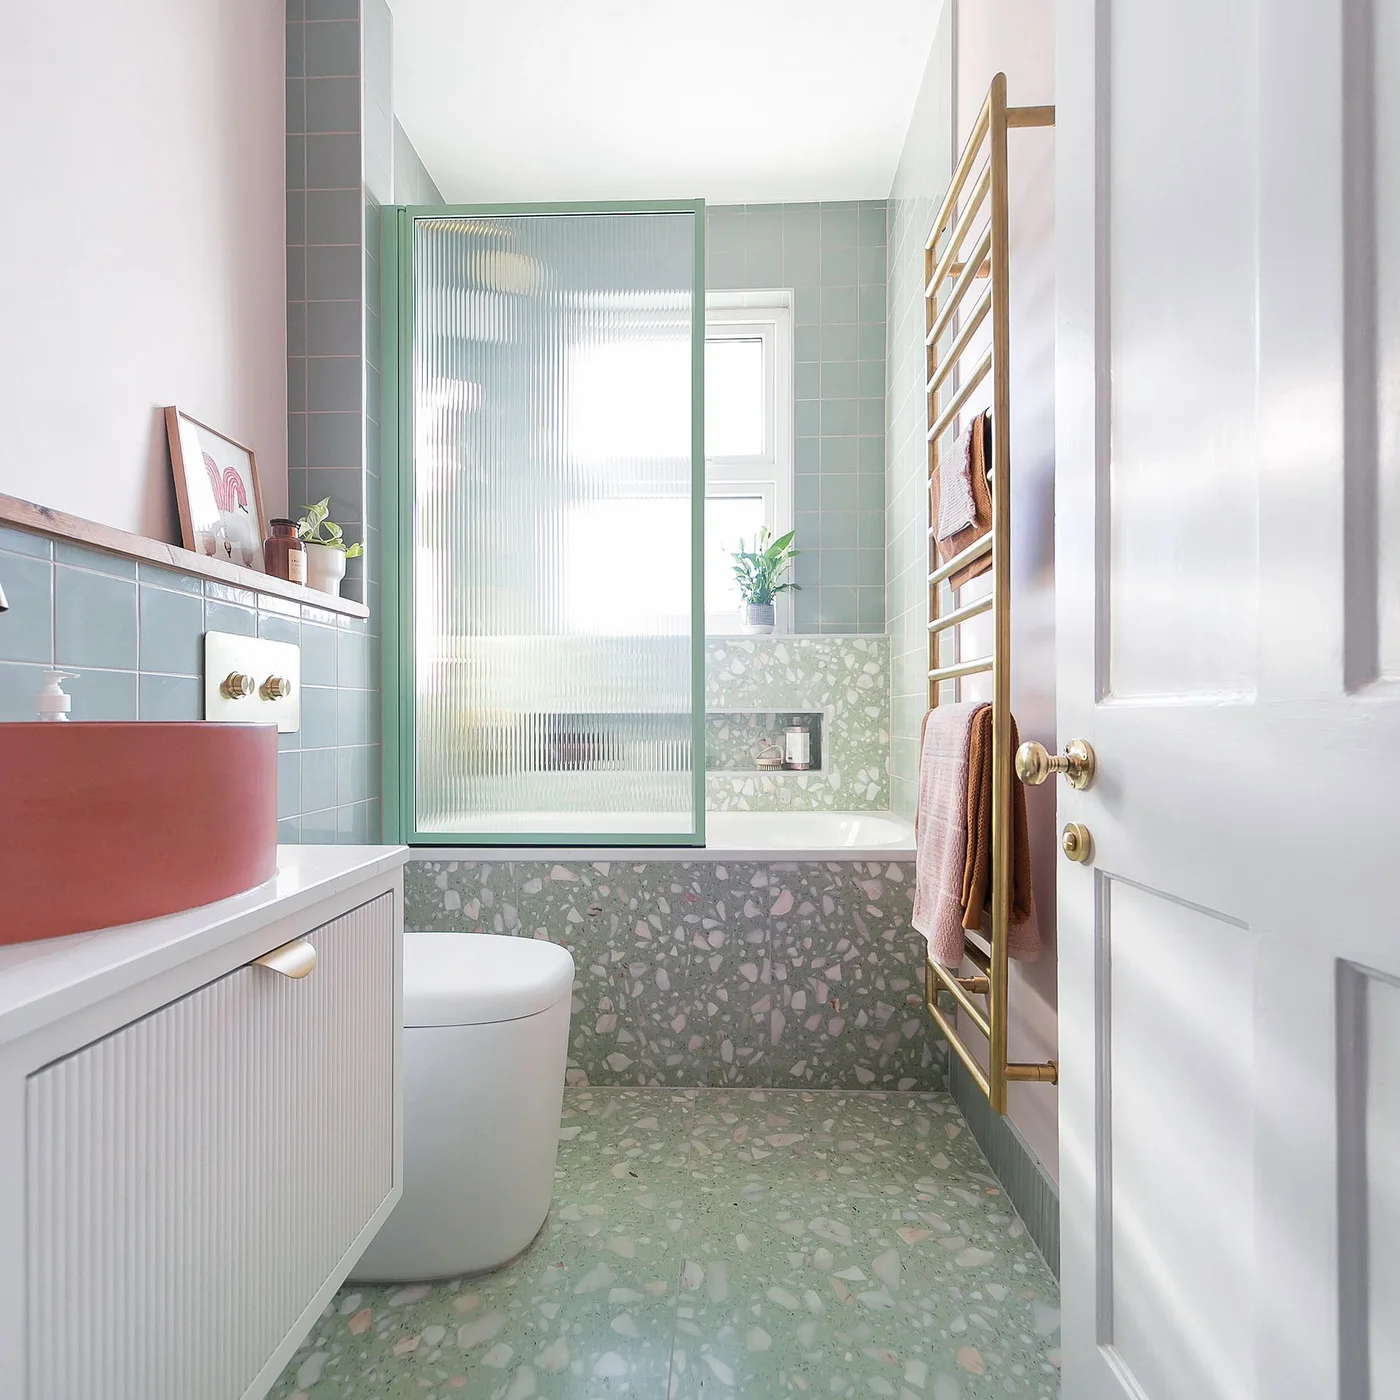
Green terrazzo continues across the floor and bath front in this small bathroom. Pink walls and a coral basin bring warmer color above it, while green wall tiles and the screen frame repeat the floor background. The reeded glass partly obscures the shower without hiding the broad terrazzo band below the tub.
Repeating the same patterned finish on a bath front can connect a narrow room, but check the tile layout from the doorway before installation. The front and floor still need their own access and waterproofing details. Keep the vanity depth and door movement in the plan so the coordinated surfaces support a usable route through the room.
IDEA 16 / 17
Use a Terrazzo Ledge Around a Bath Niche
 SaveSupport Non AI Creator
Image credit: Simply Bathrooms & Interiors (Surrey) Ltd.
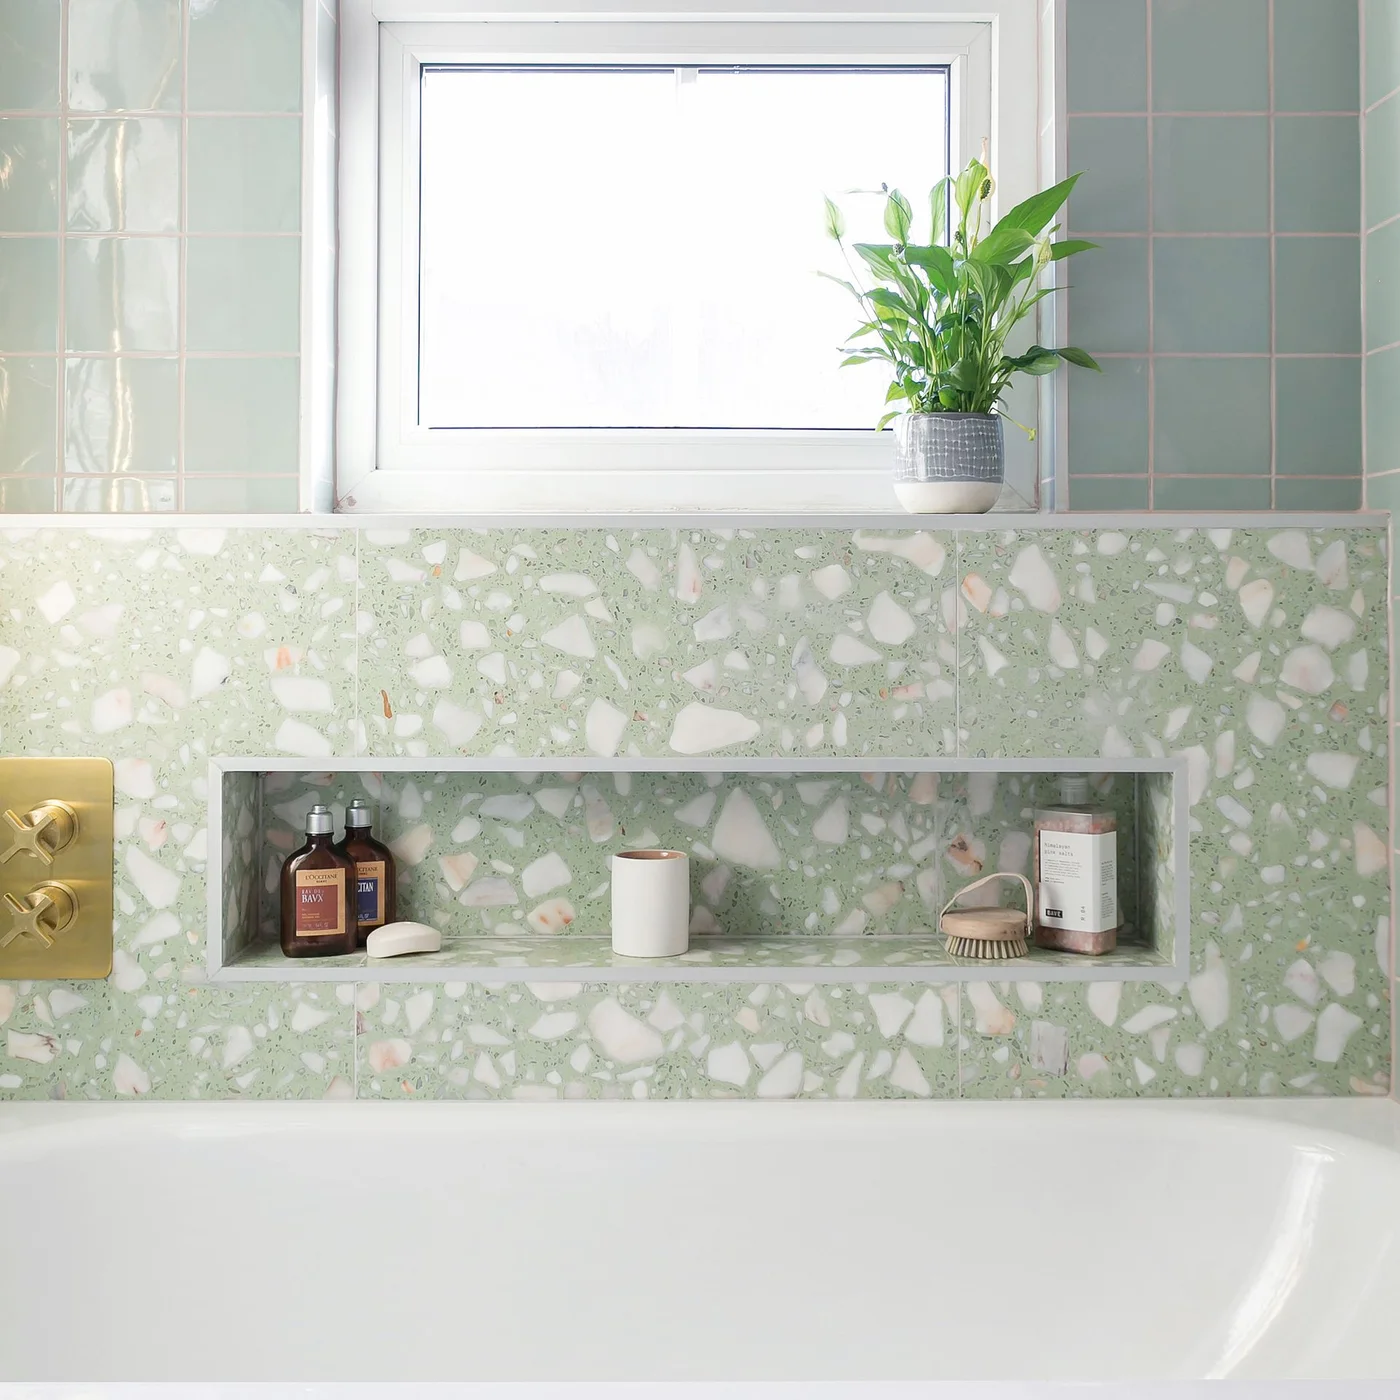
A long niche is recessed into the green terrazzo band beside the bath. Pale, pink and darker chips remain visible around the opening, while rectangular green tiles continue above the window sill. The horizontal shelf gives bottles a defined place, allowing the bath edge to remain largely clear.
Plan the opening around the products you need to store, allowing space to lift them out without crowding the recess. Coordinate tile cuts at its corners and confirm the finished shelf drainage. Keep candles and decorative objects clear of everyday washing space; the useful idea here is accessible storage within the patterned wall, not a permanently full display.
IDEA 17 / 17
Coordinate the Floor with Painted Joinery
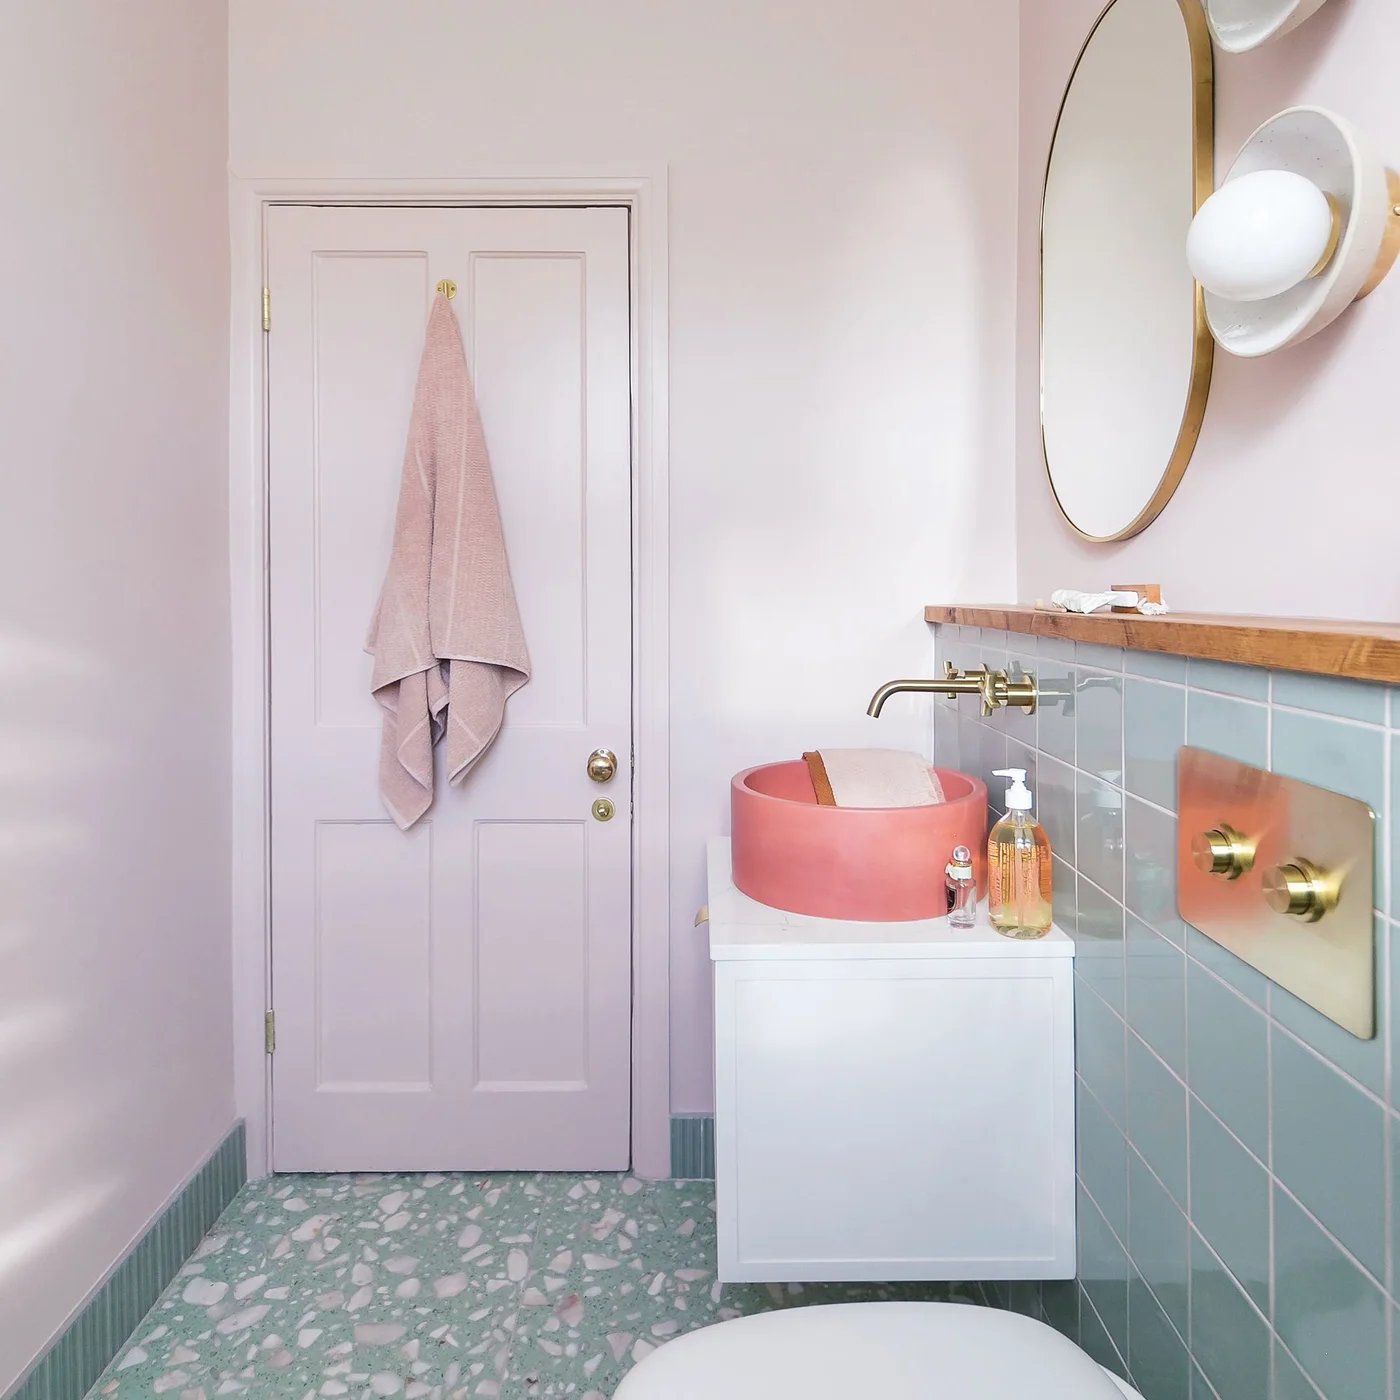 SaveSupport Non AI Creator
Image credit: Simply Bathrooms & Interiors (Surrey) Ltd.
Viewed toward the door, the same small bathroom shows how the green floor relates to the pale pink painted joinery. The coral basin supplies a stronger warm accent, while white cabinetry keeps the lower storage simple. Green tiles wrap the basin wall, connecting the flooring to the surfaces above it.
Include the door and trim in your color samples, since they can occupy a noticeable part of a small room. Keep enough contrast for handles and edges to remain easy to see. Check door clearance beside the basin and cabinet before copying this compact arrangement, and choose paint suitable for the surface and room conditions.
BRING IT ALL TOGETHER
Choose the pattern before the finishing touches
Compare a broad sample of the floor or wall finish with your largest neighboring surfaces. The chip size, background and grout all affect how much pattern the room will have. Repeat one or two colors in the paint or fittings, keeping other areas simpler if the terrazzo is especially bold.
Appearance is only part of the choice. Confirm the product composition, intended use, care instructions and installation details before buying. Include wet-area construction, drainage, access and tile edges in the plan; neither a photograph nor a terrazzo label establishes the performance of a specific product.