A natural-looking bathroom can draw warmth from timber, greenery, earthy colors and visible texture without filling every surface with decoration. Begin with the materials and objects that will suit your daily routine, then choose a restrained palette around them. A room can feel connected to nature while still using practical tiles in its wet areas.
These photographs compare warm cabinetry, window views, plant positions and feature surfaces. Two views of one reeded shower show wood-effect tiles rather than actual timber, with separate advice about its overall arrangement and niche. Use the visible details for inspiration, then confirm product suitability, installation, moisture protection and care for the finishes you intend to use.
PART 01
Bring warmth through useful storage
IDEA 01 / 20
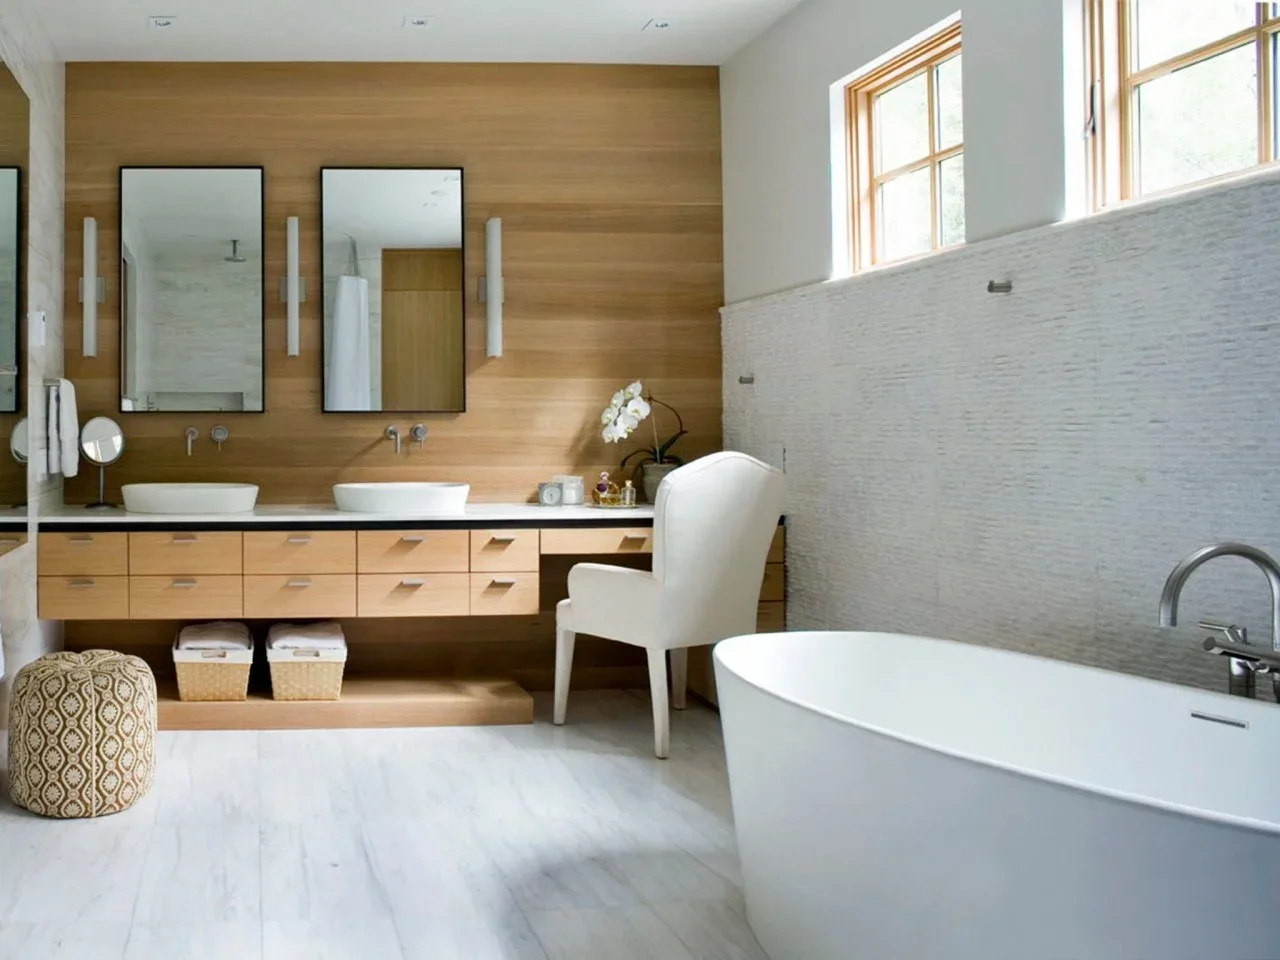
Warm a White Bathroom with a Timber Vanity Wall
 SaveSupport Non AI Creator
Image credit: Photo: Emily Minton Redfield; emrphotography.com
The timber wall and floating vanity give this white bathroom a warm central surface. Two white basins stand apart from the grain, while black mirror frames provide a finer outline above them. Woven baskets occupy the open lower shelf, and the tub sits beside a textured pale wall rather than more timber.
Choose the timber treatment around the amount of moisture it will face, not just the color in a photograph. Ask how the vanity and wall finish should be cleaned and maintained. Keep baskets easy to lift from the shelf, and leave their contents dry so the useful storage does not become a place for damp towels to accumulate.
IDEA 02 / 20
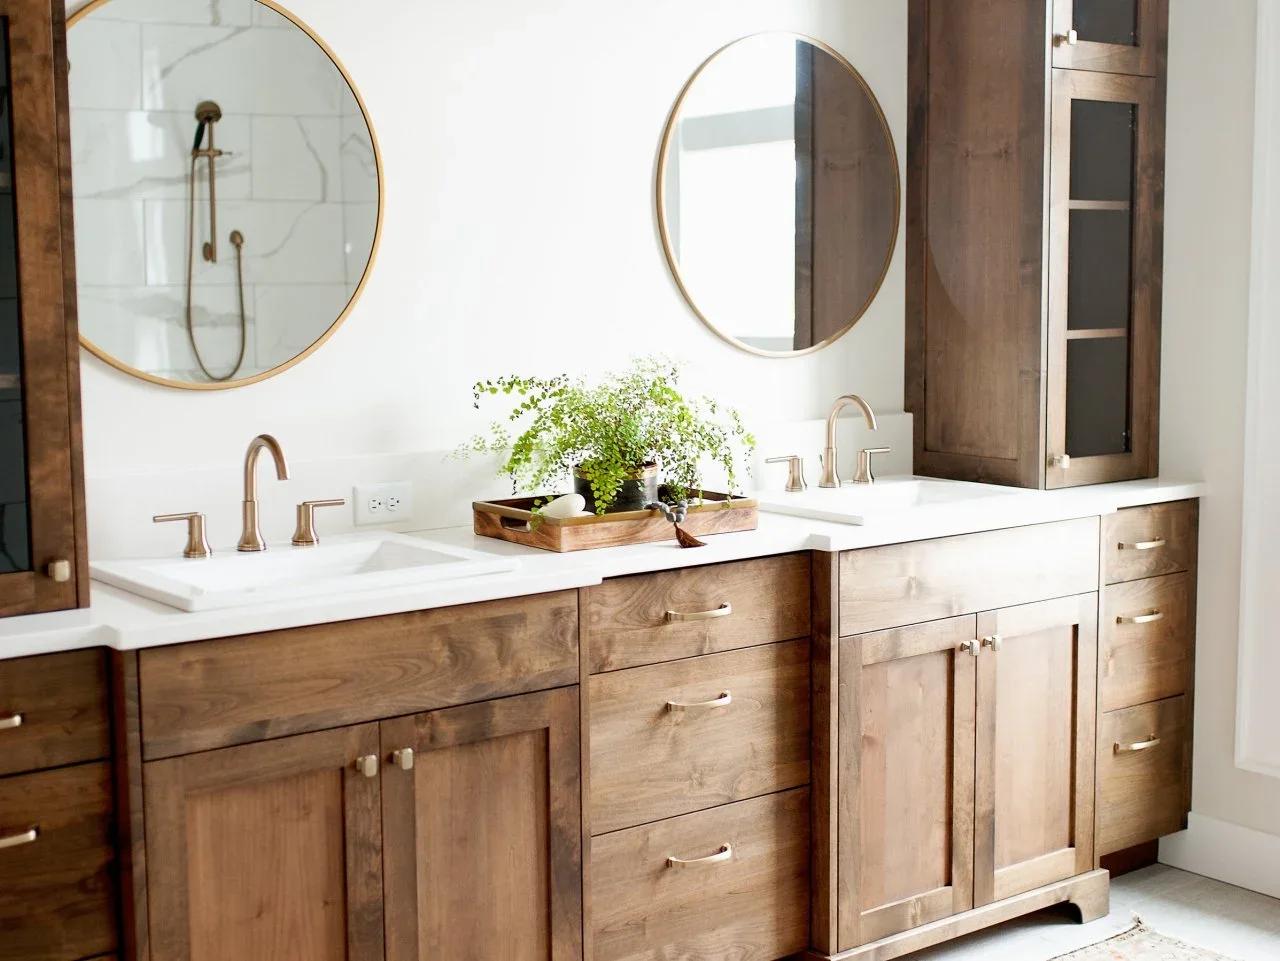
Let Cabinet Grain Supply the Detail
 SaveSupport Non AI Creator
Image credit: Photo: Dawn Burkhart. From: Judith Balis
The grain of the timber cupboards supplies most of the pattern around these two white sinks. Tall storage rises at the sides, while round mirrors soften the rectangular cabinet fronts. A small green arrangement on a tray brings another natural-looking detail to the center without covering the whole counter.
Compare several cabinet samples if you want visible grain, because its strength can vary between pieces and finishes. Keep everyday sink items in the drawers and use the tray for only a few things that can be moved together. Wipe splashes according to the cabinet instructions, paying attention to edges near the counter and sink.
IDEA 03 / 20
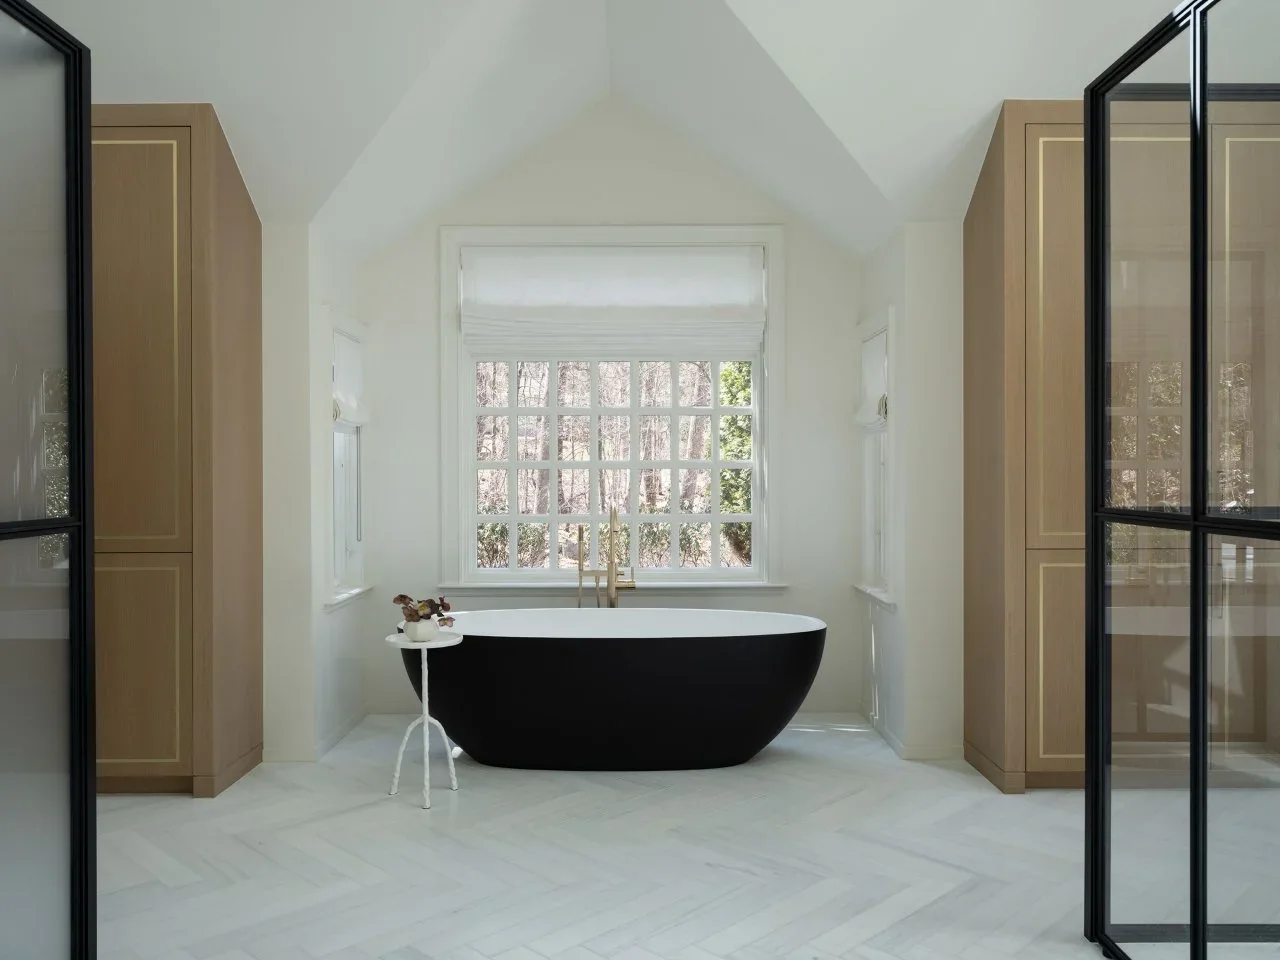
Use Tall Warm Cupboards Around a Dark Tub
 SaveSupport Non AI Creator
Image credit: Photo: Sarah Winchester Studios
Warm-toned cupboards flank the black tub in this pale room. Their broad fronts give the bathing area a sense of structure without adding a printed pattern, while the black glass frames repeat the tub color near the entrance. The white window, walls and floor keep the dark shapes from becoming the whole palette.
Check cupboard doors against the route to the tub before choosing tall storage for a compact bathing area. A symmetrical photograph can hide the space needed to open doors and move around furniture. Compare the cupboard finish with your floor sample, and keep smaller accessories light if the tub and frames already make a strong outline.
IDEA 04 / 20
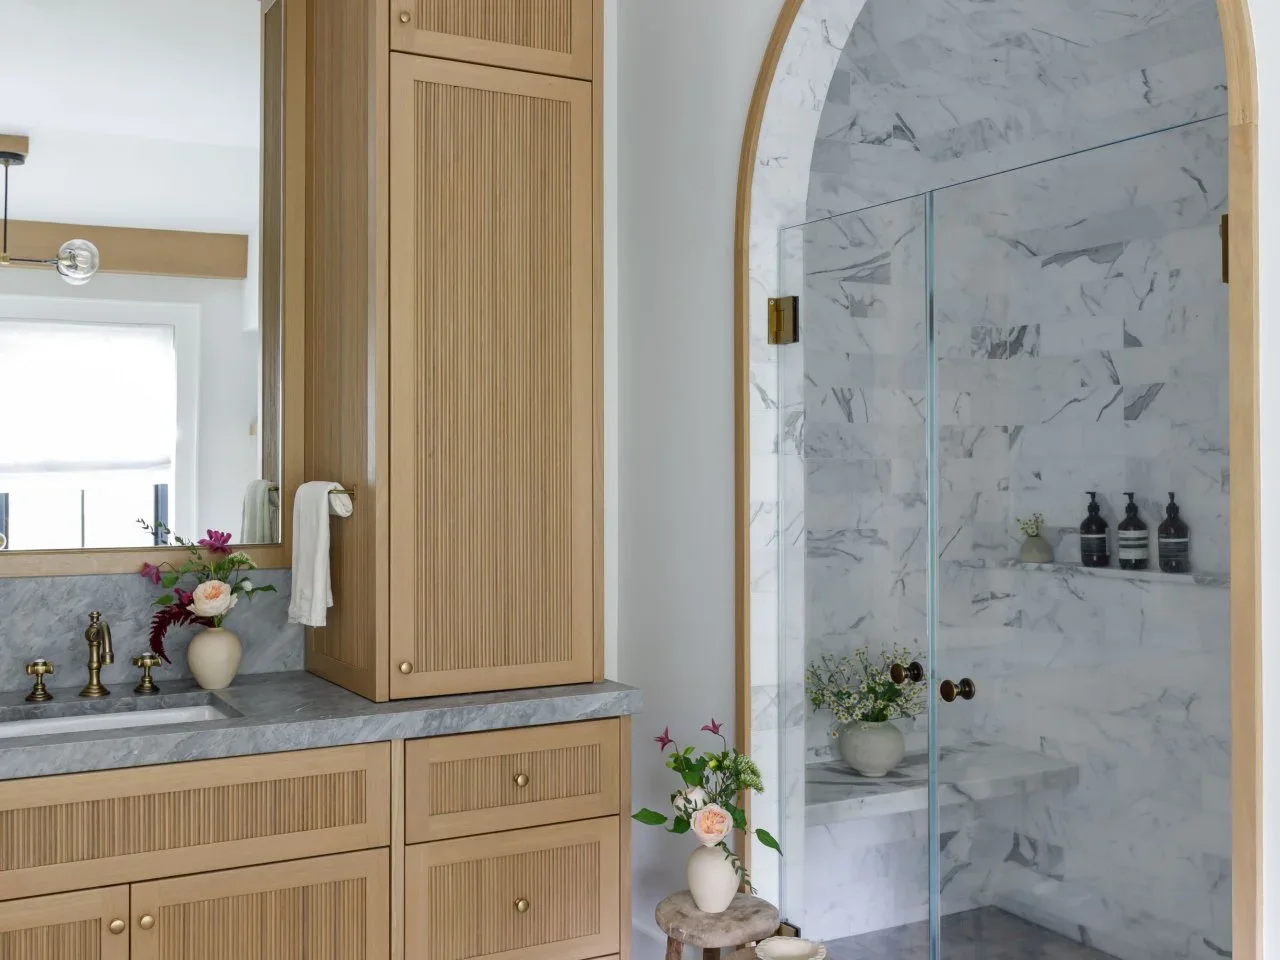
Combine Slatted Cabinet Fronts with a Curved Opening
 SaveSupport Non AI Creator
Image credit: Photo: Jake Shea, True North Development. From: Becky Shea Design
Fine vertical ribs give the pale cabinet fronts texture beside the curved shower opening. The gray-veined tiles provide a different kind of pattern inside the shower, while a small timber stool repeats the cabinet warmth near the entrance. Pale walls separate those surfaces so the ribbing and veining remain distinct.
Ribbed fronts have more edges to clean than smooth doors, so compare their care needs before choosing the detail. Test the wood color against the veined tile sample rather than relying on matching product names. Keep the stool and any vase outside the main route, and allow the shower door to move without hitting stored objects.
IDEA 05 / 20
Frame an Outdoor View with Warm Storage
 SaveSupport Non AI Creator
Image credit: Photo: Clay Burkhalter. From: Village Properties
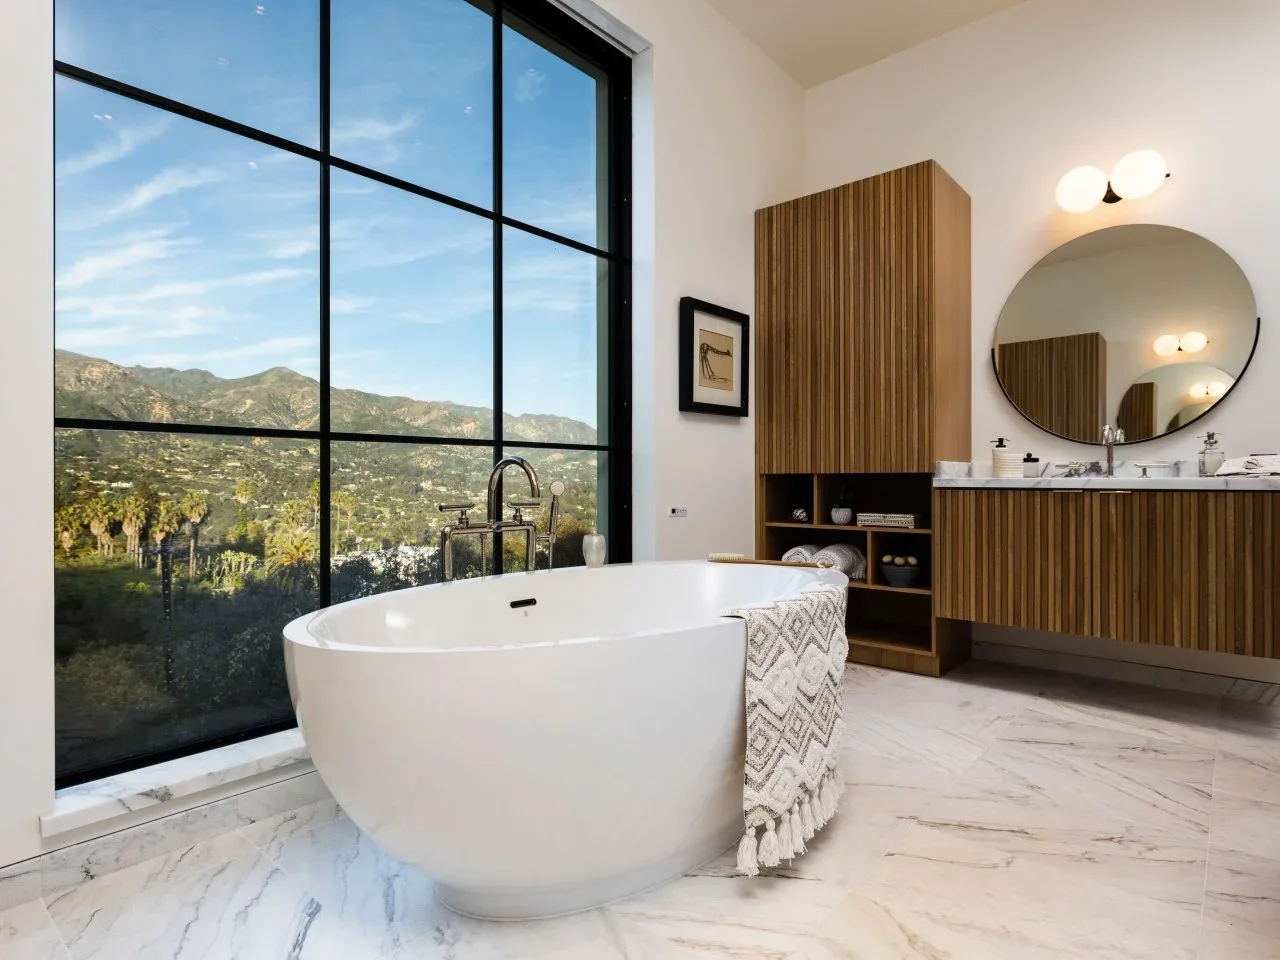
The large window makes the outdoor view a substantial part of this bathroom. Ribbed timber storage provides warmth beside the white tub, and a round mirror softens the lines of the window grid. The cabinet includes an open shelf area, keeping towels and small objects visible without filling every surface with decoration.
Treat privacy as part of the window plan, including the view into the room after dark. Choose any blind or screen around the window’s size and bathroom conditions. Keep the storage footprint and tub access practical first; a generous photograph does not establish the clearances available in a smaller home.
PART 02
Balance timber with pale surfaces
IDEA 06 / 20
Keep Timber Low When the View Is Strong
 SaveSupport Non AI Creator
Image credit: Photo: Roehner + Ryan. From: The Ranch Mine
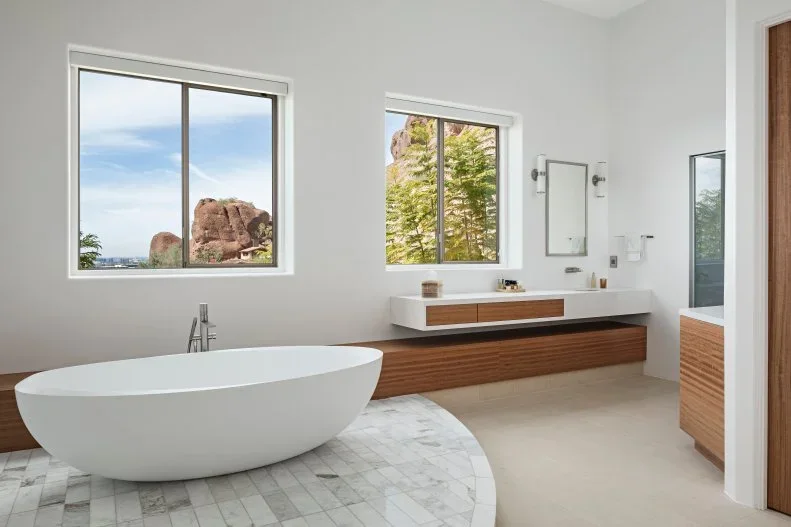
Low timber storage adds a warm line below the white counters without covering the windows. The tub sits on a curved tiled area, while rocks and trees provide larger natural shapes outside. The pale room lets the grain of the cabinets and the view remain the main details rather than adding a strongly patterned wall.
If your bathroom has a view, compare low storage with tall cupboards before buying. Keeping furniture below the window may make the room feel more open, but it reduces enclosed storage. Our minimalist bathroom ideas offer other ways to balance clear surfaces with useful cupboards, so the natural-looking room still supports everyday routines.
IDEA 07 / 20
Repeat Timber at the Ceiling and Vanity
 SaveSupport Non AI Creator
Image credit: Photo: Hawaii Life Real Estate Brokers, a member of Luxury Portfolio International. From: Hawaii Life Real Estate Brokers
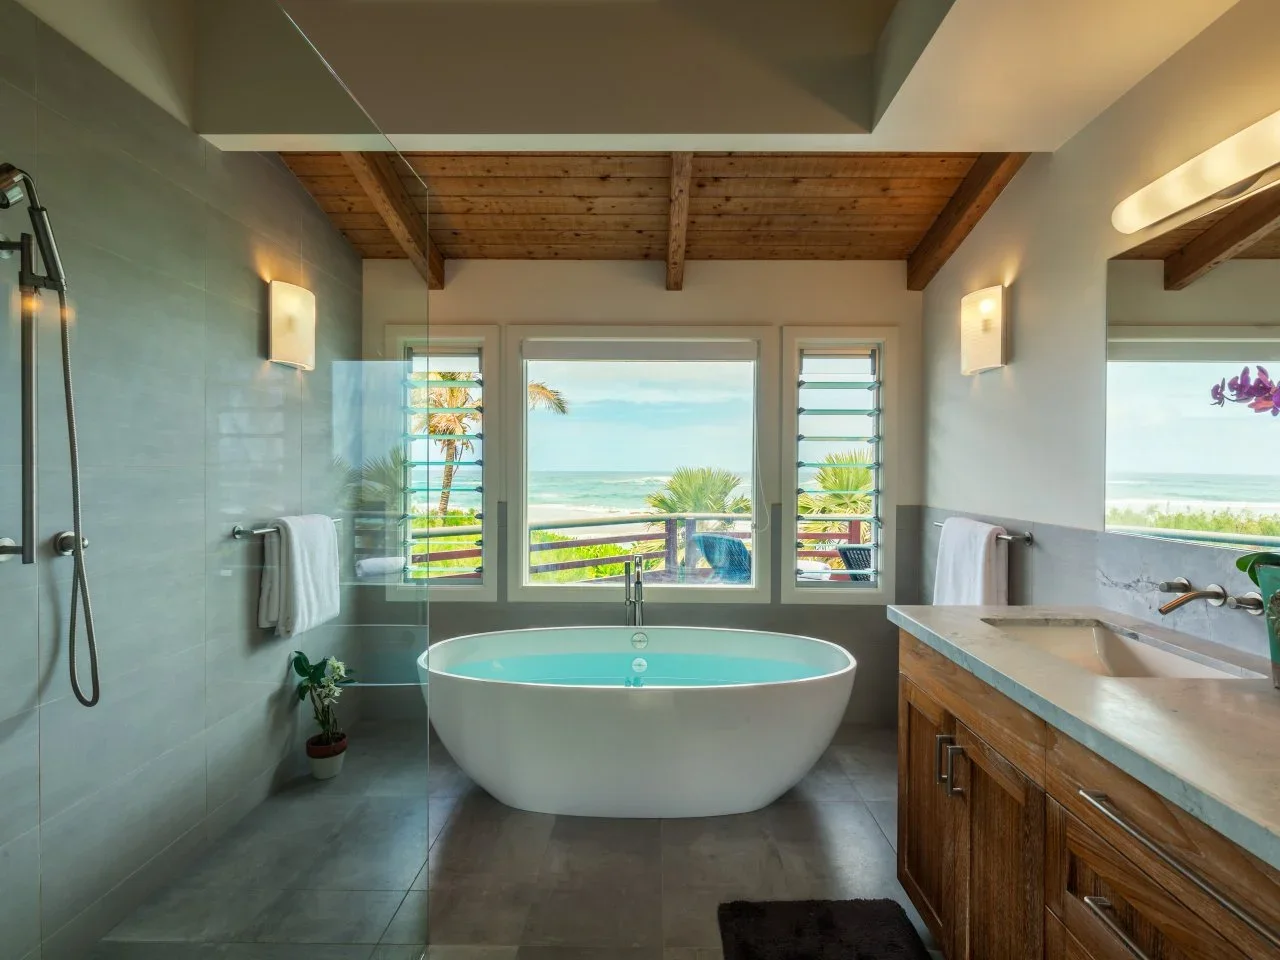
Timber appears above and below in this bathroom, with a warm ceiling over the pale tub and a matching family of tones at the vanity. Gray tile provides a calmer middle layer between them. The broad window and mirror bring light across those surfaces, preventing the timber from reading as one solid dark enclosure.
Choose ceiling and vanity finishes together, but check their suitability separately for the positions they will occupy. Moisture and cleaning access differ above the room and around a sink. Include ventilation and lighting in the plan, and compare the timber colors under evening light as well as the daylight that dominates this photograph.
IDEA 08 / 20
Separate the Wet Surface from the Timber Palette
 SaveSupport Non AI Creator
Image credit: Photo: Chas Everitt International Property Group, a member of Luxury Portfolio International. From: Chas Everitt International Property Group
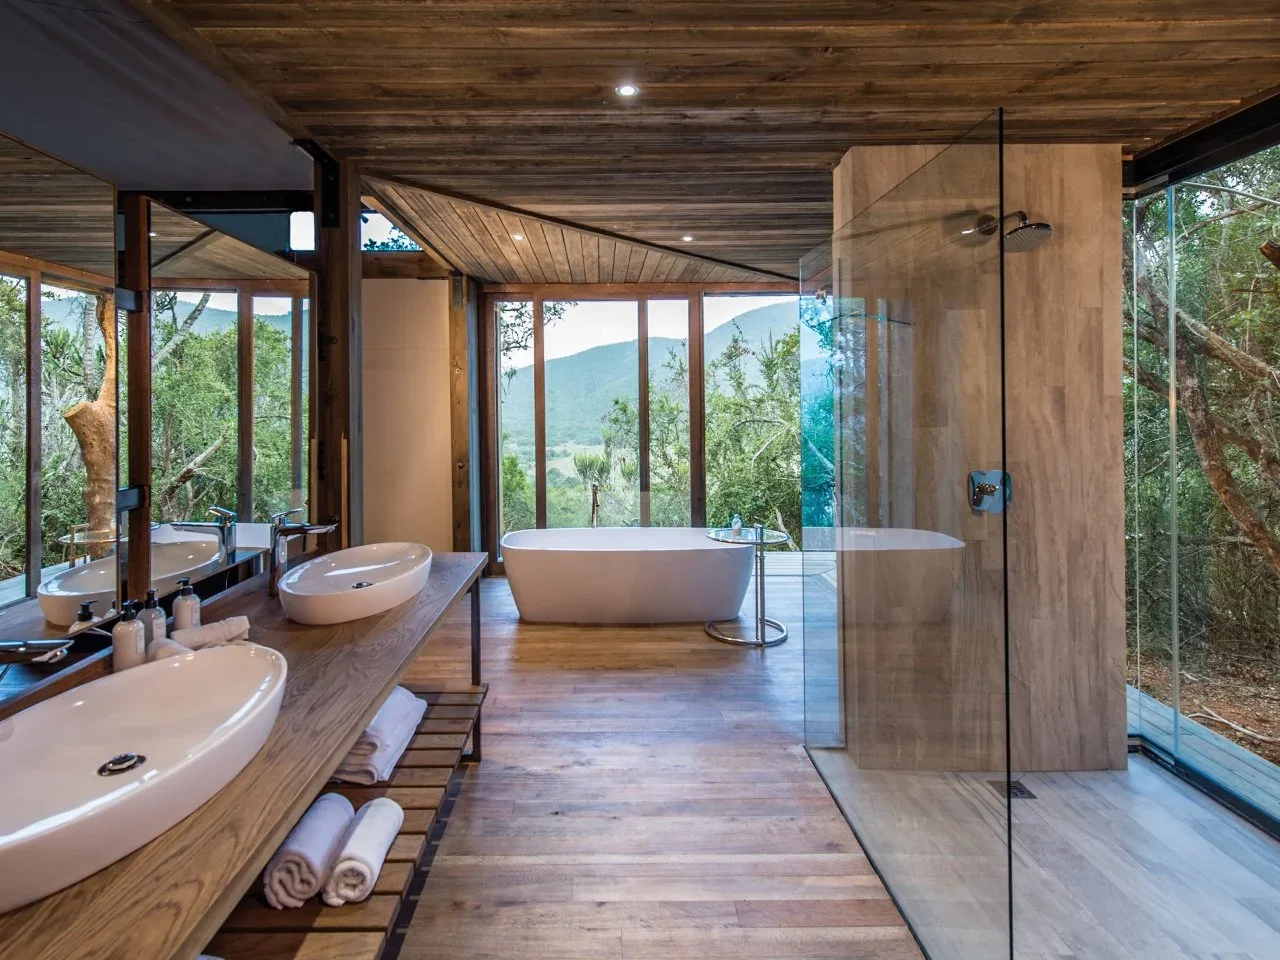
Timber surfaces extend across the ceiling, vanity and main floor in this room, while the glass shower has a separate wood-toned surface underfoot. White basins and the tub provide lighter shapes among the browns. The windows expose trees around the room, reinforcing the connection between the warm interior and the landscape.
An extensive timber palette needs a practical moisture plan. Do not copy the appearance without checking the construction and products in each wet area. Compare actual timber with suitable wood-effect tile where direct water contact makes it useful, and confirm the waterproofing, transitions and maintenance with the people specifying and installing the bathroom.
IDEA 09 / 20
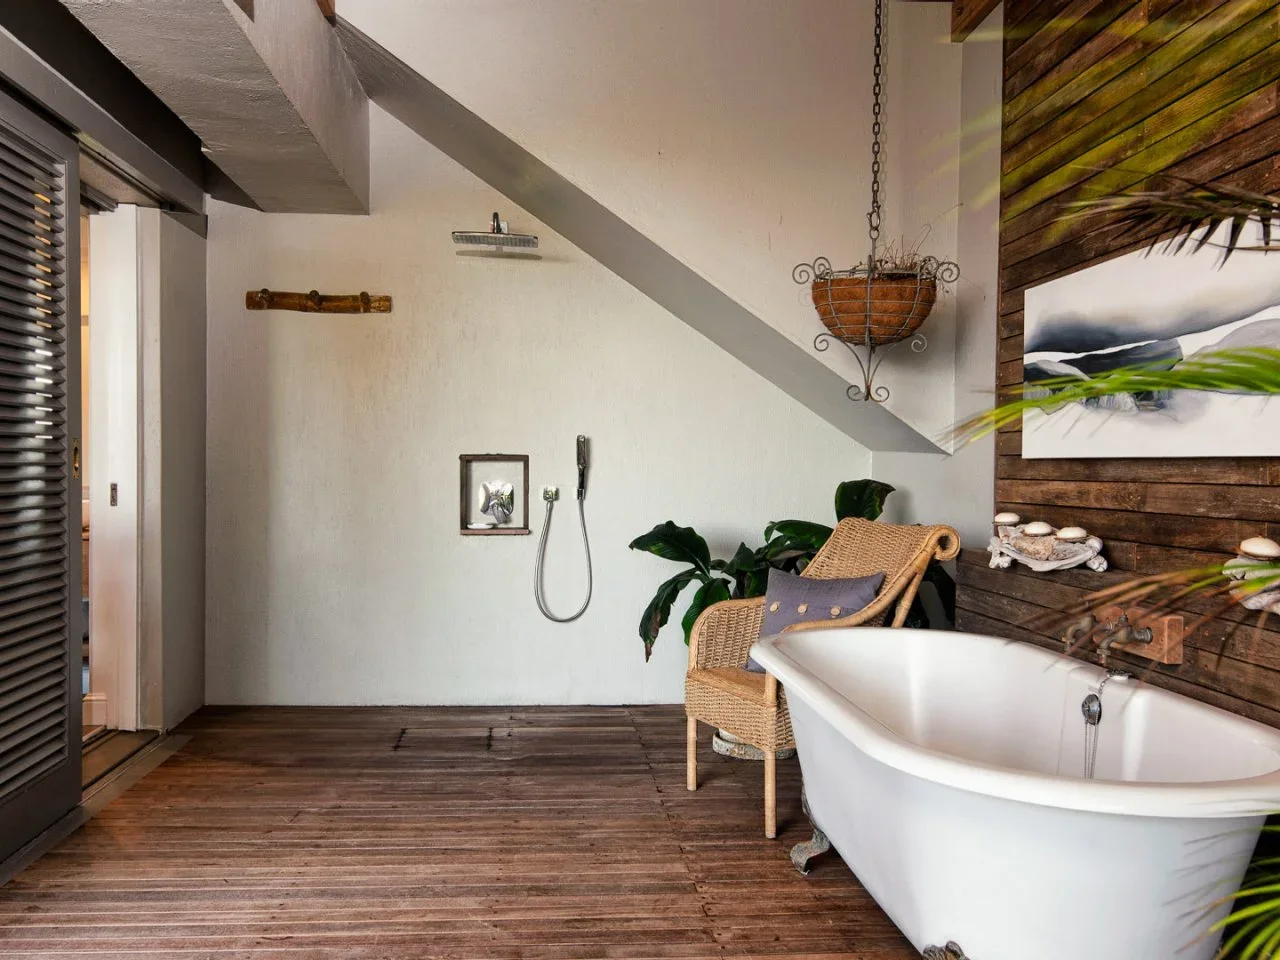
Add Woven Seating Beside Weathered Timber
 SaveSupport Non AI Creator
Image credit: Photo: Chas Everitt International Property Group, a member of Luxury Portfolio International . From: Chas Everitt International Property Group
A woven chair introduces a lighter texture beside the weathered timber surfaces and white tub. Green leaves soften the corner, while the pale wall gives the darker boards a clear boundary. The chair offers a separate place to sit, keeping the bath edge from becoming the only surface for dressing or setting things down.
Use seating only when the room leaves a comfortable route past it and the chair suits the bathroom conditions. Keep woven fibers away from regular splashes and check their cleaning instructions. If you like this combination of grain, pale surfaces and greenery, compare our earthy bathroom ideas while choosing finishes that fit your actual room.
IDEA 10 / 20
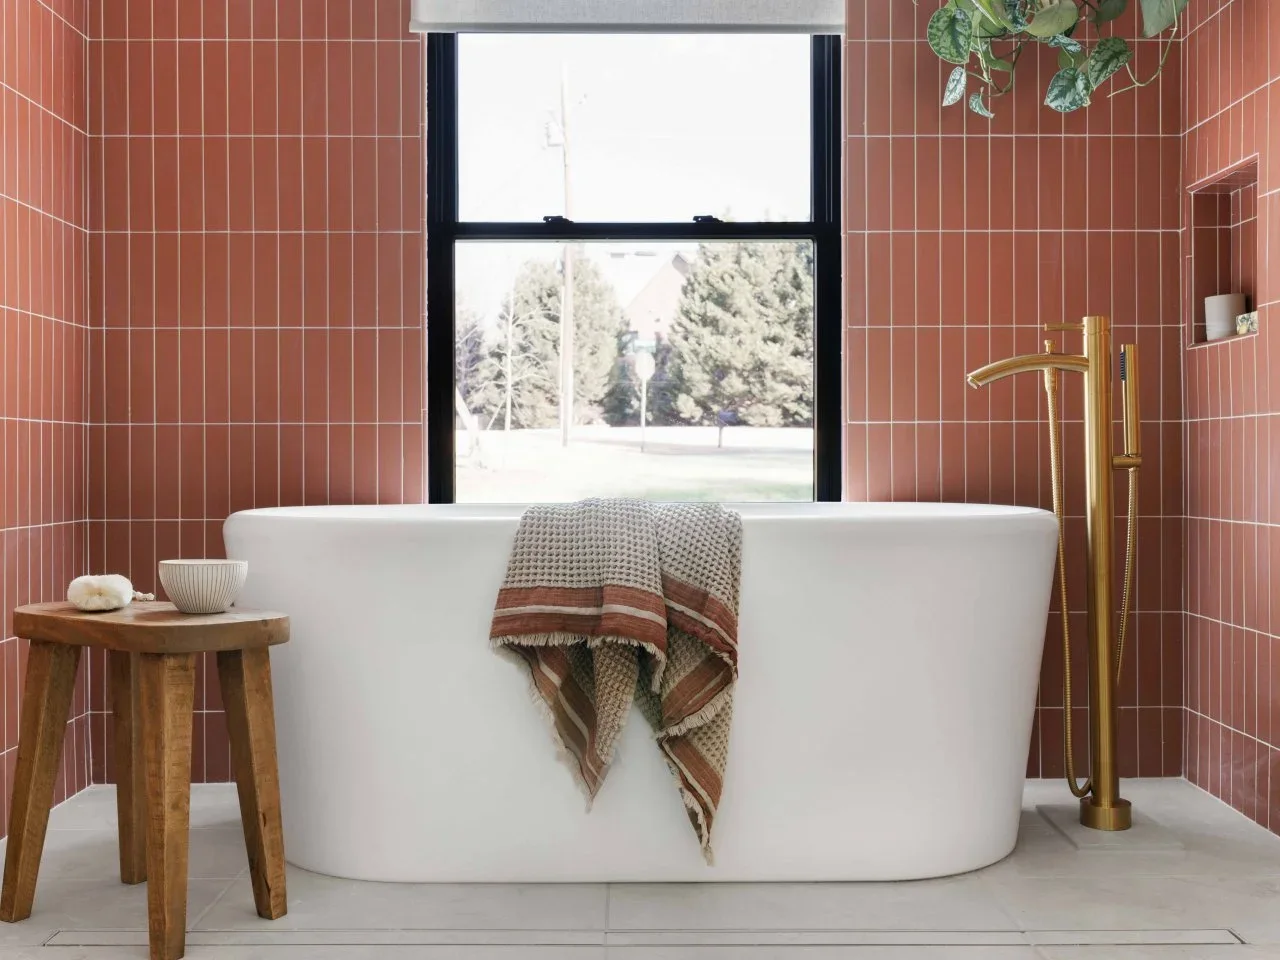
Bring Earthy Color into a Simple Tub Corner
 SaveSupport Non AI Creator
Image credit: Photo: Tomas Espinoza
Rust-pink tiles surround the white tub with an earthy color rather than a timber-covered wall. A small stool introduces visible wood grain, and the striped towel repeats warmer tones across the otherwise plain tub. Hanging greenery adds a softer shape near the top, while the dark window frame keeps the arrangement clearly outlined.
Start with a stool, textile or tile sample if you want warmth without changing every surface. Keep the stool stable and suited to the setting, with enough room to walk around it. A tiled wall can give the appearance of an earthy palette, but choose its material and maintenance requirements from product information rather than from color alone.
PART 03
Choose greenery and light deliberately
IDEA 11 / 20
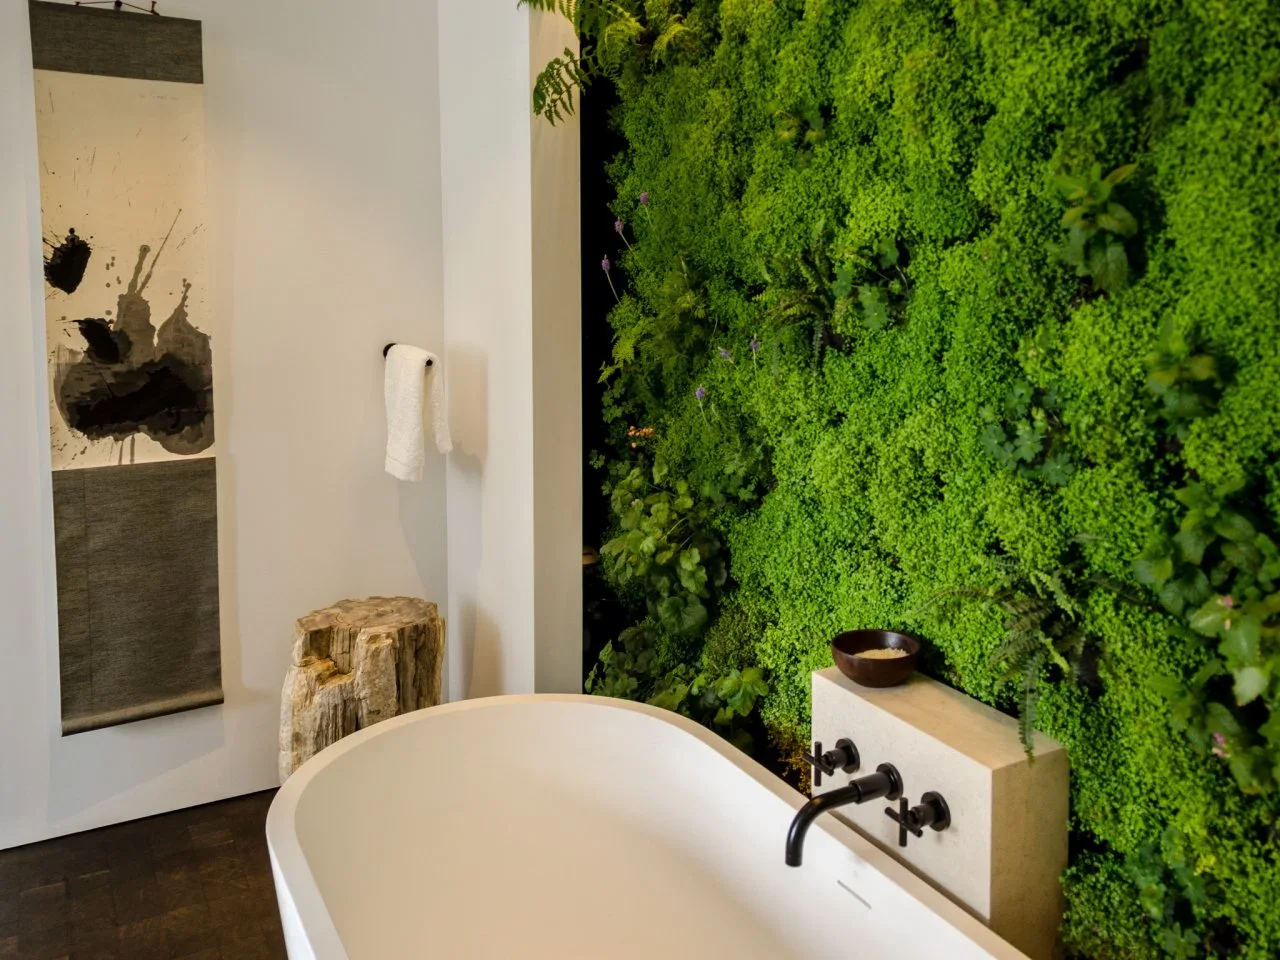
Make Greenery a Deliberate Feature
 SaveSupport Non AI Creator
Image credit: Photo: Robert Felker
A dense green wall provides the main texture behind this pale tub. The dark faucet and simple wall surfaces leave the greenery clearly visible, while a rough timber stool gives the opposite side another organic-looking shape. The arrangement uses a concentrated area of green rather than scattering many pots around the floor.
Before choosing a green wall, establish whether the system is living, preserved or artificial and what care it requires. Living planting needs suitable light, watering and access; other systems have different cleaning and placement needs. A photograph does not establish those details, so compare the system with the time and conditions your bathroom can provide.
IDEA 12 / 20
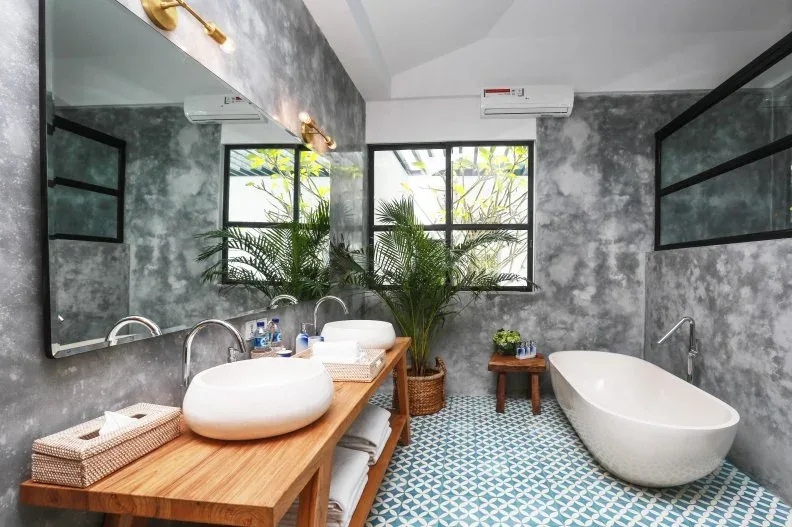
Put a Plant Beside a Simple Timber Counter
 SaveSupport Non AI Creator
Image credit: Photo: Design 4 Corners. From: Design 4 Corners
The timber counter and large plant soften the mottled gray walls in this bathroom. White basins and the tub provide broad calm shapes, while smaller woven accessories repeat the plant basket’s texture. The floor carries a stronger blue pattern, so the natural-looking details remain relatively simple rather than introducing several more prints.
Choose a plant position around available light and the clear route through the room. If you use a living plant, identify its care needs and protect the floor from pot drainage. Keep the timber counter finish suited to sink splashes, and avoid filling the remaining surface with ornaments that make wiping it down harder.
IDEA 13 / 20
Set Greenery Against a Dark Shower
 SaveSupport Non AI Creator
Image credit: Photo: Joseph Bradshaw
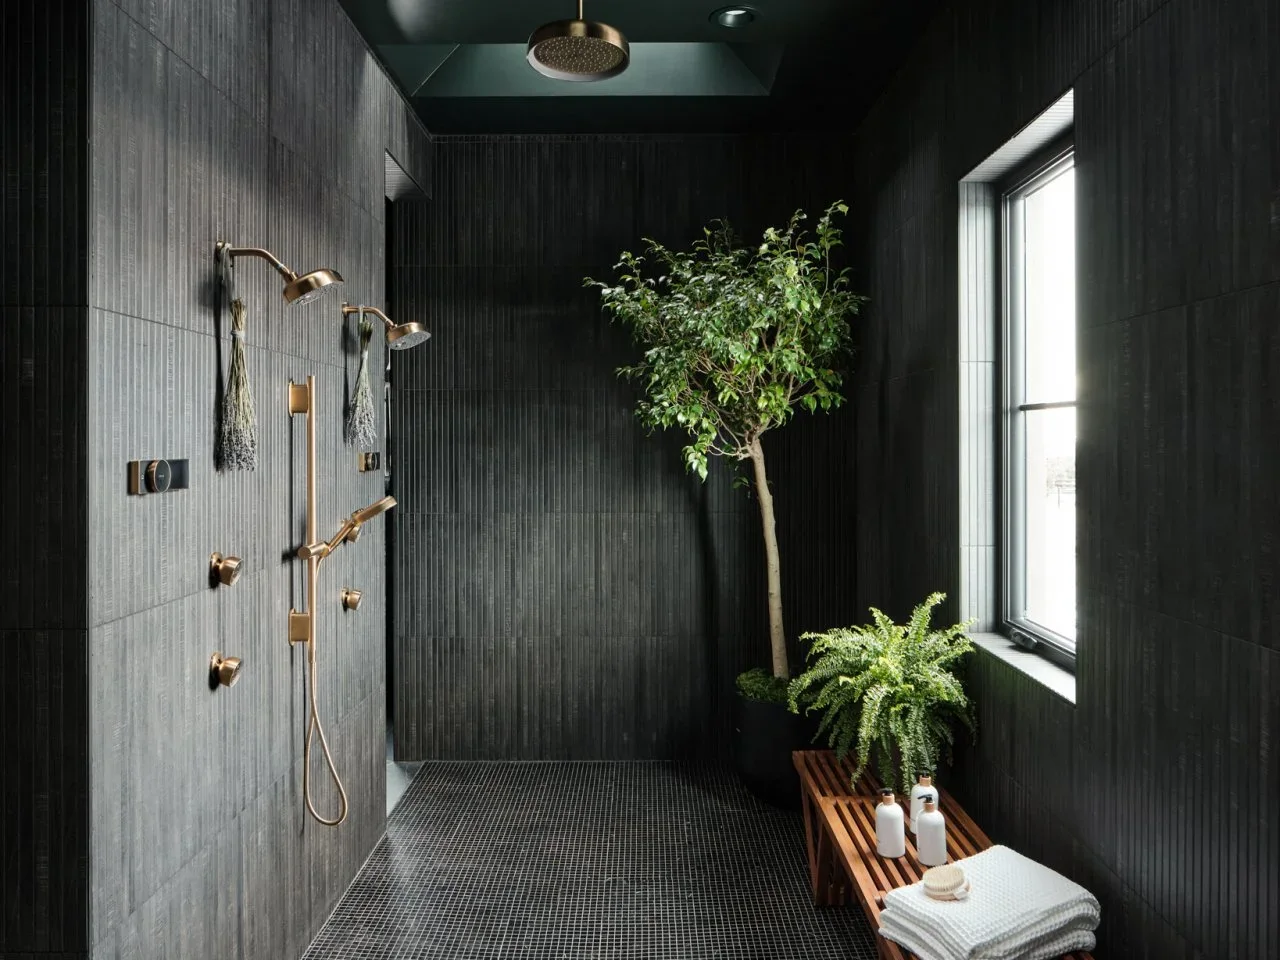
Greenery stands out against the dark ribbed walls of this shower. A slatted timber bench introduces a warm horizontal surface below the leaves, while the tall window brings light into the darker enclosure. The smaller dark floor grid continues the restrained palette, letting the plant shapes carry most of the color.
Check whether any plants you choose are suited to the light and direct moisture in the proposed position. Keep pots and the bench clear of controls, drainage and the route through the shower. Choose furniture specifically appropriate for that use, and lift or move removable pieces as instructed so the floor and wall edges remain easy to clean.
IDEA 14 / 20
Use a Sunny Window for a Plant Corner
 SaveSupport Non AI Creator
Image credit: Photo: Ben Garrett Photography. From: Cornerstone Architects
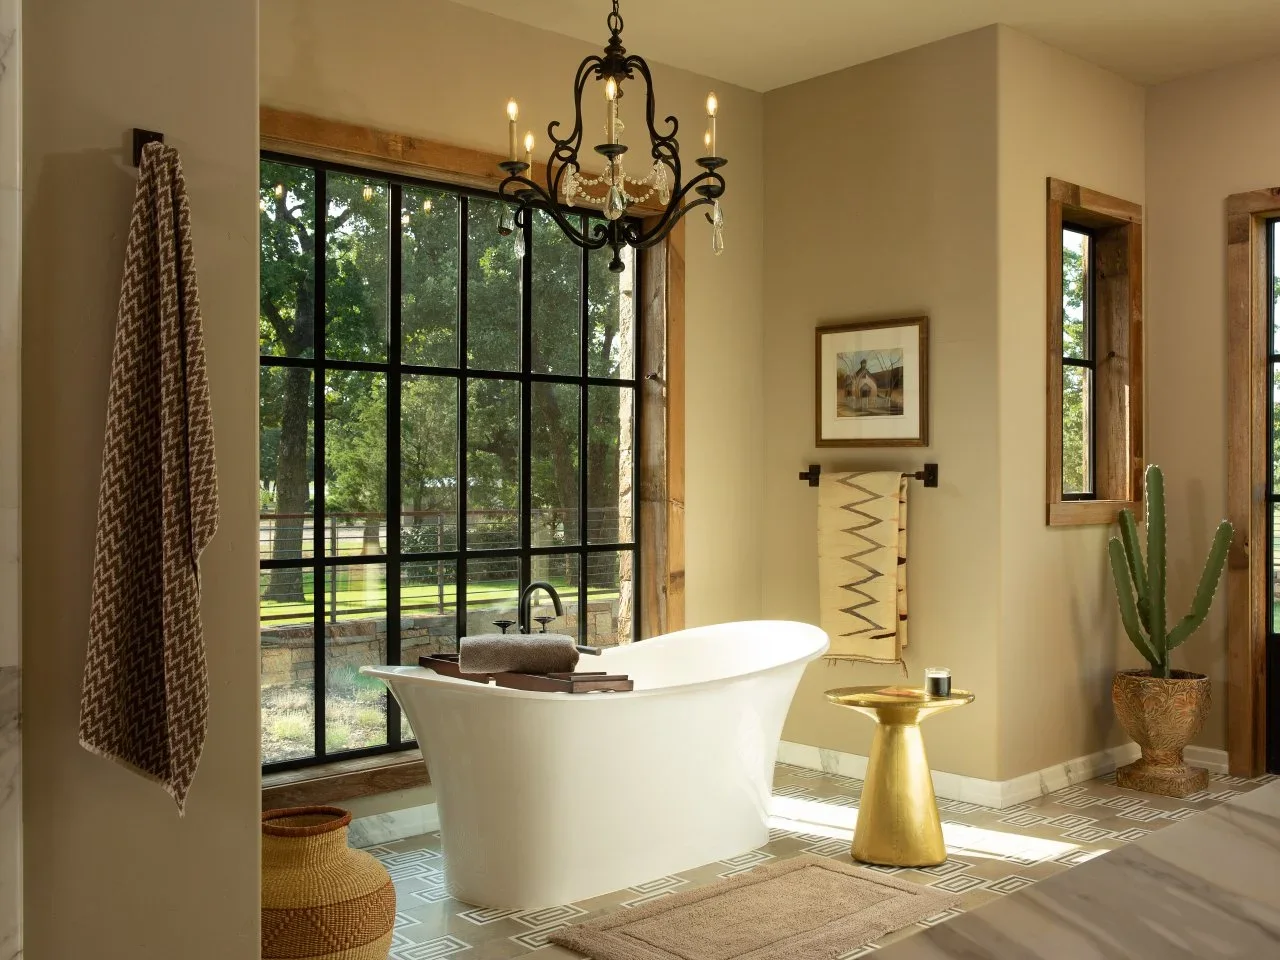
The tall cactus adds a sculptural green shape beside the white tub. Timber window surrounds, a woven basket and pale warm walls continue the earthy palette, while the large dark window grid supplies structure. A small gold-toned table gives bath items a separate landing place rather than lining the window sill with products.
Choose living plants around their actual light and watering needs; a humid bathroom is not automatically the right home for every species. Keep a spiny plant outside the reach of someone moving around the tub. Use a protective container below the pot and leave the window, curtain and cleaning access usable.
IDEA 15 / 20
Keep Plants Clear of a Raised Bathing Area
 SaveSupport Non AI Creator
Image credit: Photo: Immobilsarda, a member of Luxury Portfolio International. From: Immobilsarda
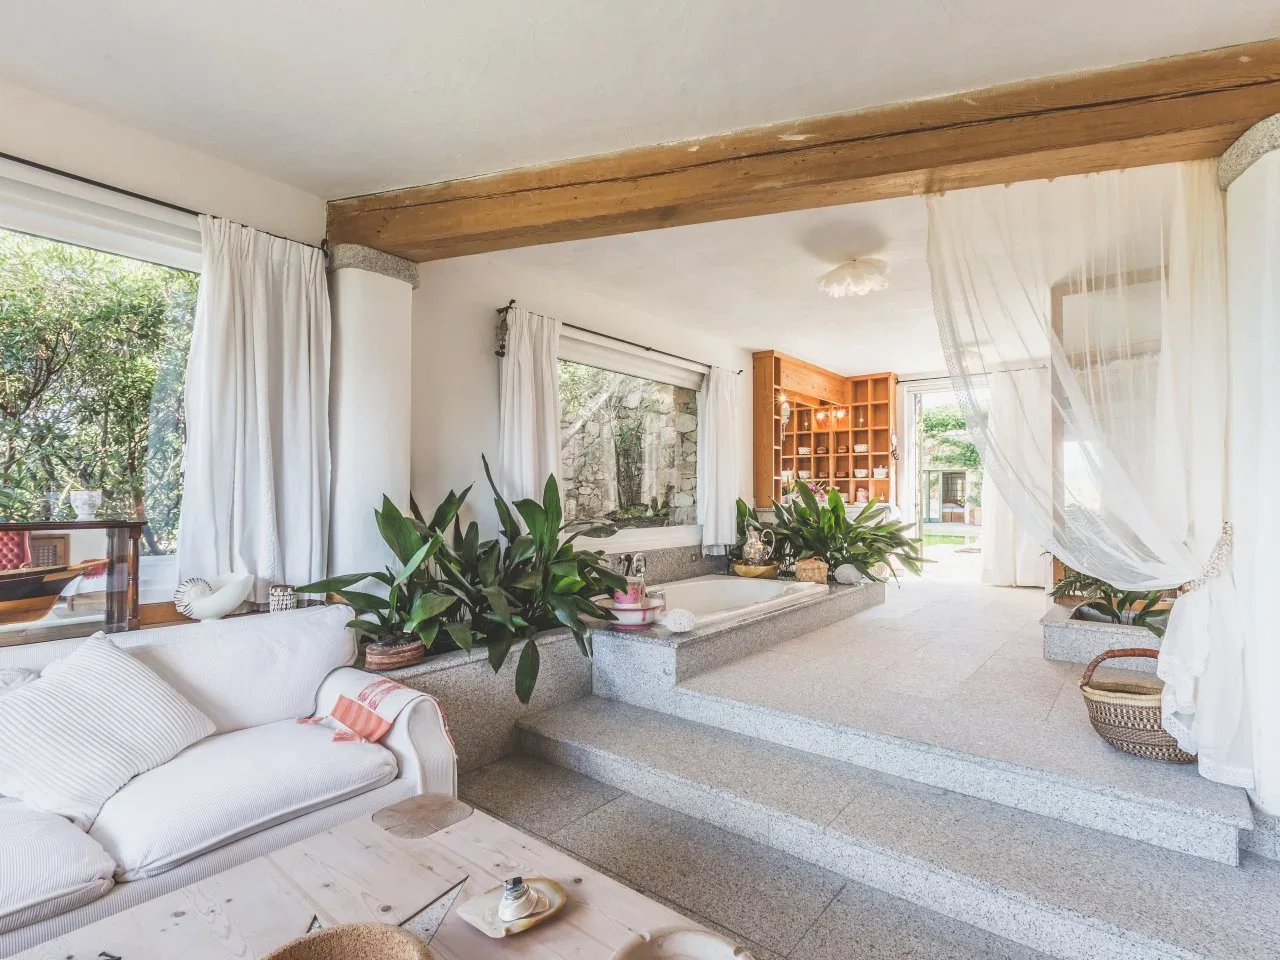
Plants border the tub within a raised bathing platform in this open room. Pale textured surfaces and white curtains keep the surrounding area light, while a timber beam and shelving introduce warmer structure. The greenery sits in defined edges rather than covering the steps between the seating area and bath.
For a room with level changes, plan the steps, visibility and clear access before adding plant containers or textiles. Keep curtains away from wet surfaces and allow them to be removed for cleaning. The spacious arrangement is useful for comparing materials and planting positions, but a smaller bathroom needs a layout that fits its own circulation.
PART 04
Compare distinctive surfaces and practical details
IDEA 16 / 20
Let a Dramatically Veined Surface Lead
 SaveSupport Non AI Creator
Image credit: Photo: Teri Fotheringham, Teri Fotheringham Photography; deverphoto.com.
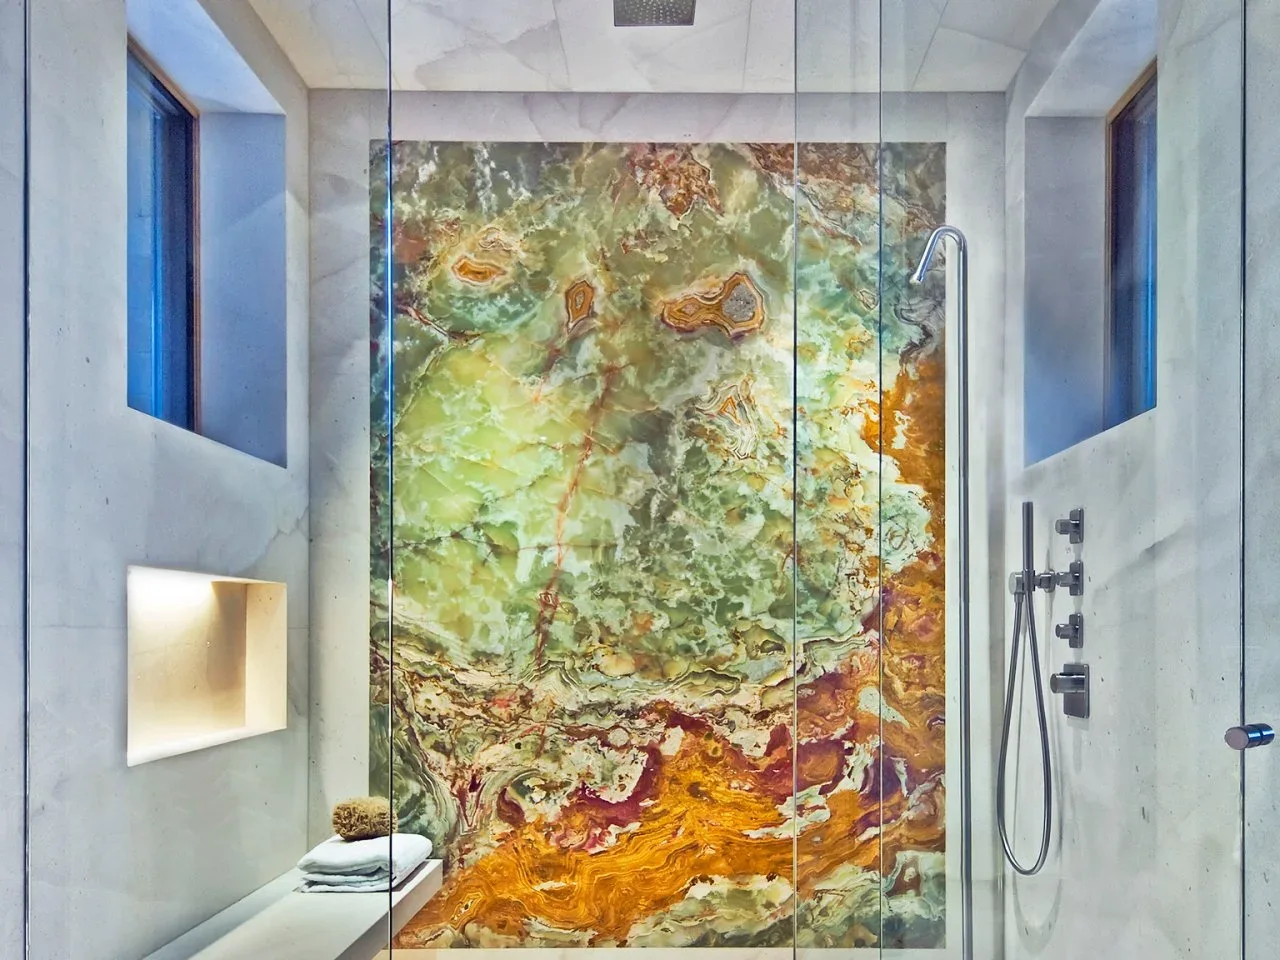
The strongly veined wall provides the main color and pattern inside this shower. Greens, golds and darker bands contrast with the quieter surrounding tiles, while clear glass leaves the feature visible. Simple metal fittings and a pale bench keep the rest of the enclosure from adding another decorative layer.
When choosing a distinctive slab or similar feature surface, review the actual piece and proposed cuts instead of relying on a small sample. Ask about its suitability, installation and care around shower water. Keep the adjoining finishes calmer, and plan fitting positions so they do not hide the part of the pattern you most want to see.
IDEA 17 / 20
Make a Textured Tub the Main Object
 SaveSupport Non AI Creator
Image credit: Photo: Werner Straube Photography
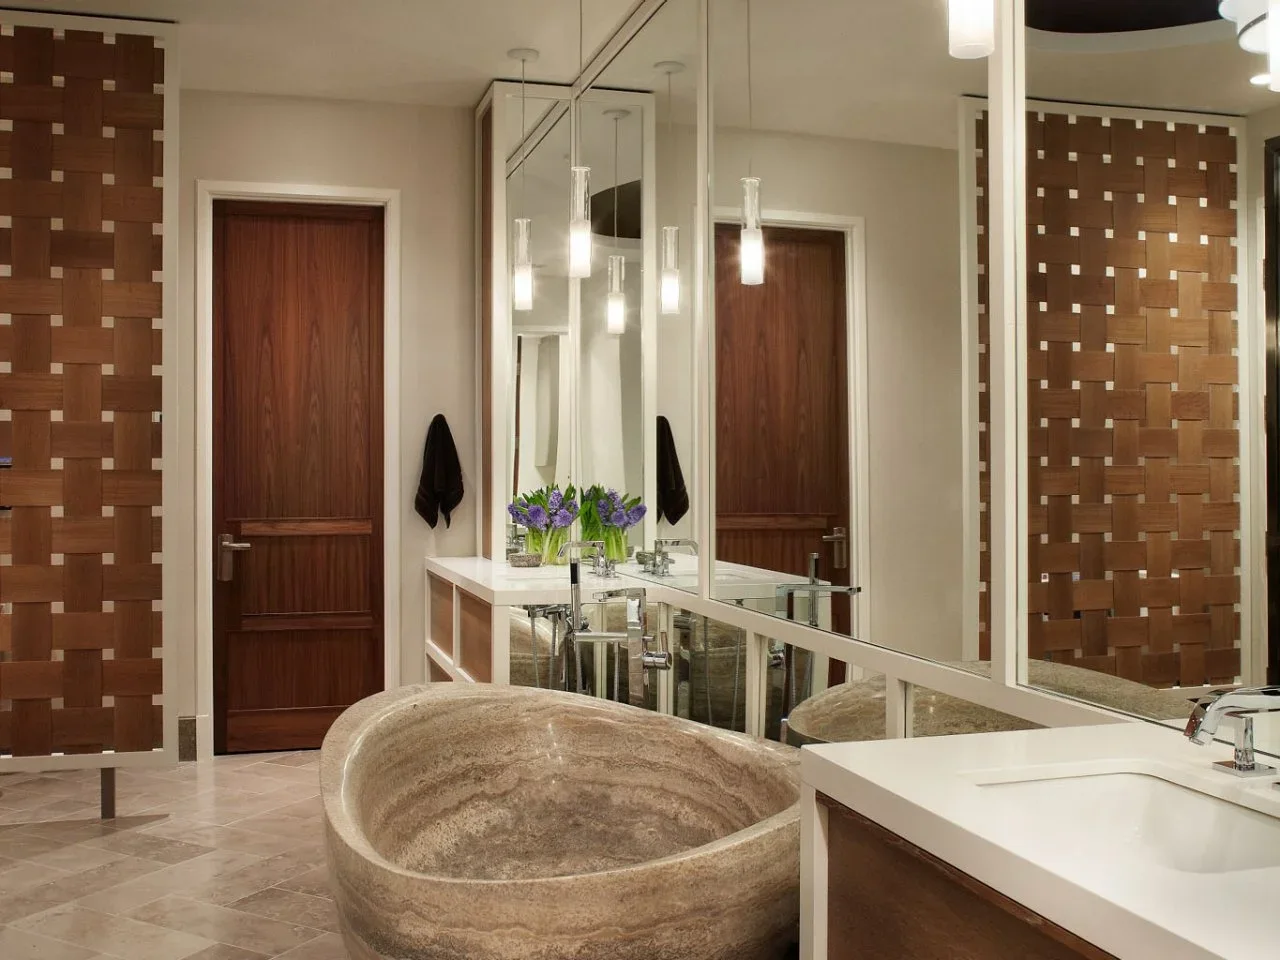
The banded brown tub introduces texture and a rounded shape beside the straighter counters and mirrors. The timber divider adds another warm pattern, while the pale surrounding surfaces leave the tub clearly distinct. Because the bath already has strong visible detail, the room does not need a crowded collection of small decorative objects.
A heavy or unusual tub needs its installation requirements checked before it is chosen for the room. Confirm the support, delivery route, plumbing and care for the particular product. Judge the tub’s shape and entry as well as its appearance, and leave enough surrounding space to clean without squeezing between fixtures.
IDEA 18 / 20
Use Furniture Shapes in a Warm Bathroom
 SaveSupport Non AI Creator
Image credit: Photo: Todd Goodman
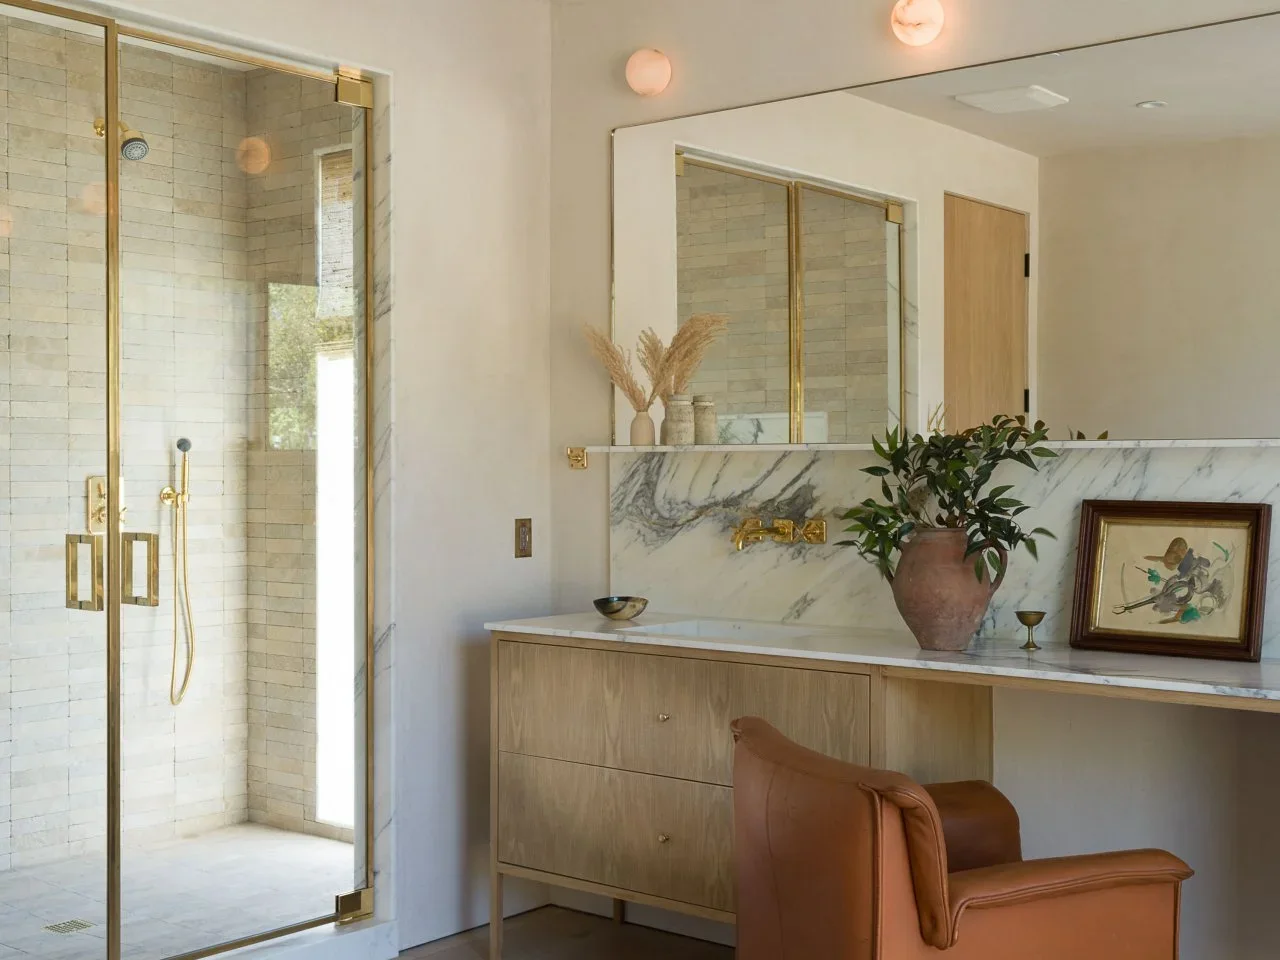
The tan chair brings a furniture-like shape into this bathroom beside the pale timber vanity. A veined backsplash and a broad mirror supply different surfaces above it, while greenery in a warm-colored vase connects the counter with the room’s brown palette. The chair remains separate from the shower rather than occupying the wet enclosure.
Consider whether bathroom seating will be used enough to justify its footprint. Check upholstery care and moisture suitability before placing a chair near a bath or shower, and keep it outside the main wet area. Keep counter accessories grouped and easy to move so the warmer furniture does not make routine cleaning more complicated.
IDEA 19 / 20
Use Wood-Effect Texture in a Wet Area
 SaveSupport Non AI Creator
Image credit: Ca Pietra
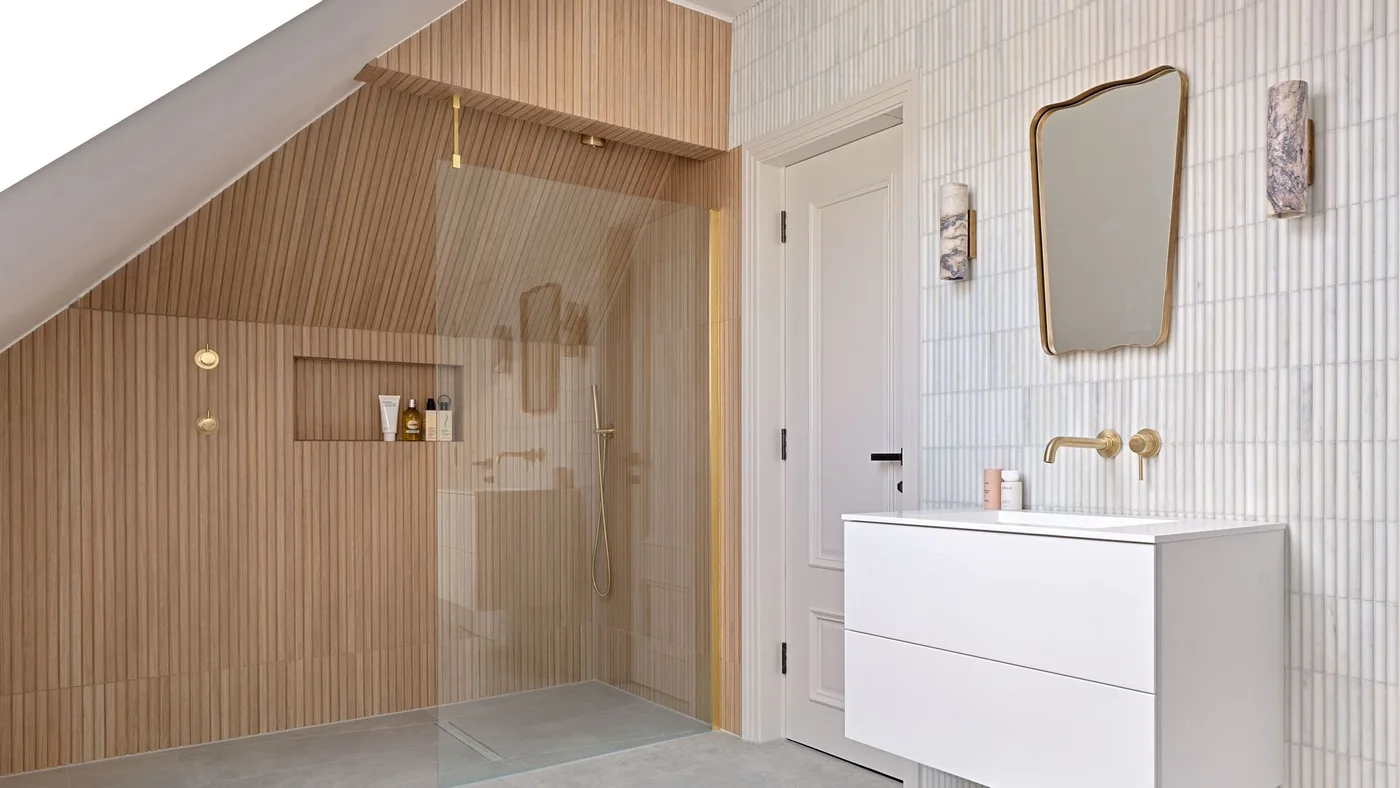
Reeded wood-effect tiles bring a warm appearance to the shower while the adjoining ribbed white surface stays lighter. The plain floating vanity gives those textures space, and the glass screen leaves the warm wall visible from the rest of the room. The tiled joints are part of the surface; this is a wood effect rather than timber cladding.
A natural-looking bathroom can combine real materials with practical alternatives. Compare the surface texture and care requirements of the exact tile rather than assuming an imitation behaves like wood. Use a sample to see how it catches bathroom lighting, and confirm the layout where its ribs meet the plain floor and glass screen.
IDEA 20 / 20
Plan the Texture Around a Shower Niche
 SaveSupport Non AI Creator
Image credit: Ca Pietra
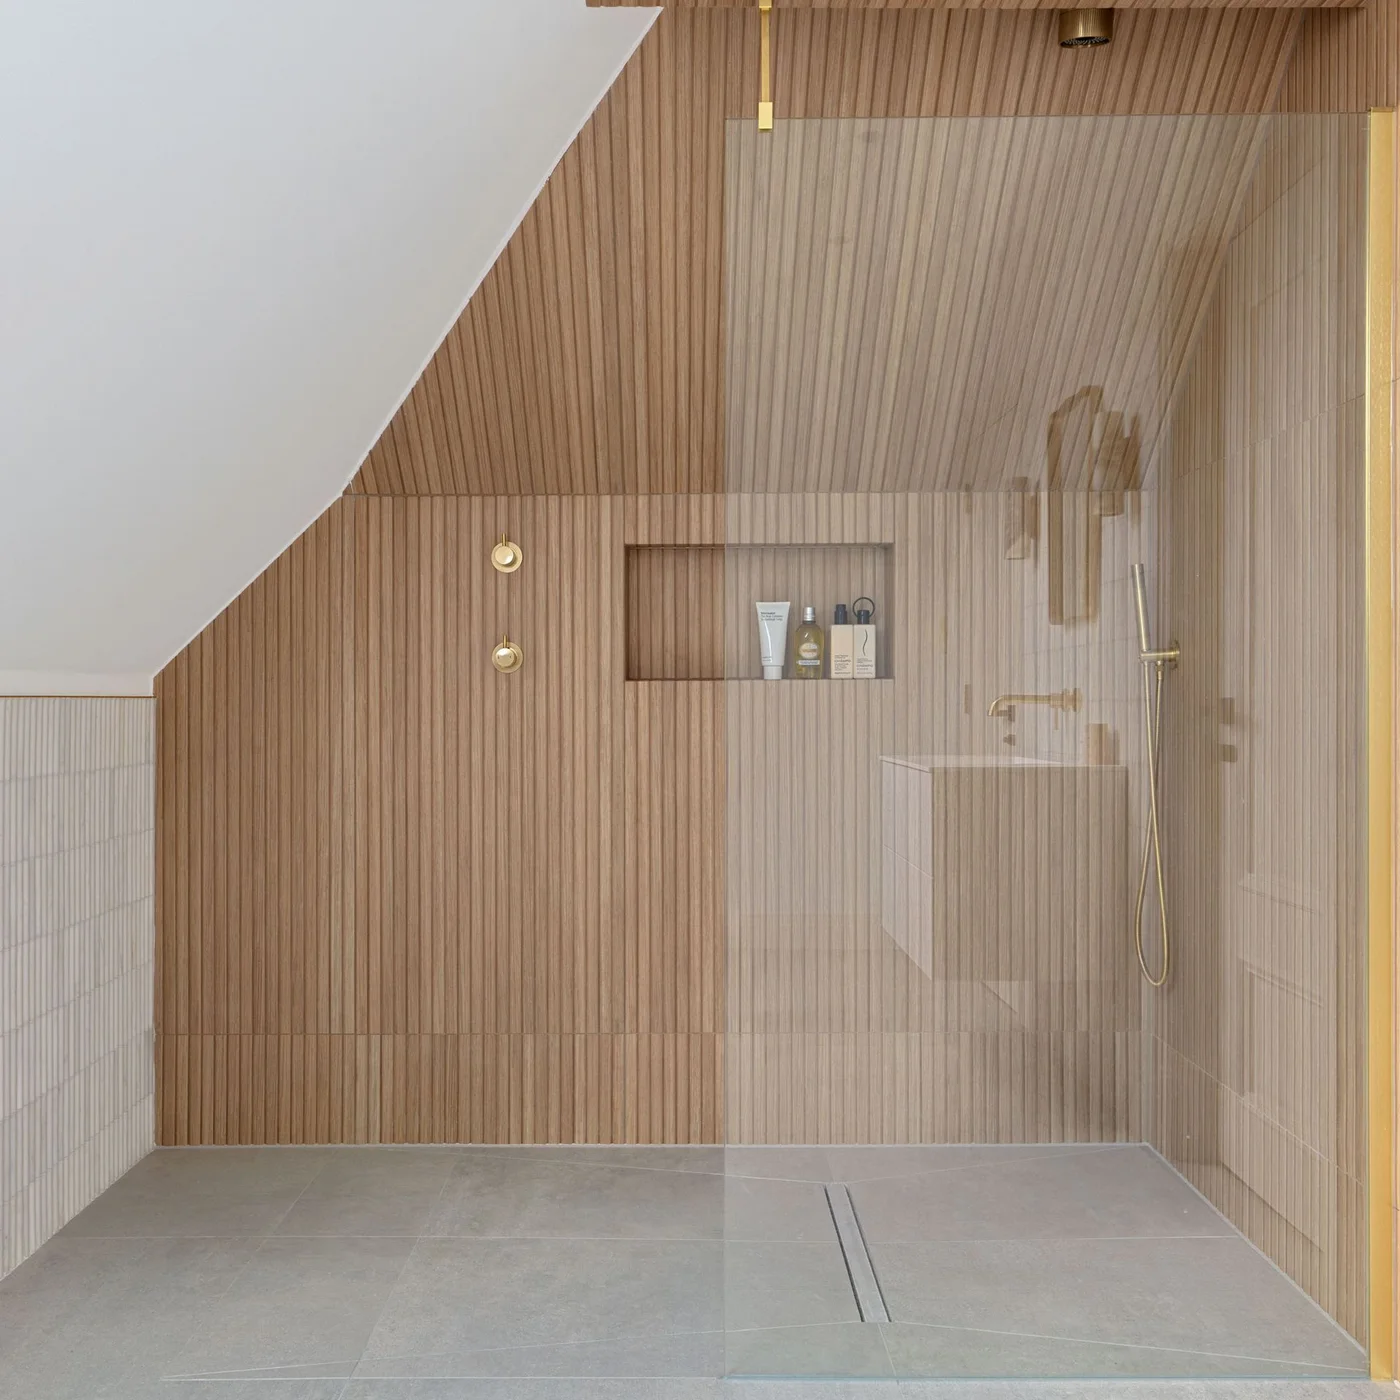
A closer view of the same shower shows the reeded effect continuing around the niche and up the sloped wall. The niche gives bottles a defined position without adding a projecting shelf. Pale floor tiles and restrained fittings keep the fine vertical texture as the main feature inside the glass enclosure.
Set out a textured tile around the niche before installation so its cut edges and changes in direction are considered. Confirm the wet-area construction and how the niche will drain and be cleaned. Keep the stored bottles within the opening, leaving room to remove them together rather than letting a decorative recess become a crowded ledge.
BRING IT ALL TOGETHER
Choose warmth that works with water
Compare your largest surfaces first: cabinets, walls, flooring and the tub. A few coordinated warm tones can be more effective than many different timber colors or plant pots. Include storage access, window privacy and a comfortable route through the room before adding the decorative pieces.
Check the finish and care information for each material, especially near direct water. Natural appearance does not establish a product’s performance, and a photograph cannot show the construction below it. Choose planting or greenery around the light and maintenance you can provide, keeping the room straightforward to clean and use.