River rock can give a planted border a clear edge, connect a water feature to its surroundings or break up a large paved surface. The useful part is choosing where it earns its place. A small band beside a path needs a different stone size and maintenance plan from a broad bed beneath established shrubs.
These photographed gardens show rounded stones in several settings, from compact entrance beds to longer dry-creek arrangements. Treat the photographs as layout references rather than drainage plans. Before moving soil or directing runoff, check the existing ground levels, underground services and where water can legally and safely go.
PART 01
Paths and places to cross
IDEA 01 / 20
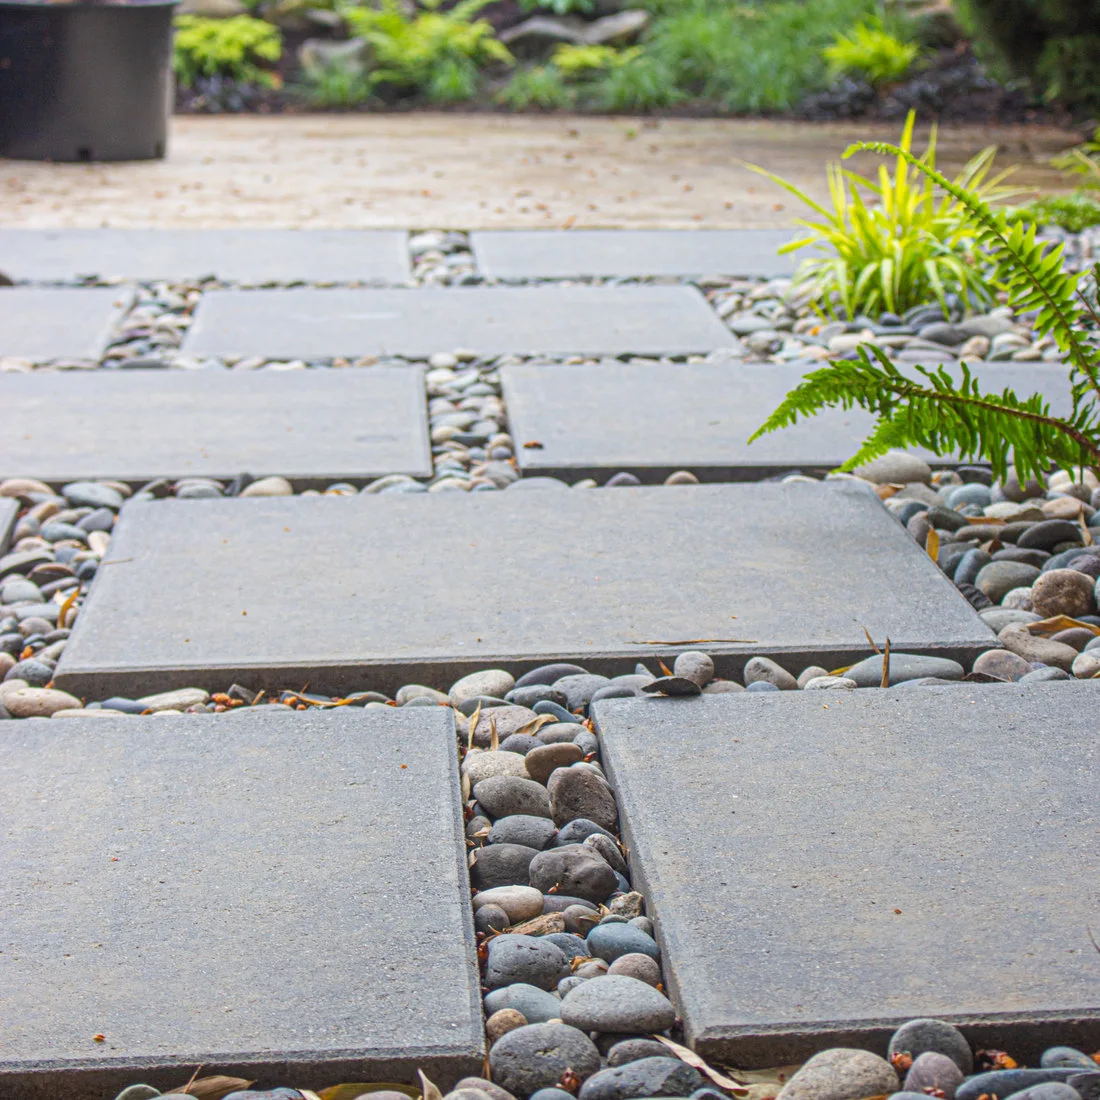
Separate Broad Pavers With Rounded Stones
 SaveSupport Non AI Creator
Image credit: Project: Northwest Native Landscapes LLC (via Houzz)
Broad gray slabs provide the walking surface, while rounded stones fill the gaps and continue into the planting at the edge. The contrast makes the paving pattern easy to read without adding another strong color. Notice that the stones stay below the main surface rather than forming raised ridges across the route.
Set out the slabs around a comfortable stride before committing to the gaps. Loose round stones are awkward for narrow wheels and unstable feet, so keep the main route continuous where accessibility matters. Allow for sweeping leaves out of the joints and topping up stones that migrate beyond their intended strips. For areas beside vehicle access, these driveway landscaping ideas show how planting and hard surfaces can meet a different kind of route.
IDEA 02 / 20
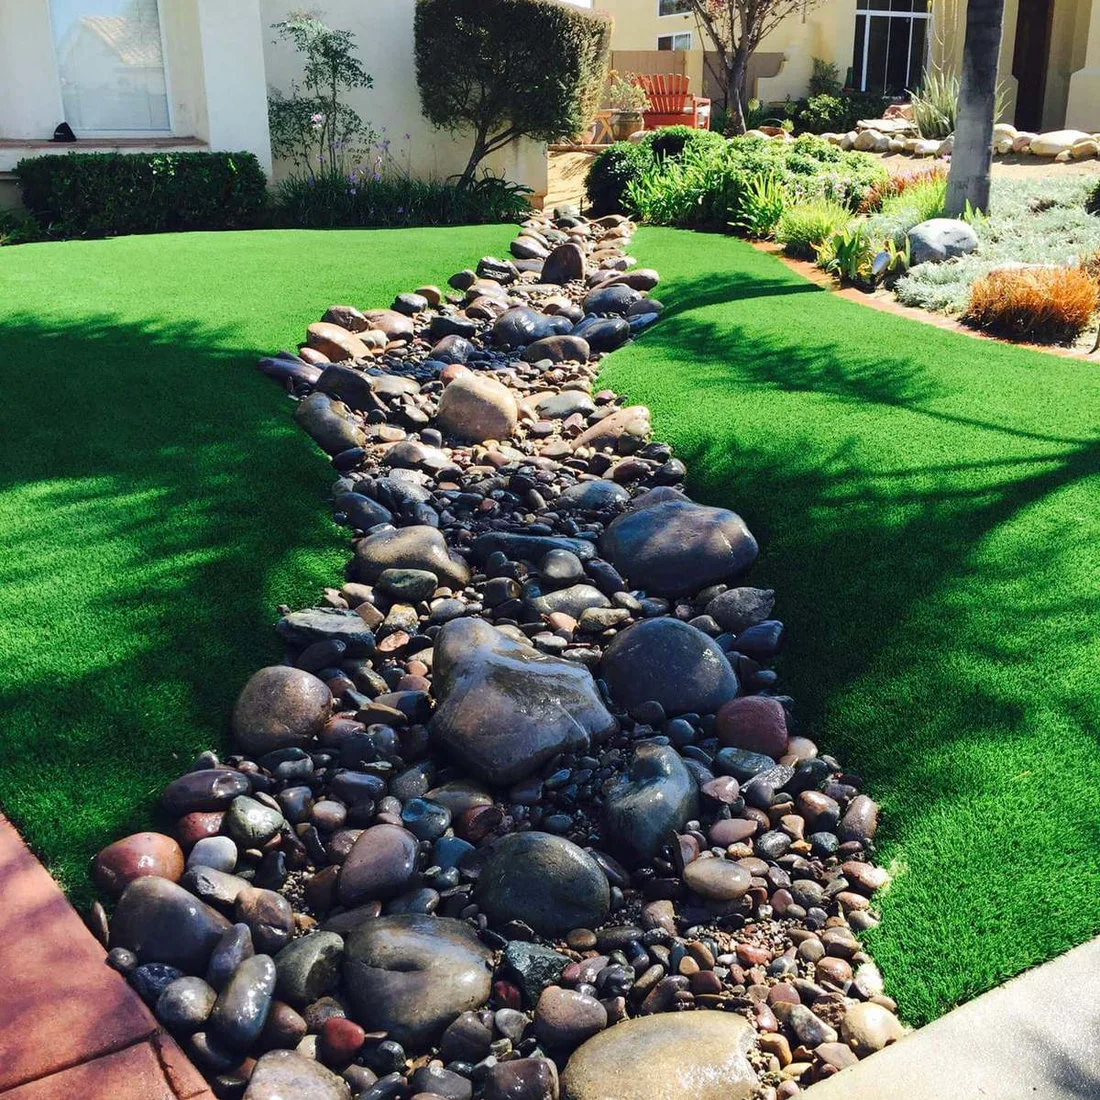
Use a Dry Creek to Divide Two Planted Areas
 SaveSupport Non AI Creator
Image credit: Project: Home Turf Synthetic Grass (via Houzz)
A ribbon of large and small stones winds between two bright green turf areas, with low plants and a palm farther back. Larger rounded rocks define the outside bends while smaller pieces occupy the middle. The channel gives this relatively simple front garden a clear direction from foreground to background.
Copy the change in scale rather than lining every edge with identical rocks. If the channel will carry runoff, have its gradient and outlet assessed before installation. Synthetic turf has its own drainage and heat considerations; the photograph shows one surface combination rather than proof that it suits every climate.
IDEA 03 / 20
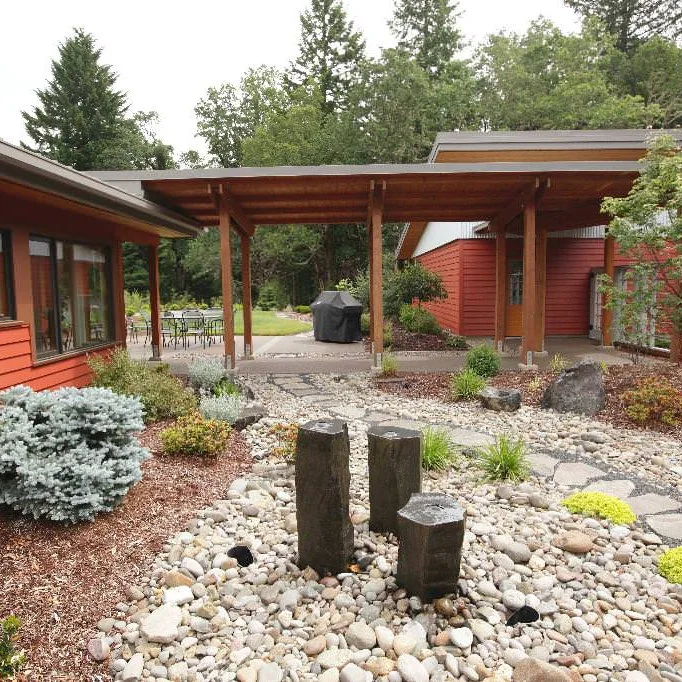
Anchor a Gravel Garden With a Compact Fountain
 SaveSupport Non AI Creator
Image credit: Project: Kraft Custom Construction (via Houzz)
Three dark upright stones rise from a pale bed of rounded rock, with a stepping route leading toward the covered outdoor area. The vertical pieces give the low groundcover a focal point without filling the courtyard with several ornaments. Small planting pockets keep the composition from becoming an uninterrupted mineral surface.
Plan how you will reach the pump, power supply and any filter before surrounding a fountain with heavy stones. Keep an obvious walking route around the feature, especially beside doors. For a quieter arrangement, use one modest focal point and let the surrounding river rock repeat the colors already present in the paving.
IDEA 04 / 20
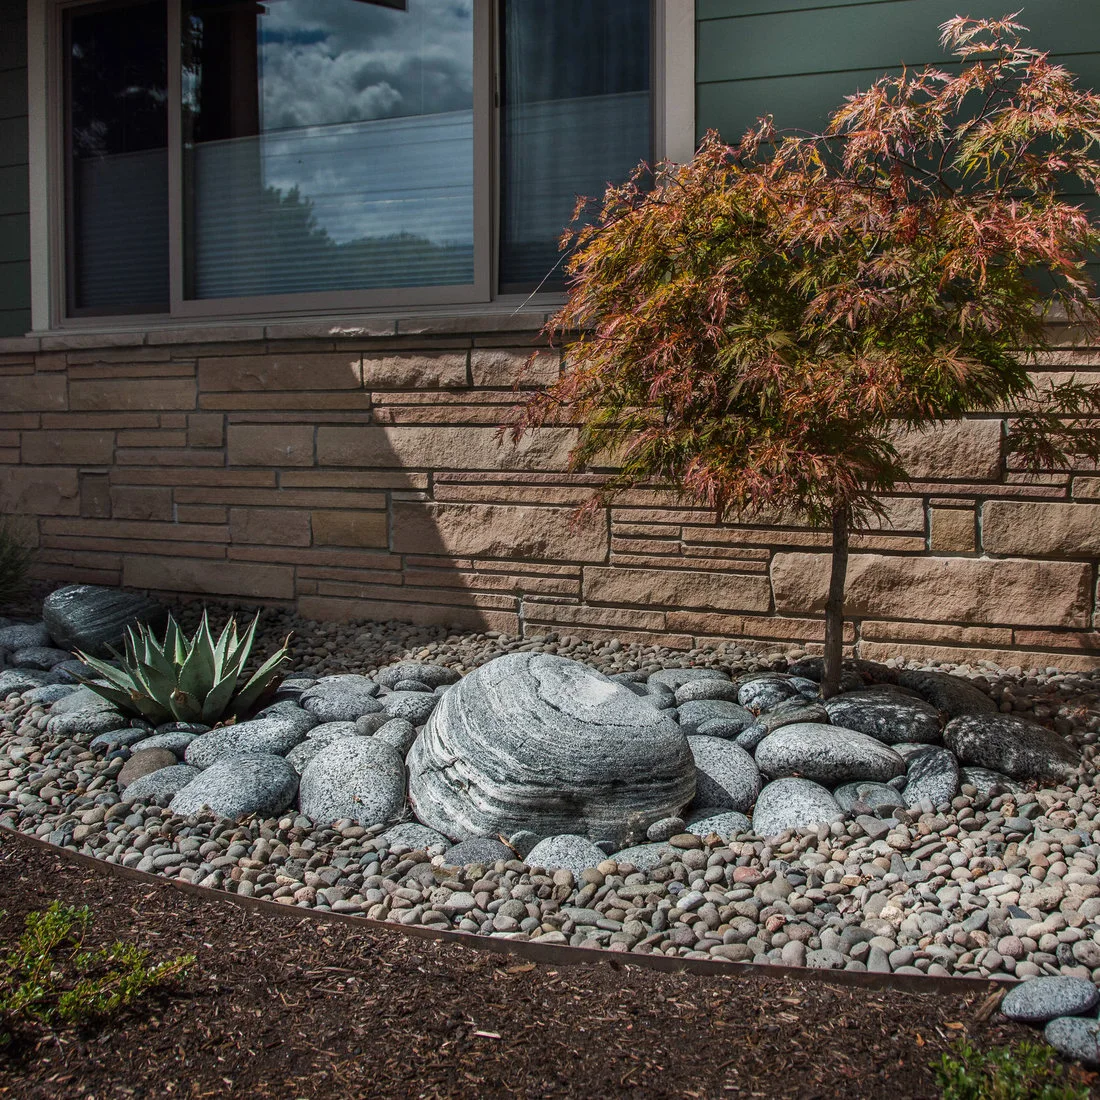
Place Larger Rocks Beneath a Small Tree
 SaveSupport Non AI Creator
Image credit: Project: Banyan Tree Landscape Construction LLC (via Houzz)
The small tree lifts its fine red foliage above a group of striped gray rocks, while a thinner layer of mixed pebbles connects the pieces below. Dark edging separates the stone bed from the surrounding soil. The window and wall remain visible, so the planting works as a low foreground rather than a screen.
Position the largest rocks before adding the finishing layer, leaving room to tend the tree and nearby plants. Keep stone away from the trunk flare and avoid burying roots beneath added depth. Collect actual samples beside your wall; a gray that looks quiet at the supplier may look much brighter against warm masonry.
IDEA 05 / 20
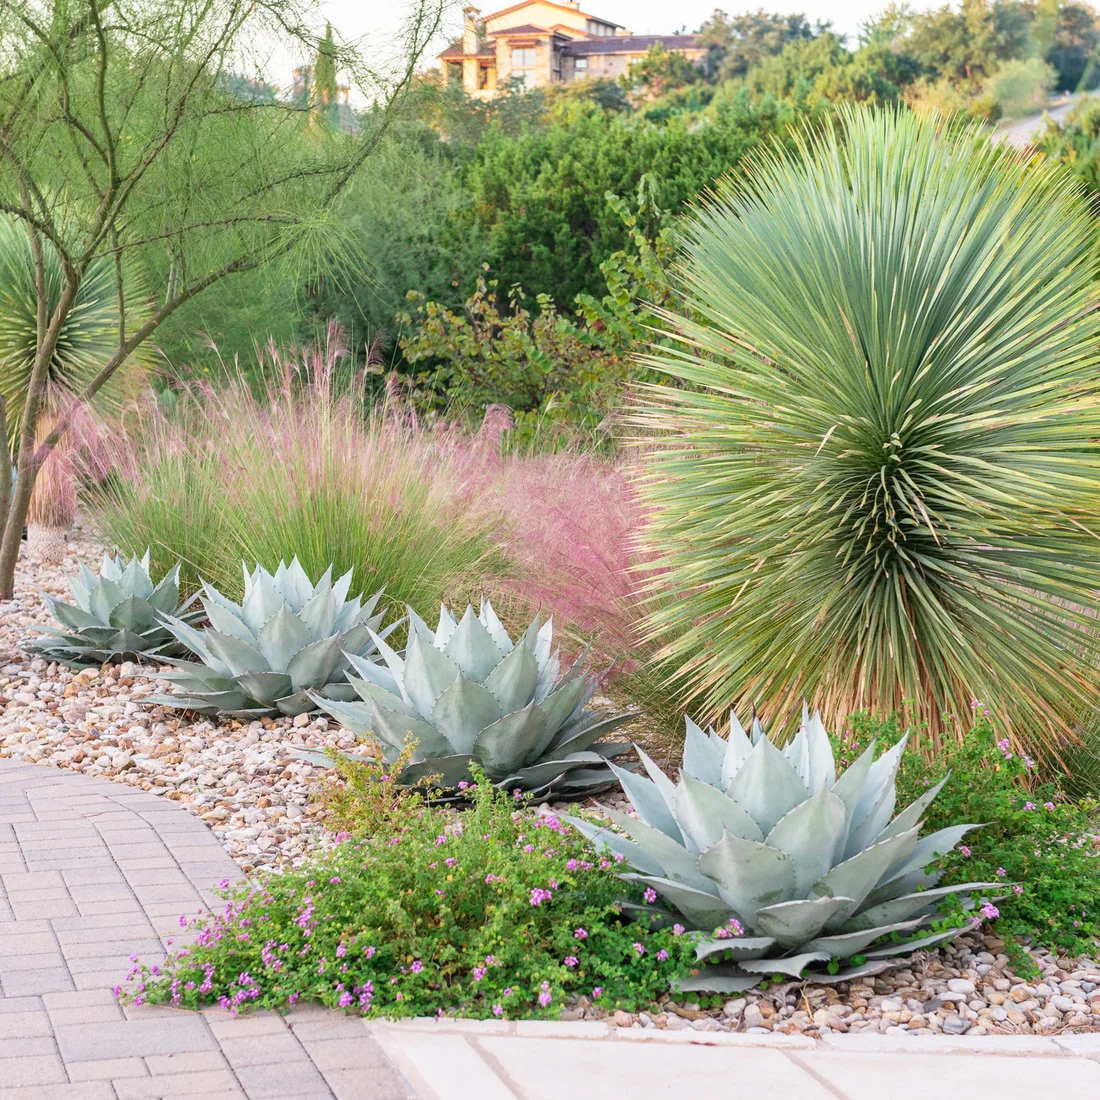
Let Pale Stones Outline Sculptural Planting
 SaveSupport Non AI Creator
Image credit: Project: Eden Garden Design (via Houzz)
Silver rosettes, fine pink grasses and a tall spiky green plant create several distinct silhouettes above a pale stone surface. The smooth stones provide a relatively quiet background, allowing the foliage to do most of the decorative work. The adjacent paving follows the planted edge instead of cutting through the middle.
Choose plants for your site before choosing the stone color. Allow for their mature spread, particularly when sharp foliage sits near a walkway. Pale stones can be visually intense in strong sun, so compare a small trial patch outdoors and consider how much reflected light nearby seating or windows will receive.
PART 02
Borders that support the planting
IDEA 06 / 20
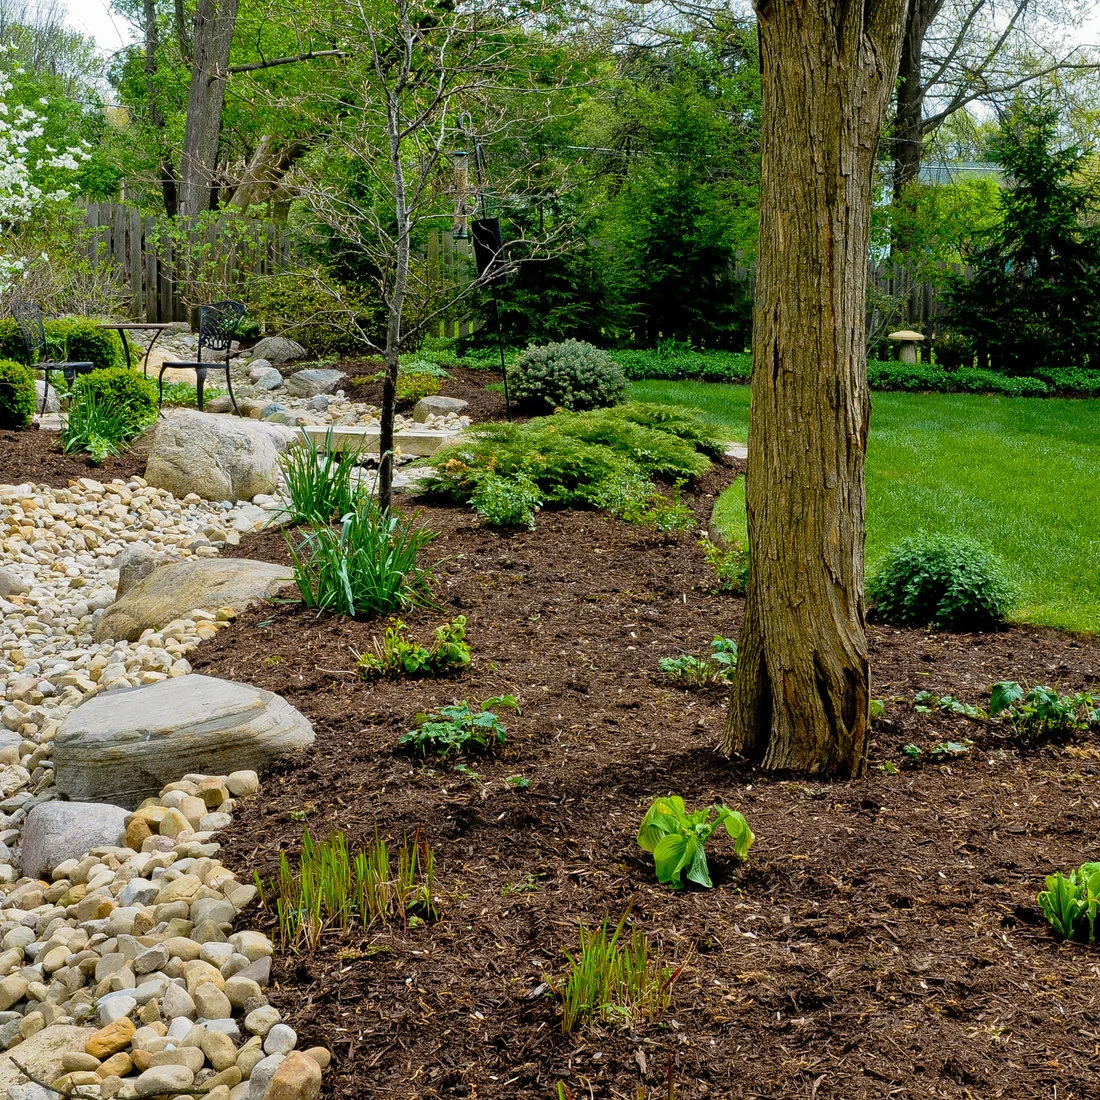
Keep Mulched Planting Beside the Stone Channel
 SaveSupport Non AI Creator
Source: www.houzz.com
A pale channel winds toward a small seating spot, with large flat stones offering crossing points. The neighboring trees and shrubs grow in dark mulched beds rather than in a blanket of rock. That separation gives the stones a recognizable shape and lets the leafy areas remain visually soft.
You do not need to replace every mulched bed to introduce river rock. Use it where the route or boundary benefits from contrast, and preserve access for pruning and leaf collection. Around mature trees, avoid digging or adding deep layers over roots simply to achieve a decorative channel shape.
IDEA 07 / 20
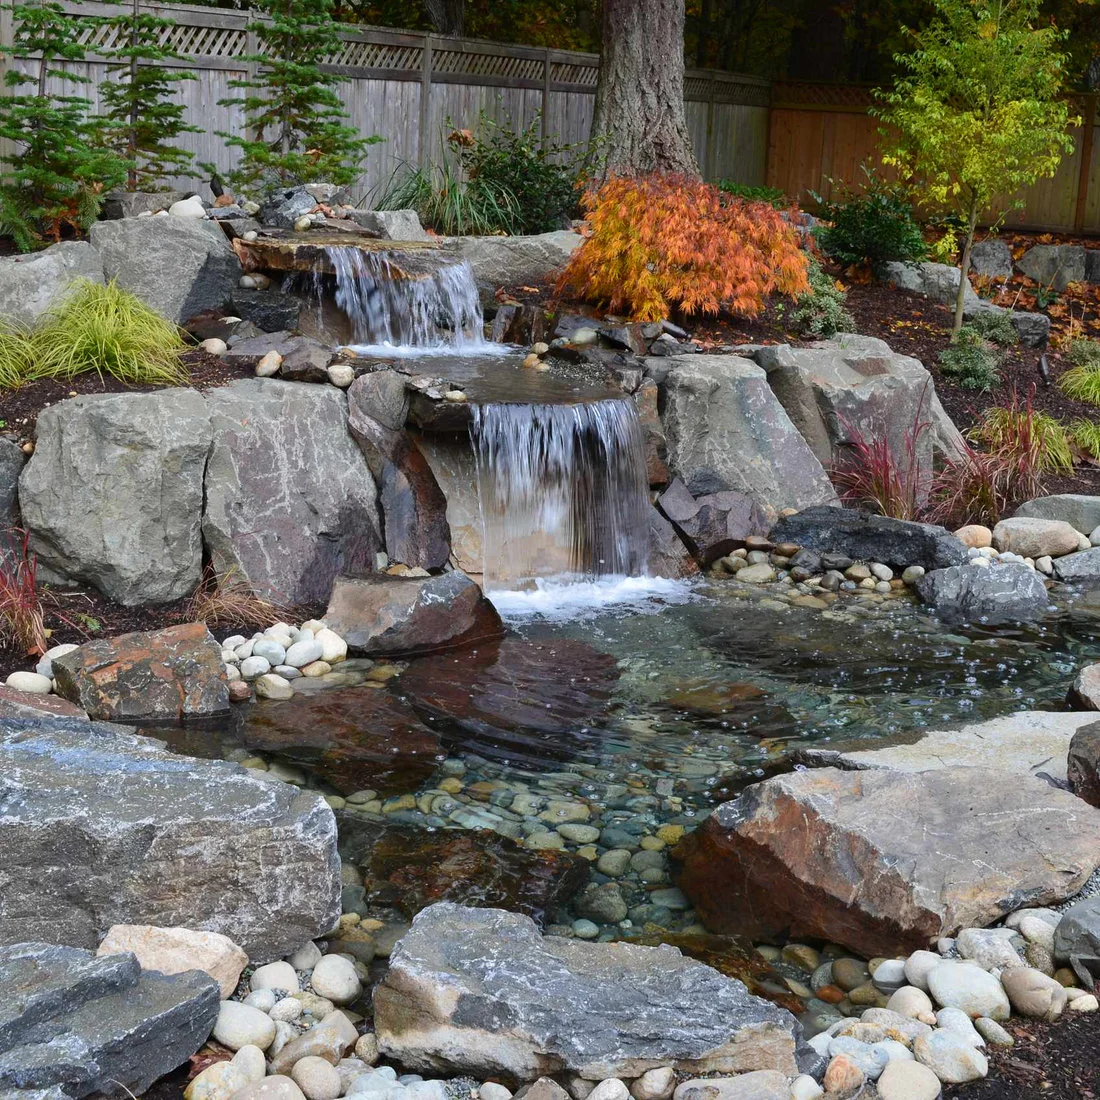
Repeat Smooth Stones Through a Water Feature
 SaveSupport Non AI Creator
Image credit: Project: Alderwood Landscape Architecture and Construction (via Houzz)
Rounded pale stones appear beside the falls and along the shallow-looking foreground, connecting the moving water with the surrounding larger rocks. The darker boulders provide the main structure, while the pebbles soften the transitions. Red and green foliage keep the scene from relying on stone alone for color.
Use this as a reference for combining sizes rather than a guide to constructing a pond. Water depth, access, electrical work and child protection need their own plan. Make sure removable stones do not block service points, and choose a location where you can manage fallen leaves without dismantling the entire edge.
IDEA 08 / 20
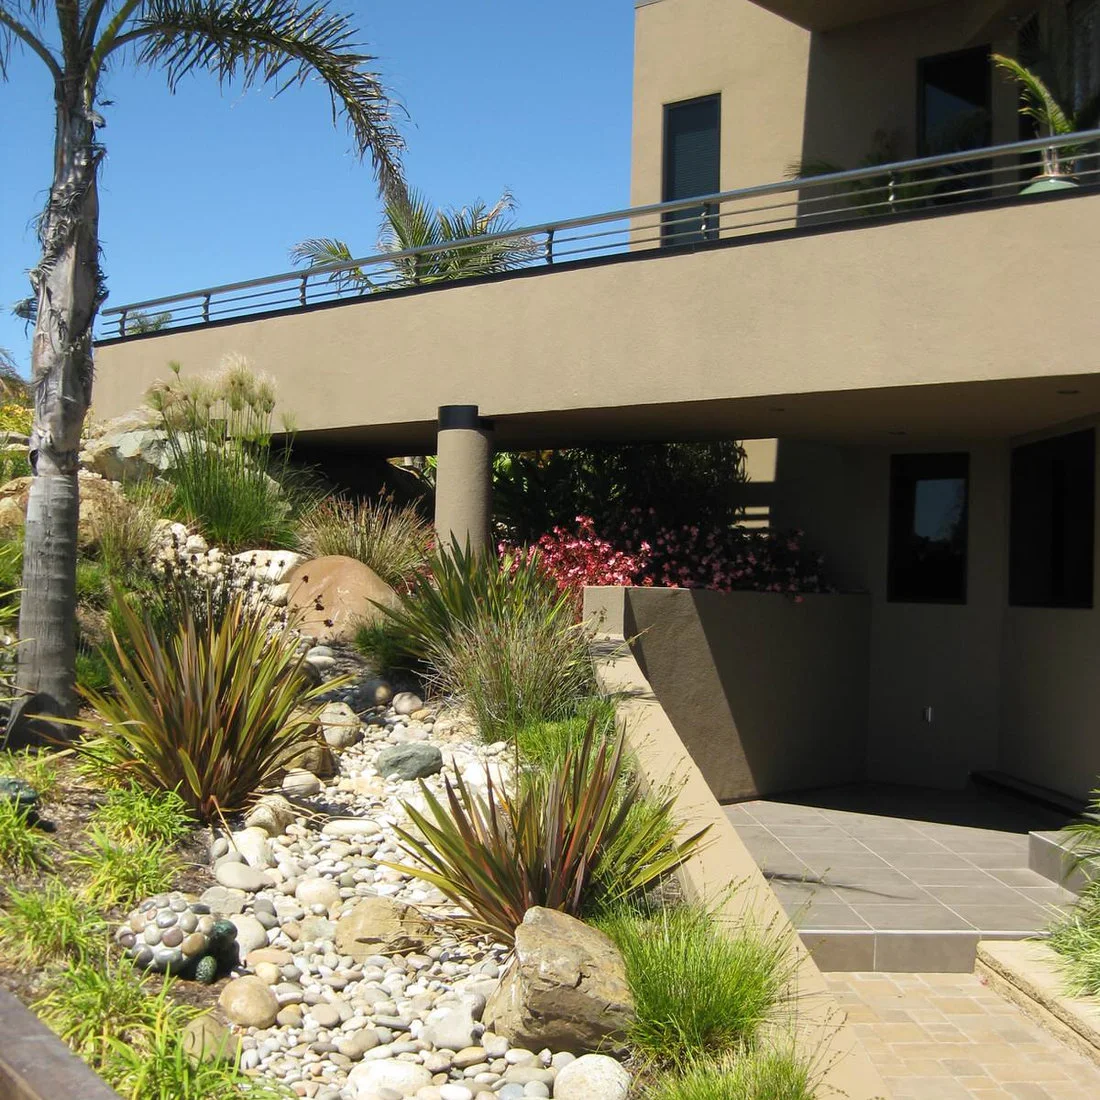
Run a Stone Ribbon Through a Sloping Bed
 SaveSupport Non AI Creator
Image credit: Project: Mark Sullivan Fine Custom Homes Inc. (via Houzz)
The pale stones curve down a planted slope beside the stairs, while larger tan rocks interrupt the ribbon at intervals. Upright foliage repeats the vertical lines of the palm and building. From the lower level, the bright strip makes the planting legible even though much of the bed sits above eye level.
On a slope, containment matters as much as appearance. Discuss stone movement, erosion and runoff with a qualified landscaper before replacing an existing surface. Leave room for plants to grow without obscuring stair access, and choose a maintenance route that does not require climbing over loose rounded rocks.
IDEA 09 / 20
Separate Stone and Bark With a Clear Curve
 SaveSupport Non AI Creator
Image credit: Project: JPM Landscape (via Houzz)
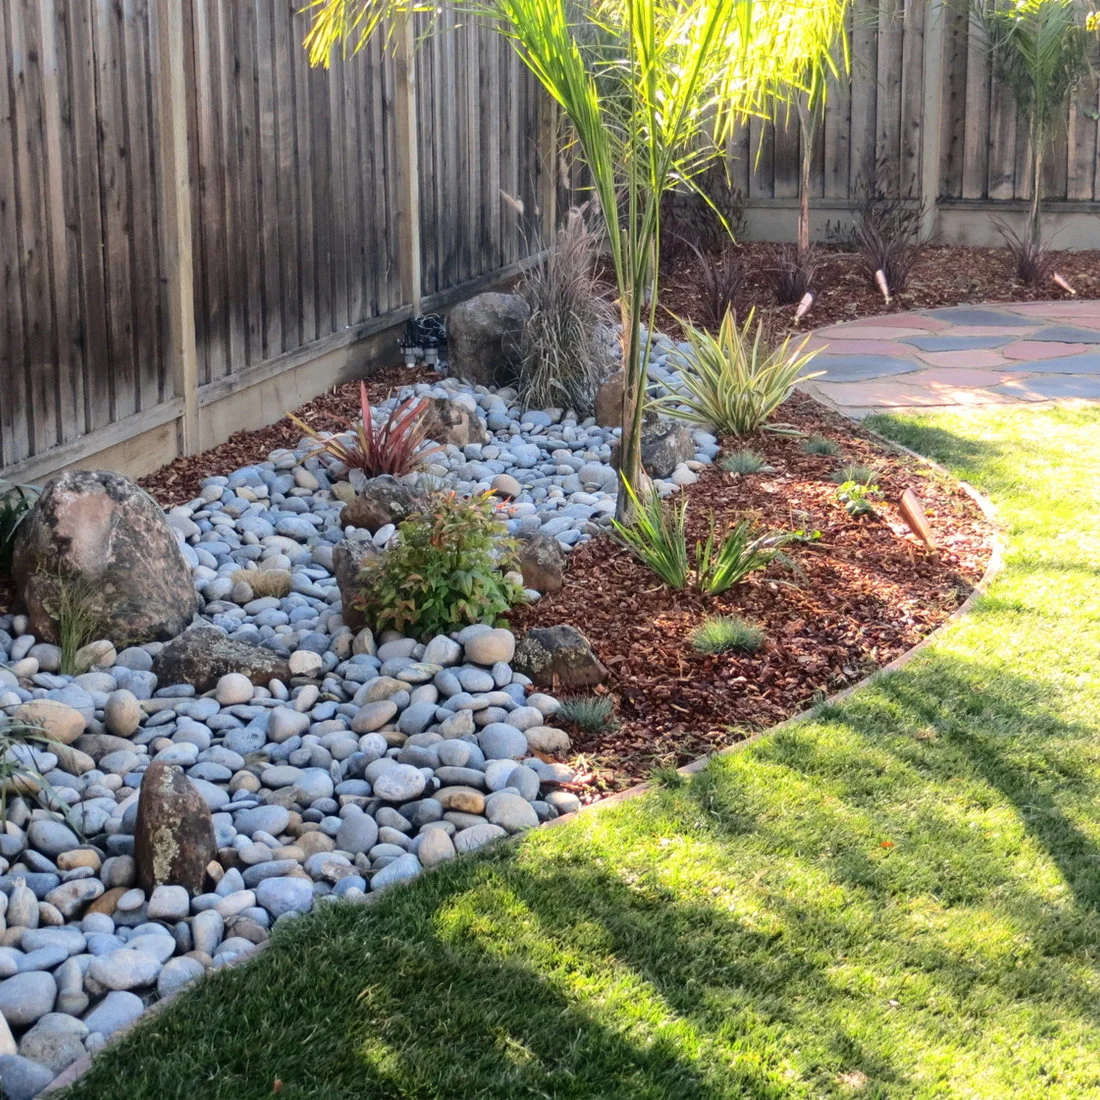
A pale stone bed follows the timber fence, while brown bark continues around the small plants and toward the lawn. The curved boundary makes the two surfaces look deliberate rather than mixed together. Several larger rocks punctuate the light-colored strip without forming a continuous raised wall.
Decide how you will keep mulch and stones from mixing before choosing a winding shape. A defined edge can simplify tidying, but it should not become a trip point beside the lawn. Keep irrigation fittings and plant bases accessible so maintenance does not require moving the whole decorative layer.
IDEA 10 / 20
Use Larger Edges Around a Long Dry Creek
 SaveSupport Non AI Creator
Source: www.houzz.com
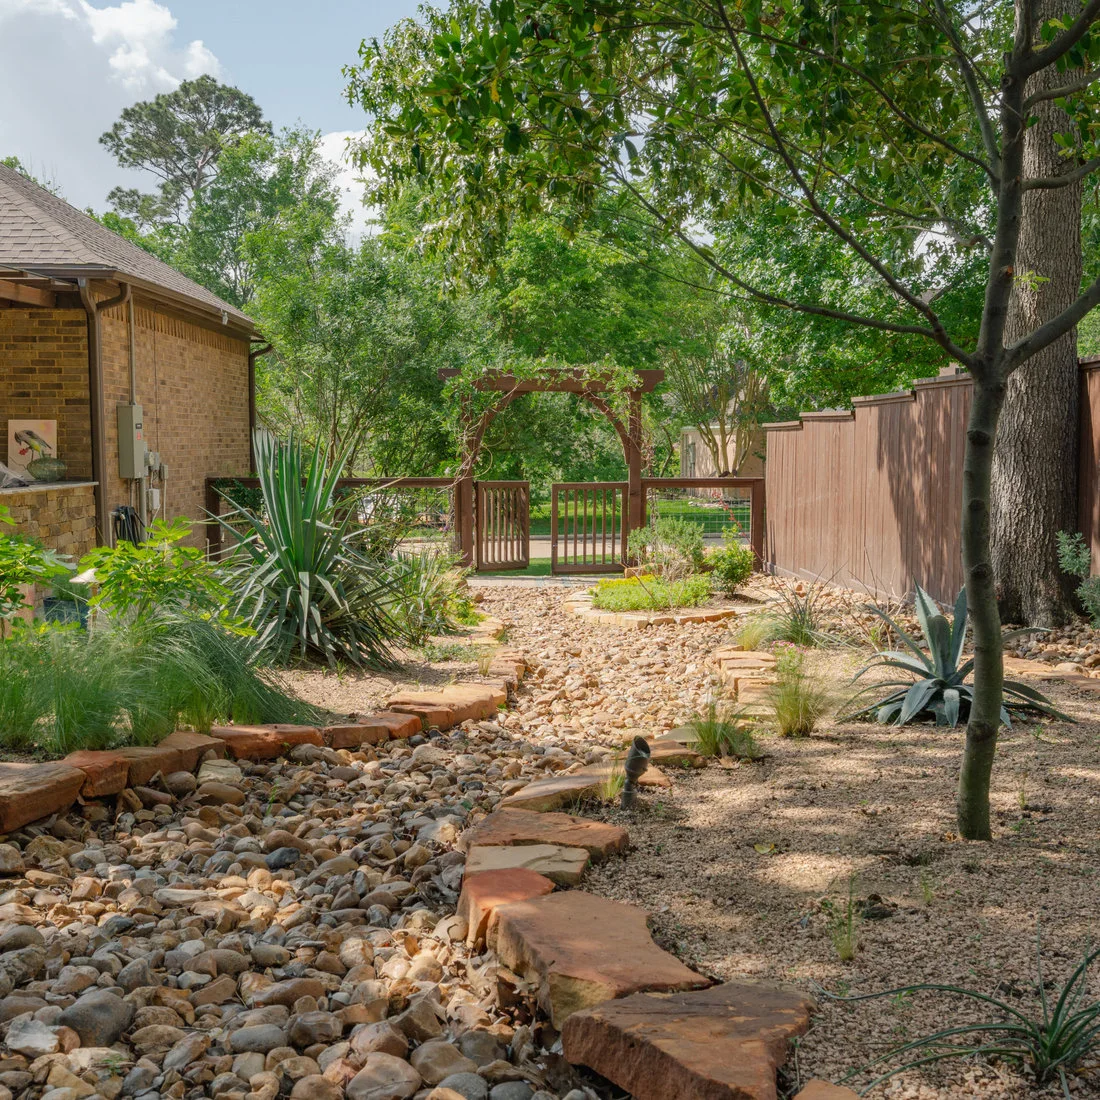
Flat reddish stones mark the banks of a long channel filled with smaller mixed-color rock. The route leads the eye toward a wooden gate, with planting kept mainly to the outer beds. Because the surrounding ground is comparatively quiet, the channel becomes the garden’s main organizing line.
A long feature benefits from an obvious destination, such as a gate or seating area. Keep the adjacent route usable for everyday garden tasks. If the arrangement is intended to move water, get the outlet and grading checked; decorative rock by itself does not establish a functioning drainage system.
PART 03
Dry creeks and water features
IDEA 11 / 20
Add One Clear Crossing Over a Narrow Creek
 SaveSupport Non AI Creator
Source: www.houzz.com
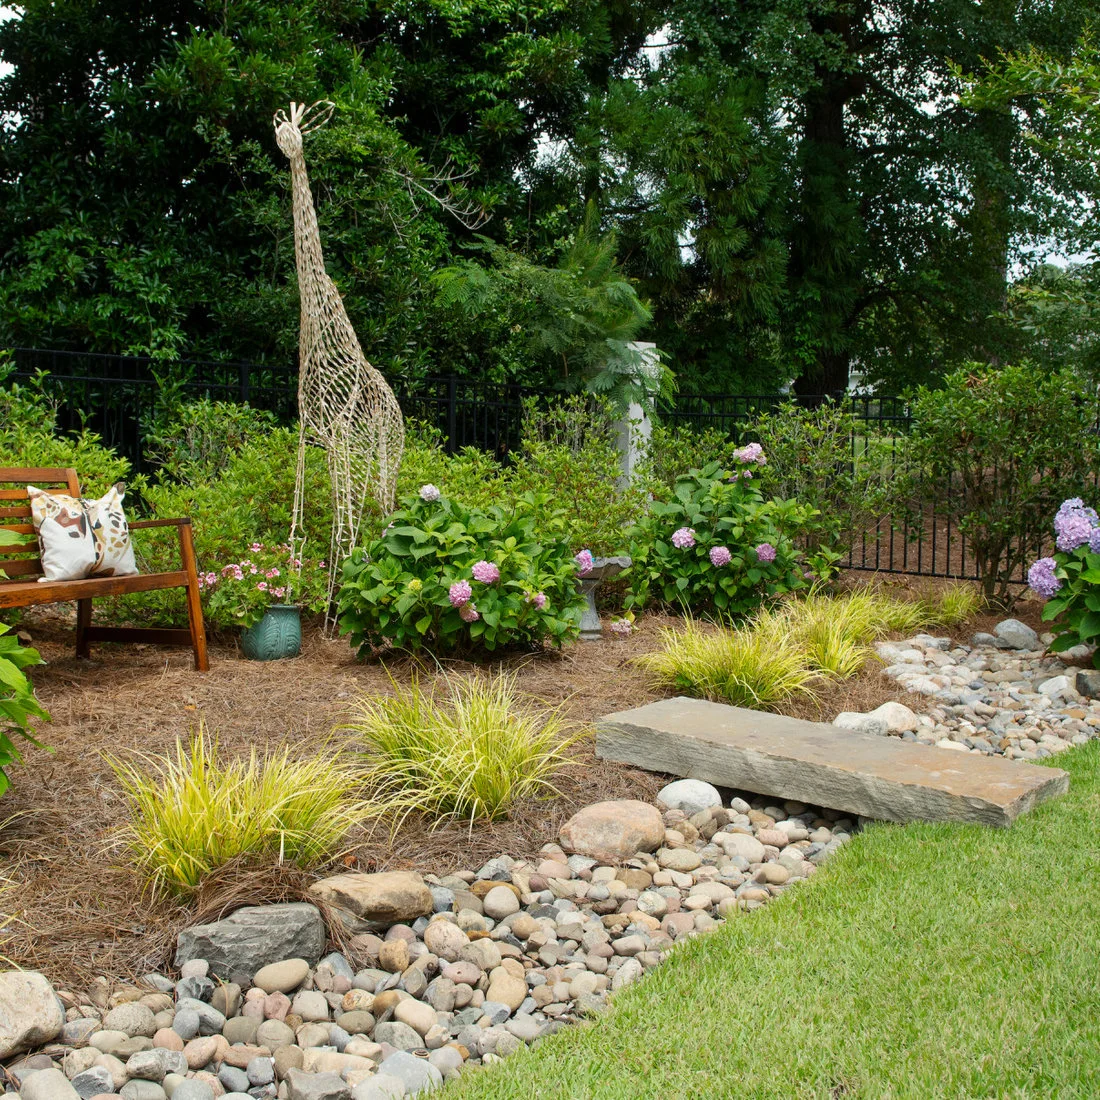
A single flat slab bridges the narrow stone channel near a bench, keeping the crossing visually simple. Tufts of fine foliage soften both banks, while larger rounded rocks keep the dry creek distinct from the lawn. The bench sits on its own planted side rather than straddling the loose surface.
Give a crossing a stable, properly supported base and enough usable width for the people who will use it. A decorative slab is not automatically suitable as a bridge. Keep the ends easy to see and avoid letting grass or trailing planting conceal a level change along a frequently used route.
IDEA 12 / 20
Follow a Broad Curve Between Existing Trees
 SaveSupport Non AI Creator
Image credit: Project: Dreamwork Home Improvements (via Houzz)
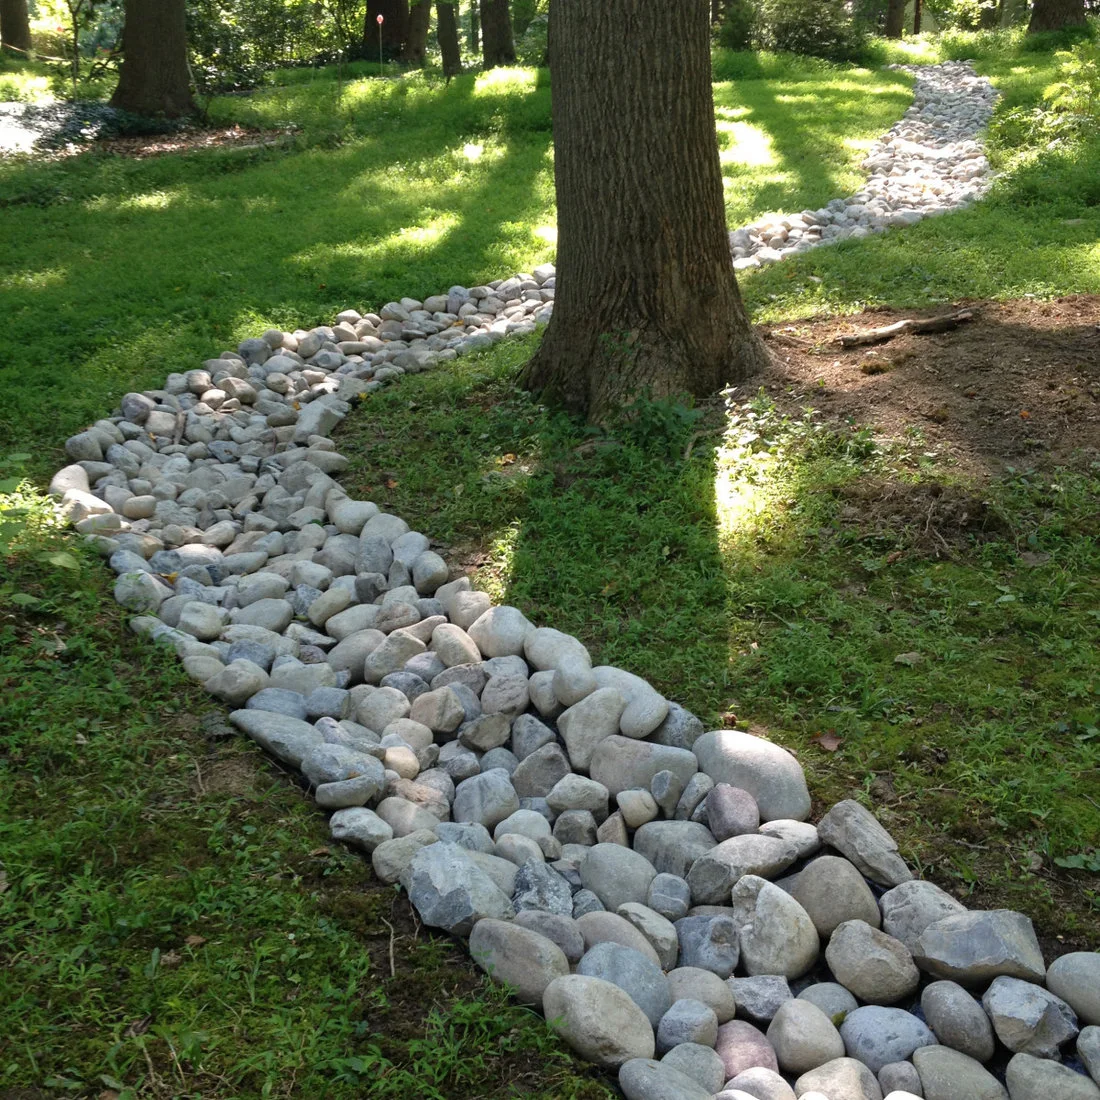
The river-rock band bends through a shaded lawn, with larger stones along the sides and a smaller mix toward the center. Mature trunks remain outside the main strip. The curved line supplies interest across a large open area without requiring a separate ornamental object at every turn.
Work around established roots rather than carving a channel wherever it looks best on paper. Observe the yard during rain before changing levels or redirecting water. A stone-filled route also takes time to clear of leaves, so keep its width and position compatible with the maintenance equipment you actually use.
IDEA 13 / 20
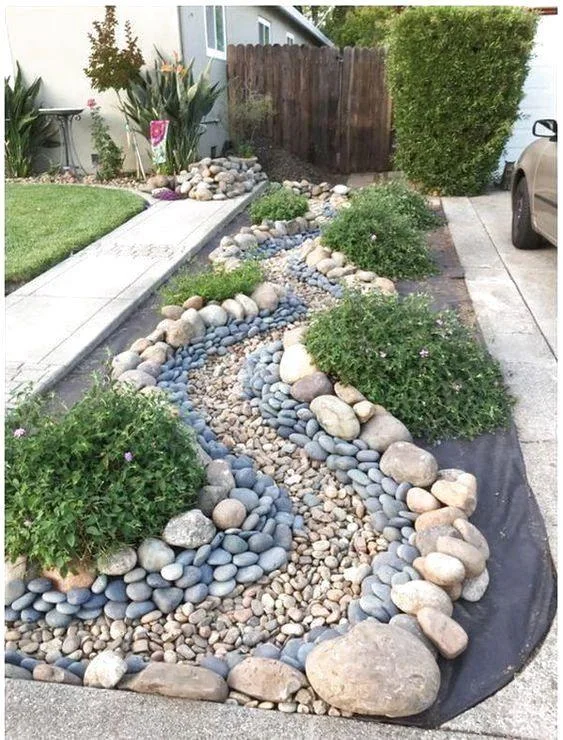
Fit a Narrow Stone Bed Beside the Driveway
 SaveSupport Non AI Creator
Source: freshpatio.com
A narrow strip between the driveway and front path contains alternating pockets of shrubs and mixed river stones. Larger pale pieces give the planting pockets a visible edge, while smaller gray stones form short ribbons between them. The bed adds variety without narrowing the paved approach to the door.
Keep loose stones contained where car tires, a mower or foot traffic could displace them. Choose plants for their eventual width so the bed does not spill into the drive. For the adjoining doorway, farmhouse outdoor entryway ideas can help you coordinate planters and practical arrival space without repeating the same rock treatment everywhere.
IDEA 14 / 20
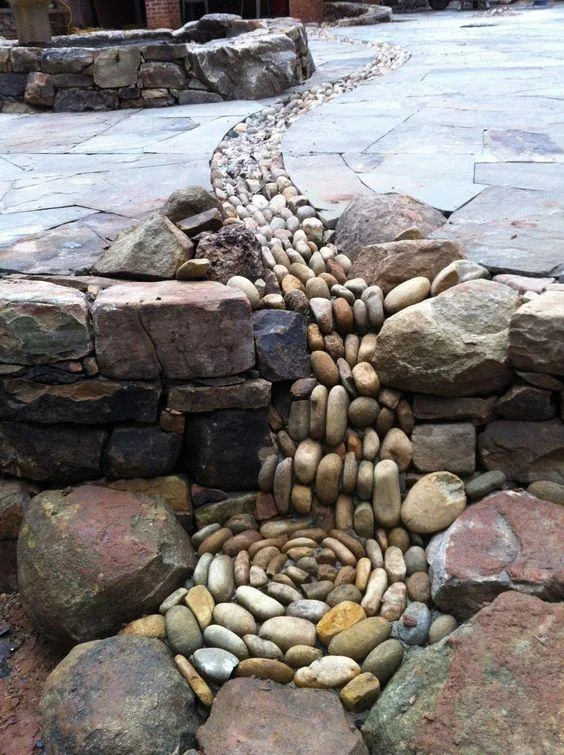
Turn a Paving Break Into a Pebble Detail
 SaveSupport Non AI Creator
Source: freshpatio.com
Rounded stones stand on edge inside a curving break in the paving, creating a textured line that continues over the change in level. Larger rocks frame the foreground, making the narrow detail feel connected to the wider garden. The interest comes from the stone arrangement rather than a bright painted accent.
A detailed pebble strip needs careful installation if it crosses a usable surface. Discuss fixing, drainage and slip resistance with the installer instead of leaving individual pieces loose underfoot. Keep the adjoining walking surface straightforward, and reserve intricate textures for places where they will not catch shoes or mobility aids.
IDEA 15 / 20
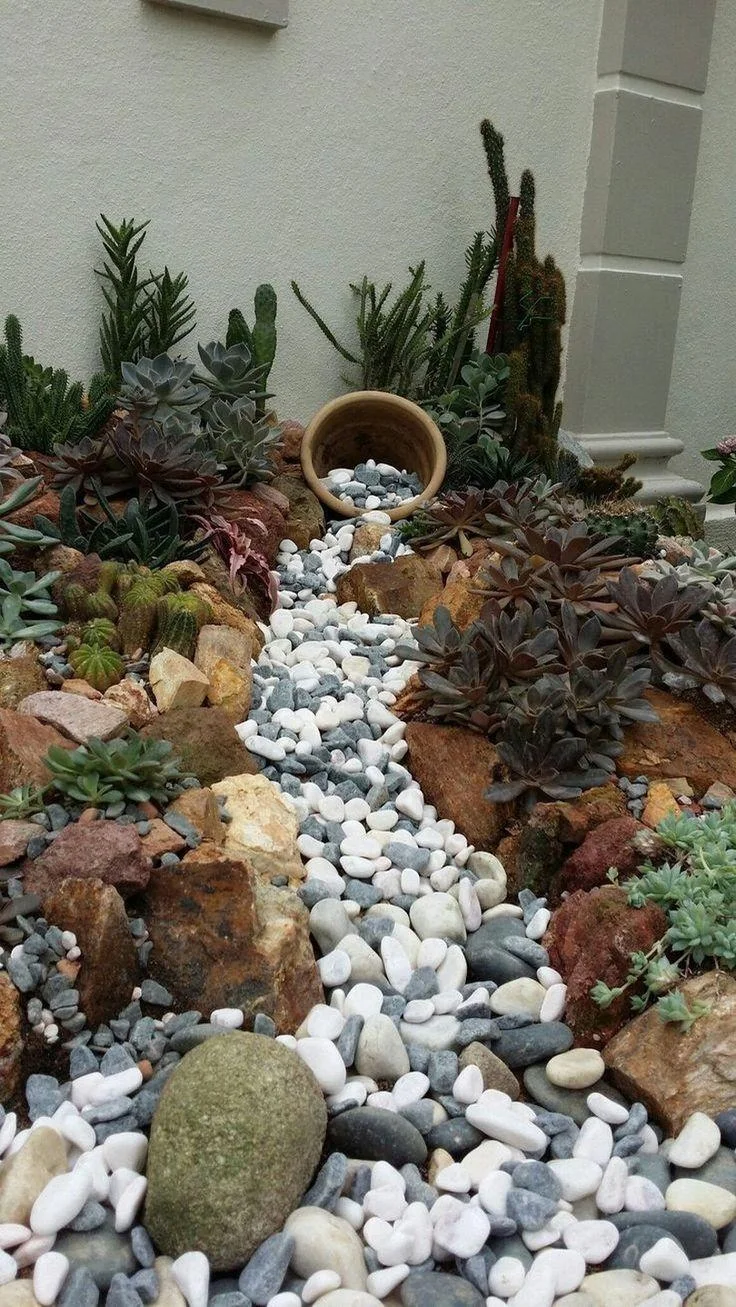
Make a Small Decorative Stream From a Tilted Pot
 SaveSupport Non AI Creator
Source: freshpatio.com
A tilted pot starts a narrow ribbon of white and gray pebbles, which winds between succulents and rougher tan rocks. There is no visible water: the arrangement suggests a stream through the placement of stones alone. The dark and pale pieces keep the line readable against the surrounding soil.
Secure the pot so it cannot roll into the planting, and allow space for the surrounding plants to grow. Choose suitable plants for the actual light and rainfall at your wall. Keep this kind of small detail concentrated in one area; repeating several spilled pots can make a compact bed feel crowded.
PART 04
Smaller details with character
IDEA 16 / 20
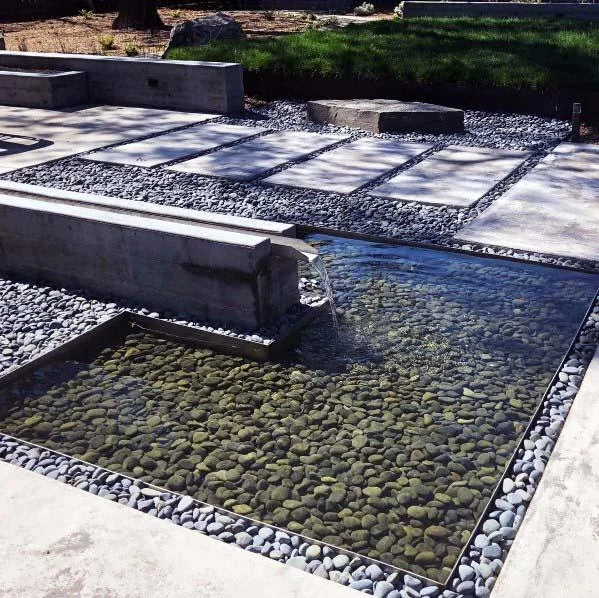
Echo a Reflecting Pool With Dark Pebbles
 SaveSupport Non AI Creator
Source: freshpatio.com
Dark pebbles appear both beneath the water and between the adjacent paving slabs, tying the two surfaces together. The rectangular pool and low wall provide strong edges, while the stone texture softens the larger planes. A small outlet adds movement without changing the overall restrained shape.
Check how stones look both wet and dry before ordering a full quantity; the color difference can be substantial. Plan access for cleaning the pool and servicing its equipment. If you prefer less upkeep, borrow the repeated pebble-and-paver relationship without adding water or copying the entire installation.
IDEA 17 / 20
Let a Dark Stone Channel Recede Into Planting
 SaveSupport Non AI Creator
Source: freshpatio.com
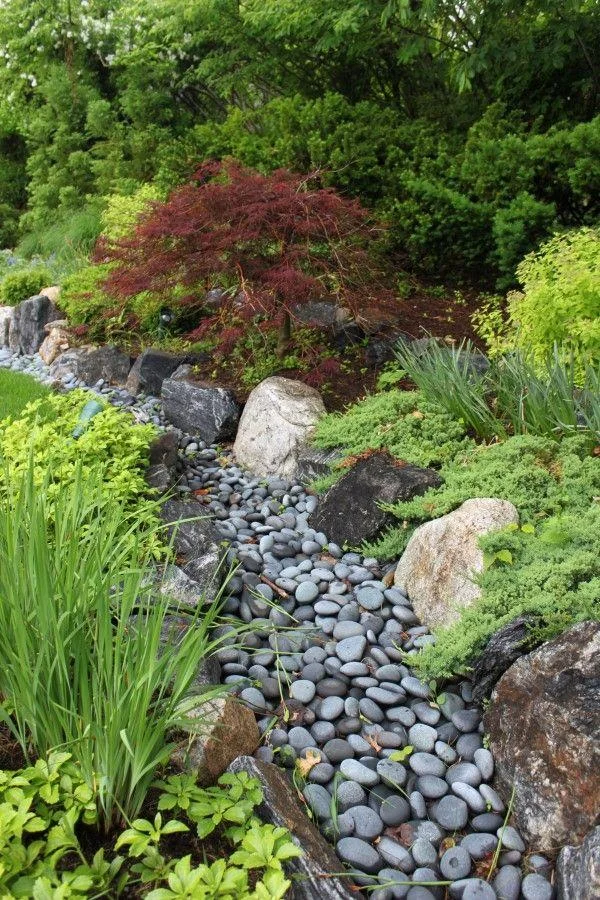
Dark rounded stones form a quiet channel between much larger rocks and dense foliage. The plants partly soften the edges but leave the center visible, so the line still carries the eye into the garden. Pale boulders and the red-leaved tree provide contrast above the darker stone surface.
Leave workable gaps for pruning and removing leaves, especially where foliage leans over the channel. Select a stone color that remains visible against your soil and mulch. In a small cottage garden, a narrow mineral detail can balance dense planting without turning the whole garden floor into rock.
IDEA 18 / 20
Use Pebbles as a Small Mosaic Rather Than Groundcover
 SaveSupport Non AI Creator
Source: freshpatio.com
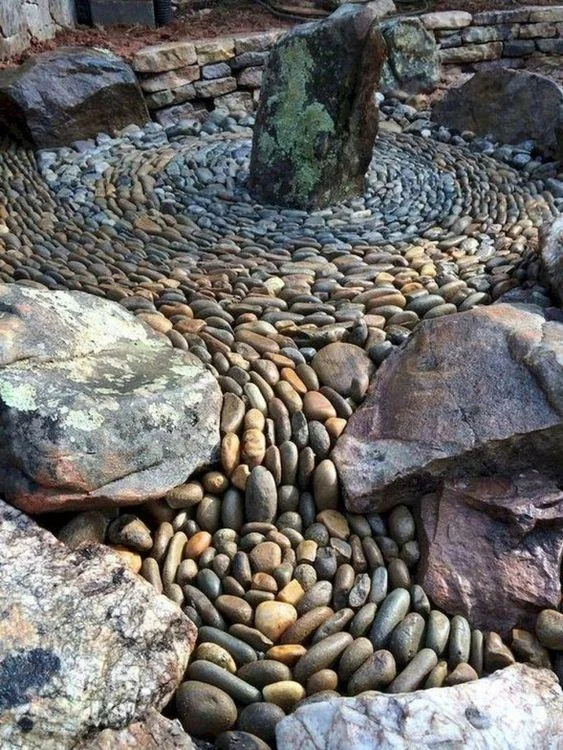
Rows of upright pebbles curve around a central stone, creating a small mosaic with a rippling pattern. Larger rocks break the edge and keep the detail from looking like a flat repeated tile. The varied shades supply the pattern without requiring paint or a collection of different decorative objects.
Treat this as a crafted feature rather than a quick loose-fill project. A durable installation needs an appropriate base, fixing method and drainage detail for the site. Place it where people can appreciate the texture without relying on it as the only comfortable walking surface through the garden.
IDEA 19 / 20
Keep a Downspout Channel Easy to Recognize
 SaveSupport Non AI Creator
Source: freshpatio.com
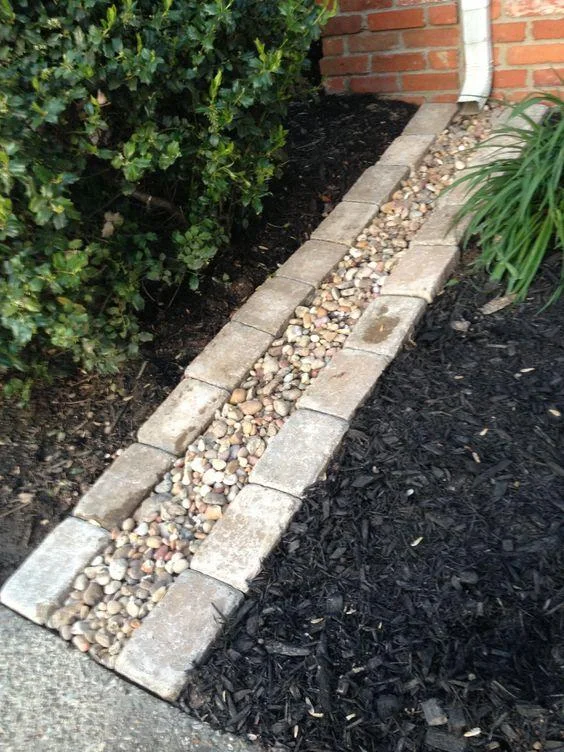
Rectangular edging blocks contain a narrow strip of small rounded stones leading away from the downspout. Dark mulch on both sides makes the route easy to see, and the simple straight section keeps the bed from becoming visually busy. The photograph shows the surface arrangement clearly rather than hiding it beneath planting.
Before copying it, confirm where roof water should go and whether a surface channel is suitable. A decorative finish must not send water toward foundations or neighboring property. Keep the outlet visible for checking after storms, and remove leaves or sediment before they build up between the stones.
IDEA 20 / 20
Combine Glossy Dark Stones With Soft Grasses
 SaveSupport Non AI Creator
Source: freshpatio.com
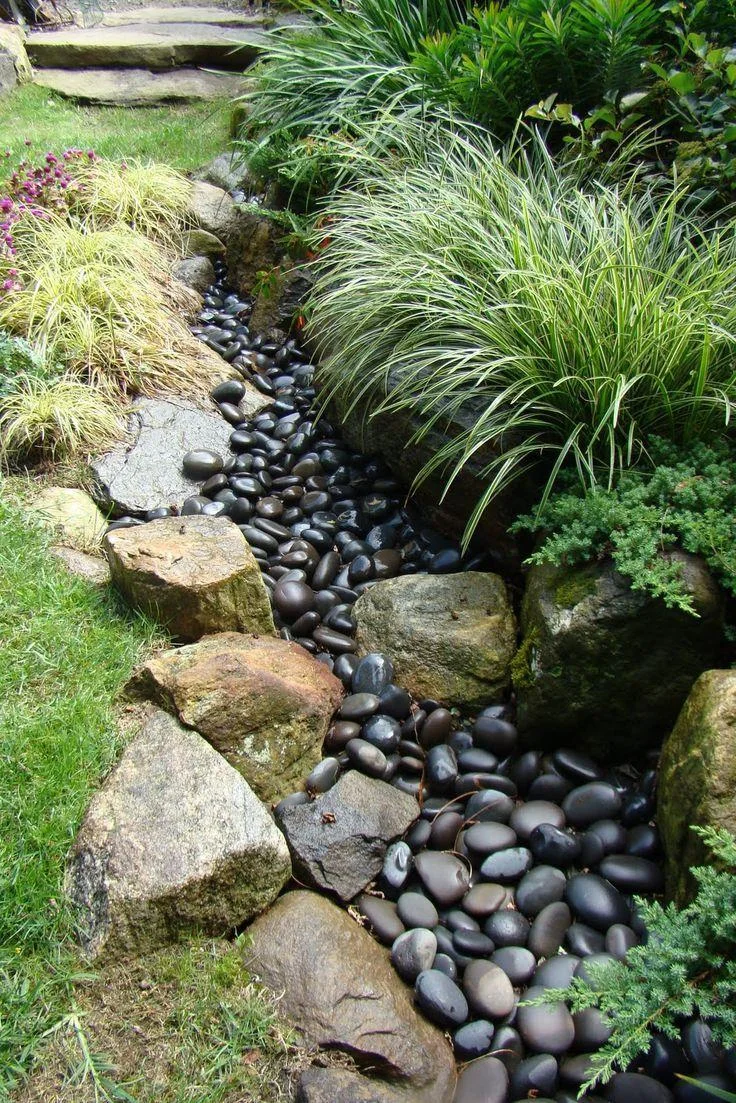
Glossy dark pebbles run through a tight space between rough boulders and fine-textured foliage. The contrast is strongest in the foreground, where the smooth stones catch the light. Farther back, the plants partially overlap the channel, giving the feature a less formal finish than a continuous hard border.
Use a modest trial area to judge whether dark stones become too hot or visually heavy in your setting. Keep the planting rooted in an appropriate growing medium rather than deep piles of rock. Leave enough access to clear dropped leaves; a narrow channel can look untidy quickly when its surface disappears under debris.
BRING IT ALL TOGETHER
Choose one job for the stones to do
Start with the part of the garden that needs definition: a bed edge, a crossing, a small focal point or a change between paving and planting. Compare stone samples in that exact position, including after rain. A limited, well-contained area is often easier to maintain than covering every open patch.
Keep planting health and everyday access ahead of the decorative pattern. Stones do not remove the need to weed, collect leaves or inspect drainage. Where a feature affects runoff, tree roots or a structure, settle those practical questions before choosing the final mix of colors and sizes.