Mosaic tiles can create a quiet floor texture, outline a small repeating shape or build a complete decorative picture. Their effect depends on the pieces, grout and amount of surface you cover. Start by deciding whether you want the mosaic to lead the room or provide detail below simpler cabinets, walls and fittings.
These photographs compare round tiles, square grids, narrow rectangles, shaped floor pieces and decorative compositions. Two views of one branch-pattern bathroom show its wider arrangement and the tilework around shower fittings. Use the visible patterns to plan proportions, then confirm the actual product’s material, intended use, installation and care requirements before buying.
PART 01
Decide where the mosaic should lead
IDEA 01 / 17
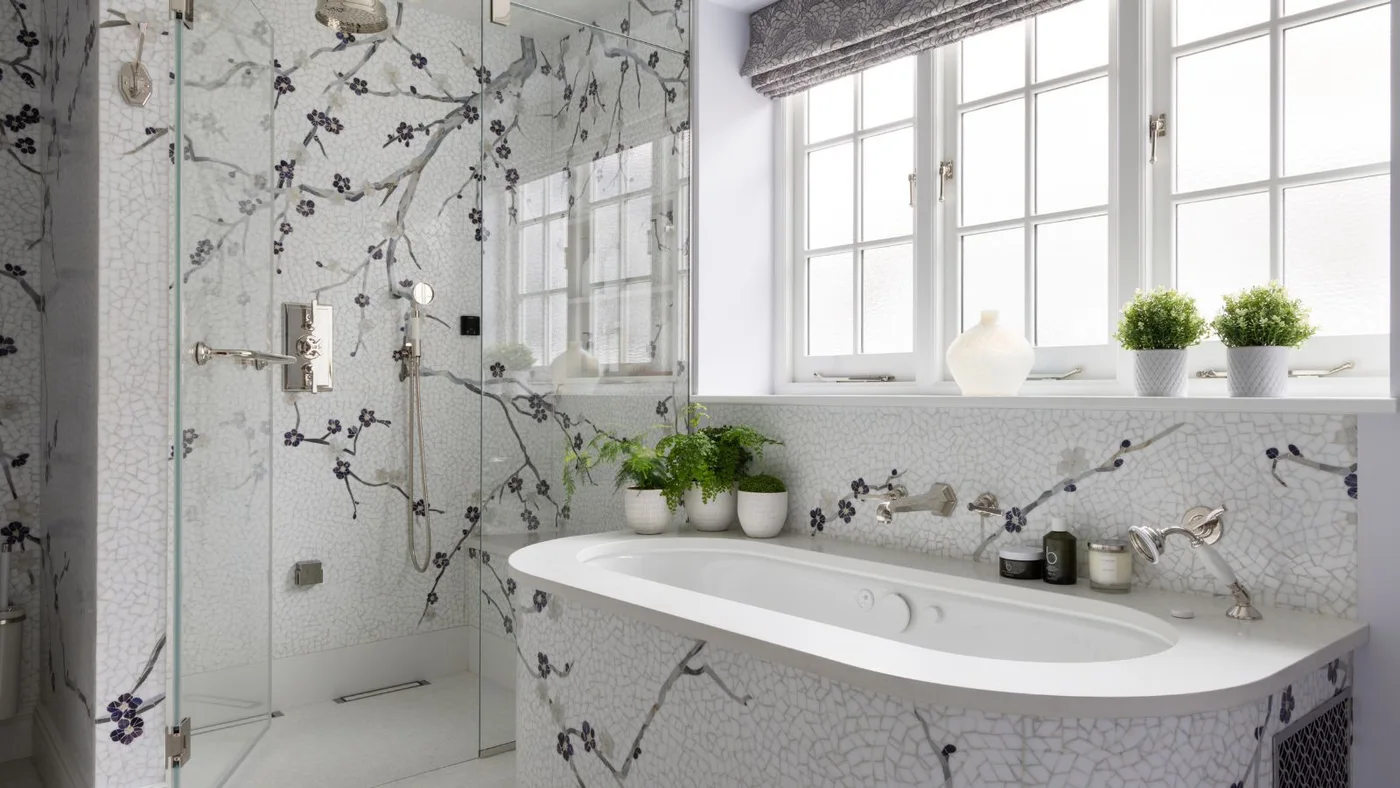
Let a Mosaic Continue Around the Tub
 SaveSupport Non AI Creator
Image credit: West One Bathrooms
Small pale pieces form a continuous field around the tub and shower, interrupted by dark flowering branches. The tub front carries the same design as the walls, making the bath part of the decorative surface. White trim and the broad window sill give the intricate tilework clear edges, while the plain tub interior keeps the arrangement readable.
Plan a decorative mosaic as a complete composition before setting the first pieces. Check how branches or other motifs meet the tub edge, controls and corners; an attractive drawing may need adjusting around those interruptions. Keep removable bath products together on a tray so cleaning the surrounding tilework does not mean moving many separate objects.
IDEA 02 / 17
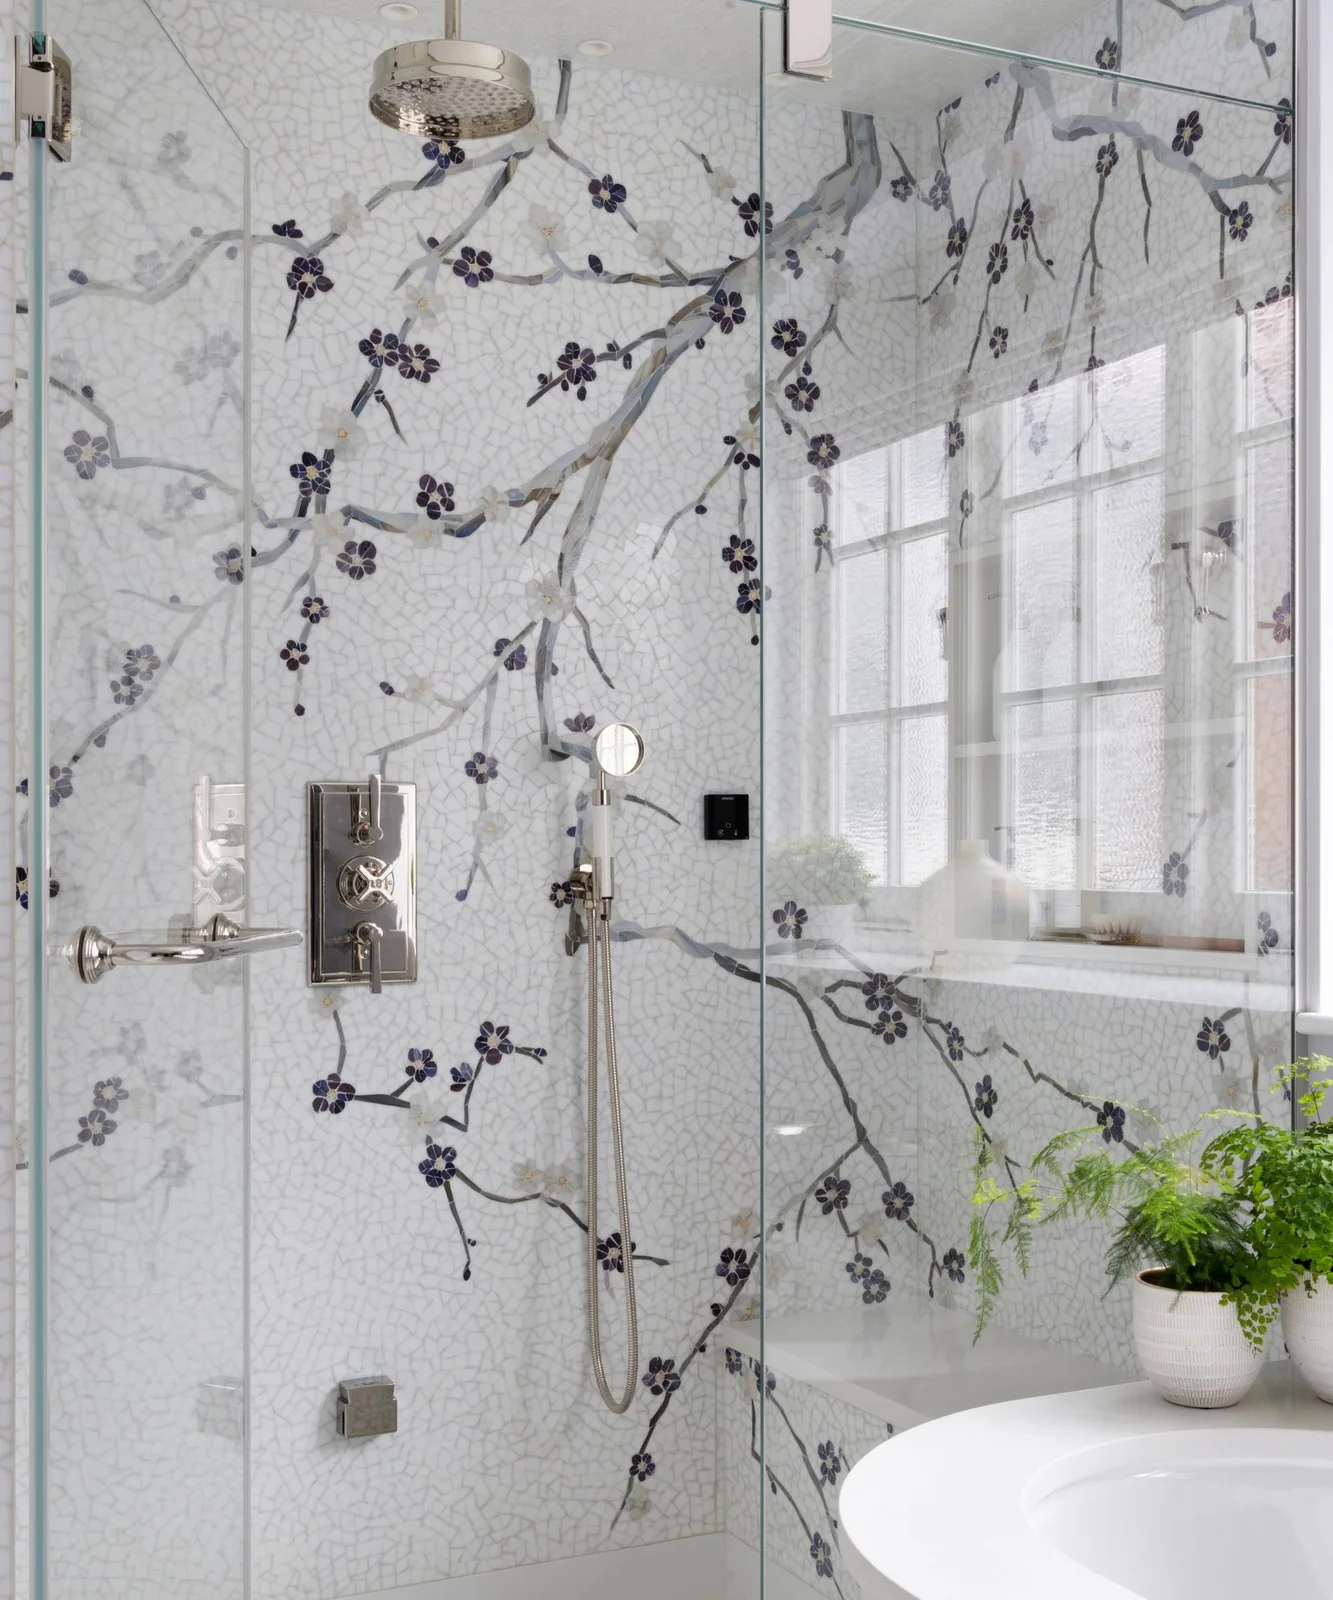
Plan the Picture Around Shower Fittings
 SaveSupport Non AI Creator
Image credit: Paul Craig
A closer view of the same bathroom shows the branch mosaic around the shower fittings. Dark flowers remain visible between the chrome controls and hand shower, while the small pale background pieces continue behind the glass. The design does not rely on a perfectly regular square grid, so its different shapes are part of the visual effect.
Set out the positions of valves, shower heads and glass fixings alongside the mosaic drawing. A fitting placed after the design is finalized can hide a key flower or create awkward cuts. Confirm installation access and the tile edges with the installer, and choose cleaning products that suit both the mosaic materials and the metal finishes.
IDEA 03 / 17
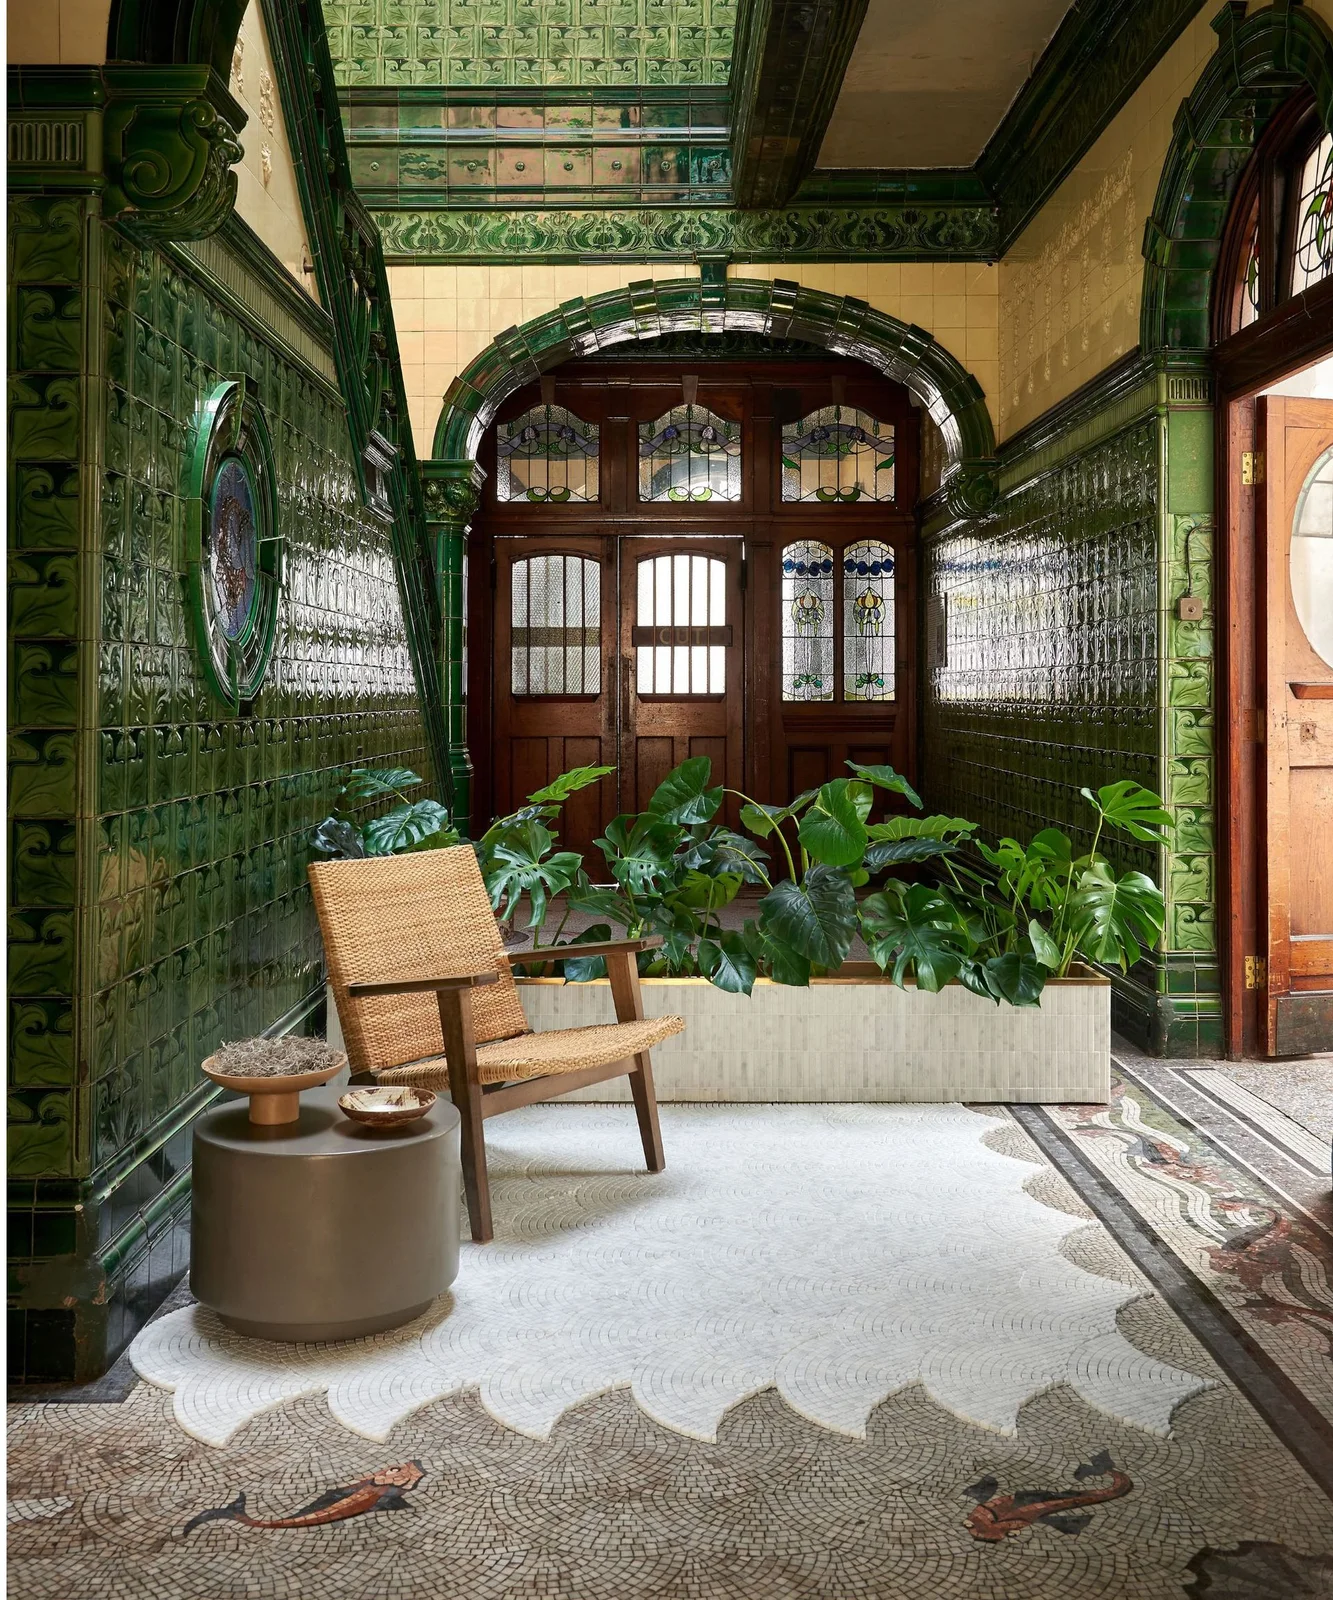
Make the Floor the Decorative Feature
 SaveSupport Non AI Creator
Image credit: Artisans of Devizes
Fish, waves and a curved pale field turn this hall floor into a decorative picture. The green walls and timber doors are more substantial surfaces, while the small mosaic pieces allow curved edges and detailed figures below them. Open-legged furniture leaves much of the floor visible, instead of covering the design with a solid cabinet.
If you want a floor composition to stay visible, plan the furniture and walking route before deciding its dimensions. Keep the main figures away from positions that will be permanently covered. Ask about floor suitability and the care required for every material in the mosaic; a decorative wall product should not be assumed appropriate underfoot.
IDEA 04 / 17
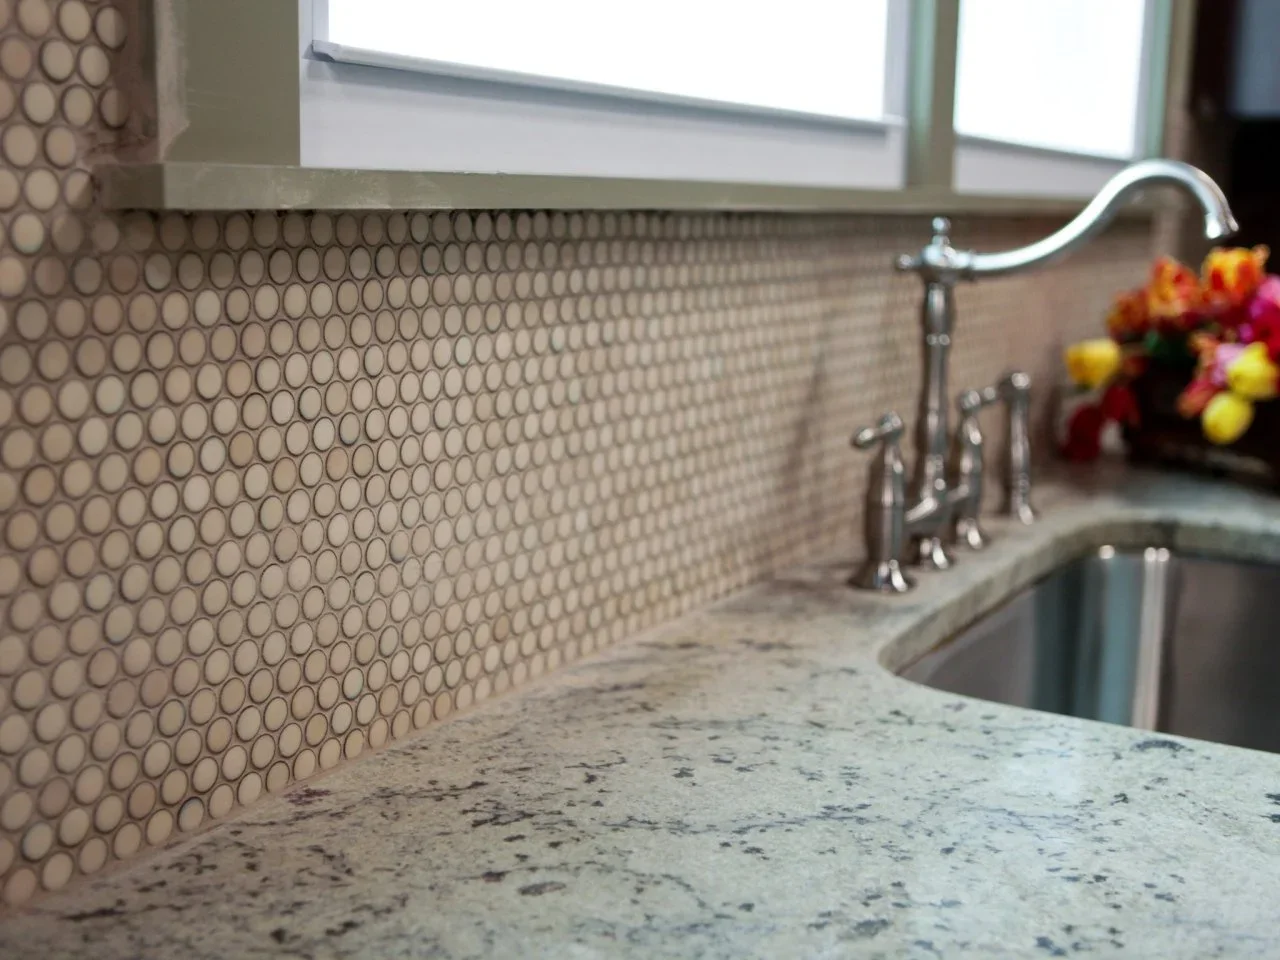
Outline Round Kitchen Tiles with Dark Grout
 SaveSupport Non AI Creator
Image credit: Design: Mark Diaz and Kellie Clements; source: HGTV
Round pale tiles form a tight mosaic behind the kitchen sink. Darker grout outlines each circle, so the backsplash supplies a clear repeat beside the more irregular counter pattern. The window creates a straight upper boundary, and the tile wraps the corner rather than stopping as a narrow panel behind the faucet.
Test the grout color on several tiles before choosing this level of contrast. Dark joints emphasize spacing changes and any sheet boundaries, so careful setting-out matters. Check the window edge and corner finish with your installer, and ask which cleaners are compatible with the tile and grout for everyday splashes around the sink.
PART 02
Compare small shapes with larger surfaces
IDEA 05 / 17
Pair a Small Floor Grid with Larger Wall Tiles
 SaveSupport Non AI Creator
Image credit: Project: sticklab
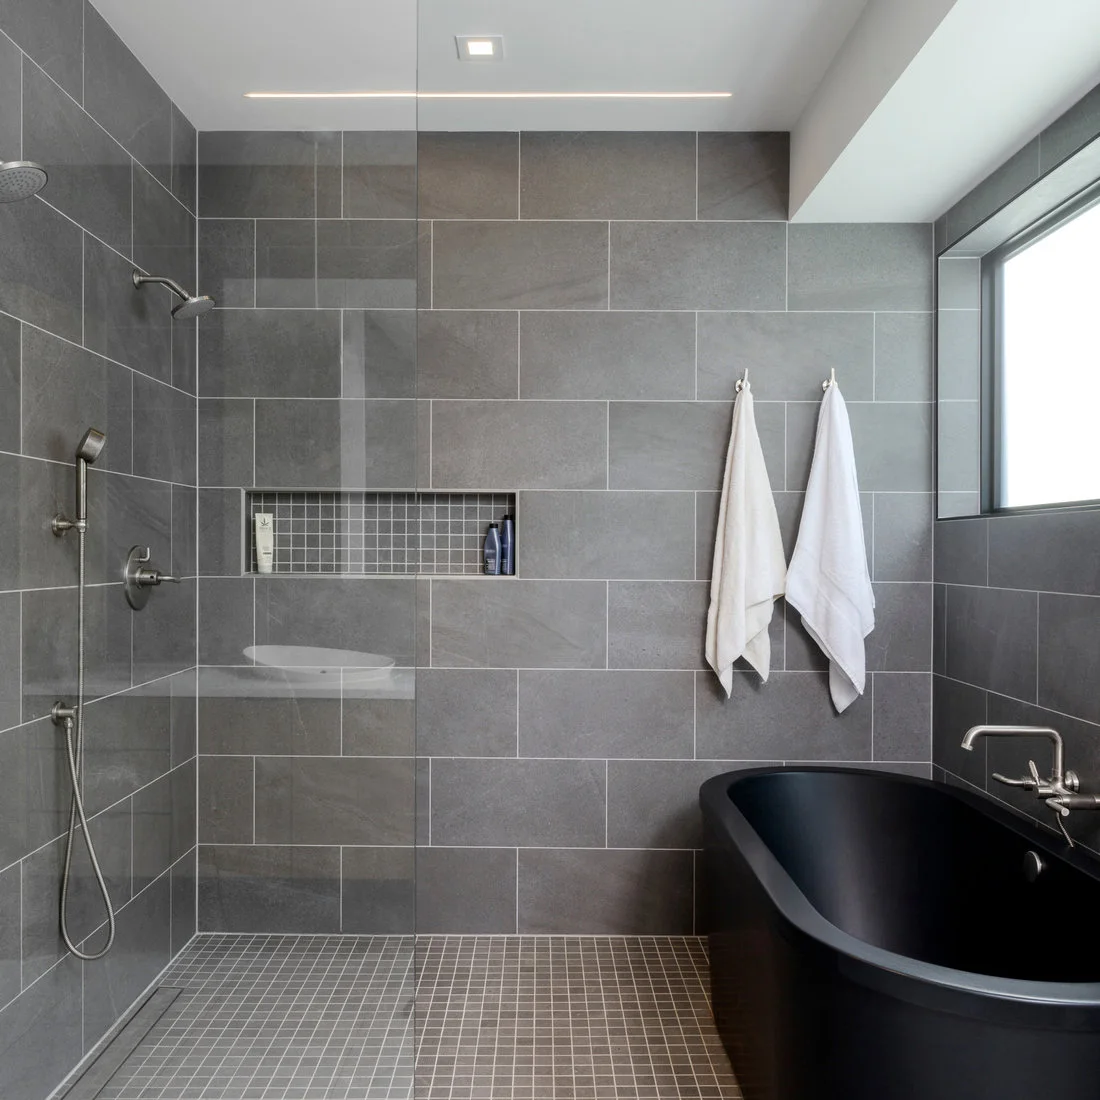
A small gray square grid covers the floor below the larger gray wall tiles. The niche uses the same smaller scale, connecting the two surfaces without covering every wall in mosaic. The black tub has a broad smooth outline, which gives the eye a pause beside the many pale grout lines.
Use the change in tile size to separate functions while keeping the color palette consistent. Lay the floor and wall samples together with the proposed grout so their contrast is intentional. Our modern bathroom tile ideas offer more combinations to compare, but confirm the suitability of your particular mosaic for the floor and shower before buying it.
IDEA 06 / 17
Keep a Penny Floor Quiet in a White Bathroom
 SaveSupport Non AI Creator
Image credit: Project: L. Thibeault & Assoc. LLC
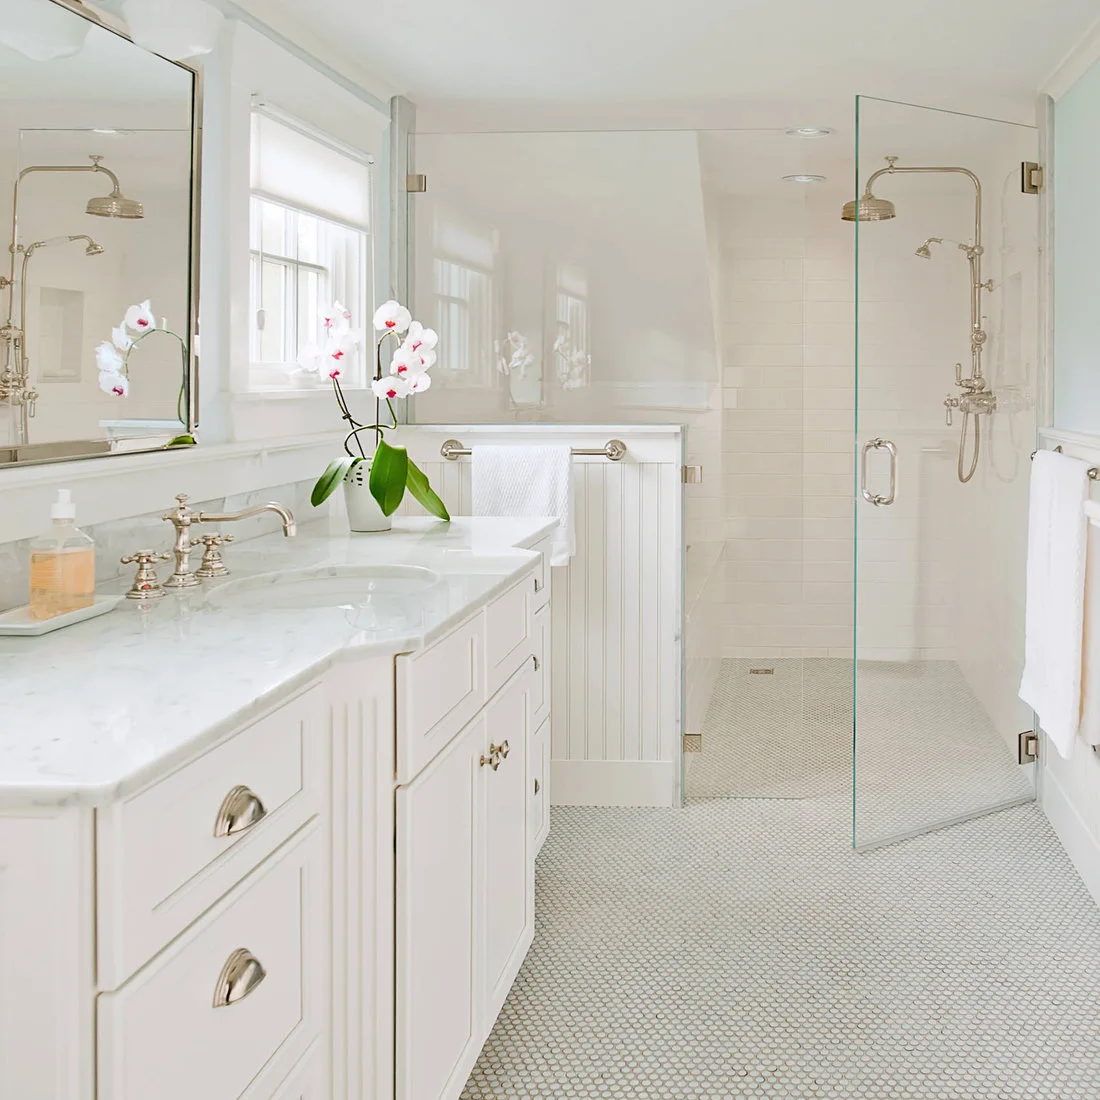
Pale round tiles spread across this white bathroom floor and continue into the shower. Their many small joints add texture below the simpler cabinet fronts and rectangular wall tiles. The restrained color keeps the floor from competing with the window, mirror and metal fittings, while the repeated circles remain visible beside the vanity.
A continuous appearance still requires separate planning for the shower area. Confirm the drainage, waterproofing and product suitability with the installer, including how the finished tile meets the door. Check several sheets together for consistent spacing before installation; on a pale floor, irregular bands of grout can be more noticeable than the individual tile colors.
IDEA 07 / 17
Put Narrow Mosaics Behind the Vanity
 SaveSupport Non AI Creator
Image credit: Project: Rivington Marx Interiors
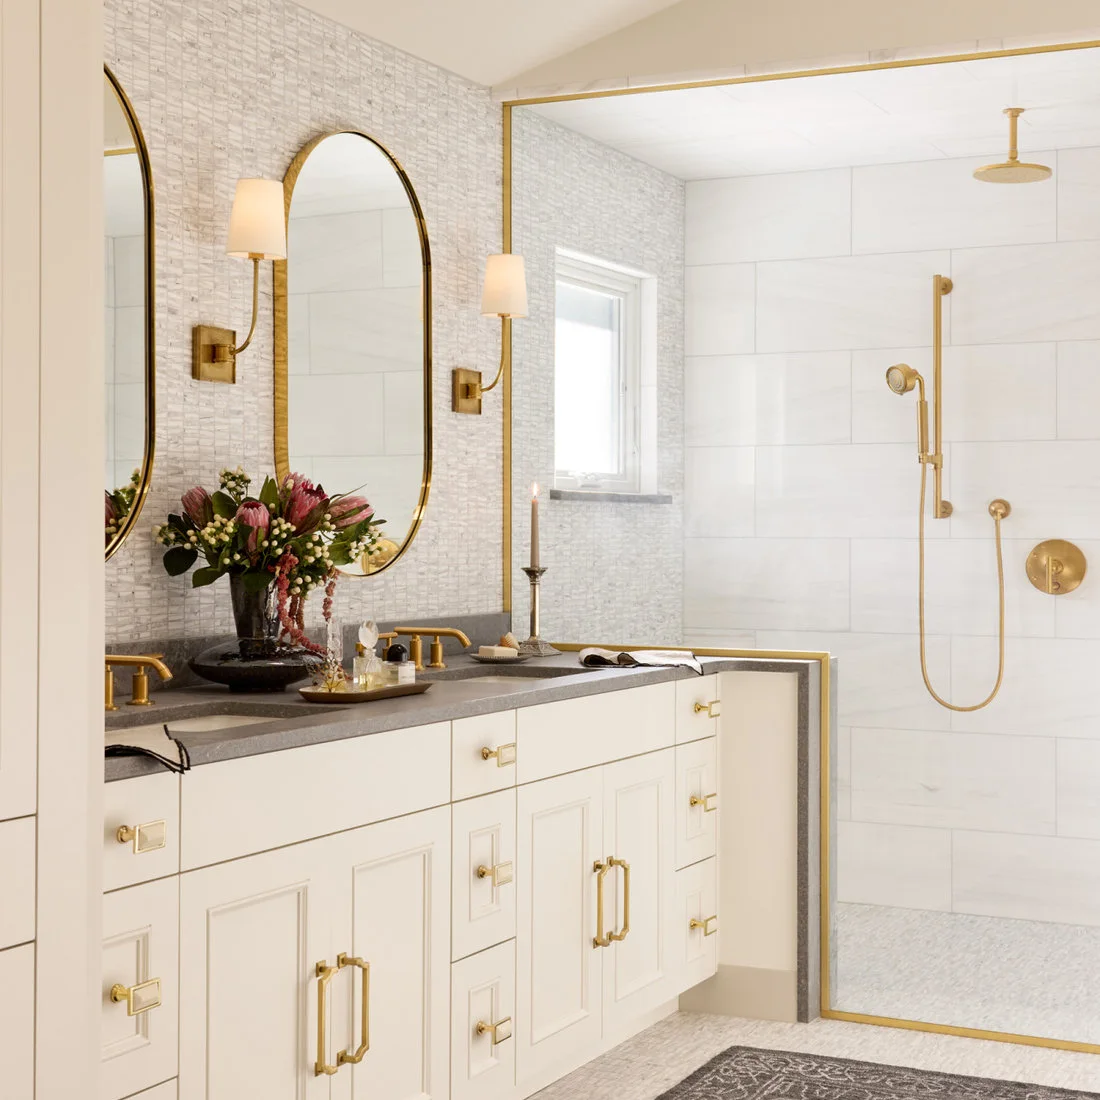
Narrow rectangular pieces give the vanity wall fine texture in this bathroom. Larger tiles keep the shower walls calmer, while the brass-colored mirror frames and fittings stand apart from the pale mosaic. The wall remains visible around the mirrors and above the counter, where it can contribute without needing a large decorative motif.
Check the mosaic against the size of your mirrors and lights before deciding the area to cover. Tiny pieces can become a busy background when many fittings interrupt them. Keep the counter display easy to lift for cleaning, and confirm the tile edge treatment where the smaller pieces meet a window, cabinet or different wall finish.
IDEA 08 / 17
Use Penny Tiles Beneath an Open Shower
 SaveSupport Non AI Creator
Image credit: Project: David Coleman / Architecture
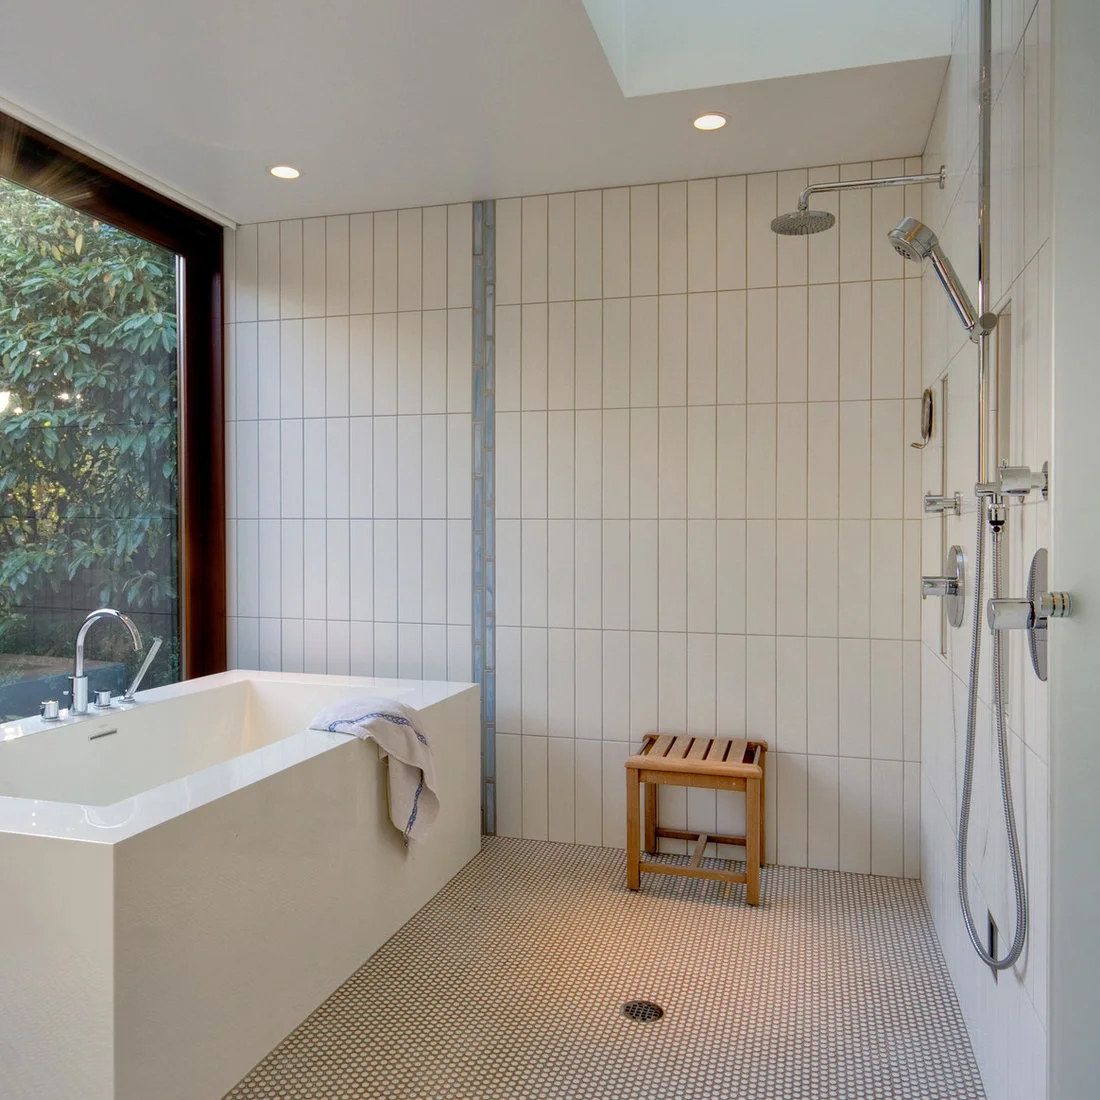
Round floor tiles fill the open area between the tub and shower in this bathroom. Their darker joints keep the small repeat visible beneath the simpler vertical wall tiles. A timber stool introduces a warmer surface, but its open legs leave the floor exposed and accessible rather than hiding a broad section of the mosaic.
Evaluate the actual floor sample underfoot and ask about its intended use; small tiles and extra grout alone do not establish slip resistance. Include the stool footprint and cleaning access when planning the room. Our bathroom floor tile ideas compare other patterns and layouts, helping you decide which surface suits the rest of your bathroom.
IDEA 09 / 17
Change the Tile Scale Without Changing the Palette
 SaveSupport Non AI Creator
Image credit: Project: Hulburd Design
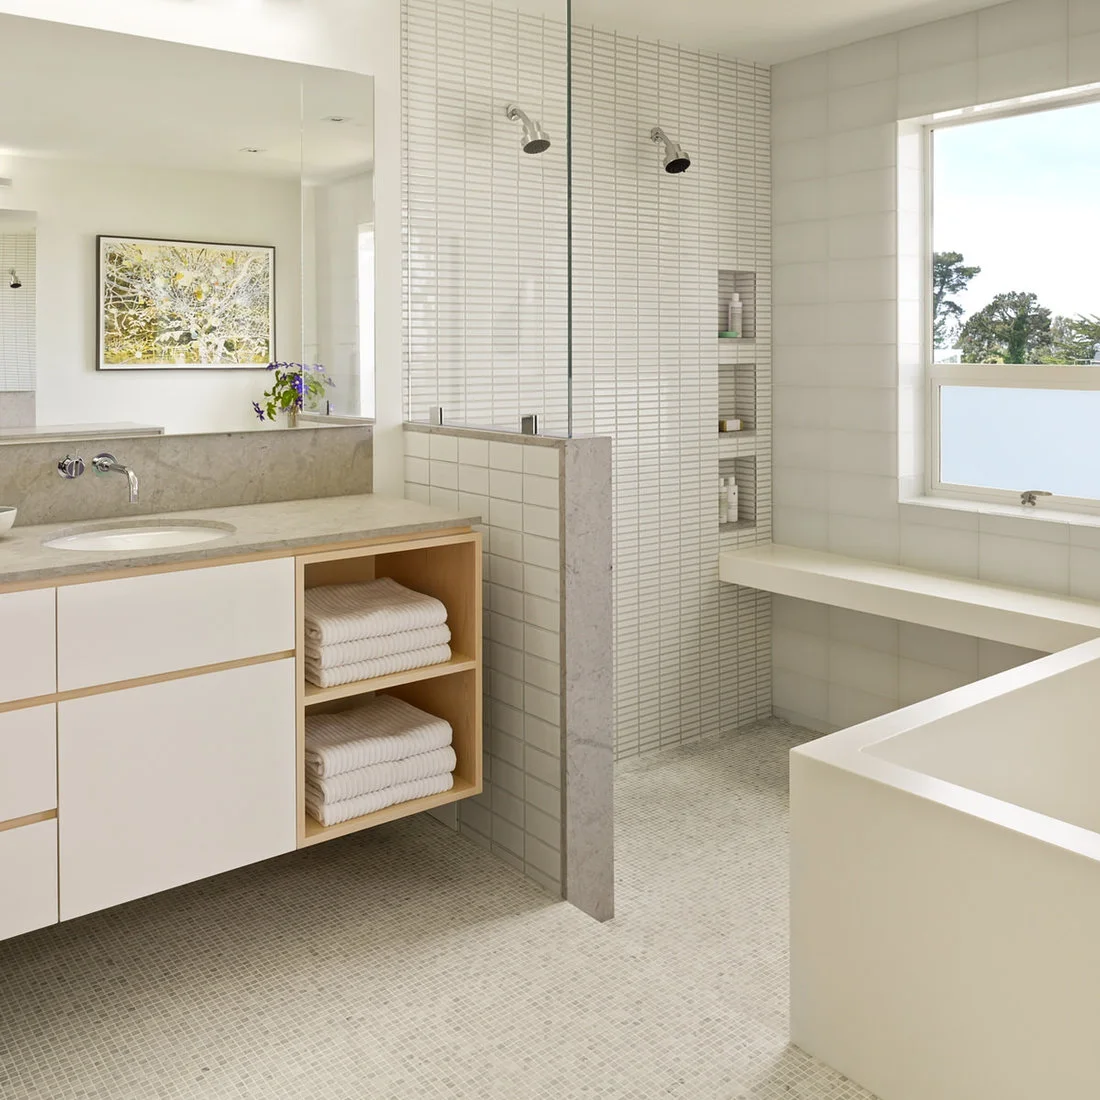
This bathroom combines fine floor mosaics with narrow wall tiles in a similar pale palette. Larger rectangular tiles cover the tub side, creating another change of scale without a strong color change. Open timber shelving gives the vanity a warmer lower edge, while the floor continues visibly around the different fittings.
Compare the grout joints as carefully as the tile colors when combining several scales. Different widths or tones can create a more pronounced change than you intended. Set out the boundaries at the tub, shower divider and vanity first, then check that the small floor pattern will meet them neatly rather than leaving awkward slivers.
PART 03
Choose a repeat that suits the room
IDEA 10 / 17
Add Dark Flower Motifs to a Pale Mosaic Floor
 SaveSupport Non AI Creator
Image credit: Project: LU Design Build
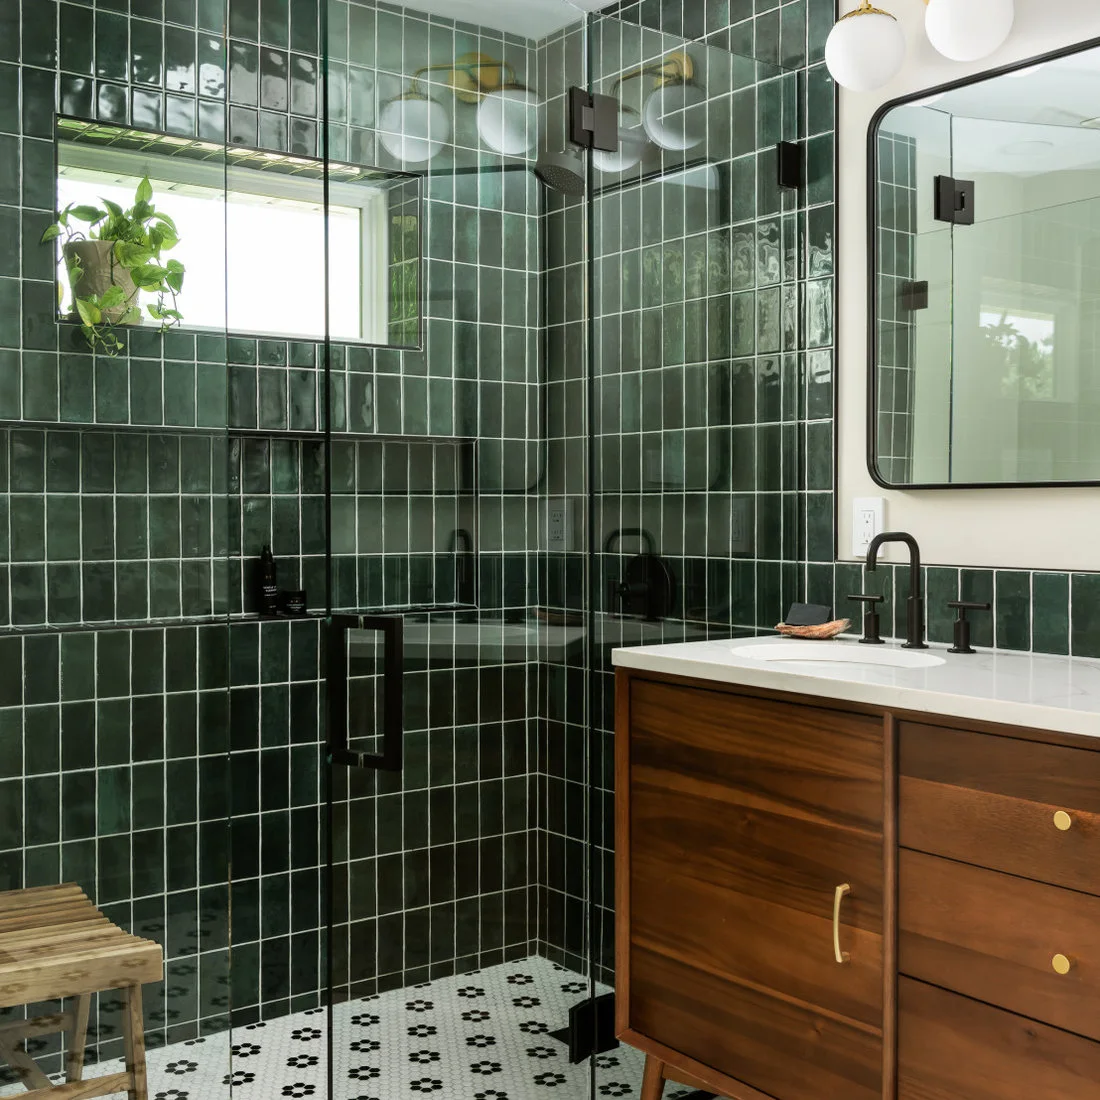
Small dark flower motifs repeat across the pale floor beneath the deep green shower walls. The floor pattern introduces contrast at a much smaller scale than the vertical green tiles. A timber vanity provides another warm surface, and black fittings connect with the dark details in the mosaic without matching the whole floor.
Check the spacing of the flower motifs around the vanity and shower entrance before installing the sheets. A motif cut in half at a prominent doorway can draw more attention than a full repeat farther inside. Choose the grout with the pale background in mind so it supports the small pattern without turning every joint into a competing line.
IDEA 11 / 17
Use a Pale Mosaic Under Traditional Details
 SaveSupport Non AI Creator
Image credit: Project: Copper Sky Design + Remodel
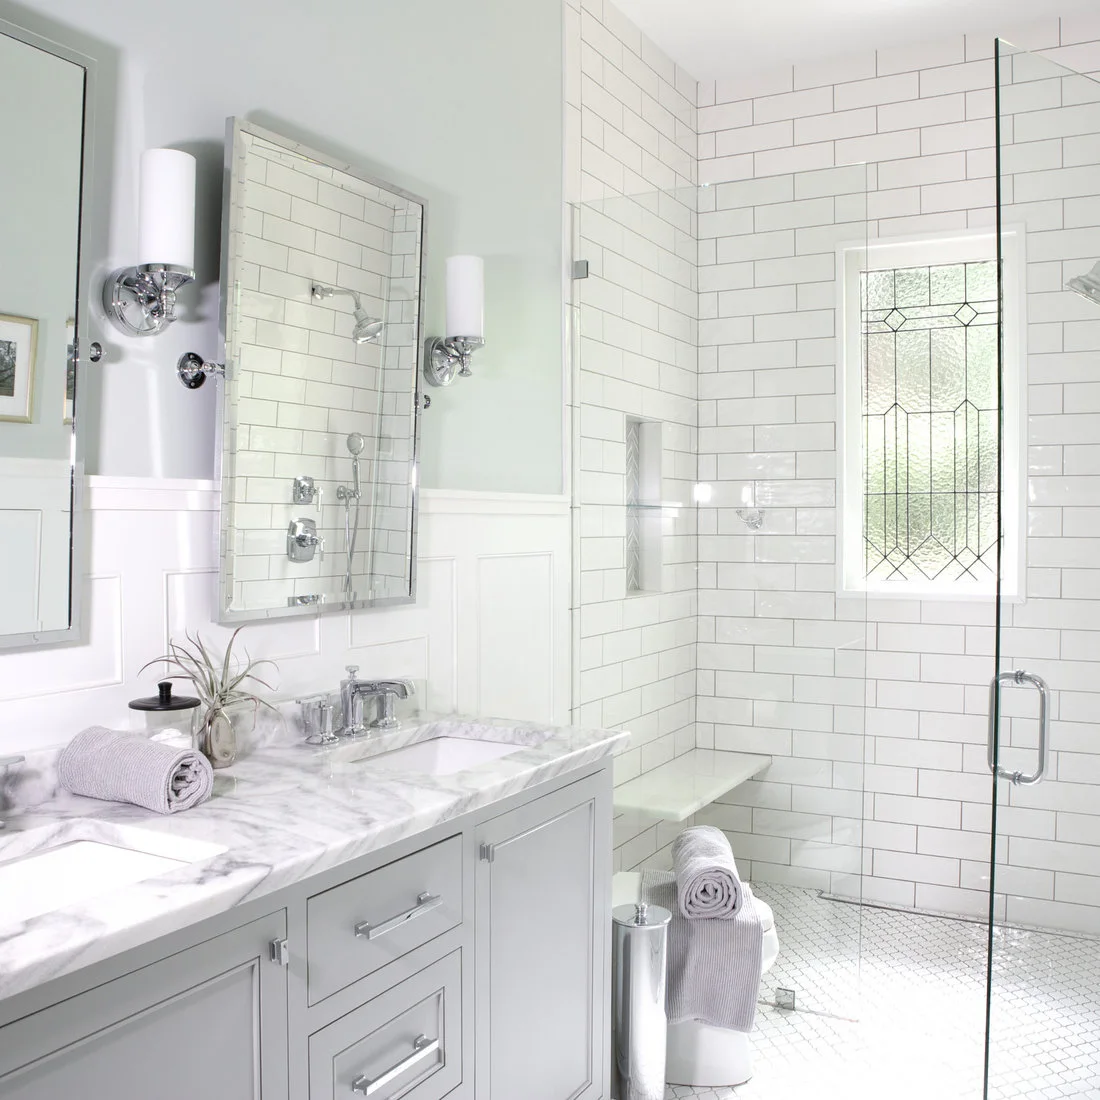
The pale mosaic floor gives this bathroom a finer texture below the larger subway wall tiles. Gray cabinetry and chrome fittings provide restrained contrast, while the leaded window adds a separate geometric detail. Keeping the floor color light allows the window and mirror to remain noticeable without requiring another dark pattern underfoot.
View the floor sample alongside the window, cabinet and counter finishes so their undertones work together. Pale does not always mean the same shade of white. Ask how the mosaic will finish at the shower glass and cabinet base, and keep the layout simple if the room already has several detailed architectural features.
IDEA 12 / 17
Check Hexagons Around a Linear Drain
 SaveSupport Non AI Creator
Image credit: Project: Blanco Flooring and Remodeling
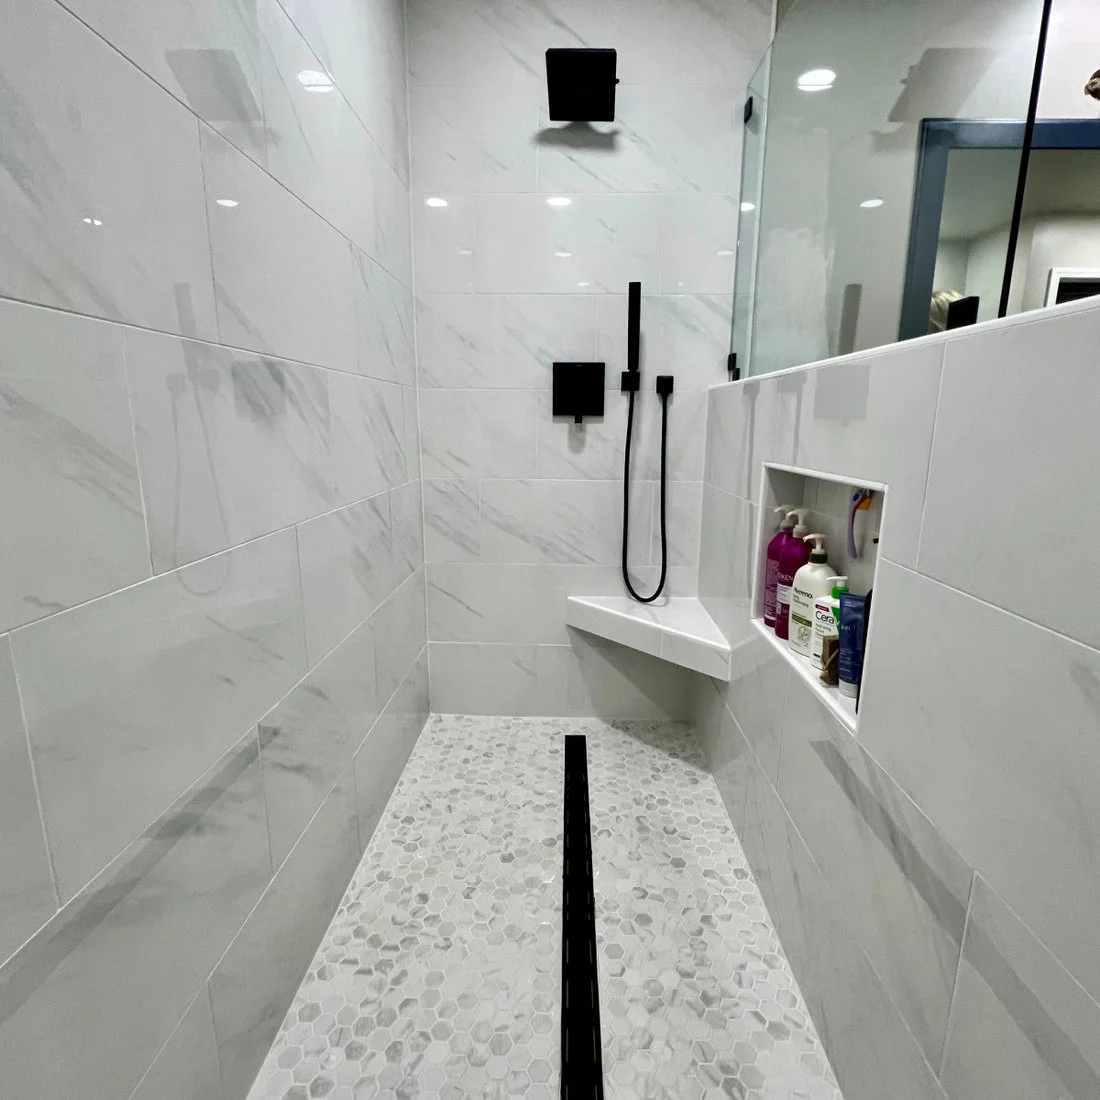
Small pale hexagons fill the shower floor around a long black drain. Their varied tones connect with the quieter veining of the larger wall tiles, while the black fittings repeat the drain color above. A corner seat and wall niche keep storage separate from the mosaic field underfoot.
Include the drain position in the tile layout before installation so the cut edges around it are considered. Tile size does not replace correct falls, waterproofing or the product’s suitability for a wet floor. Keep the drain accessible for the cleaning method its manufacturer recommends, and compare the mosaic’s maintenance needs with the larger wall tiles.
IDEA 13 / 17
Build Color Blocks from Small Squares
 SaveSupport Non AI Creator
Image credit: Project: Alloy Architecture & Construction
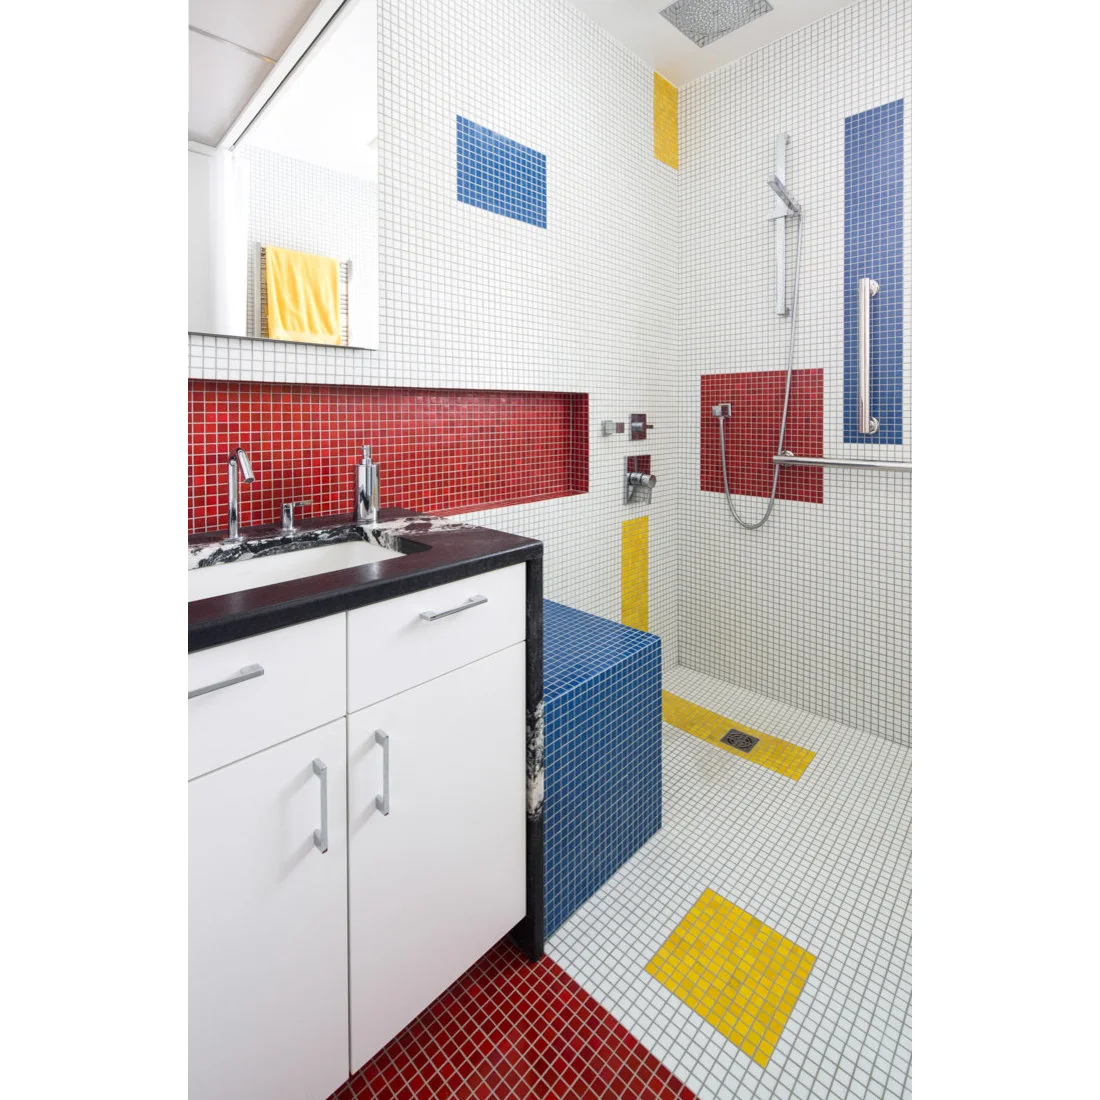
Red, blue and yellow blocks interrupt a white square mosaic grid across this bathroom. The color reaches the niche, seat and floor, turning functional areas into parts of the same composition. Straight lines remain visible between the smaller tiles, so the strong color changes feel organized rather than scattered across unrelated surfaces.
Draw the full wall and floor layout before ordering colors for a composition like this. Include the seat, drain and fittings in the drawing so each block lands where intended. Keep the remaining cabinet and counter finishes relatively calm, and check the proposed grout color on all the tile colors rather than choosing it against white alone.
PART 04
Plan floor patterns and boundaries
IDEA 14 / 17
Choose Herringbone at a Smaller Scale
 SaveSupport Non AI Creator
Image credit: Project: Landmark Building Contractors LLC
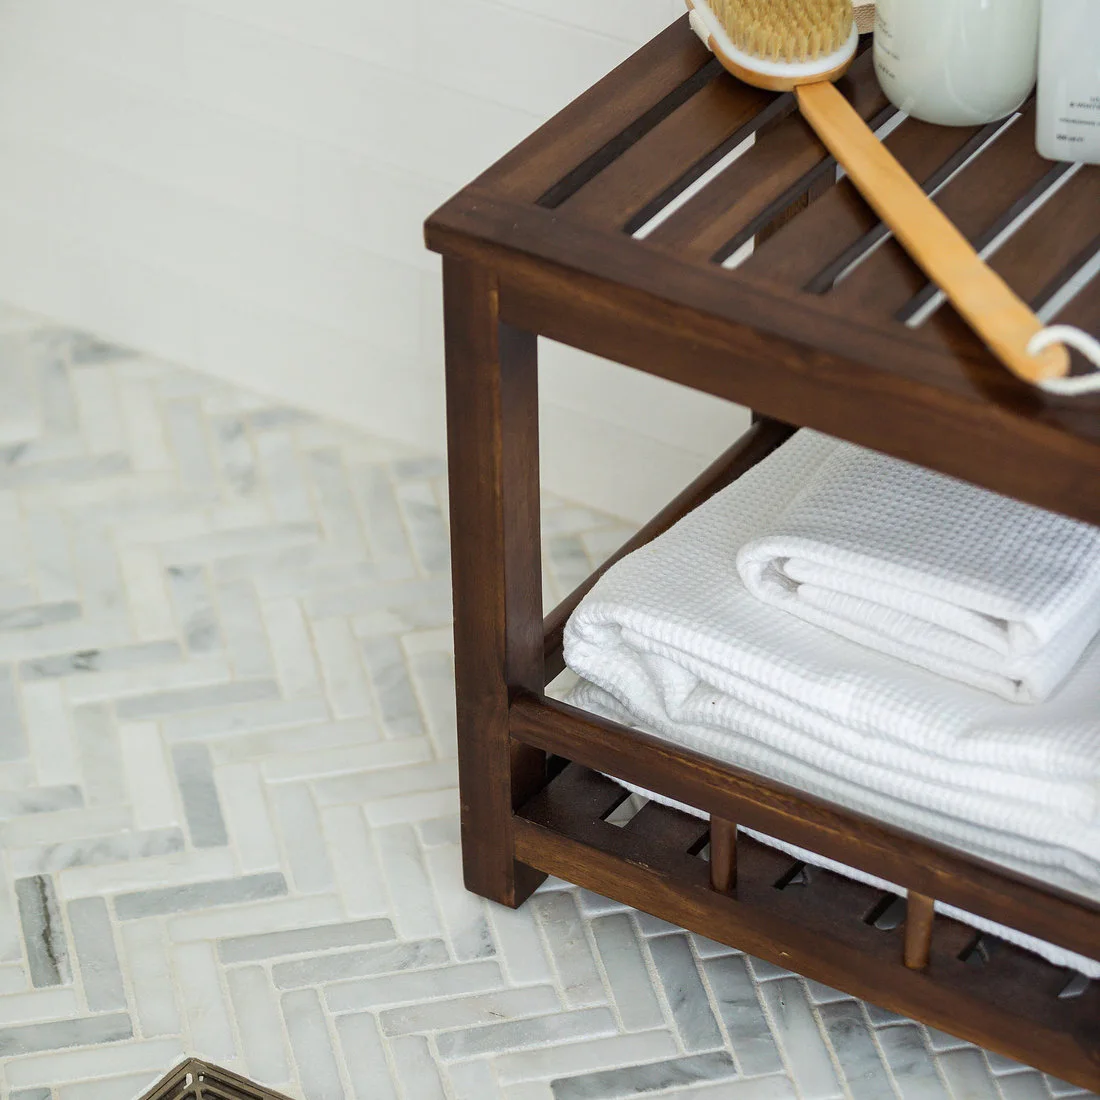
Small pale rectangles form a herringbone floor beside the timber stool. Light and darker pieces make the zigzag visible without a strong two-color design. This close view shows how much of the pattern is made by individual tile direction and joints, rather than by a printed motif on a larger square.
Inspect several sheets laid side by side to see whether the joins disappear into the repeat. Small herringbone pieces need careful edge cuts and consistent spacing around drains and walls. Choose a stool with suitable protected feet, lift it for cleaning underneath and check that its position leaves the wet-area route comfortable to use.
IDEA 15 / 17
Keep a Basketweave Floor Tonal
 SaveSupport Non AI Creator
Image credit: Project: In Your Space Interior Design
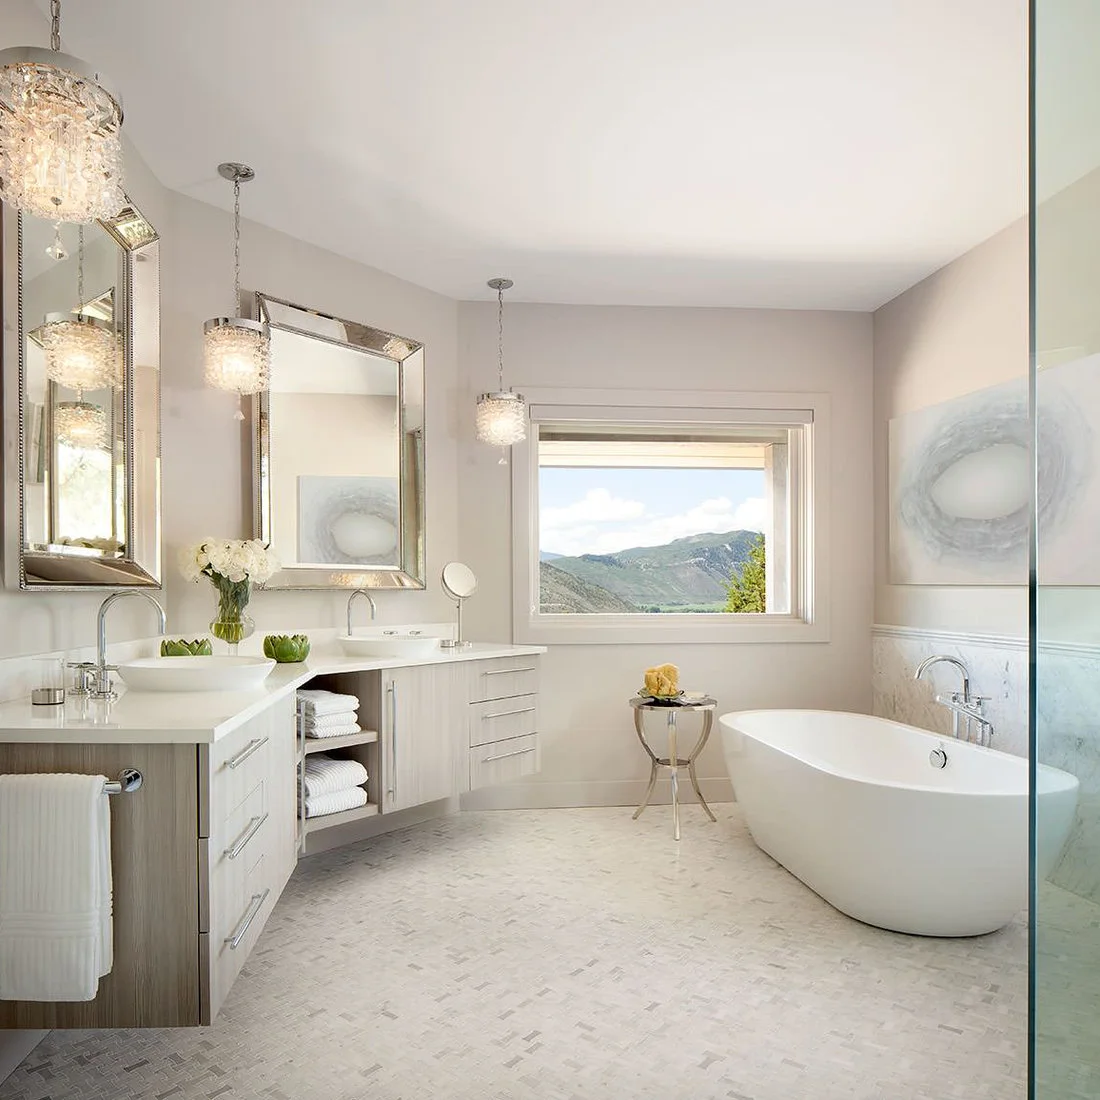
A pale basketweave pattern covers the open floor between the vanity and tub. Small darker inserts make the woven arrangement visible while the larger rectangular pieces remain close in color. Plain cabinet fronts, white fittings and light walls let the floor introduce detail without filling the room with several strongly contrasting prints.
Judge a basketweave sample at room distance as well as close up. The darker inserts can look more prominent across a large area than on a single sheet. Confirm floor suitability and care for the specific materials, and consider how much of the pattern will remain visible after mats or furniture are placed.
IDEA 16 / 17
Use a Small Mosaic Inside the Shower Boundary
 SaveSupport Non AI Creator
Image credit: Project: Nautilus Homes
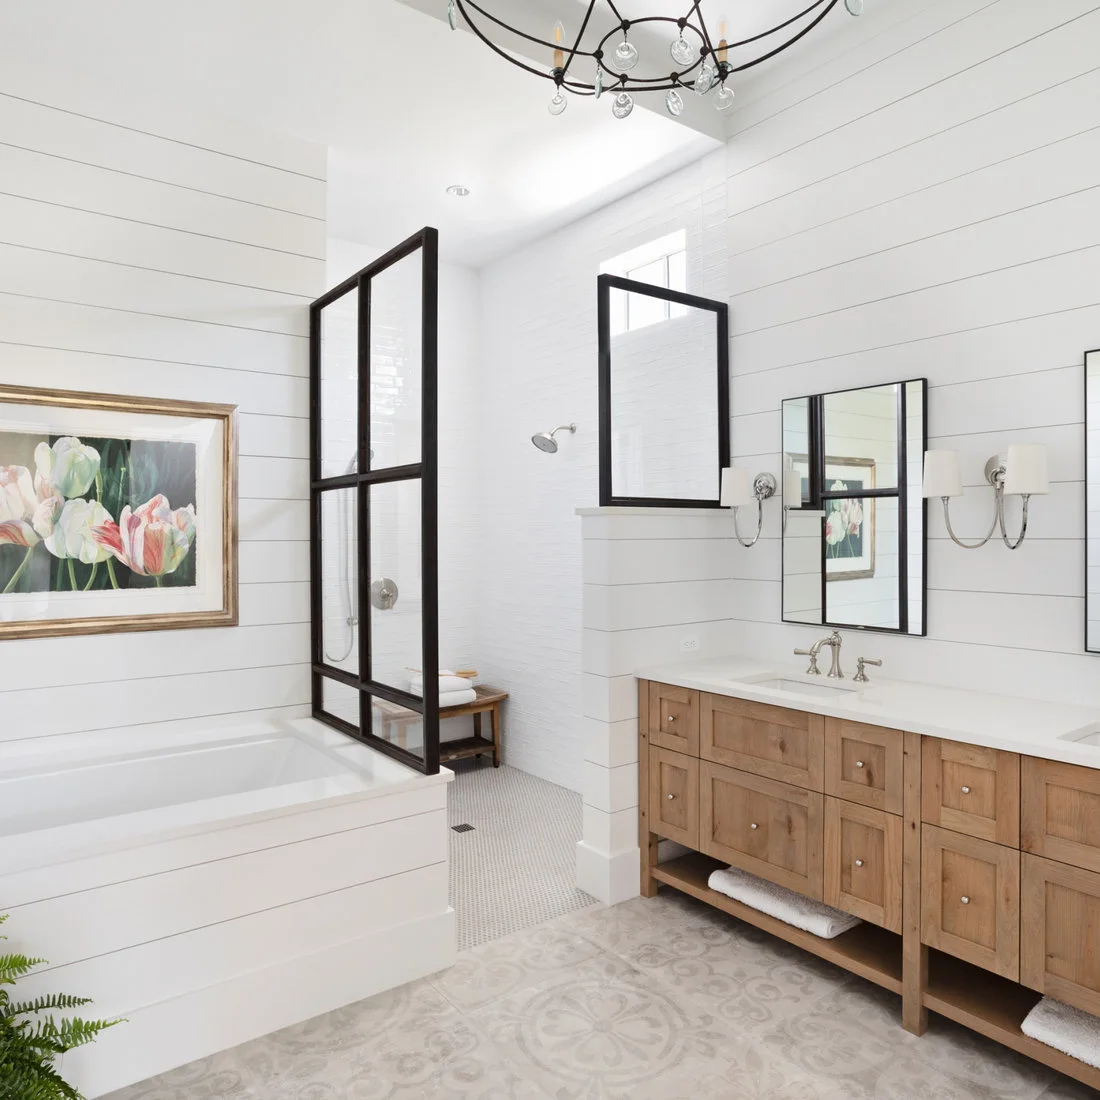
The small pale mosaic stays inside the black-framed shower, while larger patterned tiles cover the bathroom floor in front. The visible change in scale gives the two areas separate identities. White walls and a timber vanity keep the contrast focused near the floor rather than adding another strong wall pattern.
Plan the meeting point of the two floors with the shower assembly before installation. The decorative pattern outside should not decide the wet-area build-up or drainage requirements. Use the small mosaic as a deliberate contrast in scale, and check the two grout colors together so the transition looks resolved beside the black frame.
IDEA 17 / 17
Pair Pale Hexagons with Simple Rectangular Walls
 SaveSupport Non AI Creator
Image credit: Project: Ed Hughey, Architect & Realtor
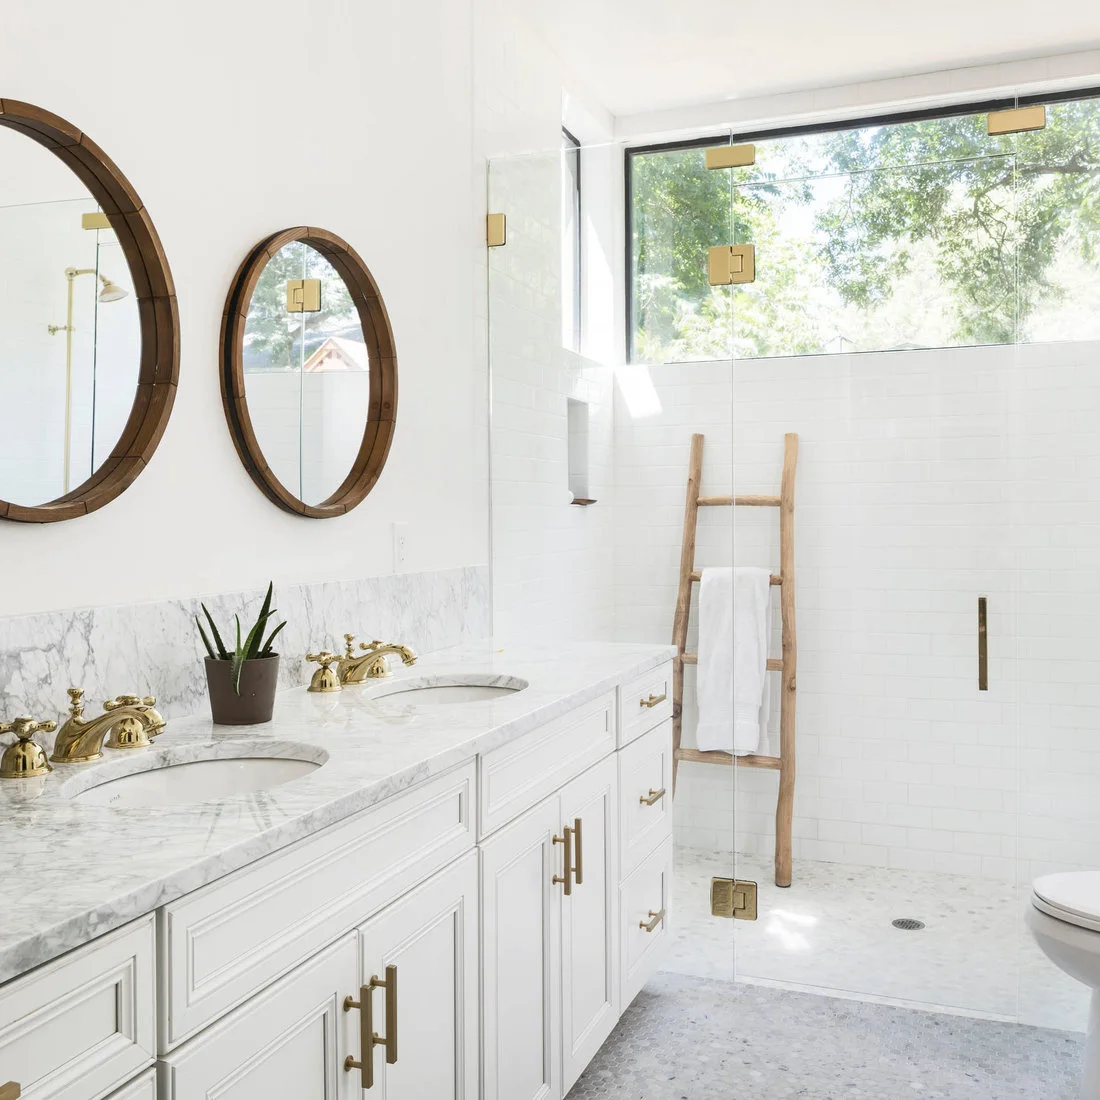
Pale hexagonal mosaics remain visible in front of the white vanity and continue behind the glass shower screen. Larger white rectangles keep the shower walls simpler, while timber-framed mirrors and a towel ladder add warmer shapes above the floor. The subdued mosaic variation gives the room detail without a bold color pattern.
Compare the mosaic with the counter and wall tiles in the same light. A pale floor can appear cooler beside a warmer cabinet or brass-colored fitting, so samples are useful even in a mostly white room. Keep cleaning access around the ladder and shower glass, and check the floor product’s care requirements before choosing a finish.
BRING IT ALL TOGETHER
Judge the pieces and the joints together
View several sheets with the proposed grout, adjoining tile and cabinet samples. A small pattern can change considerably when light joints outline each piece or darker inserts repeat across a whole floor. Check the layout around drains, corners, windows and fixtures before installation starts.
Keep the product and care details for every material in the mosaic. Confirm whether it suits a wall, dry floor or wet area, and use the recommended installation system and cleaning products. Choose a pattern you enjoy at room distance as well as close up, with enough surrounding space for it to remain readable.